Rachel Newman's Blog Posts

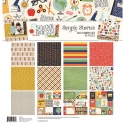
Hey Planner Friends! It’s Rachel again, and I’m here to share my Persimmon A5 Planner setup for the month of October using the Simple Vintage Halloween Collection. This collection has me feeling nostalgic with its vintage, storybook feel. I love all the illustrations, especially the cheeky pumpkin characters and mischievous little cats! The cats peaking out of pumpkins remind me of our own little rascal cat!

As always, let’s start with the pockets! I have a mix of the chipboard pieces and the bits and pieces from the collection tucked into my pockets. Those pieces on the outside of the pockets are adhered on with some removable roller adhesive. Because of the materials of the planners, I never have to worry about ruining them - sticky adhesive rubs right off (when you want it to!). I backed the large vertical pocket with some patterned paper from the collection and use this pocket to store the 4x6 collection stickers for easy access. How cute it the dressed-up girl peaking out of the pocket!

With such a cute washi set for this collection, I wanted to try and make a washi dashboard. I love how it turned out and it was super easy to make! I laid the washi down on a piece of white card stock, trimmed it out, and adhered the back of the card stock to a paper from the collection. This is a great project to get some extra mileage with your washi, and be able to display it in an eye catching way! I did add a few other washi’s from other collections, but you could easily make this dashboard with just the three in this collections.

Next up was the divider for October. I am a big fan of this plaid paper, and couldn’t wait to make a divider out of it. To measure out my divider, I traced around the A5 Divider template. I used a paper trimmer, but you could also use the template like the photo crops and cut right around the template! Once I had the divider trimmed, I used the planner punch to make the punch the holes.

I then pulled some stickers from the combo stickers sheet. This collection has stickers that come already layered into adorable clusters! If you are like me and are somewhat new to planner decorating, these clustered stickers and images are a life saver! See that sticker at the top? Yep, it came like that! All I had to do was peel it off the sheet and place in on the page! Same with the October tab! This is is great for people who love the look of layers, but maybe don’t have the time or experience to expertly craft an embellishment cluster.

I decided to put a little decoration on the page that appears before the monthly layout. I plan to document some great past costumes that my husband from years past. Spoiler alert - he is much more creative than I am when it comes to costumes!

Here is a look at the monthly spread. I started by dating the pages using the It’s a date stamp set. After the pages were dated, I filled in the major events using some icons from the Get It Done Stamp set and stickers from the 4x6 set.

I added a strip of washi to the top of the page and layered some more stickers on top. The little word strips are always so clever!

I love the monthly layout because I can plan around with the decoration, while still leaving room for the important details of the month.

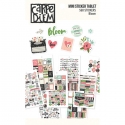
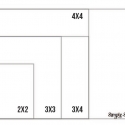
It wouldn’t be a project from me with out a little planner hack! For the weekly pages, I wanted to create a little bookmark with pieces from the collection. I decided to trim down a 2x2 insta pocket page to add chip board stickers, paper from the collection using the 2x2 photo crop, and the bits and pieces. To the top, I added a monthly tab from the Tabs sticker tablet and a washi paper clip banner.

On to the weekly layout! Because Carpe Diem Inserts are undated, you can play around with all the different layouts! This month, I wanted to use the fitness layout. To make it work for me, I simply covered the far left column where each of the boxes are labeled and placed stickers along the bottom where the hydration tracker was. I dated the pages using the numbers A5 Sticker Tablet, a must for undated planner inserts! I even made a ho-hum task list playful by adding bats as bullet points!

Here is a look at the pocket page place marker in action. This is a great way to liven up a planner page, especially if you don’t have time to decorate the planner page itself.

For the second half of the week, I tried to keep some white space for those events and to do’s that come up as the week progresses.

I hope you enjoyed a look inside my October planner setup! Even if I don’t dress up for Halloween this year, at least my planner looks the part! Until next time, I hope you have a BOOtiful October and a Happy Halloween!

Supplies

Hey planner friends! It’s Rachel again and I am feeling all the “Back to School” vibes in my Cream Dot Traveler’s Notebook. Even though I am not a student or teacher anymore, I was still really excited to use the School Rocks! Collection in my Traveler’s Notebook for September. I love this collection’s retro school feel and think the colors will be a great transition into fall. The printables for this month pair perfectly with this collection and I will be sharing how I used both in my setup for this month.

As always, let’s start with those scrumptious pockets! I used several of the elements cards and the combo stickers to give these pocket an A+ upgrade. I giggle a little when I see the trimmed down ruler from the Ready-Set-Learn paper and the You Rule! Sticker - I think it is pretty “punny”!

I decided to keep my insert covers pretty simple for this setup - just a few pieces of paper from the collection kit, an element card and a few embellishments. I love the kraft insert covers peaking through! I did go ahead and add some decoration to the back of the inserts, which I don’t often do. I like how it turned out! Isn’t that composition notebook sheet adorable? It is from the printable set from this month!

Speaking of printables, let’s talk about those next! To make page markers for three of my inserts, I used the printable notebook sheets and adhered the printable die cuts to the top. I laminated the page markers to make them sturdy and a little more functional. Now, they act a a great dashboard for sticky notes or a place to write a to-do lists (with a dry erase marker). I love seeing them peak out of the top of my travelers notebook when it is closed!

I also used the calendar printable (already dated!) and adhered it inside my monthly insert. I decorated the monthly spread with stickers from the Combo Sticker Sheet and paper scraps from the decorated notebook covers. A little hack: you know the cover sheet that you get when you buy a collection kit? Don’t be afraid to use that, too! I trimmed a strip off the top of the cover sheet and used it to decorate the beginning and end of my monthly spread.

I had so much fun putting together my monthly dashboard. I decided to focus on my goals for the month and used the combo stickers to highlight them. The notes page is reserved for “bright ideas” or big moments that I will fill in at the end of the month.

Here is next week ready to go using the new weekly inserts! To decorate, I used the Combo stickers, paper strips, and some fussy cut items from the I Love School Paper. This collection doesn’t come with washi, but that didn’t stop me from making washi paper strips instead!

As you may have seen from my last post, I love stamping, so I decided to pull coordinating stamp inks from my stash and some of the new stamps to complete my weekly spread.

I am really loving the box stamps from the Make a List Stamps to highlight important events. For my “Remember” section, I used icons from the Get it Done Stamps as my bullet points instead of my normal checklist. I keep telling myself that if my checklist is cute, maybe I will get all these things done!

For an extra “punch” of color, I love to use punched papers and adding them as decoration to my pages. For this page, I used a small hexagon punch to make a little hexagon cluster to highlight the weekend.

I like keeping the rest of the collection pieces with me, so I made a pocket folder with one of the papers and adhered a 4x4 element card and a trimmed down 4x6 Element cards to the inside of the paper. This folder lives in the center of the my weekly notebook for easy access when I am ready to decorate!

I hope you enjoyed this walk through of my September setup in my travelers notebook using the School Rocks! Collection. As you can see, this collection is not just for students and teachers. There is so much universal cuteness in this collection, that it is perfect for setting up and decorating all planner pages!

Supplies

Hey, Planner Babes! It’s Rachel, and I’m up on the blog today gushing about the new Carpe Diem Planner Stamps. If you follow me on Instagram, then you know that stamps are one of my favorite planner supplies. Now, I know some planner babes are a little hesitant when it comes to stamping, so I thought I would share today three reasons I love planner stamps and three tips for getting started. 

Three things I love about Planner Stamps 

  1. They are reusable and customizable – you’ll never run out! 

Have you ever had a planner sticker you love, but there is only one or two on the sheet? What do you do? You save it, because you want to save it for that perfect planner layout.  I do it, too! Enter planner stamps – you can use the image, icon, phrase or pattern you love a hundred times and it will never run out! The new Carpe Diem Planner stamps have all the adorable icons and patterns from past collections like Good Vibes, Domestic Bliss and Crafty Girl (you know, the ones you have been saving because there are only a few) and the small functional icons us creative planners use all the time, and you can use them forever!

You can also mix and match stamps to fit your needs and whims. With the Mug Life Stamps, I was able to stamp the same messy bun image with different sentiments underneath. How fun, right?! 

  1. They are great for dating (or re-dating!) your planner pages. 

One of the things I love most about Carpe Diem Inserts is that they are undated. Having the freedom to use different insert styles makes planning more fun. With the new It’s a Date Stamps, dating planner pages has never been easier. Here, I have used It’s a Date Stamps to date my August monthly spread. Some stamps need to be “primed” before use, so when using new stamps, I always stamp a few times on something that is not your planner page. For me, that usually means stamping onto labels or sticker sheets. With these stamps, however, I was happy to discover that they stamped perfectly right out of the package! Now that’s a good stamp set! 

As it turns out, the extra stamping came in handy. I dated one week wrong, so I used the stamped date stickers to correct my mistake! 

Stamps like this set are also great for altering the dates of old planner pages or changing the headings altogether. I love the Carpe Diem Daily Inserts, but I don't always use them on the days of the week printed on the insert. To fix this, I simply stamped the month on sticker paper and covered the part of the page where the days of the week were printed. Now I can use these pages any time in August! You could also change the heading to “Today” if you wanted to use the insert anytime of the year.

  1. They are versatile – stickers, washi, backgrounds, oh my!

With a few helpful supplies, stamps are one of the most versatile planner supplies around! They can easily be made into stickers, washi, and used for backgrounds with the color palette of your choosing!  

Here are some examples of how I used a masking technique with washi to make fun backgrounds for the vertical boxes on my weekly insert. Added bonus? You can write directly over the stamped image so you aren’t losing real estate on your planner page. I also created a mini habit tracker by stamping a grid with the lines from the List It Stamps and added icons from the Get it Done Stamps.  

For this weekly spread, I experimented with stamping faux washi across the top, middle, and bottom columns. I love how this turned out! Being able to use my favorite color combination made this page feel very "me"!


This daily planner page was also created with only stamps! Again, I stamped some faux washi directly onto the bottom of the page. The faux washi on the top of the page was stamped onto sticker paper and trimmed to look like a strip of washi. I highlighted my work schedule with a box stamp from the Make a List Stamp set and a pin icon from the Plan it Stamp Set. I have a feeling those boxes are going to get a lot of use!


Three Tips for Getting Started 

  1. Set yourself up for success with quality stamping supplies.  

High Quality stamps and inks along with the right size stamp block can take a lot of the frustration out of stamping by reducing “user error”. Start with high-quality stamps (like these!) and archival pigment ink in a neutral color like black or gray. You can always color in stamps with colored pencils or markers, so there is no need to run out and buy stamps in every color. Having one good ink pad is better than 10 not so great inks.  I do like to have multiple clear acrylic stamp block sizes because there can be quite a bit of variation in the size of stamps. When the acrylic block is roughly the stamp size as your stamp, you tend to get a better impression on the page. Luckily, stamp blocks are often sold in sets so you can purchase one set and that will be all you need!

  1. Be efficient with your stamping.

One of the complaints I sometimes here about stamping is the time and effort it takes to get all the supplies out. To avoid this, I like to be efficient with my stamping. What does this look like? It looks like stamping “all the things” at one time, rather than stamping as I go throughout the week. If you are dating planner pages, date several months at a time. If you to track a particular habit, go ahead and stamp out several weeks for that habit. 

As I mentioned above, when I stamp on my planner pages, I also stamp a few onto sticker paper, too. That way, I always have a few stamped icons that I can tuck into my planer for later use. On the sticker paper, I can stamp images in a variety of colors, too. I just love the customization of stamps!

  1. Practice, Practice, Practice! 

Stamping can be a little bit of a learning curve. Don’t give up! I have been stamping for a while now and I still make mistakes all the time! Remember earlier about me stamping the dates wrong? Progess - never perfection - Planner Babes! To take the pressure off, I practice! This coincides with the previous tip. If I have an itch to get “stampy”, I set aside some time to practice before I ink up my planner pages. Again, with new stamps especially, I like to stamp an image several times on a blank sticker sheet before I stamp in my planner. Added bonus – an extra “sticker” sheet for on the go planning! You can always cover up a mistake, so don’t worry about getting it right every time.

For storage in my planner, I either punch the stamped sticker page directly into my planner with the planner punch, or I use a 4x6 pocket page to hold smaller stamped stickers. I always have a small set of scissors with me so I can easily trim and use these sheets when I’m planning on the go.  

I hope you enjoyed reading about my love for the new Carpe Diem Planner Stamps. Maybe, I convinced you to give them a try as well!

Follow me on Instagram to see how I continue to put these stamps to use! 

Supplies

Pages