May 2015 Blog Posts

Hi Simple Stories fans!  Wendy here today sharing some SN@P! Happy layouts I created.
 
 
My first layout was a simple layout using 2 4x6 cards from the Happy SN@P! Pack.  I used a few of the die-cut pieces to build up my embellishment clusters, which you can see create a visual triangle. 
 
Each cluster is built on something, such as the first cluster is built on a frame.
 
 
My next cluster is built on a doily.
 
 
And finally my last cluster which actually became my title for my page was built on the 4x6 card.
 
 
Since I already had the Happy SN@P! Pack out (and everywhere) I began my next layout with some of the cards that caught my attention.
 
 
Then I went to my Enchanted collection to find some papers that would work well with my pictures.  The die-cuts added just the right touch to my different groupings which formed a diagonal on this page.
 
Another doily that was sitting out from my last layout and a frame.
 
 
Some fussy cutting gave me my large cloud with the saying and then a few smaller items completed the group.
 
 
Thanks so much for joining me today, I hope you have been inspired to play with the fun SN@P! Packs that are available in multiple colors/designs!

Supplies

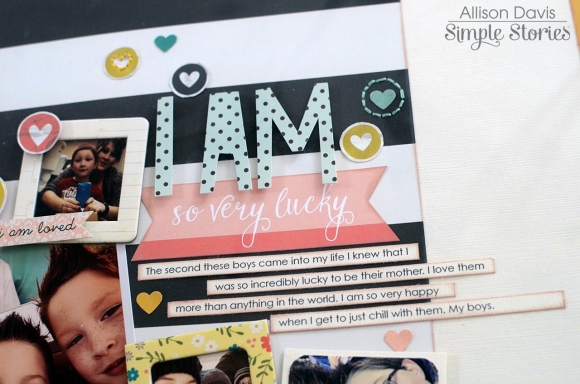
Hello everyone! It’s wonderful to be back sharing some pages I have created, with a bit of focus on my little girl. Settling beautifully into life in ‘big’ school, it’s with awe that I see her growing before my eyes, taking on board the new challenges that life has to offer. A bit of nostalgia led to the creation of my first layout. We must be having fun, because time feels like it’s flying!

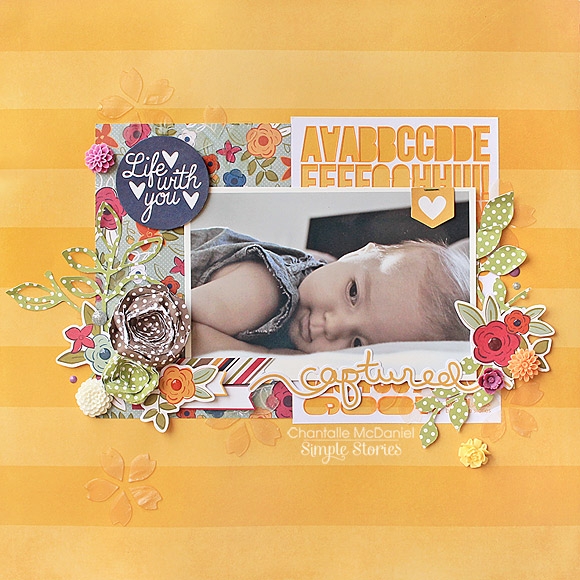
I have started this page using a beautiful, bright ‘I AM’ Important 12x12 sheet. I’m sure you have seen (and maybe even bought!) the new Sn@p Packs. I absolutely love them! I find them super versatile and love creating pages with mine, as they have pretty much everything you need, including die cuts! For this project, I have worked with the ‘Lovely’ Sn@p Pack and taken inspiration from the beautiful floral prints. My base layer comprises of a 6x4 card as well as some leftover Sn@p sticker remnants, which have been positioned in the centre of the page.

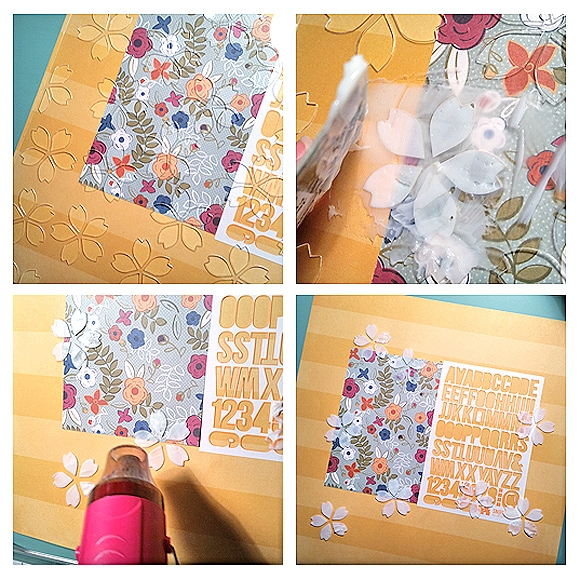
Next, using a 12x12 stencil, I went over specific areas with some Impasto to give a bit more texture to the page as well as continue the floral theme. I have used Impasto because it dries clear, which I love, as it doesn’t distract too much from what going on in your project. Here is a step by step pic. Note: It takes a fair bit of time to dry. Heat guns can speed this process up, but don’t apply the heat too close as it will bubble and spoil the surface. Once fully dry it will be transparent.

I then went about layering lots of little elements, including the pretty flower die cuts and some filigree leaves that I cut using my Silhouette Cameo.

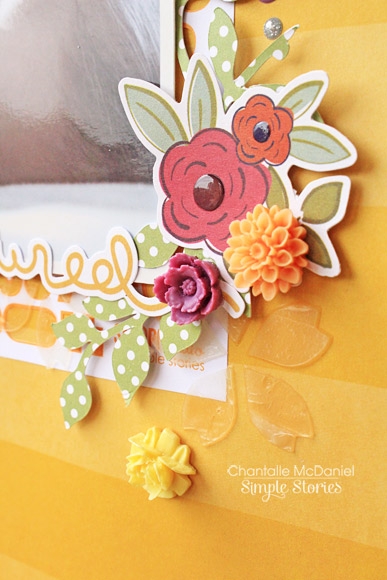
I also created some simple paper roses which add a bit of rustic charm.

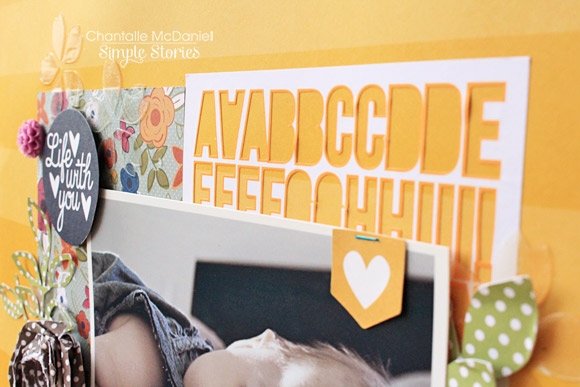
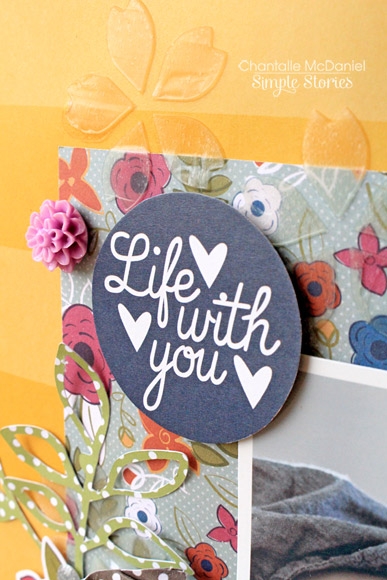
‘Life with you’ was cut out of a 4x4 card and as a final flourish, I’ve added some resin flowers and a couple of small enamel dots.

 
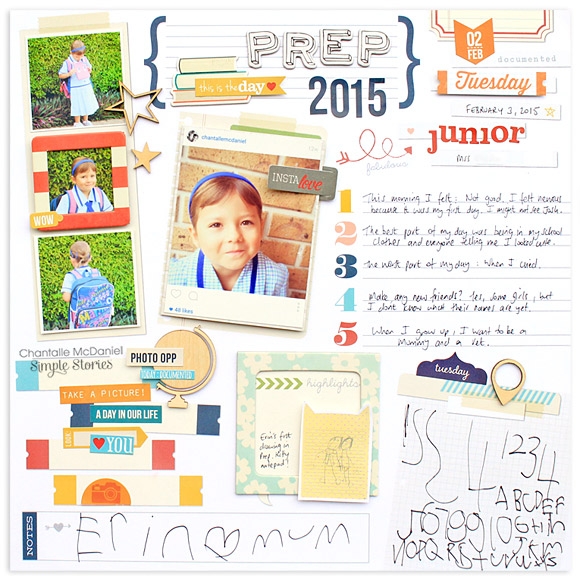
My next page is all about that all-important first day of school! When I saw this ‘Year in Review’ paper from the Life Documented collection, I knew it would be perfect for documenting each of my children’s first day. I love the way Erin’s has turned out!
 
 
Full of ‘busy-ness’, (just like the thoughts that were running through her head at the time, I’m sure!) I love that the paper already has prompts printed on to it. It gave me a great jumping off point to get down lots of aspects of the day.
 
 
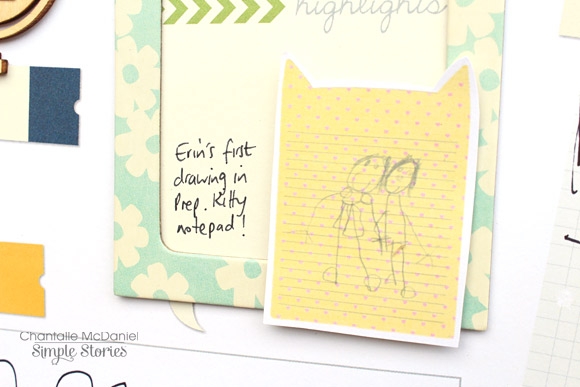
She was strangely obsessed with a little cat-shaped notebook that I had bought her the day before. She insisted on taking it with to school and drew little pictures for her new classmates. I saved one she brought home that afternoon and scanned it, printing it off onto white cardstock, to make a little embellishment.
 
 
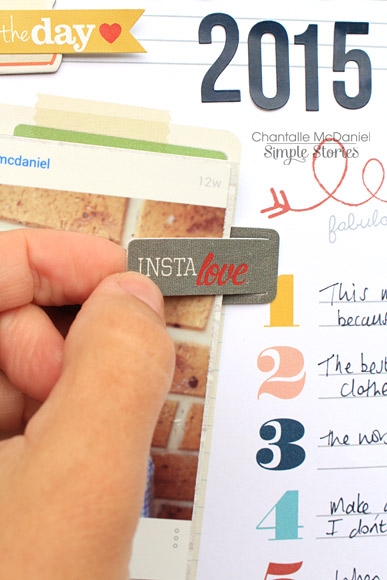
The larger image on the page opens up to reveal a small mini album containing messages of support she received via my Instagram account. This was made easy by using a 3x4 accordion file from the ‘I AM’ interactive elements.
 
 
The decorative clip holds it closed and can be removed to reveal more pictures inside as well as some screen grabs that I printed off to fit.
 
 
The printed numbered list proved very useful to jot down her thoughts on the day’s events and she added her own personal touch like proudly writing the numbers 1-10 (I love how some are backwards!) and a small note to me.
 
Thank you so much for stopping by. If you would like to see more of what I get up to, you are most welcome to pop by and say hello on Instagram @chantallemcdaniel.
 
'Til next time!


Supplies

Hey Friends! Rebecca Larson here to share some of the latest goodness available now in the digital shop!

There must have been something “written in the stars” this month with the release of 4 new digital kits! The Simple Stories powers that be must have known I needed something to show off a recent family trip to beautiful Southern Utah! The vibrant orange, lime green, and navy of the Under the Stars Digital Simple Set were calling my name. Not to mention they coordinated almost perfectly with my photos of the fiery red rock that draws travelers from all corners of the earth.

I had several fun pictures that I wanted to highlight, and knew the best way to pull them all together was to use the recently released 12x12 Digital Pocket Page templates. Not only was I able to fit in all my photos, but dragging and dropping the elements and cards from this yummy kit was a snap!
 
 
I even took liberty with using 2 slots for 1 photo, to highlight the enormous canyons that we were hiking in!
 
 
Here is the 2 page spread in its entirety.  Cant wait for our next camp trip!
 

Hello Simple Stories fans! Nancy here with a look at the pretty and colorful Enchanted line. I used various shapes, icons and patterns to create this grid-based design and a favorite Disneyland photo.

I started with a 4x4 photo and then built 1” squares of patterned paper to frame it out. I used the 6x6 paper pad for scaled down patterns.  Some of the squares were cut diagonally and glued together to add even more color. Cutting out a large letter “T” for Princess Tiana personalizes the story and adds another shape to the grid.


A few swipes of lime watercolor paint sets the perfect spot for storytelling and adds a punch of color to the white background.

I also have some of my April and May planner pages to share. First up – looking at my creative to-do list for April. It was a busy month! I used alpha stickers, washi tape and flag stickers to add splashes of navy and aqua to the yellow text background.


Looks like “create” was the theme for April. Here’s a peek at a typical day plan for the month. I used a SN@P card to remind me of upcoming assignments to be completed that week. I hole punched it and just kept moving it from day to day until it was complete.


Looking ahead to May I used the I AM collection to highlight the ‘Mom’ theme of the month.


I used the planner numbers to highlight some of the dates in gray. I like the bold impact of it in contrast with the very soft look of the I AM collection. I also used the notes section to practice handlettering and add a favorite quote.
 

Supplies

Hi Everyone! Marie here today to share some tips for putting together Pocket Pages for your SN@P! Binders.  I am using the I AM collection on these pages.
DSC_8618 copy


 I like to plan out my pocket pages in advance.  After I initially get my pages laid out I like to go back and switch things around until everything is where I want it. But once everything is glued down, it is almost impossible to go back and make changes. So here are a few temporary measures I take to be able to make changes to my pages.
 
DSC_8773 copy


On this insert I used a piece of vellum on the bottom card for my journaling.  Instead of typing directly on the card and possibly running out of space and ruining the card,  I used my computer to print out my journaling on a piece of vellum and then layered it over the card. This way I could make sure I had plenty of space, had no spelling errors, and was happy with what I had written.
 
DSC_8711 copy


I did something similar with the upper part of the insert. I first placed the sticker words "I AM Grateful" on a transparency cut to size to make sure I was happy with the spacing.  When I was done I could simply place the transparency inside my pocket page, and have a see-through element in my album.
DSC_8651 copy


Stickers can be tricky because once they are adhered to paper they can be difficult to remove and place elsewhere. I like to first place stickers on the outside of the page protector. I can then see how they look and if I want to change their position, they are easy to peel up and place somewhere else. 
 
DSC_8633 copy


I'm also a big fan of the interactive elements that are part of the I AM collection.  These layered booklets can be made ahead of time, or even taken on the road with you while you are traveling.
DSC_8746 copy


Once the entire booklet is done and you are happy with how it looks, you can slip the whole thing into a 4x6 pocket.  If you want to add things later, you can simply take it back out and work on it anytime.
 
DSC_8751 copy


I hope some of these tips come in handy the next time you are planning out your albums. Giving yourself the freedom to make last minute changes to your pages can make a huge difference! 


Supplies


Happy (inter)National Scrapbook Day, friends!  

To kick things off, we're excited to share a SEVEN page FREE printable that coordinates with our BRAND NEW Summer VIbes collection released earlier this week -

Click here for your FREE download!

Next up, TODAY ONLY, get a whopping 50% off in our Digital Store!  

With more than 25 collections in digital format, you're sure to find just what you need for your digital crafting needs!  Visit our digital store here and enter code NSD2015 during checkout.

Last but not least, we revealed 4 NEW collections this past week.  We have giveaways running for each collection through midnight on Monday, May 4th.  Visit each of these links to see the new collections and enter to win!

Summer Vibes

So Fancy

So Rad

Stars & Stripes

We hope you have a FABULOUS day!!


Hi everyone! Allison here with a new layout using the beautiful I AM... collection and a new sketch that mixes traditional scrapbooking with the SN@P! Pocket Pages.
 
 
You can download the full sketch with measurements and placements here
 
The right side of the sketch used Pocket Page Design 7 while the left side has more of a traditional style of scrapbook design. 
 
 
It’s not often that I include myself in my scrapbooking. I’m usually so focused on getting pictures of the boys and trying to document their lives that I often forget about including myself. I wish I was better about getting in front of the camera instead of hiding behind it! Thank goodness for my phone and our love of “selfies” or I wouldn’t have very many pictures of myself with my kids and husband!
 
 
The I AM... collection is was what inspired and motivated me to use some of our favorite selfies and a few of the rare photos of me in front of the camera. I have such a fun and goofy relationship with my boys and I love that we can capture that in our everyday lives with my phone. 
 
 
My favorite paper in the whole I AM... collection is the black and white striped paper with the gold foil heart in the bottom right corner. I knew from the start that I was going to use that paper and basically arranged everything around that. 
 
 
I added tons of heart circles and small punched hearts across the whole page.
 
 
A few of the hearts and circles have hand stitched circles around them. 
 
 
I used the chipboard frames for the smaller photos and then added more hearts, circles, photo stickers, and some word/phrase stickers to the photos.
 
 
For the right page I used SN@P! Pocket Page Design 7. This is one of my favorite of all the Pocket Pages! I love the large 6 x 12” pocket!
 
 
For the 6 x 12” pocket I kind of repeated the same design on the left page by arranging lots of hearts and circles across the paper and photos.
 
 
I added a photo sticker, a word sticker, and a few small hearts to the right corner of my photo. I love adding small details to the empty spaces of my photos!
 
 
In the middle pocket I used two of the chipboard frames with two smaller photos and added them over a few strips of patterned paper.
 
 
I added another sticker and some of the heart photo stickers to my photo in the bottom left pocket.
 
I hope you enjoy using the new sketch!
 

Supplies

Pages