December 2015 Blog Posts

Hello Friends! 

It's Kristine with you today and I'm here to share a pocket page spread featuring the Claus & Co. Collection.

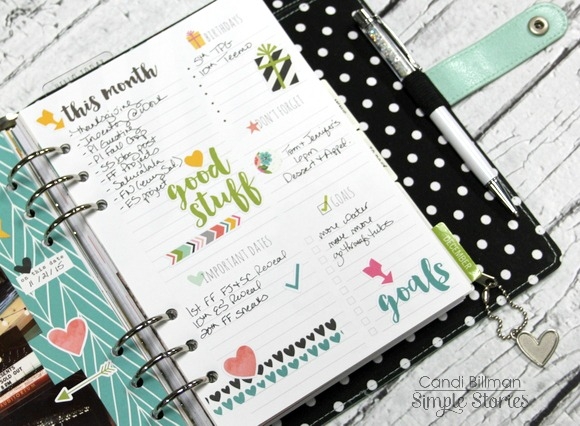
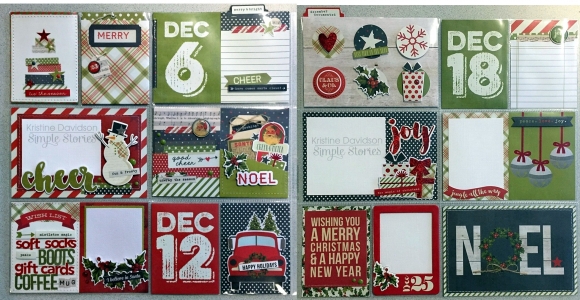
I am honestly not much of a December Daily kind of scrapbooker. I feel overwhelmed when I think about it, instead I created this 2 page pocket page spread to showcase my entire month of December. I have space for all my pictures, a few journal cards and I am happy with that. I can always add more page protectors to add tons of pictures of just leave it as is.  It works for me!

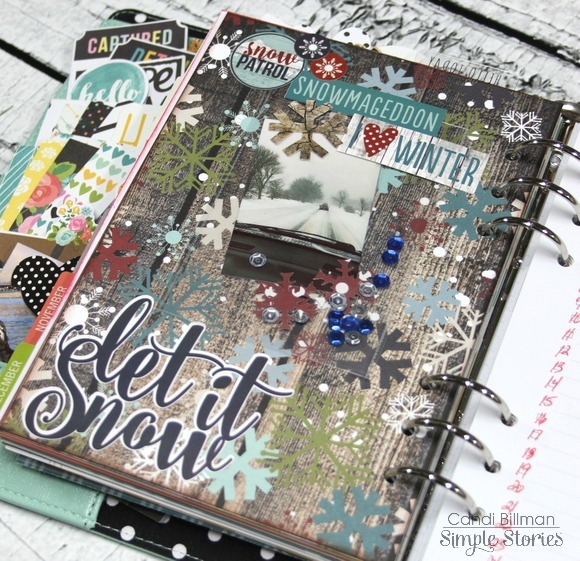
This was one of my favorite spreads to create. I was so consumed in decorating, matching, and creating - I had a blast! This Christmas collection is perfect for creating cards, mini albums, layouts, projects and so much more. One of my favorite Christmas collections ever! 

I created tons of layers in my spread using pop dots, washi paper tape, and sewing of course!

You'll see on my spread that I haven't added photos yet. That's because I wanted it left blank so I can add my own when the time comes. I have a few dates added by inserting 3x4" filler cards and I love that!

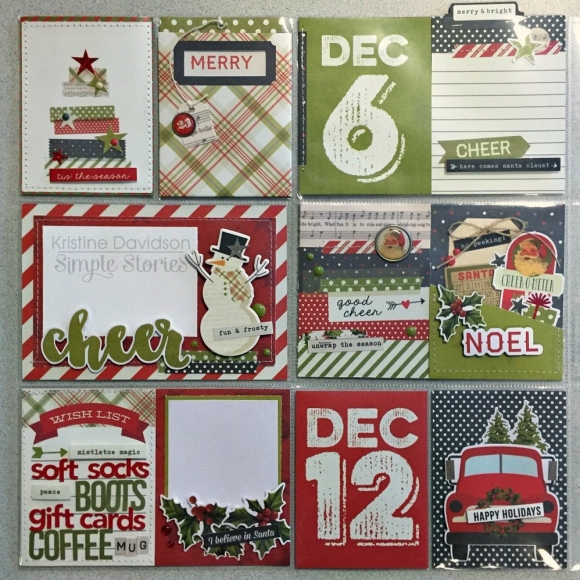
 Here are a few details of the left page

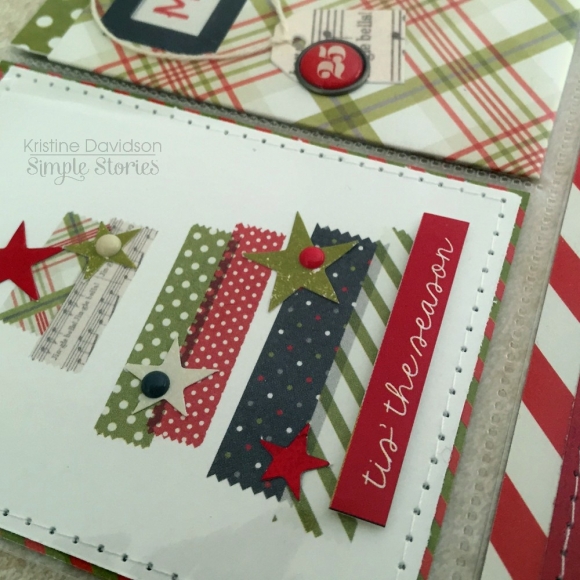
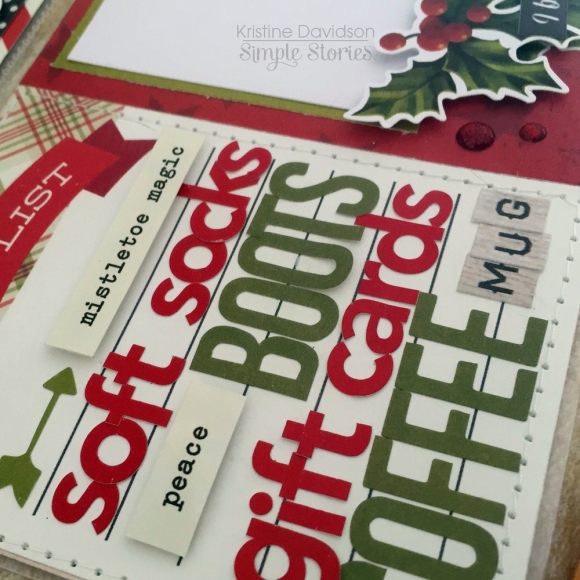
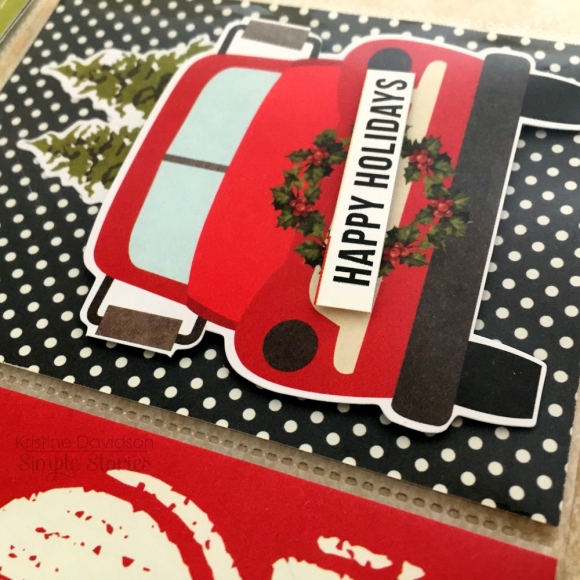
Adding washi tape and a few stars finished this 3x4" card perfectly. Of course I added sewing for some texture and fun detail. The little enamel dots created great little embellishments for my tree! Cute right?!

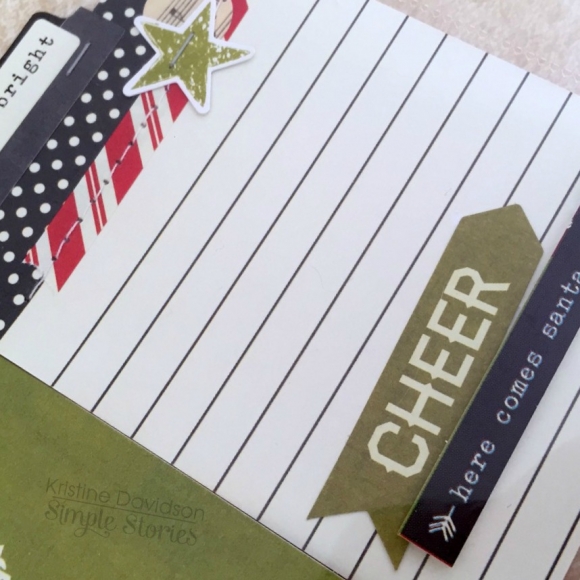
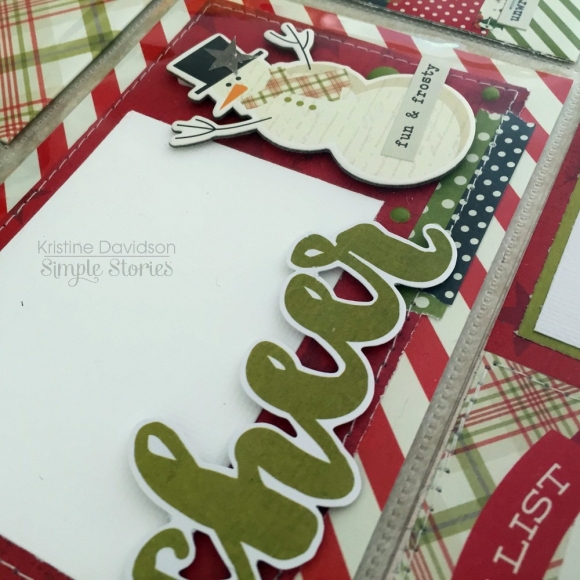
I created this next card with the snowman chipboard piece and the "cheers" from the bits and pieces. I added some pop dots under the cheer so I could easily add my 3x2.5" photo when I have it printed.

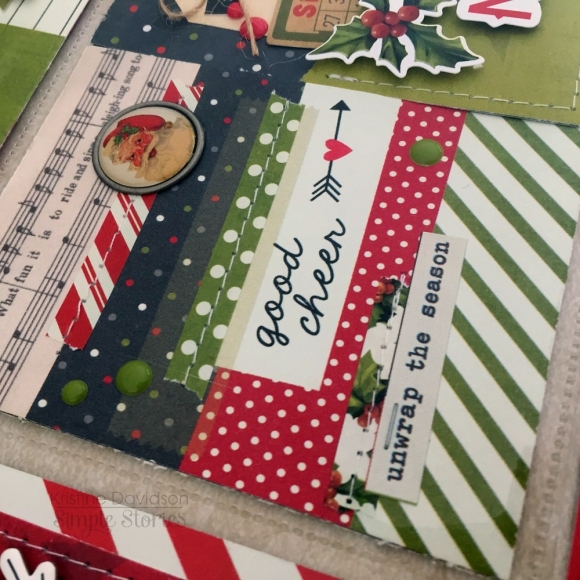
This next one was a cute filler card but I needed to add more. So I added some washi paper tape, a brad, enamel dots and some word strips. It just worked so well. You can also add this to a card and voila - a Christmas Card is done ;-)

Here are a few more photos of the inserts

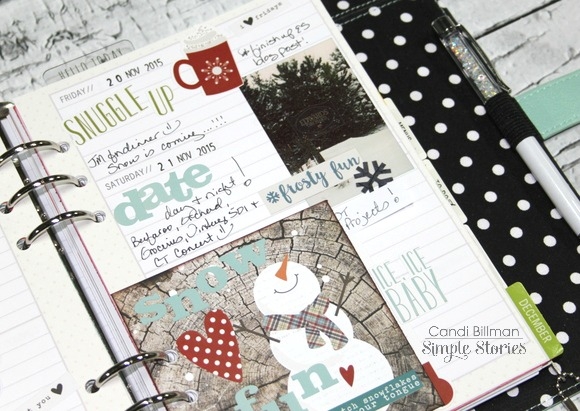
The next few photos are of the " right side" of my spread

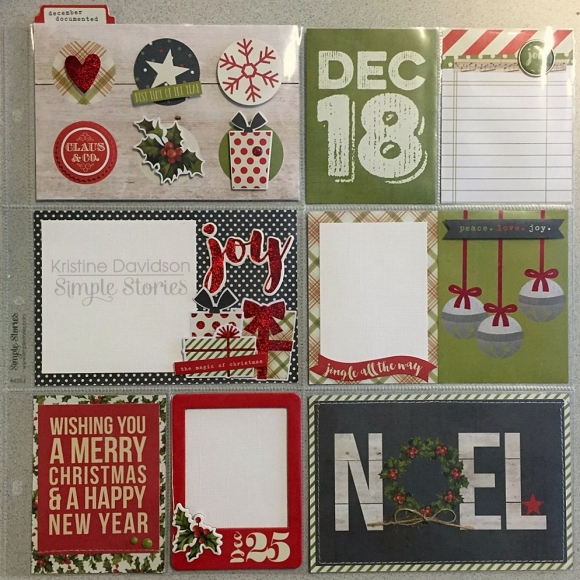
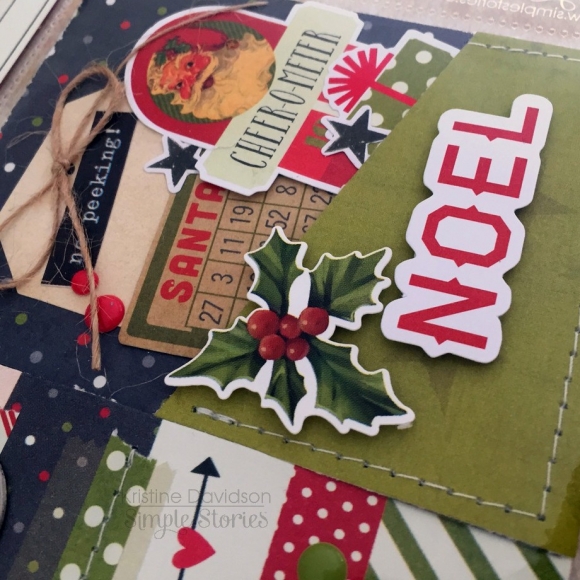
I added more cut out pieces and bits and pieces from the collection. I often add 2 - 3x4" cards into a 4x6" pocket insert. It gives me the opportunity to add a full 4x6 card of more of the same 3x4. I like that option. It fits more photos and of course more decorated cards ;-)

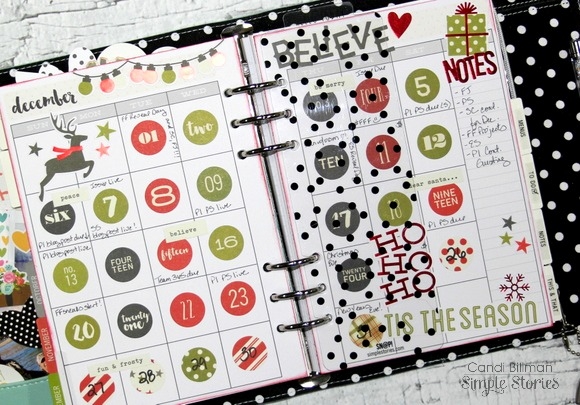
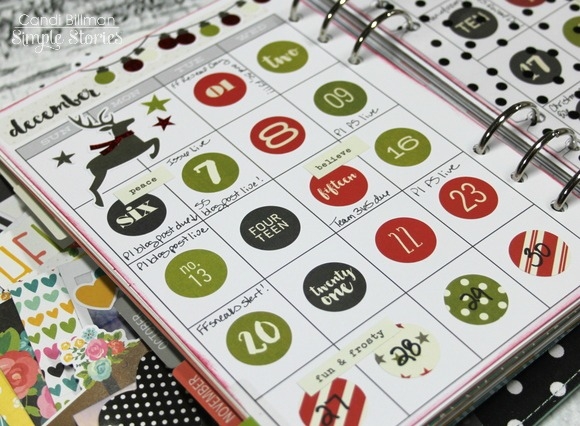
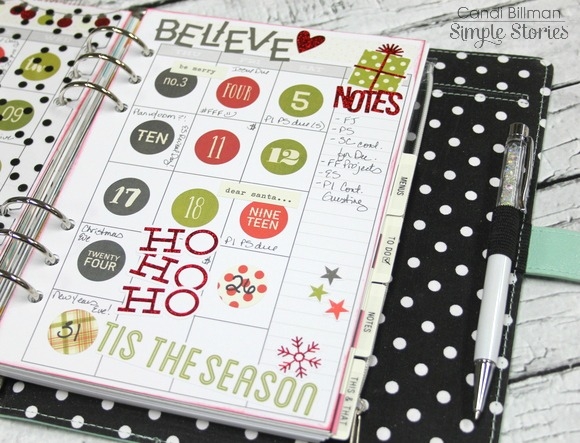
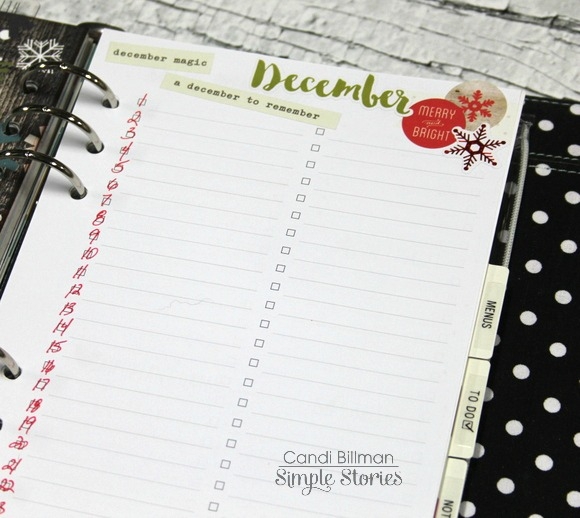
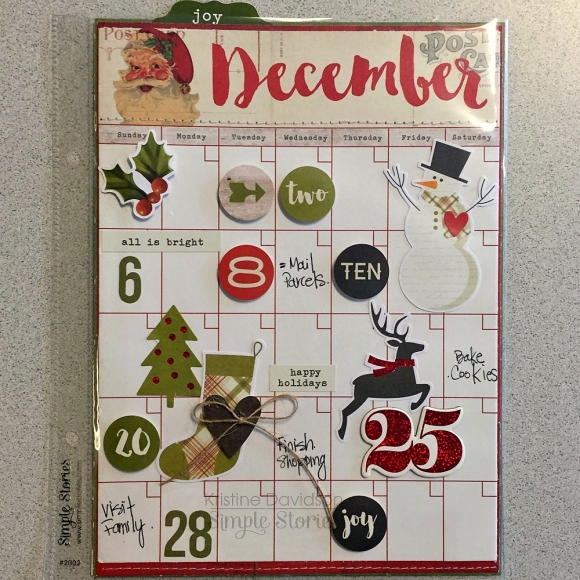
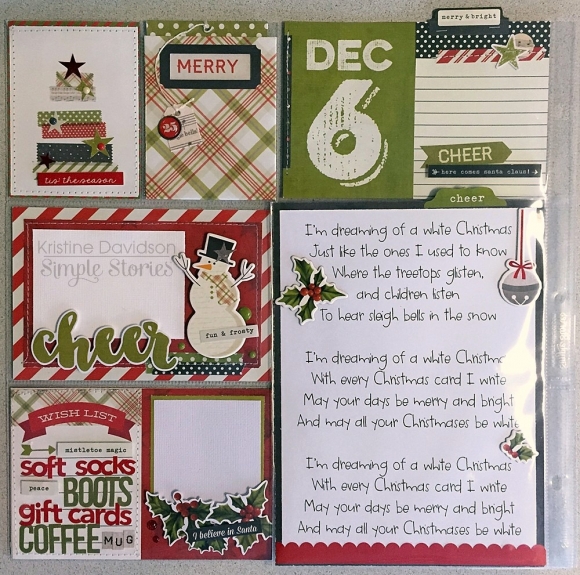
Now this next page is a little 6x8 insert. Yup, I added a December Calendar in a 6x8 pocket page to fit into the middle of my 12x12 spread. It works well. It's a calendar of the month showcasing important dates and I can add things to do on here as well; such as baking, shopping, visiting, etc ..

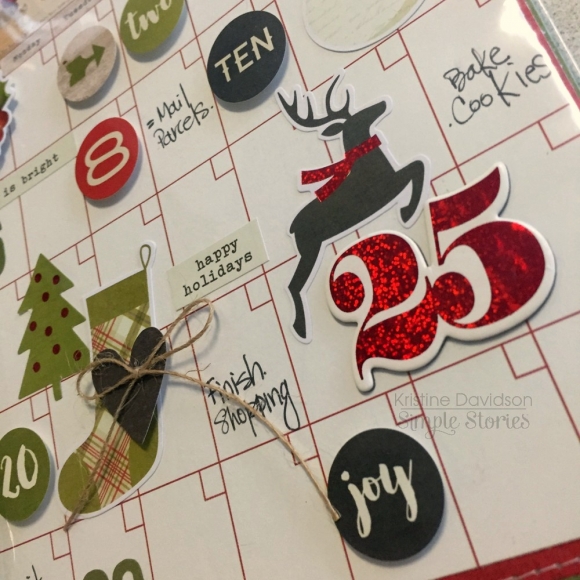
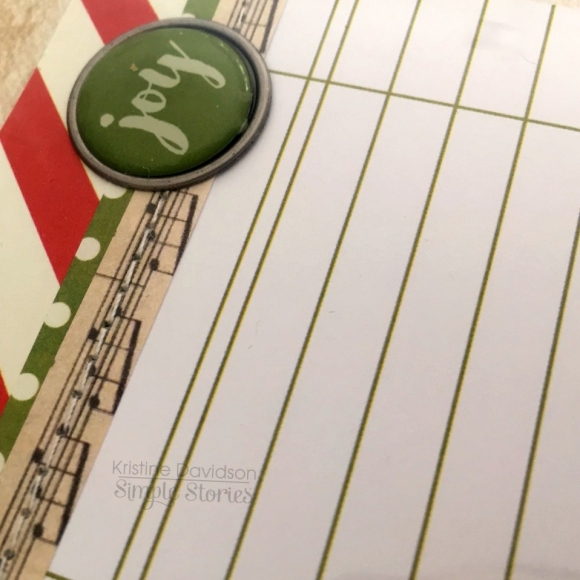
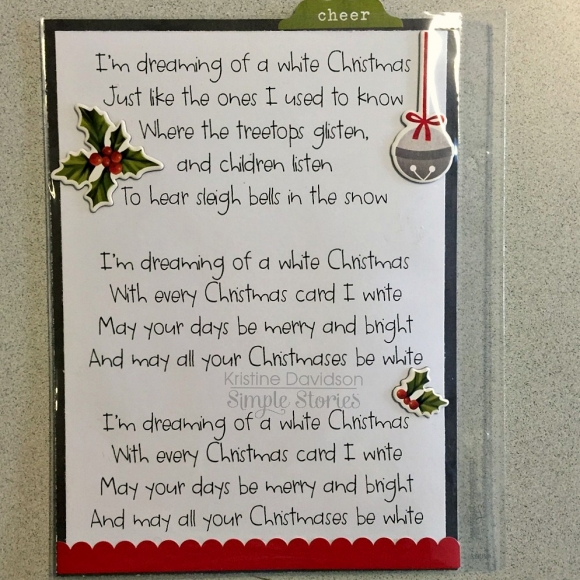
On the back of this calendar I added one of my favorite Christmas Songs. You can add a recipe, a large photo such as a pic of your Christmas Tree, the house decorate, a family pic or a Christmas card. So Many options for this little pocket!

Here is a picture of the 6x8 insert inside my spread.

Isn't that a great idea!?  

You can see how much I really enjoyed creating this spread - I will use this to document my December for sure!

Try and create your own little spread to add in your pocket page albums. Don't feel overwhelmed and pushed to document your entire month of December. Create a spread and add all the small details you'd like to remember for this holiday season.

I'd like to wish you "Happy Holidays" to you and your families.

4831 Enamel Dots, 4832 Stickers, 4835 Washi Paper Tape, 4837 Interactive Elements, 4838 Chipboard Fames;


Pocket Pages: 4053 Design 6, 4043 Album Black


I hope you enjoyed my Life Documented post today and I hope you enjoy creating with your favorite Simple Stories Products!


Supplies

When I first saw the Claus & Co. collection I immediately fell in love. I couldn't believe how MUCH I loved it considering I usually struggle with themed collections - especially Christmas-themed collections because I am never very happy with my Christmas photos. But, I could instantly see the potential for this collection to create a variety of fun projects. So I did! I made everything from tags:
 
 
to cards,


and layouts.


I even created the start of a December album. I have everything ready to go in my album and now that December is finally here, I can begin to add my photos and stories!


I have loved using this collection and will continue to enjoy making holiday decorations, teacher's cards and more this month with it! If you haven't already, go run and get yourself some Claus & Co. and have fun creating during the holiday season!


Hi there, Simple Stories fans! 

Teri here, and I'm happy to be bringing you some fun Winter-themed cards I created with Simple Stories' Snow Patrol collection.
 
I love this collection because it's got all kinds of traditional Winter icons - snowmen, mittens, snowflakes and much more. You can easily use this collection to make cards to send out for Christmas. You can also use it to make a lot of general occasion but seasonally appropriate cards to send throughout December and well into January. 
 
I can't wait to send this card to one of my friends. 
 
 
You can easily make one like it. Cover a card with patterned paper. Then take a circle punch and cut several circles from some of the Snow Patrol collection's other patterned papers. Adhere them to the card. Then take some of the Snow Patrol stickers and decorate each of the circles with them. It really is that easy! 
 
 
Another card I can't wait to get off to a good friend is this one. 
 
 
I just love the sentiment. I created it by mixing together some of the collection's different stickers. The "snow much fun" stickers started out as one sticker. I turned them into three with my trusty, old scissors. Two snips and I was good to go.
 
 
Speaking of "snow fun" cards, here's another card featuring a snowman.
 
 
Snow cute!   Again, I created a custom sentiment for my card. Again, I mixed together a bunch of different stickers.
 
 
I wanted the snowflake to stand out so I slapped an enamel dot in the middle of it. I think it just adds a little pop to the card. You just need that little pop sometimes.
 
This card would be fun one to give a loved one this Winter.
 
 
I mean all that cold weather makes Winter the perfect time to snuggle up! Right?!
I cut the hot cocoa panel from a piece of patterned paper. And then I just framed the panel by putting strips of other Snow Patrol patterned papers around it. Easy peasy!
 
 
I did add a heart sticker to the cocoa's whip cream. The heart seemed a little flat on its own so I added an enamel dot to it.
 
And here's another card to send a loved one. Well, more like, here's a card to send your sweetheart... wink
 
 
The card doesn't look like much on the outside, but you'll see this when you flip it open! 
 
 
Mmm...mmm
The words, hearts and snowflakes are all stickers. If you wanted to sauce up the inside a bit more, you could easily add some patterned paper strips to it too.
 
Thanks for stopping by today! I hope you enjoyed checking out these cards. I'll see you again real soon!

Supplies

Hello everybody ! It's Mindi here with you today, sharing a couple of pocket pages featuring some of my family's December memories from 2014. Can you believe it's already a week into December ? Boy does time fly. 
 
Every year I create a smaller mini book version of our December memories. I have yet to finish up my album from last year. Recently I took some time to get some pages done. 
Throughout my album each day of December is separated and has it's own page or pages. During day 22 I chose to tell the story of my son and his cars. We had a conversation that day that I just knew some of it would make it into the album. 
 
I printed out a photo and slipped it into the top pocket. I chose to add the photo sticker that says cheer to go along with his good cheer that day. I finished it off my adding a chipboard star and then some enamel dots for a balanced look. On the bottom of the page I started off with the adorable red truck and added some washi tape and other embellishments on the other side of my journaling card. There was a certain quote that I added in from our conversation that day. 
 
 
On the other side of day 22 I wanted to tell a longer story about our elf Harry. Here is a look at the full spread. On the right side of the album I used a 2x2 pocket page that I cut off the last line of pockets. This allowed me to have some different layers throughout my album. This size was super fun and allowed me to add in some more photos of our elf's shenanigans, some filler cards, and even a few see through pockets. Instead of using an office style tab I decided to make my own. I added the circle date sticker that shows that it was the 23rd. 
 
 
Over on the left side I printed out a larger photo and added them into the two pockets. I simply love bigger photos. My children still believe in the magic of our Elf on the Shelf. I added the word "believe" onto the outside of the page protector so that it covered both of the photos. I used a stapler to add it onto the page protector and also added the clear photo sticker. The overall look was perfect and simple ! 
 
 
Here is a look at the other side and conclusion of our Elf story. The left side I added in more photos, filler cards, ect. I got the idea to journal what our elf Harry did every night from the kids. They told me to keep track so that they could always remember. I used one of the SN@P Journal pages to keep track and it worked out great. After I had written down all my journaling I added some extra stuff to personalize it a little. 


This is what it looks like in the album all together. 
 
 
Moving on to day 24 | Santa cookies. 
 
On the back side of the SN@P Journaling page I thought it would be fun to add a flip up photo/journaling card combo. On this day me and the kids made Santa some sugar cookies. A flip up photo on the left and then another photo and journaling cards on the right hand side rounded out my day 24.
 
 
I printed out my photo smaller than the green patterned paper and cut the grey wood grained paper to the same width. Then I added my photo on the back side and folded it so that I could flip up the photo and reveal my journaling. Another thing I wanted to do was to add the red scalloped sticker on the bottom of the photo. I wanted to make sure it was on both sides of the photo/patterned paper. So when you flipped the photo up you could see the red sticker on the back side too. I just made sure I lined up the red scallops and trimmed off the edge after doing the front one. 


Included in the SN@P pack from the Claus & Co. collection are these journaling card that have numbers 1 - 25 on them. I used the one that had the 24 on it and it was simple and perfect. In the middle of the photo I added the chipboard Mrs. Claus cookie sticker. Love that one! 
 
 
That is a wrap for me today. Thanks for coming, I hope you have found some inspiration to help you document your December memories. I want to wish you all a wonderful and joyous Holiday Season. May it be filled with lots of love, laughter, and of course some scrapbooking ! 


Supplies

Hi, Carpe Diem Planner Addicts!!!  Candi here today to show you how I "winterized" my Carpe Diem Planner :)
 
If you have followed me along with my Life Documented Planner Blog Posts from earlier this year, then you know that I love to take the  Simple Sets and use those goodies inside my planner!  I use just about everything in there from the 12x12 double sided cardstock paper to the sticker sheets!  I love every element inside each Simple Set!!!  Today I am diving in and using the newest Simple Set | Snow Patrol...this snow lover, LOVES this one!!!  Underneath the dashboard I trimmed down the 12x12 Let It Snow and it is perfect for the upcoming Winter months!


I want to show you a few things that I did with November!  On the back side of the November (month on two pages spread) I adhered five pictures from a day in November.  I used my Polaroid Zip printer and then I added some random Carpe Diem Planner goodies to jazz it up a bit!  I love how this highlights a busy and fun day from November 21st :)


Here is my November "Highlight" page...I love how it recaps everything in one place for you!


Let's get in and take a peek at one of my weekly spreads from a week in November!  I pulled goodies from the Snow Patrol Simple Set...cardstock stickers and a fun little element!  I also added another little photo too :)


Now for December...!!!  I used the adorable 4x6 Stickers from the Claus & Co. Collection on my monthly December spread.  I used all of the circle/number stickers for the whole month and placed each circle in the center of each day.  This leaves me just enough room to jot down my important to-do's.  I don't need too much space to write, so this worked out fine for me. 


On the back side of December I added more of the 12x12 Let It Snow!  If you look closely...I added a 3x4 Photo Flip!  Inside the Photo Flip I added a photo, some sequins and a few punched snowflakes.  I embellished this page with Snow Patrol Cardstock Stickers...


If you are playing along with a December Daily Project, then this is the perfect way to document each photo!!!  I grabbed a to-do sheet from the Basic Inserts pack and covered up the to-do with some 4x6 Stickers from the Claus & Co. Collection.  There are 25 lines on the left and 25 lines on the right!  You can jot down info of your photo for that day on the left and then if you need more space...you have room on the right! 


I hope you enjoyed seeing how I set up my planner for the upcoming Winter months!  Is your Carpe Diem Planner ready for Winter?!?!
 
As always, thanks for stopping by!


Supplies

Hi everyone! Allison Davis here with a layout using the fun Snow Patrol collection and I have another sketch to share with you that features both traditional scrapbooking and Pocket Pages.

You can download the full sketch with measurements and placements here.

The left side of the sketch follows a traditional style of scrapbook design while the right side mixes photos and cards with the SN@P! Pocket Page, Design 10.

Here is my layout based on the sketch: 

Sledding was such a fun memory from my childhood. In the small town that I grew up in, my grandma and grandpa happened to live at the best spot to sled in town. When it snowed all the kids in town came to that hill to sled. It was the highlight of our small town winter wonderland. Now, I no longer live in that town and each year when it snows I have wished that we could find a good hill to take our kids sledding on. Last year, we finally found the perfect place and Drew and Jackson got their first taste of sledding. I’ve never seen them smile that much and that big! What fun it was to see them enjoying one of my favorite childhood memories.


I instantly fell in love with Snow Patrol and knew that I just had to use that collection to document our sledding pictures.

I thought the snowman was one of the cutest elements with this collection and had to include in on my page! It was a perfect fit among the snowflake covered patterned paper and the “let it snow” title sticker.

I also added a small heart and word sticker on the two smaller photos to complete a large cluster of elements along that background piece above the pictures.

On the right page I used photos mixed with some 4 x 4” and 2 x 2” elements with the SN@P! Pocket Page, Design 10.

In two of the top pockets I used pieces the same size of the pockets, a 4 x 4” photo and a 4 x 4” quote.

For the third pocket on the top I used a combination of 2 x 2” photos and elements to create one 4 x 4” piece. I had so many great pictures of the boys and this was an easy way to add a few more to my layout.

Along the center row of 3 x 4” pockets I used four 3 x 4” photos and then added some hand stitched flourishes to kind of tie them together.

I added some snowflakes stickers, word stickers, and enamel dots to the flourishes.

I always love find different ways to incorporate stitching into my layouts!

I did the same thing with the bottom row of pockets as I did on the top row. I use two of the pockets for a 4 x 4” photo and a 4 x 4” element.

In the third pocket I used two 2 x 2” photos and two 2 x 2” elements to create a 4 x 4” piece. I hope you all enjoy using the sketch! Happy Holidays to all!


Supplies

I love the holidays and once we hit fall each year, the countdown is on for when I can light up my house with twinkling lights and sparkle and pretty colors.  I've always been so inspired by people who document the holidays so fully and have so many fun activities and things to do during the holidays each day.  For a long time I've wanted to create an album focused on the fun my family has during the holidays, it's just never worked out to be a daily thing with my work schedule and school and all the crazy things that come up during the week for my little family.  What works better for me is a book documenting the highlights of the holidays - the traditions we've always held near and dear to our hearts, and the new things we try each year.  I love being the memory keeper in my family, knowing that someday my boys will look upon these albums with their families and hopefully want to carry on some of these traditions themselves.  
 
Inspired by this holiday memory keeping, I pulled out the digital 6x8 pocket pages again and of course, my love for bright, fun, and bold colors drew me right in to the Tis the Season SN@P! Set.  I kept it pretty light and simple this time, letting my photos and words take center stage, with some light embellishment to draw the eye in.  
 
 
I love the varying alphabet stickers included with this - I'm a big fan of mixing and matching and these worked perfectly.  I also "cut" the card in the top left corner to fit around the card, almost as if you would with an X-acto knife with a paper product, and I love how that one turned out.  
 
 
On this page, I ended up resizing and layering different cards to bring more colors and patterns into play, and "cutting" up cards to fit in other spots, like the hearts below the photo in the bottom left.  
 
 
I am really happy with how this turned out and excited to document the holidays in my own way.  
 
Happy holidays!

Hello there!  Shellye along with a set of "FRAMED SNOWMEN" tags that can also double as ornaments after the gift-giving is done!
 

To start, I grabbed a few of the "Claus & Co." Chipboard Frames.  For each snowman, you'll need a large and small square, as well as a round chipboard shape for the head.
 

 Next, I backed each of the frames with a matching-sized square of patterned paper from the 6X6 Paper Pad
 

The heads were covered in an off-white pattern from a section of the "Ho Ho Ho" paper. For the noses I used smaller sized hearts from the "Wood Veneer" pack and inked them with a burnt orange chalk ink.
 

 The cheeks were given some blush with pink chalk and black enamel dots were used for the eyes. 
To adhere the small and large frame together, simply use a scrap piece of heavyweight cardstock or chipboard piece.  Make a bridge at the back with the material by gluing one end to the large frame and the other half to the smaller frame.
 

Now for the fun part...embellishing!  I added different Wood Veneer pieces (that I inked with various chalk inks) and then accented the centers with Bradz.  The smaller alphabet stickers from the "Expressions Cardstock Stickers" were used to personalize with the snowmen.
 

To give a nice, finished look (as well as make into a gift tag), I traced the entire snowman onto a piece of cardstock and then trimmed out and glued to the back.  Use stickers or fancy hand-writing to add your To and From :)
 

With a small hole punched at the top, tie some string or twine through and your tag-ornament is framed and ready to go!

I hope that you enjoyed this fun Christmas craft and will give it a try!

Supplies

Pages