December 2015 Blog Posts

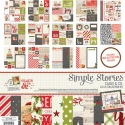
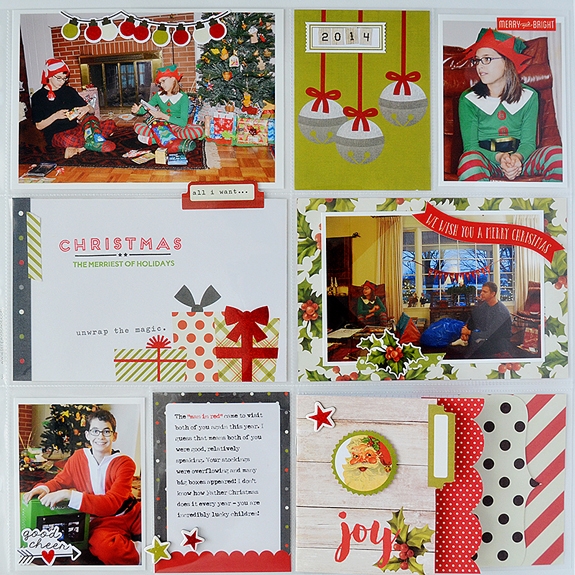
Hi everyone, it's Audrey. And today I have a couple of last minute holiday card ideas to share with you, featuring our adorable Claus & Co. collection.

AudreyPettit Claus&Co MerryCard I love how festive and happy this first card is. I think the images really pop with all the bright red, and the bit of extra shine and sparkle from the foil accents is always such a welcome addition at holiday time. Best thing is, this card is super quick and easy to make, even at the last minute like now. AudreyPettit Claus&Co MerryCard2 
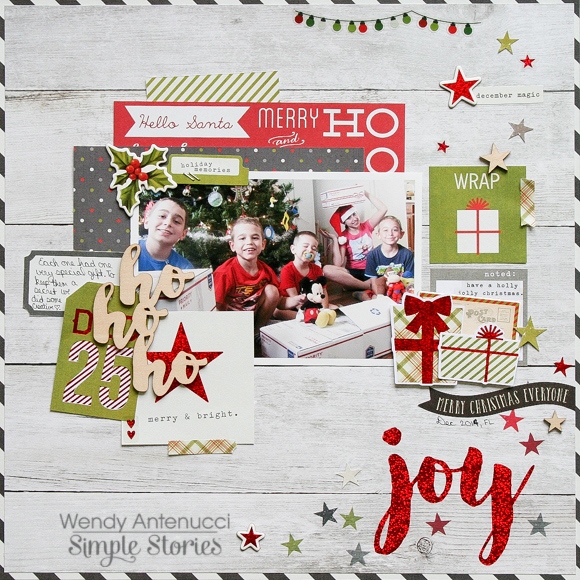
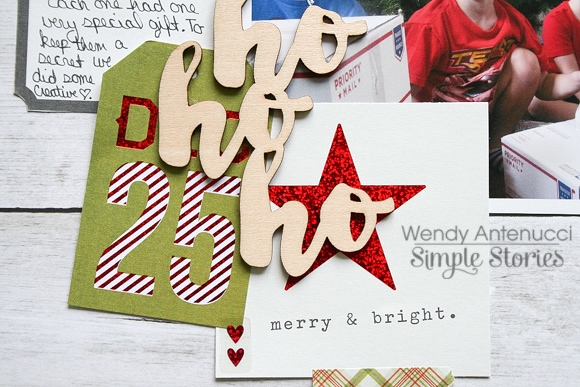
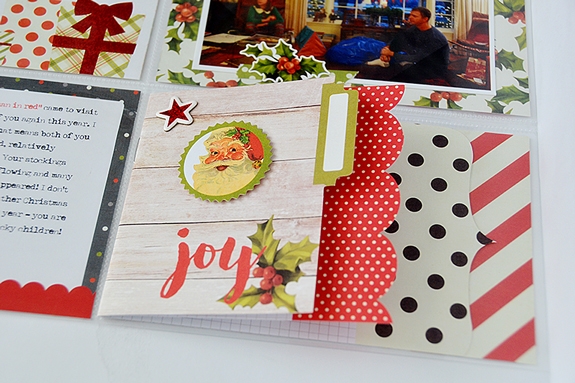
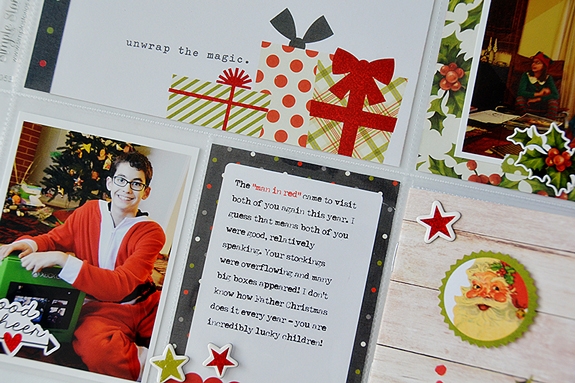
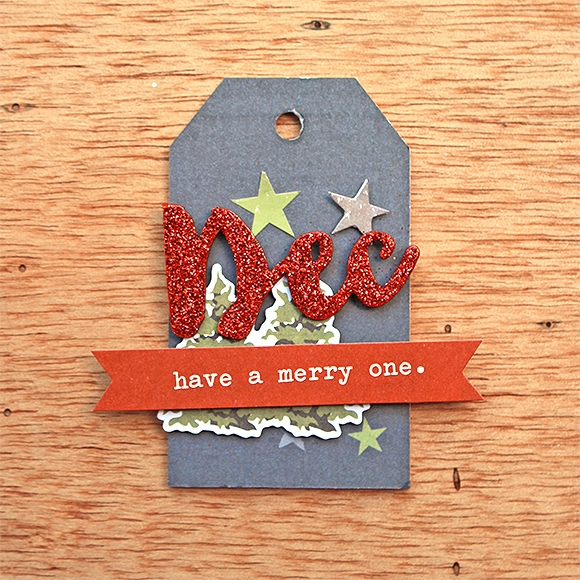
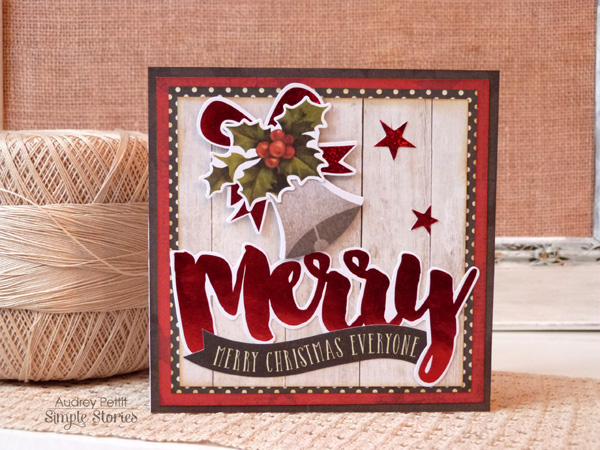
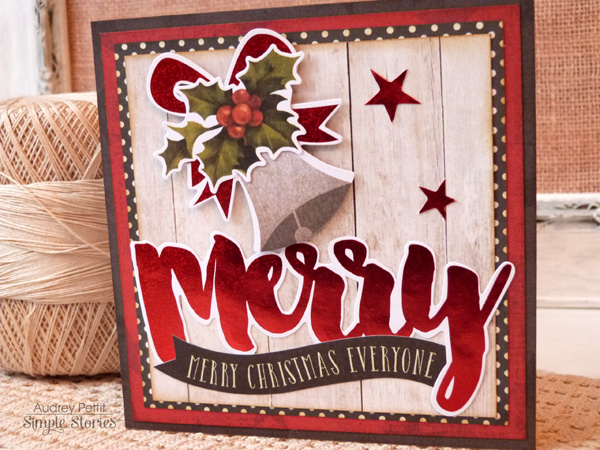
What makes this card so easy is that all the accent pieces, from the holly and bell to the stars and the sentiment, are all pre-made die cuts from the Bits & Pieces embellishment pack. I simply popped them onto my card base using glue dots, with a bit of foam adhesive behind my main image, and boom.... done. AudreyPettit Claus&Co MerryCard3 
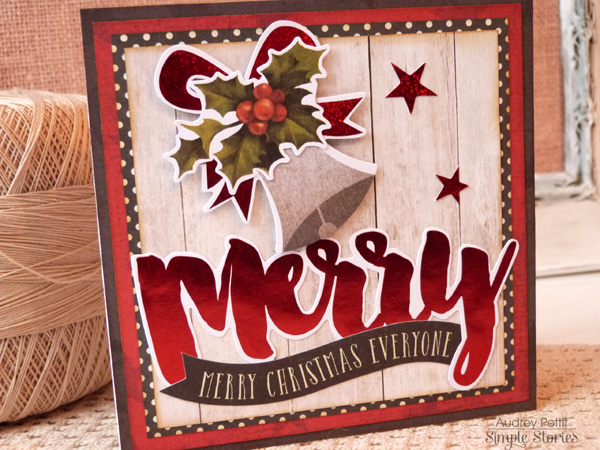
The card base itself was just as easy. I used a couple of the 4x4 SN@P journaling cards for the top, and layered them onto two solids from the Simple Basics Kit. Really doesn't get any easier than that. AudreyPettit Claus&Co NorthPoleCard 
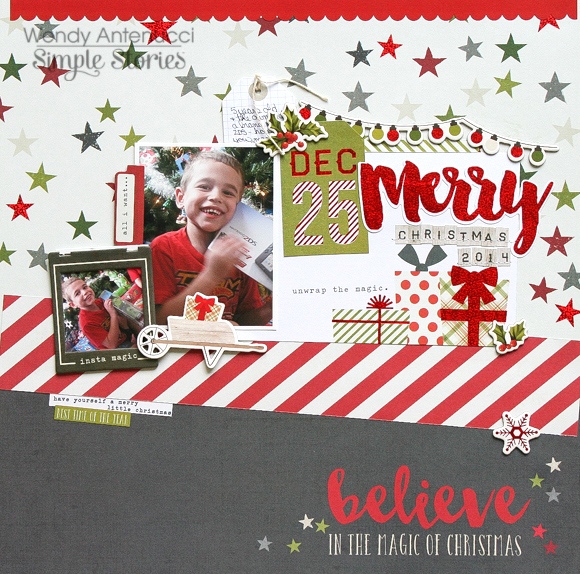
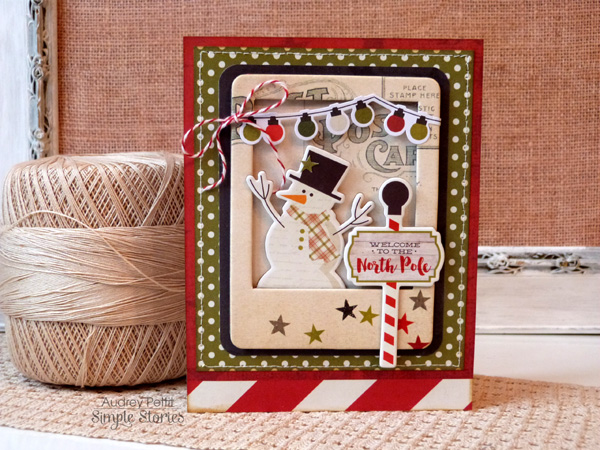
My second card may look a bit more detailed, but it, too, was quite quick and easy to make, thanks to more adorable die cuts and chipboard shapes. AudreyPettit Claus&Co NorthPoleCard2 
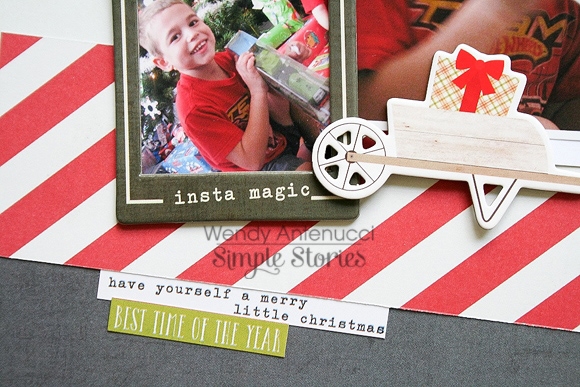
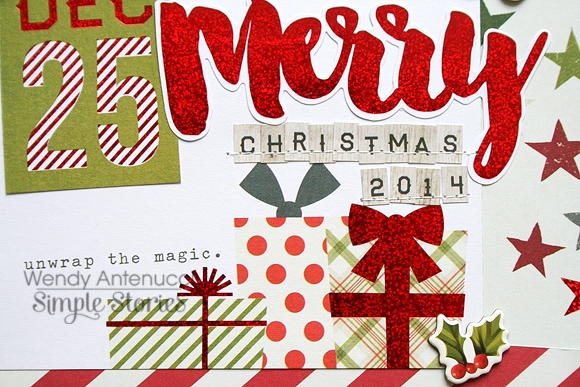
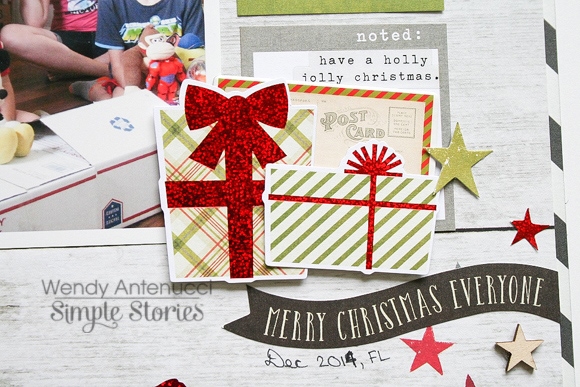
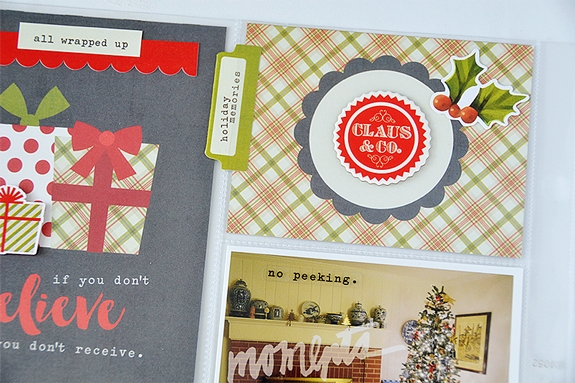
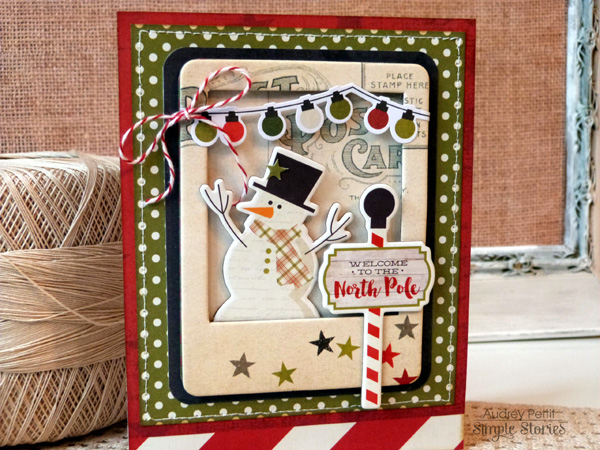
The background is all pieced from papers from the Simple Basics Kit. I mixed the stripes and dots with the more solid patterns for detail, and topped them all with a fun Polaroid-style chipboard frame. Then I built my little snowman scene in and around the frame. AudreyPettit Claus&Co NorthPoleCard3 
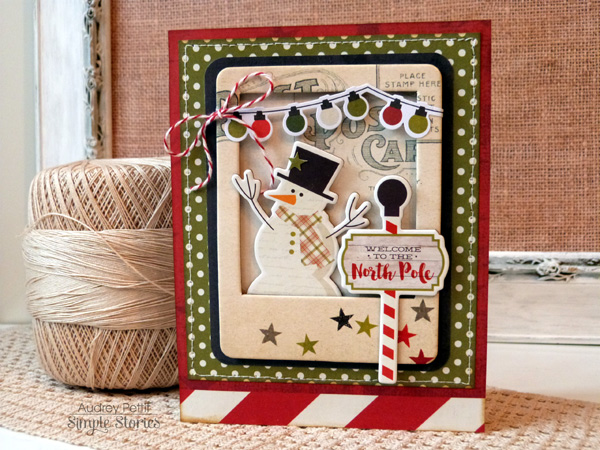
I added a bit of extra detail to this card with some machine stitching. Always love that special handmade touch it adds to my cards. And lastly, I finished off with a small twine bow in the upper corner. Thanks so much for stopping by! Happy Holidays everyone! 

Supplies

Merry Christmas everyone!  Wendy here today to share a few layouts I created with the Claus & Co collection.  I was so inspired by this collection that I have finally (just about) caught up on the Christmas layouts that I had avoided making, LOL!  

 
My first layout, Joy & Cheer, began by nestling my photos on the calender piece with a 4x4 card that matched my son's shirt.  I of course, being the totally addicted fussy cutter that I am, had to cut the light paper and use a festive string of lights on this layout.  I love that the enamel dots are the perfect size to fit the light bulbs and add that special touch.  A few border pieces were the perfect touches to finish grounding my page.
 
 
I began making an embellishment cluster under my pictures with some Bits & Pieces, chipboard, and a wooden veneer which will form a visual triangle with my other wooden pieces.
 
 
I love the photo stickers that allow layering without overpowering.  The jingle bells tie back down to the 4x4 card leading your eyes around the page and connecting for a bigger impact.
 
My next page, Merry Christmas 2014, again began with my "photo block" as I like to call it, a picture and a 4x6 card which housed my title.
 
 
I grounded my photo with the border elements which also helped to balance the busyness of the top of the layout.  The chipboard frame housed a smaller picture that was important, but not the star of the show.
 
 
And one more look at my title area that I used a variety of embellishments to form an eye catching title card.
 
 
I have one more layout to share, one of all of most of the kids gathered, Ho Ho Ho.
 
 
I chose my photo and then I used the Sn@p! cards to mat my photo.  The 2x2 cards added to my "photo block" and gave me room to record details of the day.  
 
 
I placed my title on one of these 2x2 areas with a tag and a journaling piece giving the cluster enough importance to also ground my photo.
 
 
My other 2x2 cluster was just a lot of fun elements that tied into the background of the paper with the Joy and the star trail.
 
Thanks for joining me today, I hope you are feeling merry!  I have quite a few more projects up on my blog using the Claus & Co collection, if you'd like to stop by, see you there!  

Supplies

Hi there Simple Stories fans! Suzanna here to day wrapping up my year with Simple Stories with another pocket layout for you. The Claus & Co collection is just about my favorite of all the collections I have worked with this year. But then again, I have a slight bias towards Christmas and all things Christmas. Some people collect dolls or tea pots, I collect Christmas papercrafting product!
 
 
These pictures are of December 24th, 2014. I probably fill an SD card on Christmas day itself, just of the opening of presents. The joy and excitement of my children warms my heart.
 
 
In many ways, this is a hybrid layout as I did use digital elements on my pictures as well as some stamps on the journal cards. Photo stickers are great on the outside of the pocket pages as well to create a similar hybrid look.
 
 
Because I have some many pictures that I want to include, I used an interactive element for additional journaling and pictures. I wrote the big Santa gifts so the kids know what they got that year on one of the pages and included some more pictures. The less attractive pictures. It's so difficult to capture Christmas morning when it's all a big blur! The kids are in constant motion, the lighting isn't ideal and I hate using the flash. But, it's our memories captured.
 
 
I like to use embellishments on both the pictures directly and on the outside of the pocket pages. The look of chipboard within the pocket creates a disturbing "bulge" to the page so the bulkier elements tend to get adhered to the outside of my pages.


Well that's it for me for the year! Thanks for popping in, I hope you have found some inspiration to help you document Christmas morning. I want to wish you all a wonderful and joyous Holiday Season!

Supplies

It can be difficult to find time for crafting during the busy month of December.  We all have Christmas parties, holiday baking, decorating and so much more, that can cause our crafty time to be put on the back burner.  But I have some tips to share, that can help you get a layout or two, done in the blink of an eye!

I created two layouts using the Claus & Co. collection, and each layout only took around 45 minutes.  That's definitely fast for me, because each of my layouts normally take about an hour and a half to two hours.  My first tip for quick crafting, is let the paper do the work for you.

On my first layout, I used the "I Believe" patterned paper from the Claus & Co. collection.  This paper has a great circle design.  I started out by punching six 2 inch circles from the 6x6 Paper Pad.  I wanted a fast way to add stitching to my layout, and this was the perfect way to do it.  Once the circles were punched, I used my sewing machine to add messy stitching around the edge of each circle.  Then I just placed them over the printed circles on the background paper.


After the sewn circles were adhered, I printed out my photo and cut it into a circle shape also.  I placed it at the top left hand side of the page, and used letter stickers from the Expressions Cardstock Sticker sheet to create a wrap around title.  Then I used the large wood veneer "Ho Ho Ho" phrase beside the photo, to have a large element that would help draw your eye to the photo and title.


Next came my favorite part...adding embellishments!  I went through all of my packs included with the Claus & Co. collection.  I added a mix of wood veneers, enamel dots, Bradz, Chipboard, Bits & Pieces and stickers to each of the circles to finish my layout.


My second layout started out in the same way as the first.  I chose a paper that would cut down on my design time.  I love the overlapping post card look and large Santa on the "Ho Ho Ho" paper, and knew it would be perfect with the Chipboard Frames from the Claus & Co. collection.

This paper allowed me the opportunity for a larger photo and space for six of the Chipboard Frames.  I placed my photo in the lower center of the page and then placed the frames according to the spacing of the post card design on the background paper.  


Now, I had just the right spots for my embellishments and title.  I used the letter stickers from the Claus & Co. collection to add my title to the top center frame.  I love that there are four different types of alphas on the Expressions Cardstock Sticker sheet, because I like to mix the look of the typography on my layouts.  And that's another one of my tips for quick crafting...make use of those coordinating letter stickers.  They are on hand and already coordinate with your page, so it takes the guess work out of adding a title to your page.


And one last "quick" tip...instead of sitting down to create one layout, go ahead and have your photos ready for a second layout and use the same product from your first page.  That's what I did for these two pages.  I already had all of the product on my desk, but was able to use it in a different way on both layouts.  And if we're already at our craft desk, we might as well go for two layouts instead of just one!!


Supplies

Hello again and thank you for popping in today, as I share this festive December countdown calendar with you. I’ve created it using a do-it-yourself tag calendar and some Claus & Co. goodies. It looks great on my mantle and my kids are having fun replacing the numbers as the days of the month go by.

After arranging the bits and pieces from the calendar I had a think about the amount of numbers I would need, as well as which papers and embellishments I wanted to use. I have been hoarding a sheet of ‘Charcoal Stars/Stripes’, as I just love the soft distress of this print. I think using the darker colour in the background along with the woodgrain print for the base has given this calendar a nice clean feel and I’m very proud to show it off in my home!

Here’s how I went about putting it all together:

The calendar kit comes flat packed, so I separated al the pieces, sanded down the tags and had my husband drill some pilot holes for the hooks for me. For the base, I have used a sheet of ‘Oh Joy’, creating a faux woodgrain effect.
 
 
For the body of the calendar and the edges, I have used ‘Charcoal Stars/Stripes’. As you can see, I used Helmar 450 to adhere my paper to the wooden base. It’s one of my favourite adhesives. (For a lasting finish, it would probably also be a good idea to seal your project so it looks beautiful for years to come.)


Next I moved on to the tags. They come pre-punched which is great as it takes the guesswork out of making sure everything is even. I chose to use mostly Claus & Co. Sn@p cards to cover my tags, as the sizing was pretty much spot on and I had a great variety of prints and foil details to choose from. The Sn@p packs also come with some bonus die cuts too!
 
 
If you want to show a specific area of a print, a quick way is to just hold the tag and paper up to a light source so you can gauge the area you want to cover.
 
 
If you want to cover both sides of your tags, be sure to cover one side, then punch the hole while you can still see it, then cover the other side and punch again.
 
 
When all the bases of my tags were covered, I set about embellishing them.
 
 
The fun part!
 
 
The numbers 1 and 2 would be used a couple of times, so there were two for each of those, along with a ‘0’ and a couple of blanks ones, as I didn’t want to do the numbers 06 for Day 6 iykwim. 
 
Here is the static ‘December’ tag. I’ve used some Claus & Co. wood veneer as well as some Bits & Pieces and cardstock stickers…
 
 
The veneer has been given a glittering finish. To achieve this I:
 
1. Coloured my veneer in using a red marker. This will give the base an even coat of colour and prevent show-through.
 
 
2. I then have it a good coat of Glossy Accents
 
 
3. Finally I gave it a good dose of fine red glitter. I thought it would dry with a more raised effect actually. Next time I will give another layer over the top!
 
 
Here’s a look at the rest of my tags. It’s the perfect time of year for a bit of sparkle!
 
 
A bit closer…
 
 
I’ve finished these off using Claus & Co. Expressions and Fundamental stickers, Bits & Pieces, wood veneer, Photo stickers (my current crush!) chipboard frames, brads and enamel dots.
 
 
I love how they each have their own little character.
 
 
The final little touches on the calendar were these adorable wood veneer snow flakes. I have again, used a couple of different markers to colour these. It’s quick and effective and a metallic paint marker is an easy way to glimmer up a plain piece.


This project would make a fabulous gift for someone special at this time of the year.
 
 
I hope you have enjoyed today’s post. You will find a list of materials used below. To keep up with my other crafty creations, you can find me over on Instagram @chantallemcdaniel. Thank you so much for stopping by!


Supplies

Hey Simple Stories fans, Amy here to share a layout I created using the Snow Patrol mini collection.  This collection is perfect for, of course, winter pictures.  I created a layout of my littlest playing in the snow. I visited the Silhouette Design Store and picked out the Simple Stories snowflake cut file to create my background.  After I cut the snowflake pattern out of my white card stock, I backed them with different patterned paper.  I then used some of the white snowflakes as accents, and colored them with mist to coordinate.

Since this is a mini collection, there aren't as many embellishments offered, so I grabbed the I AM embellishments which worked perfectly. Here are some closeups.

The photo overlay was perfect to frame my pictures.
 
 
I cut out the large heart from the Element 2 paper for my title.
 
 
This next closeup features a chipboard frame, and several of the photo stickers from I AM, mixed in with some stickers from Snow Patrol.
 
 
Thanks for visiting the blog today!


Supplies

Hi there Simple Planner fans, it's Nancy with a peek at my Christmas Planner. I'm using the 6x8 Holiday Sn@p Binder to store all of my plans (and some memories) this month. I customized the cover with white card stock, die cuts and stickers from the Claus & Co. collection.

The Holiday Planning Inserts include a November and December calendar as well as these square stickers. I love how the fill up the month blocks perfectly!

Here's a detailed look at some of the planner stickers included in the Planning Insert Pack. There are titles, phrases and icon stickers.

The inserts are a list lovers dream! There are some beautiful ones for Christmas Cards, Decorations, Wish Lists, To-Do's and an Online Checklist. Everything you could possibly need a list for has been included.

There is a fun section entirely dedicated to menus. There are several pages for Christmas Eve, Christmas and New Years. 

There are also pages for recording your favorite baking recipes. I love how this one is organized In theory, I won't forget a thing!

This is a second pull out December calendar. I love to track my online orders and received dates on this one.

The inserts also include some memory keeping pages. I love the holidays and "what I'm doing right now" sections. This is such a great place to get down the current memories.

The Holiday 6x8 SN@P Binder and Holiday Planning Inserts are a beautiful and organized way to keep all of your Christmas memories! The best part is the it's undated, so you can still pick one up for next year.

Supplies

Pages