October 2016 Blog Posts

Hi everyone!  Theresa here sharing my October setup in my The Reset Girl Persimmon Carpe Diem planner!

I'm using the Hello Fall collection again this month.  To create some fun Fall clips, I took my Posh planner clips and used temporary adhesive to add the Hello Fall die cuts to them.  I changed the photo in the front clear pocket and added a fall embellishment to it as well.

I created a new dashboard with the patterned paper from the collection.  I added a photo of my kids at the pumpkin patch and used stickers and die cuts to embellish.  

When I think of Fall, the colors brown, orange and yellow always come to mind.  So I used those colors for my monthly layout.  I hope you're having fun adding Fall to your planners!

Supplies

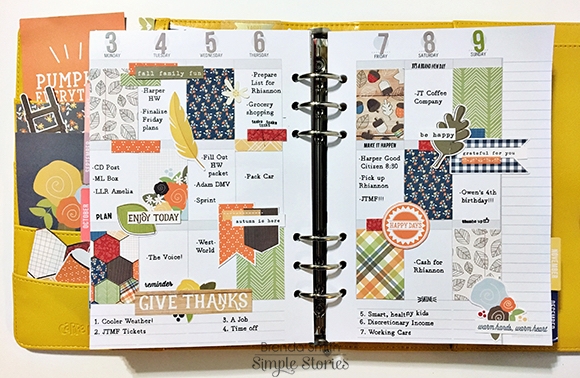
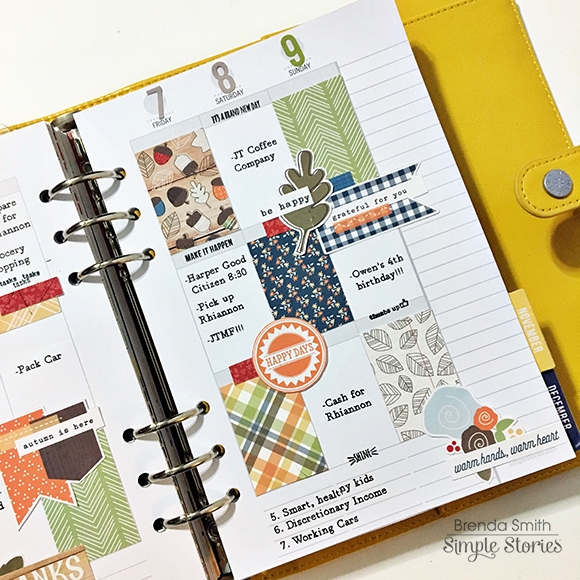
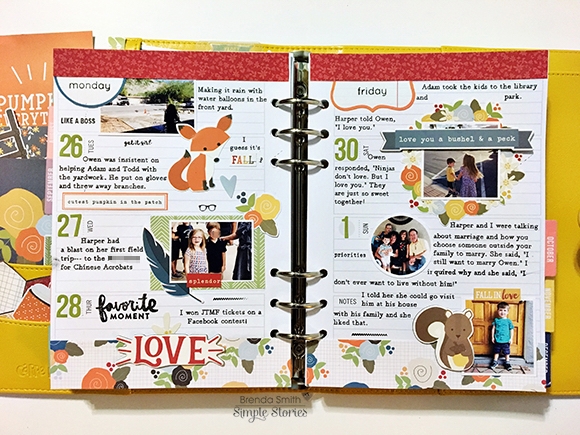
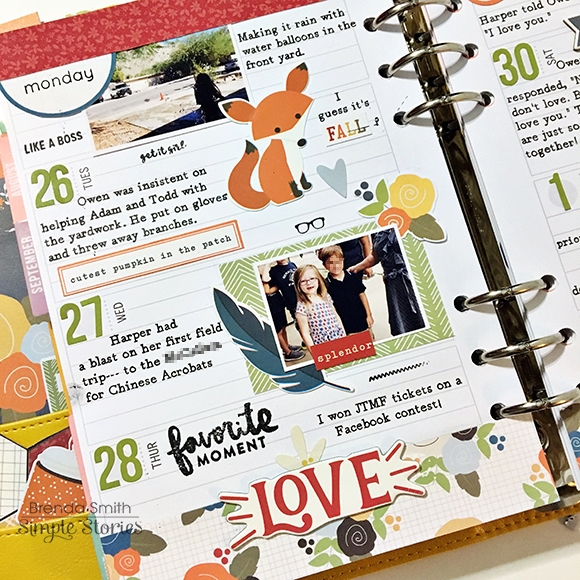
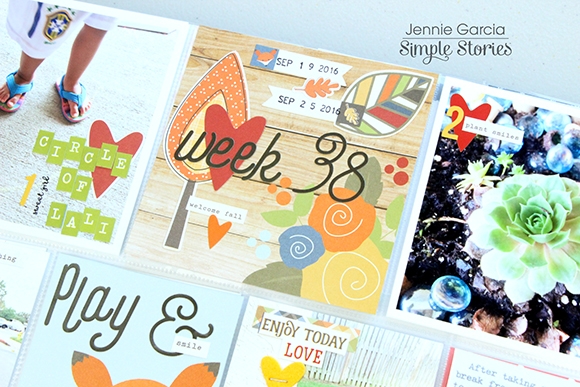
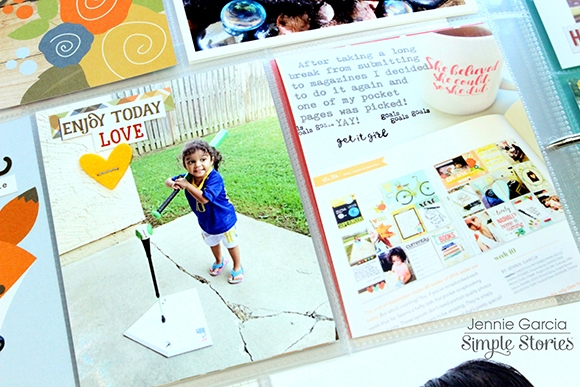
Hello crafters! I'm on the Simple Stories blog today with 2 layouts using the Hello Fall collection.

I am so inspired by this collection because fall is my favourite season amongst the 4 seasons! Singapore does not experience the four seasons (It is really summer all year round), so I am always enjoying the photos taken by my friends with different seasons.

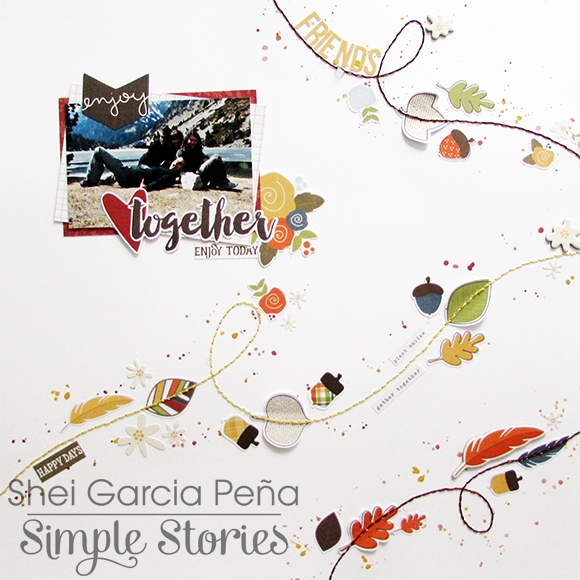
The layouts I have done this time are taken by my ex-colleague and a good friend who has taken so many nice photos! I am always so inspired by his photography. These pictures are taken by JC Soo, at Liberty Memorial. Alongside with the photos, I also documented some of my favourite autumn quotes. It is a good way to store my memory of things I like at this point of time!

Be Thankful

For my first layout, I got inspired by the hexagons on the Warm & Cozy pattern paper. Love the colours in this collection; it really enhances the colours in my photo!

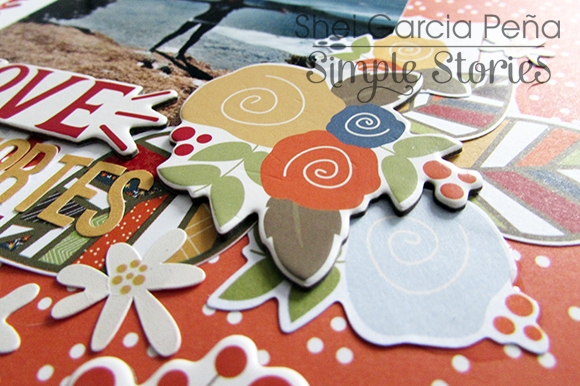
I started layering with the hexagons on the background. The fussy cutting of hexagons was so therapeutic; I actually cut all of the pattern paper into individual hexagons. I did not use up all of it though; I will leave the rest for another layout. The hexagons highlight one of my favourite fall quote – “Every leaf speaks bliss to me, fluttering from the autumn tree

For the title, it was easy to pick from the bits and pieces pack! Just the word I was looking for! A little stitching across the title helps to create more attention to the title.

There are so many elements in the Bits & Pieces pack that I used in this layout. The leaves and acorns are so cute! I like to use leaves as fillers – they help to reduce empty spaces and yet at the same time, do not over clutter the layout. 

More embellishments added to the layout. I like this tag – thankful - from the sticker sheet. Just paste it on, and add some more zig zag stitching to join the photo and the tag. Below the tag, I added some more layers of embellishments from the bits and pieces pack. There are simply too many goodies in this pack!

On the other end of the photo, I added this cute little chipmunk with the wooden logs. This melts my heart! Layering the embellishments one on top another creates a scene, and in this case, due to the lighter colour of wooden grain background, achieves a very good contrast!

_____________________________

Autumn

For my second layout, the main inspiration comes from the 2x12, 4x12 & 6x12 Elements pattern paper. I am really inspired by the papers in this collection! Everything else comes into place with this collection.

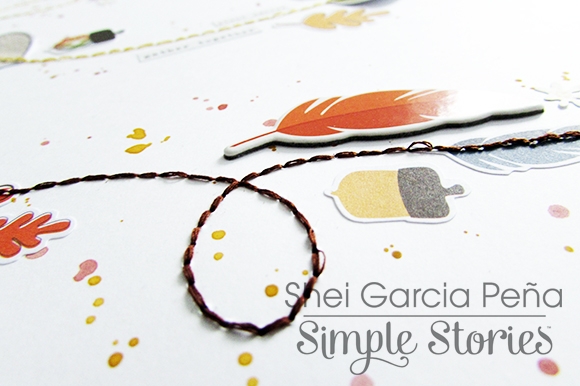
First, I chose a dark woodgrain as the background to serve contrast against the lighter elements I would be placing on the layout. Next, I did a fussy cut on the scroll from the 2x12, 4x12 & 6x12 Elements pattern paper. This element inspired me to create a portrait layout with vertical elements. In this layout though, I opted for hand stitching with some DMC thread. I wanted a bold contrast of stitching to enhance this layout; especially so since the background is dark, while the scroll had a lighter shade. I added the title at the top of the scroll, just above the photo. I like how the colors are concentrated at the top of the alphabet. This title came from the sticker sheet

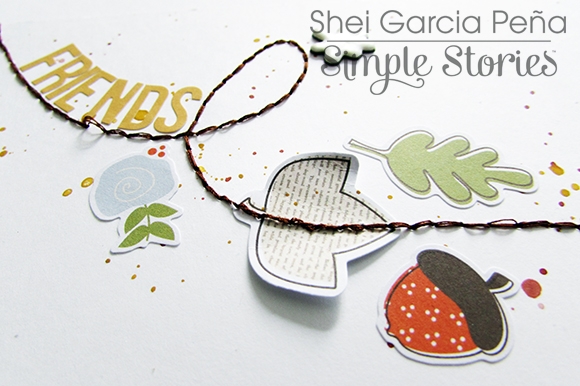
Surrounding the scroll, I have added some fussy cuts of the beautiful florals from I {heart} Fall pattern paper. It is a continuation from the florals existing from the scroll page. I have also die cut some leaves and added them in between the papers to act as fillers. 

Some more goodies in the Bits & Pieces pack! I like to use embellishments associated with the photos. The simple yet eye catching trees in this pack works wonders!

Another cluster, backed with leaves as fillers to showcase a perfect embellishment – Autumn is here. All I needed to do was to fill up the space with another of my favourite fall quote – “How beautifully leaves grow old, how full of light and color are their last days.

I am such a Fall girl, and this collection has granted me a great journey into Autumn! Hope you have enjoyed the walk through, and thanks for dropping by today.

Supplies


Supplies

Good morning friends! Brenda Smith here with you today to share with you a couple planner spreads that I’ve been making in my Marigold Carpe Diem planner. I wanted to walk you through how I approach making my spreads. 
 
I first fell in love with the Carpe Diem planners because of the horizontal weekly format, which is PERFECT for memory planning. But a few months ago when the new Carpe Diems came with vertical weekly inserts, I couldn’t wait to give them a try! The vertical inserts have quickly become my favorite for traditional planning because I find the format works best for all the lists I have in my head.
 
 
The first thing I do is cut down some patterned paper to size to fit in the vertical boxes. The vertical boxes are 1.25” wide by 1.875” tall. I’m horrible at measuring with the little tiny lines on a ruler so I used the Pages program on my Mac to make a template (this can also be done in Microsoft Word). In pages, I chose “shape” from the top bar, and chose a square shape and filled it with a color. I resized by pulling at the edges until it was the right size. I printed out on heavy cardstock and then cut it out. I used this as a template to cut out all the rectangles for my vertical boxes.
 
 
I used the Hello Fall 6x6 pad and mixed and matched patterns to give myself a good selection. I also trimmed out tiny little pieces of patterned paper to use as layering pieces, kind of like I would use little bits of washi but paper instead. 
 
 
I took some die cut pieces from the Hello Fall Bits and Pieces and layered them atop my patterned paper boxes and paper strips. I move everything around (without gluing anything yet) until I’m satisfied with how it looks and then I start gluing things down systematically. 
 
 
Once I have everything glued down, I’ll break out my stamps keeping in mind sentiments that will work for what I have going on that week. I want there to be a little white space left after I’ve added journaling, so I make sure to use stamps that will not take up too much valuable space. The Simple Stories roller stamps (List It and Make it Happen) are perfect for this because they offer a variety of sentiments in the optimum size for planners. 
 
 
I usually use either my typewriter or my Silhouette Cameo with sketch pens to do the lists and journaling on my planner pages. I like the clean and eclectic look it gives. 
 
 
Occasionally, I will outline my die cuts or embellishments that fade into the background with a black pen just to make them stand out more. I felt like this spread didn’t need any help with that, though, so I left it as is. 
 
 
Also in my Marigold planner, I’ve got a divided section for memory planning. I do memory planning in a few different planners with the idea that maybe some day, I could hand completed memory planners to my son and daughter after they move out. So I have a planner for memory planning that is more skewed toward my daughter and things she says and does and I have one for my son, and I also have a more generic family memory planner which is this one. 
 
 
This time, I decided to add a few photos directly to my memory planning pages. They take up a lot of room on my page, but as long as I can write a few lines to remind of us of the memories, I’m not worried about it. 
 
 
Now I know this might make some orderly scrapbookers have a bit of a panic attack, but I’m going to let you in on a little secret: as long as my photos and memories happen within that week, I’m not always careful to put them on the corresponding day that the pictures were actually taken. If I took a photo on Saturday but it doesn’t really work for my design purposes to be placed on Saturday, I don’t worry about it. I put the pictures where they look best and relax about the timeline. Nobody is ever going to look back at these and say, “Hey, that actually happened 3 days earlier!” Within the week is specific enough for me. 
 
 
I hope you’ve enjoyed this peek into how I’m planning Fall in my Marigold planner. Have you transitioned into Fall in your planners? Make sure to tag Simple Stories when sharing on social media so we can enjoy all the beautiful pages you're making in your Carpe Diem!

Supplies

Hi there!

It’s Shei on the blog today. I’m so happy to be back sharing two layouts. Let’s get started!

My first layout is devoted to one of my favourite places in the world. This photo is from National Park Aigüestortes, a catalonian natural park (in Spain). This place is very special for my ‘cause it is where I spent all my childhood summers. 

So, I used the cute and fun “Hello Fall” collection. I chose the orange with white dots paper (Sweater Weather b-side) as my background. Then I cut a lot of leaves‘s contour with my Silhouette Cameo on white cardstock. But I didn’t cut completely the leaves, I only cut the half of each silhouette instead it. After that, I folded all the leaves so you can see the background paper.

Next came the embellishing! (my favorite part). I created a cluster of embellishments with flowers and leaves from chipboard stickers, bits&pieces, the combo cardstock stickers and the 4x6 stickers sheets. 

___________________________

The next layout I’m sharing with you today was again created with the beautiful “Hello Fall” collection. I started this page with a white cardstock as my background. 

My idea was to represent the withered leaves flying on a windy autumn day. So I sew three lines like when you draw the leaves movement. Then I glued a lot of embellishments around them. The flowers, feathers and leaves from the chipboard stickers, bits&pieces and 4x6 stickers and the acorns and some sentences from the combo cardstock stickers and 4x6 stickers. Furthermore, I wrote the word ”friends” with the abc from 4x6 stickers. And finally I splattered yellow and brown paint  around the lines.

Then I glued my pic on two decorated papers (Autumn Delight and Warm and Cozy b-side) and I decorated it with some of the cute pieces than you can find in bits&pieces (the heart, the word to my title or the flowers are some of them).

Thank you so much for taking the time to read my post! I hope you enjoyed my layouts! See you next month!

Never stop smiling! Kisses!!

SaveSave

Supplies

Hello Everyone! This is Jennie and today I’m going to share with you how I documented the first week of fall. The perfect collection for these memories is the Hello Fall Collection.

On a few the past weeks' pages I have a few red flags on the top. These mean that I haven’t worked on these pages. Every week or two I print photos and I slip them in the page protectors. Printing photos is the most boring part so I like to do it fast and be done with it. However these pages are ready for that moment where I find the perfect products or inspiration to work on them.

In one of the pockets I included a booklet that come in Shopkins toys. My daughter is obsessed with those toys so I think it would be cool for her to pull it out and look at it.

I really like how this title card came out! The font on the Hello Fall Combo Stickers is gorgeous!

I always need to add a little something to each card, even the photos. The new 4x6 Stickers include one sheet of little words and another sheets with words and pattern rectangles. I also like to use the Posh Word Label Stickers.

 
To write my journaling I add a number to the photos and then I write the story in a journaling card. I used the numbers from thePosh Number Stickers.
 
 
The Hello Fall Collection has a washi tape set but you can also mix it with the washi tape from The Reset Girl or the Posh collections. 
 
 
I love the Photo Flips because I can always add extra memories and journaling. You can also make a shaker flip pocket on top of a photo to create a really cool effect.  
 
 
I hope you enjoyed these pages! If you want to see how I made these pages check out this process video:https://www.youtube.com/watch?v=rUqY8uL_iGU&feature=youtu.be

Supplies

As many of you know, October is Breast Cancer Awareness month, an annual campaign by the Breast Cancer Awareness Foundation to increase awareness of the disease that has directly & indirectly touched millions of women worldwide.

Earlier this year, owner and creative director Amber Crowell introduced you to our Hope Simple Set honoring the fight - 

Hope is a small collection dedicated to one of Amber's dearest friends of 30 years, Heidi, and to everyone who has been affected by breast cancer.  Last year Heidi was diagnosed with stage 3 breast cancer.  Of course this news was devastating to her, her family, and everyone that knows her.  In Amber's words, "Heidi is the toughest, most dedicated person I know and immediatley set out to kick cancer's butt!  After a year of surgeries and treatments Heidi is standing strong - she even dyed her hair pink to show her victory over cancer. Heidi's kick butt attitude is the inspiration for the new HOPE collection - all about fighting the fight and having hope for a better tomorrow.  Heidi, you're my hero in so many ways!"

While the collection was launched nearly a year ago, it's a collection we continue to produce in an effort to provide breast cancer themed product for women to document their trials, tribulations & triumphs with the disease and to increase breast cancer awareness.

For more information about National Breast Cancer Awareness Month, visit www.nationalbreastcancer.org


Pages