October 2016 Blog Posts

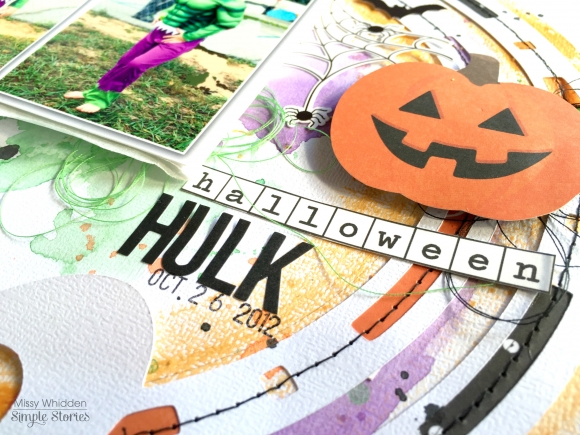
Hey, friends!  Missy back here with you today, and I have two fun Halloween layouts to share using the Happy Haunting Simple Set.  Halloween is my favorite holiday to scrap, and I decided to create a layout about my daughter dressing up as the Hulk a few years ago.  If you know her and her personality, you’d know that this was the perfect costume for her…haha!  I love that there is a lot of green and purple in these photos, so I wanted to bring them into the layout to contrast with all the orange and black in the collection.  I started off brushing some Shimmerz Texturez  in a circle on a sheet of white cardstock.  I found a cute circle frame cut file from The Cut Shoppe and placed that over the paint.  I came in with some purple and green watercolors to peek out from the cut file and the photos.  I backed some of the open spots of the cut file with papers from the collection.

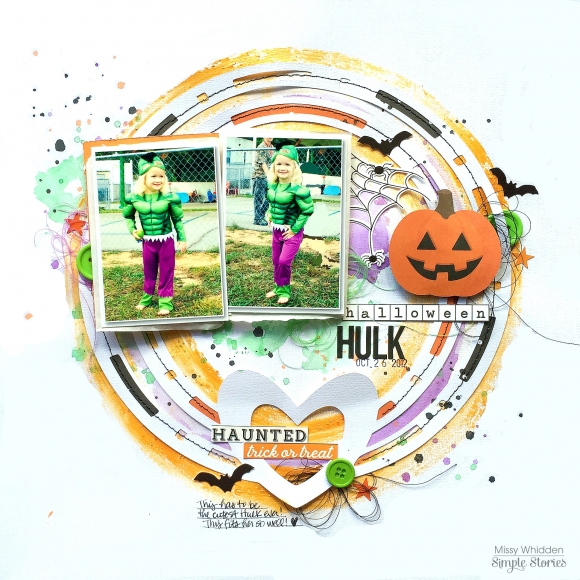
I cut the word “Halloween” from the 3x4 4x6 Elements sheet and paired it with some of the black Snap Bolds Alphas to create my title.  I fussy cut that cute pumpkin from the same paper and added some foam under him to pop him up a bit.  That cute spider web is from the 6x12 Cardstock Sticker sheet.  I also added some machine stitching.  I just love the mix of green & purple with this line!

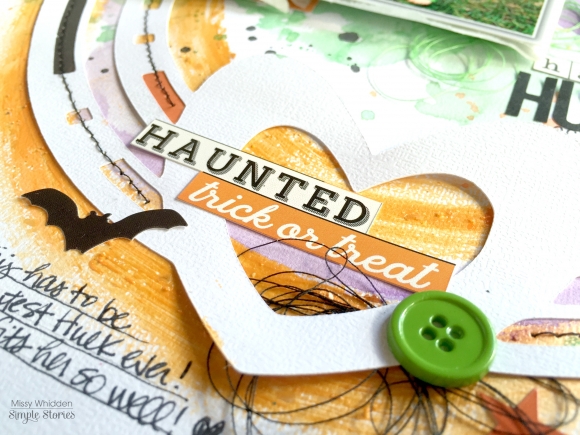
I added a few phrase stickers down here at the bottom as well as a green button from my stash.  I love adding those little bits & pieces from my stash to add pops of color here and there.  Since there is no green in this collection, this was a great way to do that.  I also added some tangled thread for an extra pop of black.  I think the orange Texturez looks so neat under the circle frame!

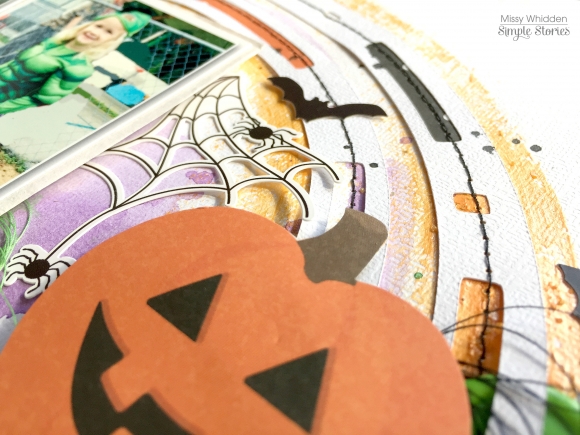
Here’s a closer look at that adorable spider web sticker.  I positioned the pumpkin so it looks like the spiders are about to crawl on him.  I added a few bat stickers, too.

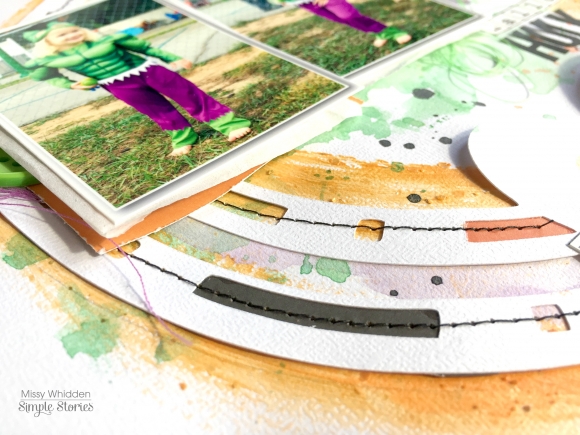
This turned out to be a pretty simple layout once I got the paint down and the cut file layered over it.  I think when you have super cute photos with bright colors, less is more when it comes to embellishing!

____________________________________

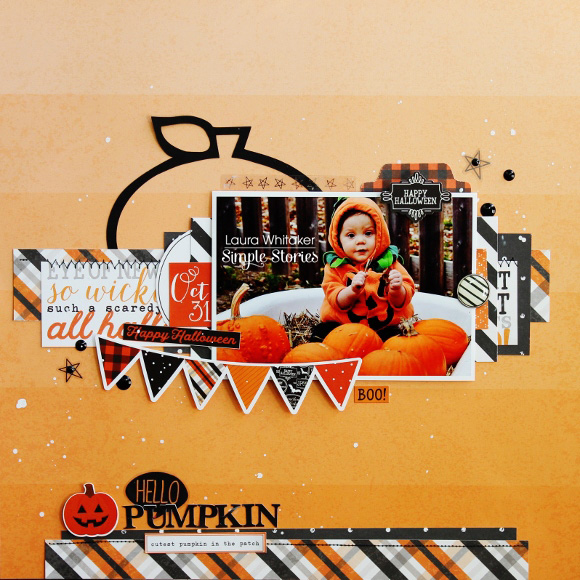
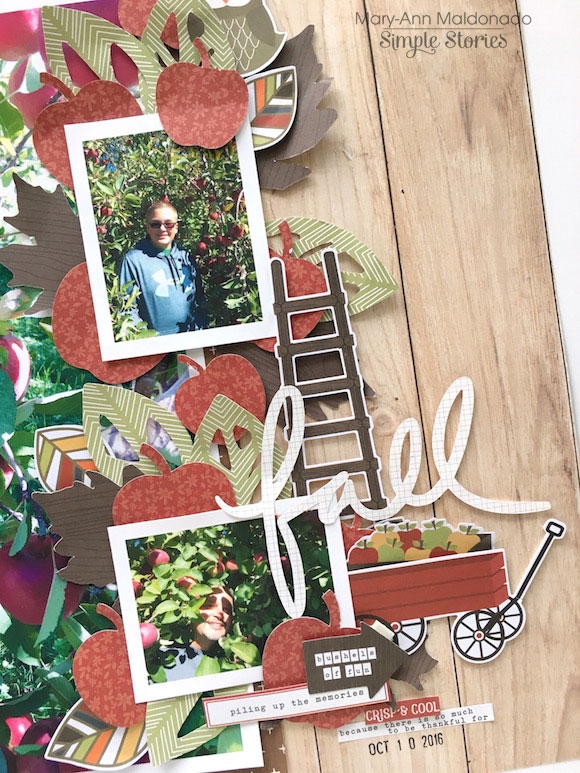
For my second page, I decided to start with a neutral background.  I pulled out some light kraft cardstock from my stash to build on.  I love how the oranges look against it.  It’s such a great Fall color, and to bring out the oranges in the collection I sprayed some orange ink first.  I used a small grid stencil with some gold ink spray to add a bit more interest and color.  I came in with some dark brown and black splatters.  Since my photo has a lot of orange and a lot of pumpkins, I decided to play on that and create lots of die cut pumpkins.  I found another cut file from The Cut Shoppe and cut several pumpkins using a few different patterned papers.  I created a row of pumpkins under the photo, which I backed with a few scraps of coordinating patterned papers.  Again, since my photo was pretty busy, I didn’t want to overwhelm the page with a ton of embellishments.

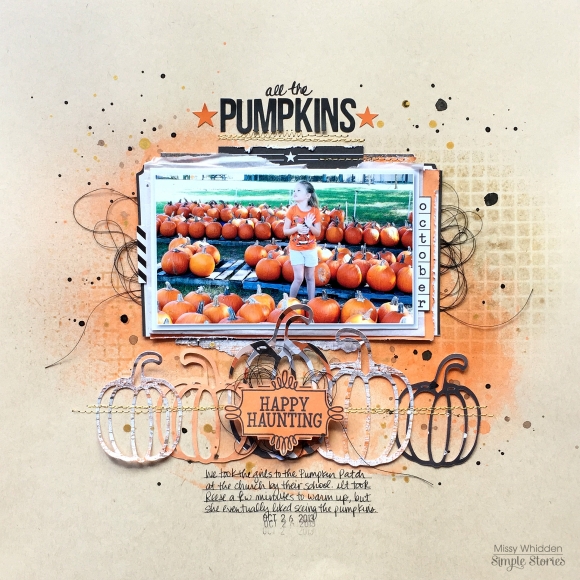
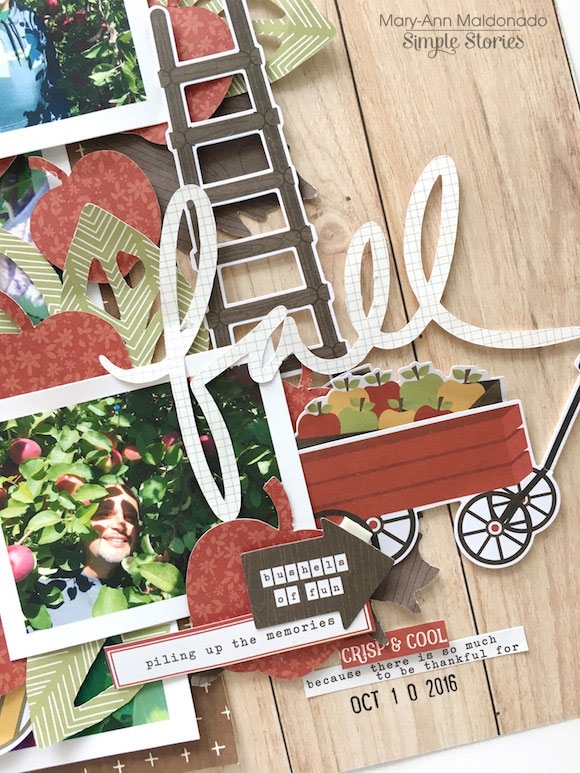
I lightly glued all the pumpkins together and lined them up centered with my photo.  I stitched through them all with shiny gold thread since I had some gold in the background.  I fussy cut the “happy haunting” piece from patterned paper and added foam under it as well as some tangled thread.  I kept everything on a centered vertical design and added a few lines of journaling down at the bottom.

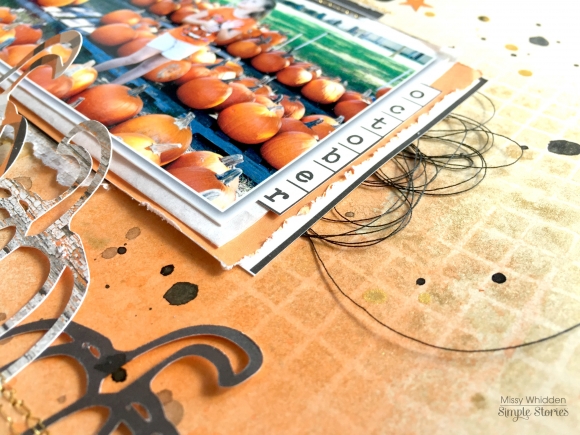
Here’s a closer look at the layers behind the photo.  I love how the gold spray looks mixed with the orange…so pretty!  I cut “October” from the 3x4 4x6 Elements paper and used it as a cute embellishment here.  I also used my edge distress tool to roughen up the papers’ edges.

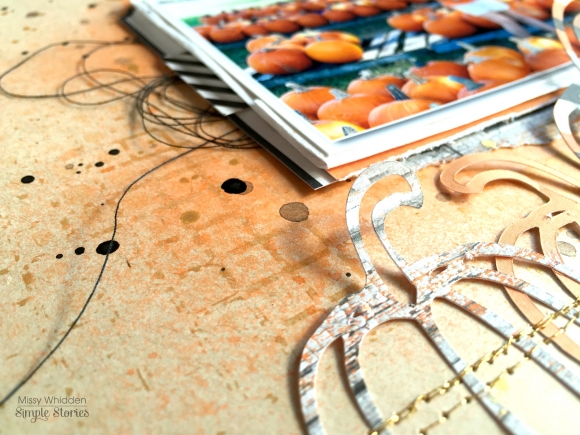
Here’s the other side of the photo.  You can really see the texture from the stencil and splatters here.  The machine stitching also creates wonderful texture as well as shine.

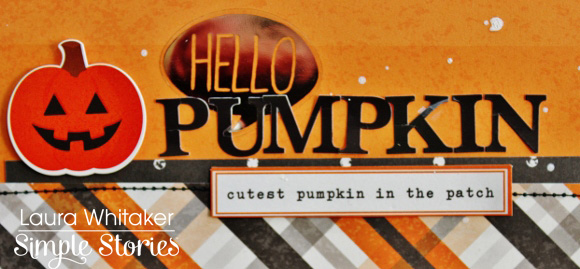
One last close-up of the top area.  I used some of the black Snap Bolds alphas to create the title.  I added in a few orange stars from the 6x12 Cardstock Stickers and some more metallic gold stitching.  I used my handwriting to finish off the title.  Again, a pretty simple layout, but I love how it turned out!

I hope these pages give you some fun ideas to try with the Happy Haunting Simple Set, it’s got everything you need to create something for Halloween!  Thanks for stopping by, and have a Happy Halloween!!

SaveSave

Supplies

Hey planner ghouls! Meka here today, excited to share my Halloween décor in my Carpe Diem planner. The Happy Haunting Simple Set is full of sweet and spooky treats for the holiday.

The kit comes with a sheet of element cards that I cut apart to embellish my planner pockets. I prefer a combo of straight and organic shapes in varying sizes. To achieve that variety, I cut out the ghost, witch’s hat, and pumpkin from the element cards and placed them in and on the pockets with stickers from the 6x12 cardstock sticker sheet.

For the dashboard pocket page, I used Trick or Treat, a 12x12 double-sided cardstock. It has the perfect contrast of plaid and polka dots. To create the pocket, I folded the bottom portion of the polka dots over to the plaid in front, then doubled that on itself and glued shut—instant pockets! A few paper scraps and stickers made for easy embellishment.

For quick and easy deco clips, gold paper clips were attached behind stickers. The black, white, and orange metal clips from The Reset Girl line add fun and function. I swapped the epoxy from one of the orange Posh metal clips with a TRG one. Totally unnecessary, I know, but this girl loves her gold hardware!

Dividers were cut to size using my existing dividers as a guide. With the remaining paper pieces, I punched a set of tabs using a tab punch, and cut tiny labels in more solid tones so the words would be visible.

I initially planned on creating one layout, only for the week of the 31st. A few coordinating washi tapes and the letters B-O-O-! (from Simple Stories’ neutral-toned Sn@p Basics sticker pack) were the perfect pairing to allow the Happy Haunting stickers to take center stage.

I had a few stickers left over, so I decided to decorate the week before Halloween, as well.  I chose the vertical format weekly inserts for this week, and challenged myself to create a black and gold color theme. The Posh Designer Stickers pack and Clear Stickers pack have gold foiled words that helped tie it all together. I love how it turned out. Such an unexpected treat!

I hope my Halloween planner décor was a bit of a treat for you! Visit me on Instagram and let me know how you’re spending your Halloween. Whatever you do, make it a safe and happy one!

Supplies

Hello friends!

I have been having a little fun getting ready for Halloween which is just around the corner and catching up on some Halloween scrapbooking, too!  Of course, the Happy Haunting Simple Set is just perfect for that! 
 

Hello Pumpkin

This first layout features a photo of my grandson, taken a couple of years ago, and since he was a wee little guy at the time I opted to create a "sweeter" layout.  I love this orange ombre paper in the kit and knew immediately that I would want to use it for a background, it is awesome that you get two sheets of it because the other side is a gorgeous wood-grained paper that I love just as much!

I started my page by die cutting a super simple pumpkin outline and then cut a few strips of patterned papers, since I love layers and "white" space I chose to create a page that has both of these things.
 

I pulled in a few left over elements from other Simple Stories collections like this phrase die cut from the Hello Fall collection, the silver foiled clear sticker from the Life in Color collection and the small alphas and and bradz from the Carpe Diem Scrapbooking collection!
 

I think this cardstock banner sticker from the Happy Haunting collection is the perfect way to add some sweetness to my layout!  I added a bit of foam behind it to give it a little pop!  Actually the sticker sheet for this collection has so many icons that are just perfect for creating several Halloween inspired pages! I also added in some machine stitching with black thread for a bit of fun texture.
 

The silver foiled star stickers are also from the Life in Color collection, and the enamel dots were left over from the I Am collection.  Once my layout was finished I added a bit of white mist.  I am in love with the way this page turned out and cannot wait to pop it into his album!
 

Happy Haunting
 
This second layout features a "spookier" photo, this time of my youngest son hanging out in the "graveyard" that he and my husband created in the front yard of our previous home on Halloween night.  Because he was 11 in this photo and feeling like a big kid, I challenged myself to also make a layout that wasn't overly cute for him.
 
I started by using the reverse side of the ombre paper, which has a fabulous wood-grain and is super realistic looking!   I also used one of the cut apart cards as my title, because I do not do a lot of pocket albums, I love to use these cards in other creative ways.
 
 
I hand- stitched on a spiderweb which adds great texture. After that I layered many strips of patterned papers vertically on my page, adding some foam behind a few of them.
 

I pulled in cardstock stickers to accentuate my page and that spoke to a more grown up look. I also added in enamel dots from the You are Here collection. I finished off this layout with sprinkles of black and white mist.
 

Look at that wood-grain,  it is so realistic! Swoon!  I have so loved working with this collection and feel another couple of pages are in my near future!
 
Thanks so much for visiting today!


Supplies

 Hello Friends! Alexandra here with a brand new pocket page spread using The Reset Girl collection. 

It is such a beautiful collection for all kinds of occasions. Here we have recent pictures taken both outside and inside.

Our daughter Gabrielle Rose was visiting and brought us presents from Thaïland. We had lunch downtown Chicago, watched the Cubs advance to the World Series for the first time in 71 years...

In terms of journaling, I really wanted to have a majority of handwritten text.

I included mine, our daughter's and asked my husband, a die-hard Cub fan, to write a couple of lines about the victory.

I also used a few 3-D chipboard stickers, a great way to use dimension and a bit of fun to a spread.

Thank you! 

Hi planner friends!  It's Vanessa & I’m back again to show my last full week for October using the Hello Fall collection.
 
 
I used a mixture of the Carpe Diem Hello Fall stickers and stickers from the Posh collection to fill in the vertical boxes.  Along the bottom, I used the Hello Fall cardstock stickers and trimmed some cardstock to use as a trim.  Throughout the month, I still used the paper clips that I made from the Hello Fall chipboard stickers and they’ve held up well.


Again, on the second half of my weekly page, I cut a small strip of cardstock from the Hello Fall collection to use as trim on the bottom page and added some of the cardstock stickers.  I also used the 4x6 weekly planner stickers from the Posh Collection to fill in some of the boxes and to add some color.


I hope you’re enjoying the Hello Fall collection, as it works wonderfully with  the other Carpe Diem collections.  Thanks for stopping by and I’ll see you next month!

Supplies

Hello friends! It's Jennifer here on the blog today to share my 6x8 SN@P! Binder I created using the new Hello Fall collection!   I'm usually a layout creator for the team but I had the opportunity to change things up and create a mini book!  Albums are second favorite on my list of scrapbook creations!  
 
I started with the 6x8 SN@P! Binder in Brown which includes kraft chipboard dividers, SN@P! Pages, and pocket pages! So you will definitely have a variety of elements to use in your book! I used some of the beautiful fall prints from Hello Fall to cover the front of my album including the woodgrain leaf and acorn print of "Harvest Season"
 
 
I love to layer on my pages and Simple Stories has many fun embellishment to choose from!  I started with 3x4 Journaling Card Elements for my base then started adding different embellishments including die cuts from the Bits and PiecesBradz, andChipboard pieces.  How cute are the new Decorative Clips?!  
 
 
This is one of my most favorite times of the year! Hello Fall captures the beauty of fall with its warm colors and classic prints! The SN@P! Binder is perfect to document a fun fall event or some favorite photos!  One recent warm October afternoon, I bribed my kids to take some good photos at a local pumpkin farm!   At the ages of 10 and 13, they are so fond of the camera! Here, I used one of the kraft inserts and covered with the beautiful wood grain print of "Falling For You" as well as added the Capture This Moment Simple Stories Silhouette Cut File.
 
 
The SN@P! Pages included in the album are fun to work with, too,  as they are "ledger type" prints and you're able to add lots of color!  
 
 
The deep orange of "Sweater Weather" is gorgeous in person! I added one of my favorite photos of my daughter as well as a fun circular cut file. I then finished by adding in small embellishments including die cuts, chipboard pieces, and Bradz.  I love how it turned out! 
 
 
Showing some of the die cuts and stickers that are included in the collection!  I love the little squirrel as well as the multi-colored leaves!  I also added  a cute sentiment found in the Bits and Pieces as well as added my date on a ledger sticker from the 4x6 Sticker Set
 
 
For this page, I fussy cut a portion of the hexagons from "Warm and Cozy" and placed it behind my photo.  I then added in chipboard and sticker elements to accent!
 
 
I love including pocket pages in my mini albums and you receive an assortment of sizes in the SN@P! Binders!  Here, I used the 3x4 Journaling Cards to go along with my photos.  
 
 
I love the transparency of pocket pages so its always fun to add a pocket of sequins and small embellishments such as wood veneer shapes!  I will then use my sewing machine to stitch around the edges to ensure my embellishments are secure. 
 
 
I love the 4x4 Journaling Card Elements as well!  I paired one with this black and white photo of my daughter.  
 
 
I also created a 6x8 sheet to fit the insert included in the binder! I adhered two of my 4x6 photo to the B-side of "Celebrate Fall"and accented with a cute decorative pin and sticker! 
 
 
​Thank you for stopping by today! Be sure to check out this collection in its entirety on Simple Stories Products Page! Have a wonderful day! 

SaveSave

Supplies

Howdy!  Layle here with you today.  We have a fun week planned for you - a Simple Stories & JustNick Digital Cut Files Team Up!

Both design teams have swapped 'products' and will be sharing on our blogs all week long for some great inspiration!  Let me tell you, if you fancy digital cut files then you're in for a treat!  Nicole Nowosad, creator of JustNick, is super talented and has a fabulous library of cut files available! 

Today creative team member Mary-Ann Maldonado joins us with not one but two Hello Fall layouts - 

Every year, my family ventures out for apple picking.  It is a tradition of ours, to go at least twice during the season.  We make everything from Apple Crisp and Apple Pies to Apple Sauce.  Both of my layouts today revolve around our recent trip to the farm.  For my first layout, I may be spilling the apple cart, and telling you one of the main reasons we all love to go pick.  They serve hot, fresh and squishy Apple Cider Donuts.  Oh.  My.  I  can not tell you how amazing they are right out of the fryer.  They truly melt in your mouth. 


Don't they just look divine?  Cinnamon sugar goes everywhere.  Anyway, this week we are teaming up with Just Nick Studios which was perfect for both of my layout ideas.  I used the berry branches from the 'Sweater Weather' cut file to accompany the Gather Together and Hello Fall collections. 


You can see the cut file here.  I layered the file twice to add whimsical branches peeking from behind my photos.  


To help complete my title, I used the 'Handcut Letters 2' file.  When creating the word DONUTS, I touched the letters together, then welded them so the cut would all be one piece.  I am showing you the second photo of the title because I wanted to focus on the bottom date.  I must tell you, underneath that sticker is the date, but it is stamped upside down.  Ugh, not the first time!  So, I used one of the banner stickers from the 4x6 Stickers to cover it and tried again.  


I used the Simple Set Gather Together in conjunction with the Hello Fall.  Both of these collections blend well together.  

_______________________________


This year, the orchard was overflowing with apples.  It was amazing how many apples were on each tree.  We were the first to enter the field where we picked.  It was s sea of red.  We always eat our weight in apples and my boys goof around in the trees too.  


I enlarged a picture of just the plush apple tree to use as a focal point.  Sort of like a background paper.  I backed it with a piece from The Reset Girl collection and the obvious choice of woodgrain from the Hello Fall.  I was searching the Just Nick Studios store for an apple and Nicole, from JNS connected me with the FREE September cut file she created for the Scrapbook and Cards Today blog.  


Look how cute they are.  They actually had a heart and a leaf, but I removed those before applying.  


I lined the right side of the large photo with various leaf cut files, apples and photos.  My attempt at recreating the voluptuous apple tree photo!  The ladder was perfect for 'climbing' the tree! 


I finished the layout with the title 'fall' from the 'Sweater Weather' cut file. 


Again, I combined both, Gather Together and Hello Fall with the JustNick cut files.  


Love what you've seen so far & want to see more?  You can find JustNick here - 

Website
Blog
Facebook
Instagram

Thanks so much for joining us this week in our team up with JustNick Studios!  


SaveSave

Supplies

Howdy!  Layle here with you today.  We have a fun week planned for you - a Simple Stories & JustNick Digital Cut Files Team Up!

Both design teams have swapped 'products' and will be sharing on our blogs all week long for some great inspiration!  Let me tell you, if you fancy digital cut files then you're in for a treat!  Nicole Nowosad, creator of JustNick, is super talented and has a fabulous library of cut files available! 

Today creative team member Brenda Smith joins us with a Reset Girl Pocket Page spread - 

Good morning friends! Brenda Smith here with you sharing a pocket page I have been putting off making. Not because I didn't want to scrap this event, but because I loved my photos so much I wanted to wait for the absolute right product to scrap them with. The colors of The Reset Girl scrapbook collection and the fun, whimsical cut files from JustNick were the combination I was waiting for. 

I'll admit, I'm one of those girls who's had a Silhouette machine for quite a while but has mostly let it collect dust. But these cute cut files from JustNick were the inspiration I needed to brush off the dust. 

I tried to pick out cut files that seemed evocative of our trip to this music festival in May. Luckily for me, the JustNick shop had plenty of viable options to choose from. I made sure to get some background cut files, some fancier cuts, and some layerable pieces. 

On this side of the spread, I used the Dandelion Background cut file to help create my title card. I used the alphas from the Combo Sticker sheet to finish off the card. 

The Floral Flourish Circle perfectly housed the bulk of my journaling for this side. I love the contrast of the lacy, delicate cut file with the harsher black ink droplets. 

There are some planner-specific elements in the Reset Girl line but there is plenty in the collection to make everyday pages. I tried to stick to the lighter, brighter patterns and elements to go along with the natural beauty in my photos. 

 
This card was made in a matter of moments because once I added the Leaf Cluster cut file, there wasn't much more that needed to be added. If I'm not sure where my cut files are going to go when I cut them out, I play it safe and cut out in white cardstock. I can almost always make a white cardstock cut file work wherever I want it to go. 
 
 
On this card, I used two cut files that I'm sure I'll use over and over again: the brushstrokes and the Funky Piecharts. I placed several of the Funky Piecharts in varying sizes throughout the spread because I like how versatile they are as layers. They add an extra little bit of color and pattern without overwhelming too much. The brushstrokes are just a good alternative to the rectangles of patterned paper I usually layer with on my cards. This provides a little more visual interest to my pages. 
 
Using these cut files on my project for today has made me realize that there really isn't that much extra effort that goes into cutting some shapes out for playing with in my pages and I'm definitely going to be implementing them more into my designs. 
 
Love what you've seen so far & want to see more?  You can find JustNick here - 

Website
Blog
Facebook
Instagram

Check back in tomorrow for great inspiration using JustNick cut files!


Supplies

Pages