October 2016 Blog Posts

Howdy!  Layle here with you today.  We have a fun week planned for you - a Simple Stories & JustNick Digital Cut Files Team Up!

Both design teams have swapped 'products' and will be sharing on our blogs all week long for some great inspiration!  Let me tell you, if you fancy digital cut files then you're in for a treat!  Nicole Nowosad, creator of JustNick, is super talented and has a fabulous library of cut files available! 

Today creative team member Allie Stewart joins us with two lovely layouts -

 
For my first layout, I used the JustNick Basketweave Background cut file and The Reset Girl collection!
 
 
I cut the Basketweave from white cardstock, and backed each rectangle with green patterns featured thoughout The Reset Girl collection. Next, I sewed vellum over the top so it made the background a little less busy. Starting with a Library Pocket as a layering piece, I placed my photo and layers on the page. I cut flowers from the "Like a Boss" paper, and added them behind the photo. 
 
 
My title came from another patterned paper: I think fussy cutting is a fantastic way to get more mileage out of your collections! I added a few more embellishments, and the layout was complete!
 
 
My second layout was created using the Hello Fall collection and Leaf Cluster cut file.
 
 
I backed the Leaf Cluster with patterns from the 6"x6" paper pad. I use up almost all of my 6"x6" pads by backing cut files! Once I had the cut file on my background, I stitched down the middle of the leaves to add interest and secure the cut file to the page. Next, I used bronze Stickles for the dots of the leaves. 
 
 
I loved the large" FALL" in the chipboard set, and immediately wanted to use it as part of my title. I added the "Hello" chipboard with it to create the full title, which happens to be the name of this collection! To finish the page, I added lots of word stickers and some die-cut leaves. 
 
 
I was so inspired by the Just Nick files and had so much fun pairing them with Simple Stories products! Thanks for joining me to!
 
Head over to the JustNick blog & check out what her team has created with our products!

Love what you've seen so far & want to see more?  You can find JustNick here - 

Website
Blog
Facebook
Instagram

Check back in tomorrow for great inspiration using JustNick cut files!


Howdy!  Layle here with you today.  We have a fun week planned for you - a Simple Stories & JustNick Digital Cut Files Team Up!

Both design teams have swapped 'products' and will be sharing on our blogs all week long for some great inspiration!  Let me tell you, if you fancy digital cut files then you're in for a treat!  Nicole Nowosad, creator of JustNick, is super talented and has a fabulous library of cut files available! 

Today creative team member Violet Ballew joins us with a spooooky Carpe Diem planner -

My favorite Color is October! I am so glad October is here. As I sit here drinking a pumpkin spice latte and looking at my planner spread, October is what inspired me this month for my divider set up. I used the Happy Haunting Simple Set and had the opportunity to incorporate JustNick digital cut files.

I started off by picking which digital cut file I wanted to work with and the JustNick 31, Happy Little Monsters, and Scribbles were perfect for what I wanted to achieve in my planner this month. 

I added Tabs to the dividers and I absolutely love the way they came out. It keeps everything organized and in it's place. The orange and black with plaid and distressed paper and all the cool spooky stickers from the Happy Haunting Collection Kit were a match made in planner heaven. 

I wanted something spooky on my next divider and realized that everything was just too cute to spook! I was able to use the collection stickers and distressed wood paper and some of the Happy little monsters with scribbles to create an outside ghost Fest.  The ghost Journaling Card made the perfect center piece on my next divider and decided he was going to be a planner nerdy ghost. Lol. 

Last but surely not the least is my favorite part of Creative Planning. The pockets! I know I probably mention that every time I blog, but it is so true. Once again I used the Just nick "31 and "Happy little Monsters" cut files to create paperclips. I added goggly eyes to add a little more characters to the little monsters, ghost, cat and I think they are so stinkin cute!

As the days get shorter and nights are longer, grab a cup of coffee and cozy up with a nice warm blanket and plan away.

I want to take this time to say a special thank you to Simple Stories and Just Nick for the privilege to use their products and create something fun and seasonal in my planner. I had a blast and will continue to use the cutting files and collection kit throughout all of October. Thank you again to everyone who took the time to stop by the blog.
 
Head over to the JustNick blog & check out what her team has created with our products!

Love what you've seen so far & want to see more?  You can find JustNick here - 

Website
Blog
Facebook
Instagram

Check back in tomorrow for great inspiration using JustNick cut files!

SaveSave

SaveSave

Supplies

Howdy!  Layle here with you today.  We have a fun week planned for you - a Simple Stories & JustNick Digital Cut Files Team Up!

Both design teams have swapped 'products' and will be sharing on our blogs all week long for some great inspiration!  Let me tell you, if you fancy digital cut files then you're in for a treat!  Nicole Nowosad, creator of JustNick, is super talented and has a fabulous library of cut files available! 

Today creative team member Marcia Dehn-Nix joins us with two Posh layouts -

Hello Simple Stories friends! Marcia here. This week we are teaming up with JustNick Studios who sells awesome digital cut files you can download to use with your electronic die cut machine. Today I am using some of those digital cut files with the gorgeous Posh collection. Posh is so pretty with it's gold accents. It definitely has a classy feminine feel to it ... Posh is the perfect description for it. I decided to scrap some girly layouts with it. This first one is of my daughter at her Veterinary School white coat ceremony.


I used the Broken Heart digital cut file from JustNick Studios for the big heart behind my photo and pieced different solid colored pattern papers behind it. To create some texture, I stitched around my heart with a gold metallic thread.
 
 
The Broken Heart cut file is similar to the hearts you will find in the Posh collection. Like this sticker heart I place near my journaling.
 
 
There is a lot of gold mixed in the bits & pieces die cuts, stickers and chipboard and it really gives this collection a classy look. I used some of the clear stickers over my photo. "You Can Do Anything" was perfect! I couldn't resist using these adorable blue birds in my embellishment clusters along with some of the flower bits and pieces die cuts. 
 
 
I love these tabs from the Bits & Pieces die cuts and they work so well with the phrase stickers.
 
 
The chipboard "dream" makes a dreamy title indeed and I combined it with some of the alpha stickers.
 
 
My second layout is a two-pager. I recently went to a paint night with my daughter, sister, and nieces. My first paint night ever! We had so much fun. I wanted to use lots of my photos to document the night. Who knew I could paint?
 
 
I used the JustNick Studios Infinity Hearts digital cut file to create those circles with hearts and the scallops under the photos are another digital cut file; Simple Scallop Strips.


To create my title, I used the JustNick Studios Simple  Set Alphabet and once again combined it with the alpha stickers from the Posh collection. I layered some heart chipboard stickers and some flower die cuts to help draw attention to the title.


Yes, I used more of those adorable blue birds here too... who could resist! 
 

The Posh collection has some beautiful washi tape and I used a couple different ones on my layout. This one might be my favorite washi tape...


Thanks so much for stopping by today. Be sure to check back all week for more Simple Stories and JustNick Studios inspiration.
 
Head over to the JustNick blog & check out what her team has created with our products!

Love what you've seen so far & want to see more?  You can find JustNick here - 

Website
Blog
Facebook
Instagram

Check back in tomorrow for great inspiration using JustNick cut files!

SaveSave

Supplies

Howdy!  Layle here with you today.  We have a fun week planned for you - a Simple Stories & JustNick Digital Cut Files Team Up!

Both design teams have swapped 'products' and will be sharing on our blogs all week long for some great inspiration!  Let me tell you, if you fancy digital cut files then you're in for a treat!  Nicole Nowosad, creator of JustNick, is super talented and has a fabulous library of cut files available! 

Today creative team member Chantalle McDaniel joins us with two Hello Fall layouts -

Hello Simple Stories fans and welcome back to the blog today for a special JustNick swap. I’m a big fan of Nicole’s designs and am very happy to be able to work with her cut files again!

I’ve created two projects to share with you, both using the beautiful new Hello Fall collection and the JustNick Stems 2 and Rustic Leaf Frame cut files.

This page captures a little family escape after my DD was ill with a week-long bout of fevers a couple of years ago. Inspired by the beautiful colour palette in the Hello Fall line, I have used a touch of mixed media to add a bit of rustic charm to my page.

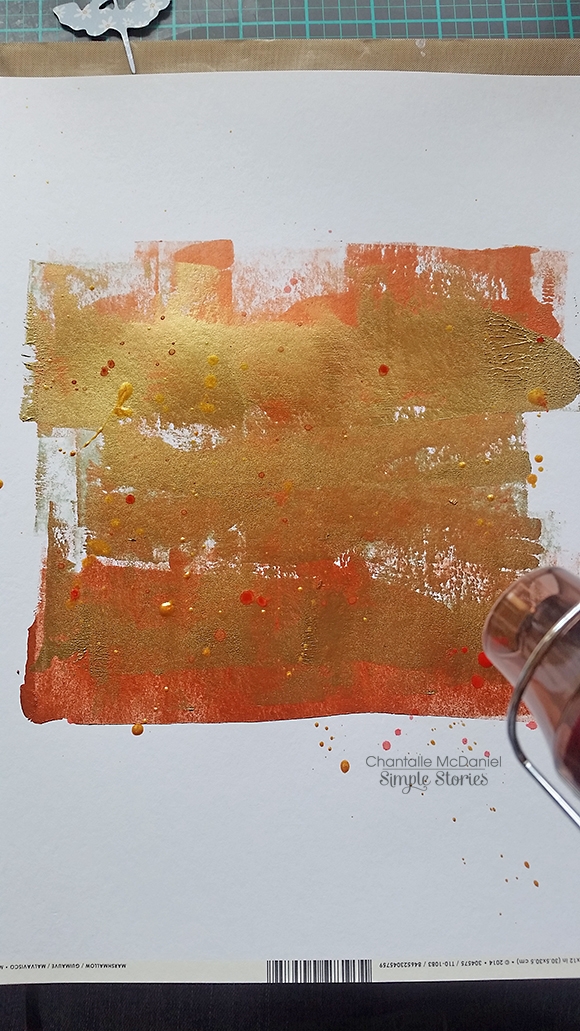
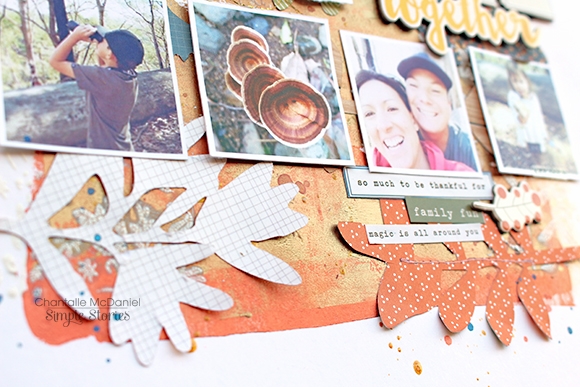
Unfortunately, capturing the true sheen of metallic paint on camera continues to elude me! I have used some copper and bronze acrylic paints with a brayer on some heavy duty cardstock.

I really like the way these stems are arranged in a grid pattern for display. It definately influenced the way I laid them out after I had cut them on the Silhouette Cameo. TIP: To save time, I trimmed my chosen sheets from a Hello Fall 6x6 pad down a bit and laid a piece in each of the four corners of my cutting mat. This way, I was able to cut four different shapes in one run.

 
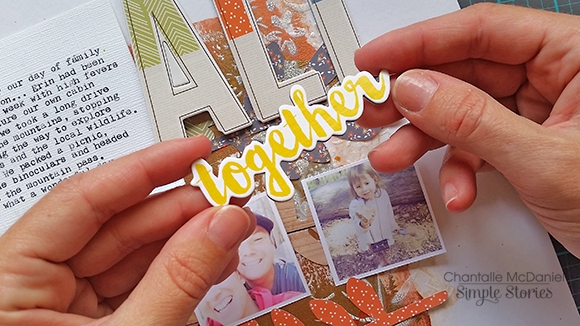
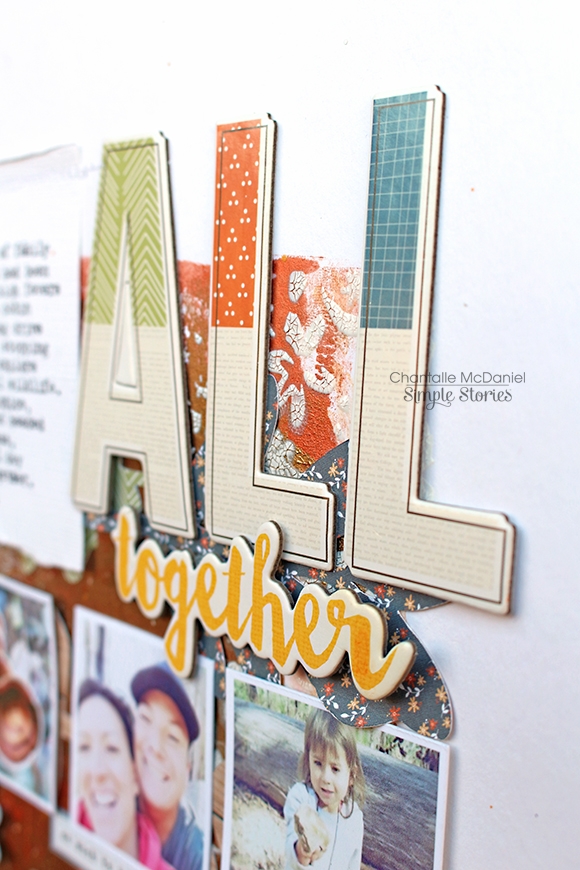
These awesome large letters are from a pack of Hello Fall Chipboard Stickers. I’ve left out the ‘F’ so it just spells ‘all’. (In Australia we use Autumn more commonly, so I will keep my big ‘F’ for another project.) Behind the lettering, you can see a snip of the die cuts and metallic paint peeking through. 
 
 
To complete my title, I have used the word ‘together’, which is a chipboard sticker from an older 'We are Family’ collection. It was just the right phrase, size and colour. Lucky me!
 
 
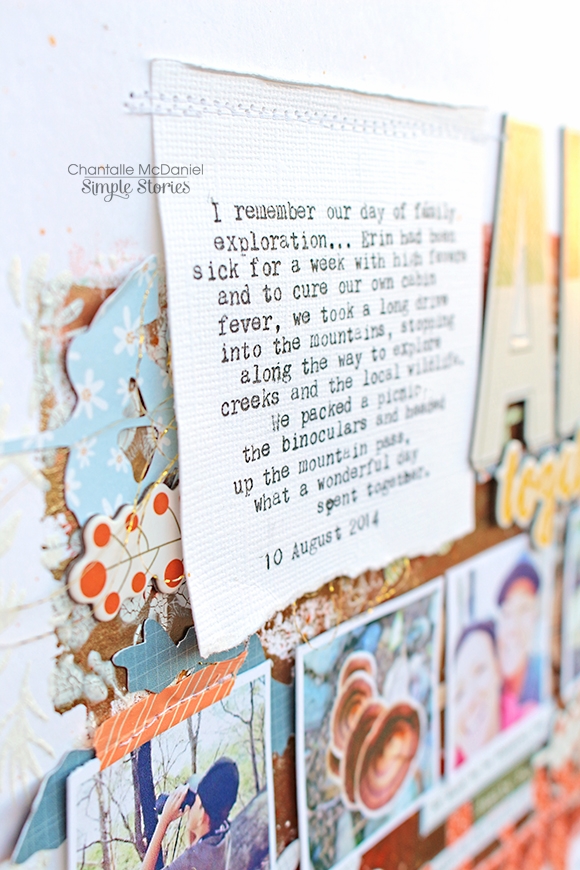
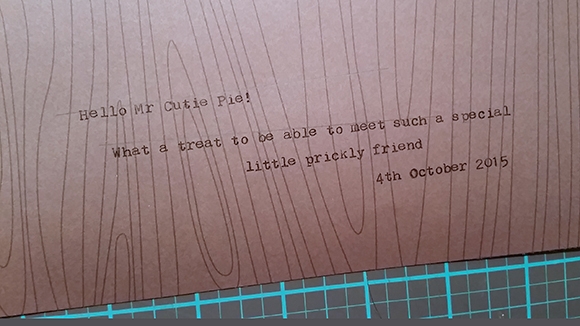
To document the day, I’ve run some white cardstock through my typewriter and then stitched the journalling to my page using a sewing machine.
 
 
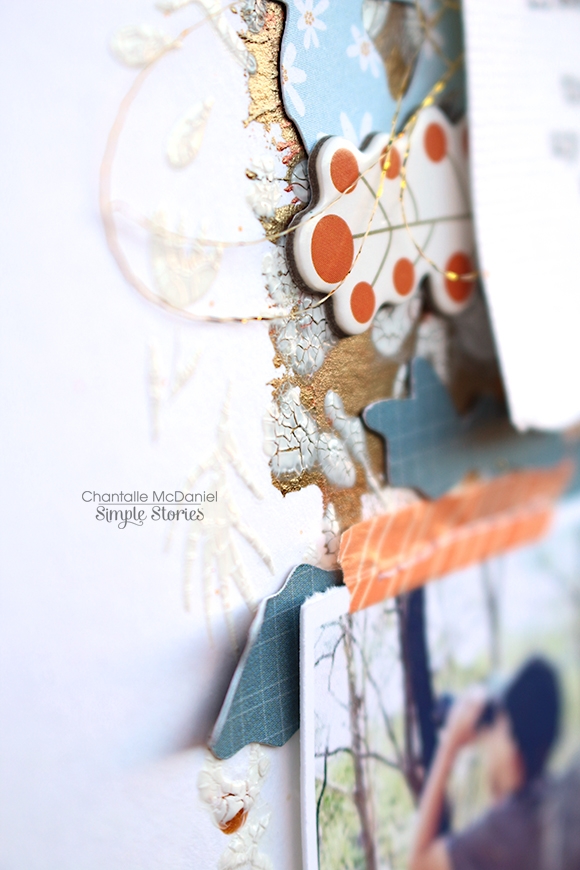
You’ll notice a few more details behind that journalling… some fine golden thread and some crackle texture paste which has been applied through a botanically themed stencil. I just love the way one can see a bit of the bottom layers through the fine cracks.
 
 
These Stem cut files are so versatile. Change up the colours and you’ve got spring/summer foliage or add a touch of glitter for a festive touch.
 

______________________

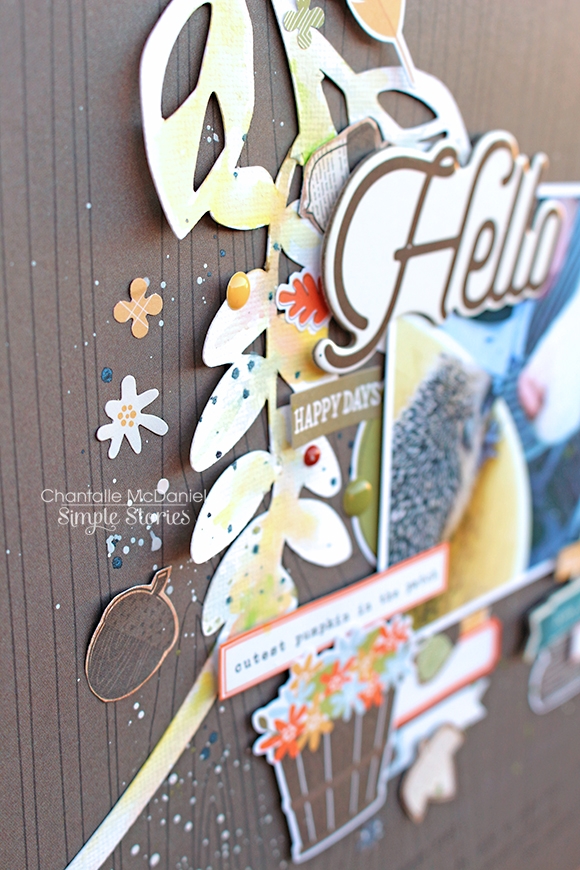
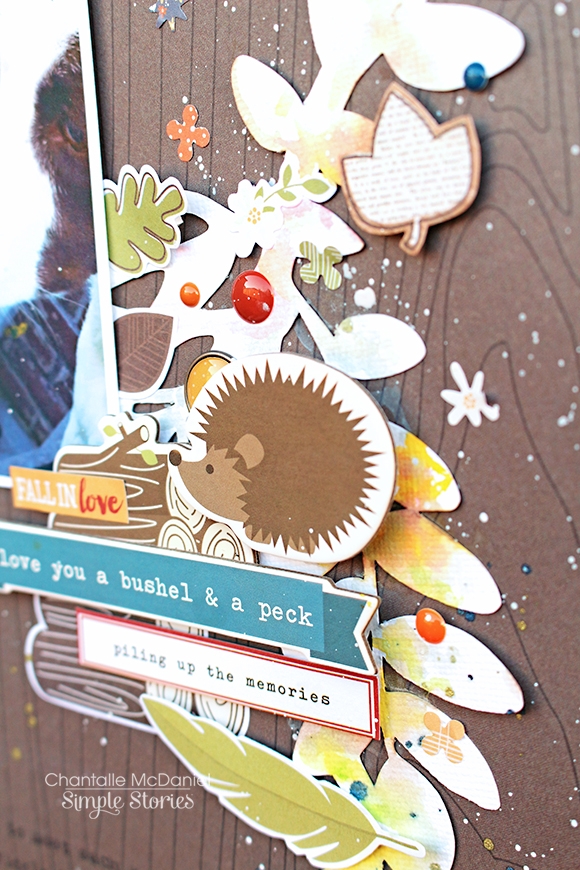
My second page captures the moment my Sister’s dog met a hedgehog for the first time. I sincerely hope that one day, I too, will get to meet one of these cuties in real life!

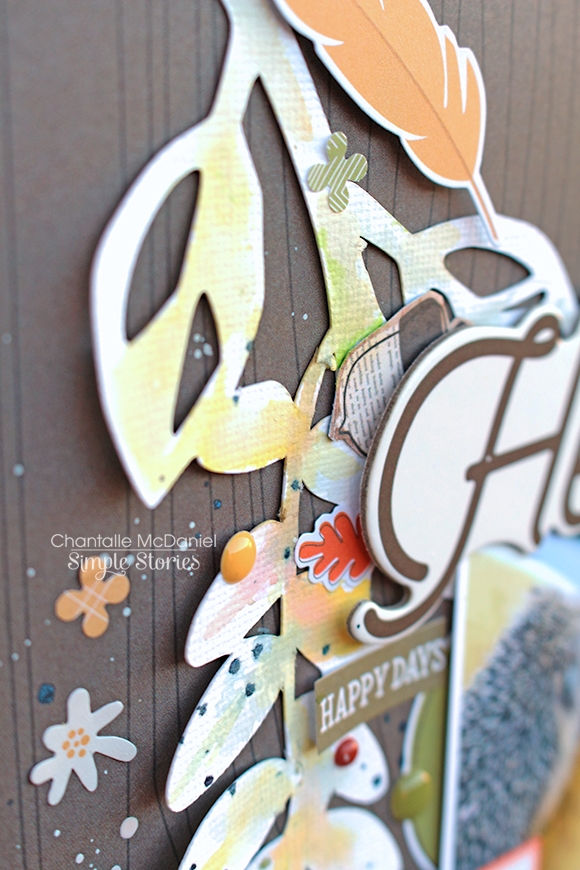
For this page, I have used the Just Nick Rustic Frame cut file with some white cardstock. I’ve rotated it slightly and snipped it in half, arranging each half on opposite sides of the page.

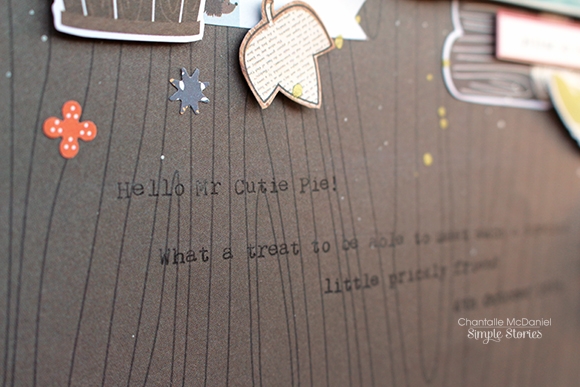
Before I adhered my cut files down, I ran a sheet of Hello Fall ‘Piles of Smiles’ through my typewriter to add some notes directly to my page. As a guide, I drew some light pencil marks beforehand, so I would knew exactly where to type.

I then adhered the cut file frame and built my other elements around them.

It was so only after I was pretty much done that I realised the page was missing something… a few splashes of colour applied with a water brush pen and some watercolour paints really tied all the elements together and made the white cut files feel less stark.

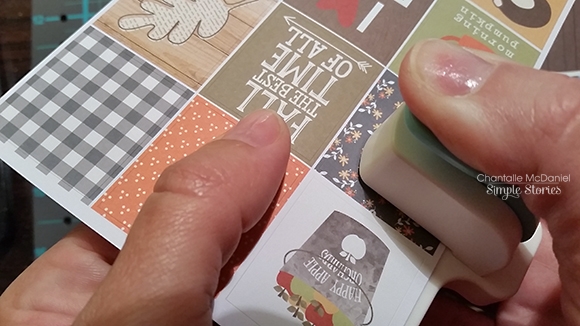
There are few finer details on this page like fine mist work and some mini stickers. I created these little DIY numbers by using a punch and some Hello Fall Stickers. 

Being self adhesive, as soon as I had peeled away the backing paper, these guys were ready to go!

I just adore this little prickly fellow!

Thanks so much for stopping by today! Until next time.

Head over to the JustNick blog & check out what her team has created with our products!

Love what you've seen so far & want to see more?  You can find JustNick here - 

Website
Blog
Facebook
Instagram

Check back in tomorrow for great inspiration using JustNick cut files!

SaveSave

SaveSave

SaveSave

SaveSave

Utah friends!  Come see us at the Salt Lake City Pinners Conference, November 4th and 5th!


You’ve pinned lots of cool stuff on all those Pinterest boards, haven’t you?  Now come to the Pinners Conference and see it all come to life with fun shopping and over 100 creative classes.  Even better, we’ll have a Carpe Diem booth with the latest and greatest Carpe Diem planner products available!

Click HERE to register and use code FREESHOPPING for free access to the trade show floor; use code SIMPLESTORIES to receive a 10% discount on classes of your choice when you register.

Speaking of classes, join Marketing Director Layle Koncar on Saturday, November 5th at 3:30 for a Creative Planning class!  This hour long class will touch briefly on the history of planners (in a fun way!), the why behind using a planner, what creative planning is and different ways you can build/customize a planner in a creative way. 

We hope to see you there!  Register today!

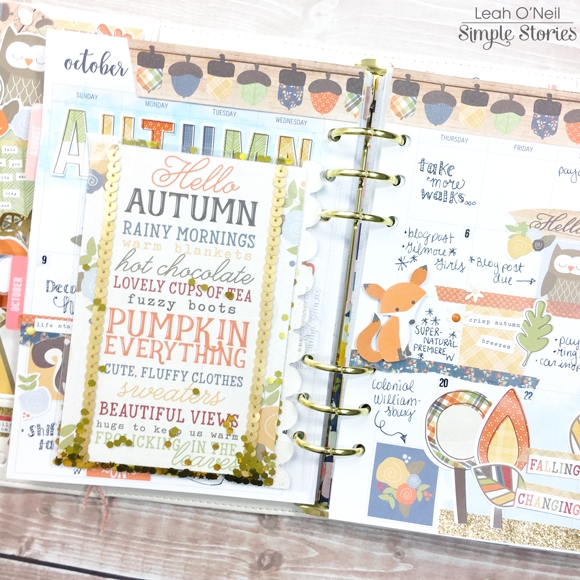
Hello friends and hello fall! Leah here to show you how I’ve added touches of my favorite season to my planner using the Hello Fall collection. I cannot say enough just how much I love my Ivory Carpe Diem planner! I know darker colors tend to be more popular for fall and winter, but the warm neutral tone of the Ivory really compliments and emphasizes the beautiful colors in all of the Simple Stories Fall and Winter collections. Doesn’t the Hello Fall collection look so warm and cozy against the Ivory?!
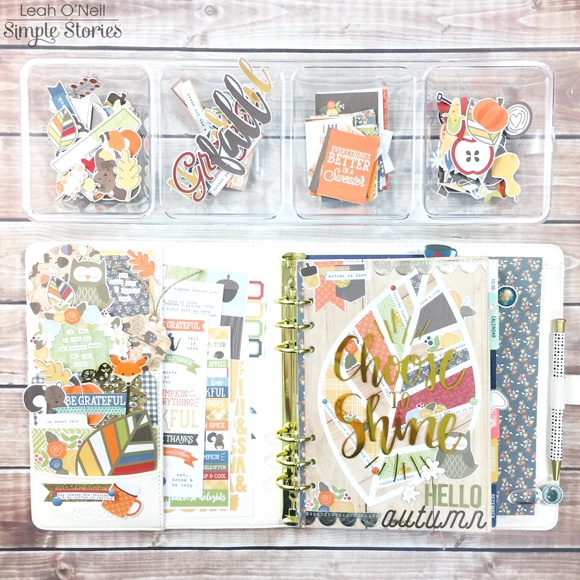
The Hello Fall collection is full of adorable seasonal designs and sweet little woodland creatures!  My favorite design is the leaf with all the colors of the collection in it. You will notice the leaf design reappears several times throughout this post!
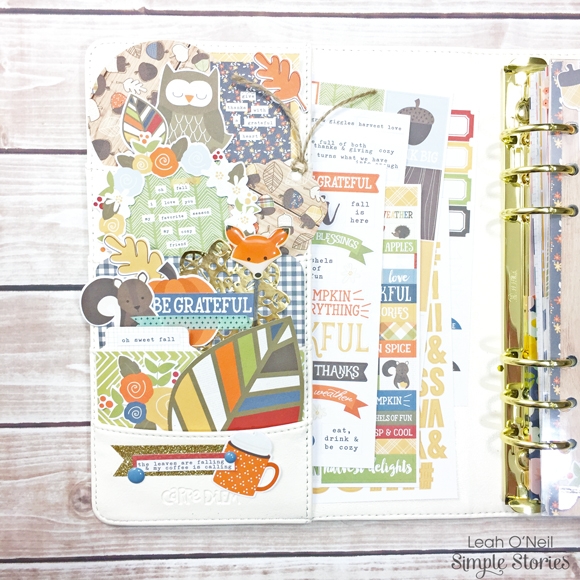
In my front pockets, I used several pieces from the SN@P! Pack: a couple of the 2x2 cards with fun fall sentiments on them, a couple of the 3x4 cards to provide patterned backgrounds, and several of the ephemera pieces from the pack. The larger leaf in the bottom pocket was cut out from a card in the pack as well. If I wanted to, I could decorate my entire planner with one SN@P! Pack because there is so much product in each one!
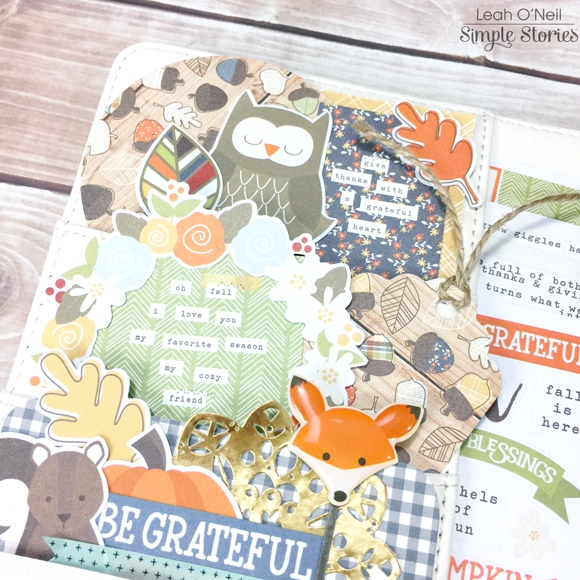
I also punched a tag and 3-inch circle from papers in the 6x6 paper pad for layering, and added some of the darling die cuts from the Hello Fall Bits and Pieces pack. How cute is that fox clip?! The decorative clips are one of my favorite products in all of the new Simple Stories collections!
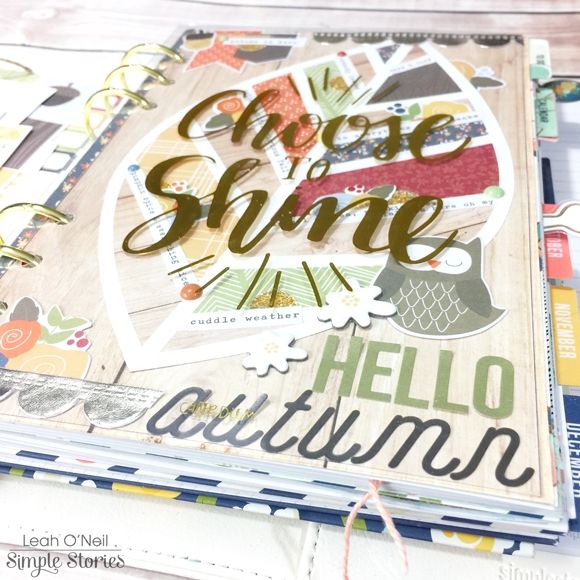
Under the clear “Choose to Shine” dashboard that came with my planner, I made a fall-themed dashboard to peek through. When I saw the “Celebrate Fall” 12x12 paper with that gorgeous leaf design on it, I KNEW I wanted to do something special with it! However, the leaf was too big to fit in my A5 planner. So I found the same page in the 6x6 paper pad and cut out the leaf so I could turn it to fit on the page. I cut down the “Falling for You” 12x12 paper to use as a background to adhere the leaf to. I added very little extra décor because I didn’t want to take away from the beautiful design, but I love how the little details turned out!
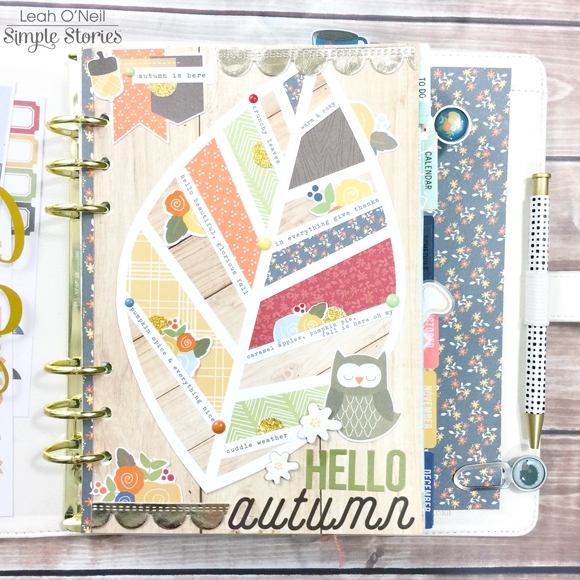
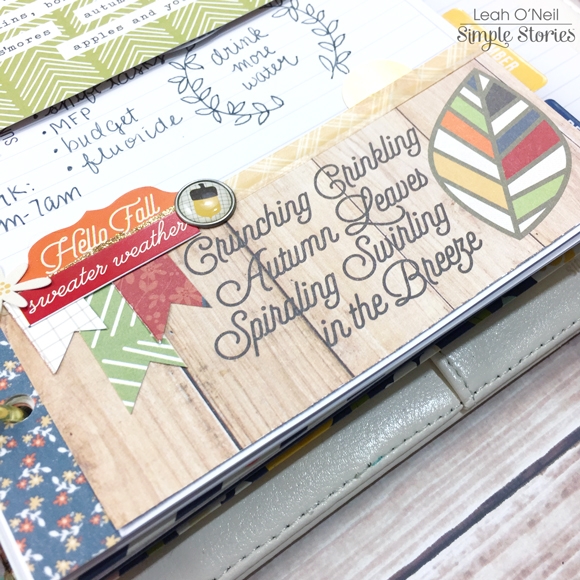
I arranged some of the word strip stickers from the Hello Fall sticker pack into the white vein areas of the leaf. All the sayings are fall-inspired! I also added some enamel dots and cut a few floral stickers in half and tucked them around the word strips for a little more interest. Up at the top of the page, I added the die cut flags from the Bits and Pieces pack and an acorn sticker. The gold scalloped ribbon is from my craft stash.
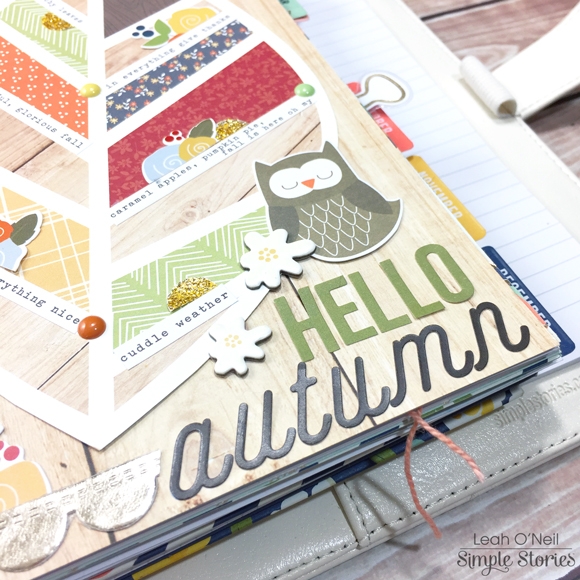
At the bottom of the dashboard, the owl is from the Bits and Pieces pack and the little white flowers are from the chipboard sticker sheet. The letters that spell out “autumn” are from the Hello Fall 12x12 cardstock sticker sheet, and the green letters that spell out “Hello” are letter stickers from the SN@P! Color Vibe collection. Whenever I stack letters like this for a title on a page, I like to combine different fonts because I think the contrast creates a bolder statement that attracts the eye.
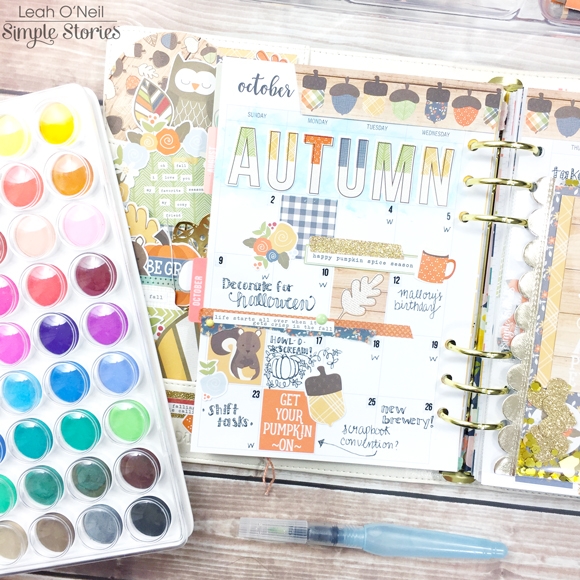
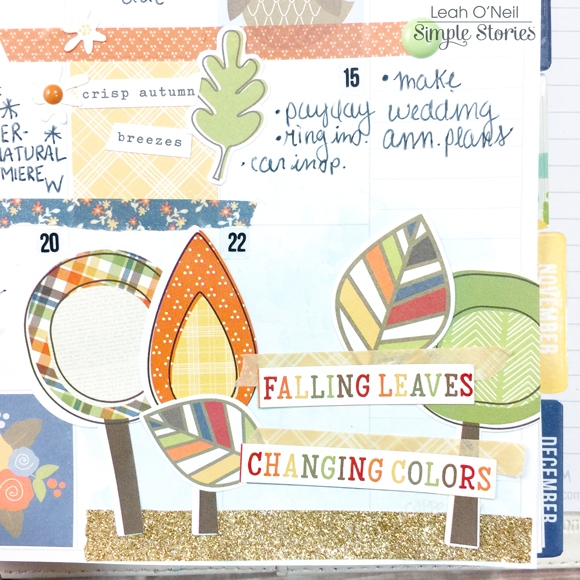
My October monthly pages were a blast to create! I love adding a little mixed media into my planner here and there. I mixed a few watercolor shades to create the light blue shade that you see under the big alphas that spell out “Autumn.” These alphas are from the 12x12 Cardstock Sticker sheet.

I decorated the rest of the layout with stickers from the Hello Fall sticker pack, the Hello Fall washi tapes, and die cuts from the Bits and Pieces pack. I brought more of the blue watercolor into the bottom right corner of the layout to create some balance. The acorns across the top of the pages are cut from one of the elements sheets in the 6x6 paper pad.

The next decorative fall element I made for my planner is a shaker pocket! It was SO easy to make! I started with a clear 4x6 pocket page, chose a few of my favorite SN@P! cards, and gathered a few sparkly things from my stash.
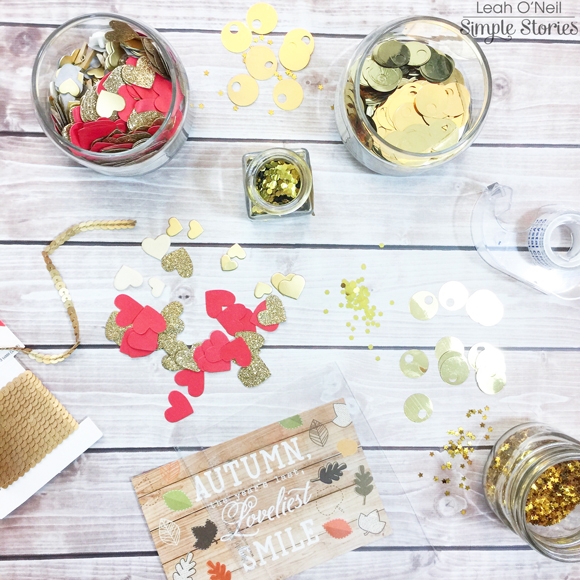
For the front side, I layered a few cards from the SN@P! Pack and just started putting various gold sequins and glittery hearts into the pocket, as well as couple of small die cuts. To seal the top, I used plain old, clear Scotch tape. I added a little more of that gold scalloped ribbon along the side as a finishing touch.
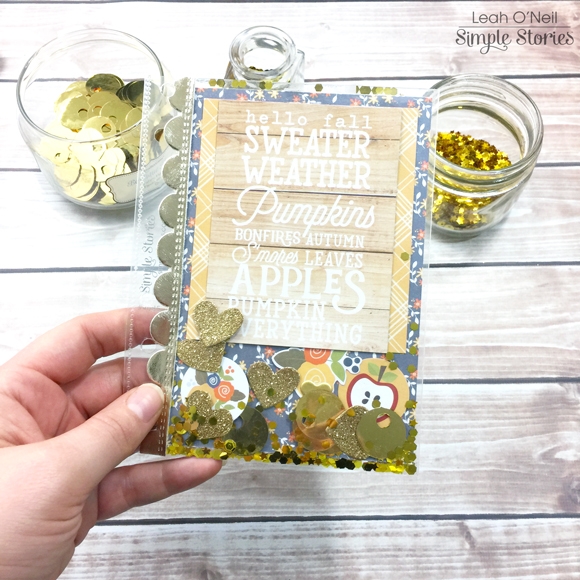
For the back of the pocket, I chose another one of my favorite 4x6 SN@P! cards and added some gold sequined string. I didn’t add any other bling into this side of the pocket, but some of the glitter came through from the other side and I love it!
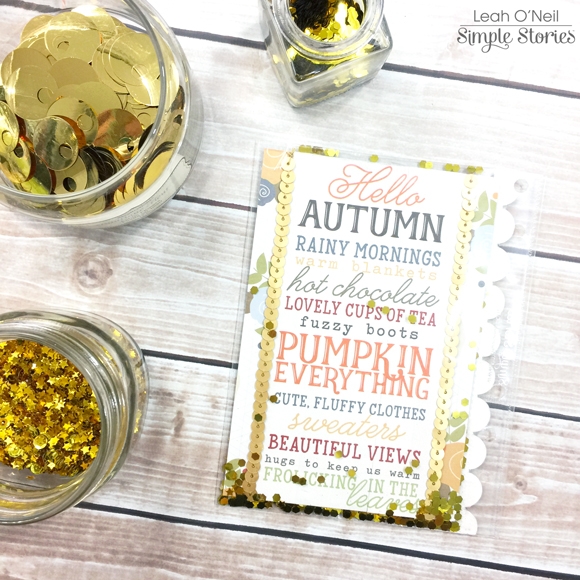
Here’s what the shaker pocket looks like in my planner! How sweet, right?! 
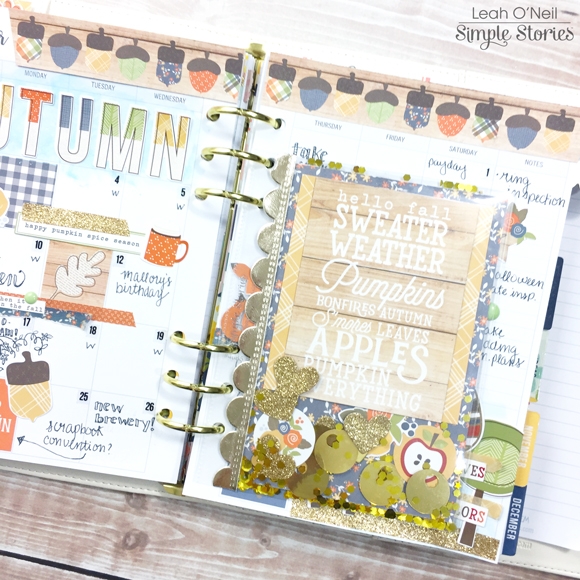
I am really feeling inspired to use the Hello Fall collection throughout the season on all my weekly layouts! For the first week of October, I used lots of Bits and Pieces die cuts and the Hello Fall washi tapes. I cut all the flags from different patterned papers in the 6x6 paper pad. The notecard on the left is from the SN@P! Pack, as is the green card on the right with the flower. The flower itself is from Heidi Swapp and sprayed with her gold Color Shine spray. I cut about half an inch off the length of the card and rounded the corners so the card became part of the layout, rather than covering half the page.
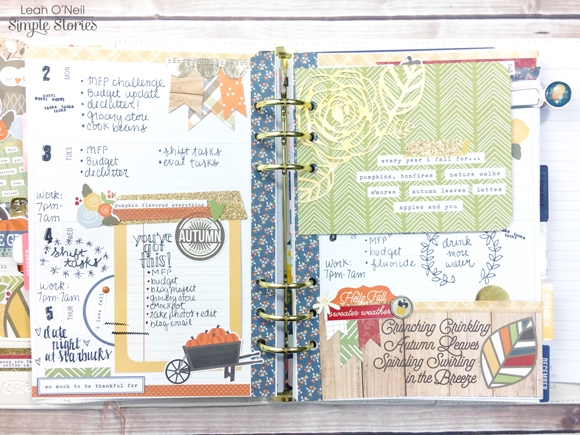
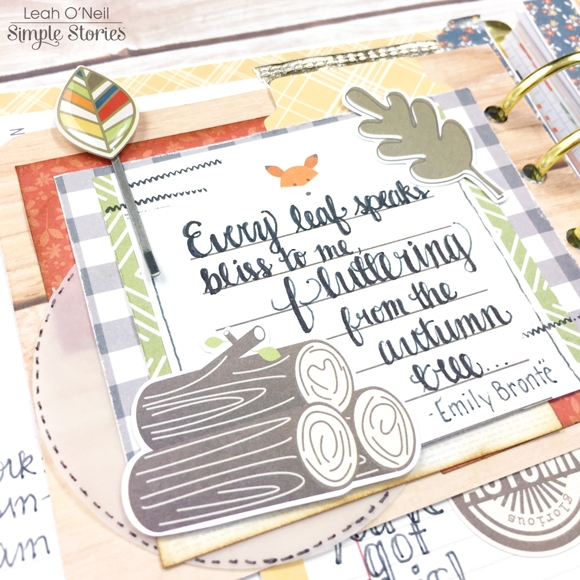
On the other side of the green card, I had a lot of fun with lots of layering! I started with a 3x4 SN@P! notecard and cut it to be slightly shorter to fit the space better. I then used several scraps from 6x6 papers I had cut earlier to start layering behind the notecard. To add some dimension, I inked the edges of the orange paper scraps. I also used a 3-inch paper punch to punch out a vellum circle to tuck into the layers, and added some faux stitching around the edge with a black sharpie pen. I added a couple of die cuts and a decorative paperclip, and stamped the stitched pattern from The Reset Girl roller stamp. I then chose a fun Fall quote I found online and lettered it onto the card.
The right side of my weekly layout has more Hello Fall stickers, die cuts and washi tape.
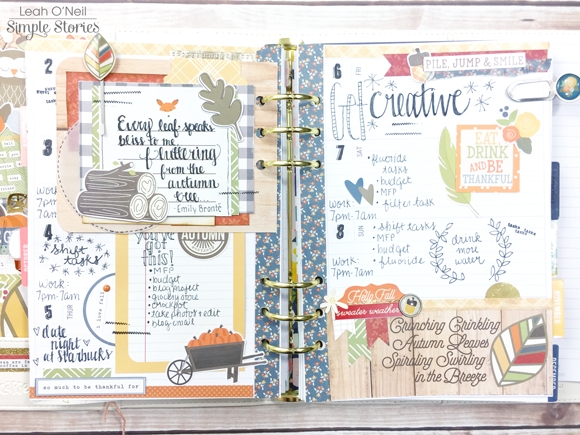
The bottom of the page is a strip cut from a paper in the 6x6 paper pad. I used some washi along the top, added a die cut tab, a decorative brad, a couple of cardstock stickers and more of the paper flags I made with paper scraps.
I really cannot get enough of this collection! I will be happily using it all season! The designs are so beautiful, and all the quotes perfectly capture the magic of autumn. If you haven’t “FALL-en in love” with this collection yet, go check out the Carpe Diem Planners Instagram for some more deliciously fall-themed planner décor! You can also check out my Instagram to see more of my Hello Fall projects coming up!

SaveSave

Supplies

Hello Friends, It’s Kristine Davidson with you today.  It’s actually Thanksgiving today in Canada as I'm creating, so this post is even that much more special! I created both of my layouts this month using the Hello Fall collection because it has wonderful fall colors and those little critters are cute too!

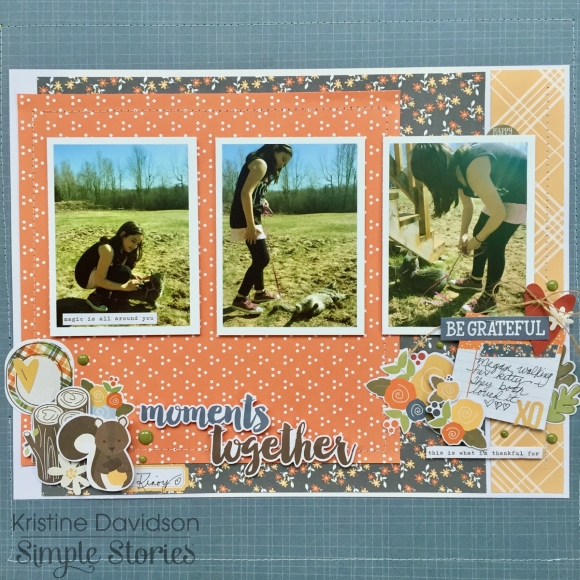
The first layout I'll be sharing is called "Moments Together"

These pictures are of my niece from the Spring! Yup, but I decided it was just as good for a fall themed layout. She was interested in getting a leash for her kitty. She was so excited to be taking her cat outside for a walk! They both enjoyed it very much and she still walks her today!  I used a sketch to create this page – it’s a sketch from Creative Scrappers. Using 3 photos isn’t my thing but I do enjoy the finished layout.

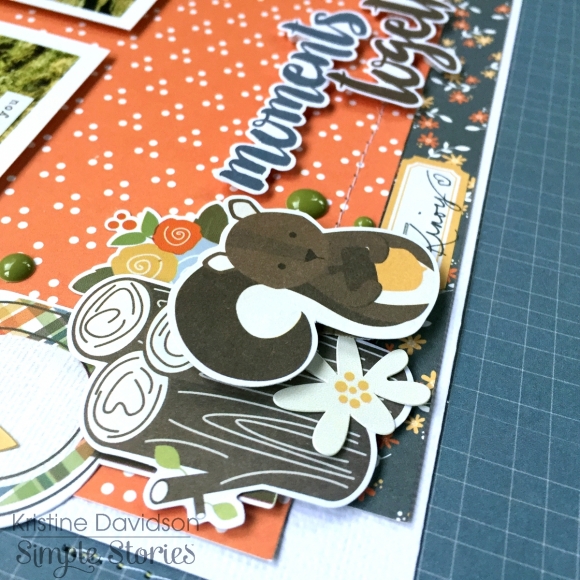
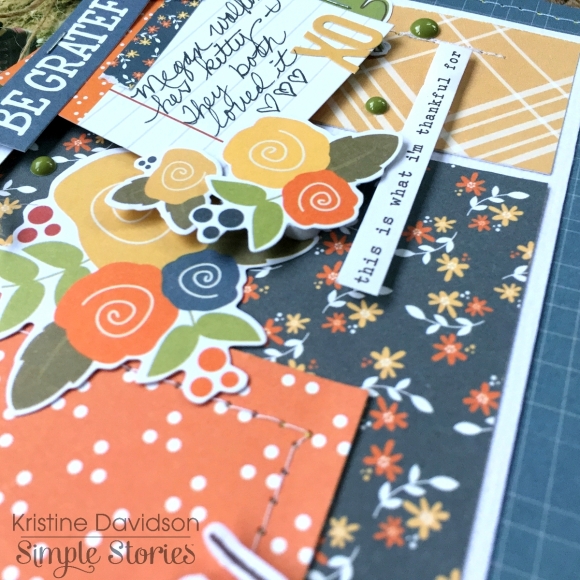
These little critters layered with some Bits & Pieces from the same collection are too cute! I mean a little plaid tree, some tree stumps and a little chippie! I created clusters on embellishments on both sides of my layout. Layering papers and adding cardstock behind to make the colors pop out a little more than just on the blue patterned paper was also to match the white border around my photos.

I added a small 2x2 piece of paper for my journaling –something different than my usual journal strips!

_______________________________________________________________

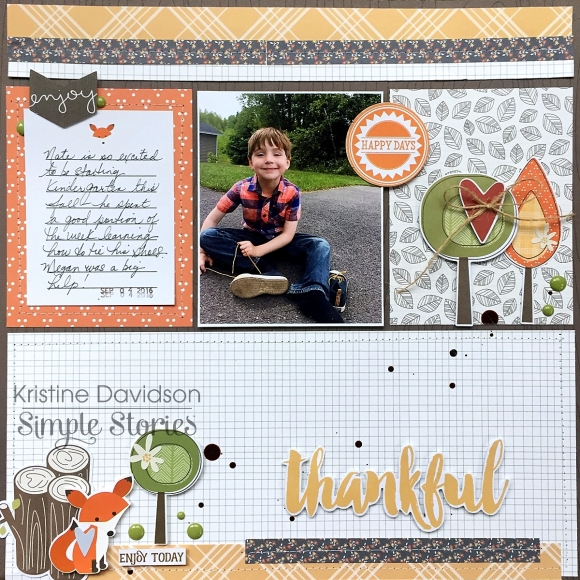
My Second layout for you today is called "Enjoy Today"

This layout was also created using the Hello Fall collection. It’s a cute picture of my nephew learning to tie his shoes. Quite the accomplishments for a 5 year old! I added some cute fall themed bits and pieces and well his plaid shirt is also a good focus for this page ;)

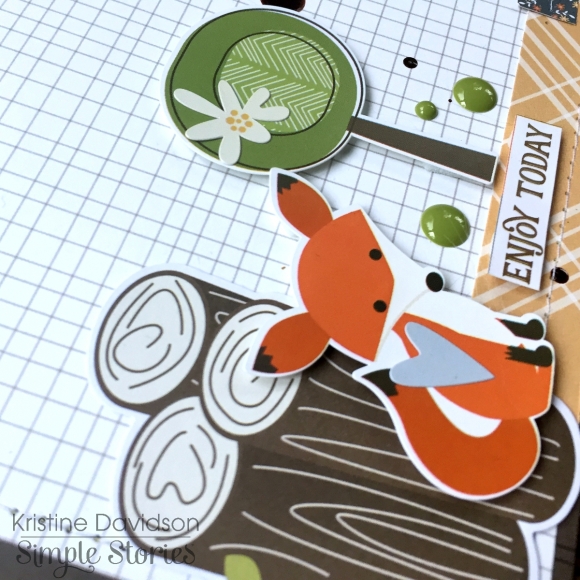
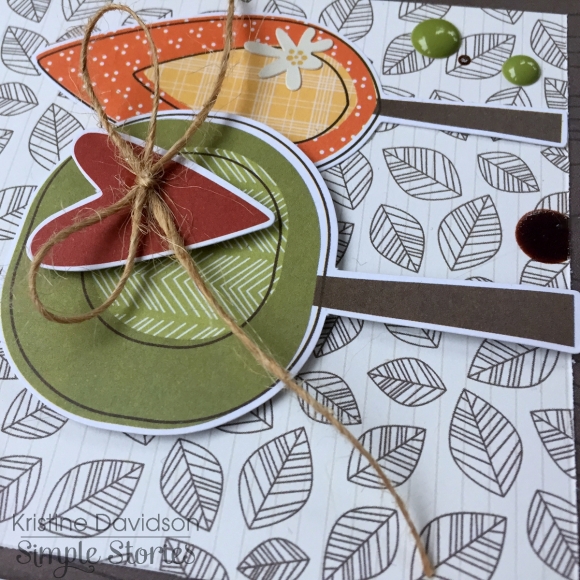
These little critters and trees also made their way to this layout. I really couldn’t help myself and add a few of them on my page.

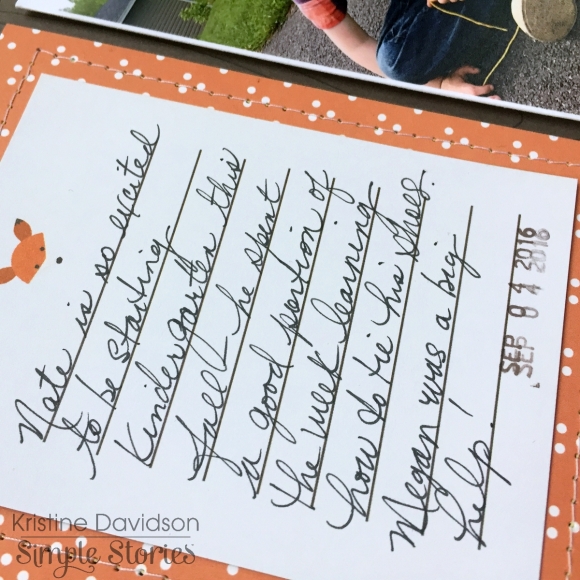
My journaling was also handwritten on a 3x4” journal card.  

To see more of my work you can find me on Instagram at @KristineDavidson 

Thank you so much for reading and being a fan of Simple Stories!

Supplies

Hello everyone ! It is Mindi here with you today. I am so excited to be sharing some pocket pages that I recently created all about the first week of Fall. The Hello Fall collection was perfect for this particular project. The colors in this one are soooo very pretty. 
 
As I have mentioned before I typically do my pocket pages in a weekly format. This week was no different except for the fact that I added an insert to accommodate more photos from the week's activities. Here is what both pages look like minus the insert that I will get to later. It is a great mixture of everyday life and a few fun events that took place. That is what is so fabulous about pocket pages. It all can have a home together. 
 
 
One of my favorite parts about this collection are these cute trees. I chose this blue card with the trees on it for the background of my title card. This card was embellished already so it was easy for me to add my week number and the dates for the week. I also want to point out that I cut out some of the word phrases from a 3x4 card. I love all the little word strips that are throughout this collection. I knew that I wanted to use them some how so I cut some out and added them to my title card. Don't be afraid to cut up cards and use them in new and custom ways. It can really stretch your stash. 
 
 
This week turned out to be very photo heavy. One of the things I like to do when this happens is to print some smaller photos to go into the smaller pockets. Lots of fun things happened this week, even a half a day at Disneyland. I love how they decorate for Fall there at Disneyland and so I made sure I got a photo of the Mickey shaped pumpkin ears on the light post. 
 
 
The card that has the fall leaves on it is my favorite from this collection. This week I started to decorate for Fall around the house. I added a small photo of my Fall leaves and added it to the top of that card. Let's move on to the right side now. This is the insert that I mentioned earlier. I used only half a page protector to make my insert and I love how it turned out. This first page of my insert is all about our day at Disneyland. I added lots of photos and embellished a few of the cards. The colors in this collection were a great match for our Disneyland day. Lots of blues, oranges, and yellows. 


On the other side of the insert page I added one card with a photo of some sunflowers I had bought. I decided to make a little frame with washi tape to go underneath the photo. I wanted to be able to see the frame and so I did it on an angle and then embellished around the photo. The whole line of embellishments, stickers, enamel dots, ect. make it so easy to embellish your pages so beautifully. 
 
 
Here is what the bottom half of the insert looks like. I added a few photos and made a custom journaling card. I needed some more color onto this insert page so I added some patterned paper onto the top of the journaling card. On the bottom I added those adorable logs with the word CAMP on it. 
 
 
This right side of my spread is all about some fun fall events that typically happen around here. Football and Camping !! We have to wait until the weather has cooled down to go camping and Fall is always the perfect time. The boys went camping overnight on Friday and I included some photos from their adventures. I even stuck their parking pass on one of the filler cards. That will be fun to look back on and see how much they payed for a camp site. 
 
Another one of my favorite cards is the one that says Fall. I combined the F from the chipboard set with the rest of the word fall. I cut off the F from the die cut piece and it made for a fun custom card. On the bottom there is a photo of their campsite location and then a journaling card. Along the bottom corner of the journaling card I thought that would be a great space to add a cluster of embellishments. I also added the strip of washi tape. 


Thank you so much for joining me today as I walked you through my Fall themed pocket page spread. I hope you have found some inspiration to document all of your wonderful Fall moments. 

SaveSave
Pages