January 2017 Blog Posts

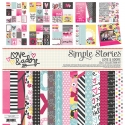
Hi everyone! It’s Lori on the blog today sharing a layout I made with our Love & Adore collection.

When this collection was designed, I immediately fell in love with the fun, playful designs as well as the gorgeous florals and accents. I’ve been so excited to work with this product line; I didn’t even wait for Valentine’s Day! That’s one thing that’s so great about this collection. You’re not limited to using it for only Valentine’s photos. The papers and embellishments also work well for documenting other special relationships in your life.


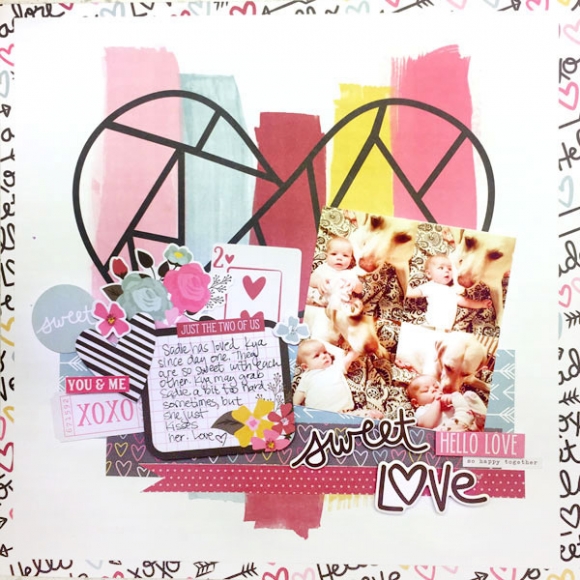
My six-month-old daughter, Kya, and my 5-year-old yellow lab, Sadie, adore each other. From the day we brought Kya home from the hospital, Sadie has been by her side watching over her and protecting her. Now that Kya is rolling around and babbling, you can always find Sadie trying to creep up to her and kiss her sweet cheeks. Sadie is patient and tolerates Kya’s pawing at her, and Kya is fascinated by her furry friend. This relationship is very special, and I wanted to document how early it started.

Did I reach for dog-themed paper? Nope? Baby themed? No way! This page was about their love for each other, so Love & Adore was the perfect collection to use.

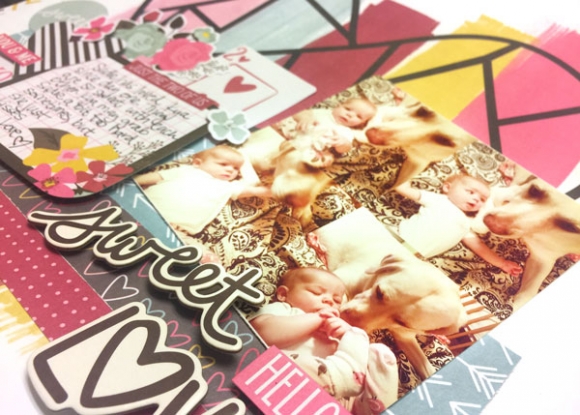
One night as Kya and Sadie were lying on a blanket together, I snapped a series of photos.  I posted a few of my favorite pics to Instagram using the Layout option that allowed me to upload multiple pictures into one collage.

I didn’t want to print 4 individual photos for this layout, so I used the Instagram collage to make an impact and save space on my page. To print this photo, I simply uploaded the Instagram photo and printed it onto 4”x6” borderless, glossy photo paper. I got the impact of multiple pics on my layout without the hassle--and the small pictures each tell a story about the relationship I’m documenting.

I typically shy away from using big, graphic backgrounds as the base of my layout. Since I’m more of a clean-lines type of scrapbooker, these patterned papers always intimidated me. Don’t let these bold designs scare you! If you anchor your photos and elements with a few strips of patterned paper and stick to designing around those strips, the layout will feel coordinated and the bold design can play a secondary role to your photo and embellishments.

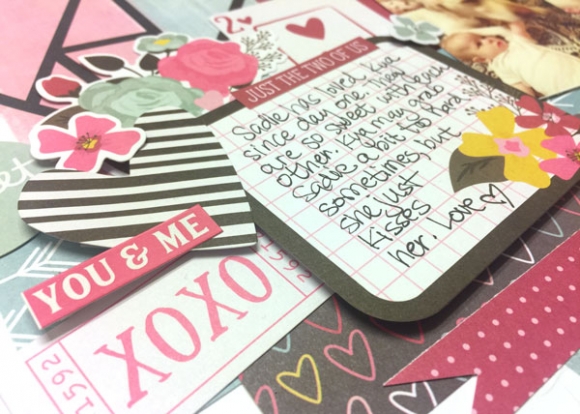
As you can see in my design, there are 3 strips of patterned paper adhered to the bottom third of the page. My photo, my journaling block, and all of my embellishments are “grounded” on the layout because they are touching each other or the strips of paper.

Part of the fun of using this Love & Adore collection is seeing the many different ways you can use the beautiful product. So what are you waiting for--Valentine’s Day? Don’t wait! Document a special relationship today!

SaveSave

Supplies

EDITED TO ADD:

WOOOHOO!!!  We've picked 5 random lucky winners & I'll be on my way to visit these lucky people & places very soon!

Valerie - Malaysia

Sandi Presley - Orlando, Florida

mscantli - Las Vegas, Nevada

Vonia Fonseca - Portugal

Coralie Peter Bouillot - Paris, France

________________________________

Howdy friends!  You may recognize me, I'm Winston, the Carpe Diem mascot.  A few months ago we held a contest to name me; once I had my name & passport, I packed my bags & embarked on a journey to see the word, Flat Stanley style! 

You can follow my travels on Instagram at @WheresWinstonCD and with the hashtag #WheresWinstonCD.  I've already been to 5 countries around the world & visited some pretty amazing places, including Victoria Peak in Hong Hong, Graceland in Memphis, Tennessee and Larry the Lobster in South Australia!  

Would you like to show me around your part of the world?!  Leave a comment here on the blog sharing where you’d like to see me travel.  Five random lucky winners will be chosen and announced on the blog & on social media on Sunday, January 8th; the five will receive ME in the mail along with a fun prize pack full of products with my likeness!

Thanks for playing along, I can't wait to continue my journey around the world! 

Your Friendly Pup, Winston

SaveSave

SaveSave

SaveSave

SaveSave

SaveSave

Hello there! Allie here today, sharing two layouts with you using the Winter Wonderland collection. It rarely snows where I live, so I was super excited when it snowed right after the Winter Wonderland collection showed up at my doorstep! It was meant to be.

For my first layout, I used pictures from when we looked at Christmas Lights!


I was inspired by the "Winter Wonderland" part of the 2x12, 4x12 & 6x12 Elements paper, and decided to use it as the focal point of my layout. I also wanted to include a few more beautiful patterns, and cut several into various size strips. I laid the blocks of patterned papers on the page, leaving a white border around each one. Next, I stitched around the blocks with gold thread. I used the 3"x4" Journaling Card Elements paper to create layers for my photos. I used washi tape to adhere them to the page, and added die-cuts and stickers as embellishments. Finally, I finished with enamel dots!


My next layout was inspired by the Warm Winter Wishes patterned paper. It was just too pretty to cut up, so I used it as a background.


I added more snowflakes and pine cones to the background using the stickers and die cuts.  Next, I added several layers of patterned paper and tissue paper to my photo, and adhered it to the page. I used the die cuts to add the "Snow Day" title. I love how the letters are angled like that! Since I didn't know when I'd have more snow pictures to use, I also added the "Snow FUN" sticker. I like how it blends into the page but still gives it a little something extra. 
 
 
I finished the layout by using twine and mitten die cuts to make my own mitten embellishment! It looked lonely underneath the title, so I added a heart sticker with pop dots. This layout was super easy and took about 20 minutes to make. I love it when the beautiful background papers do all the work for you!
 
 
Thank you for joining me today, I hope you feel inspired to scrapbook some winter pictures!

Supplies

Today we're excited to welcome back guest designer Julie Johnson & some fabulously fun home decor she's created with our Winter Wonderland collection

______________________________

Hi!  It's Julie with Paisleys and Polka Dots.  Here is a fun winter wood décor project I designed using the Winter Wonderland collection. 

I fell in love with the cool color palette of this collection and felt it was “trending” with the style of home décor right now.  For my wood projects, I usually work with just pattern paper but when I began designing this project I couldn’t resist using the chipboard embellishments.  They were just the right size and with a few pieces of greenery gave my project the perfect winter touch.  

I loved this collection so much that I couldn’t stop designing once I got started!  Plus, when I decorate, I like to have several items as it creates a focal point.  I knew I wanted to create a wood block to coordinate with the snowmen.  There are so many adorable phrases to work with in this collection, but I decided on one of the 6x12 Elements as I loved the size and, of course, the phrase is perfect for home décor! 

Last, are these adorable hanging mittens.  And guess what?!  Both sides have cuffs and are covered with paper so there are no worries with the direction they are hanging. 

Once I finished my projects, I added a few more coordinating décor pieces that I picked up at my local Hobby Lobby.  I love this store and I can wander the aisles for hours!  But, what I love even more is that I can get crafty with my handmade projects and they coordinate so well with my purchased items to create this beautiful winter display.  I definitely will enjoy this wintery scene all season long!

______________________________

Aren't these just the cutest?!  If you're interested in getting your hands on a set of these wood décor pieces, Julie has kits available on her website at www.paisleysandpolkadots.com

SaveSave

Supplies

Pages