January 2017 Blog Posts

Hey friends!  Missy back today to share two layouts using the Winter Wonderland collection.  Have you ever had a collection really challenge you?  Well, considering this line is all about Winter, snow, skiing and sledding, I was definitely challenged.  I live in sunny Florida, and we are all about the sunshine, beaches and pools.  So I had to get creative with my projects!  This taught me to really study the collection and pull from it what works for me.  I looked at the florals as more of a Fall piece and tried to play on the more neutral patterned papers.  I scrapped two outdoor photos and used the pieces that helped me showcase them.  Here is what I came up with. 

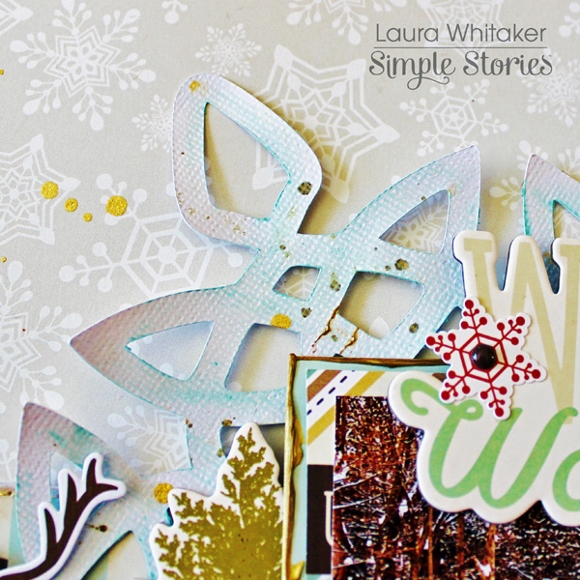
My first layout is about going on a hike up a mountain in a state park in Georgia.  My friend and I found this really cool structure that looked like an old stone fireplace that must’ve been from a house many years ago.  I decided to recreate it using a fun cut file from Just Nick.  I cut it on kraft cardstock and then backed it with the beautiful blue woodgrain Warm Winter Wishes paper.  I love how it looks!  I fussy cut some hearts and flower clusters to layer around my photo.  I also smudged some white gesso on the background and used some coordinating Shimmerz Paints colors to add some watercolor effects.  I think all these neutral colors really convey nature and the outdoors really well.

I love these little hearts and flower clusters.  I layered a few of them around my photo and added some tangled thread under them.  I went small with my title and used the small dark brown alpha stickers from the 4x6 Sticker sheet.  I really love that gorgeous blue color popping in from the background.

I added another fussy cut flower cluster to the left of the photo as well as more thread and a few brown enamel dots.  I did add some foam under my photo to raise it up and create some depth.  I also did some machine stitching around the photo area with some dark brown thread.

I created another small cluster for the top right of the layout just to add a little bit of interest up in that area.  I also added in a label sticker.

Here’s one more look at the background cut file and the layers behind my photo.  I used a few papers from the 6x6 Paper Pad behind the photo as well as a few die cuts from the Bits & Pieces pack.  When you are struggling for an idea, cut files are a great way to give the papers you have a totally different look.

_____________________________________

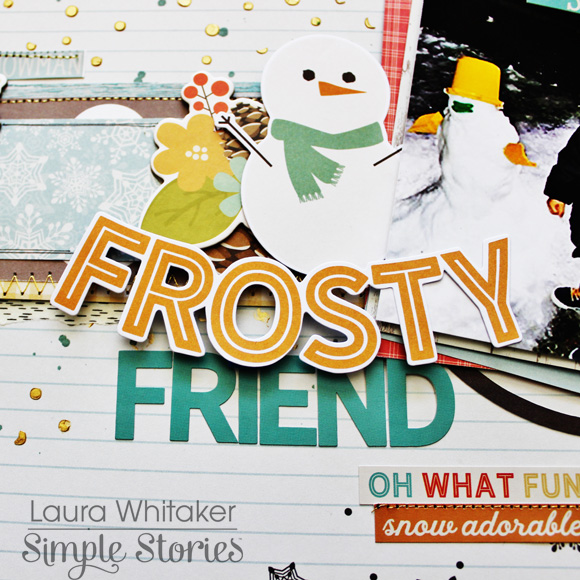
For my second page, I continued with an outdoor photo of my husband and daughter riding the Honda.  I love all the green in the photo, so the trees in this collection were perfect.  I went with a white cardstock background and added a bit of watercolor in blue and a light golden color.  I added a scribbly circle die cut I had lying in my stash just to add a little something extra to the background.  I layered a die cut tree and a sticker tree behind the photo.  For my title, I made it big and bold with an alpha cut file from The Cut Shoppe.  I used papers from the 6x6 Paper Pad to cut them and then backed the open spots with vellum.  I love large titles, and I love how this one is arranged to frame the photo.

After I glued down the letters, I stitched through them all with brown thread.  I added my journaling to the left side of the page to balance it all out.  I had a lot of white space left over in that area, so it was the perfect spot for it.

I love that the die cut tree is a different color than the sticker tree.  It makes them look more realistic!  And I like that they’re different sizes.  They were perfect since my photo has lots of trees in it.  For an extra pop of that orange red color, I added in some tangled thread and then a small floral sticker right onto the photo.

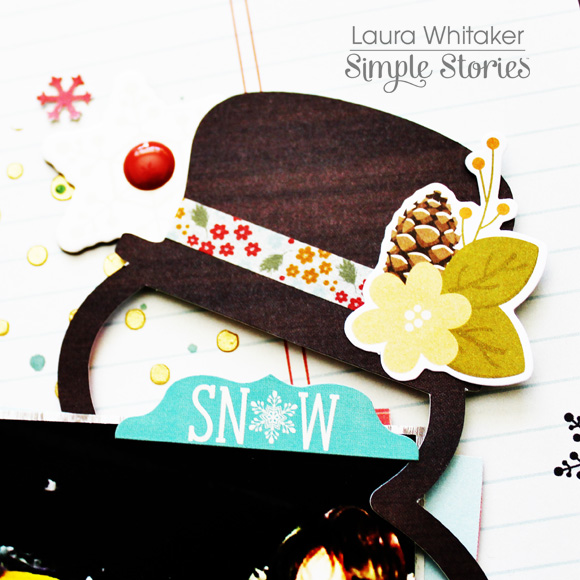
I thought this little wooden circle was so cute, and I layered some foam under it to raise it up.  I added a fussy cut flower and leaf cluster under it along with some thread.  And I found another tree that was smaller, so it was perfect for this spot.

Here you can see a lot of the paint splatters I added in a matching blue color.  I also fussy cut those cute clouds from 6x6 papers and stitched them down with blue thread.  I really love the pop of blue they give, and I also ruffled the tops of them to give them a little bit of dimension.

I had so much fun putting these pages together!  I hope you’ve gained some inspiration on how you can use themed collections in a completely different way!  Thanks for stopping by!

Supplies

Hey there, it's Laura here with you today sharing two layouts using the gorgeous Winter Wonderland collection! I am loving the colours in this wintery collection, of course it has traditional cool blues and grey, but there are also beautiful soft honey yellows and a lovely warm coral which is such a cozy addition to this palette!


I am documenting this photo taken of my backyard facing into the woods behind us.  I have a fascination with photographing the woods since moving to this house a year and a half ago.  I love watching the changes that occur here throughout the seasons.


I started my page by die cutting a large snowflake from white cardstock and then used Gelatos and mists to add some subtle colour to it. It is hard to tell in this photo, but thanks to the addition of some clear but shimmery Glimmermist, it really sparkles.
 

I was really inspired by this large chipboard element to document this story, so I knew it had to function as the title on my page.

 
I added a strip of birch tree patterned paper on top of this pretty snowflake paper to create the basis for my entire page.  I layered the large die cut snowflake, my photo and title centrally on my layout to create my focal area.  Next, I layered up some ephemera bits and pieces as well as some stickers to create a trio of embellishment clusters. 

I repeated this beautiful coral colour and some stitching in all of my clusters.
 

I finished off my page with some journaling and some gold mist splatters.

For my second layout, I chose to document this photo of my grandson and his little snow friend, sent to me by my son.  Normally I scrapbook about a year behind, but I couldn't resist adding this photo to a page immediately!
 

I loved this notebook lined and snowflake scattered ptterned paper and definitely felt it needed to be a background.  I added gold texture paste "snowfall" created with a mask from My Favorite Things, to reinforce my wintery theme and draw the eye to the centre of the page.
 

I created this die cut of a snowman just for this page, and love how it looks cut from this gorgeous dark wood-grained paper.  I couldn't resist adding some seasonal flair to his hat with Washi and a die cut!
 

My photo is tucked into the snowman, to which I layered chipboard, die cut and sticker elements, as well as a tag behind and around.  All of the snowflakes that I used got a little enamel dot in their centres. I love the pops of colour they add!
 

My title is a combination of a cardstock sticker and alphas stickers, both from the collection.  I layered them together and added an embellishment cluster above them.
 

To finish things off, I added a small cluster to the upper left side of my page and some journalling.

I cannot tell you loud enough how much I love this collection, it makes me so happy and that says a lot as I am not a lover of winter! Ha!  I think this is a definite must have if you have winter photos to scrapbook!

Thank you so much for visiting today!

Supplies

Hey planner friends! It’s Meka today here on the Simple Stories blog. I’m bringing my Carpe Diem planner into 2017 with the Winter Wonderland collection.  This is a great kit with some non-traditional colors mixed in for those of us who live in places where the weather seldom feels, and the scenery rarely looks truly wintery.

My front pockets have been decorated with cheery winter icons and words from the Bits and Pieces pack, and stuffed with planner goodies I’ll be using over the next couple of weeks.

I absolutely adore the Silver White Winter 12x12 cardstock pattern. I’ve left it unadorned as my first divider, with just the original Reset Girl Choose to Shine transparent Carpe Diem planner dashboard as an overlay. The cutie pie snowman is attached to it with a jumbo paperclip affixed sideways.

The 4x6 sticker pack included narrow labels and stickers trips that were perfect for labeling divider tabs. Just a small snip off the end of the labels and it’s just about the simplest bit of fun and function you can do!

Still in vacation mode last week, I opted for a journal-style spread for this layout. The horizontal inserts that come with Posh boxed planner kit are perfect for letting free-form thoughts flow.

Perhaps too free-flowing, I re-learned a lesson– always jot down the week’s events before starting in on a layout! I totally fudged my dates, but a 3x4 journaling card element adorned with a few stickers was all it took to set the story straight.

This week it’s back to business. I used the Planner Essentials vertical format weekly inserts to record the week’s priorities. The pages were decorated with planner favorites— layers of stickers and coordinating washi tapes from the Winter Wonderland collection. This time I added watercolor to the page at the end. It worked out well to blend and tie in some of the elements on the page.

Oh, and that not-so-wintery weather I mentioned? That gave me cause to transform a “100% chance of snow” sticker into something a bit more appropriate for this 75 degree January climate!

I hope you enjoyed this Winter Wonderland setup in my pretty ivory Carpe Diem planner.  Come visit me at https://www.instagram.com/yespleaseplanning. Hope you’re having a happy new year!

Supplies

Hi planner friends! I hope you had a wonderful holiday and you’re staying warm and toasty wherever you live!  I’m back to show you my January calendar setup using the Winter Wonderland collection in my A5 Ivory Carpe Diem Planner.

Now that the holidays are over, it’s time to go back to the beautiful and cool winter theme and the Winter Wonderland collection is perfect for these winter months ahead.  I filled all of the pockets with 3x4 journaling cards, some of the chipboard stickers that I turned into paper clips, and the matching 4x6 sticker sheets.  I also made a simple pocket folder to store extra stickers and journaling cards using the Wonderland cardstock.


For the month of January, I mostly used the Winter Wonderland cardstock stickers and the matching 4x6 stickers to decorate the pages.  The square stickers from the 4x6 sticker set fit perfectly in the calendar boxes and add a pop of color.  


Along the top of the pages, I used a small piece of the Warm Winter Wishes cardstock as trim and added a few of the card stock stickers.  This collection also includes a trio set of washi tape that I used on the calendar boxes and along the bottom trim.


I hope you’re enjoying the winter season and enjoy using the beautiful Winter Wonderland collection in your Carpe Diem planner. 

Supplies

Hey Everyone! This is Jennie! Today I’m showing you how you can use the Winter Wonderland Collection without having to use snow photos. I live in Maryland and the closest thing we’ve had to snow are flurries that look like someone spilled sugar from a powdered donut. 


Sn@p Letter Stickers are my favorite for almost every project! I love the fact that they come in every color and no the 4x6 Stickers include one sheet of these letters.

This collection has 3 gorgeous washi tapes! I love to layer them and add a word sticker.


I love how the weekly card turned out. The labels from the 4x6 Stickers are great for stamping dates and adding journaling.

No snow doesn’t mean that it's warm. It’s pretty cold here but you can also use this collection for documenting Frozen costumes.

Enamel Dots are one of my scrappy staples. I like to add them to the center of flowers to give them a little extra detail.

Lettering is one of my favorite hobbies. This paper is really smooth so it’s really easy to use with my brush pen. If you plan to do this practice on a scrap paper first. The background needed a little extra something so I stamped “thumbs up” over and over using the Make it Happen Roller Stamp


I hope you enjoyed these pages while drinking hot cocoa!

Supplies

It’s a brand new year & for many of us, that means a list of goals longer than our arm!  :)

If planning & staying organized are among your goals for 2017, we’ve got you covered! 

Check out our brand new LIVE.LOVE.PLAN. Pinterest board here with nearly 400 pins (and growing!), full of inspiration & ideas for your Carpe Diem planner!

Here’s to a fantastic 2017, meeting your goals, & staying organized in a fun and creative way while you’re at it!

Good morning friends! Brenda Smith here with you today sharing a few 6x8 spreads I made in my all-about-me album. I was excited when I saw the new Simple Set called #Whatever because I knew it would be perfect for documenting some of the not-so-easy moments of motherhood. 

While I focused primarily on the use of #Whatever on these spreads, I used up some of my leftovers from past Simple Stories collections. I found that I Am and the Carpe Diem scrapbook line had elements that coordinated perfectly with my spreads. 

One thing that I do when my photos have too many colors going on or they clash with the spread, I'll turn it black and white. I love how the black and white contrasts with the colorful letters of the "Insta Cool" sticker. 

The "Sharing my story" banner is from the Carpe Diem line and was just the embellishment I was looking for. I gave it a little dimension by popping it up with some thin foam adhesive. I love adding depth to my pages and thankfully the Simple Stories 6x8 page protectors are roomy enough to allow for such dimension. 

In my main pocket page album, I sometimes hesitate to get too personal with my feelings and emotions because I feel like the focus should be on the family. However, with this 6x8 album, anything goes. 

For better or for worse, I usually try to keep the main pocket page album mostly upbeat and talk about the good, happy times. But when allowing myself the freedom to tell whatever story I want in this album, I find that I'm using up some photos that would otherwise just sit on my phone. 

I accented with a little bit of paint to bring out the bright color palette of #Whatever. 

In this spread, I had more fun with mixing and matching collections. I used the floral paper from I Am and you'd never know that it didn't come from the same kit. 

The lighthearted, cheeky tone of this kit goes perfectly with the playful photos I've been taking lately. I admit that I get into a slump of taking only perfectly posed, smiling faces photos of my kids. But sometimes it's fun to include the outtakes and this kit makes it easy to incorporate them. 

I like to keep a stash of doilies because I find they add the perfect delicate touch when layering. 

How are you using your Simple Stories collections? Have you had any success in combining kits? Make sure to tag us @simplestories_ and hashtag #simplestories when sharing on Instagram so we can come check it out!

SaveSave

Supplies

Pages