May 2018 Blog Posts

Hi there planner girls, it's Cara! Happy Spring! Is it ok to actually say that now? Did I just jink it again? I’m so scared to say that spring has finally arrived this year because every time that I do, it snows or something the next day!!  I’ll take my cue from the birds who have been singing their little hearts out and making my days a lot more enjoyable. 

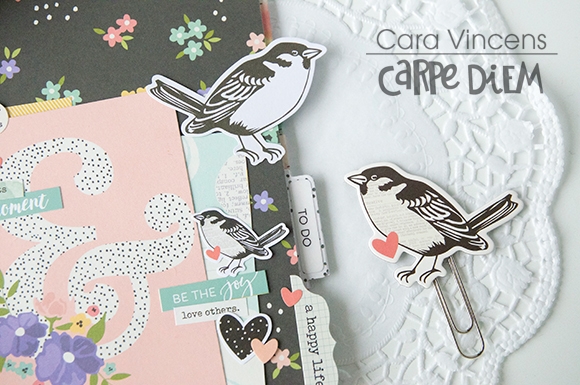
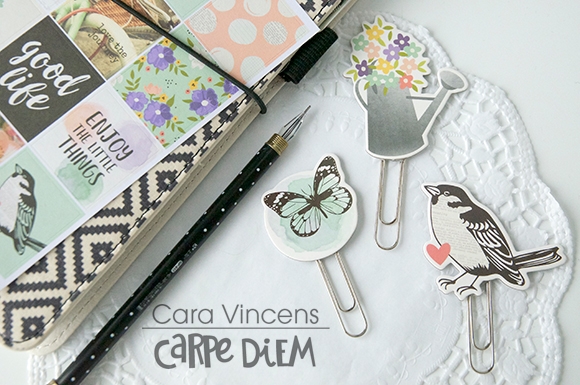
I wanted to take all that bird song and bring it right into my traveller’s notebook! I took the little birdie from the BLISS line and her friends, the butterflies, and started there! I decided on some chipboard planner clips and made one from that adorable watering can as well. I pushed the chipboard pieces through to the back making sure that the backing came with it. Then a paper clip and a little hot glue added in between the chipboard and the backing is all you need for a quick planner clip.

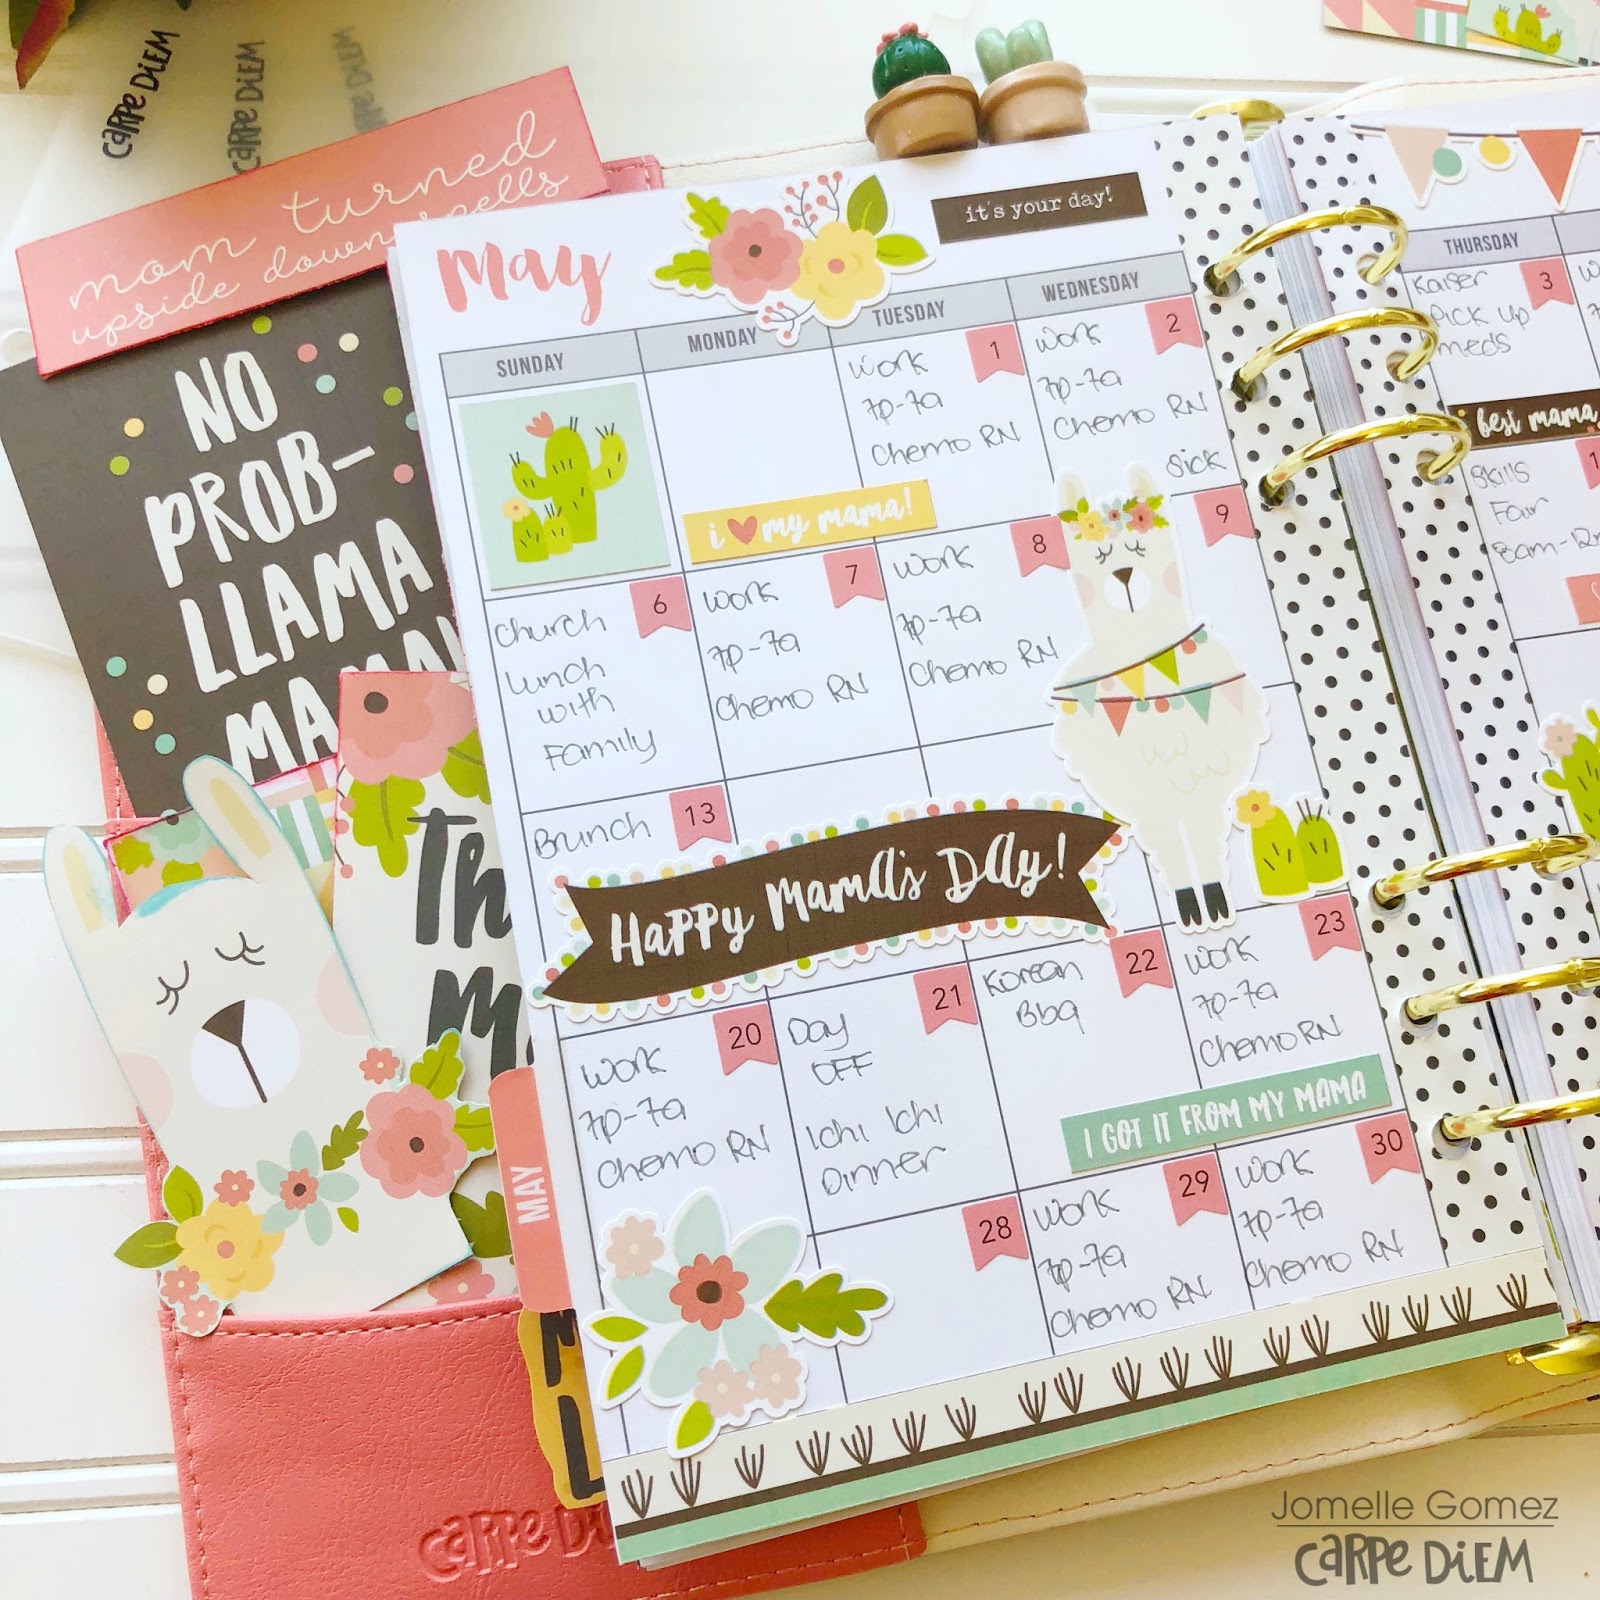
I also made my own insert, which I love to do. I have a simple tutorial on YouTube if you’d like to give it a try. I took the ‘Enjoy the Ride’ paper from the Bliss collection and some plain heavy weight computer paper to make this insert.

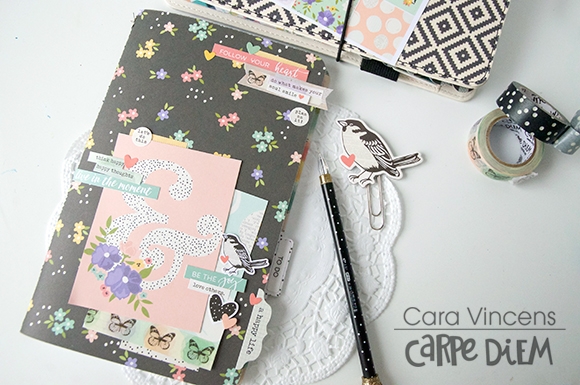
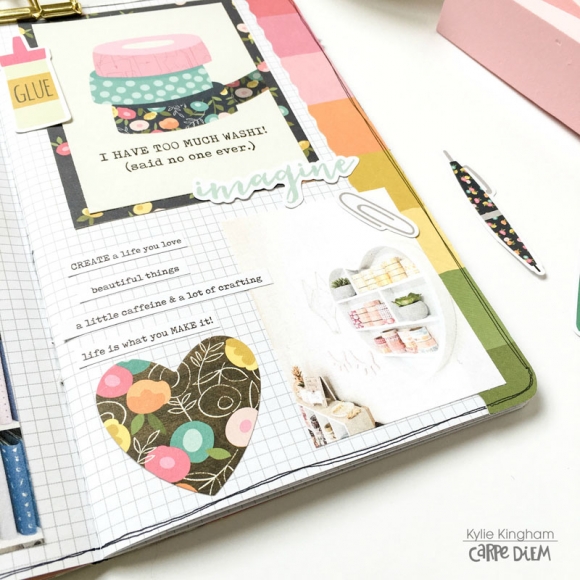
I decorated the cover with some of the cut apart bits from the ‘3x4 Elements’ paper, and some of the ‘Bliss 4x6 stickers’ including that little birdie again, and more from the ‘Combo Sticker’ sheet. A bit of the ‘Butterflies’ washi and it’s done! I don’t know about you, but most things I make just don’t seem finished until they have at least a bit of washi :D

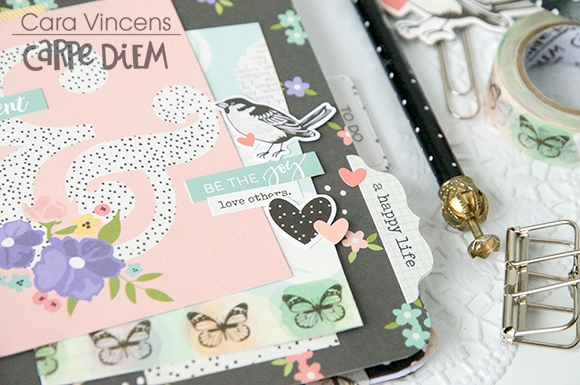
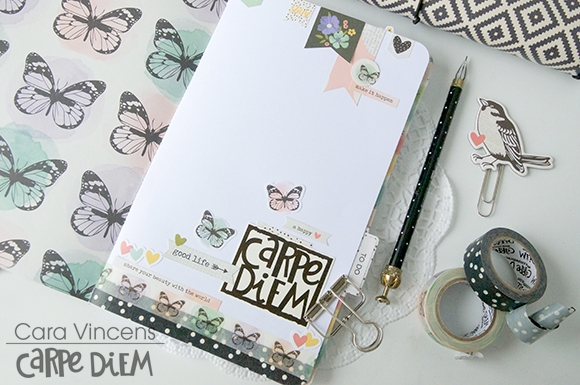
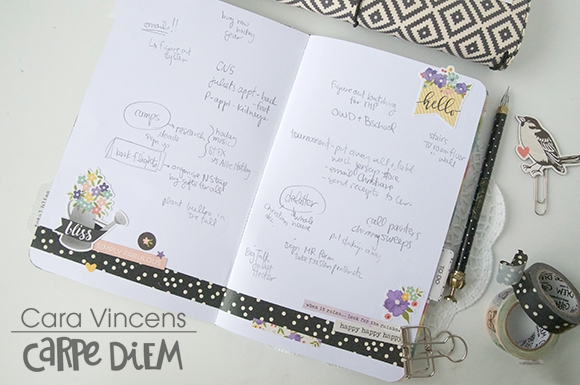
I made a simple title page, the theme of this insert is to seize the day and do as much with my day as possible. Since Carpe Diem means ‘seize the day’, I cut the Carpe Diem logo from a bit of packaging and layered it with more stickers and butterflies washi layered over the ‘Black Speckled’ washi.  A die cut flag and one cut from the ‘4x6 Elements’ paper layered with flags stickers make a cute cluster at the top of the page.

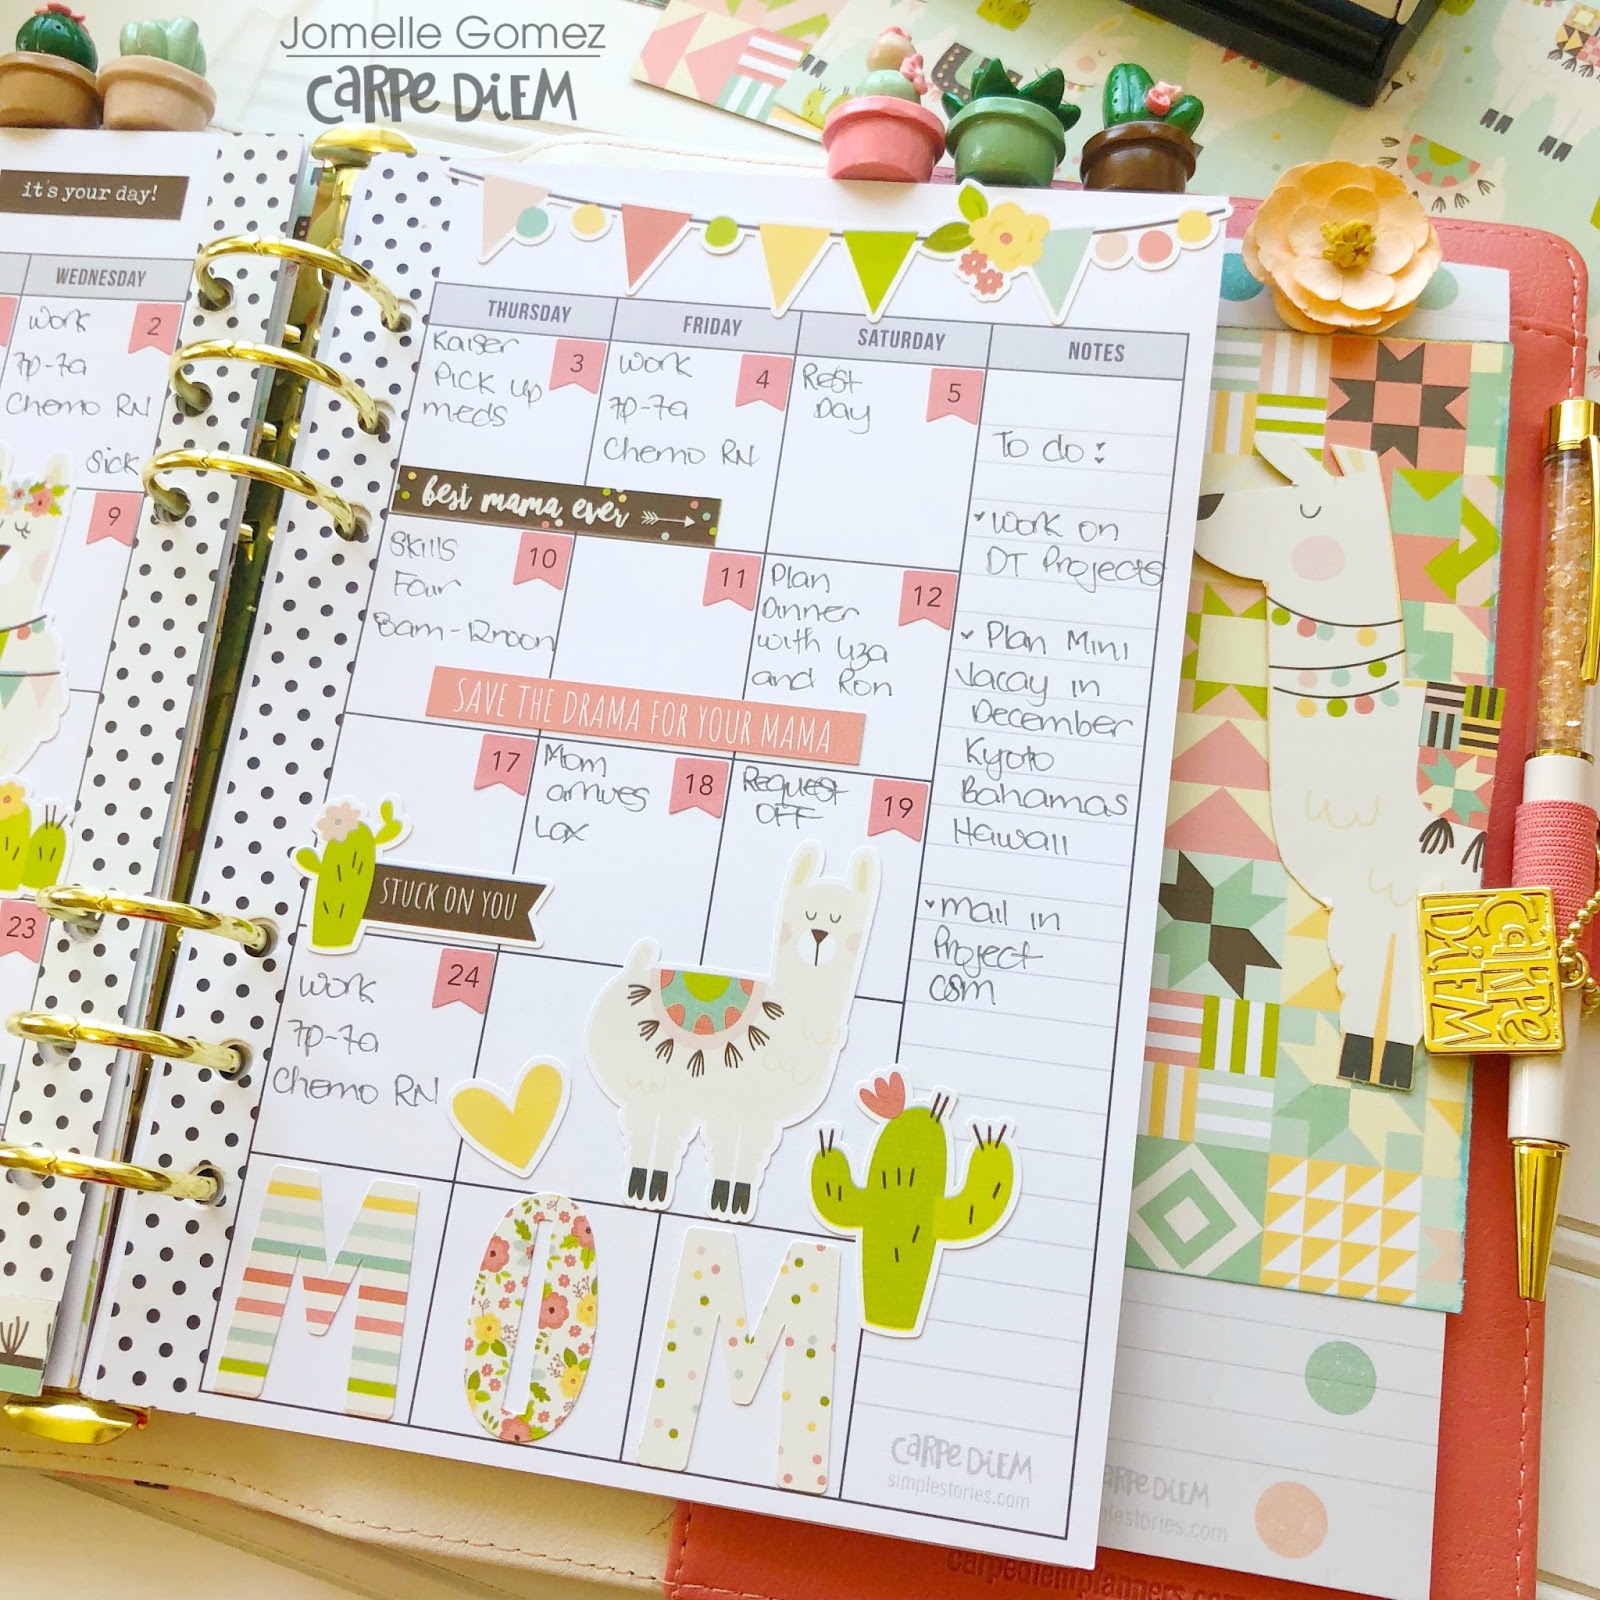
The first page of the insert is a brainstorming page. I wanted to keep the decoration to a minimum so that I had room to write, but that doesn’t mean I can’t make it look fabulous!  A single strip of the Black Speckled washi layered with a few stickers is all it needs.

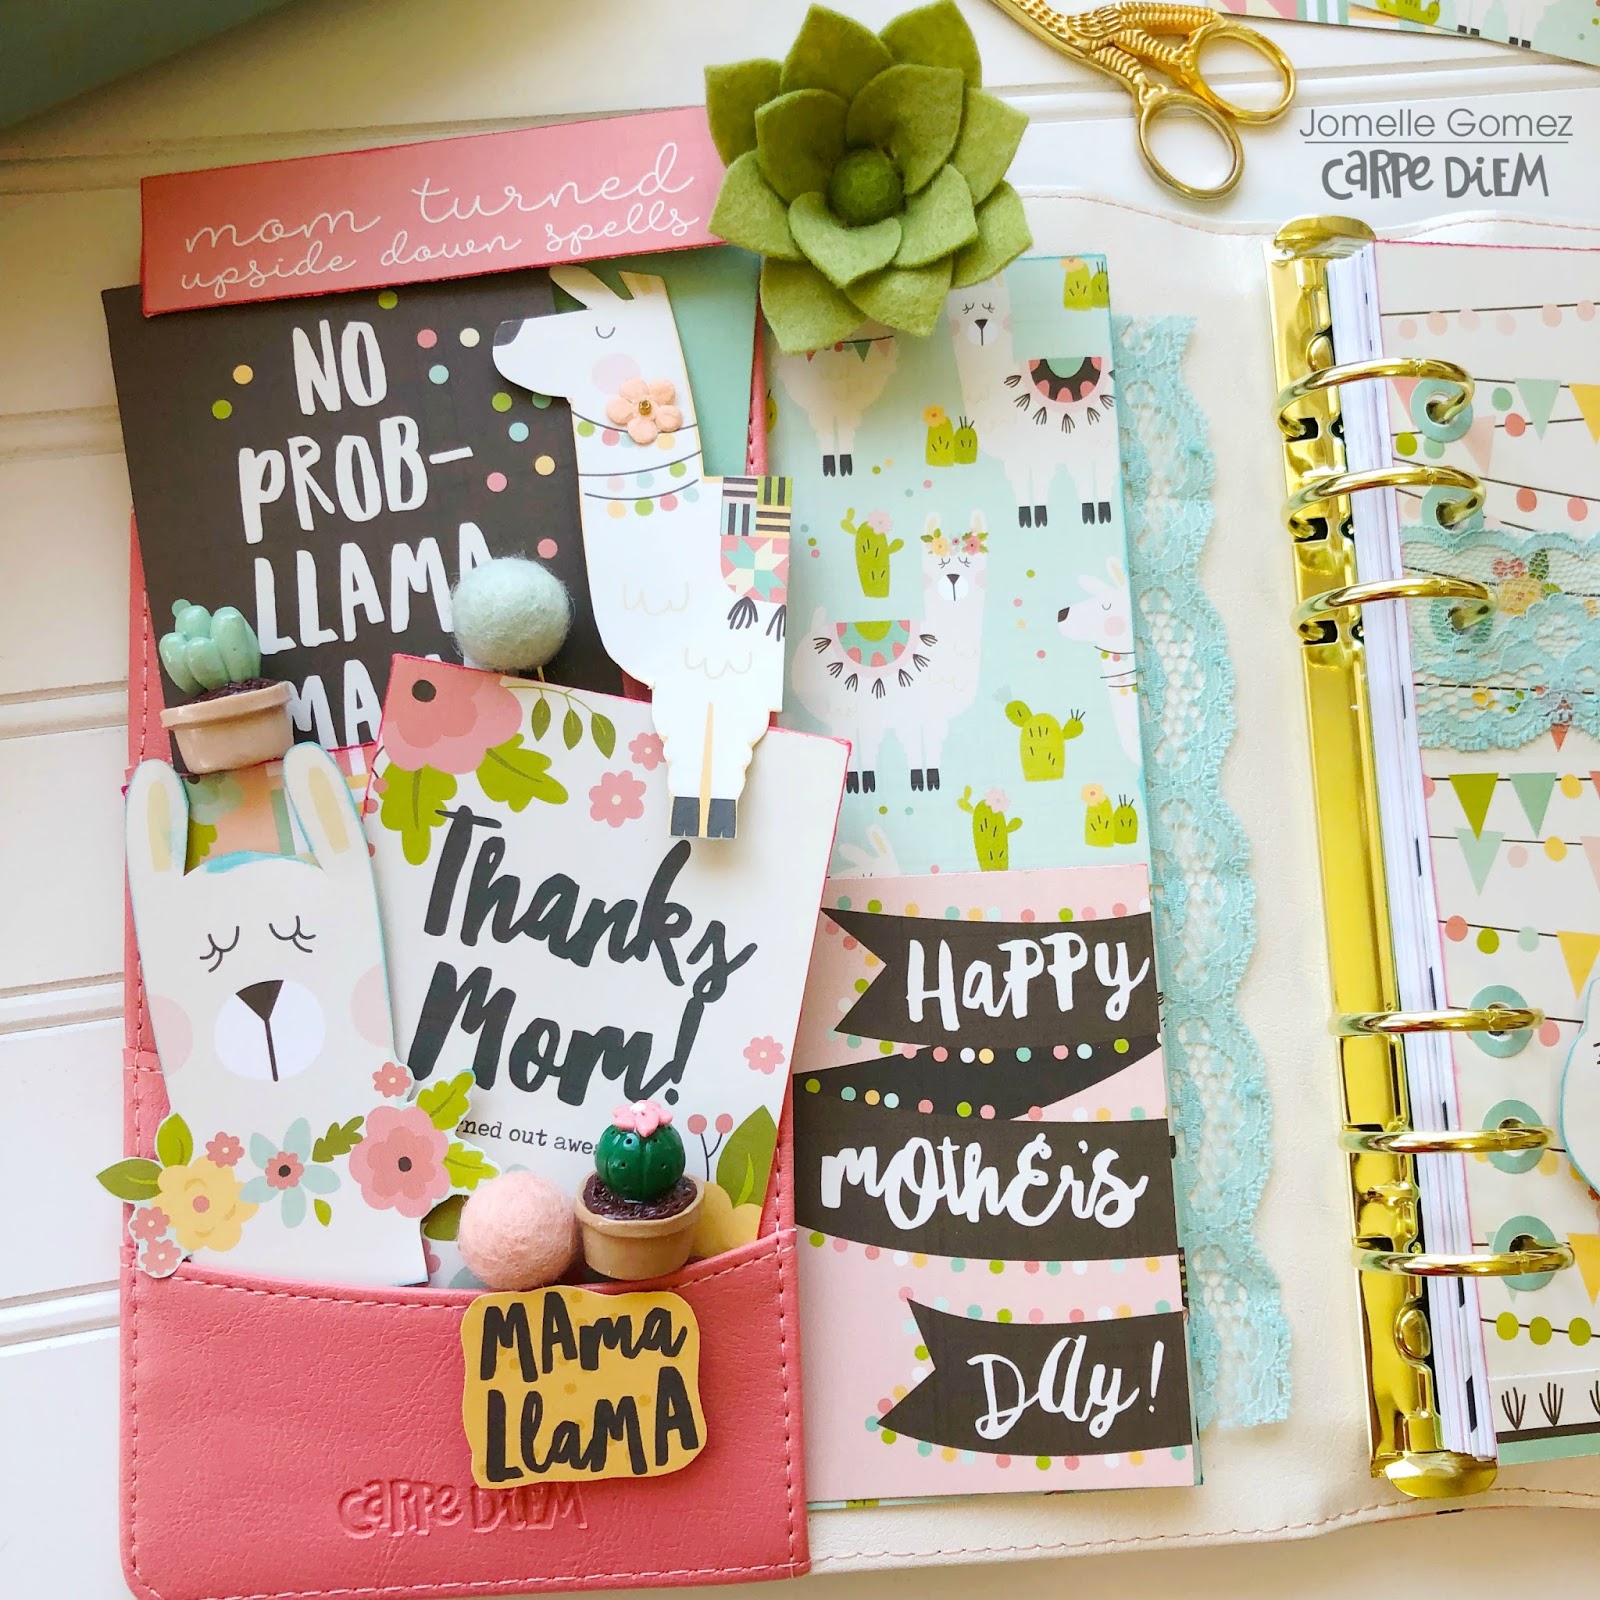
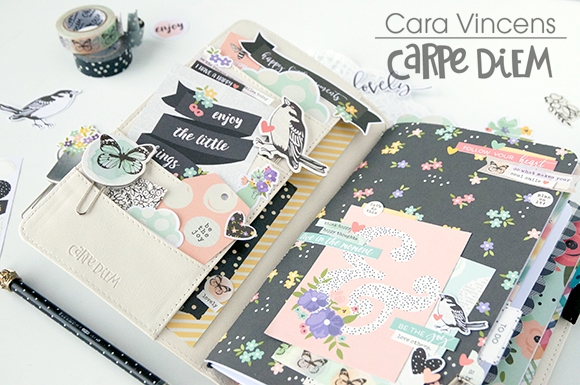
And of course, I couldn’t add a new insert to my Aztec Traveller’s Notebook without changing out the pockets to match. Pockets are one of my favourite things to decorate! I added my birdie and butterfly clips, some die cuts from the ‘Bits & Pieces’ pack and a card from the ‘3x4 Elements’ paper. I tucked a strip of the ‘Remember to Shine’ paper into the long back pocker and layered it with washi and stickers and boom! This planner makes me smile every time I open it!

Has spring finally arrived for you? Is your planner all decorated for Spring?

Supplies

This Hello Summer line by Simple Stories is the most darling line and will be sure to make your pictures pop!!! I used the Hello Summer Collection Kit to create these pages and darling banner. 

These cute sticker elements look so darling popped up. I was having so much fun with this line I made multiple pages for my kids books. 

And with my left over stickers I used them to make a happy Summer Banner... 

 It was super easy and fun!!! Just string the 3x4 journaling cards and add stickers!!! 

Or if you have lots of pictures put both these pages together and make a double page spread!!! I love these colors they are so happy and fun!!! Have fun creating with this fun line!!! 

Supplies

Hello friends it’s Kylie with you all again today sharing a fun project I have been working on in my lovely Aztec Travellers Notebook, using the ‘Crafty Girl’ collection by Simple Stories. There are so many gorgeous elements to this range and I was really excited to get started with it.

Recently, my Craft Space had a complete make over so I really wanted to create a photo journal for memory keeping purposes. Using ‘Crafty Girl’ just seemed to be the perfect match for it.

The notebook that came with my Aztec TN already had a gorgeous print cover, but I decided I wanted to cover it with one of the beautiful print papers from the Crafty Girl range. I also added some of the Bits & Pieces as well as some of the Combo Cardstock stickers.

Once completed, I loved how it looked within my TN.

On the inside of the front cover I constructed a pocket.This is easily done by cutting your shape and using strong, double sided tape to the two sides and bottom.

There are some great quotes included in the Bits & Pieces which I have loved layering over different elements throughout my journal.

I have also created a fun tag to slide into my cover pocket. I used some of the Chipboard stickers from the collection which were just so cute!

Couldn’t resist creating an oversized paper clip with the Chipboard stickers too.This will be perfect as a page marker or holding my pages together.

I used many different papers throughout my journal, mostly as borders to frame my images throughout.

The 4 x 6 Horizontal elements paper was perfect for cutting apart and adding into my journal as part of the story.

I really think this collection will suit many a Crafter out there, from planning to scrapbooking and sewing. I’m sure you will love it as much as I do. My Aztec Travelers Notebook is now looking beautiful and making the perfect companion.

I hope you have enjoyed seeing my project today and it inspires you with creating your own. Until next time,

Supplies

Hi there Simple Stories Fans and Friends!

Nathalie with you today to bring you  a fun and cheery layout that will surely put you in a Summer mood!  The new Simple Stories Hello Summer collection is perfect to document Summer, the colors and designs are amazing. So i had to use a bit of everything in the collection to create this page:

I was inspired by the umbrella die cut to create this page, and all i can think was paper rosettes.  So i cut strips of paper of about 12x1.5 and 12x1in to create the rosettes.

Then used the cardstock stickers as centers of the rosettes.   Once they were all ready, the  rosettes were glued to the b-side of the Sn@p basics Chestnut/white dot paper on a diagonal.

The picture was then added (lots of foam adhesive and pop dots are behind the picture) and a few clusters were created at the corners of the picture using a combination of the cardstock stickers and die cuts, the small umbrella is also featured in the cluster.

Finally i used the large chipboard word with a sticker from the 12x12 sticker combo page to form the title of this page.   To finish the page, a strip of the Life is Good paper was added to the sided of the page.

Just look at all those colors and the happiness it brings.   So ready for Summer. I hope you check the entire Hello Summer collection, it should be hitting your local scrapbook stores right now.

XO

Supplies

Hello, Planner Friends! This is Rachel, back again to share another planner project! This time, we are talking all things Memory Planning! Don’t know what Memory Planning is? Check out this awesome video series Layle put together with Scrapbook.com! I like to think of Memory Keeping as small-scale scrapbooking in your planner. I typically Memory Plan with sticky notes as the week is happening and then add the photos and decoration after the week has passed.

This weekend was a special one. My husband and I took a trip to California to meet up with his family in their desert cabin. The trip was so great. My favorite part was getting to explore Joshua Tree National Park and spending time with John’s family at their desert cabin, lovingly known as “the shack”. So when I saw the Travel Notes Collection, I knew this collection would be a perfect way to document this trip in my Memory Planner.

A memory like this calls for more space than what is available on the pages of this spiral planner. Now, I’m not one to shy away from a good “planner hack”, so I decided to trim some of the papers from the 6x8 paper pad, punch holes, cut slits in the holes, and add them to this week’s spread. Who said a spiral planner isn’t customizable? Want to know about another planner hack?  I took out the pages from September – December 2017 by cutting slits in the pages and gently removing them. Now my memory planner has just 2018 in it, which I like. Plus, this give me more room to add more pages and memorabilia into the planner when I need to.

I loved using the 4x6 and Combo stickers from this collection to embellish this page. I used the little banners to highlight my husband and his family jumping around on the rocks. Something that I always do when I travel is try to find memorabilia from places we visit. I grabbed that cute Joshua Tree sticker, and my thoughtful husband stamped the date and location on a piece of paper for me! I was so pleased to see how seamlessly these two extra details matched the Travel Notes elements on the page!

I adore the clear stickers and word strips in this collection. My photo editing skills are pretty limited, so having these clears stickers and word strips allow me to easily add some embellishments to my photos. For an added touch, I included a tab with a word strip to this page.

Can we just take a moment and talk about that adorable backpack die cut from the bits and pieces pack? Not only do I love the reference to the great Doc Brown, but I thought it went perfectly with our desert adventure! Believe me, it was quite an adventure just getting to the family cabin that first night.

Here, you can see the back of the added insert page. I added photos of the cabin and some journaling my first time there and its story. I also put some of the details of the week on the luggage tag die cut. The trip as a whole came at such a great time and was such a nice escape!

I like to vary the way I document moments in my memory planner. Sometimes I journal, other times I use a list format, while other times I use doodles and lettering or alpha stickers.

I try to pick up postcards when I travel and this one worked perfectly with the Travel Notes Collection. I decided to make an interactive element with the postcard by adding washi to one side of the postcard and the planner page. When the postcard is flipped open, you can see more journaling and photos. Having a fold out element is another easy way to add space to your memory planner without having to add to the spiral.

I hope you enjoyed taking a look at my memory planner! Be sure to check out my Instagram to see more pages from this planner. This is such a fun project and great way to get “scrappy” on a small scale and stay (relatively) up to date documenting all the memories! 

Supplies

Hello everyone!!  Jackie G  here again with some fun cards to share with you!!

I can’t believe Mother’s Day just around the corner…do you have your cards ready??  This mini collection is seriously perfect for all your “mama” needs!!!! I mean, who doesn’t love cute little llamas??  Brings back some fun memories…when I was growing up, our house backed up against a large field.  Guess what was in that field...llamas!!  Lots of llamas!!  My sister and I had so much fun seeing the them daily, especially in spring when the babies were born!! So, of course I fell instantly in love with this collection the moment I saw it!! 

I was able to get a set of 4 cards out of this collection and still had scraps to spare!!

I also decorated the inside of a couple of the cards and made matching envelopes!! 

Thanks for stopping by!!  Happy Mama Day!!!!

Supplies

Hello! Jennifer on the blog to share a layout using the Crafty Girl collection!  There is so much to love about this line with the bright colors and prints as well as the fun scrappy sentiments!  Every piece in this line makes the crafter in me smile!  I  knew it would be perfect to scrap about my fun time at Creativation in 2017!  

I  opted to use wallet sized photos so I could include multiple pictures on my page!  Also, arranging my photos and embellishments in a "clothes line"  fashion allowed me to fit in extra pieces of die cuts from the Bits and Pieces pack. I  placed pop dots behind both photos and die cuts where allowed to add dimension and so my mini clothes pins would fit! 

How cute is this circle journaling die cut from the Bits and Pieces? I'm always a fan of ledger paper mixed with patterns! Underneath, I layered patterned sticker strips from the 4x6 Sticker Sheet as well as the cute paint splash Imagine Washi Tape! The 4x6 Sticker Sheets have multiple smaller shapes to accent your photos such as hearts, flowers or the "craftiness is happiness" sticker shown here!  

Each photo is matted on white cardstock to resemble a Polaroid photo.  I  then added small stickers or pieces from the 

6x12 Chipboard.   One of my favorite die cuts is the washi tape rolls! I  included them as a piece on the "banner" along with the adorable tag you see here! 


​Thank you for visiting the blog today!  Check out the entire Crafty Girl collection by visiting the Products page! And be sure to see  the newest releases too!  Have a great day!

Supplies

Mother's Day is just around the corner. What can be more perfect than to use the Mama Llama collection for my planner set up?
Sometimes the best way to thank our moms is with a simple and heartfelt message.
"Out of all the Mamas in the world...I'm so glad you're mine" the perfect quote to use to put my gratitude into words.
 How can I not use the Llamas in my dashboard. They are super adorable, don't you agree?
 I fussy cut the Mama Llama, baby Llama and the cactus from the 4x6 journaling cards elements. I inked the edges of the llamas blue to have them stand out more. I then added small flowers for the finishing touch. Its simple but beautiful at the same time.
 The small pearls that surround the quote makes it more elegant. I added some embellishments from my stash to achieve the look I wanted. I really love how it turned out.
No bits & pieces in this collection to use to stuff your planner pockets? No prob-llama. I used the 3x4 journaling card elements to decorate my planner pockets. I fussy cut 2 more Llamas to turn them into die cuts. 
I used mainly the stickers that came with the Mama Llama collection for my Monthly layout. The stickers are simple yet fun way to decorate your layout. 
 I also love using the new numbers sticker tablet. I decided to use the peach color to match the stickers well.
 The pastel colors in this collection gives my layout more of the soft image. 

I hope you enjoyed viewing my planner set up. Happy Mother's Day to My Mom and to all the Moms out there. Thank you for all that you do. 

Supplies

Pages