August 2018 Blog Posts

I have loved saving my family memories over the years, and as some of you know, I have two sons, 24 and 28 years old.  As you can imagine, there are a lot of blue pages, sports layouts, and masculine themes in my albums .... until my sweet granddaughter joined the family 22 months ago.  I will continue to document the men in my life, but I'm having so much fun scrapbooking my life with this little princess. 

The Dream Big collection was perfect for saving some of my favorite 2018 memories.  I love the colors!
The 2x2 pockets make such a fun page.  I added just one tiny photo on this page, to highlight a special moment between my granddaughter and her uncle.
I used the 12x12 collection pack, including the sticker sheet.  I also used the chipboard stickers, puffy stickers, and Bits & Pieces die cuts.  
 
If you have a little girl in your life, the Dream Big collection is a must have.   Thanks for letting me share with you today!

Blog * Facebook * Instagram * Pinterest

Supplies

Hello friends! I hope you're enjoying your summer! Linsey here today sharing my latest altered project, a shadowbox using the super sweet and adorable Oh, Baby! Collection. A new baby is always a joy and creating a handmade keepsake is such a special way to celebrate the occasion. Come along and see how I transformed this ordinary wood shadowbox into a one-of-a-kind keepsake gift for baby! 

First, the outside of the box was covered with 12x12 Precious and Little One paper. Next, all of the edges were covered with So Sweet Washi Tape, which is a nice alternative to painting. Each of the inner boxes were covered using papers from the 6x8 Pad. The smaller designs in the pad are perfectly proportionate to individual boxes. Delicate white lace trim was added around the inside of the frame for a touch of softness. Finally, the fun part--decorating each of the tiny boxes with an array of darling detail using stickers, chipboard and die cuts. 

I love that the colors, patterns and designs in this collection are just right for either baby boy or baby girl so you can create effortlessly without worrying about your project being too boyish or girly.

Since my niece is expecting a baby girl this December, this will be for her. A name has yet to be chosen, so I kept it basic, but how cute would it be to personalize it with the name, date and details of birth using letter/number stickers too? I had the most delightful time decorating all of the tiny inner boxes. There are so many precious pieces in this collection, the details possibilities are endless! 

And that's a wrap! I hope you enjoyed seeing my altered shadowbox and if you are so blessed to be expecting a precious new little one in your life or family, the Oh, Baby! collection is a no brainer. Thanks so much for visiting today and until next time, happy crafting! 

Supplies

Florence here! I wanted to share with you one of my passions that I hold near and dear. It’s my bible journal. I wanted to share an entry that was dedicated to my nieces Baptism and I thought the Dream Big line was perfect for it. 

Kairie (my niece) is extremely girly. So I wanted to create this page with bursts of colors that represented her personality! I am extremely blessed to have her in my life and to have been able to be one of her God Parents. 

I know many of us come from different religious backgrounds but I wanted to share another way to utilize this kit. With bible journaling, I love working with bright colors especially yellow, pinks, and mints. Even though this line isn’t only for faith documentation, we can get our creative juices flowing and make it into anything we desire :) 

I hope you got some inspiration on using Dream Big for your next project!! Until next time!

XO,

Florence

Supplies

Hello friends!  Jennifer on the blog today to share a layout I created with the new Lil Dude collection! Who doesn't appreciate a good boy line? Lil Dude knocks it out of the park with its bold, bright colors and prints! The coordinating embellishments have enough mix of "boy" to range from toddler to teen!  Photos of my son when he was 6 years old  playing with Hot Wheels were perfect to use with Lil Dude!

I  used my Silhouette to cut different sizes of circles from my favorite patterns to layer across my white cardstock background. I  then clustered my photos in the center of my page matting with cardstock to help them "pop" against the colors. 

I  used a circle frame, again cut from my Silhouette, to position my title.  Using foam dots, I adhered the bright letter stickers from the Combo Sticker Sheet. I  then accented with additional stickers found on the same 12x12 Sheet.  I  am loving the new addition of the Puffy Stickers!  You can see the miniature stars as well as small arrow; you receive two sheets in each package!

I  love using the 3x4 Elements for my journaling especially since there is almost always a ledger/notebook print included!  I  accented with a cute star cardstock sticker as well as more Puffy Stickers!

The Bits and Pieces pack is always full of a large variety of shapes as well as journaling spots such as the one seen here. I  used a date stamp in my stash and added a bright blue chipboard star. You can also spy a mini circle sticker found on one of the 4x6 Sticker Sheets...and yes, more Puffy Stickers! 

The B side of "Hear Me Roar" is probably one of my favorite prints of the collection!  I  am a huge fan of plaid and am loving the black and white. You can even note the hint of type as well!  For this circle, I  added a cute pennant from the Bits and Pieces as well as additional stars.  

Thank you for stopping by the blog today!  Check out the collection in its entirety by going to the Products page. You can also see all of the new, exciting Simple Stories collections coming soon!  Have a great day!

Supplies

Hi everyone! It’s Tara from Secretbees Studio  One of my favorite things of summer are all of the beautiful flowers! I really enjoy creating my own pots of flowers and watching them bloom and blossom over the season. A little part of me is always sad to see them go so I created a bouquet of paper flowers that will last forever!

For this adorable paper cone bouquet I used the lovely Simple Stories 'Bloom' paper collection along with lots of the coordinating embellishments for a lush and full arrangement. The large flowers were cut with Silhouette cut files and large flower dies. I also stuffed in a few sweet rolled flowers made with some smaller dies. I attached my flowers to wooden sticks and then used hot glue to make sure they all stood up in the bouquet.

To go along with the blooms, I added in a few of the lovely stickers of the collection and highlighted them with other goodies like the 'Bits and Pieces' die cuts and small word sentiments. For even more charm, I added in beautiful paper curls made from the patterned papers!

The tag on the outside of the paper cone was made with a couple of the die cut pieces and I simply added a word sticker, a rolled rose and a bit of twine. I used a bit of thicker adhesive to add dimension to the tag before attaching it to the cone.  I attached a handle to the back of the cone to make this into a lovely door hanger I can enjoy long after my summer pots of flowers are gone!

Supplies

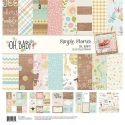
As much as I love the "Dream Big" Collection, I wanted to give some love and special attention to the
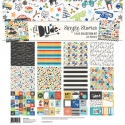
 "Lil' Dude" Collection
 
While everyone is going gaga over unicorns, fairies, rainbows and mermaids, I wanted to use something out of the norm. 
The "Lil' Dude" Collection is perfect since most planner girls don't use boys products in their TN's and planners.
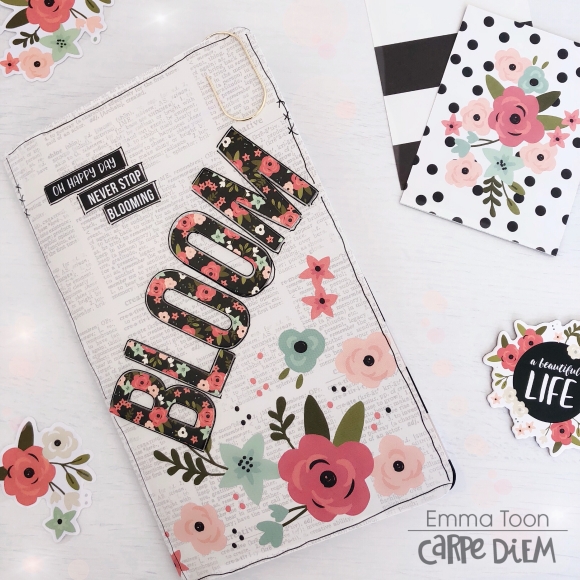
 I decided to use my Typewriter Circles Traveler's Notebook. As always, I created covers for my inserts. I love the robots, video games, trucks, fidget spinners, rubik's cube and so much more.
 
I finally put my Stitch Happy Sewing machine to use. I wanted to add black stitching all around the border of each of my covers. I love how it adds a little bit more detail.
The inside of my covers all have pockets. I cut the length of the papers into the size of my notebook insert but I left the height alone, which is 12 inches.
Then I just folded the bottom part of paper over to create the same height of my notebook insert and voila you now have pockets. 
 
I don't plan to permanently glue my inserts so I can change the covers whenever I want to match the theme I'm going for in the future. 
I am planning to use this Monthly insert all year long. Without gluing the notebook insert to the cover, I will be able to take it out and use it in another TN with a different set up.
Having to use it this way, I can use the pockets in the front and in the back to hold stickers, bits & pieces and other elements I want to use later on.
 Carpe Diem now offer Monthly, Weekly, Daily, Dot Grid and Blank inserts. I can use these covers for each of the inserts, or I can just leave it as it is and use it as pockets when I add them inside my TN.
The front cover is so mesmerizing that all I want to do is stare at this whenever I open my TN. 
 I also wanted to add fun elements in my pockets, but at the same time I didn't want it to be too bulky. I decided to sew more black stitching on some of the elements I chose to add in my pockets.
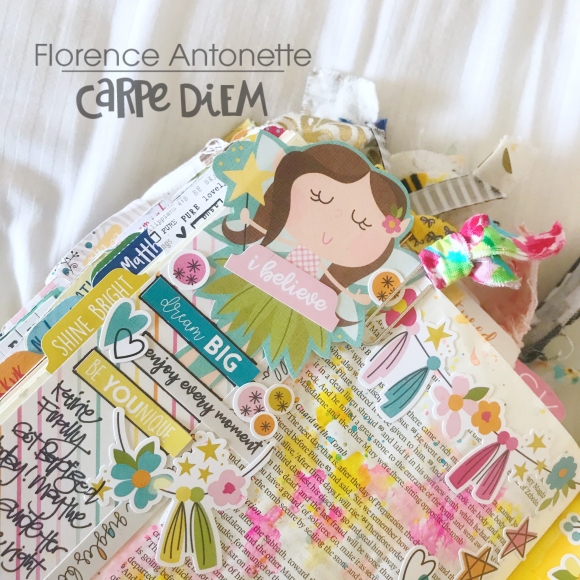
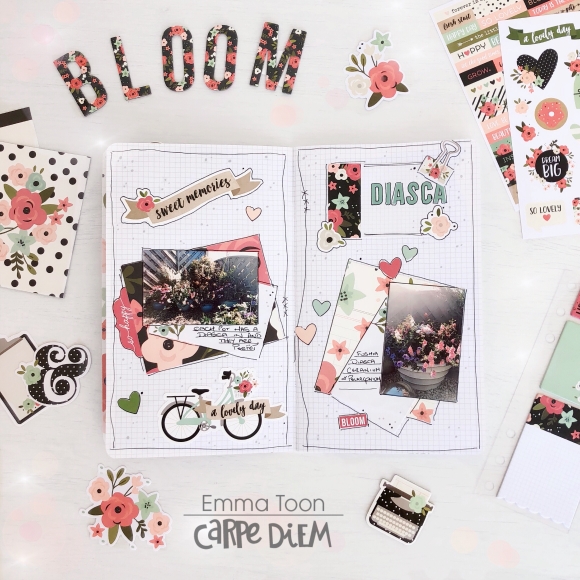
My "Before the Pen" layout for the month of September. 

 I will be adding some journaling and photos to these pages. 
This was my first time sewing on papers. I still need to work on my stitching so it will be straight, clean and precise. 
Although the "Dream Big" Collection would've been perfect to use to create a set up for August since it's my Birthday month, the "Lil' Dude" Collection is just as sweet, if not sweeter in my TN.
Thank you for stopping by and I hope I was able to inspire you to use more boys products in your planners and TN's in the future.

Supplies

Hi there!  Nathalie with you today, and I am so excited to share with you a new layout that celebrates all those girly dreams of fairies and rainbows.   The new Dream Big  collection is filled with all rainbows, butterflies, fairies, mermaids, and unicorns just every little girl  and woman's dream.

For this page, I wanted to play with colors in the collection, so i used a Paige Evans cut file to recreate a rainbow for the background.   

A paper from the High Style pad was used for the background,  a bit of white acrylic paint was added as to form a cloudy sky

A few layers of papers from the Dream Big collection were used to back the picture.  Just love all the patterns and colors in the collection!!!

To embellish the page, I placed a few of the fairy stickers, from the Dream Big collection, so that they formed a visual triangle on the page.   Stickers, die cuts and the new puffy stickers were added around each of the fairies so that they pop from the page.

Just love all the puffy stickers in the Dream Big collection, all the stars work so nicely around the clouds and rainbow in this page.

This layout was a joy to put together, all the icons and papers in the DREAM BIG collection are sure to bring a smile to your face.   I cannot wait to see what you all create with this new Simple Stories collection.

XO

Supplies

Hello, this month I’d like to show you how I’ve been using one of my many Carpediemplanner TN Inserts with the beautiful Simple Stories Bloom collection.

I really enjoy gardening and watching how it evolves over time, I decided that the bloom collection would perfect to document all about my garden this year.

I’m going to show you some of the pages I’ve done so far that are about my favourite plants this summer.

I used a small photo printer that prints your pictures onto little stickers, so perfect for popping on my pages. You can find several similar types on the market. One thing I have found with mine is the colour of the prints are far less vibrant than the original photo.

I used the letter stickers by Simple Stories, I have a large selection of these in different colours from a lights & a brights pack, you’ll find these in the product list below, they worked perfectly to highlight each particular plant I wanted to journal about, this made the word really stand out nicely, I then went round each letter with a black ink gel pen to outline, this is something I like to do, along with any journaling cards, each page and stickers I might add, this is ‘my style’, some might think it’s a little ‘scruffy’ but I like the informal look...and it works well with my dreadful handwriting!! ;)

I’ve cut up scraps of paper to layer my pictures and also filled some ‘white spaces’ with black ink spots, another thing I like to do too! I’ve also used lots of the stickers and bits & pieces to add more interest to my pages. 

I’m really looking forward to filling this notebook out with pictures from my garden and journaling about what has and hasn’t worked for me this summer.

So there we have it, my little book of plants! I hope you’ve enjoyed having a browse at some of my pages and maybe taken some inspiration of the different ways that the Carpediemplanner TNs can be used. 

If you would like to see more pictures using Simple Stories products then checkout my IG account  https://www.instagram.com/heartsbyemma

Supplies

Pages