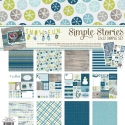
Life Documented Planner
When you open up my planner I created a transparent flyleaf. The flyleaf is there to protect my cover page and a place to quickly put any sticky notes with important information that I need to jot down later in my planner. I thought it would be fun to punch a few circles out of the 2015 Card Set and add that to the flyleaf (front and back)...I love how the punched out circles add a little something to the top of the next sheet which says "12 months, 52 weeks, 365 days"


Inside the package of the Monthly Dividers, you will receive a fold out Year Planner. I used some of the Letter Stickers to spell out "Twenty-15".

I am loving this quick glance at the whole entire year!!! To block off the "quarters", I used a highlighter...since that is the way I receive my Design Team Assignments (per quarter). I added a 3x4 card of the current month, just in case I need to take a quick glance to see what day the date landed on. Once I am finished with that task, I use a grey highlighter to highlight over it.


Here are a few photos at my month at a glance...to find this spot quickly, I have a bookmark in place. I am a huge fan of decorating my planners so I had to add that January 4x6 card (by using a single hole punch) from the 2015 Card Set...stamped some snowflakes using white acrylic paint and added a few stickers from the Snow Fun Simple Set...so much fun :) makes me happy every time I open up my planner!


I am thinking that I want to add an Insta-Pocket Pocket Page for each month! The front side, decorate it with patterned paper and embellishments...then on the back side add some of my favorite shots throughout that particular month (you will get to see that finished next month {wink}) SUPER happy with how this turned out!!!

My favorite part about a "ring" style planner is...you can add ANYTHING to the inside of your planner! In this photo, I am sharing how I printed off a monthly calendar schedule that was emailed to me...added a few punched holes and inside my planner it goes! Another tip...whenever I receive any invites in the mail, I punch a few holes and add it in my planner for that particular month/week!

Here is January 1st and 2nd, using the Daily Planner Inserts. These inserts are great...so much room! I especially love at the top where you jot down your top 3 things that need to get done on that day. You also have a to do list, schedule and a notes section. Once again...LOVE to decorate my inserts so I had to add a few stickers here and there using the Snow Fun Simple Set.


I am so thrilled to be on the Simple Stories Design Team for 2015, to show you all how I am using the Life Documented Planner. There is just so much to share...
Next month I will show you how I finished off my Insta-Pocket Page for January, a peek inside how I am using the Life Documented Planning (pocket pages) Section and my planner will be all set up for Valentine's Day Month!!!
Thanks for stopping by...
Happy Planning,
Candi


