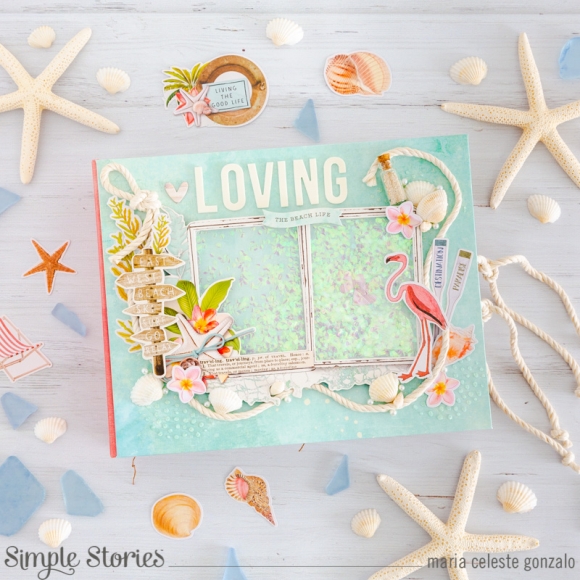
Loving This Beach Life By Maria Celeste Gonzalo!
Hello! I´m so happy to be back! The last days I have been dreaming about my next vacation… I want to go to the sea… That is why I’m so excited to show my new mini book!
The new Simple Vintage Coastal has made me dream about this amazing vacation. All the details, the colors… you can even smell the sea! I´m Celes from GuiadeManualidades.com and I’m inviting you to create something special with me. The first time I saw this collection I fell in love with it. You see every detail and you think and feel the sea, the fresh breeze and the sand. So, I knew what I wanted to create with this amazing collection. A very special mini book. And when I say special… you will see what I mean… I've included a lot of details… you will see even a small bottle with real sand!
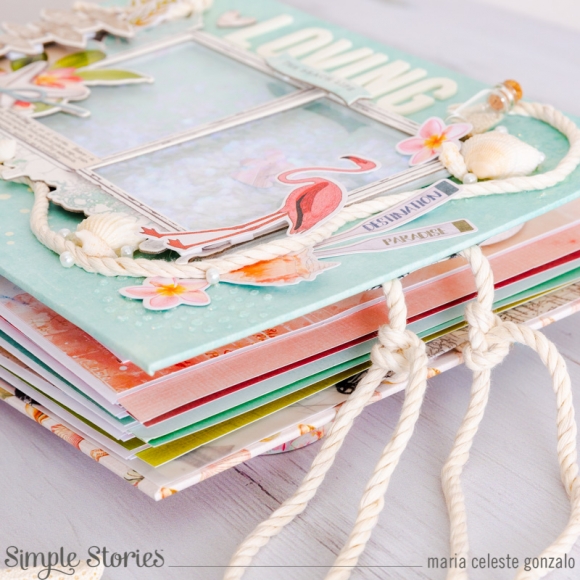
First thing to do is to prepare the stable cardboard pieces. As I always tell you, remember you can make this mini album in the size you want. For my project I cut 3 pieces of stable cardboard : #1- 9 1/2” w x 7 1/2” h (cut 2 of it), #2- 2 1/4” w x 7 1/2” h. I used two of the collection kit papers and one of the basic kit to cover all the structure. Besides, I picked one design paper for the interior. But, you have to wait to add the inside paper until you prepare the spine.
I made a basic spine. For making it cut a piece of white cardstock paper of 9 1/2” w x 7 1/4” h. Then you have to scored it in 1 ½”, 2”, 2 ½”, 2 7/8”, 3 3/8”, 3 7/8”, 4 ¼”, 4 ¾”, 5 ¼”, 5 5/8”, 6 1/8”, 6 5/8”, 7”, 7 ½”, 8”. As a result you are going to have a classic spine with 5 hinges. Another detail you can add are small stripes of color paper between them. Once the spine is ready, you can glue it in the interior of the mini album structure.
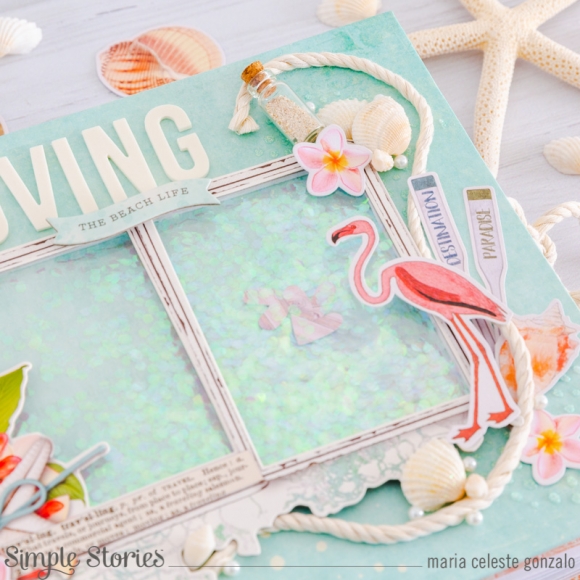
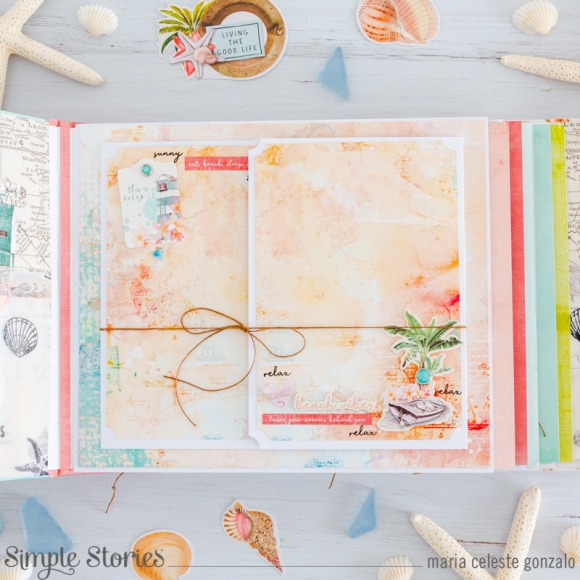
Try to find a special twine (similar for those you see in the boats or for nautical or sailor knots). It’s a wonderful detail for the cover and to close the mini book.
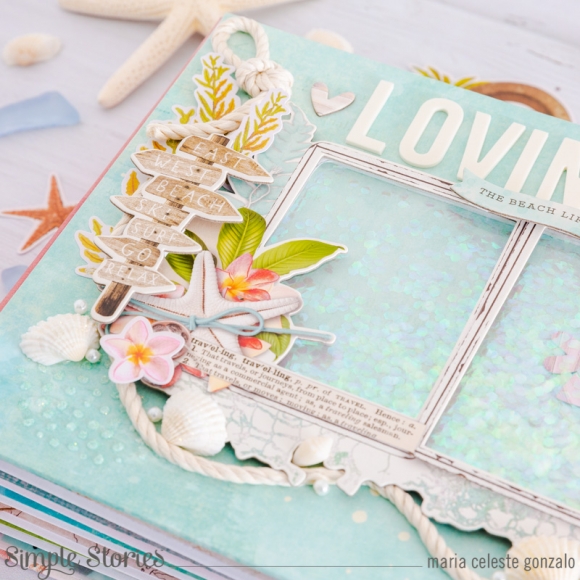
Now we are going to work on the cover. My design is full of details. You will see: real sand, texture paste, seashells, die cuts, chipboards, small beads and I transformed one of the layered frames into a shaker. Play with all the elements you have to create something beautiful and special! You will love it!
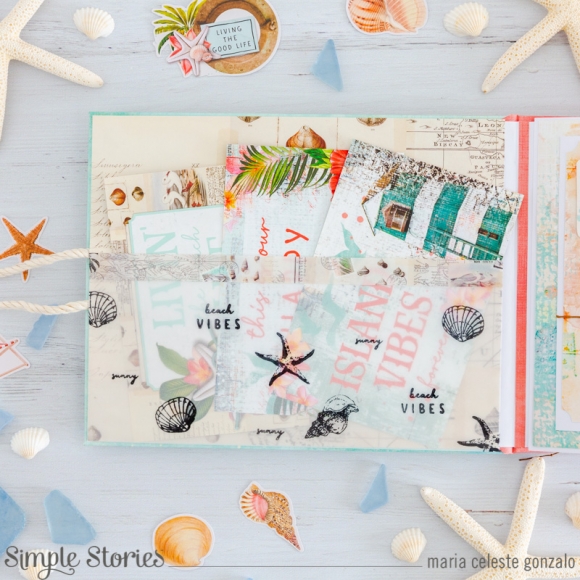
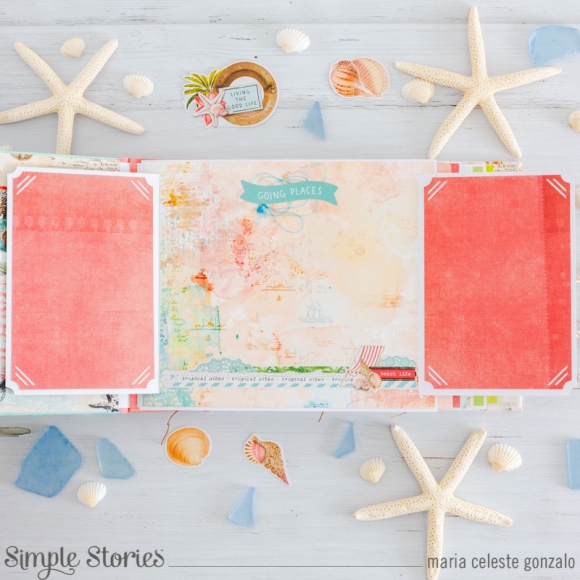
Let´s go to the interior! First thing you’ll see is that I made two vellum pockets. I decorated them with washi tape and stamps. It’s a lovely detail and it will give you a lot of space for pictures and memories. Before adding the pockets and the interior paper, remember to glue the twine for closing the mini book.
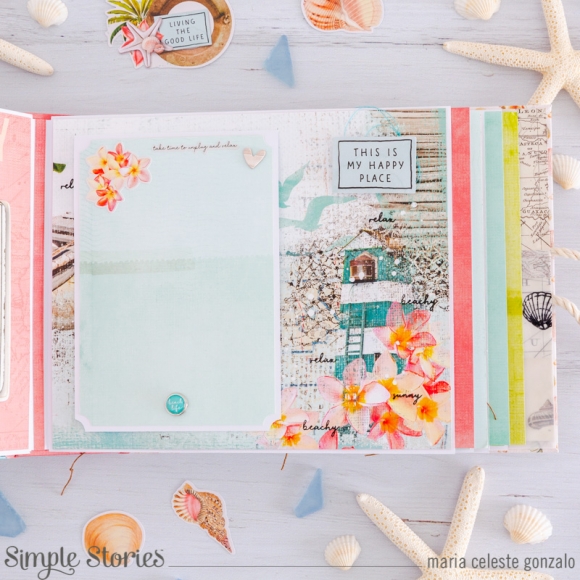
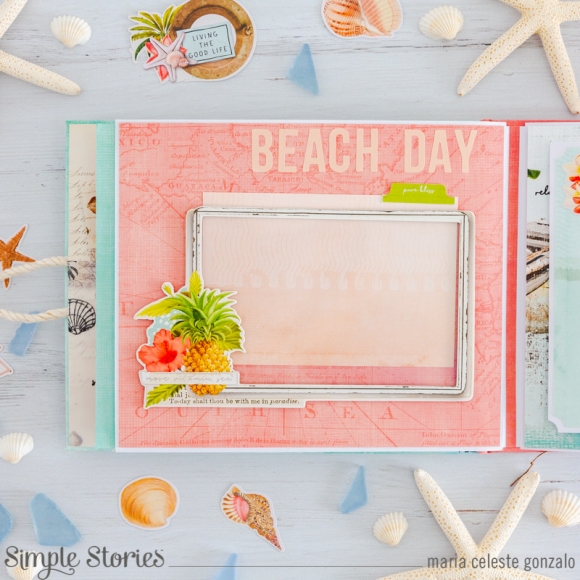
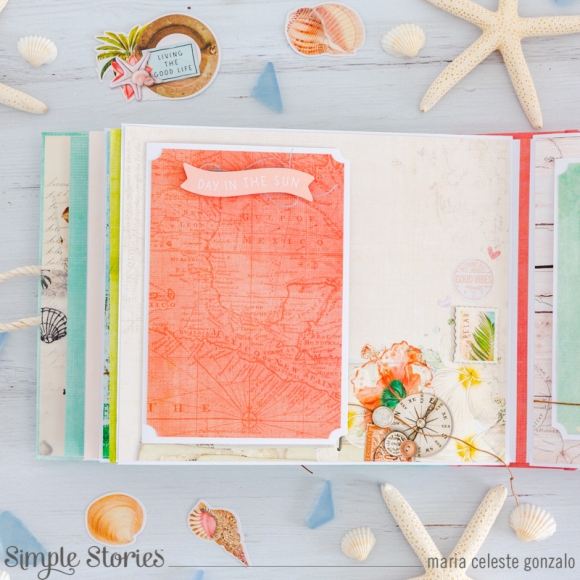
We are now going to make special pocket pages and you can add an extra page inside of them using the papers of the basic kit. Remember that these pages must be a bit smaller than the pocket pages. Time to decorate! Bring all you've got to your table… As I always say… magic begins! You can make as many interior structures as you like. One idea is to use layered frames to make pockets or “windows” for your pictures. Besides, you can make another shaker… they are amazing!
To decorate the pages you can use all you have. Die cuts, stickers, chipboards, enamels dots and washi tape. As you can see, this album has a lot of space for pictures. I even left some pages and places just for them.
I hope you like this idea! You can put all your favorite pictures in it. You will have plenty of space for them and for keeping travel memories.
See you next time!
Supplies