Hey everyone!  Andrea here with you today to share a fun board book made with the Good Day Sunshine collection from Simple Stories.  The wood grain papers and embellishments in this collection give it a “beachy” feel that make it great for your outdoor summer photos.

This book is made from chipboard pieces cut to 5 1/2 x 10, and is held together by O-rings.  Once I had all my pieces cut, I covered them with papers from the collection and sanded all the edges to give it a weathered look.  I added SN@P! Cards on the ends of some of the pages and tied ribbon around the entire page to add an extra element.

The cover has some paper flowers attached to the ribbon by a decorative brad, and I hung some beads and a button off of that for visual appeal.

Once the pages were covered I added my photos.  I matted them on white cardstock so they would stand out against the background.  The photos show how we spend our summer days, and this album will be our summer “coffee table” book.

Once the photos were added it was on to embellishing, and when it comes to that, all I can say is, “LAYER, LAYER, LAYER”!  There are so many items in the collection to choose from, and all those embellishments around a photo really draw your eye to the focal point of the page.  The SN@P! Cards are great for this; place them behind the photo, and layer embellishments on to them.

Did you notice all the Simple Stories Silhouette cut files I used in this book?  Simple Stories has a TON of files to choose from, and they are great additions to ANY project.  I especially love the new “tickets”!

And what about the Clear Photo Stickers?!  These things are so hot, it’s hard to get your hands on them - I love them! 

I hope you’ve enjoyed today’s post and you’re inspired to make up a quick “coffee table” book of your own!

Supplies

Hello! Nichol here today with a new layout and card showcasing the new Sea To Shining Sea Collection. I am a huge fan of red, white and blue and this new Simple Set is perfection!

For my layout share today I used some of my favorite Simple Stories polaroid cut files from the Silhouette Online Store to create polaroid "folders" to stick my photos inside, fold over and staple shut. It's super easy to customize the cut files and create folders. In the video below I'll show you how!


I sized all the polaroid "folders" to 3" wide by 4.5" tall so that they would completely fill the width of my 12x12 layout. I placed my photos behind the polaroids with text cut outs and removed the text from the other polaroids so they cut smooth. I filled those with red, white and blue embellishments!

Layering stickers over a photo adds interest to the page and helps with the overall cohesiveness of the design.

I used a combination of letter stickers from Sea To Shining Sea and The Story of Us for my page title, replacing the "a" in "crabby" with the cute crab from the sticker sheet.

I knew I loved the lighthouse and boat from the Sea To Shining Sea sticker sheet so I designed a "scene" using some steel rule dies plus the Simple Stories sunshine and cloud cut files from the Silhouette Online Store.


I popped up some of the elements and stickers on my card for subtle dimension.

Silhouette Cut Files: Sun Card (Design ID #61845); Cloud Circle (Design ID #61226); Month Polaroids May-Aug (Design ID #55321); Awesome, Sn@pshot and Good Stuff Polaroids (Design ID #54010); Fabulous Polaroids (Design ID #54976)

Supplies

Hi Simple Stories and Kerri Bradford fans! Rebecca Keppel here for day 6 of the Designer Team Up with the Simple Stories & the Kerri Bradford Studio design teams.  Kerri's team will be working with our collections and we'll be working with her fabulous cut files.  We'll be doing some fun giveaways, sharing a discount code to Kerri's store and offering a freebie cut file, so keep reading and make sure to visit Kerri's blog as well as join us again here each day this week to parcitipate in the fun!, So excited to share with you what I have created with Kerri bradford studio digital design cuts.

Today I've combined Kerri Bradford Studio's fabulous digital cut files with my current favorite Simple Stories collection Good Day Sunshine. The combination is absolutely addicting and I am willing to bet my next bunch of layouts will include the same! I started with Kerri Bradford's Enjoy the Sunshine cut and the Simple Stories Good Day Sunshine Basics to cut out a large sun.

The sun comes in two pieces and I love seeing the white background cardstock in between. I machine stitched around both to add texture. Next I cut out the "Enjoy" part of the file. The word comes in two parts, so I cut the Joy out with Simple Stories Blue Skies cardstock and the "EN" was cut with the Basics Beach Wood. I added the chipboard beach ball to the center of the "o" because it fit there perfectly ;)

I cut the last part of Enjoy the Sunshine with Simple Stories Carefree patterned paper. By turning the paper 90 degrees and cutting, I was able to see the entire rainbow of colors in the two words "the sunshine."

Last, but not least, I also used the Have a Great Summer cut. I removed everything besides the glasses and cut the frames from the Teal Basics and the lenses from the Beach Wood Basics.

This was my first opportunity to use Kerri Bradford Studio's digital cuts, but it will definitely NOT be the last! The KBS website is easy to navigate, the files are a breeze to download and use and they work so well with Simple Stories designs! 

Now for some fun!  This week we'll be giving 3 random lucky winners a $25 Spending Spree to Kerri's store

Hop on over to her site, check out what her design team did today with our products, then check out her store.  Come back and leave a comment here telling us what you saw and loved and you'll be entered in the giveaway.  Even better, when you find some things there that you just can't live without, you can save 15% off on orders over $20.  And hey, she's giving away some fun new Simple Stories product on her site as well, so head on over!


Supplies

Hi there. Angella here with you today for day 5 of the Designer Team Up with the Simple Stories & the Kerri Bradford Studio design teams.  Kerri's team will be working with our collections and we'll be working with her fabulous cut files.  We'll be doing some fun giveaways, sharing a discount code to Kerri's store and offering a freebie cut file, so keep reading and make sure to visit Kerri's blog as well as join us again here each day this week to parcitipate in the fun!

I am super excited to be able to play with Kerri's designs. I received the Click, Lucky Stars, and Feathers kits - the designs are fabulous and worked perfectly into my project.

I've decorated a ship's wheel caddy using the Sea to Shining Sea collection -

The caddy has 6 circle pages that sit inside, I covered the pages with Sea to Shining Sea patterned paper and I attached one of the pages to the front of the caddy using 3D foam, so I could decorate the front with a base.

I printed Kerri's “love this Grey Overlay” (from the Click kit) so I could aattach to the front cover using 3D foam.

I cut camera- insta, Stars and feathers for my pages using my Zing die cutting machine.

I added dimension to my pages with the feathers - I cut 2 sizes out with co-coordinating papers and machine sewed them together with a cute bow to finish off!.

Tip - add straws with foam balls attached to the end for great embellishments for your projects!

Here's a few close-up shots.

Now for some fun! 

Kerri has created this FABULOUS freebie cut file for our team up this week!

How cool is that?!!  To download the free file, click the image or click here!  Kerri has quite a few freebies on her site, you can check them out here!

This week we'll be giving 3 random lucky winners a $25 Spending Spree to Kerri's store

Hop on over to her site, check out what her design team did today with our products, then check out her store.  Come back and leave a comment here telling us what you saw and loved and you'll be entered in the giveaway.  Even better, when you find some things there that you just can't live without, you can save 15% off on orders over $20.  And hey, she's giving away some fun new Simple Stories product on her site as well, so head on over!


Supplies

Hi, it's Wendy here today for day 4 of the Designer Team Up with the Simple Stories & the Kerri Bradford Studio design teams.  Kerri's team will be working with our collections and we'll be working with her fabulous cut files.  We'll be doing some fun giveaways, sharing a discount code to Kerri's store and offering a freebie cut file, so keep reading and make sure to visit Kerri's blog as well as join us again here each day this week to parcitipate in the fun!

I was thrilled to get the chance to design with the Kerri Bradford Studio files for this team up!  After getting my files I sat down with my Cameo and began to cut everything!  Since my Cameo is downstairs and I create upstairs I will usually cut multiple pieces on white cardstock; things that I think I might use and just like and then I go create.   

I cut the saying Nothing Short of Amazing large (from the Say What #2 kit) to fit beside a 4x6 vertical shot, still without picking products or photos. 

Once I got to my scrap area I pulled some pictures that I thought might work and matched them papers from the new Under the Stars Simple Set and finally my cuts that I had made.  The picture of my son catching this big fish totally fit the saying and so they became my layout.  I knew I wanted an outdoorsy look which matched the woodgrain paper.  I added a little bit of color through the plaid and the dark blue floral grounded my pieces.

I fussy cut a few pieces (trees, tent, journaling spot, arrow) from the Elements #1 & #2 to add some decorations without overpowering my title and photo which were the main focus of the page.

As I put my final touches on the page in the form of my journaling, I added in some color by using phrases that were included on the Under the Stars Expressions sticker sheet.

For my next layout, I knew that Lucky Stars and star paper (also from the new Under the Stars Simple Set) were just meant to be, but my dilemma was what picture to use!

I had so many pictures that look so amazing on this paper and fit the title (from the Thank My Lucky Stars kit), but I chose to write about my son who will soon be one.  

My page was quite simple as I had a large picture and my words filling up the top diagonal of the page, but I knew I needed more color to MAKE my page.  As I sorted through the Under the Stars collection nothing really gave me what I wanted, until I bent up the star paper to see what was underneath and found the perfect color.

I debated about cutting a triangle off the page and flipping it over, but I was afraid that I might mess up the dimensions and it wouldn't "fit" back together again.  So I just left the page bent and adhered some white cardstock underneath giving me the perfect spot to write about how lucky we are to have our little boy.

A few added star veneers and my journaling completed my page.  The words 'for you' (from the February Fourteen kit) were cut from white cardstock, but I wanted to balance out the blue of the page on the bottom so I misted them with Heidi Swapp Navy mist to give them more weight.

I had so many more cuts sitting on my desk that I created another layout that you can find here on my blog; I'm also sharing some tips to getting great cuts!  Thanks for joining me today, I hope you are inspired to try some fun cutting.

Now for some fun!  This week we'll be giving 3 random lucky winners a $25 Spending Spree to Kerri's store

Hop on over to her site, check out what her design team did today with our products, then check out her store.  Come back and leave a comment here telling us what you saw and loved and you'll be entered in the giveaway.  Even better, when you find some things there that you just can't live without, you can save 15% off on orders over $20.  And hey, she's giving away some fun new Simple Stories product on her site as well, so head on over!


Supplies

Hi everyone in Simple Stories land. Heather Leopard here today for day 3 of the Designer Team Up with the Simple Stories & the Kerri Bradford Studio design teams.  Kerri's team will be working with our collections and we'll be working with her fabulous cut files.  We'll be doing some fun giveaways, sharing a discount code to Kerri's store and offering a freebie cut file, so keep reading and make sure to visit Kerri's blog as well as join us again here each day this week to parcitipate in the fun!

Today I have  another baby layout (see Month 1 and 2 HERE) using the new Hello Baby collection and the Kerri Bradford Thank My Lucky Stars cut file

I chose to super size one of the stars and use it as my bold flagplant on the page. Once I sized it how I wanted it, I sprinkled little clusters of stars in the white space, making sure to leave lots of room for the title. 

I backed each of the little stars with pattern paper from the Hello Baby collection and then either stitched around the stars or right over them. I trimmed about 1/4" of the edges where the large star was cut and adhered the white background paper to the subtle music sheet paper. I took the large, cut out star and adhered different coordinating papers in each section of the star and then added it over the music sheet paper. Last step here was to stitch around the outside border of the star and then again right over the inside cut for the star.

Can I just tell you that Kerri's fonts, especially the hand writing ones are INCREDIBLE?!?! I just love how it completes my page and ties everything together.

Thanks Kerri and Simple Stories for the amazing designs and collection. I can't wait to create with the other files Kerri blessed me with.

Now for some fun!  This week we'll be giving 3 random lucky winners a $25 Spending Spree to Kerri's store

Hop on over to her site, check out what her design team did today with our products, then check out her store.  Come back and leave a comment here telling us what you saw and loved and you'll be entered in the giveaway.  Even better, when you find some things there that you just can't live without, you can save 15% off on orders over $20.  And hey, she's giving away some fun new Simple Stories product on her site as well, so head on over!


 6x6 Paper Pads; Expressions Cardstock Stickers; Fundamentals Cardstock Stickers; Chipboard Stickers; Decorative Brads; Bits & Pieces

Supplies

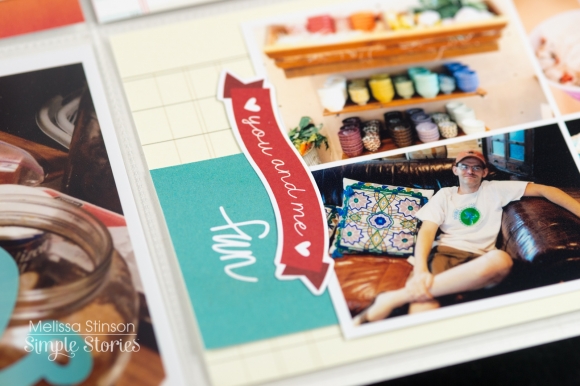
Hello Everyone! It's Kristine Davidson with you today for day 2 of the Designer Team Up with the Simple Stories & the Kerri Bradford Studio design teams.  Kerri's team will be working with our collections and we'll be working with her fabulous cut files.  We'll be doing some fun giveaways, sharing a discount code to Kerri's store and offering a freebie cut file, so keep reading and make sure to visit Kerri's blog as well as join us again here each day this week to parcitipate in the fun! 

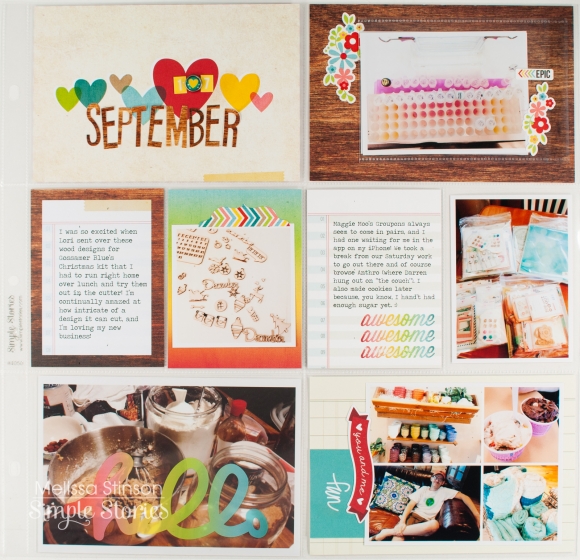
I couldn't be more excited to be working with Kerri's cut files this month. I love Kerri's work and all her cut files are so fun and easy to use!  In my previous posts I shared with you that I would document 2012 and today I'm sharing the month of July 2012.  I still haven't been able to find any photos of 2012 so I'm very thankful that I have some photos on Instagram. If it wasn't that I really wouldn't have any photos of the year 2012 and I'm also glad this LIFE Documented series has allowed me to save some of those memories ;-)

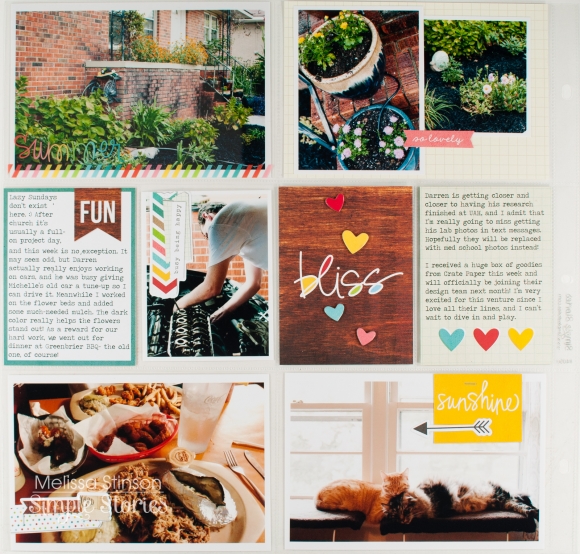
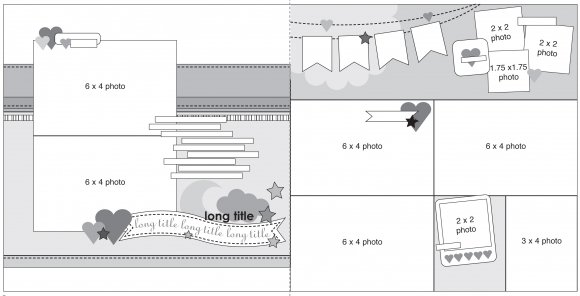
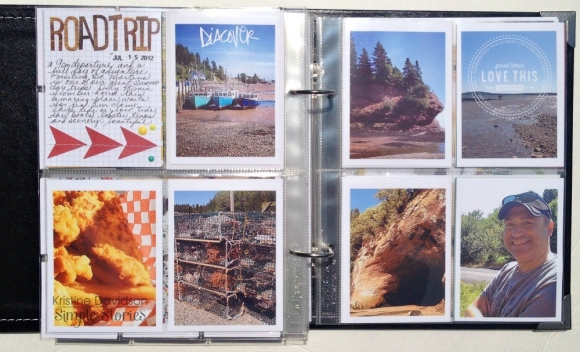
I am still using the 6x8" album and I'm including all formats of pocket pages. I haven't limited myself to the standard 4 (3x4) but instead including 2x2, 4x6, etc. It makes my album that much more versatile and I'm not limited to the standard size photos - that works for me.

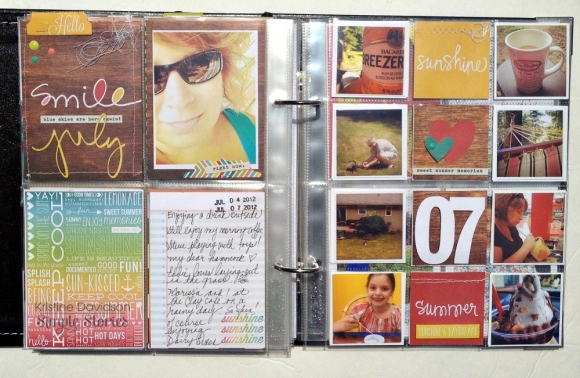
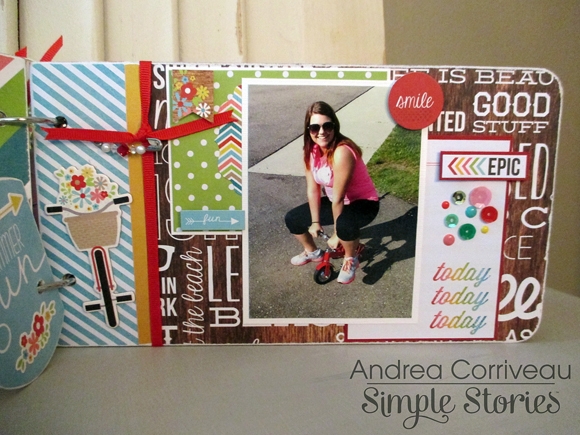
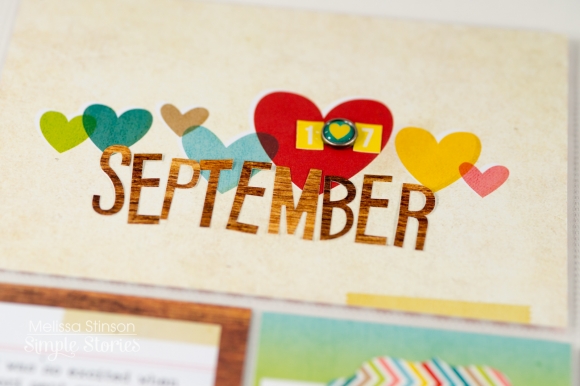
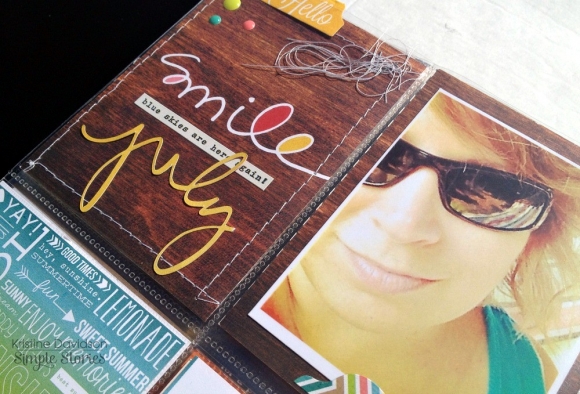
Left Side - I have 4 (3x4) photos. I used one of the 3x4 SN@P Cards to create my starting point for this month's spread. A photo of myself to see the changes in my wrinkles and hair color -- although I wear my sunglasses most of the time but still it's a selfie right?!  I cut 'july' from the Monthlies kit.
 

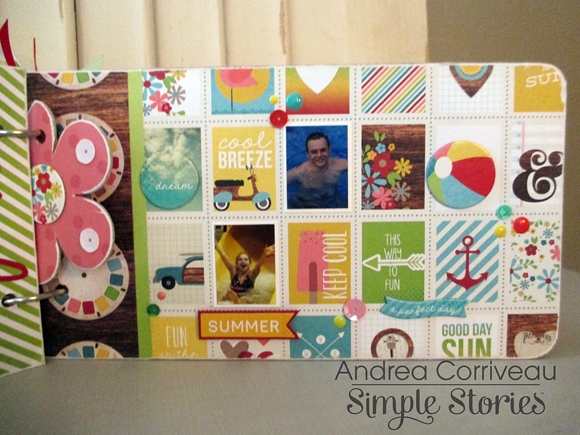
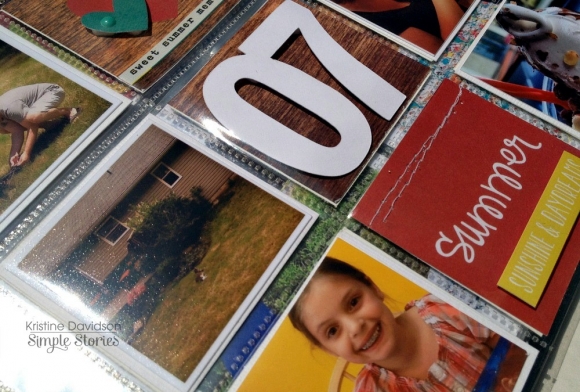
Right Side-  I have added mini 2x2 pictures to kind of showcase what my month of July was like in 2012. I love the mini format cause i can include so many small pictures that I really don't need to add in the corresponding pages.  I used the 07 from the Life Additions: Weeklies to reflect the month of the year, and it could even be 07 July - that works too!

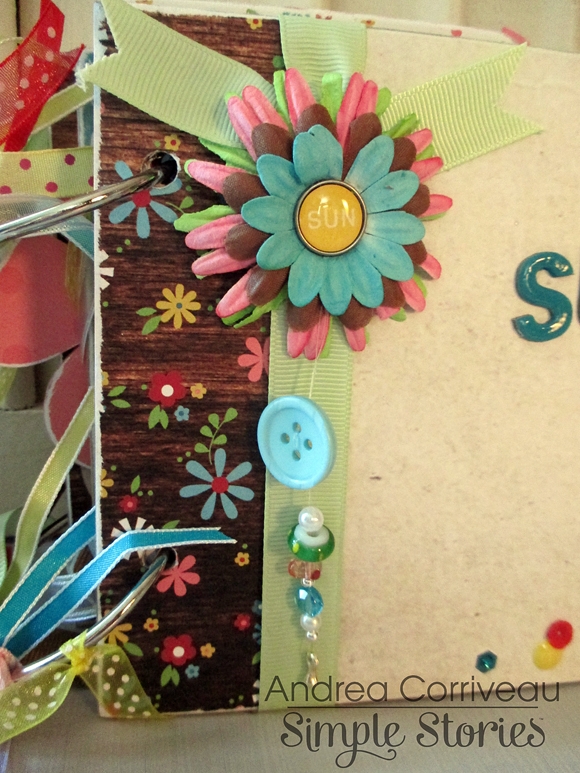
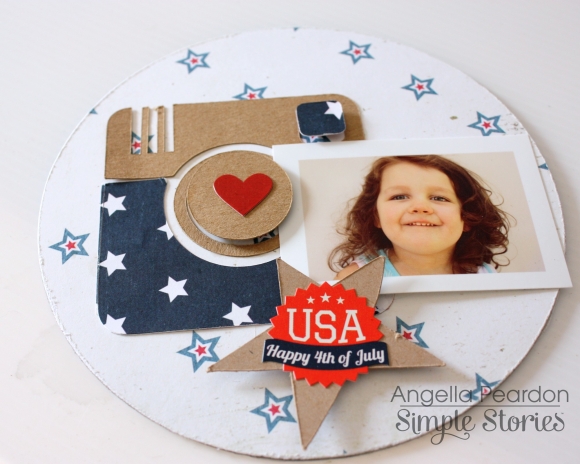
I loved adding Kerri Bradford's Silhouette cuts in this months Life Documented Project. Kerri's online store has been my go to place for great silhouette cuts and I her classes on  how to use they cameo is fantastic!

Spending time with my nieces was a big part of my summer last year. I tried to visit as much as i could. We did lots of crafts, scrapbooking, painting and playing outside.  The Left Side has a 6x8 photo of my nieces in their paint shirts and large canvas that we created. I decided I wanted to add this 6x8 photo and cut it into small 2x2 pieces to fit behind the previous photo display. I love doing this to larger photos and it's a great way to add a " fun" photo of the girls.

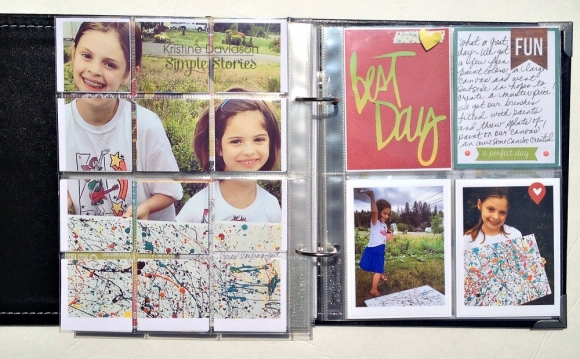
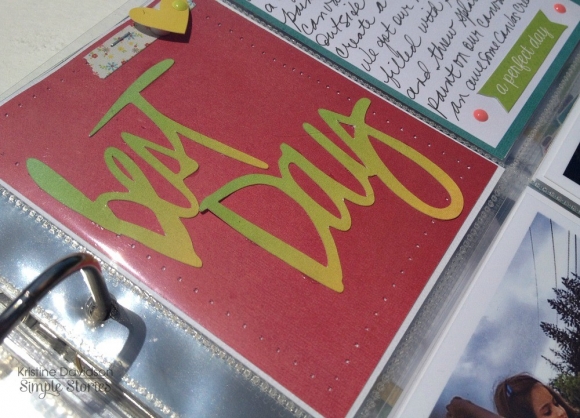
The Right Side of my spread has another awesome Kerri Bradford file - Best Day from the Let's Go kit.   I added some journaling on a card and also added two more photos of the girls playing with paint. I still have this canvas that we created together - I have it hanging in my scrapbook room. It reminds me of how much fun we had that day !


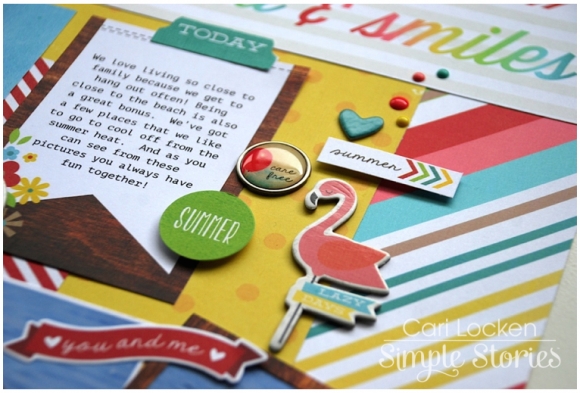
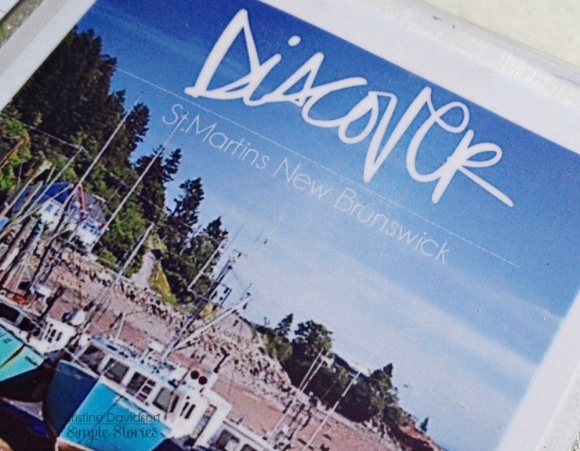
Another weekend in July we took a day trip to one of our favorite places - St. Martins which is only 45 minutes away from our house. It is always nice to visit and explore the caves, the seafood, the wharf and yes the peace and quiet.  It's called ROAD TRIP! - I used Kerri's arrow cut files from the Need Directions kit on this page as well as the word Discover (from the Well Traveled kit) and the Love This overlay (from the Click kit) as a png image on top of my photo as a layer. I LOVE that feature of her png images.

This transparent layer can be done with any of Kerri's png images. I use an old program to create this effect on my photos but i know if you use photoshop you can certainly do this. Wanna know how ? visit Kerri's tutorial here on you tube.

My sister came to visit with her two kids for a weekend and we played with some fun photo props - HOT LIPS! They were a hit, even with my sister being included in the photo!

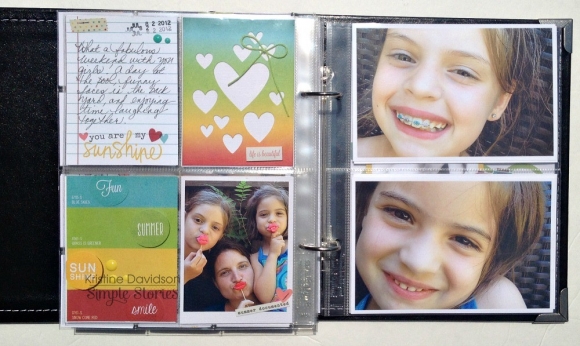
I sometimes have to bribe my nieces for photos so giving them a prop always makes this fun and a bit easier for me to take their picture. I added some journaling and larger 4x6 photos on the right hand side. I love these pictures of them, especially when Marissa had her braces!

 The Final Details -

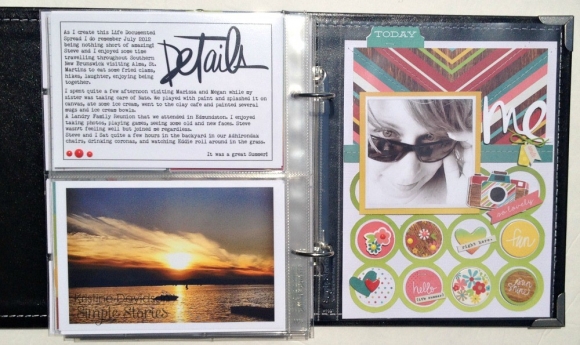
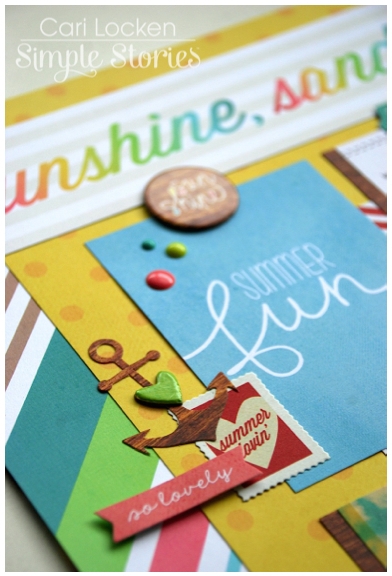
I added a Kerri Bradford png image (Details from the Happy Stuff kit) image to my 4x6 journal card. I also used a typewriter font to add some thoughts on the months' activities and a few more memories.  This also has a beautiful picture of a sunset that happens almost nightly on the Kennebecasis River in our town. It's beautiful! I added nothing on top of this photo although I could have.

The Final Page of July 2012 has a 6x8 layout of me.  ( it was later in 2012 when I realized my husband should be part of my Life Documented spreads! I promise he's coming in the album soon! )

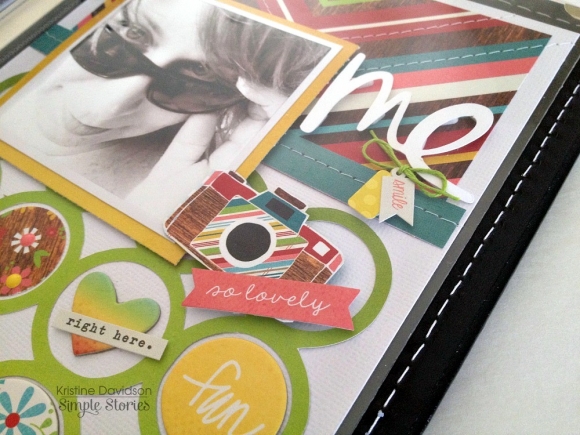
I created a small circle mat for my background from the Life Additions: Backgrounds kit and LOVE this! I will be doing this again in a larger format for sure. The title Me is also from the Well Traveled kit.

I'm using the 6x8 SN@P! faux leather album in black for my Life Documented 2012 album.  The sturdiness, metal corner accents, and stitch details are fantastic features to this album but I really like the fact that it's timeless and because they are so well built and will endure the many years to come.  This Sn@p! album is so far the best I've been using.

I used a variety of inserts for this monthly spread - in the 6x8" size featuring 2x2" , 3x4" to 4x6 and also a full 6x8. The Sn@p pocket pages come in a variety that you can add to your album. PERFECT for any project! 

Now for some fun!  This week we'll be giving 3 random lucky winners a $25 Spending Spree to Kerri's store

Hop on over to her site, check out what her design team did today with our products, then check out her store.  Come back and leave a comment here telling us what you saw and loved and you'll be entered in the giveaway.  Even better, when you find some things there that you just can't live without, you can save 15% off on orders over $20.  And hey, she's giving away some fun new Simple Stories product on her site as well, so head on over!


Supplies

Howdy!  Layle here with you today.  This week you're in store for a treat - we're doing a week long Designer Team Up with the Simple Stories & the Kerri Bradford Studio design teams.  Kerri's team will be working with our collections and we'll be working with her fabulous cut files.  We'll be doing some fun giveaways, sharing a discount code to Kerri's store and offering a freebie cut file, so keep reading and make sure to visit Kerri's blog as well as join me again here each day this week to parcitipate in the fun! 

I've known Kerri for many years and I have to tell you she is one of the kindest, sweetest, and most talented people you'll ever run across!  I've been working with her cut file designs for the last year or so and am smitten with them :)

So, without further adieu, Simple Stories design team member Nancy is kicking off this fun week today!

Hey Simple fans, Nancy here today with a look at our pretty, soft new release, Hello Baby paired with some intricate cuts from Kerri Bradford Studio.This collections pairs a gender neutral color scheme, wood grains and beautiful soft patterns. 

The intricate cuts by Kerri Bradford Studio add texture and movement to the design. This background is called scattered petals, included in Kerri's Basic Backgrounds shape set.

The staples and enamel dots placed on the shape cut, add more color and texture to the background design.

The beautiful title was cut out of vellum to accentuate the intricacy of the script font. This title can be found in Kerri's Something to Say set.

Pairing Kerri Bradford Studio and Hello Baby is a perfect way to tell your most precious stories!

Now for some fun!  This week we'll be giving 3 random lucky winners a $25 Spending Spree to Kerri's store

Hop on over to her site, check out what her design team did today with our products, then check out her store.  Come back and leave a comment here telling us what you saw and loved and you'll be entered in the giveaway.  Even better, when you find some things there that you just can't live without, you can save 15% off on orders over $20.  And hey, she's giving away some fun new Simple Stories product on her site as well, so head on over!


Supplies

Hello, everyone! Melissa here with you today to share a Life Documented layout using Simple Stories' Good Day Sunshine collection.

This layout uses photos from the first week of September in 2013, and, while September is the start of fall for many people, here in Alabama it is still most definitely blazing hot summertime weather. Luckily, blazing hot summer weather is my favorite, and Simple Storie's Good Day Sunshine was the perfect fit for the mood and feel of these pictures- from the woodgrains to the bright colors!

I used lots of the woodgrain print found throughout the collection on my layout as a second neutral to sit alongside the cream journaling cards. Since my photos include lots of brickwork from the exterior of our house and the butcher block island in our kitchen, the woodgrain helped to convey a home-y feel- perfect since most of the photos are of us keeping busy around the house.

You'll find a little pop of that woodgrain on my title card, too, where I used the woodgrain letter stickers to make my weekly title card.

The new Insta-Squares that Simple Stories has been making this year are some of my favorite pieces in the collections! I don't use Pocket Pages that have square pockets very often, but I still use these little guys a ton to create embellishments on my pages. Lately my favorite is to hang the square off the top or side and trim off the excess to create a feeling of movement on a page.

One of the best things about using a Simple Stories collection for a Life Documented layout is how quickly the coordinated products help you to put a page together! The designs and colors worked together almost effortlessly for me, and I was able to make this page in just under an hour- which is just about all the time I have to spare during the busy summer months!

Supplies

Hello everyone! Emily here today with a couple of projects to share from the oh-so-precious "Hello Baby" collection! When I first saw this collection, I immediately knew that this would be the one to use to scrap some of my daughters baby photos. She is now 6 years old, but you've got to start the baby book sooner or later, right? In my defense, I've been waiting for the perfect baby themed paper collection to come along. Finally, it has! 

I created this layout with a photo from my daughter's first birthday. I'm not usually a layout maker, but like I said, I love this collection! I couldn't wait to capture some of those moments from my daughter's early years in a layout. 

I also wanted to show that this collection can be used for more than just layouts and cards. So I created a fun little canvas. Wouldn't this be adorable in a nursery? I just love the soft colors in this collection!

Thanks for stopping by today!

Supplies

Hey There!  It's Vicki dropping in with a fun project I created using Hello Baby and a few items from DIY

I was sorting through all of the new releases from Simple Stories looking for something quick and fun to make.  I love the colours and graphics of the Hello Baby line but didn't really have a specific baby themed project in mind.  So I decided to whip up a project that didn't necessarily have to be for a little one.

I created a 3x4 accordion book with some of the DIY- Office Card Foundations, Kraft Tags and Word Stickers and my favourite elements from Hello Baby.

To create the base I chose five 3x4 cards and laid them out side by side.  I used washi tape to bind the cards together.  Make sure to wrap the tape around the front and back.

The cover is decorated with a 2x2 Insta-Square that I created a banner flag from and I added a few stickers.

On the second page I layered a DIY Word Sticker with a Hello Baby Expressions sticker.  The third page is the back side of a 3x3 Insta-square the I used to create a pocket. I then layered a 2x2 square on top and added a sticker.

For page four I layered a kraft tag with some heartland a word banner from the Bits & Pieces set.  The last page is layered stickers.

Here is one last look at the little accordion book.  I am going to add some photos on the back of the pages and add it in a pocket in a mini book.  This would also be a great addition to a SN@P! pocket or it could be added to Photo Flip!.

Thanks for joining me today on the Simple Stories Blog!  I hope you make the time to create something too!

Hi there! Marie here with you today to kick off the summer months with a Life Documented spread using the new Good Day Sunshine collection.  This line is here just in time to help document all of those summer activities from beach days to road trips.

School doesn't even get out for 3 more weeks here but trust me, it already feels like summer.  The flip flops have come out and the top is off the Jeep.

I started off my spread by adding some bright, colorful enamel dots to the Hello Summer Card.  The dots match the colors of the card which I love!

I tend to make my pages monthly instead of weekly, so I added a June calendar with some coordinating stickers and chipboard.

The second page is a mix of different things we've been up to lately.  A slumber party for my daughter, a road trip, and I'm just now starting to get the garden put together.

Nothing goes better with summer than ice cream, and once again I used the new enamel dots on a 4x6 card.  These enamels dots are my new favorite thing, I'm using them everywhere.

I placed a lot of stickers from this collection straight on top of my photos.  I think it adds a nice pop of color and a fun element to the pictures.

I hope you've enjoyed taking a peek at my first Life Documented spread of the summer.  Thanks for joining me today!!

Hello! Teri here today, and I'm here with another Life Documented project. I'm pumped to share with you a few pages I made with the Good Day Sunshine collection.

I recently went to Utah for the annual Editorial Board meeting for Paper Crafts & Scrapbooking magazine. I'm one of the magazine's Go-to Gals. Once a year, me and the other Go-to Gals go to Utah to meet with the editors to review the last year's worth of issues and brainstorm ideas for the next year's worth of publications.

Good Day Sunshine was the perfect collection to use to document my adventure because it's just such a fun, happy collection! Even though the purpose of my trip was business, there was a lot of fun involved. We got to explore Park City, visit some scrapbooking businesses and even spend some time crafting together. Plus we got to spend a lot of time hanging out with each other, which was the best part! 

One of my favorite elements on this page is the Smile SN@P! card. I used my trusty, old-fashioned typewriter to type "(You are in Utah!)" on a strip of cardstock and cover up the "It's Summer" phrase that appears under the Smile word. I also added a brad, a few stickers and some enamel dots.

I also dig this pocket. I started out with a 4x6 SN@P! card and then added 3x4 card on top of it with some typed words about the trip. The left side features a few random bits and pieces from the Good Day Sunshine collection that I clustered together.

All the pictures on these page just make me smile! Such good, happy memories.

I love the "Hello Super Fun" pocket! I die-cut the "super" circle using this Silhouette cut file; to make the banner die-cut pop, I tied some floss around it and adhered it to the 4x6 SN@P! card with foam tape.

I also altered this SN@P! card. I used a chipboard heart and enamel dots. One of the things I love about the SN@P! cards is that you can use them as they come or you can sauce them up and really make them your own by adding a few embellishments to them. 

By the way, I'm using a 12x12 SN@P! faux leather album in red to document all my 2014 adventures in. I often scrapbook out of order so I dig that the album's ring binding allows me to do that. I used the SN@P! Pocket Pages Design 3 and 6 for these pages. It's nice that Simple Stories offers so many different styles of pages. I enjoy having creative options!

Thanks for stopping by today. I will see you again soon!

Supplies

Hello, friends.. Shellye here with you today!  After putting away my Spring wreaths this past week, I decided that I was in need of a new Summery wreath for our carport entry.  The idea of a pinwheel wreath caught my attention while visiting Pinterest, so I went from there!  You can use any type of wreath: straw, stryofoam, grapevine, etc. 

I kept this very simple by using sheets from the "Good Day Sunshine" 6X6 Paper Pad.  You can also cut your favorite 12X12 sheets to 6X6 size.  I've used a total of ten 6X6 sheets for this project.

Using a ruler and pencil, draw a line from one end to the opposite end and then repeat with the other side so that you have an "X" over the paper.  Next, I traced a small 1" circle around the center of the "X"...this gave me a guide of how far to cut the lines.

Using scissors or a paper trimmer, cut along each line up to the circle.  Next, use a 1/8" hole punch, make a hole at the RIGHT hand corner of each triangular flap.  Punch a hole at the center of the "X". 

Insert a large brad through each of the flap's holes and then through the center. 

I attached my pinwheels to a 14" grapevine wreath.  I wrapped a piece of thin gauged wire around (the backside of the pinwheel) the brad's prongs and then gave a good twist.  Thread the wire ends through the grapevine and twist together at the back of the wreath.

I also wanted a focal point to the wreath, so I covered a piece of scalloped chipboard and decorated with some pieces from the "Good Day Sunshine" Collection.

Make smaller pinwheels, larger pinwheels or a mix of both!  There are so many ideas for making these fun wreaths.  And because I work in Labor & Delivery, I also thought this design would be so cute as a "welcome baby" door hanger made with the new "Hello Baby" Collection :)

Thank you for visiting us at Simple Stories!

Hi everyone! Allison here with a Life Documented layout using the new Hello Baby collection, based on a new sketch that mixes both traditional scrapbooking with the SN@P! Pocket Pages.

You can download the full sketch with measurements and placements here.

The left side of the sketch is a traditional style of scrapbook layout while the right page uses combination of cards, photos, and elements with the SN@P! Pocket Page, Design 9.

Here is my layout based on the new Life Documented sketch -

I'll admit I might have gotten a little teary eyed while making this layout. The little guy in the photos will turn 9-years-old in just a few weeks. Where did the last nine years go? Everyone tells you that they really do grow up fast but I just don't think anything can prepare you for just how fast it really goes. It feels like just yesterday that he was this little.

I didn't start scrapbooking until he was about a year old so I have a ton of his baby pictures that I really want to get on pages and in some albums. I love that with the super cute designs and cards in the Hello Baby collection and the SN@P! Pocket Pages I can get that done quickly.

On the left page I kind of built the design around the "love you to the moon" banner on the patterned paper. I love that saying and thought it would make a great title for the page.

I added a few details to the banner, moon, cloud, and stars already on the paper. I used the alphabet stickers to create my own little banner with Drew's full name and then added a few sticker and chipboard hearts and stars.

At the top of the photos I added a few stickers and chipboard pieces.

On the right page I used the SN@P! Pocket Page, Design 9. I love the 12"x4" pocket along the top! I used one of the 4x12 elements for that pocket and then added some smaller detail photos on it.

I created a cluster of small photos of Drew's feet, ears, and nose accented with some stickers and chipboard pieces.

I love finding ways to incorporate stitching into the designs on the cards and elements. I added stitching for the string on the banner and then added some enamel dots to the center of the flowers.

Since these photos had a plain, dark background I had some room for adding a few details to the empty spaces. I love the little cut out banners and thought that one of those would stand out really well on the black in that photo. I also added a heart die cut and a chipboard star.

On the 3x4 card I added a smaller photo with a little Polaroid-style frame to it. I love adding small detail photos to the 3x4 cards!

I'm using the 12x12 SN@P! faux leather album in black for all of my Life Documented layouts. I love the beautiful construction and details! I also used the 12x12 SN@P! Pocket Pages, Design 9 from the Variety Pack.

I enjoy using several different styles of Pocket Pages and since the Variety Pack has so many great options and designs, I have a lot to choose from.

I hope you enjoy using the new Life Documented sketch!

 Wood Veneer/Music 3916, Blue Wood/Stars 3919, Yellow Wood/Dots 3920;

Supplies

Hi Simple Stories fans! Cari here with you today and I'm excited to share with you some layouts that I created using some of the new releases.

The first layout I'd like to share is one I created using the Good Day Sunshine collection.  I love the warmth of this collection and the super cute designs that capture what summer is all about.

We live close to the beach and spend many summer days there. So my layout is about our last big summer day at the beach before school started up last year.

The coordinating stickers, brads and chipboard add so much visual interest and texture.

And I just love the new Enamel Dots. Love them!!

The second layout that I'd like to share with you is using The Story of Us collection. This is a beautiful & romantic collection.  I love the chalkboard theme that is throughout the entire collection.  Plus you don't have to use wedding photos - the theme is love and you can definitely use other photos with this collection.

I decided to create a layout about my hubby and me.  We celebrated 16 years of marriage just a few weeks ago. Time flies and boy ... the wrinkles sure do creep in there too.  We really do look young (but we were 30 when we got married so not that young at all!!)

The Enamel Dots in this collection sparkle - how fun is that?

And once again, I just love how everything (stickers, chipboard embellishments, etc) all matches. It makes creating a project so much fun and easy to do.

Thanks for joining me today!

Supplies

Hi there! Donna here with you as your host for the blog today, and I have a few projects to share with you. First up, by now you know that Simple Stories is the featured manufacturer for the May issue of Scrapbook Generation’s CREATE Magazine! I created a layout using the single-page sketch for this month:

As soon as I saw the sketch I was immediately drawn to the horizontal row of 3x4 photographs. Since there were three of them I decided to do a page about my three boys and use papers and embellishments from A Charmed Life to create this layout:

I simplified the design by moving the journaling space so it would be in line with the photos. I also eliminated the two small detail photos, and instead put a circular die-cut from the Bits & Pieces embellishment pack in their place.

I used the chipboard word “Lucky” and a few arrows from the same collection to create a simple, easy, and fun title. These changes to the design reflect my personal style, but still keep the feeling of the original sketch. Here’s a closer look at the journaling:

I am indeed so lucky to be the mom to these three boys!

I also made a tag for the issue using the Homespun Collection:

In total, our team created 27 projects for the magazine! See all the sketches and projects and download the May issue for free, here.

Switching gears a bit, I’ve also had a lot of fun playing with the newest collections including Good Day Sunshine. I have loved every summer collection released by Simple Stories (remember 100Days of Summer!?) and this one is no exception. I decided to create a grid using 3x4 Sn@p! cards and photos of the same size.

Summertime is upon us and the papers and embellishments from this collection were perfect for documenting my guys enjoying some of the some sweet treats I’ve been making for them such as popsicles and ice cream.

We’ve made a few of our favorites, but have also been experimenting with new flavors like lemon-buttermilk sherbet and avocado ice cream. Yes, when you live in California avocado ice cream is not so strange! It is surprisingly good and even baby Sam enjoyed it!

I’ve mentioned this before several times, but all of the collections from Simple Stories mix and match so well. The background paper for this layout actually comes from the Hello Baby Simple Basics Kit. I absolutely love the colored woodgrain in that collection and the blue was a perfect match to the colors in Good Day Sunshine.

Thank you for stopping by!

Supplies:

 Fundamentals Stickers, 4x6 Sn@p! Cards,  Enamel Dots, Bits & Pieces, Beach Wood/Ledger


Hello Baby: Simple Basics Kit, Blue Wood/Stars


A Charmed Life: Collection Kit, Simple Basics Kit, Expressions Stickers, 4x6 Sn@p! Cards, Chipboard Stickers, Bits & Pieces, Decorative Brads, Happy Go Lucky, Be Still My Heart, Whitewashed Wood, Yellow Stripes


Homespun: Collection Kit, 6x6 Paper Pad, Chipboard Stickers, Grey Wood/Grid

Supplies

Hi, Angella here with you today, I am so excited to share with you what I have been creating  with the new Good Day Sunshine collection.

And as soon as I saw the new ranges I was so excited, I just could not stop smiling I had to start creating straight away.  I have created this little Bus Caddy for a few snapshots of my niece who loves playing around in the sun, her smile is a true sunshine.

I inserted a photo of her in a SN@P! Pocket - they're great for your little snapshots; just pop a photo or 2 into the pockets to showcase your memories.  The 4x6 SN@P! Cards are perfect for journaling.

For a great idea, fundamental 12x12 stickers matted onto cardstock and attached to straws make great embellishments.

And it is always fun to finish off creating a card

Thanks for joining me today!

Supplies

Pages