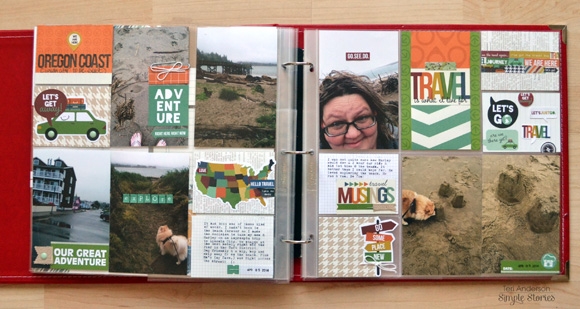
Hello Everyone. It's Mindi here with you today and I am sharing a Life Documented layout using the brand new The Story Of Us collection. 

Being the only scrapbooker of the family (besides my mom), I took on the task of putting together an album for my brother and sister-in-law, all about their wedding. 

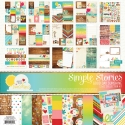
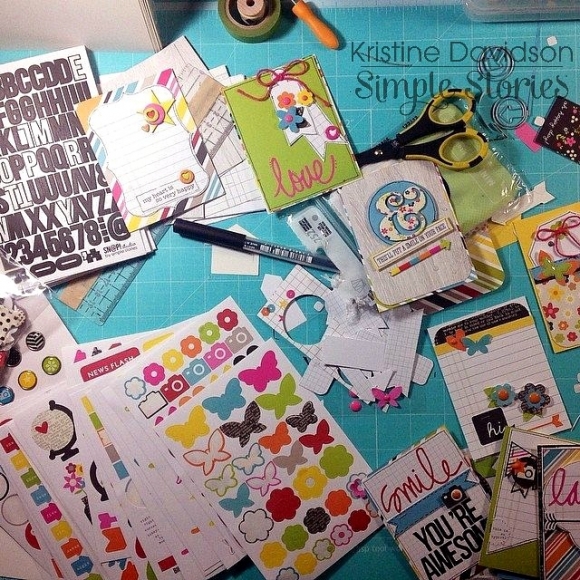
When I first saw this line, I knew it was absolutely perfect for my brother's wedding. The pictures, papers, embellishments seemed to be made for each other. I was in heaven. So many fun things to work with. 

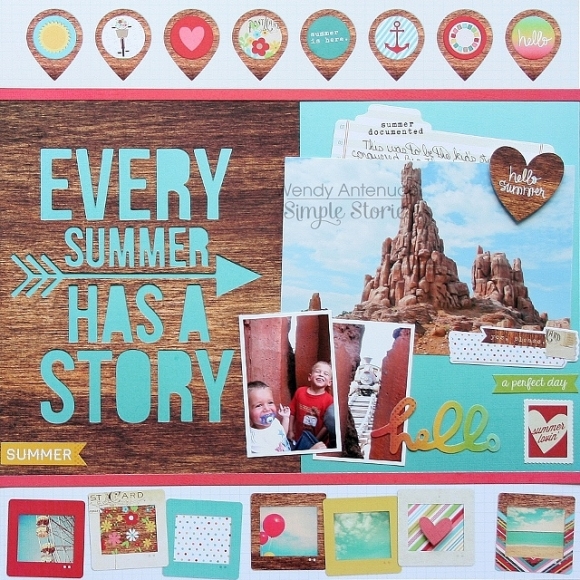
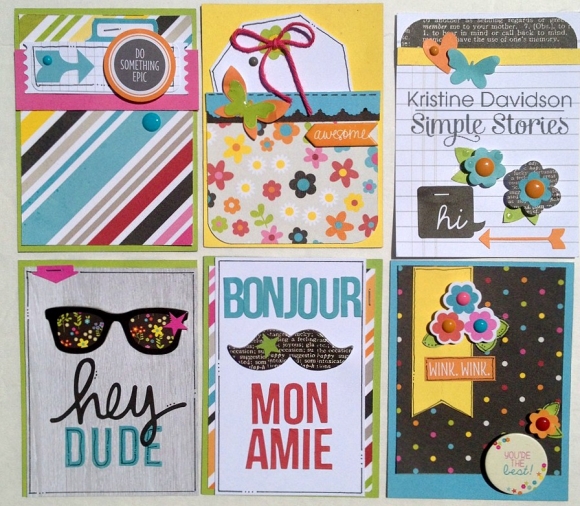
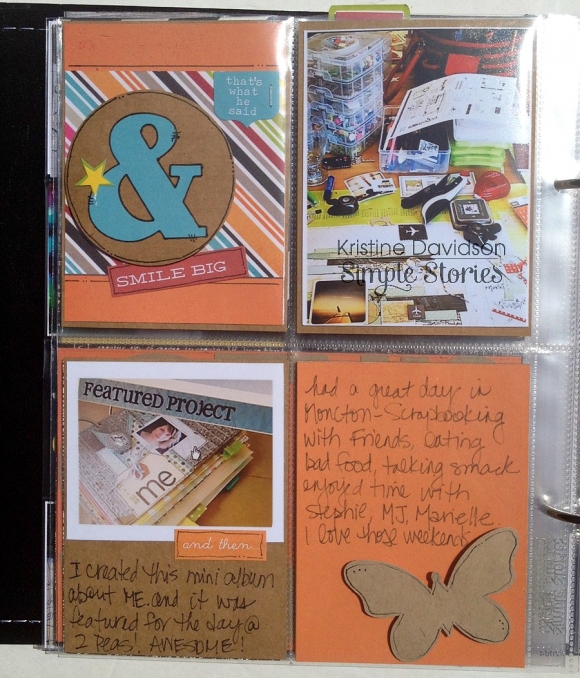
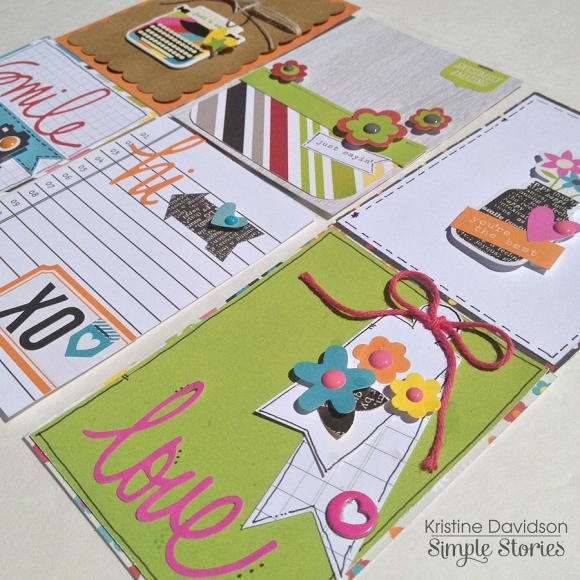
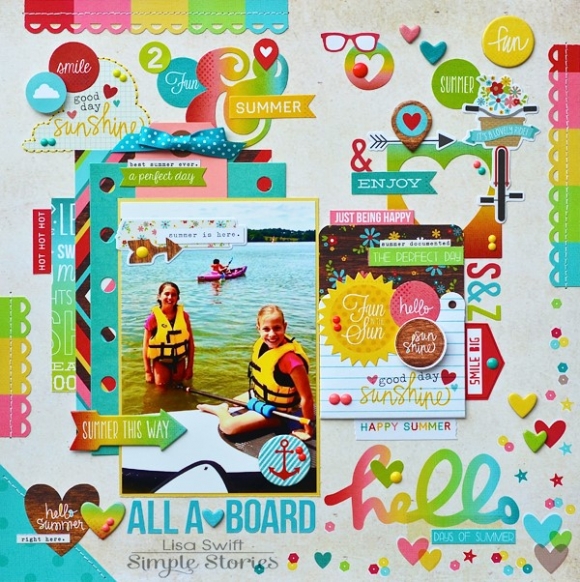
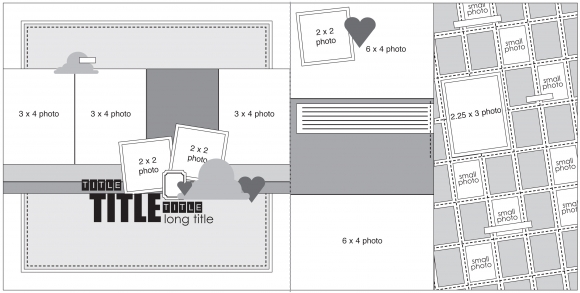
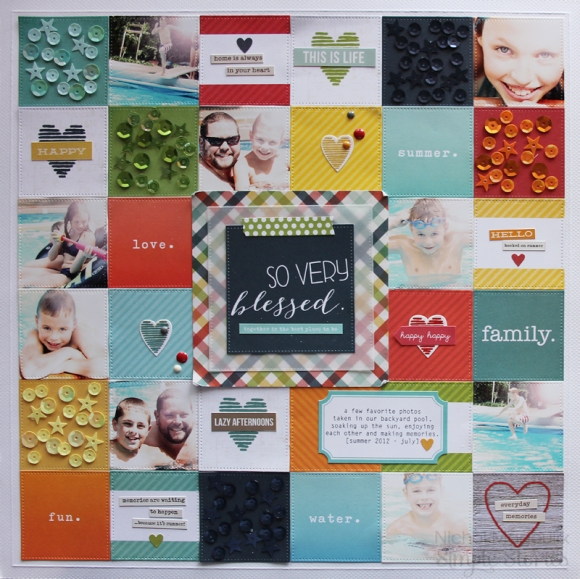
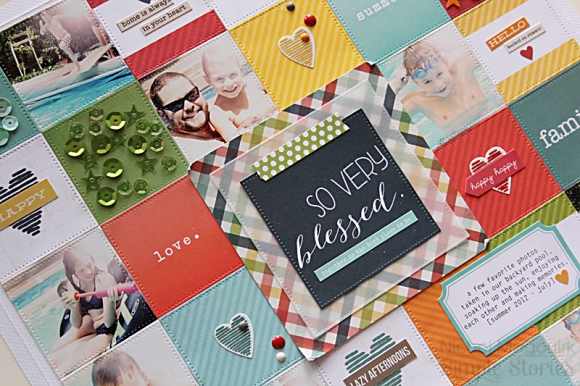
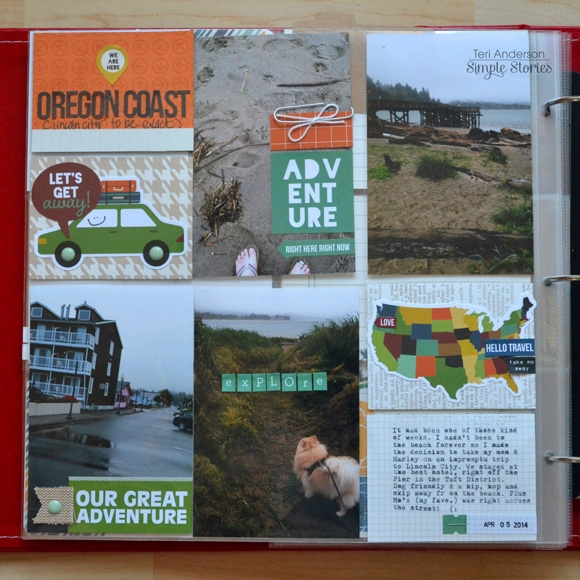
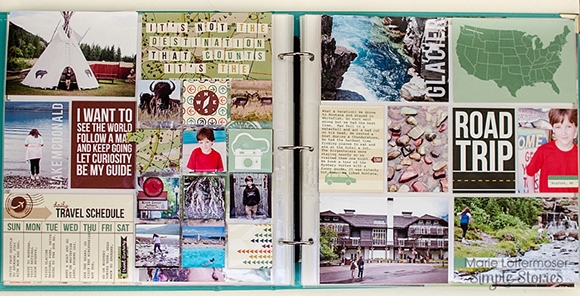
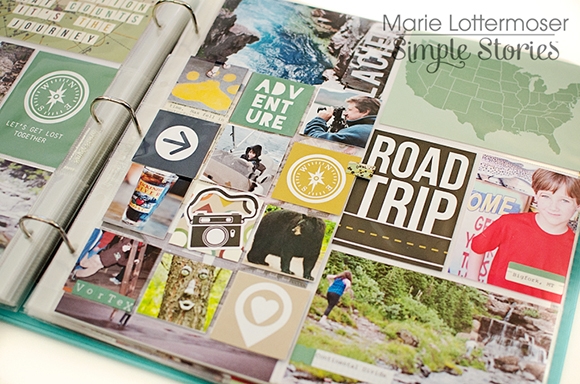
For this first page I used the Pocket Page Design 5. I had lots of vertical shots that needed to be included.

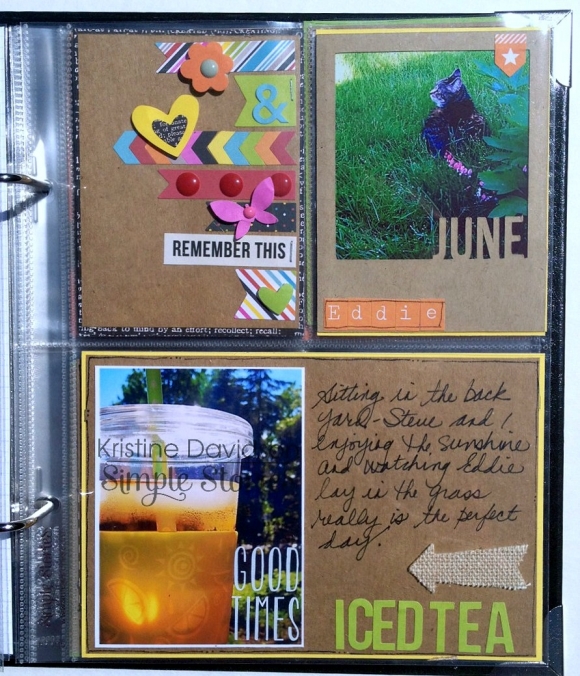
To start out I decided that this page really didn't need a title card, but simply some journaling surrounding the photos and to explain what was going on. These photos were taken at the hotel where we all stayed, the ceremony was held elsewhere. 

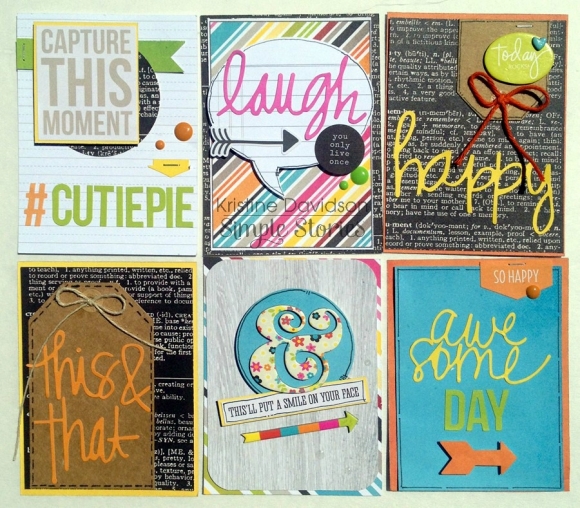
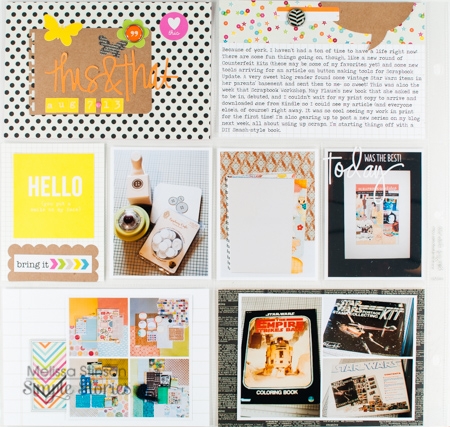
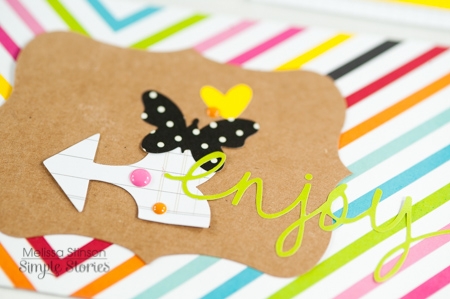
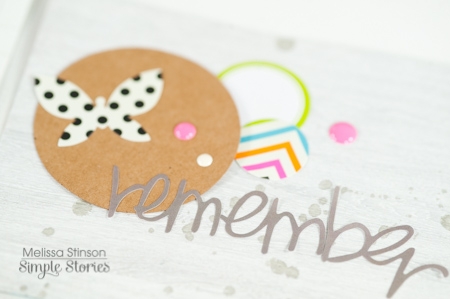
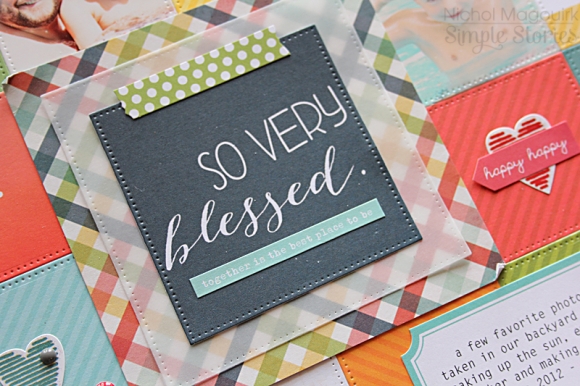
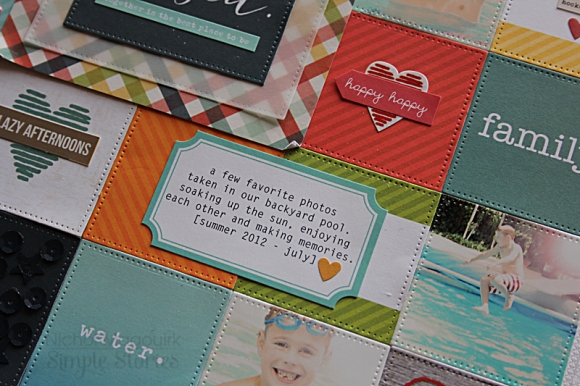
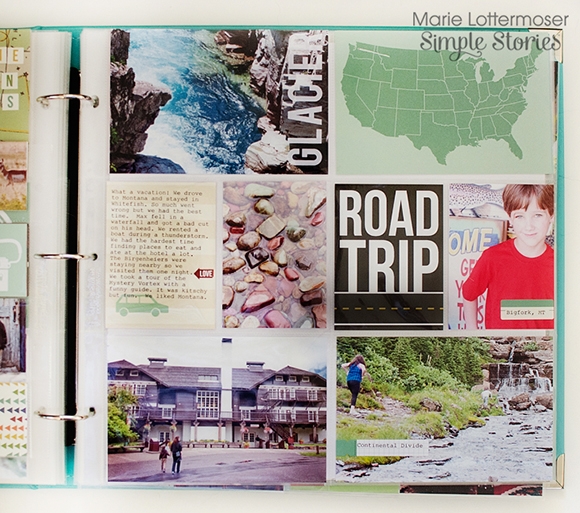
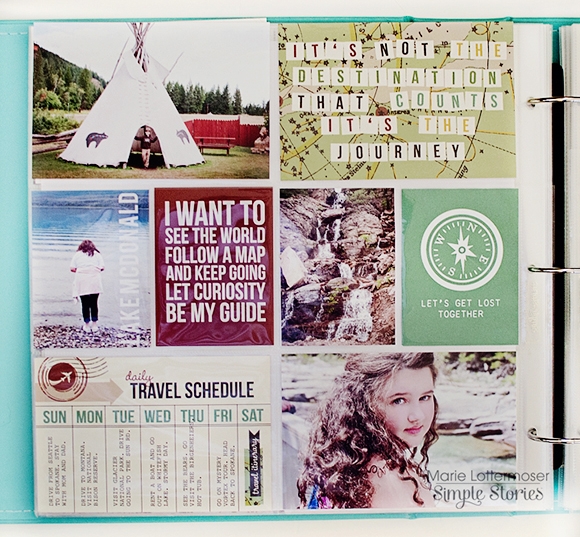
There were so many fun cards to choose from but I narrowed it down to this card. I gave my Brother and Sister-in-law some "homework" to do and they provided the journaling for all of the cards on this layout. I finished it off with some great embellishments from The Story of Us collection. 

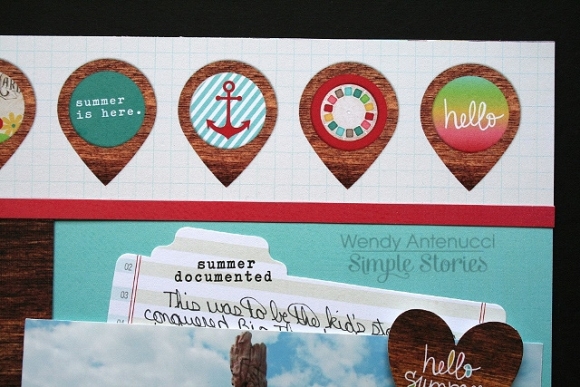
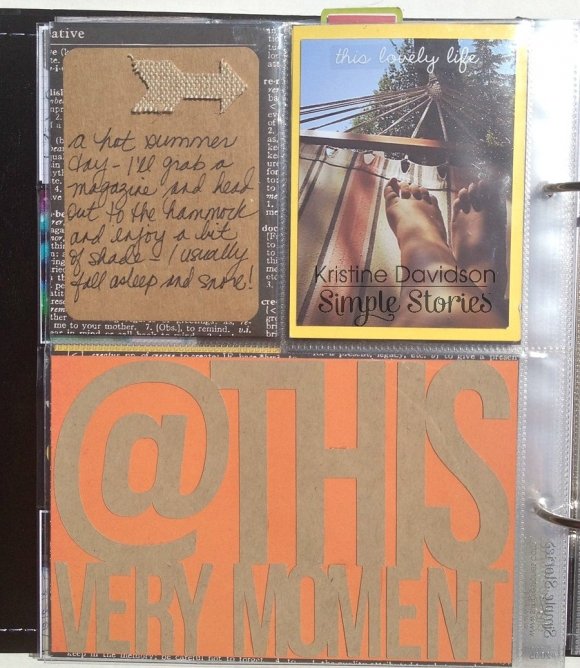
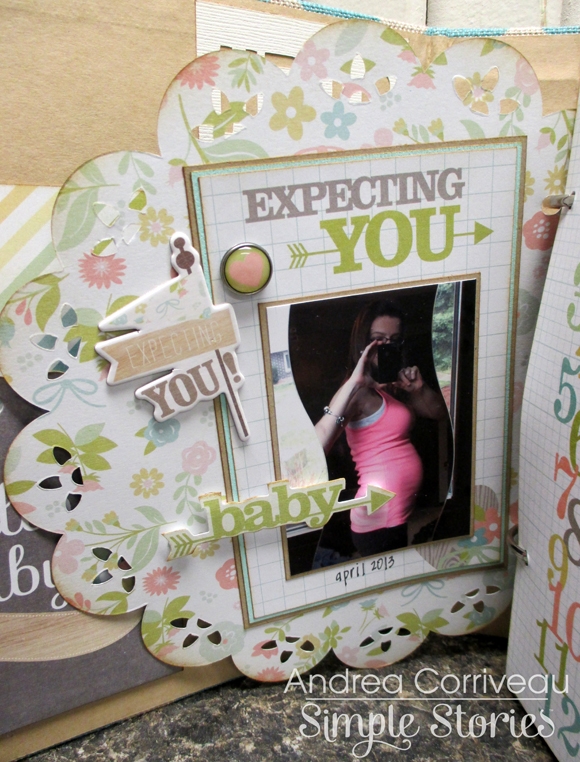
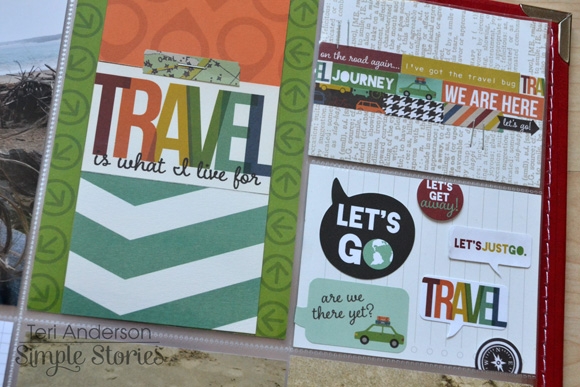
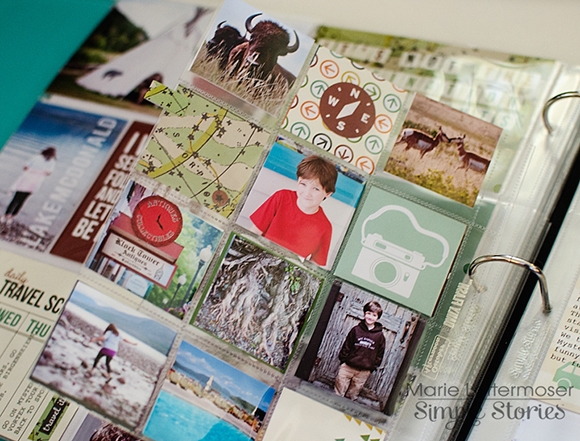
I am always looking for different ways, techniques, ect. to add to my Life Documented layouts. This time I used vellum for a different and elegant look.  Instead of printing off my picture on photo paper I printed it out on vellum. It is real easy to do and has a great, almost transparent, soft look. Here is a quick tip, rub a paper bag (for instance, a brown lunch bag) over the whole piece of vellum before printing. It makes the ink stick better. 

After I had my picture printed out on the vellum, I added photo corners and placed on top of one of the SN@P! cuts that I had embellished. 

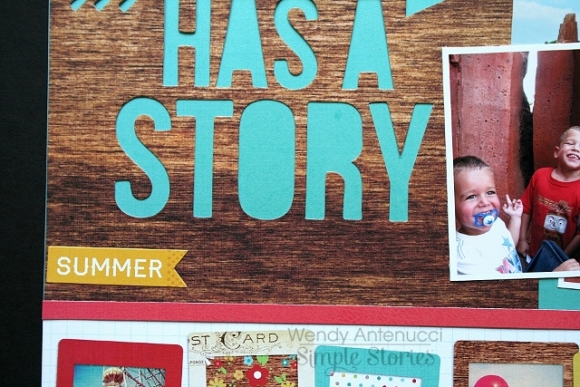
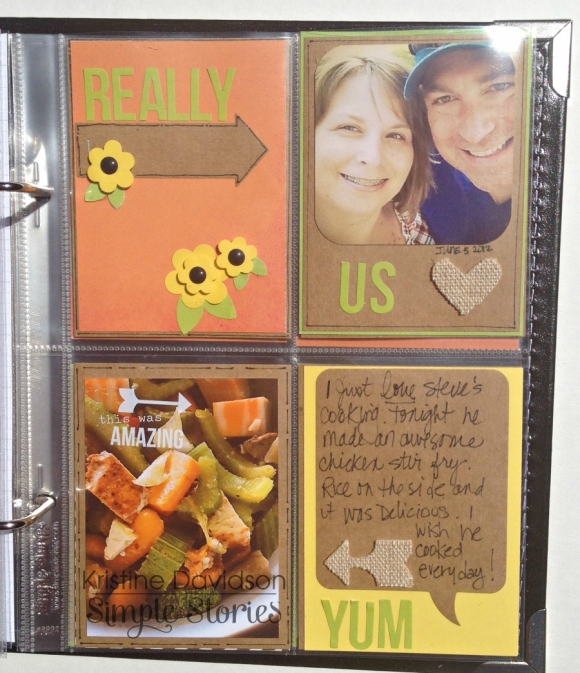
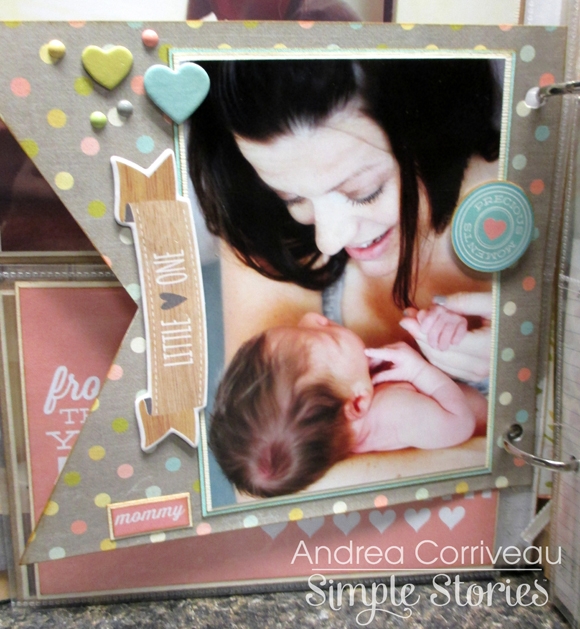
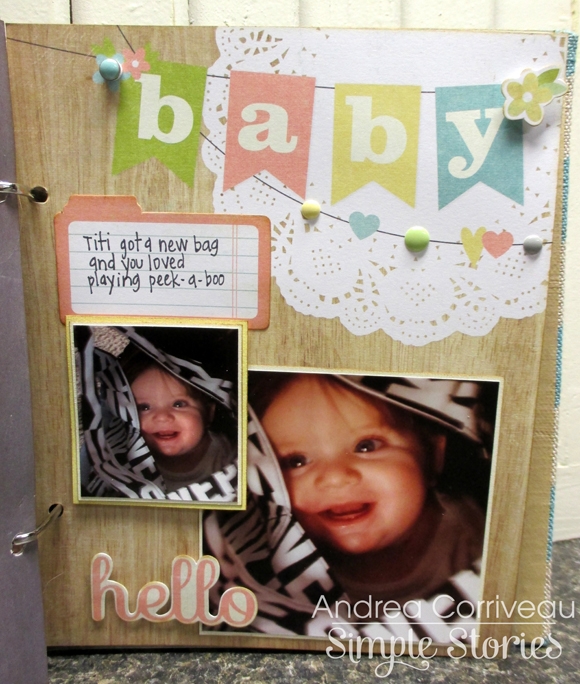
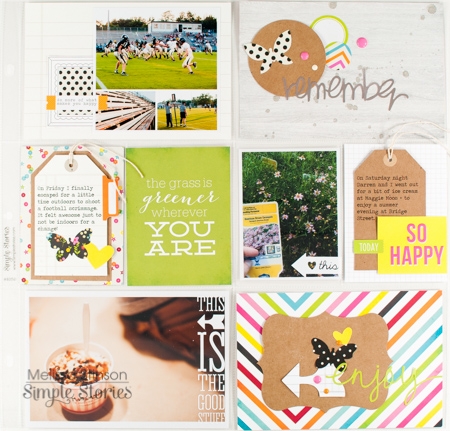
I used some more vellum for this photo. I started out with a picture printed on photo paper on the bottom in color. I then turned the photo black and white and printed it again onto vellum. I wanted to make the people in the photo the focal point and so I punched a circle in the vellum photo to make them stand out. 

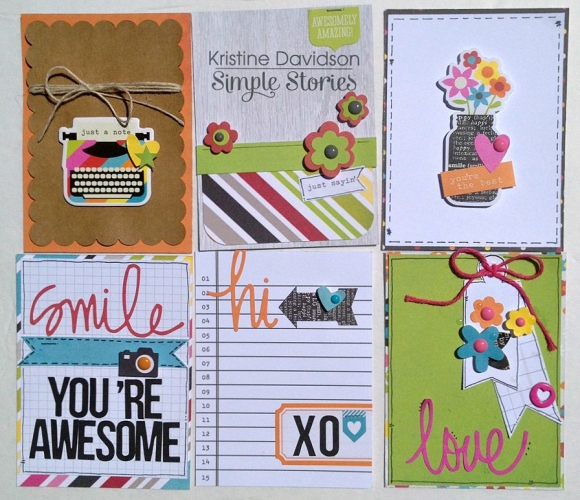
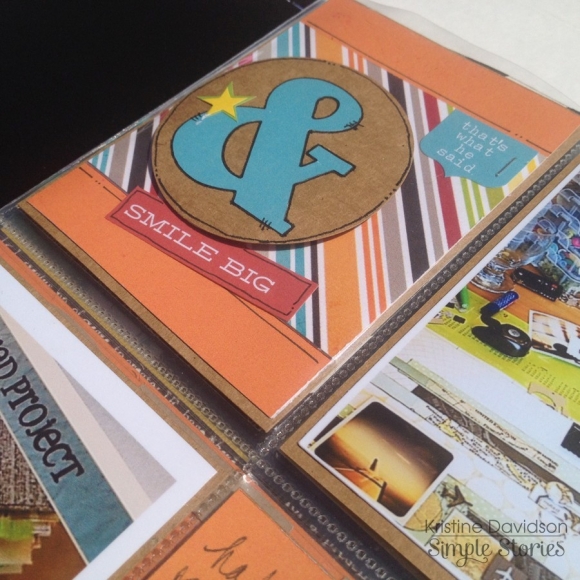
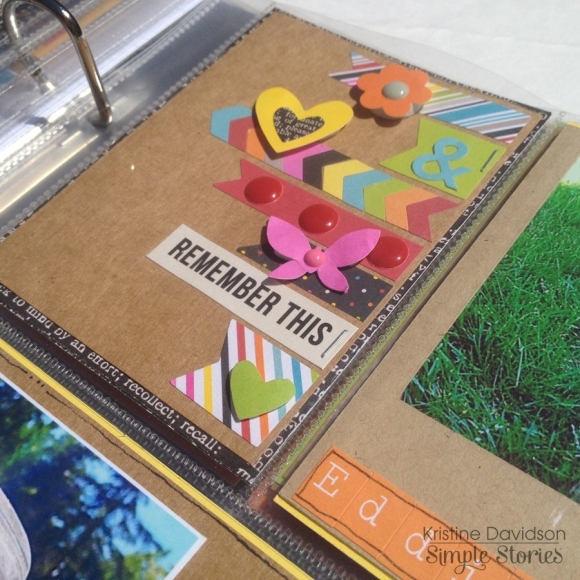
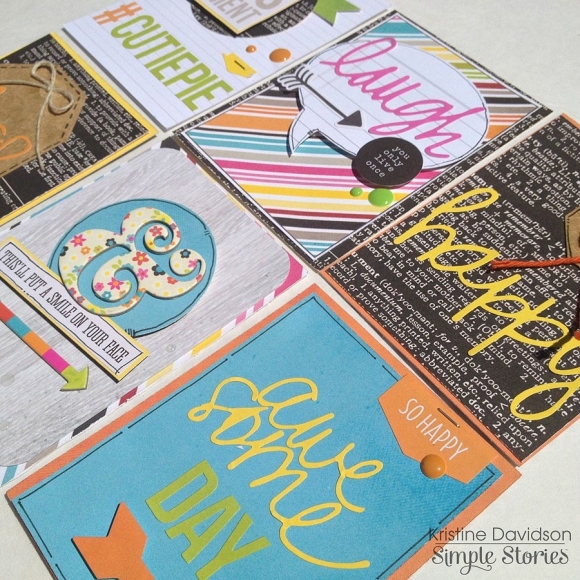
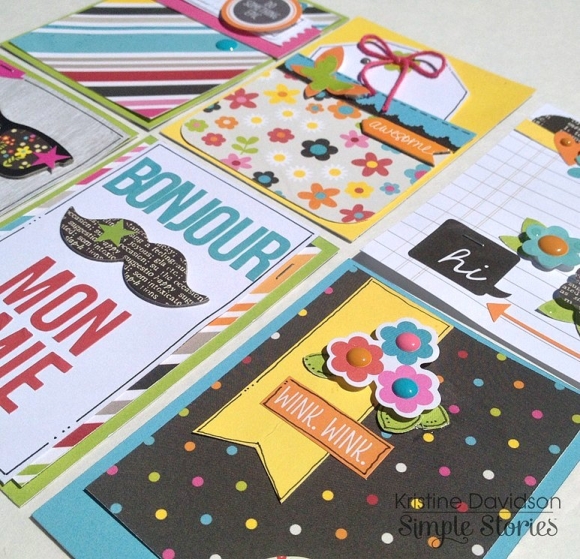
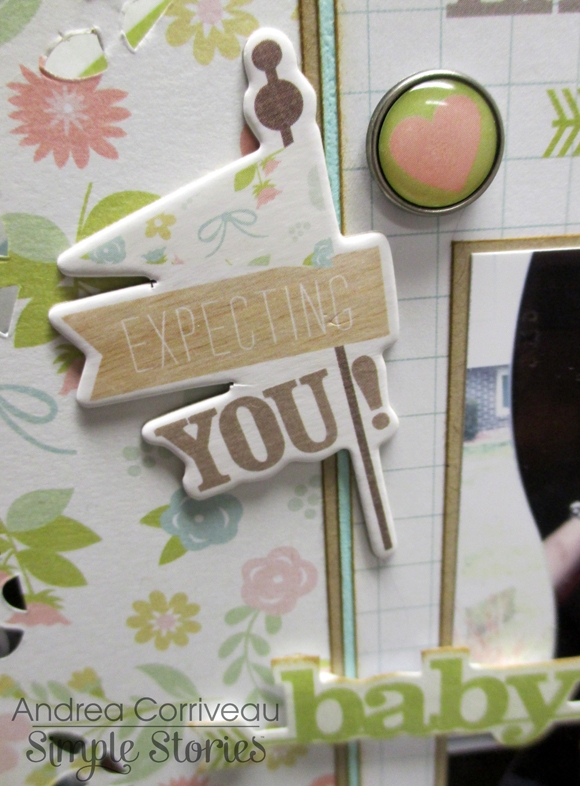
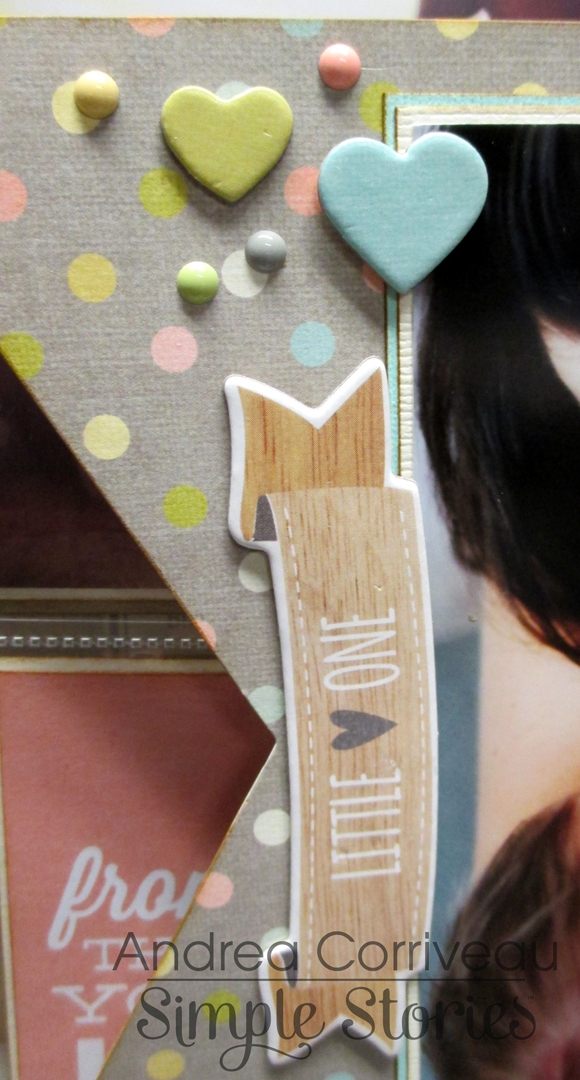
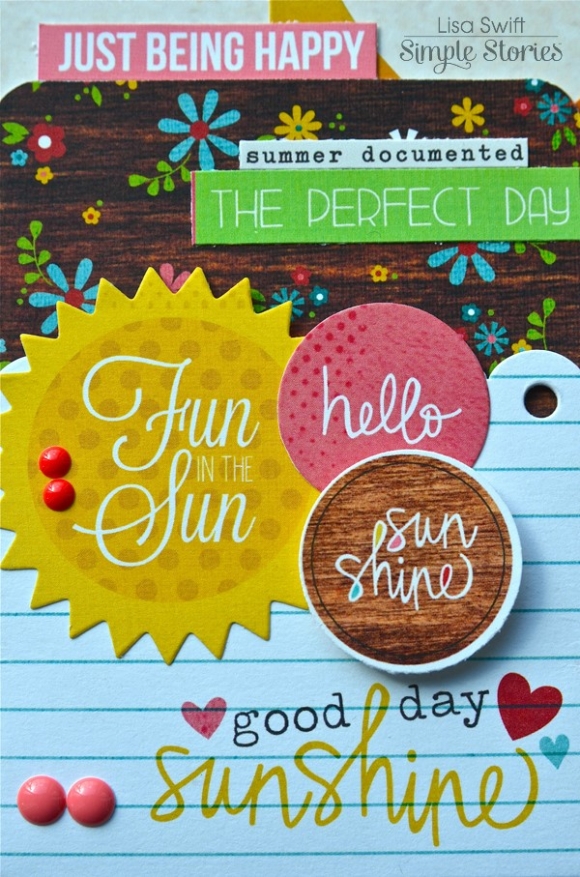
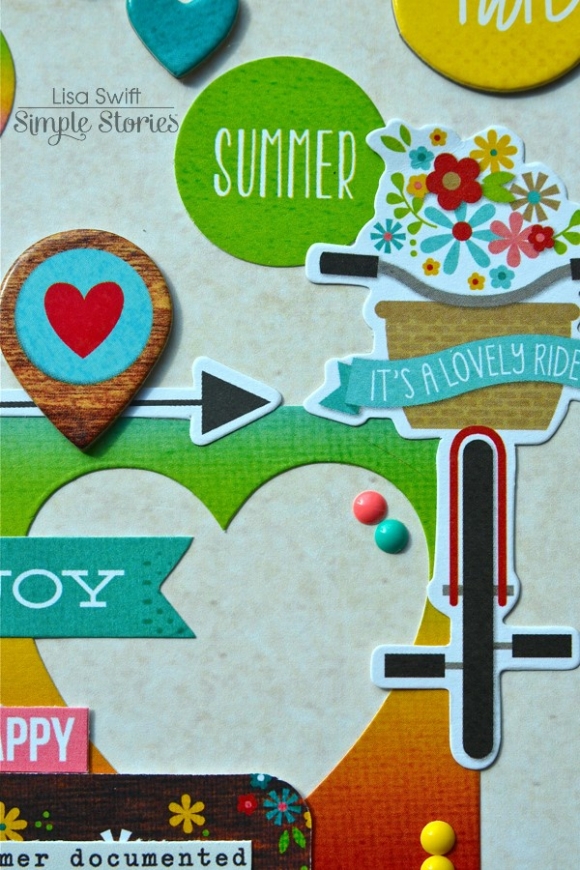
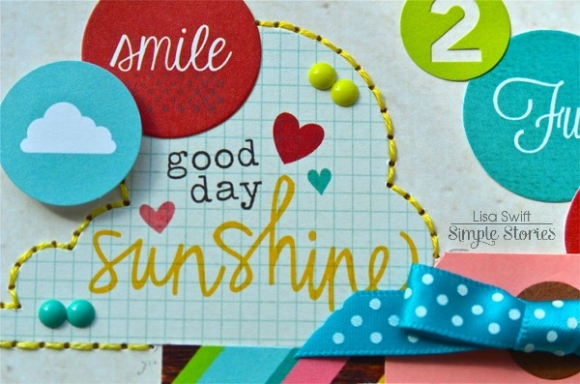
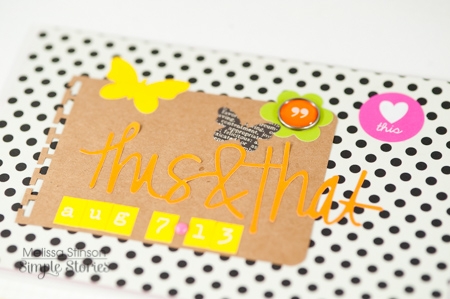
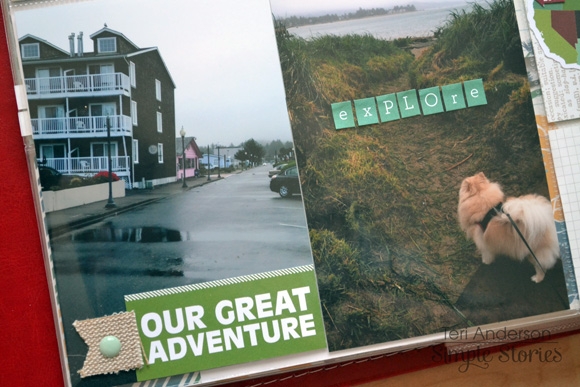
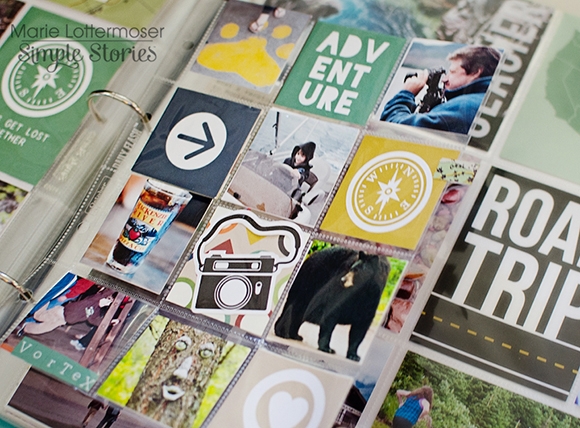
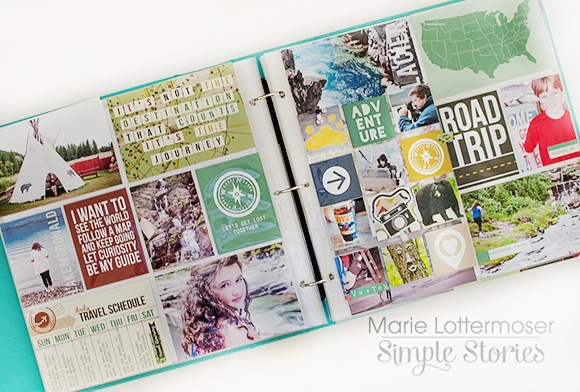
Here are some more close ups. 

I hope you have enjoyed this look at The Story Of Us. It is both beautiful, classy, and super fun to work with ! 

Hi all! Rebecca Keppel here with a look at the newest Simple Stories summer collection Good Day Sunshine

I love everything about summer. From the warm sunshine to the relaxed schedules to the many, many dips in the pool. I have always been a summer person. So each year since Simple Stories' first summer collection I have waited anxiously to get my hands on the latest and greatest scrapbooking goodies for summer lovers. Good Day Sunshine does NOT disappoint! It is loaded with amazing summer colors, deep rich wood grains, fun playful images and much more. I think the rainbow ombre paper might be my favorite. 

I usually hide some journaling or memorabilia in the Simple Stories Pockets, but this time I added a strip of wallet photos.

I LOVED fussy cutting out a bunch of viewfinder circles and popped up some other fun circles on top.

I literally can't say enough about how much I love this collection. I guess it is fortunate that I will have about 6 months of photos to document with it (since our "summer" in Arizona is a long one to say the least)!

I also made a card based on a sketch from the May issue of Scrapbook Generation's Magazine.

Have you ever seen such a fun combination of ombre, rainbow, polka dots, hearts confetti, epoxy dots and more? Good Day Sunshine will be hitting the stores any day now, so run and scoop it up because summer is on its way!

Supplies

Hi Simple Stories fans, Wendy here today.  I am so excited to share some of what I have created using the newest collections from Simple Stories.  In addition to some great new collections I always stumbled upon a great new discovery (for me).  Besides using the SN@P! Journal Pages in the 6x8 SN@P! Binders and Albums, did you know that you can also use the SN@P! Journal Pages on your scrapbook layouts? 

Every Summer has a Story

I never thought about using the SN@P! Journal Pages on my layouts until I was looking through my goodies from the Good Day Sunshine collection and the wood grain and saying on this page totally jumped out at me.

I paired a SN@P! Journal Page with the amazing blue ombre paper (my favorite) which made my sentiment pop.  

I finished this rather simple page by using the 2x12 Element Borders, one at the top and one at the bottom.  I used a heart die-cut with foam adhesive to add some dimension to the bottom strip.  A few pictures and a journaling card slipped behind my picture that doubles as a pocket finishes up the page.

And a few more details...


Love You to the Moon

After my ah-ha moment  about using the SN@P! Journal Pages, I couldn't wait to tear into the next collection, Hello Baby  and see what SN@P! Journal Pages were included and I wasn't disappointed!

Do you see that wooden scallop and the lovely star mat?  Yep, those are both SN@P! Journal Pages!

A few fussy cut clouds, moon, and stars to mimic the design on the bottom of the page.  Foam adhesive is definitely my friend, I love layering different embellishments!

Another cluster of embellishments finish up the page.  I love mixing the chipboard elements with the die-cut pieces, there are so many lovely choices.


Not Sweet, Yucky

Can you spy the SN@P! Journal Pages I used in this layout?  I used another to mat my picture and added a border to finish off my design.  I couldn't resist using these pictures of my little guy's first taste of green beans and the sweet die-cut and hence my title, 'not sweet, yucky'!  He has since this picture was taken learned to eat them without gagging, but he still spits!

I used the 7 month card from the 4x6 designs to document how old my son is here and a few bits and pieces tucked in to draw attention to the 7.  I tied my thread in a bow and placed an enamel dot on the top of the flag to give the impression that this was a stick pin.

Some messy string to imitate the mess my little guy was making and a few cute tags and pieces to draw attention to his facial expressions.

Thanks so much for joining me today, I can't wait to see what you discover by thinking out of the box!  Stop by my blog for another layout created using the Good Day Sunshine collection, hope to see you there!

Hi friends. It's Heather and I have to tell you that I love the soft palette of colors in the Hello Baby collection and the fun mix of patterns is inspiring me to pull out my girls' baby albums and start working on them again. I love the mix of 12x12 papers combined with the SN@P sets. I think it will make completing their albums a breeze because now I can do a main layout and Pocket Page for each month. Here are 1st and 2nd month layouts of my youngest daughter.

Sweet Little One

I was inspired to create this layout based on the So Sweet 12x12 paper. I love the pattern and wanted to use it as a background but I my photo got a bit lost so I cut up some of the paper elements and recreated the background.

I trimmed the pieces and then arranged them on the page and then stitched lines down the page. Once that was done, I added the title, photo and embellishments. I chose tone on tone wood grain alphas to add her name to the page. The journaling is included on a pull out tab behind the photo.


Baby Love

You know when you are so inspired by the products that the pages just come together naturally? Yep, that's what happens every time I get Hello Baby out. This collection makes creating these baby pages a breeze. I had some leftover pieces from paper I cut out for the layout above so I put them to use on this layout by creating a wide border at the bottom and smaller one at the top.

I adore the sentiments that are pre-printed on the papers. They are great to use them as titles but I choose to create a title above and use the pre-printed one as a subtle message. I added hand and machine stitching, embellishments and journaling to complete the page.

Now I just need to get my hands on some 12x12 Pocket Pages so I can complete the complimentary 2nd page for each month!

Hey Simple fans, Nancy here today with a look at our bright and fun new release, Good Day Sunshine. This collections pair a bold color scheme, wood grains and beautiful ombre solids perfect for all of your summer season photos.

I started this layout with a white cardstock background and layers of blue and yellow ombre patterned paper. The postage stamp paper adds a punch of color and whimsy,  while the chevron on wood pattern adds contrast.  

A 4x6 SN@P! Cut card was used (blue dots) to mat the focal point and was the perfect place to tuck a chipboard flamingo. 

Key elements on the page were highlighted with a handstitched circle of white floss. This adds dimension and shape to the page in a subtle way. Enamel dots were added for little splashes of color.

Good Day Sunshine is packed with fun summer icons great for travels near and far or just those things you do at home. Creating layers with SN@P! Pages and Cuts make it easy and fun - just add photos!

Hello Friends! 

It's Kristine with you today and I am excited to show you a few of my DIY Filler Cards for my 2012 Life Documented Album.

I first drooled on the entire DIY & DIY Boutique collections and then decided on which elements I was going to use. Most of them made the list and ended up scattered on my entire scrapbook table! I decided I was going to do a "set of 24" just to have on hand and maybe trade some with friends for their own Life Documented albums.  

I used some DIY Boutique papers and cut them up 3x4" knowing they are double sided I could use the A or B sides, I also used the DIY Office Card Foundations. Using a few scraps of paper and of course lots of pop dots, DIY stickers and chipboard I was able to create a great variety of cards.  

I began creating these cards a little late in the evening, a few hours after a little over 1:30am I looked at the clock and I seriously couldn't stop! This project is perfect for Crops or Scrapbook nights with friends! So fun to do ;-)  and sharing them for Card Swaps even better! The DIY products are for sure a must have in your stash!

Here's are a few finished Life Documented pages using a few of my own filler cards.  

Here's a few close-up shots.

and a few close up shots of my Filler Cards.

This Collection is fabulous to create your own journal cards, pages, mini albums and so much more - it's endless! As you can see these are just too much fun to create, Give it a try, add them to your Life Documented pages and Please share them with us!

Supplies Used : 


5142

5143

5148


DIY BOUTIQUE

5100

5127

5128

5141


ALBUM

4037

2004


Hey everyone!  Andrea here with you today to share a mini album made with the new Hello Baby collection from Simple Stories.  You’re going to love the soft, gender friendly colors in these papers and embellishments!  I love that the collection focuses on baby’s first year, and a friend was kind enough to let me use her son Logan as my muse for this project; it documents his first six months.

I used a Burlap Binder as the base for the album.  Because it already has texture and pattern, I wanted to keep the cover simple; a cut file, photo, and a few embellishments was all it needed.  I matted one of the Insta-Squares (You) as a title, and made the photo of those cute little feet the focal point of the album cover.

The inner pages are a mix of Pocket Pages, papers from the collection, SN@P! Pages, and SN@P! Pockets.  These left me plenty of room for photos, embellishments and journaling.

I love the great shapes of the SN@P! Pages and how they accent the album.

Here’s a few close-ups of some of the great embellishments in the collection:

I cut the frames for each month out of the 12 x 12 Tiny Details paper and pop dotted them over the photos that coordinate with Logan’s age.

Here’s a few more of the pages:

And there you have it!

Thanks so much for joining me today.  I love using the collections from Simple Stories in my projects because EVERYTHING you need is right there and coordinated; simple!  And I’ll love this collection even more when I get to use it to document my first grandbaby in October.

I hope you’re inspired to pick up a collection and whip together something fabulous!

Supplies

Hi there! Kim here in sunny Arizona, gearing up for a long, hot summer. But, you know what? Call me strange, but summer is my favorite season of the year, even here in AZ. Maybe it’s because I was born right here in Phoenix. Regardless, I say “bring it on”.

I have a feeling more of you will be summer converts after seeing and crafting with our new Good Day Sunshine collection. How could you resist the sun drenched colors, the warmth of the wood grain, and my favorite? The touch of vintage in the photo inspired products.

The new release will be hitting stores in just a week or two, but in the meantime, here’s a peek at two cards I’ve created with the new collection.

I hope that tides you over until you get your hands on this lovely new collection! Take care and enjoy a great kick off to summer!

Hi everyone! Lisa here to add a bit of sunshine to your day. The projects I'm sharing with you today will give you a good look at one of Simple Stories brand new releases called Good Day Sunshine. I don't know about you, but I get all excited about new releases. I definitely can't wait for the reveals and I especially love to see the product in action. This collection is definitely a must have for all of your summer photos.

Let's start off with a card that's definitely summer sweet.

I love the mix of colorful contemporary and vintage elements in this collection. With so many colors to work with, it was easy to put this card together by layering a number of Bits & Pieces (index card, Polaroid frame, banner and ice cream truck) over a piece of multi-colored text paper. Fundamental Cardstock Stickers, enamel dots and ribbon help to finish it all off.

Next up I have a layout to share. I couldn't believe how perfectly this photo of my niece, aboard her paddle board, coordinated with the rainbow of colors in this collection.

Let's take a closer look at some of the details on this page:


Although the SN@P! Pockets are perfect for holding journaling tags or cards, sometimes I like to use them as a decorative element on a project. Think about layering embellishments on top of the pocket and adding to the design already printed on them.

I used a mix of Bits & Pieces and Chipboard Stickers in the upper right hand corner of the page. The chipboard adds dimension and layers nicely with the diecut pieces.

This last detail shot shows a mix of Bits & Pieces and stickers. I hand-stitched around the outer edge of the cloud with embroidery floss to add some texture. The yellow floss adds color and helps the cloud stand out against the background paper.


I hope you enjoyed getting a good look at Good Day Sunshine. It's a fun collection to consider for recording all of your summer memories and colorful summer photos.

Hi everyone! Allison here today with a Life Documented layout using the brand new Good Day Sunshine collection and I have a new double page sketch that mixes traditional scrapbooking with the SN@P! Pocket Pages.

You can download the full sketch with measurements and placements here Life Documented Sketch #11.  The left side of the sketch is designed in a more traditional style of scrapbooking while the right side of the sketch uses a combination of photos, cards, and paper to fit the Sn@P! Pocket Page, Design 7.

Here's my layout based on the sketch above.

The instant I saw Good Day Sunshine I knew that our beach pictures from last summer would go with it perfectly! What a fun and bright collection and it's full of so many great elements and designs! It really made putting my layout together so easy.

On the left page I created a large sunburst for one of the background squares on the sketch. The yellow ombre paper was just right for this kind of design. I always enjoy trying to find ways to incorporate the theme of my layout into the design of the papers too. A sunburst was a great fit for not only my pictures but the Good Day Sunshine collection too.

The sunburst may look like individual strips but, since part of the sunburst is behind the photos, I was able to keep that part of the paper intact. This made it so much easier to adhere it on to the white cardstock behind it. I just cut the little strips out between each piece of the sunburst, stopping before I went all the way to the center.  Trying to make sure that each individual strip is perfectly adhered could take some time! This way it all went down at once saving me lot of time and possible headaches!

I added some hand stitching to the sunburst design and finished it with some yellow enamel dots on a few of the stitched lines.  I used clouds to accent the sunburst design. The first cloud is above the photos with a brad and word sticker attached to it.

At the bottom of the photos I added waves made with a circle punch. I really like using this simple technique on water pages. All you have to do is cut a strip of paper to the size you need and then use a circle punch to punch little half circles along one side of the strip. It's so easy! I especially like layering multiple "wave" strips.  I added a few smaller photos, my title, and another cloud over the wave strips. I loved the little hearts on the cloud so I added some more hearts on both sides of it.

On the right page I used the SN@P! Pocket Page, Design 7; this is one of my favorite Pocket Page designs because of that large 6 x 12" pocket on the right! I used a 6 x 12" piece cut from the "Life is Beachy" patterned paper for that pocket. I was drawn to the design of this paper and thought it would be fun to use some small pictures in place of some of the rectangles.

I used one larger photo in place of four of the rectangles and then used smaller photos to cover a few of the smaller ones.

I also used foam adhesive and a small cardstock mat behind each photo. I wanted to make sure the photos stood out and took center stage.

I had a photo with a lot of empty space and I happened to have one more photo that I wanted to include on the layout. An easy solution was to add the smaller photo to the empty space. I then finished it with the "hello summer" heart.

The "Every summer has a story" SN@P! Cut is one that stood out to me. I printed out a picture I had taken at the beach of the water crashing into the sand and adhered it behind the card so that the sand and water would show up in the letters. Since the card specifically says "story" I thought,  "what could be a better place to put my journaling"?

I'm using the 12x12 SN@P! faux leather album in black for all of my Life Documented layouts. The quality of the faux leather is top notch and I love the stitching accent on them. They are beautiful! I also used the 12x12 Sn@P! Pocket Pages, Design 7 from the Variety Pack. I enjoy using several different styles of Pocket Pages and since the Variety Pack has so many great options and designs, I have a lot to choose from.

I hope you enjoy using the new sketch!

Hello, everyone! Melissa here with you today to share a Life Documented layout using Simple Stories' DIY and DIY Boutique collections.

I had a little help designing this page thanks to a fabulous sketch by Becky Fleck of PageMaps. Becky put together lots of great sketches last month with inspiration for using Simple Stories' Pocket Pages, and this particular one centers around Simple Stories' Pocket Page Design 3.

I didn't have many photos for this particular week in my album, so I was glad to have some extra inspiration to fill those empty pockets!

Using a combination of the embellishment cues from the sketch and the layering elements from DIY and DIY Boutique, I was able to quickly build a few decorative clusters to fill in the blank space.

DIY Boutique has a great combination of neutral bases in kraft, cream, white, and black, and I used them liberally to keep the bright colors from the title words, shape stickers, and enamel dots from overwhelming my page.

Hey there!  It's Vicki here today with some DIY goodness to share.  For CHA Winter I had lots of fun creating a series of make 'n takes using pieces of the DIY line.  Let me tell you…I am head over heels for DIY!!  I love to layer and build projects and this line was made for exactly that!  Take a look at some of the pieces I had to work with and let me tell you a little more about it.

This system is set up for success!  First, you have your "Foundations" i.e. tags, cards, pockets and envelopes.  The next step is "Layers" (probably my favourite Simple Stories invention ever!!).  And finally you have the "embellishments" which include stickers (6 sets with 8 sheets in EACH pack!!!!), Clear Photo Stickers, stamps, Enamel Dots and Burlap Icons, Banners and Arrow Stickers!!!  The Foundations and Layers come in both Kraft and Office.  That, my friends, makes for a ton of choices and combinations!!  Take a look at a few that I came up with…

Here are a few ideas using the tags…

Here are some samples using the cards…

Take a look at some pocket samples…

And finally, here are a few ideas using the envelopes…

I could create these DIY projects ALL DAY LONG!!!  They are versatile and fun.  This system works for any type of crafter…cardmakers, scrapbookers, pocket page lovers, etc.  The possibilities seem endless.  I plan on making more with a few different elements and additions and I will post them when it's my turn again to spend some time with you here.

Thanks for stopping by!  I can't wait to hear your thoughts on DIY and see what you create with it!!

Hi everyone! Nichol here today with a 12x12 layout and set of four cards showcasing Insta-Squares from the Homespun CollectionSummer Sn@p! Insta-Squares & Pieces SetWedding Sn@p! Insta-Squares & Pieces Set and Birthday Sn@p! Insta-Squares & Pieces Set. I'm a big fan of using repetitive patterns or shapes on my layouts and other paper crafting projects and the squares in the Insta-Squares makes it so easy to create amazing projects!  

For my layout share today, I used an assortment of 2" squares from several collections. To give these squares even more "pop", I used pierced nesting square dies from My Favorite Things to give the squares and square photos pierced decorative edges.

The dies make the 2" squares slightly smaller so I used a ruler to figure out where to begin adhering these small squares so that the design would be centered in the middle of the white cardstock background. I left a space in the center of the page where I adhered a 4" square from the Homespun Collection and then layered a vellum die cut square and a square from the Homespun Collection die cut with another one of the pierced nesting square dies. I embellished this title square with some Simple Stories stickers.

I embellished the smaller squares with additional Simple Stories stickers, sequins, enamel dots, etc.

I printed my journaling on a Sn@p! label sticker and adhered it across two of the 2" squares.

The Insta-Squares also make super fast cards. I used the same nesting square dies to cut the center panels for the cards.

I've created four completely different themed cards but they all four have the same design. I adhered a 4x4 patterned Insta-Square on a 4.25" square white card base, cut a piece of 4" square vellum to layer over the patterned design and then die cut the center Insta-Square and adhered the center piece with foam adhesive. Simple embellishments are all these cards need. The design of the Insta-Squares don't need much!


Hi Everyone, Angella here to bring you a couple of Easter treats.

I always like to put my spin on any of our holiday treats, especially when it involves gift giving. Making it all more personalized and special, instead of just  grabbing something off the shelf.

I have used a little chipboard box in which I have  covered with papers from the Homespun collection.

Then all you have to do is decorate your box with fussy cut images from your pattern paper, fill the box with tissue paper, add a nest and eggs and glue a cotton reel to the bottom of the box, to act as a stand for the gift box.

For my next project I created this fun ladybug by drawing an egg for the body, then a circle, cut both shapes out, cut the circle in half for the wings and voila!  

Wishing you all a Happy Easter, and if you're like me, I will be trying to avoid the chocolate overload !

Have a great day!

Supplies

Hi all! Teri here today, and I'm here with another Life Documented project. I'm excited to share with you a few pages I made with the SN@P! Travel set. 

I went on a spur-of-the-moment trip to the Oregon Coast this month with my family. I just love the beach. And this trip was extra special because it was the first time I've ever taken my dog Marley to the ocean.

The SN@P! Travel set was perfect to use for these pages. If you have ever been to the Oregon Coast, you'll know our beaches aren't like the ones in California and Florida. It's a little more windy, a little bit more chilly and a little more rugged here. Instead of seeing folks lying on our beachers in swimsuits, you often see people bundled up in sweatshirts and jeans as they explore the beach.

One of my favorite elements on this page is the "Our Great Adventure" title. I made it simply by cutting up a 3x4 SN@P! card and then added a burlap banner sticker to it.

I really went to town cutting up my SN@P! cards on this page too.

I just love the large "Travel" card. I made it by cutting up several of 3x4 and 4x6 SN@P! Travel cards and mixing them together to make one really big 4x6 card. One of the great things about using cards from the same SN@P! set is you can easily mix them together because they all are in the same color scheme! Sometimes, my brain just needs to grab a pack of SN@P! cards and know they are going to work together no matter which ones I use.

Oh. By the way, what's the little rectangle at the top of the travel block? That's a sticker from SN@P! Travel Stickers.

And check out the card in the upper right corner. I created the border that goes across with stickers. Yep. Stickers. I just love how those stickers together.

The "Travel Musings" block here was... you guessed it... cut from a 3x4 SN@P! card. I embellished it by adding a burlap banner sticker to it.

By the way, I'm using a 12x12 SN@P! faux leather album in red to document all my 2014 adventures in. Being able to scrapbook out of order is big to me, and I love that the album's ring binding allows me to do that. I used the SN@P! Pocket Pages Design 5 for these pages. I dig that Simple Stories offers so many different styles of pages. It's great to have so many creative options.

Thanks for stopping by today. I'll be back again soon!

Hi there! Marie here with you today to take you on a road trip adventure with our family using the Travel SN@P! Set.

Every time we go on a vacation I seem to do the same thing. I take 500 photos and promise myself someday I will do something with them.  But usually the photos just end up sitting on my hard drive.  Using the SN@P! Sets has made it easier than ever to actually put my photos together in an album.

These pages are of a road trip we took to Montana to visit Glacier National Park.  We also went on a lot of day trips such as the National Bison Reserve and Bigfork.

I added a 2x2 Insta-Pocket page in the middle of my spread so I could fit in extra photos.  I love how many pictures and embellishments such a small page can hold.

I like having different size Pocket Pages in the same album.  I added a tab made out of a sticker to the side of the 2x2 Insta-Pocket Page to make flipping through even easier.

We packed a lot into a few days and I needed to find a way to organize all of the different side trips we took.  I typed out our itinerary on a 4x6 SN@P! card.  Having a record of all the different places we went is very helpful to remember our trip.

And that's our road trip in a nutshell.  Do you have any vacation plans coming up?  I highly recommend the Travel SN@P!! Set if you do!

Hi there, Emily here with you today!  For my project, I decided to cut some cute little treat boxes for Easter with my Silhouette Cameo. There are SO many treat box files to choose from in the Silhouette online store, the possibilities are endless! 

The Fresh Air Simple Set is the PERFECT collection for anything Spring. I don't buy a ton of Spring paper because I'm not always a fan of pastels, so the size of this kit is great for someone like me who is only going to use it a couple times and be done with it. I've used the entire kit up on a couple of Spring projects that I've done and no leftovers so I feel accomplished! 

I loved that I was able to reach for this beautiful collection and create some perfect little treat boxes to go in my kids' Easter baskets this weekend. Thanks for stopping by today! Have a Happy Easter! 

Supplies

Hi there!  Shellye along today with a handsome little mini album made with pieces from the SN@P! Baby Boy Set and a onesie shaped die by Top Dog Dies.  I love to make small albums such as this to give as gifts to a new mom or grandma...they're the perfect size for a brag book and display so sweetly on a shelf or cabinet!

The die that I used is actually a 'card' die, so look for that if you're interested in shopping for it.  First, I cut the shape from white mat board; you can also use a medium-heavy weight chipboard.  When I cut the shape, the scoring area of the die actually cut instead of score, which worked out perfectly.  So a 12 page mini album would consist of cutting the entire die shape three times from a 6X12 sheet of material.  Next, repeat the process and cut the shape  from either a cardstock or patterned paper. 

The 'mat' portion of the pages were die-cut with a onesie 'finisher' die set, but you could also cut an oval or rectangle so that it fits nicely.  I die cut the pieces from various 4X6 cards found in the SN@P! Baby Boy Set, as well as some plaid and solid patterns found in the Homespun 6X6 paper pad.  The front is simply decorated with some layered hearts and adorable stickers from the set.

I decided to go with a 'flip-up' style album, so just keep in mind the direction that your pages need to be decorated when putting it together.  Between each chipboard page, I added 2-3 of the 'months' cards found in the Baby Boy SN@P! 3x4 cards.  Great place for mom to journal or add extra photos.

Also, when putting the album together, I try to stagger the embellishments from page-to-page so that one page's embellishments doesn't layer right on top of the next page's. 

Use designs found on the larger, 4X6 cards as embellishments.  Below, I cut one of the hearts from a card and then simply added some hand-stitching over it. 

Although I try to keep the 'bulk' to minimum with such a thick album, I still like to raise up a few of the stickers by adding foam adhesive to the back.  Brads and buttons dress up plain stickers and give a touch of dimension.

And don't forget about the other fun products by Simple Stories that you can mix in!  The DIY Kraft and Burlap pieces are great for layering.

One of my favorite SN@P! products are the adorable pockets!  Here, I've added one of the smaller ones to the page and then simply tucked in one of the DIY Kraft tags.

In finishing, I like to add some baker's twine around the edge of the album. This isn't necessary, especially when using a clean-cut die, but it does add such a soft texture.  For the binding, I took the first page of the album and punched two holes at the top.  I then used it as a template for creating holes in all of the following pages.  The album is quite thick, so I strung through two 1.5" rings and tied on single ribbon bows to each.  Now it's ready to be adored for many years to come!

Pages