Hi Simple Stories fans, Rebecca here with some DIY Christmas projects for the holidays season.  I loved the original Simple Stories DIY line so I was pretty excited about the DIY Christmas collection and it does not disappoint! The mix of chalkboard black, Kraft and graphic designs is a different twist on a holiday collection so everything you create with this line will look fresh and trendy.
 
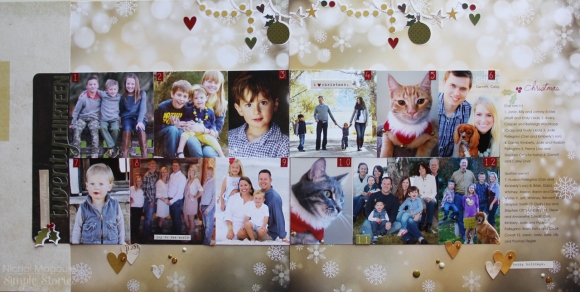
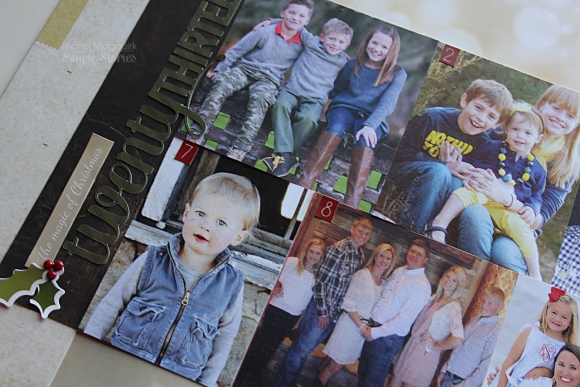
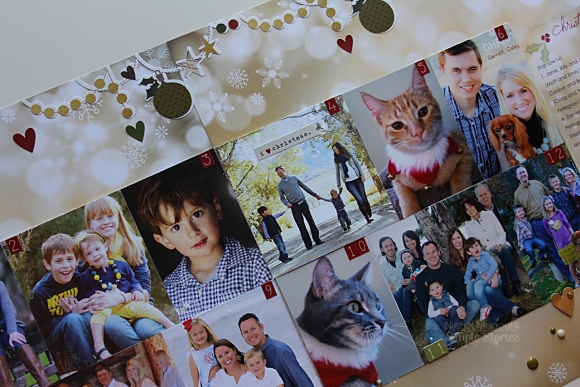
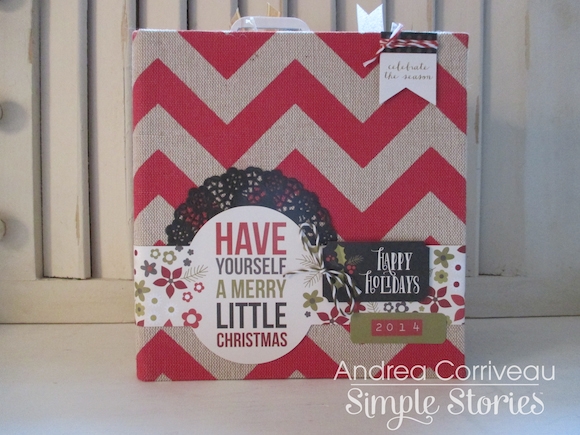
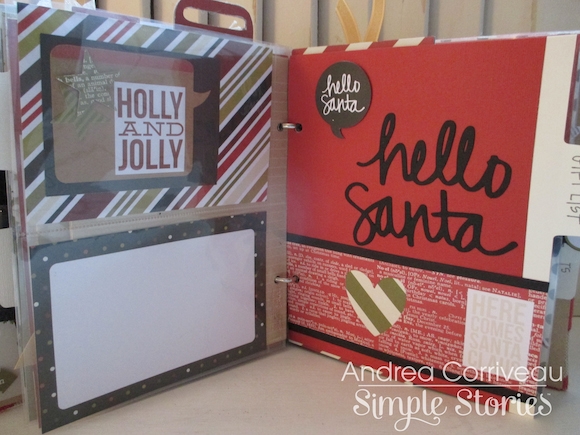
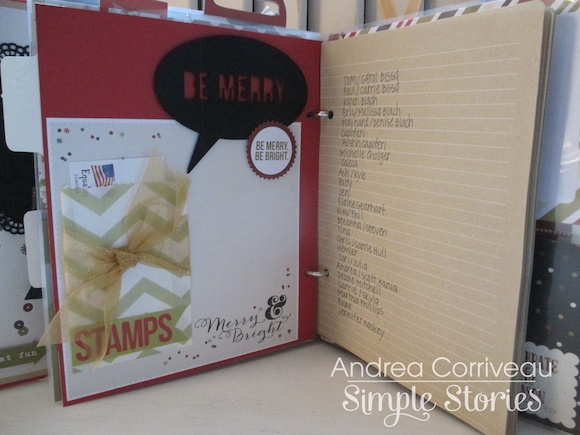
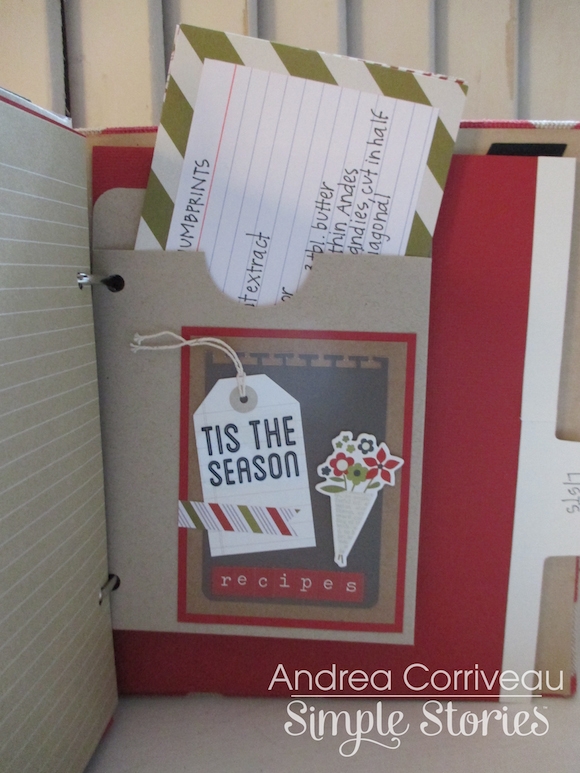
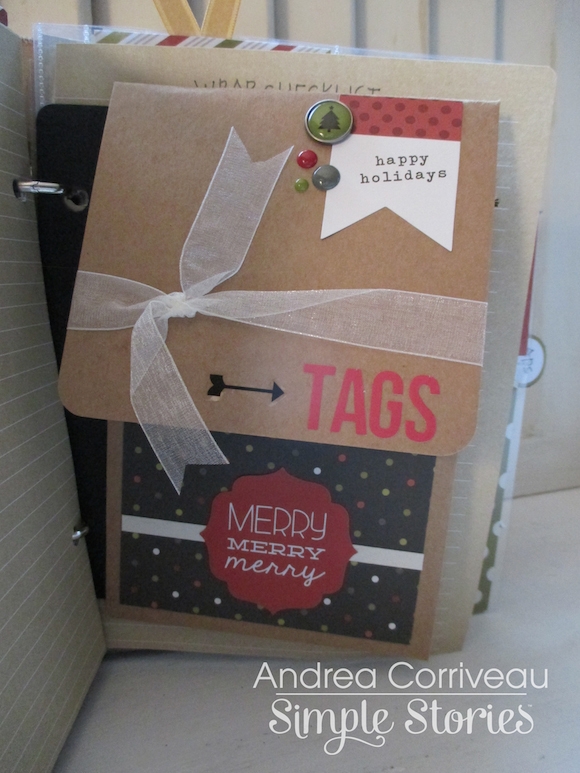
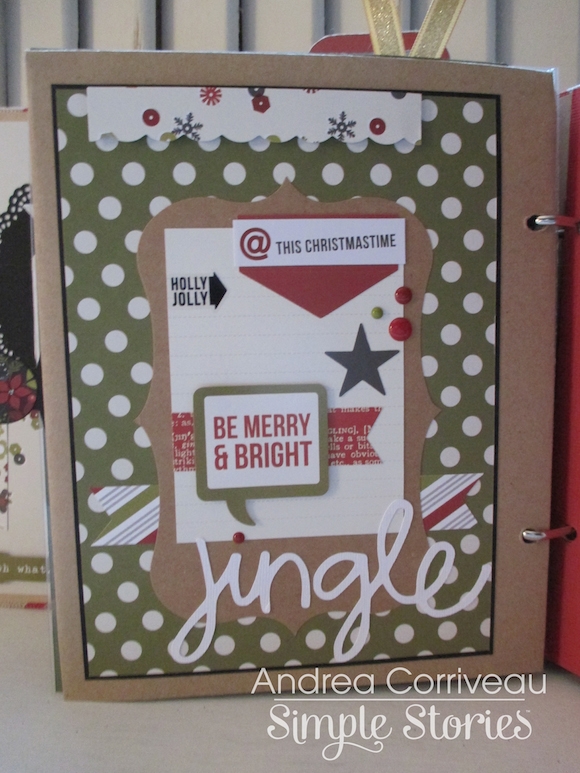
I used DIY Christmas to get my December Daily started.
 
 
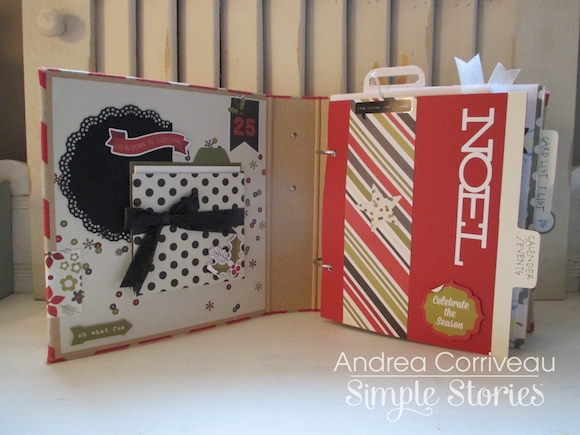
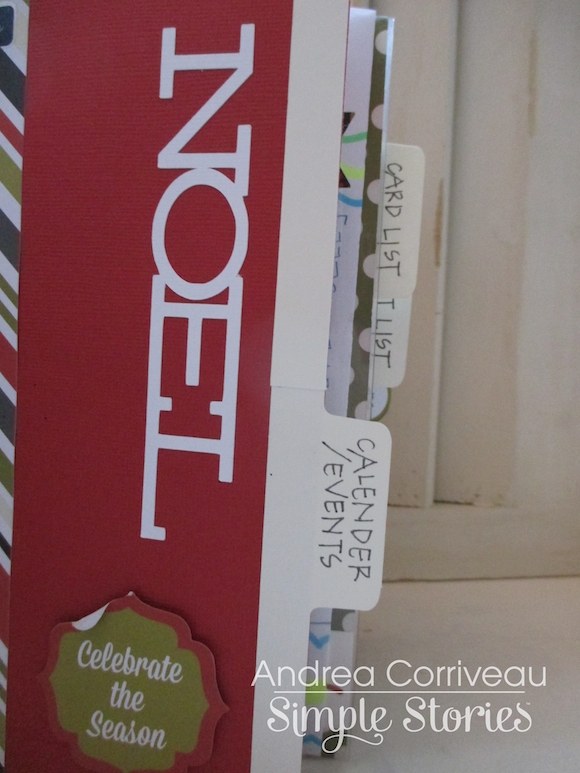
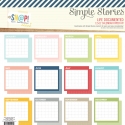
The Card Foundations, Layers, and Advent Bits and Pieces make putting together a daily album quick and easy.
 
 
Stay tuned to my blog as I start to fill in this album with our first December pictures! 
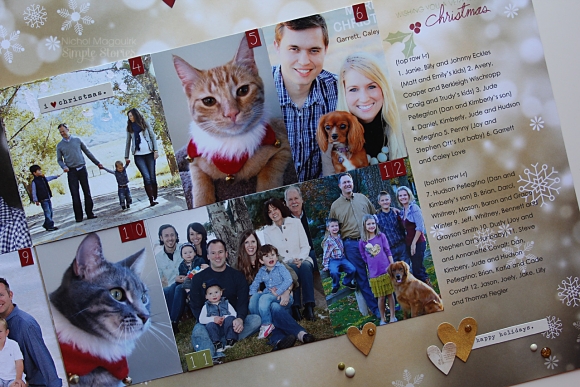
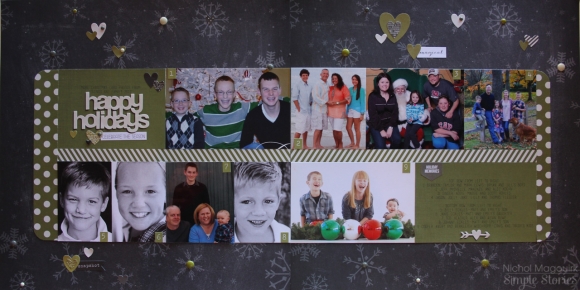
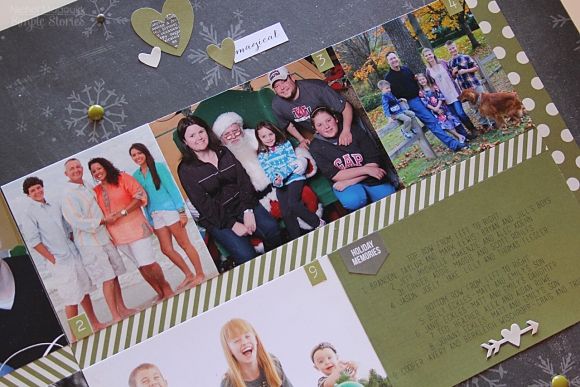
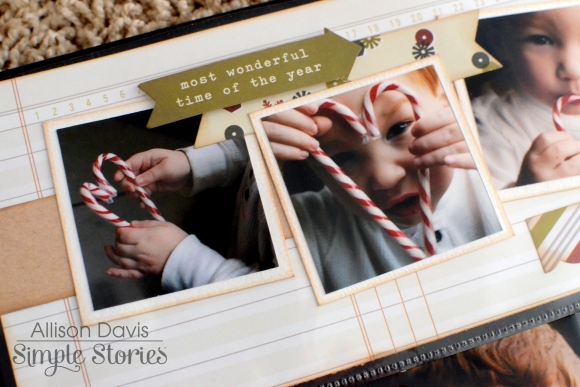
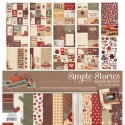
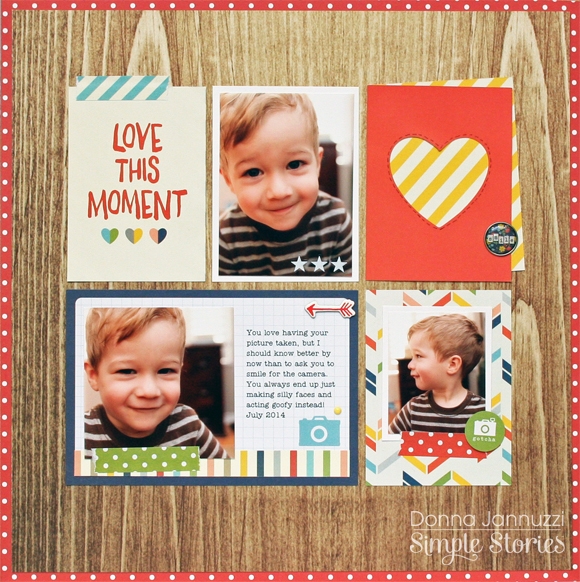
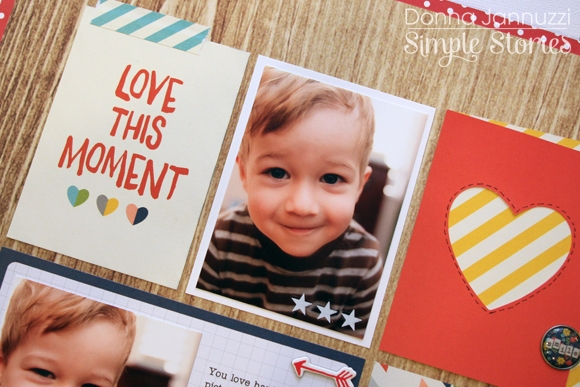
For you layout makers there are plenty of beautiful 12x12 patterned papers too.
 
 
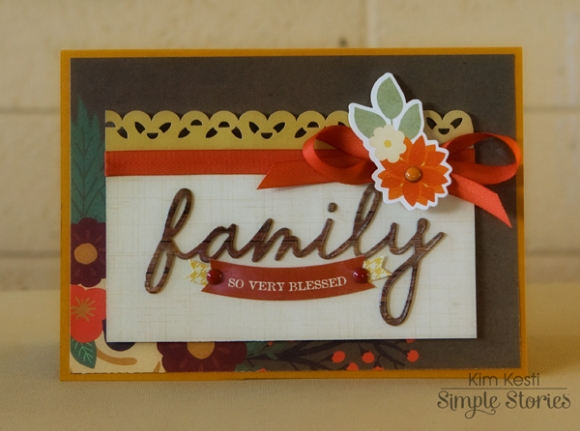
But let's not forget the cardmakers! DIY Christmas includes a 6x6 pads and fun embellishments like chipboard stickers, epoxy dots and brads that make creating handmade cards a breeze.
 
 
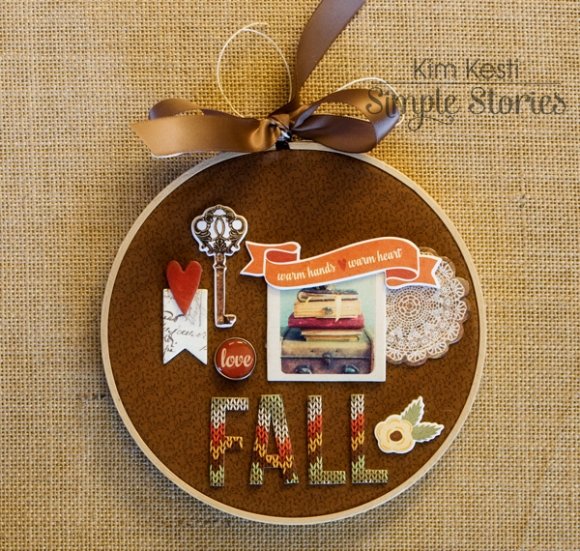
Last, but not least, how about a home decor project? I created these Christmas pinwheels with DIY Christmas papers, brads and chipboard stickers.
 
 
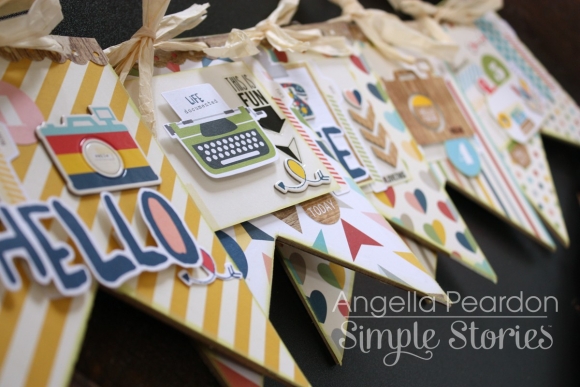
There are a million other uses for DIY Christmas including gifts, treat wrappers, banners and more! What are you DIY-ing with DIY Christmas this season? Here's to hoping all your projects are magical and your holidays are happy!

Supplies

Hello everybody ! It's Mindi here with you today. I am so excited to be sharing a few of my 2013 December Daily pages featuring the wonderfully festive DIY Christmas. Can you believe it's already December ?  I don't know about you but I sure am looking forward to the holidays. 
 
This was Day 11, which included a scavenger hunt and some elf mischief. 
 
The family packed up in the car that night for a Christmas Light Scavenger Hunt.  All the kids were armed with clipboards and pencils as they piled in the back of our van. We had the Christmas music playing as we drove around many of the neighborhoods looking for lights. The kids were so excited to be able to cross things off their list when they were spotted.
 
 
Even though it was dark I wanted to include a fun photo of our adventure. I also wanted to be able to tell that it was in fact dark outside, so I snapped one from my seat in the front with my phone.  I added my photo to one of the journaling cards and added some embellishments. 
 
Harry the elf also got added into Day 11. We caught him and Rex the Dinosaur having a snowball fight with some mini marshmallows. 
 
 
The DIY Christmas collection is so fun ! I love all the different stickers, embellishments, and fun journaling cards. I started out my journaling with a 4x6 card and added the word sticker "holiday" at the top. Finishing it off with some personal touches using some chipboard pieces and enamel dots. 
 
 
I really wanted to include a print out of the Scavenger Hunt that we used in my album, especially since I didn't have many photos of the event. It turned out real easy to resize it to 6x8 and print it out. Instead of leaving it plain I decided to embellish it a little bit. I added some pen doodling around the edges and the some embellishments in the middle. 
 
 
Thank you so much for joining me today. I want to wish you all a very magical and wonderful holiday season. 
 
Supplies :
 
DIY Christmas :


Supplies

Hello everyone!
 
Today I'm sharing with you a layout and a card that I created using Cozy Christmas and the DIY Christmas collections.  They are so much fun to work with!
 
First of all let me share my layout with you.  I created this using some photos from last christmas.
 
 
I used the 4x12 strips across the lower portion of the layout to add some extra colour on the dark background paper and a bit of depth.  I also used a 3x4 journal card behind the left photo. 
 
 
I embellished with lots of stickers from the Cozy Chrismtas and DIY Christmas collections, along with some Clear Stickers on my photos.  I love how those look.
 
 
I also added a few enamel dots to the ornament tops.
 
 
It was very simple & easy to put this layout together ... because Simple Stories just makes it so EASY!!
 
 
I also created this Christmas card along with an envelope using the new DIY Christmas.  This new release makes it so easy to create a card in a matter of minutes!! Seriously.  That's all it took me.  And I could have taken a long time figuring out what products to use normally but this system is so amazing & quick!
 
 
I just created a few layers onto the patterned paper Card Front using the Card Layers & Journal Layers. After tying some string around a few pieces I then just adhered it to the card front using some 3d dimensional stickers for added depth. And voila!
 
 
I finished the set off by using one of the envelope wraps onto the bottom section of a DIY Christmas kraft envelope.  This really makes the set complete.  I love the look!
 
 
Thanks for stopping by!!
 

Supplies

Hello, hello Simple Stories fans! Have you started gearing up for the December holidays? Do you have your holiday shopping done? Are you busy making holiday treats? No matter what you're up to, I hope you make time for holiday crafting because both the Cozy Christmas and DIY Christmas collections are perfect for documenting your holiday memories.

Today I'm sharing a layout with you featuring some delicious holiday treats. Seriously, you can't eat just one. I'll also show you a pretty way to package holiday treats for gifting to neighbors, teachers, mail carriers, etc. and share the recipe for these delicious confections.
 
First up is the layout, Rolo Pretzel Confections. I used a mix of Cozy Christmas and DIY Christmas on here.
 
 
You may have noticed by now how much I love layering on my projects. This page is no exception. Here's a look at the trailing cluster of elements, starting at the bottom of the page. I used a mix of stickers, chipboard and die cuts. I even removed the front of a Cozy Christmas Sn@p pocket to start the whole thing off ("believe" file folder piece).
 
 
The layering continues at the top of the page as well. Here's a look at the mix of elements there.
 
 
Now let's take a look at a pretty way to package holiday treats. I purchased this polka dot gable box at Target and decorated it with elements from the DIY Christmas collection. I used a mix of die cuts, chipboard, enamel dots and stickers.
 
 
Before I go, here's the recipe I promised. Don't say I didn't warn you...they're addicting!
 
1 bag square waffle pretzels
1 bag Rolo candies, unwrapped
1 bag pecan halves
 
1. Heat oven to 350°F. Line a cookie sheet with parchment paper or aluminum foil.
 
2. Line pretzels up on the prepared cookie sheet. Top each pretzel with one Rolo candy.
 
3. Bake 3-5 minutes or until the Rolo begins to soften, but not melt.
 
4. Remove the cookie sheet from the oven. Top each Rolo with a pecan half, pressing in gently.
 
5. Cool completely.
 
6. Enjoy!


Supplies

Hi everyone! Nichol here today with one of my favorite projects every year, scrapbooking Christmas Card Photos from friends and family. I have an entire album (or two!) dedicated to recording those treasures that come in the mailbox during the holiday season. Today I have two two-page layouts to share with you. 
 
This first page share showcases some of the photo cards we received last year at Christmas-time. I used the beautiful Cozy Christmas Collection, using the gorgeous bokeh background of the Sparkle Flurries/Ledger Paper.
 
 
I die cut a title from a Kerri Bradford Studio cut file  and added stickers from the Fundamental Cozy Christmas sticker sheet and Cozy Christmas enamel dots for added color and interest. I used number stickers from the Cozy Christmas Expressions 12x12 Cardstock Sticker Sheet on each photo to correspond back to the journaling.
 
 
I added the fun hanging ornament stickers from the Cozy Christmas Fundamentals Sticker Sheet along the top edge of the two-page spread for a pop of color and interest.
 
 
I randomly added sticker phrases to a couple of the photos and finished the page with a bit of stamping above the journaling and some Cozy Christmas Fundamentals heart stickers and Bits and Pieces die cuts.
 
 
My second layout features the remaining photos from 2012 that I hadn’t scrapbooked. I used the DIY Christmas Collection for this page and a green/cream/black color scheme.
 
 
I layered stickers from the DIY Christmas Sentiment Stickers on a piece of Grinch Green DIY Christmas paper. I printed a sub-title above the stickers and finished the title block with additional stickers from the DIY Christmas Icon Stickers and DIY Christmas enamel dots.
 
 
I added number stickers from the DIY Christmas Word/Letters Stickers on each photo to correspond back to the journaling. I finished the page with heart stickers, enamel dots and phrase stickers.


Supplies

Hi everyone! Allison here with a layout using the fun DIY Christmas collection. I've also got a new sketch to share with you that combines traditional scrapbooking with the SN@P! Pocket Pages.


You can download the full sketch with measurements and placements here.


The right side of the sketch uses the SN@P! Pocket Page, Design 9 and the left side follows a traditional style of layout design. Here is my layout based on the sketch:


I got to take a trip down memory lane with these pictures of my now 9-year-old son Drew. Every year I take the pictures for our Christmas card and each year I try to do something different. I think Drew loved this year the most because he had a sweet and tasty prop to occupy him while I snapped his picture. We ended up with messier pictures than I had planned but his smile was so cute I didn't care!


I am in love with the DIY Christmas collection! There are so many fun options and elements to create and add your own unique touches to your projects. I used the "Merry & Bright" paper as the background and simply added my pictures and pieces from the DIY Christmas collection around that.


I added a few banner strips from the A2 Card Layers package and finished it with some hand stitching and the "cheer" arrow.


I framed the "Merry & Bright" with some Christmas trees, hearts, and enamel dots. I also added a little candy cane to one of the trees.


I used more of the banner strips and a scallop strip with some hearts to the top of the photos.


I added one more banner strip to the top left corner of the page and finished it with some hearts and enamel dots and hand stitching.


For the right page I used a combination of card and photos with the SN@P! Pocket Page, Design 9.


In the top pocket I used a 4x12" strip accent with 2x2" photos.


I also added more banner strips, hearts, and a title to the 4x12" strip.


There are three 6x4" pockets on the SN@P! Pocket Page but I didn't use any 6x4" photos. All of the photos I wanted to use were vertical photos and I wanted to include a lot more. My simple solution was to break the 6x4" pockets/photos into two 3x4" photos.


I couldn't resist using the cute candy canes so I created a card to fit the candy cane theme of the layout. I added some stitching and few hearts to finish the card.


I created another card to use as my journaling space. I layered a few pieces and added some hearts and a candy cane to finish it.


I'm using the 12x12 SN@P! faux leather album in black for all of my Life Documented layouts. The quality of the faux leather is fantastic and I love the stitching accent on them. I also used the 12x12 SN@P! Pocket Pages, Design 9 from the Variety Pack. I enjoy using several different styles of Pocket Pages and since the Variety Pack has so many great options, I have a lot to choose from!


I hope you all enjoy the new Life Documented sketch and I wish everyone a fun and memorable holiday season!

Supplies

Hey everyone! Andrea here with you today to share a Christmas organizer I made using the DIY Christmas Collection and a SN@P! Burlap Binder.  This is how I’m going to keep it all together throughout the holiday season!


The book has a place for everything.  I’ve tabbed sections for a calendar, card list, gift list, store ads, recipes and lists.


There’s a spot for stamps, receipts, recipes and tags.


There’s also plenty of room in the pocket pages for me to add photos and journaling to document the season.


If this can’t help me stay organized, then nothing will!
 
Thanks for joining me today.  I hope that your holiday season is organized and stress free.


Supplies

Hi!  It's Kim here with you today.  Happy Thanksgiving to our US friends!

I am blessed to have my eight children, husband, and both sets of our parents together this year for Thanksgiving. We are looking forward to a day filled with gratitude (and food, of course). I have created two projects that both reflect the Thankful theme. Being on the Simple Stories design team has been another thing I am thankful for!

Although this project was created as a card, I think it would be wonderful in a cute frame. It’s sweet, simple and to the point.


I’ve been wanting to play around with this wooden embroidery hoop for a while, so I recently pulled it out of my drawer. I put fabric in the hoop then added some darling paper crafting elements. I wanted a “collage” look and I really love how it turned out. Try mixing fabric with your next project!


Have a wonderful (and blessed) week!


Supplies

Hey there friends!!!  It’s Vicki here dropping in with a layout all about how THANKFUL I am to be blessed with the best mom ever!  When I sat down to work on this page I decided to use the Simple Stories Legacy line.  I love how the earthy, richness of this line really allows the photo to “pop”.  Take a look…

I played off of the over sized “&” from the Legacy 2x12 Border, 4x12 Title Elements paper and went with an exaggerated title block by layering letter stickers, chipboard pieces (mom was taken from “Memories” on the Chipboard Sticker sheet) and Bits & Pieces.  Here is a closer look…

Journaling is often overlooked on my pages.  I kind of like (ok, LOVE) product and focus on photos more.  This time I had something to say so I added handwritten journaling strips which act as a design detail.  Here is a close up…

A layout would not be complete without a little layered element so I created a “Love Tree” with the Legacy Bits & Pieces.

Here is a close up of the top of the photo.  I cut apart a Legacy SN@P! Card to get the “cherish”.

Take a closer look at the title here…

I love the details and gorgeous artwork on the Simple Stories lines!!!  The attention to detail on the Legacy line is AMAZING!!!!

Well thanks for stopping by!!!  Hope you get a little time between the turkey and good company to craft a little!!!!  Happy Thanksgiving!

Hello there, Simple Stories fans! Teri here today, and I'm here with another pocket page spread. I'm excited to share with you a couple pages made with Sweater Weather.
 
I did something really different this time with my pages. Usually, I build my pages around events or happenings in my life right now. But I decided this time to instead create a couple pages about things I'm thankful for right now.
 
 
I think the Sweater Weather collection was the perfect collection to use for these pages because it is packed with Fall icons and patterns and features so many words that work with a gratitude-themed project. It just works.
 
 
My spread is a bit on the random side, featuring a bunch of random pictures and words. On this first page, I wanted to create a title card to set the theme for the spread. I cut apart the "thankful" chipboard word and then stamped "for this" on the label die-cut. 
 
 
And check out the "Love" card here.  I randomly wrote a bunch of things I was thankful for, printed them out and then adhered them to a 3x4 card.  
 
 
My right page is a lot like my left page. There are a few pictures and some random things I am thankful for on it as well. 
 
 
I embellished the "Home" card by adding a heart, some leaves and an enamel dot. For the card next to it, I added some patterned paper, a few die-cuts and a little twine. I also added the sticker sentiment. 
 
 
The thing I love about Simple Stories' products is you can use them as they come or you can really customize them to suit needs by mixing different pieces together. 
 
 
So before I go, let's talk about albums for a minute (or two or three). I'm using a 12x12 SN@P! faux leather album in red to document all of my 2014 adventures and thoughts. I frequently scrapbook out of order so I like that the album's ring binding allows me to do that. I used the SN@P! Pocket Pages Design 3 and Design 10 for this spread. I love that Simple Stories offers so many different styles of pages. I think it helps me to keep my pages interesting by use different page styles.


Supplies

Hi Everyone!  Marie here today with another Life Documented spread.  This one features a lot of things I am grateful for, especially during fall.  I used the Simple Stories Sweater Weather line to make these pages.
Autumn

I have to confess, autumn used to be my least favorite season, but in recent years it's become one of my favorites.  I love the fall colors, cozy sweaters, fires, and of course, Thanksgiving.  Here's a closer look at my pages.
 
Autumn1


Autumn2


Autumn3


In some places I placed stickers on top of the page protectors instead of straight on the cards or photos. It helps give the page a little more dimension.
 
Autumn4


I chose to leave the knit sweater card blank, because I love the look.  It looks like there is an actual sweater in the pocket.
 
Autumn5


And the list of things I am grateful for is not complete without some mention of coffee.  I took a coffee sleeve and placed it directly in one of the pockets, held down by a sticker.
 
I hope you've enjoyed looking at my pages using Sweater Weather today.  I hope you are enjoying this beautiful season.

Supplies

Hi there, Angella with you today to share my project called HelloI It's a Beautiful Life.   The new Life Documented scrapbook collection says it all!  it is a beautiful, so I thought what better way to celebrate this range than to make a banner to hang over my office desk.  What could be better then walking into work and seeing your banner hanging there like sunshine?

I used a chipboard banner as my base, I then covered the banner papers from the 12 x12 Paper Kit.   It was easy - just trace, cut and glue the pattern paper onto the banner pieces.

To decorate the banners,  I used chipboard pieces, Insta Squares, Clear Photo Stickers and the Bits & Pieces. You can totally go wild with this collection. I love it!

Here are a few close up shots of the individual banne pieces - 

When you have finished decorating your banner pieces, just string raffia or ribbon through holes and top off with a bows.

Supplies

Hi, it's Shellye!  Today I'm sharing a trio of cards that focus on the brand new "Life Documented" Collection.  The collection is a series of bright colors, trendy patterns and cute icons...perfect for a set of cards!

First up is a 6X6 card entitled "Hello"

I was inspired by the diagonal patterns on the backs of the 2X2 Insta Squares cards.  I arranged them in a grid pattern and added a strip of the woodgrain washi tape to the sides of the two pieces on the right.  I focused the design on the left by simply accenting with a cut-out portion of the "hello" 3X3 card, a couple of chipboard pieces, enamel dots and matching polka dot bow.

Next up is a 4X6 birthday card showcasing the Washi Paper Tape:


I cut a swatch of paper that was the same width as the 3x3 "1 great year" card and then applied various strips of the paper washi tapes to it.
The banner chipboard sticker was the perfect divider and just says CELEBRATE!

Lastly is a heavily layered card that features some of the softer, feminine sides of the collection:

Squares, squares, squares!  Using the three different sizes of squares found in the Insta Squares Pack made this a really quick card to put together.  Again, I trimmed out the speech bubble sentiment and added a few cute chipboard stickers around it.  
 

Supplies

Hello there everyone! Donna here today, your host for the blog, and I have two layouts to share with you using the new Life Documented scrapbook collection. I have been fortunate enough to be on the Simple Stories design team for nearly three years now, and in that time I have had many favorite paper collections. But, I have to tell you, this one may be my most favorite yet! To start, I used several cards from the new collection to create this first layout.

I have said many times here before on the blog that I am a simple scrapper at heart. Even if you don’t keep a Life Documented pocket page album, the cards in this collection provide great inspiration for layouts. Use them to create an instant grid. They make it so quick and easy to put layouts together! Make the design work even easier, and use a card to double as a title for your page.

In this close-up you can see a few of my favorite products from this new line: Basic Washi Paper TapePhoto Stickers, and Bradz. I always cut the prongs off of my brads when scrapbooking and so I feel like the new self adhesive Bradz were made just for me!

I also used one of the journaling cards as a home for my journaling and a close-up photo of my silly boy.  

Speaking of grids, I have had a lot of fun lately in my scrapbooking playing with asymmetrical grids and designs. For this second layout I wanted to create a clean background with simple patterns to feature a collection of photos of my boys from the past year.

I used the white grid paper so as to not compete with the colors in the photographs, and added color to the layout with the yellow striped and polka dotted paper off to the side. I took inspiration from the collection’s name to create the title for this layout, and added a pop of color to this part of the design using the Chipboard PiecesBradz and Enamel Dots.

I do love our crazy life and my three boys very much!

I just know that once you get a chance to use the new Life Documented collection you are going to love it as much as I do! Thank you for stopping by the blog today!

Supplies

Hello there, my friends.  Heather's here today with you to highlight a really cool concept from Simple Stories.  I'm sure you've all read about and seen the new Life Documented planners and collection and are just as excited about it as I am.  I had a strong need and desire to organize my life and I'm am just overjoyed to have such a great solution now!  

While I was putting my planner together to keep track of all family activities, do my meal planning, track deadlines, etc, I came across the Life Documented Planning Inserts.  Imagine a light bulb going off.  No, even better...the clouds cleared and birds starting singing - I was that excited!

Do you see that cool little grid in the photo and the section below to plan out your photos, supplies, ideas, journaling???? Genius! I stopped everything I was doing and started sketching.  Take a look at how I used this cool feature of the planners.

I started by selecting the photos I wanted to scrap. Then, I pulled out my Life Documented supplies and started sorting through them, looking for the perfect papers and embellishments. I jotted them down along with a few other items I knew I wanted to use.  I didn't have any memorabilia this time. We ended up donating my daughter's hair to those in need but once we get the confirmation letter back, I will add it to the page somewhere, maybe behind.

I love that I can use this to plan everything out in advance so when I'm ready to scrap, I have my plan and I'm ready to go.

So, let's see how it all transpired into an actual layout...

I really wanted to use the awesome paper with all the words.  The words were soo fitting for what my daughter was doing.  She grew out her hair and it took her a while to make the decision to cut it but she did and I am soo proud of her.  She felt soo wonderful knowing that she was helping another child in need.  It was definitely a FABULOUS, EPIC, AWESOME thing for her to do.

I toned down the words on the paper by adding gesso and then I added the graph section to the bottom, lining the dividing line with tags and banners.

I created the title using a combo of hand cut and die cut words.  I am still deciding what exactly I want to journal about but I do know it will go right there in the empty section near the title.

Supplies

Hello Friends! 

It's Kristine Davidson with you today and I am here to share a Life Documented spread featuring the NEW LIFE DOCUMENTED Collection! How exciting is that? You are going to love the diversity of this collection to create layouts, projects and Life Documented Spreads in 2015.   

This collection is filled with bright primary colors, journal cards that make it easy for you to document your daily activities or adventures, filler cards, and the cutest bits & pieces!

The Left Side of my spread has one of my favorite title cards that I made. I used the TODAY diecut and added popdots for dimension, I then added sewing on the initial card and cut up a quote @this very moment from another Day to Day card. I love it! I then added the date with a roller stamp and it was so easy ;-)

The Right Side of my spread has 6 SN@P! Insta Squares that I sewed together to create a 4x6 card. I added a few extra details by using bradz, Stickers, and Bits & Pieces.

This collection is so much fun to play with. You'll enjoy creating your own cards and making this collection one of your favorites!

I hope you enjoyed my Life Documented post today and I hope you enjoy creating with your Simple Stories Life Documented Collection!

Supplies

Hi there Simple fans! Nancy here today with a video on how I set up my new Life Documented Planner. Take a look at the video as I walk you through the set up I plan to use to organize my ideas, schedule, project life and sketches.

Click here to watch the video or watch below.

Here's a peek at how I'm using the daily planner inserts:

Supplies

Hi everyone! Nichol here today with a new layout and card showcasing the fabulous new Life Documented Collection from Simple Stories! I love this new collection. The colors, the designs… perfection!

I created a layout showcasing my daughter and her friend from several years ago by grouping several photos into a photo collage border and adhering them on a woodgrain background from the Life Documented Collection. 

I trimmed several strips from the Life Documented diagonal stripe papers in light blue, navy and green and adhered three of them at the top of the page and three below the photo collage. I added a title for my page using a combination of Life Documented die cut shapes and stickers.

I used embellishments in the same colors as the three striped patterned papers plus a bit of yellow to unify the design. I used the Life Documented die cuts, stickers, chipboard, and enamel dots.

I printed the journaling for my page on one of the 4x6 journaling cards and tucked it behind the photo collage, embellishing it with a label sticker and chipboard sticker. I finished the page with a few wood veneer shapes and sequins.

I created a simple card using the Life Documented journaling cards, washi stickers and stickers.

To see the creation of the scrapbook page from start to finish watch the video below or HERE on youtube.

Supplies

Pages