This past weekend my family and I took a day trip to the EMP (Experience Music Project) and I managed to take over 200 pictures! I wanted to put my favorites in an album, but I admit I was feeling overwhelmed at the task. Then I pulled out the new 4x6 SN@P! Binder and my entire album came together in under an hour. 

One of my favorite features of this album are the different size Pocket Pages (which are included). I love the layered look of 3x4, 4x4, and 4x6 photos stacked on top of each other.  I am going to need to stock up on these sizes!

I used the new Gold SN@P! Pack inside the album.  The metallic, kraft, and black colors worked perfectly with the "rock n' roll" photos, and are very on trend right now.

I added a single page of journaling, but to save time I mostly let the photos speak for themselves.

With the different Pocket Page configurations it was possible to place up to 12 photos in a single spread, which was definitely an easy way to get all of my photos in the album instead of sitting on my computer.

The EMP has many different sections such as music, movies, and games.  I divided up my album much like the themes of the rooms in the museum.  I ended with my favorite section which was movie costumes and props.  They even had the hat from the Wicked Witch in The Wizard of Oz, and the glove from the 6-fingered man in The Princess Bride.  

I've enjoyed sharing my album with you today, and I hope it helps show how quickly an album can come together using Pocket Pages and a SN@P! Pack!

Hi there! Suzanna here to share with you two layouts I created using the utterly amazing I AM and Say Cheese II collections! These collections are available to retailers now so be sure to stop in and snatch them up before they are gone! They are sure to disappear quickly.
 
My first layout is about my daughter, Mia. I am very fortunate that her name uses the same letters "I am" and I was able to use the very plentiful "I am" stickers for her name in the title of the layout. I used the 6x12 element page cut apart and reconstructed around the picture for this layout. Sometimes, based on the direction that your subject is facing, you need a little shifting and manipulating as I did here.
 
 
The bulk of the embellishing of this layout was done utilizing stickers, smaller chipboard pieces, Washi Paper Tape, Bradz and Enamel Dots to "supplement" the labels found on the 6x12 Element page. Some of the defining characteristics that don't really apply to an 8 year old I chose to cover with elements that were more appropriate. In many ways, this is my journaling. I just wrote on a small piece of washi at the bottom of the layout where the picture was taken and the date.
 
 
The bottom of this 6x12 picture was white space and a bit distracting.   Cutting the banner from a 4x6  card was the perfect cover up. It provided me with a space to put the title of my layout with further embellishments.
 
 
The next layout that I would like to share with you today I created utilizing the Say Cheese II collection. Our first trip to a Disney theme park was to Disneyland California when my kids were rather little.  I'm not sure that the "grandness" of it all really struck the kids. Honestly, I'm not sure they really knew who half of the characters were.  We aren't big TV watchers and so they would have had little exposure to the characters. This layout is of their first visit to Disney and their first "encounter" with Mickey.
 
 
Again, with this layout, the majority of the patterned papers come from Element pieces and SN@P! Cards with lots of little embellies here and there to supplement. I used the chipboard frame to frame a picture of Mickey signing the homemade autograph book that I had made the kids before we left for California.
 
 
I often find that there are elements of the patterned paper that I really like which "limit" the use of the paper if I don't cut into it. Don't be afraid to fussy cut and layer your background pieces over your pictures. Take for example the heart on the left hand side of the main pictures. If I hadn't fussy cut the inner most part of the heart, it would have been hidden underneath the picture. It's not a bad place for it to be but I wanted the full effect of the heart. The label sticker was perfect to help hold the heart layer down onto the picture.
 
 
I love using larger sized pictures for my layouts and the element pieces of these collections make scrapping larger pictures so easy! What size picture is your preference?
 
Thanks for stopping in today!


Supplies

Hi everyone!  Shellye along today with a perfectly adorable and "Enchanted" door hanger for any little princess in your life. 

I started with a sheet of heavy weight chipboard and an album die from Top Dog Dies, but any pre-made chipboard shape would work. Next, I cut the shape from the "Dreams Come True" paper and distressed around the edges with a walnut ink before attaching to the chipboard base.

The edge was trimmed in a pom pom ribbon along the back of the chipboard.  For a nice finishing touch, I also covered the back in a coordinating paper.

The focal point of the hanger was made with a couple of die-cut hearts from the Enchanted 6X6 Paper Pad and the center piece is a smaller chipboard shape hosting the sweet sentiment that was cut from the 4X6 Journaling Card Elements paper.

Extra dimension was added with various chipboard stickers pieces, decorative Bradz, Enamel Dots and Bits & Pieces die cuts.  To create the hanger, two holes were punched at the top and a strand of 1.5" grosgrain ribbon was strung through and then knotted at the ends.  Two boutique style bows were made and then attached above the knotted ribbon ends.  Now it's all ready for gift-giving or hanging!

Click here to download the I AM... SN@PBOOKING Album Guide!

Supplies

Hello scrapbooking friends!
 
I'm Sara and I'm back this month to show you some more of the new releases in the Digital Store!  There were lots of choices this month and I decided to once again work with my very favorite parts of the Simple Stories collections - the 3x4 and 4x6 cards!  I am having a blast experimenting with digital pocket pages, and have been even trying to use pocket style pages for scrapping events instead of strictly daily life.  I love making each little pocket it's own layout and mixing colors and patterns and finding just the right photos.  It is hard to narrow down which cards and patterns I want to use, though.  Simple Stories has an understanding for fun, lively colors.  
 
I started out working with the bright and sunny digital Summer Paradise Simple Set, which has so many refreshing and bright patterns, it calls to mind a warm summer day on a beach with your toes in the sand.  Which, for this Minnesota girl in the thick of winter, was a welcome change of pace! 
 
 
I dug up some pictures from our trip up to Lake Superior last summer since beach trips are few and far between for our family.  Once I found the pictures of my boys playing in the sand and in the water, I knew what I wanted to do with this collection.  I like to incorporate multicolored papers in my pages as much as I can, so this turned out really bright!  I also love to mix things up a bit sometimes and use some of the smaller square cards on a page with the traditional 4x6 and 3x4 layout by shrinking them down a little and putting them on a patterned background.  
 
I wasn't sure if I would be able to pull off a second project as I found myself stuck in a huge creative rut this month for whatever reason (or...winter).  But when the first digital SN@P! Set - the Love SN@P! Set - became available, inspiration struck and I was so excited!
 
 
I have been known to randomly stage a little "photoshoot" from time to time and so I pulled out a few things toward the end of January to do a little Valentine's Day photoshoot of my boys.  I purposely picked a day when it was nicer outside so I could use outside play as a bribe to get them to sit for pictures, since they don't often get to play outside during our frigid winters.  I knew I wanted to use the Sn@p set to document a few of the pictures I captured that day and it turned out almost exactly as I had envisioned in my head.  
 
 
I like to pop a few of the elements off the page to give it a little more of a realistic look - like I had used pop dots on them.  I scattered hearts around the whole layout with the "pop dot" effect, and even on a few of the hearts in the jar to give that card a little bit of extra dimension.  This came together so very easily for me and I was thrilled to feel inspired once again!
 
Thanks for dropping by, and happy scrapping!
Last year for Spring break we went to Disneyland for the first time as a family. I still have about a billion photos that I want to scrapbook from that quick trip! I loved Simple Stories' original Say Cheese collection and the latest Say Cheese II collection is just as awesome.
 
 
With the traditional red, black and white Disney colors, it was perfect for a ton of our Disney photos. The gold foiling in the die cuts from the Bits and Pieces pack is such a fabulous touch! I also adore the Self Adhesive/wingless Bradz and the glittered gold Enamel Dots!
 
 
But some photos (think princess and the castle!) require a softer color palette. Lucky for us, Simple Stories heard the call for a girly Disney-inspired line and brought us Enchanted
 
 
Of course, Disneyland and other theme parks work well with these lines, but they are more versatile than that. Check out my layout about a photo shoot I did with my less-than-cooperative daughter.


Both of these lines are so fun and playful, feature both cute and beautiful elements and can be used for a wide variety of paper crafting projects. Besides who doesn't love having another reason to get back to Disney? ;)

Supplies

It's Kristine with you today and I am here to share a Life Documented spread featuring the LIFE DOCUMENTED collection.  It should be available at your Local Scrapbook Store - HURRY!   You are going to love the diversity of this kit to create plenty of Layouts and Pocket Page Spreads in 2015.

This is the first page in my Life Documented album for 2015. I'm doing something a bit different this year. I'm not committing to a weekly spread. This means I can do a month at a time, a week at a time or even a day at a time. I am not worried about the pocket page style that I'll be using either. It's considered more of a large "mini ablum" and I'm looking forward to creating this year and hope you'll join me!  

I started my spread using the Simple Stories Design 10 Pocket Pages. This allows me to add larger photos 4"x4" and also the standard 3"x4". The left Side of my spread has a photo of hubby and I from 2014 and a bit of journaling about the year ahead. I love that my pictures can be included with journaling on a 4x4 card.

Creating your own journal cards can be so much fun.  I used 4x6 and also 3x4 cards and created my own. I added 1" strips and sewed them to cut up 4x6 cards. Super easy to do and gives you a unique touch to your page using all the wonderful Simple Stories Cards. 


Since my spread is about the entire Month of January 2015 I wanted to add photo and journaling but not have this on a few spreads so I typed directly underneath my pictures!

The Right Side of my spread has the same format as the Left.   I did a picture collage on one of my photos to showcase the great day we had at the Clay Café. This is a place I bring my nieces when I visit. We have a blast and always look forward to getting our fired clay pieces.  

Below is an example of a journal card I created using a 4x6 card cut to fit below the " Week In Review " title. I added a tag for my journaling and created little embellishment details with the Life Documented Washi Paper Tape. So Easy!

This collection is so much fun to play with. I hope you enjoyed my Life Documented post today and I hope you enjoy creating with your Simple Stories Life Documented Collection!

Supplies

Hello everyone, Chantalle with you again and I’m looking forward to sharing a couple of layouts I’ve created, using the truly beautiful I AM... and Enchanted collections.
 
First up, is this page entitled ‘I am perfectly imperfect'. I think the reason we are so smitten with the ‘I Am’ collection is that it resonates will all of us. Not only is it a beautiful line, but the sentiments expressed pertain to our every day lives. We all have our fears, our eccentricities and instead of dwelling on them, it’s a happy reminder to be comfortable in our own skin!
 
 
I have stitched together a couple of different elements to create my base layer. Using a sheet of ’Thankful’ 12x12 paper underneath, I then went about trimming the diagram section from the 6x8 elements paper and placing it in the centre towards the bottom. As you can see, I have printed my journalling directly onto this section, using my home printer. Finally, I have placed a 6x4 SN@P! card in complimentary hues at the top, leaving a small gap for interest. Everything was then machine stitched down.
 
 
Various elements have been strategically placed onto the journalled sheet. Some stickers have been raised onto foam tape, some ephemera stitched over the top. I have used the prompts on the stickers to remind myself of the things I want to remember this year. I just love the gold touches in this collection!
 
 
One of my favourite things I like to do with enamel dots is highlight patterns. Pop an enamel dot over a spotted pattern or use it as the centre of a floral print to add definition.
 
 
Experiment with tucking your die cuts in and over other objects on your page. A great way to make your stash go further is to cut things in half... There’s no point wasting a great bit of a die cut that no-one can see anyway!
 
In this next page, I have pulled out all the elements I could find in the yellow and green hues from the Enchanted collection, to tell a wedding love story. I especially love that rose pattern. Doesn’t it evoke imagery of Sleeping Beauty waiting for her dashing Prince?!
 
 
The floral print, inspired me to create a bramble (just like in the storybook!) using my Silhouette Cameo, where I have tucked lots of elements inside, including my photo.
 
 
Some machine stitching adds texture along with a mix of elements, like the glitter enamel dots (SO yum!) metallic sheen from the gorgeous silver foil elements and metal bradz. 
 
 
If diamonds are a girl’s best friend, then you are going to be serious BFF’s with this collection! Layer chipboard frames over parts of a print to highlight them, like on this sheet from the 6x6 paper pad.
 
 
An awesome touch is the various sizes and circular shapes included in the washi paper, that also have some sentiments printed onto them. Here I have placed the thicker size of the yellow floral tape onto some plain cardstock, then raised it with some foam tape. Layer another piece of washi over the top to create your own layered stickers.
 
 
Thank you so much for stopping by today!
 

Supplies

Happy Valentines to all of you Simple Stories fans!!!
 
I hope that you've all got some big romantic plans for the day or can at least spend time with those you love.  I'll be cheering my middle child as he has a few soccer games today!
 
I'm excited to share with you some layouts today that I created using the new Hugs & Kisses collection. I absolutely adore the colour combination in this release (probably because turquoise is my favourite colour!!)
 
My first layout that I'd like to share with you has to do with my personal love affair! Yes, ... love affair. With yarn!!! 
 
 
I used a sheet of the red polka dot/chevron paper from the Sn@p Color Vibes Brights on the floral heart background paper from the Hugs & Kisses collection. I really like the combo of pink & red.
 
I used my Silhouette cameo and some of the Simple Stories Silhouette cut files on my layout.  I backed the arrow with some turquoise coloured card stock to tie it in with the other bits of turquoise in the typewriter and flowers.


 Here's another Simple Stories Silhouette cut file - I added a sticker and a red Enamel Dot for a punch of colour.
 
 
I like using foam dots for added dimension and I did so with this rose sticker (as well as a few other embellishments on this layout.
 
 
The second layout that I'd like to share with you today is titled "I Love You" and it's about my three children.  I wanted to keep this layout clean and simple to focus on the photos.
 
 
At the bottom left corner of the patterned paper you will see a cluster of roses. I decided to cut them a little bit so that they could overlap my photo. So I used an xacto knife and cut around the sections of the flower that I wanted to show overtop of the photo.
 
 
And here's a peek at how it looks when finished.
 
 
I printed a line of journaling onto some vellum which I then stapled to the middle section of my layout.  I added the title and a few enamel dots to each end of the vellum.


Once again I have used a fair bit of foam dots (yes, I'm slightly obsessed with them!) on my layout because I really like the depth and dimension that it gives to a layout.
 
 
Thanks so much for popping by today and I hope that you have a fun-filled Valentines Day!

Supplies

Happy Friday, SS Fans!!!  
 
Candi here today to bring you another peek inside my Life Documented Planner and how it is working out for me so far.  I have been loving this planner so much and the more I work in it, the more I LOVE adding bits and pieces inside!
 
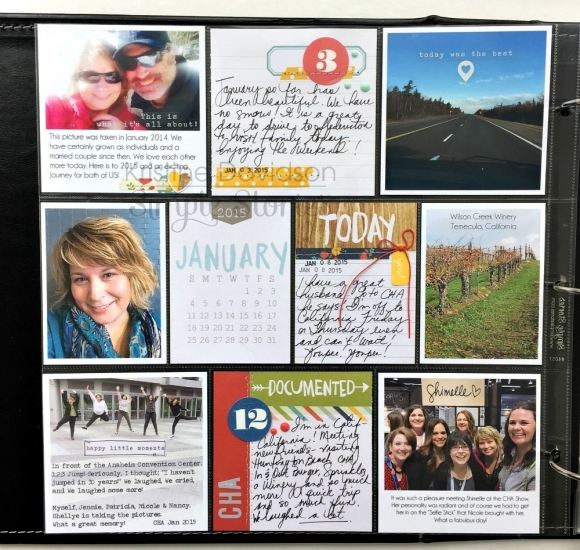
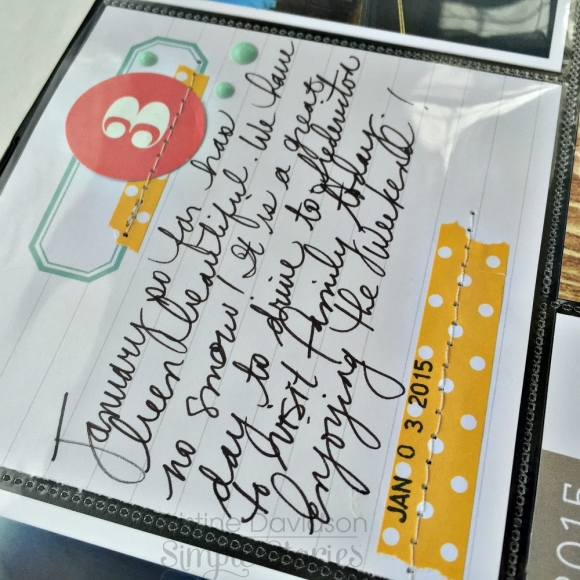
On the back of the monthly dividers, there is a little place to recap your month.  Here is my recap for January...I added a photo, stickers and some journaling.
 
 
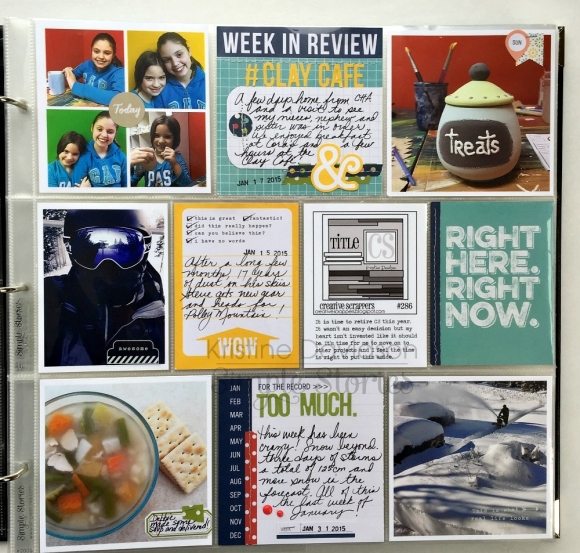
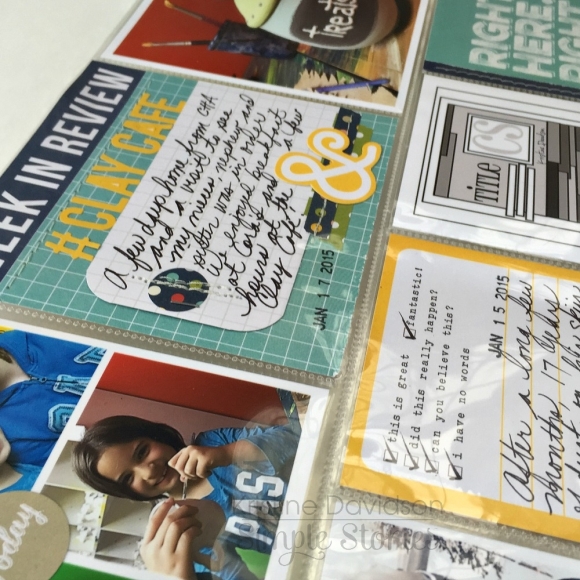
Not sure if you remember my blog post from January, but I used an Insta-Pocket Page for January (recap for the month in photos).  Front side I decorated it using the Snow Fun Simple Set...well here I have the back side complete with a few photos from January.  I trimmed them down to 2x2 and added some embellishments.


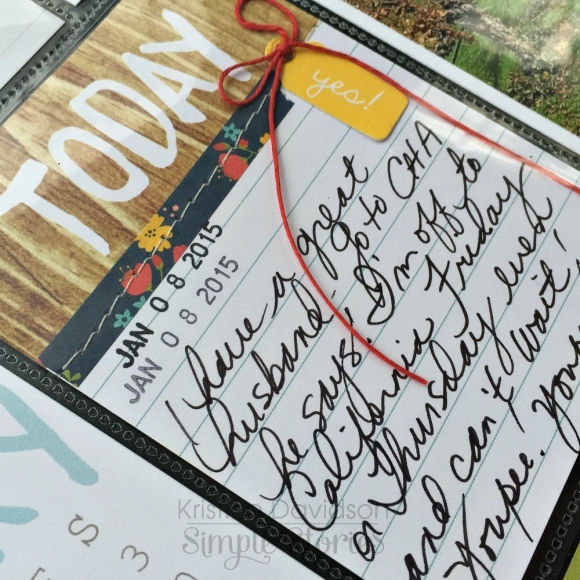
After my January recap, I took two 4x6 photos and adhered them together...punched a few holes, added a few embellishments and stuck that right inside my planner.  LOVE how it turned out!


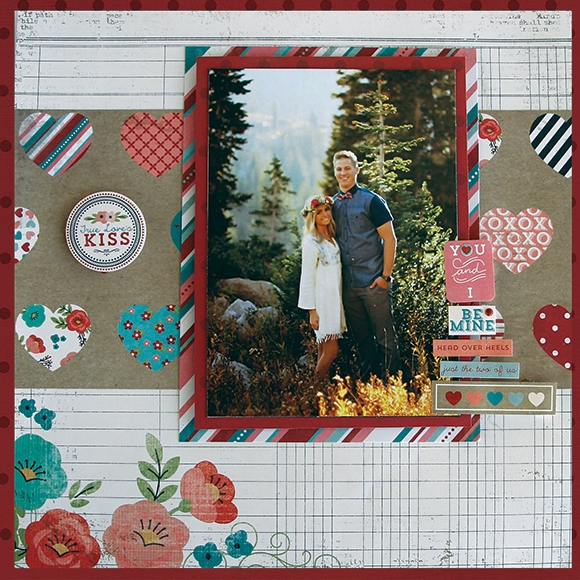
Time to get into February and decorate it up!!!  I used bits and pieces from the Hugs & Kisses Simple Set to create a little insert...


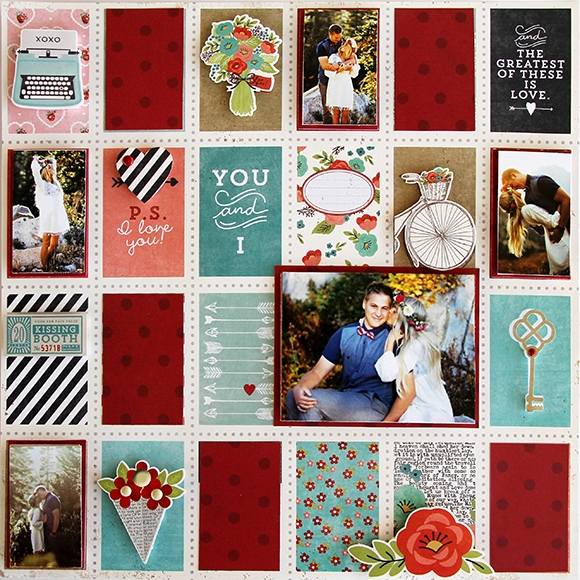
I grabbed an Insta-Pocket Page for February...front side I decorated it with pieces from the Hugs & Kisses Simple Set.  Once again, when February is over with I will go through and pic my favorite photos and add them into the missing holes on the front and back side of this Insta-Pocket Page.


Before you open to February, I added a 4x6 card from the 2015 Card Set...


Here is a look at my month on two pages for February!  I added stickers, some stamping and my tasks for the month...


I wanted to share a couple of my Daily Planner Inserts (Feb. 5th & 6th).  I added a few scratch off tickets and a menu from Chipotle.  Just a few pieces of memorabilia from those two days.  If you don't already own a single hole punch...you NEED one for this planner.  Punch holes in anything and add it in your planner!!!  


Close up shot of my day...


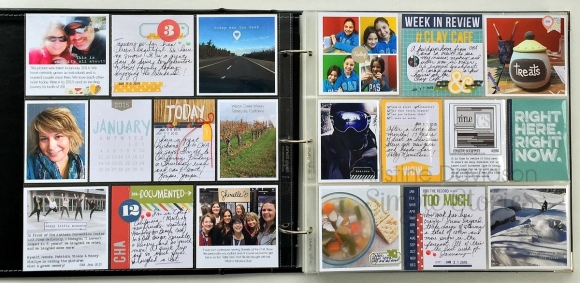
I was so excited to start using my Life Documented Planning Inserts...these inserts are a life saver!!!  I am always behind on my pocket pages so this helps me out a BUNCH!!!  Here is a shot of the left hand side of my Week 2...there is a spot to fill out your photos, memorabilia, notes and even a place to sketch out your pocket pages!!!  
 
 
Here is the right side...a place for each day of the week.  I stamped out the date and jotted down a few things from each day.


I sat down to create my pocket page spread for Week 2 on February 3rd and it was so nice to just go back to my Life Documented Planning Inserts for Week 2.  I printed out my photos, pulled some paper and embellishments......AND to have all that information from my week right there in front of my face!  This system is working out GREAT for me!!!  Here is a photo of my Week 2...
 
 
I wanted to add more journaling for that week, so I decided to add a 4x6 card from the Journaling Card Set...I think it's perfect!  


I also added a 4x6 thank you card from a piece of mail that I received from that week...


I am still unsure of what I am wanting to do as far as storing my pocket pages...right now my thought is to have everything in one binder (might need a few binders though...lol).  I want to keep my monthly divider, planner inserts (maybe clip those together w/a mini binder clip for each month) and pocket pages all together.  I just think it would be neat to look back through some "old" planner pages...we will see...I will keep you posted next month! 
 
 
It's so exciting to see the Life Documented Planner goodies arriving in your hot little hands!!!  I have been going through the different hashtags on Instagram to see all of your fun photos!  Keep sharing...it's always great to see how everyone is using their planners!  
 
Have any of you started printing out any of the FREE Printables yet?!  I am hoping to do some of that for my next blog post in March...
 
Have a great weekend and I will see you next month!!!

Happy Planning!

Supplies

Hi everyone, it's Audrey, and I'm so happy to be here to share a couple of fun cards with you. In honor of Valentine's Day just a few short days away, I have a pair of "heartfelt" love cards to share today, made with the adorable Say Cheese II collection. AudreyPettit-SayCheeseII-LoveThisMomentCard Valentine's Day is all about the love, and what better way to show your love than with some great, big paper hearts. Both of my cards today feature hearts from the Say Cheese II collection in a prominent, yet slightly non-traditional, way to create some fun love-themed cards that work perfectly for Valentine's Day..... or any other special day. AudreyPettit-SayCheeseII-LoveThisMomentCard4

Simple Stories' Elements papers are a great source for fun focal images and sentiments for just about any card occasion. Both of my cards today feature hearts cut from a variety of Elements papers. This first heart and sentiment combo are from the 3X4 & 4x6 Elements. I used another of the Elements from the same sheet to create the backdrop for the chipboard frame, too. AudreyPettit-SayCheeseII-LoveThisMomentCard3 I'm all about the layers. I think it's the little details that adds interest to your design. A die cut Bits & Pieces sentiment banner and text-print Bradz are a quick and easy way add a lot of extra charm, and helps call special attention to the focal point heart. AudreyPettit-SayCheeseII-LoveThisMomentCard2 My second card also features a heart cut from the Say Cheese II Elements sheets, this time, from the 2x2 & 4x4 Elements paper. AudreyPettit-SayCheeseII-HelloLoveCard Once again the heart has been fussy cut from the paper and layered with one of the fun chipboard frames. And again, I layered the heart with a few details. In this case, a metal arrow adornment, a bit of twine, and a stamped and hand cut sentiment image. AudreyPettit-SayCheeseII-HelloLoveCard3 I love the black and white polka dotted chipboard frame, but thought it might lose a bit of definition layered against the black background paper. A light sanding around the frame's edge, however, removed some of the black to reveal a bit of white underneath. And now my frame stands out nicely from the layers below. AudreyPettit-SayCheeseII-HelloLoveCard2

Supplies

Hi everyone!  It's Ashley and today I'm stopping in to share two new layouts with you.  Valentine's Day is only four days away and I'm sure you're wanting to document this special day.  So I wanted to share some "love"ly ideas for creating love themed layouts, using the I AM... and Say Cheese II collections.


I think we all have a tendency to document what we feel are the "best" photos on our layouts.  But I think it's important to also document the not so perfect photos too.  We want our albums to be a record of memories for future generations, so I think that includes the good and the not so good.  The photo I used definitely isn't perfect.  The kids' hair was wind blown and our son had his eyes closed, but I love that it showed the bond between the kids.


I started my layout, with the idea to create the heart circle die cut and add water color paint behind it.  Once I had my die cut paper layered over the dry water color paint, I mounted the white cardstock on the Courageous 12x12 paper.  Then I used my sewing machine to add some messy stitched circles around the heart design.


I thought it would be fun to add some dimension to my photo, so I layered it over one of the Interactive Elements.  After my photo was in place, I started adding embellishments from the I Am collection including Decorative Brads, Enamel Dots and Bits & Pieces.

On my second layout, using the Say Cheese II collection, I wanted to try out a fun trend that's been popping up lately...String Art.  I cut out the letters for the word Love on my Cameo, and then placed them on my background paper.  I traced around the letters, and then used my paper piercer to punch holes for my stitching
 

After I back stitched around the edge of each letter, I randomly criss-cross stitched on the letters using teal embroidery floss to create the String Art look.  I wanted the title in the center of my page, so I added my photo and embellishing at the top.  I chose the Teal striped patterned paper and embroidery floss, to balance out the Pink that was in my photo.  

I also thought it would be fun to create some hand cut letters to finish the title for my page.  I used four different papers from the Say Cheese II 6x6 Patterned Paper Pad and my small scissors to cut out the word This.  Once I had the letters in place, I used my sewing machine to add some stitching.

The I Am collection and Say Cheese II collections would also be great, for some of your Valentine's projects or Cards.

Supplies

Hey Friends, Rebecca Larson (IG: digiscrapbec) here to share a couple projects using the latest digital kits added to the shop. First up a layout I created using the Legacy Digital  Collection. I was instantly drawn to the wood plank paper, and the vintage cards. I knew it would be perfect to highlight a photo of me and my sons, taken this summer in Glacier National Park. After downloading the content, I knew that I wanted to use this card in some way.

I love the texture, and the scratches that make it look like a classic relic.

In Photoshop, I merged the photo. Then using different blending modes, and the healing brush, I was able to combine the picture with the yummy grain, and texture of the photo.

I then used some of the cards, and elements from the kit to give the layout a well rounded theme, yet rustic and woodsy.

My second project seemed to come together on accident. I created it on my SMART PHONE!!

On a drive to visit family, I realized that I didn’t have a card to go with a gift I had purchased for my husband’s birthday. I had previously imported the Hey POP! Simple Set into my Drop Box account to be able to use it between my devices (computer, ipad and smart phone).

First, using a collage app on my phone, I pulled the cards from Drop Box and added them, and the photos I had accessible on Facebook, to the collage.

I then imported the collage into an app that allows you to add text to your photo. I added Happy Birthday Dan, and then emailed it to myself.

When I got to a computer, I opened it in Photoshop, changed the image size to 4x4 and printed and mounted it to some heavy cardstock. Super quick, and easy! All from the palm of my hand!

Thank you for stopping by!

Join us this week on the blog as we celebrate all things LOVE!  If you're in the mood for love, our pint sized Hugs & Kisses Simple Set is just what you need!

Have you used our Simple Sets?  They're mini, themed collections, including four double sided 12x12 papers, two 12x12 Element Papers, and two 6x12 sticker sheets.

In house designer Sue Kendall created a fun class using just the Hugs & Kisses Simple Set, Enamel Dots and two pocket pages.  Check with your favorite local or online retailer to see if they have it available!

On this first 12x12 layout, Sue used the Love Letter Designer Cardstock, then adhered photos over several of the 'stamps'.  Adding stickers with foam adhesive brings some extra dimenion and pop to the layout!

This 2nd layout uses an additional photo from the same photo shoot of this lovely couple.  Using similar photos across 2 different layouts lends continuity, so you can use the layouts together as a two page spread, or keep them separate.

Sue also created this 2 page pocket page spread using our 4x6 Vertical/3x4 Horizontal and 4x6 Horizontal/3x4 Vertical Pocket Pages.  This is a great way to scrap additional photos from a special event or photo shoot, without having to create additional 12x12 layouts!

Supplies

Hi everyone, it's Amy here today to share a layout with you I created using the new Say Cheese II line.  I love that although it's a themed line, it's versatile enough to use for some every day projects, too. Of course I love it all, but I just adore the fun pieces in the Bits and Pieces package!

Here are some closeups. I used some of the Simple Stories Silhouette cut files, which you can find here, to create my title.

I love using the adorable new Chipboard Frames for my journaling.

Thanks for stopping by the blog today!!


Say Cheese II Enamel Dots: 4331

Supplies

Hi everybody, Mindi here with you today. I am excited to be sharing a few pocket pages using the brand new Enchanted collection! I have been slowly making my way through our last Disney trip back in 2012. When I saw this new line I was so grateful that I had not tried to tackle my princess pictures yet. Because the colors in the Enchanted line are simply perfect, and you throw in the hint of silver ! Amazing. 

Here is a look at what both pages look like together. 

A few close ups from the first page. 

One of the things I was looking forward to using were the photo overlays. I used the Disney Castle overlay as part of my title card. On the other side of the title card I cut out the pink label from one of the 4x6 cards and printed out my title on there. Finished it off with some personal touches and called it done. 

New this year are the Chipboard Frames. I used it here as a frame around my girls Brave doll. 

I made a fun filler card using a few pieces of the new washi tape on the side. I really had fun using the washi tape. The size is perfect. I also added a photo overlay over the photo. 

A close up of the right side. 

This MAGIC card might have been my favorite! I added a strip of the washi tape on the bottom and also added the fairy wand chipboard piece to personalize it. So fun ! 

One last close up. 

This collection is jam packed with great colors, wonderful embellishments, that I can't wait to create with it again. I can see it being used for much more than princess pictures ! 

Thanks for stopping by everyone. 

Hi friends!   Vicki here with you today to share a layout I created using the new I AM... collection.

One of the things I love the most about this collection is that it inspires me to tell MY story.  The vast majority of the scrapbooking that I do is about someone else - my kids, my husband, my family, my friends - you name it!  Everyone else BUT me.  The I AM...  collection really resonated with me in that it prompted me to step back and really think about how important it is for me to tell MY story.

Between the gold foil accents, the beautiful, feminine colors & patterns and the prompts, the I AM...  collection is the the perfect collection to tell the most important story you have to tell... yours.

Supplies

Hi everyone! Allison here with a layout using the lovely Hugs & Kisses collection. I've also got a new sketch to share with you that combines traditional scrapbooking with the SN@P! Pocket Pages.

You can download the full sketch with measurements and placements here.

The left side of the sketch follows a more traditional style of layout design while the right side uses the SN@P! Pocket Page, Design 3.

Here is my layout based on the sketch.

Valentine's Day in our house is usually a day full of fun activities. We have to make Valentine's for Drew and Jackson to hand out a school. We always have a heart themed breakfast like heart shaped strawberry muffins or heart shaped red velvet pancakes and our own special "love potion" to drink. There are balloons and candy and lost of hugs and kisses and even a heart scavenger hunt. We usually end the day with a visit to see family which usually involves lots more balloons, candy, hugs, and kisses. It's definitely a day to document!

I love how the Hugs & Kisses collection has the traditional Valentine's Day colors mixed with the blues and black and white. Those colors made it easy to take something more feminine like hearts and flowers and use them with boy heavy photos.

For the background of the left page I cut out several hearts from the Heartthrob 12x12 Designer Cardstock. I love the variety of colors and patterns! I use hearts often and if you were to visit my house you would see them everywhere. When I first saw the Heartthrob paper, I knew we would be pals!

I added a few small details to some of the hearts like arrows, stickers, smaller hearts, and even small photos. The arrows are cut from the Love Letter Designer Cardstock. I also used some foam adhesive to make a few of the hearts stand out and give some more dimension to the layout.

For the title I used the "love" stickers and added the "Happy Valentine's Day" banner at the bottom.

On the right page I used a combination of cards and photos with the SN@P! Pocket Page, Design 3.

I always enjoy adding small details to the empty spaces of my photos. On this photo I added a small xoxo sticker the bottom corner and added a small circle/heart to one of the "o"s.

For the 3x4" pockets I used photos for three of the pockets for photos and then used a 3x4" card in one pocket. I added a small photo and heart embellishment to the card. The heart embellishment is actually cut from one of the 4x3 cards on the Elements #2 sheet.

On the bottom card I added a small photo to one of the hanging frames. I also added some small heart stickers to the wire the frames are hanging from.

I hope you enjoy using the new sketch and have fun playing with the super cute Hugs & Kisses collection!


Supplies

Pages