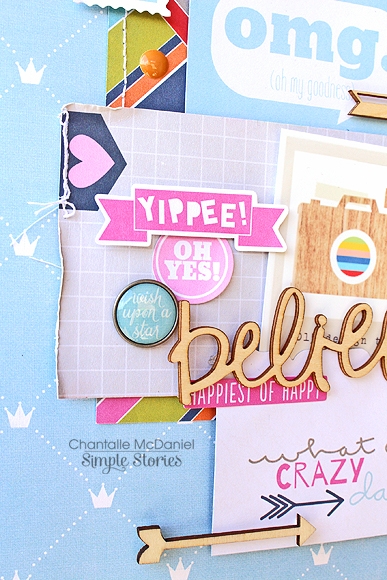
Hello everyone,  it’s so wonderful to be back with you again!  Chantalle here and I’m hoping to inspire you to create with the new and incredibly fun SN@P! Packs! There are six different sets to choose from, with something to suit every style of scrapping, from retro hues, to fabulously fresh and luxurious gold foil. You are sure to love them as much as I do!
 
My first page is entitled ‘You & Me’ and features my parents on their wedding day, many moons ago!  The Gold SN@P! Pack with it’s beautiful gold foil touches and love inspired sentiments lended themselves perfectly to the theme and black & white image. 
 
 
I have used a grid design (based on a sketch I saw online) The super sweet 2x2 squares line up nicely, with the addition of an altered one, which I have turned into a mini pocket. I have used my Silhouette Cameo to cut the title ’You & Me’. This file is available in the Silhouette Store. I have used embroidery floss and hand stitched a running stitch into the title for a bit of texture and some detail.
 
 
I created my little pocket by cutting out the top part of the printed envelope located on one of the black-based 2x2 cards (shown above) I then mounted this cut piece onto a piece of spare white cardstock, which was the same width at the 2x2 but a teeny bit taller in height, to create a flap which I can open and close. As you can see, I machine stitched the top black part to the bottom piece of plain white cardstock so I got maximum space inside the pocket. If I had used double sided tape, I would’ve lost valuable space or run the risk of the small photo sticking to the edges of the glue. Wet glue would be a good alternative if you don’t like stitching. Make sure it’s completely dry before adding anything to your pocket. You can keep your mini envelope pocket closed with a small peg or paperclip.
 
 
Part of my journalling has been adhered onto a decorative clip, which I then slid over my photo. 
 
 
A great thing about the SN@P! Packs is that they come with lots of different sized SN@P! cards, as well as some die cuts! I have used some of them to embellish some of the 2x2 cards. Try mount gold on gold with some foam tape or add enamel dots over a polka dot print.


My next page is all about the day I found out I would be joining the Simple Stories Design Team. For me, it was a dream come true!!  I’ve used the ‘Fresh’ SN@P! Pack for this page.
 
 
Again, using the various sized cards in the pack, I have formed a base for my layers. By using the long strips down the left hand side of my page, I can continue hints of the darker shades in my colour palette. For this layered 3X4 card (shown below), I have cut up the postage stamp print 3x4 card and placed them over a zigzag pattern card. I have machine stitched the cut ’stamps’ to secure them down. I like to use top stitch thread, which is nice and bold. Then, I cut the ‘Happy, Happy, Happy’ printed card into three bits and raised the words onto bits of foam tape. I’ve left the bits of thread on for a relaxed finish.
 
 
So many of the sentiments on the cards in this pack express how I felt on the day perfectly! Can’t-believe-what-I’m-reading sheer elation! Cluster the die cuts you find in the pack with fun Bradz and wood veneer.
 
 
I have also created a simple pocket out of a section cut from a 12x12 sheet of Color Vibe Bolds ’Navy’. Inside, I have placed a bright pink 3x4 Sn@p card from the collection as well as the email I received at the time, which I have printed off and folded up. Add interest by punching little shapes, like this small circle on my pocket.


My final page has a retro vibe, thanks to the ‘Epic’ SN@P! Pack. This little pack is bursting with fun. I especially liked the vintage retro elements, like the cassette tape! My Sister and I are rocking the corduroy dungaree look!
 
 
Two 4x6 Sn@p cards form the base, with lots of smaller elements layered over the top. The wood veneer speech bubble has been backed with a bit of orange print from one of the 3x3 cards in the pack. The printed star on the die cut tag (behind the photo) has been punched with a small star hand punch to echo the star shape.
 
 
I love backing up the ‘big idea’ on my pages with lots of smaller bits of supporting text. Expression stickers are a wonderful way to add a bit more chatter to your projects.
 
 
Make your wood veneer go further by snipping larger pieces in half with some sturdy scissors. I get to use the other half of this awesome view finder on another project!


Thank you so much for stopping by today!

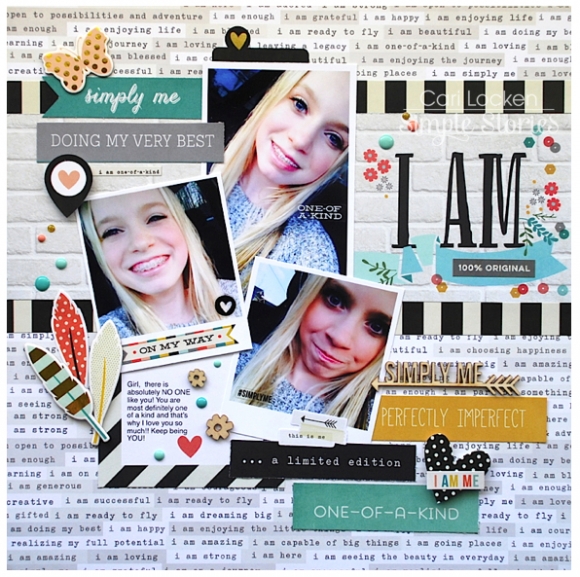
I will often find selfies on my phone taken by my daughter (as I'm sure many of you can relate to).  Oh how I would love to print them all off and show the world how crazy she is! (but alas, I may be in her bad books for some time if I did so).  So, I chose a few that I wanted to scrapbook and came up with this layout using the I AM... collection. She is one amazing kid and I love that she likes to be different than everyone.  
 
 
I used a few of the 3x4 journal boxes and cut up the word strips to use on my page because they fit perfectly. 
 
 
 I am so excited about the wood veneer that Simple Stories has come out with too. They add the perfect dimension and texture to a project.
 
 
In keeping with the dimension aspect I used some chipboard 'feathers' and added some foam dots to adhere a few stickers.


This past year has been busy with sports for our kids and I must admit that I didn't take my camera with me to the games.  Not because I didn't want to take pictures but more so because I just loved watching him play so much that I didn't want to be distracted by taking good photos.  I did, however, snap a few pics with my phone. They're not the greatest quality but they capture his determination and effort that he always put in to his playing.  I started with the Epic SN@P! Pack and added some extra embellishments from a few different collections.
 
 
I used my Silhouette to cut out the 'fabulous' and 'awesome' words from Simple Stories at the Silhouette online store -  the words are available here
 
 
I love the Photo Stickers because they add a bit of text and a punch of black colour to my layout.
 
I then printed my journaling onto a 6x4 journal card to keep things neat and streamlined.
 
 
I love adding texture (as I mentioned earlier) and did so by adding some foam dots to some of the die cut pieces.
 
 
I also used some brads for added interest along with a wood veneer arrow.


Thanks for stopping by today!

Supplies

Hello again, Simple Fans :)
 
Candi here today and I am super excited to share some more bits n pieces from inside my Life Documented Planner.
 
In last months blog post I was unsure as to what my plan was going to be with my pocket pages...keep them with my planner inserts or keep them separate...?!  I finally decided to keep them all together :)
 
Here is my January (see pic below) = my month on two pages, daily inserts for the whole month and my first 3 weeks of pocket pages.  I still need to add week 4 and 5 pocket pages, but I can say that I am pleased with this so much.  I believe I have room for 1/4 of the year in one binder (4 binders total when it's all said and done)!  I am not only creating pocket pages, but also adding extra memorabilia throughout my days in between my planner pages.  
 
 
Just wait until I explain EVERYTHING that I have inside my week 10!!!  (warning...yes, this week will be super chunky, but I don't mind...love me a chunky planner!)  This is a shot when you open up my planner, using the bookmark, to my current week...


Week 10 in action!  For the dates I stamped out a few and for the others, I used some number stickers.  I also used some of the designer washi paper tape, several of the calendar stickers, word strip and label stickers...


I wanted a place to house my receipts for the month so I took one vertical 4x6 pocket page and slipped in the "March" 4x6 card from the 2015 Card Set (I added some embellishments to the "March" card)...then tucked my receipts behind it.


After I created the receipt pocket...I thought to myself that the Calendar Stickers would all fit snug inside and would be great to have in place each week since those are my most used stickers in my planner.  They are right there at my finger tips!  I will move this pocket from week to week!


Last week I was updating my Life Documented Planning Inserts and thought why not insert a little "Day in the Life", Ali Edwards style!!!  I chose Thursday, March 5th and just used my cell phone to snap pics throughout my day!  I printed off about 10 pics and embellished them with lots of SS goodies and tucked them inside the pocket pages.  I used a 3x4 card from the Week in Review Cards, added some stickers and stamped the date!  Finished it off by using a mini binder clip to clip the card to all 5 pocket pages...I just LOVE how this turned out!!!  


I was invited to an open house on Friday the 13th so I punched a few holes in the postcard and added that right in front of my week 11...


Besides using the pouch for my extra memorabilia, I am also storing some inside one of the pocket inserts until it's time to go into my pocket pages...
 
 
These FREE printables are fantastic...I need to reprint mine off on some heavier cardstock so they will be more sturdier inside my planner.  If you have not checked them out, click HERE for the direct link to the Project Downloads then scroll through and locate "Life Documented FREE Printables - January" and "Life Documented FREE Printables - February"!!!  Later this month March will be available!!!  


I hope you enjoyed this month's blog post...and cross your fingers for me that I can fit 3 months in one binder {wink}
 
Have a great week and I will see you in April!!


Supplies

Click here to shop from the new Silhouette designs.

Click here to shop from the new digital collections.

Hi everyone, it's Audrey, and today I'm here to share a couple of cards with you that I made with the super adorable Say Cheese II collection.

AudreyPettit-SayCheeseII-BestDayEverCard

have fallen so hard and fast for this collection! Of course, who doesn't love a paper line dedicated to the happiest place on earth, right? But what I love even more is how well this Disney-inspired collection works for any occasion, way beyond just a visit to the theme park. Today I'm going to show you several ways to use this sweet themed line to create a pair of general purpose, all-occasion cards.  On my first card, I've swapped out Mickey for another current hot trend in the paper crafting world these days, coffee and tea.

AudreyPettit-SayCheeseII-BestDayEverCard2

Here I've nestled two cups from the Bits & Pieces die cuts pack inside a chipboard frame, and accented with a sentiment banner to create a fun celebratory look that would work perfectly for a birthday, or any other special day, for that matter.  I had fun making my own "tea tag" from a bit of twine and a portion of a die cut Bits & Pieces label. I simply stapled the twine to the back, then tucked the loose end of the twine behind the cup. It was so quick and easy and really makes me smile.

A couple of other details here? A Layered\Stitched Tag and a pair of bright enamel dots. The background layers are journaling SN@P Cards, in both 3x4 and 4x6.

AudreyPettit-SayCheeseII-BestDayEverCard3

My second card takes on a bit of a love theme, with lots of hearts and a lovey dovey sentiment. I love the clean look to this one, mixed with small accents of gold.

AudreyPettit-SayCheeseII-HappyTogetherCard

I used lots of papers from the 6x6 Paper Pad to create my pieced background, but I also threw in one bolder striped print from the 12x12 papers. I always think mixing the different sizes and scales of the prints is an easy way to add a lot of interest to  the finished design.

AudreyPettit-SayCheeseII-HappyTogetherCard4

 I made my own tag from one of the 6x6 papers, too. Love how the little ticket on the paper becomes highlighted with the addition of a chipboard frame on top.

AudreyPettit-SayCheeseII-HappyTogetherCard3

And the hole reinforcer on the tag? That's actually a Bits & Pieces balloon die cut... but folded over the top you would never know. 

AudreyPettit-SayCheeseII-HappyTogetherCard2

Hope I've given you some fun ideas! And thanks for stopping by! 

Supplies

Hi everyone!  It's Ashley, and I'm here today to share two new layouts with you.  I love using my Silhouette Cameo and die cuts to create fun, unique looks on my layouts.  And every once in a while, I like to do something a little different and use popular shapes to create shaped photos on my layouts!  For my first layout, I used one of the Simple Stories talk bubble shapes.  Did you know, that Simple Stories has lots of fun shapes in the Silhouette store?  Well they do, so make sure you stop by and check them out here!!


I used the Wood Grain paper from the Life Documented collection as the background for this layout.  Then I ran it through my Cameo and cut three large talk bubble shapes.  After they were cut, I backed each talk bubble shape with my photos.

Since the large talk bubbles were a negative cut, I also wanted to add some smaller positive talk bubbles.  I cut these from four different patterned papers from the Life Documented collection and added pop dots under each one to add some dimension to my layout.


And I also played around with mixing product on this layout.  Most of it is from the Life Documented collection, but I also mixed in wood veneers from the Say Cheese II Collection and some items from the Epic SN@P Pack.
 
On my second layout, I wanted to use a Triangle design.  I used a basic Triangle shape and created several different sizes, and randomly arranged them in Silhouette Studio.  Once the Triangles were cut, I backed them with different patterned papers from the I Am 6x6 paper pad.

Because I was using a square Instagram photo, my printed photo didn't fill in the large Triangle where I wanted to place it.  So I added the photo first behind the Triangle shape, and then used the Yellow diagonal striped paper from the 6x6 paper pad behind the photo to cover the rest of the Triangle.


I wanted to embellish my layout, but not cover all of the patterned papers behind the Triangles, so I chose a few of them to embellish with Stickers, Bits & Pieces, Bradz, and Enamel Dots.


So if you're looking for a fun way to use some of your Simple Stories products, make sure you check out the coordinating cut files in the Silhouette store.  There are a lot of great shapes to use for your next project!

Supplies

Hey everyone! Rebecca Larson here! It seems like every March I get the itch. The travel itch. You know the one where you dream of far off places and exotic foods and smells! This is when I pull out photos from trips past, and relive the memories. While it doesn’t completely rid the itch, it does make it tolerable - lol!

For this month's blog post, I chose to find life once again in some memories of a trip that my husband and I took to Washington DC for the Cherry Blossom Festival (Bucket List: Check). I'm using one of the first digital kits that was added to the digital store - Urban Traveler. I love the retro feel of this collection. The elements and cards remind me of travel posters of the 50’s and 60’s. The bright primary colors are the perfect blend of masculine and feminine.

I wanted my layout to resemble a vintage suitcase that you would see with lots of tags and stickers on it, and boy did the Fundamentals deliver!  The Expressions give this layout the final touches, as I enlarged the DC letters to draw the eye to the title.

Urban Traveler is a beautiful digital collection to help you document your upcoming - or past - travels!

Thanks for stopping by!

Hey everyone, Amy here to share a project I created using the fabulous Enchanted collection.  Obviously the Enchanted line is a "princess" themed line, but it's also versatile enough to use for everyday pages.  My sweet teenage daughter is obviously way past princesses, but this line still works for pictures of her and her friends. That's what I love about all the Simple Stories lines, they always have enough versatility that you can use them for so many types and styles of pages! 
 
Here's the page I created - 
 
 
I know I've said it before, but the frames in each collection are just my favorite!! The make it so easy to create a grid-style page.  Here are some closeups. I love the silver foil in this collection!
 
 
I used my Silhouette Cameo sketch pens for the title.
 
 
Thanks so much for stopping by the blog today, have a great day!


Tell us who are for a chance to win one of 2 $100 I AM prizes!  Here's how to play -

1.  Download and print one of the 7 colorful I AM signs here.

2.  Add your own I AM statement & have someone take a photo of you holding your I AM sign.

3.  Post your photo to Facebook and/or Instagram with the hashtag ‪#‎SimpleStoriesIAM‬

We'll draw two random lucky winners who posted their I AM photo to receive an I AM prize pack valued at $100! 

We'll also gather all of the I AM photos and put them into a Flipagram video like this one we put together of retailers and friends from CHA telling us who they are - 

We can't wait to hear who YOU are!!

Hello everybody. It's Mindi here with you today. I'm super excited to be sharing some pocket pages with you using the new Say Cheese II collection. The whole Say Cheese II line is awesome ! I used it to document our family's Disney trip from 2012.


Here's  my title card.  These photos are random memories from our Disney trip back in 2012. I started with one of the 4x6 journaling cards and then added the black castle and wish circle from the Bits and Pieces pack. 
 
 
I just love to embellish here and there on the journaling cards. I used one of the photo overlays and added it to the corner of the journaling card for a fun star effect. 
 
 
Here is another example of using the photo overlays. I used the believe overlay and added a gold foiled heart underneath the overlay. 
 
 
If you have ever been to Disneyland you know that meeting Mickey is a BIG deal. I added in an insert with Mickey and Minnie Mouse memories + photos. I added some personalized journaling cards in the middle of the insert.
 
 
These gold photo overlays are so fun. I loved this one of the Mickey ears. I used some of the new washi tape along with the wood veneers to embellish this journaling card. These wood veneers are among my favorites !! 
 
 
Here is a look at the other side of the insert and then one more pocket page.
 
 
This side of the insert is about Minnie Mouse. Here are some journaling cards. 
 
 
Here are a few close ups from the right side page. Both of these cards I had fun using the chipboard frames as photo frames. 


I knew I wanted to do something with this wood word "magic". I used it as the center of my journaling, all about the word magic !! 
 
 
That is a wrap on my Disney pages. I loved working with the new Say Cheese II collection!


Hey there it’s Vicki!  Happy to be here sharing a project I created with one of my all time favorite Simple Stories collections - I AM....  I love this color palette so much and couldn’t wait to dig in and make something.  As I was shuffling through the papers one immediately caught my eye and the design idea started to take shape.

This is the paper…

I AM... 2x2 & 6x8 Elements.  All of those little squares really appealed to me and I thought it would be fun to try to maximize the use of one sheet of paper to create a layout.  Here is what I came up with…

I used two other sheets of paper, some cardstock and a few embellishments to finish off the page.  I love how this one turned out!!!

Take a closer look at the 2x2 squares.  They make perfect pennants!  And the word paper cut into strips creates a little fun.

Don’t you just love the Chipboard frames?!  That little pop of yellow tied the whole page together.

Here is another perspective of the page.

I used my craft knife to cut around the rose so I could slide my photo under it.  This allowed me some freedom with the positioning of the photo.  This picture also shows off the gold foil that is found throughout the I AM... collection.  That gold is another thing I LOVE!!!

Thanks a million for stopping by and letting me share my project with you today!  I hope “I AM...” encourages you to step out from behind the camera lens and get in some of those photos!!!

Supplies

Hi everyone!
 
Teri here, and I'm excited to share with you some cards I created with the  Say Cheese II collection. I just love the fun feel of this collection. You just can't go wrong with references to fun times, happy places and "magical memories!"   And I think the collection's chipboard frames are SO fun so I threw a creative challenge to myself to use them on each of the cards I'm sharing with you today.
 
 
I have to admit that I'm a big mix and matcher when it comes to paper crafting. And one of the reasons I really dig Simple Stories' products is you can easily mix and match things together. You can just pick a collection and pull different things from it together. The colors and designs all go together. Everything has been thought out so it just works. I like that a lot! 
 
 
I adhered the chipboard frame over a little bit of patterned paper for this card. Notice how the patterns just go together? LOVE that. I get a kick out of how the mouse's ear just peeks out from behind the frame. So fun.
 
 
To give the frame a unique feel, I decorated it with a Bradz and a couple enamel dots.
 
 
I used three chipboard frames on this card. Instead of using all three in their entirety, I used my scissors to just cut off a portion of two of the frames to use.
 
 
You might say I played things straight with this card. 
 
 
I didn't alter or decorate the frame at all. I used it instead to "frame" the sentiment and a couple stars.
 
 
I went crazy with chipboard frames on this card, using (... wait for it...) four of them! 
 
 
I used just a piece of two of them. And I altered one of the frames by adding the ampersand die-cut to it. 
 
 
I used multiple chipboard frames on this final card as well. Look real close and you'll see there are actually three of them on my card.
 
 
I stacked two frames together on the left to frame the balloons! 
 
 
I envision using this card as a birthday card so I decorated the inside as well. I made a pocket by applying adhesive to just three sides to a strip of patterned paper. And then I added a few stickers. The cool thing about the pocket is I can slide a gift card into (as you see here) or some cash for the recipient.
 
 
I think it will make fun gift! 
 
Thanks for stopping by today! I'll see you again real soon!


Supplies

Hi everyone! Allison here with a layout using the fun Life Documented collection and a new sketch that mixes traditional scrapbooking with the SN@P! Pocket Pages.
 
 
You can download the full sketch with measurements and placements here.
 
The right side of the used the SN@P! Pocket Page, Design 7 while the left side follows a more traditional style of scrapbooking design. 
 
 
My oldest son, Drew, does martial arts classes four days a week so my youngest son, Jackson and I spend that time together while we wait for Drew’s class to end. It’s always a fun time for us. It’s not often that I get alone time with just one of the boys so I really enjoy it. The activities change from day to day. Sometimes we draw pictures, we talk, make up goofy games, read, and on this particular day we had a little picture taking time. 
 
 
The Life Documented collection was just what I was looking for to document my fun little alone time with Jackson. I sometimes forget to capture the everyday. Those little day to day, normal routine type of activities. They become so routine that I just forget that those moments are worth recording and remembering. The Life Documented collection is such a great reminder to document those moments! 
 
 
For my title I used a cluster of stickers and the die cut “today” piece from the Day to Day Card Set.
 
I always love finding ways to incorporate stitching into my layouts. There is something about that I really enjoy doing so I tend to stitch often. I used stitching to help enhance the “today” piece and make it really stand out. I did both stitching in the center and as a border around the edges. 
 
 
At the top of the photos I used a tab accented with chipboard arrows, a sticker arrow, and the “love this” circle sticker. I love all the different stickers, die cuts, and chipboard pieces in this collection and had fun layering them on top of each other.
 
 
I added a stitched border around the background piece and then added a few small chipboard arrows to one area. I also used a lot of word strip stickers and the photo stickers one my pictures thoughout the layout.
 
 
For the right page I used combination of photos, patterned paper, and cards with the SN@P! Pocket Page, Design 7
 
 
One of my favorite features of the Pocket Page, Design 7 is the large 6x12” pocket. I enjoy getting to use a little bit of creative freedom within the Pocket Page on such a large scale.
 
For this layout, I cut a 5-3/4x12” strip from the “It’s Your Life” cardstock and added a 1/4” striped strip to fill the 6x12” pocket. I thought the camera on the paper was super cute! 


I used more word strip stickers and photo stickers to accent my photos. I am kind of addicted to word stickers so I couldn’t wait to get my hands on the Word Strip Stickers in this collection.
 
 
I often like to add little details and accents to empty spaces in my photos. For this photo I used a combination of photo sti
ckers and die cuts to create a little cluster of embellishments. 
 
 
To accent the “today” card I used some bradz and enamel dots around the circle. 
 
 
I repeated the chipboard arrow design with the circle sticker that I used on the left page on this photo. 
 
I'm using the 12x12 SN@P! faux leather album in black for all of my Life Documented layouts. The quality of the faux leather is fantastic and I love the stitching accent on them. I also used the 12x12 SN@P! Pocket Pages, Design 7 from the Variety Pack. I enjoy using several different styles of Pocket Pages and since the Variety Pack has so many great options, I have a lot to choose from!
 
I hope enjoy using the new sketch!

Supplies

Click here to watch the Washi Paper Tape video.

Click here to watch the Self Adhesive Bradz video.

Good Morning everyone, Wendy here today to share some layouts I created with the gorgeous I AM collection.  
 
 
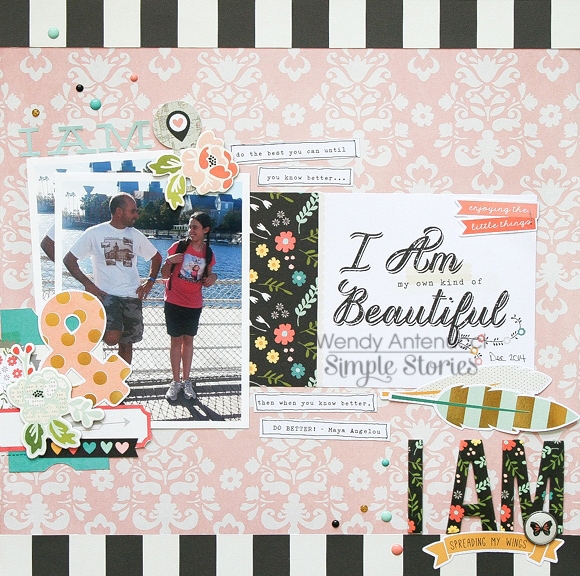
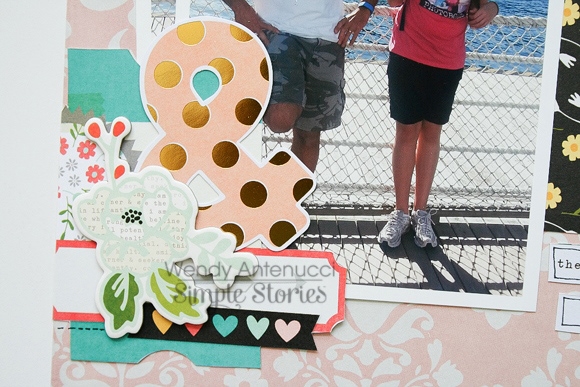
My Own Kind of Beautiful, was created to help my 'soon to be' teenage daughter know who she is. This collection is perfect for building up our children to become all they can be with affirming words.  Sometimes our children might not be acting like what we hoped, but we can call forth who they really are by our choice of words.  The words I wanted to convey to my daughter were on the SN@P! Card, "I am my own kind of beautiful" and that is where this layout began.  I pulled a picture of my daughter to pair with the saying and from there I began to embellish the pink background I chose.
 
 
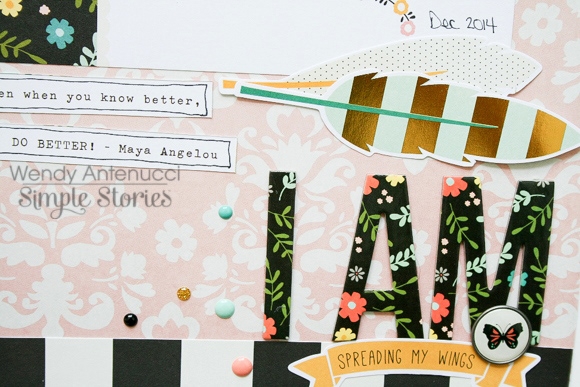
I chose to keep my design simple with the rectangle at the center of the page and then I built three embellishment/title clusters around the page to guide the eyes.   My first was the chipboard I AM piece that I used to bring a boldness to my message and the page.  A bradz (got to love those new kinds with no prongs!), a few die-cut pieces, and some sprinkling of dots finished that cluster.
 
 
My next embellishment cluster was really just a pretty grouping of some of my favorite pieces, again a pop of black and an area to write something (which I forgot at the time).
 
 
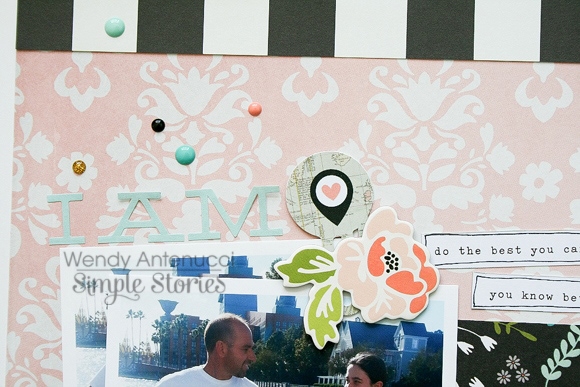
My last cluster was a softer I AM with a location clip to mark that this is where we are right now and it is good!  I finished the page with strips of black and white paper at the top and the bottom to keep the black visual triangle going and I feel it keeps my pieces on my page by providing a boundary.  
 
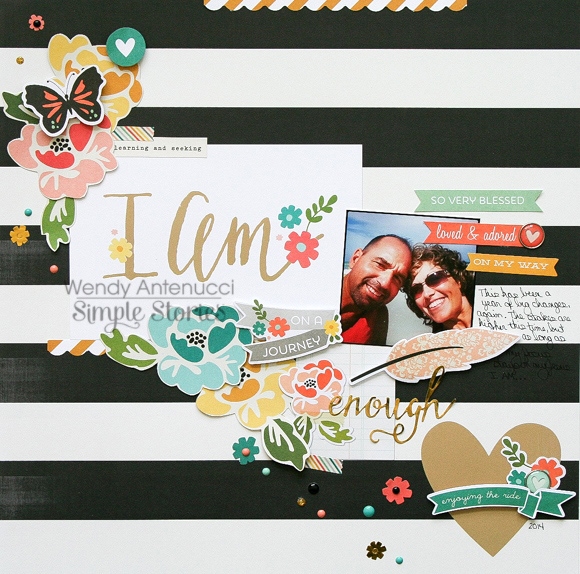
My next layout, I AM Enough was my thoughts on 2014 and where they year had taken me.  
 
 
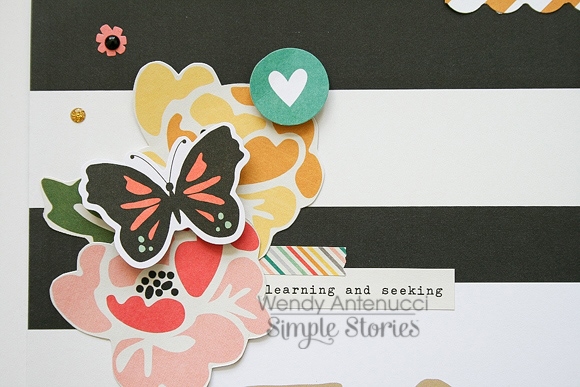
I love flowers and I love fussy cutting so you see a trail of flowers on a diagonal which is one of my favorite design ideas based around another 4x6 card that became my title.  I also added in a sticker with a word that summed up the year for me.
 
 
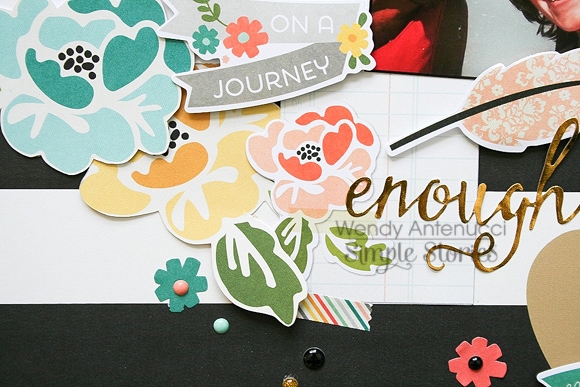
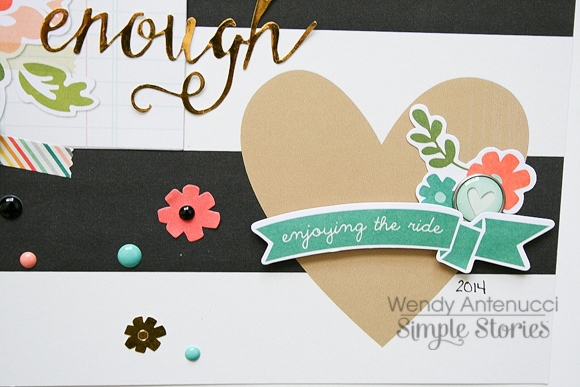
Even though I was working with a diagonal, as the previous layout, I also have three embellishment clusters.  The first had part of my title with my word.  The next included flowers and die-cut pieces with sayings that gave more depth to my thoughts of the year.  A butterfly to show change and a sprinkling of dots to further embellish the group.
 
 
And my last cluster, dressed up the heart that came on my background paper.  I always allow my paper to help me build my clusters, it takes less thinking and more going with the flow :)


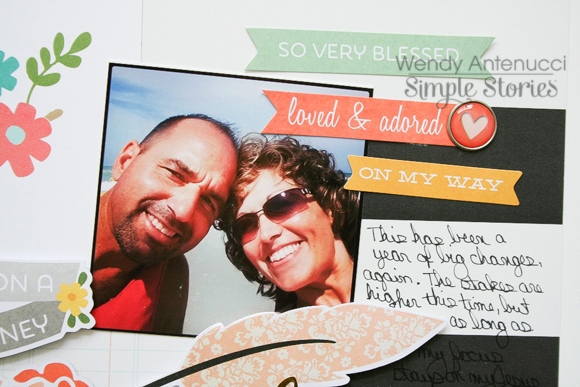
My last piece was a picture of me and my hubby.  As the page was not built around a picture, I chose a small picture that I liked.  I added a few more die-cut phrases, a bradz, and my thoughts to finish documenting 2014.
 
Thanks for joining me today, I have another I am layout, Dreaming Big on my blog if you'd like more inspiration with this collection.  Have a great weekend, and remember I AM is enough!

Supplies

Hello!  This is Amber, founder and creative director of Simple Stories, back again for my monthly 'behind the scenes' Life Documented blog feature.  

I've had so much fun using my SN@P! Life Documented Planner, and hope you are too.  There's a ton of information in my last blog post with tips and ideas on how you can get started using your planner, plus we featured some awesome FREE Printables that you can download here

This month I'm focusing on how you can use your planner to incorporate photos and memory keeping using some of our cool products from the Life Documented Scrapbook collection.

MIX AND MATCH

Our Life Documented collection features both planner and scrapbooking products, designed to mix and match with each other.  One of my favorite products from Life Documented are our SN@P! Cards - we offer 4 different packs and they come with a ton of cards.  
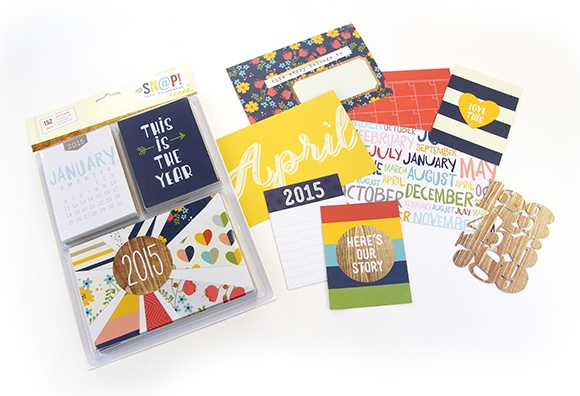
Even better, there are 2 duplicates of each design in several of the Life Documented SN@P! card sets, so you get a good variety - 2 each of your favorite designs, without a bunch of repetitive designs. Each pack has a different theme, from the Week in Review set with a 4x6 card for each week of the year, to the 2015 set that features the 12 months of the year, as well as a Journaling set and Day to Day set.   When you combine the 4 sets together, that's over 600 cards for the year!
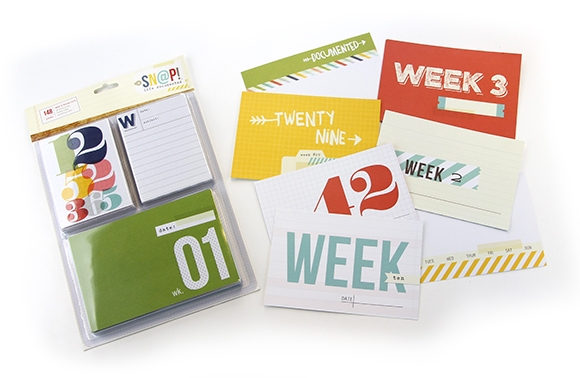
We designed the cards with a fun color palette of multicolor patterns and solids to be mixed and matched so you can customize however you like. 

COOL COLORS - FEBRUARY

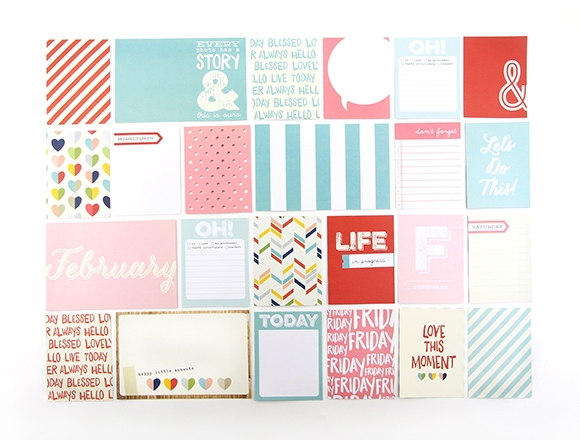
Check out some fun possibilities for February with cards from the 4 different Life Documented card sets, with a mixture of pink, teal, red, and colorful hearts for a touch of and whimsy.
DOCUMENT YOUR LIFE!

One thing I love about our planner system is it easily incorporates your day to day planning plus memory keeping, even if you're not a scrapbooker.   It's so easy to highlight some of your favorite memories and photos - no scrapbooking involved!  Our system is unique in that our planner albums include the divided pocket pages,  perfect for adding some of your favorite photos and 3x4 & 4x6 cards.
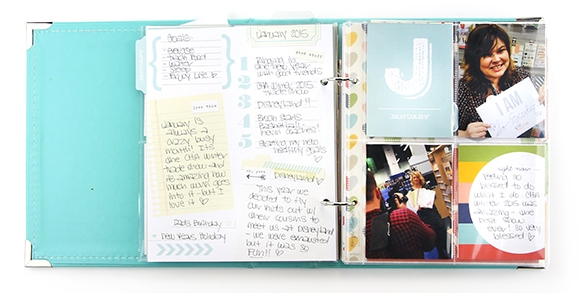
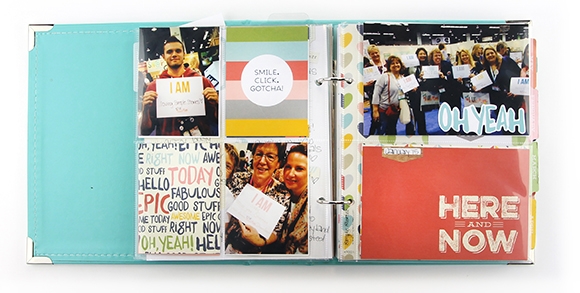
You can see here how I simply used the pocket pages included in the planner, a few Life Documented SN@P! cards and photos that I easily printed from my phone using a quick app from my local drugstore, to highlight some of my memories from the month.  The back of the January Monthly Divider is the perfect place to record a few highlights from the month, along with a few label stickers from the collection.  Because the planner has rings, I can add as many pages as I want.  When my planner starts to become full I'll start to store my monthly divider pages and pocket pages in a separate album so I can easily flip through and have memories recorded for each month.
PLAN YOUR PAGES
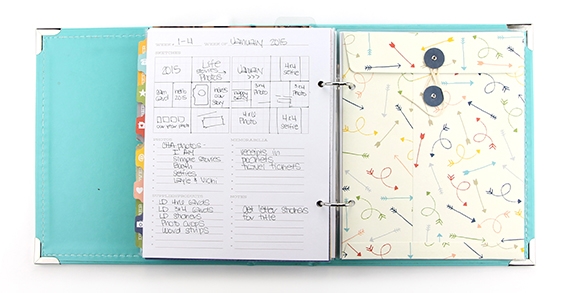
If memory keeping is your thing, then we also have really cool inserts enabling you to easily plan your 12x12 layouts and Pocket Page spreads - the Life Documented Planning Inserts.  These inserts feature a grid to sketch your pages, along with lists for products to use, memorabilia to include and notes. 
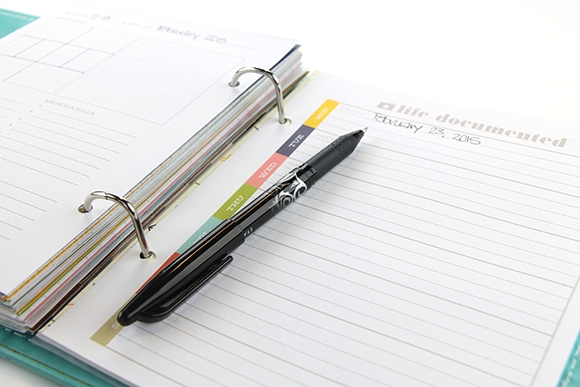
In addition, there's a journaling page for each week that you can use jot down notes and highlights for each day of the week.  Whether you're a pocket page scrapbooker or a traditional scrapbooker, this is a great tool to help you document your life.
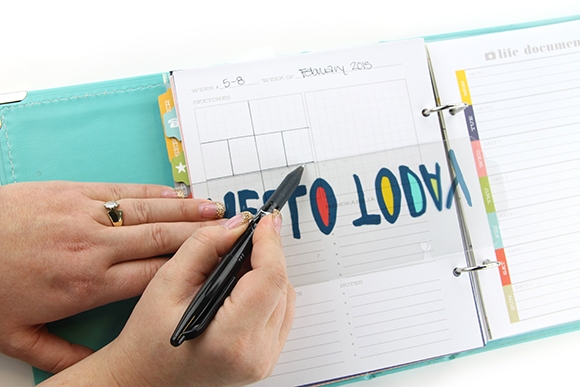
TIP:  We designed the squares on these inserts to represent a double-page spread - with grid marks to represent an inch - so you can easily sketch your own pocket page configurations or 12x12 pages.  It's easy to do using the side of our planner bookmark to make even lines!

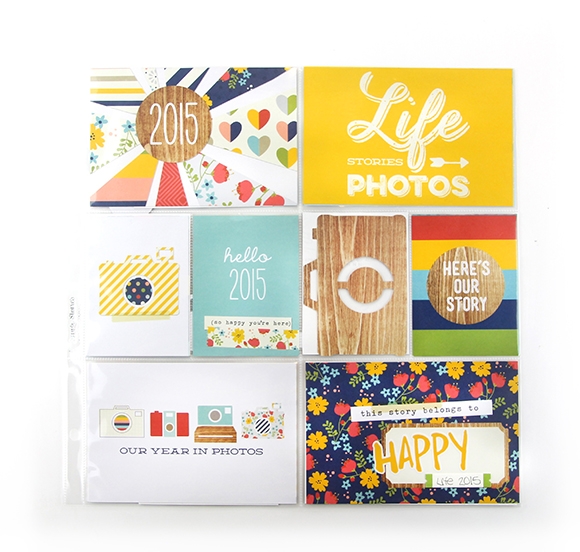
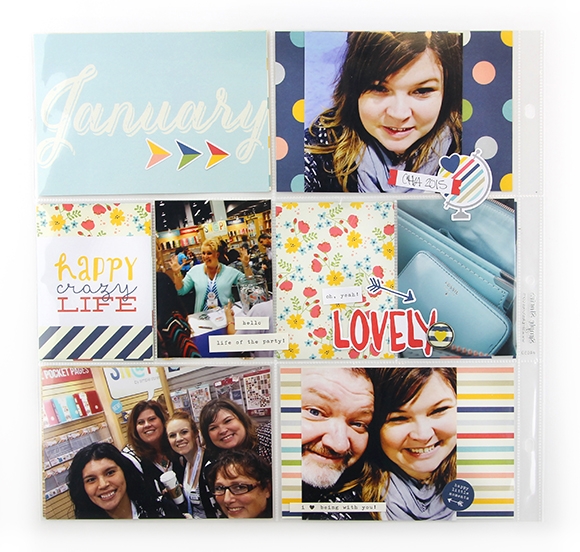
Here are the two 12x12 pocket pages I created after I had used the Life Documented Planning Inserts to plan my pages - it made it so quick and easy to put my pages together after only a few minutes spent planning & sketching!
FREE PRINTABLES!

Now we get to the really fun part!  We've designed these FREE printables for February to coordinate with your Life Documented planner.  Even better, we'll be offering free printables each month!  

Click here to download February's Free Life Documented Printables

There are a 5 free printables this month, including:

February Month in Review
Things to Do, Places to Go, People to See Checklist
Project Planner
Recipes to Try/Music to Check Out Checklist
Books to Read/Movies to Watch Checklist

TIP: The February free printables are on a single PDF document with 6 pages - print off what you want and the quantity you need.  We've added cut marks to each printable, so you can easily trim your pages to size.  

Thanks so much for letting me share my insight and vision for our Life Documented Planner system - it's a dream come true for me to finally have my dream planner.  I already feel like my life is so much more organized.  I hope you're inspired to plan and organize your life with our Life Documented Planner system as well!   See you back here next month!

Supplies

Traditionally folks make resolutions at the start of a New Year, but the planner in me bucks that trend. Instead, I make lists – lots of them! Things I want to accomplish, healthy goals, places I want to go, a honey-do list, and learning targets.

I started my 2015 list with a blank page from the Life Documented Basics Inserts pack and decorated it with letter and icon stickers from the collection.

The calendar stickers separate each of the main categories and represent the most important things on the goal list.

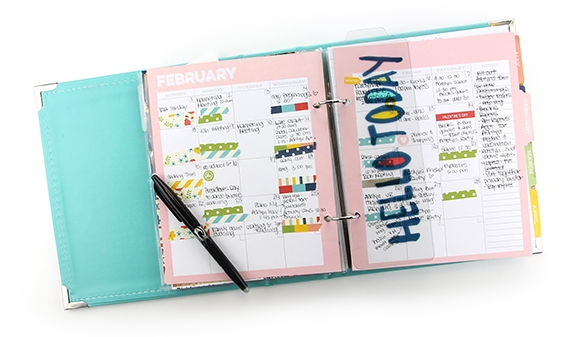
Here is an overview of how I use the monthly calendar pages. I note important appointments and celebrations here.

I use icon stickers to highlight the theme of the month and some calendar stickers to remind me of important things coming up. I like adding a sticky note to the side for notes and changes.

I’ve been using the Weekly planner inserts to capture a quick snapshot of the most important weekly goals and appointments. I kept this streamlined, adding a few pops of color with washi tape and a handful of calendar stickers. I love how I can turn to this page and see my entire week in one spot.

The Life Documented Planning Inserts are the perfect spot for jotting down design ideas and keeping track of photos to be printed.

Instead of writing down a daily account on these planner sheets, I use them to journal about the stories I want to highlight that month. Instead of plugging in a date, I write down the main subject and highlight with a light gray brush marker. It’s a great way to document the day to day things that are sometimes lost as time passes.

Finally, a sneak peek of the theme I chose for the coming week. I used a palette of grey and yellow. It’s my small attempt at brightening up a bleak time of the year. This is exactly what I love most about the Life Documented Planner – how it can be custom decorated to fit my needs (and wants)!

Supplies


Click here to download the I AM... eBook!


Pages