Hi everyone! Allison here with a layout using the Snow Fun Simple Set and a new sketch that mixes traditional scrapbooking with the SN@P! Pocket Pages.

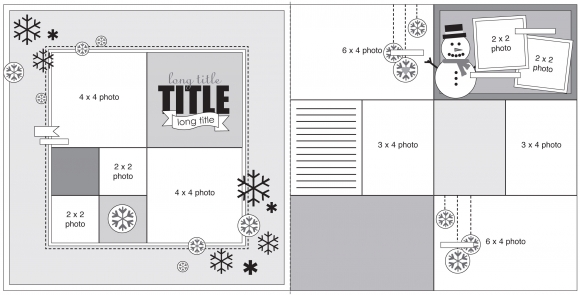
You can download the full sketch with measurements and placements here.

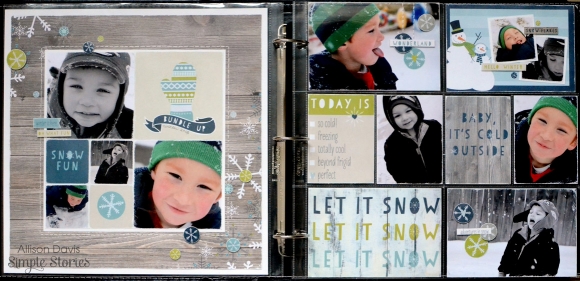
The left side of the sketch is designed with a more traditional style of scrapbooking in mind, while the right side uses photos and cards with the SN@P! Pocket Page, Design 3.

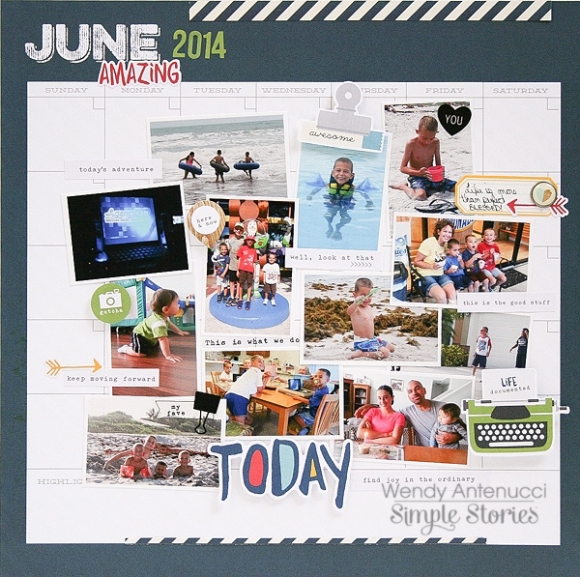
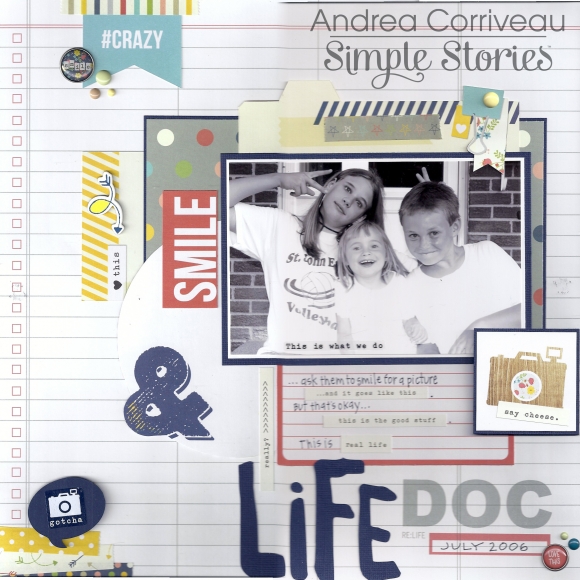
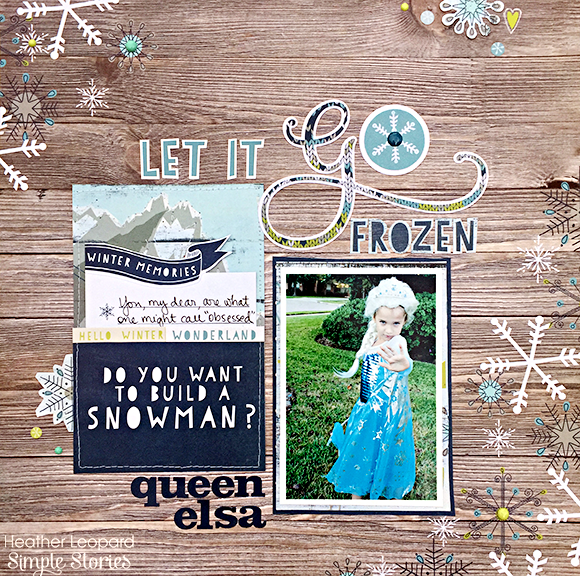
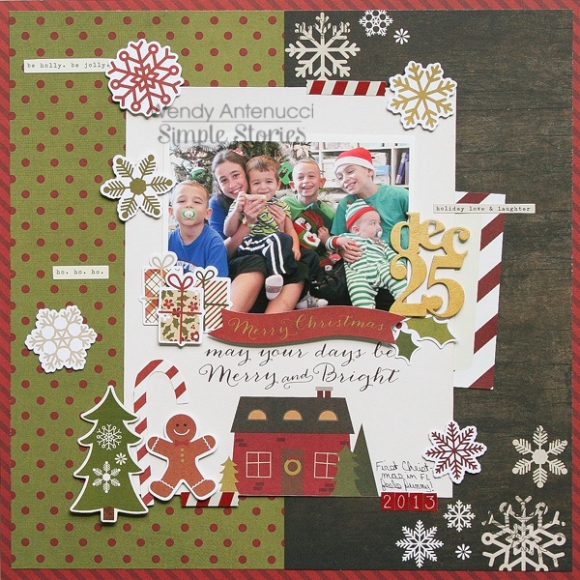
Here is my layout based on the sketch.

The last few years we've had some pretty wicked snow and ice storms in my part of the country so I'm definitely not short on snow pictures. Both of my boys love playing outside and especially when there is lots of white, fluffy snow to roll around in or throw at each other.

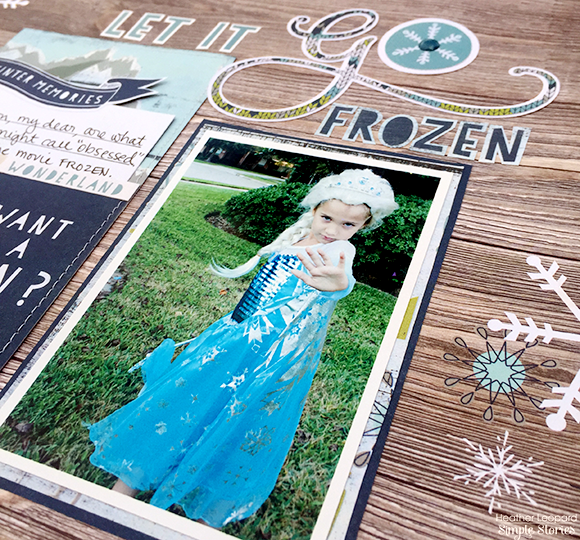
The colors of the Snow Fun collection were so great for my snow pictures. From the wood papers matching the wood fence in our backyard to the blues and greens perfectly matching my oldest son, Drew's, hat. I did run into a little speed bump with my youngest son, Jackson's, hat. It was bright red! A simple solution was to convert all of his pictures to black and white. Not only did it compliment the papers, it also added a fun and different look to mix color photos with black and white photos. 
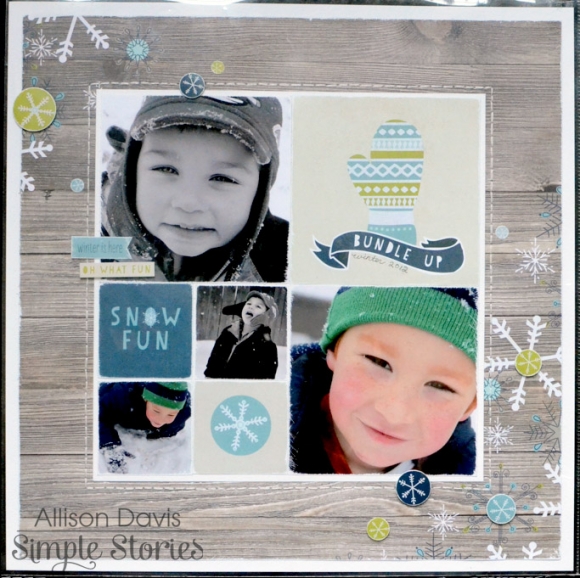
The wood paper with the snowflakes was my favorite of the whole collection. I thought it would be a great background for my layout and the snowflakes would help to frame my photo block design.

I used a combination of cards and photos to create a photo block and then added some hand stitching around the whole thing.

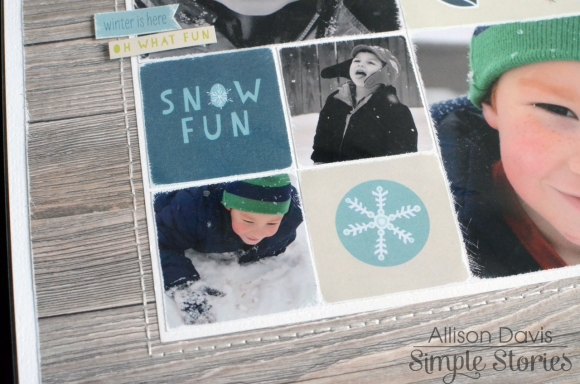
I used 4 x 4" photos and a card for most of the photo block but used 2 x 2" photos and patterned paper squares for one area. 
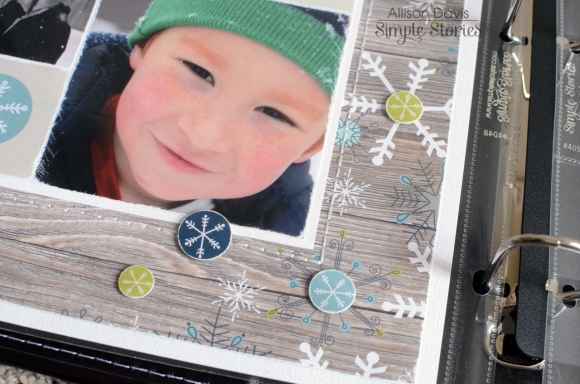
I added some snowflakes stickers to accent the snowflakes design on the paper. 
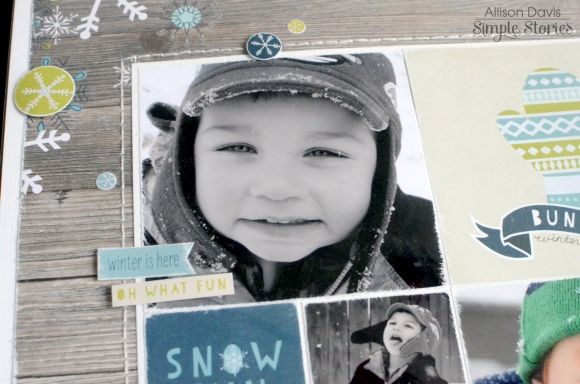
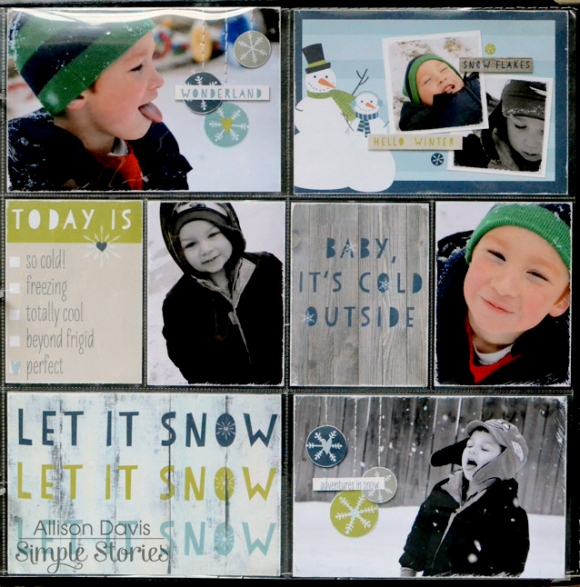
On the right page I used a combination of cards and photos with the SN@P! Pocket Page, Design 3 
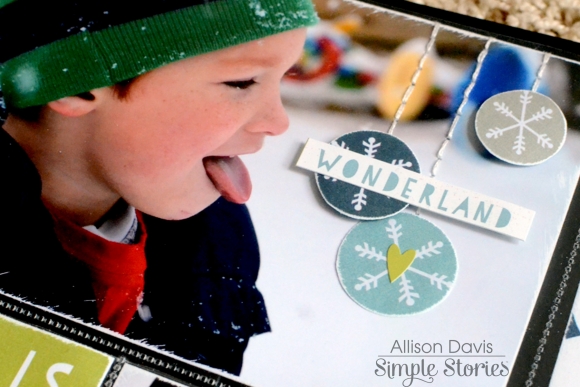
I decided to add some embellishments to the empty space on my photos. To go with the snowy theme, I added snowflake circles cut from patterned paper and then some hand stitching. 
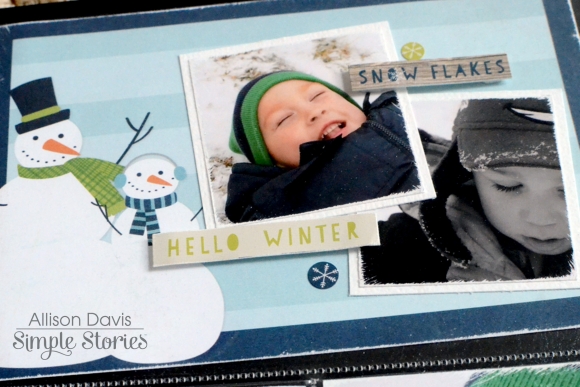
On the snowman journaling card I added two smaller photos and a few word stickers. 
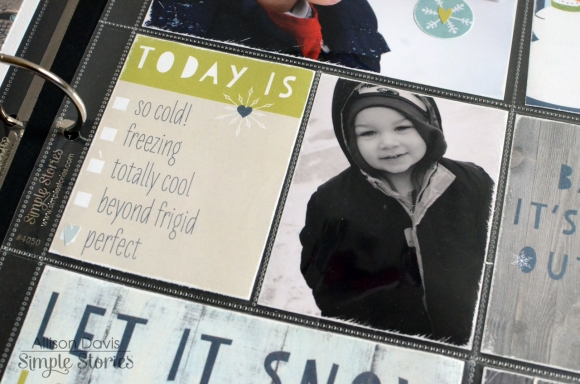
For my journaling, I let the "today is" card do most of the work. I used a heart sticker to "check" the box that fit the mood of my layout. 
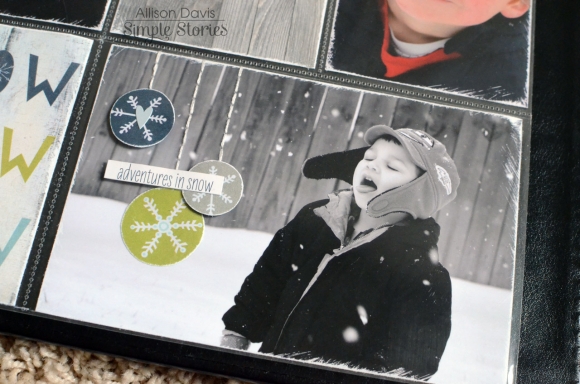
I used the same snowflake embellishments on the empty space on the second  6x4" photo. I also sanded the edges of all the photos and patterned papers to reveal the white edges. I thought it would be very fitting for a snow themed page!

I hope you enjoy the new sketches! Happy New Year!

Supplies

Hi everyone! Lisa with you today. I'm excited to share some cards I made with the fabulous new Life Documented Scrapbook collection. You didn't think it was only meant for use in the new planners, did you? :)
 
I always like to have "basic/generic" cards on hand — cards that can be used for any occasion — and this is the perfect collection to do that with. So let me show you the two cards I made to add to my stash...
 
First up is a card called "Today". I made it by layering a 3x4 card over a 4x6 card from the Journaling Card Set. Once I had those layers adhered, I added die cuts from the Bits & Pieces pack, chipboard pieces and enamel dots.
 
 
This next card, called "And Then...", uses the same concept of layered journaling cards, but this time I used four of them (two 4x6 and two 3x4). One of the 3x4s is actually the heart-shaped die cut and the other is the chevron pattern that fills the opening of the heart. I trimmed down the polka dot card so the solid border of the underlying 4x6 card makes it appear as if it's been matted.
 
 
I hope you've been inspired to use the Journaling Cards and embellishments from the Life Documented Scrapbook collection to make cards. Of course, they're equally fun to use to pretty up your planner or to make a layout or other project.
 

Supplies

Wendy here today to share some layouts using the new Life Documented collection.   

 
When I first ripped open my box of goodies I had to create with the new calender pages first.  While I do weekly pages for my family, I loved the idea that I could make a page of a month at a time, all the highlights.   I grabbed the June calender page and printed the highlights of the month in wallets and smaller sizes and I began arranging them in a cluster until I was happy with the design.
 
 
I chose a few of the Bits & Pieces next to enhance and help tell the story of our month.  I knew that I wanted to use the today word as a large focal point to ground my design on my page.
 
 
The stickers that correspond with the Life Documented collection are perfect for telling your story, whether titles, captions, or fun designs.  I chose a few phrases to add to the pictures to provide the journaling without taking any more time to handwrite or type up what I wanted to say.
 
 
I can't wait to add in a monthly page in our scrapbooks to tell the highlights of the month in a glance!
 
Because I was able to create such a quick scrapbook page about the highlights of our month due to the amazing Life Documented collection I had plenty of time to scrap a fun picture of our youngest now.
 
 
So I am in love with the words included in the Bits & Pieces package!  I began this layout with the Today word and pictures printed straight from my printer, not even cutting them apart.  I grabbed a 3x4 card with the perfect sentiment for my little guy and my page was born.  
 
 
The camera paper was the perfect backdrop for my photos, but I needed a little more color and design because my page was a little bare.  I chose a blue paper to continue with the today word and the colors in my picture, but added a pop of yellow to spice up the page (plus the scrap was sitting right there on my table).  I cut a few triangles from another paper to match my background and to help lead your eyes around the page.
 
 
A few fussy cut pieces, a little tag and some twine added a little fun instead of the empty space on my photo.
 
 
I was having so much fun with the Life Documented products and since the layouts were coming together so quickly I was able to create yet another page which you can find on my blog, http://antenucci.blogspot.com.  Thanks for joining me today!


Supplies

Hey everyone!  Andrea here with you today to share some layouts I made using the new Life Documented collection.  Have you seen this stuff yet?!  It’s AWESOME!!!  Every time a new collection comes out it becomes my “favorite”…and this one I really love!  It’s not just for planners (although, who doesn’t love a super cute planner??) - take a look…
 
 
If you were to look through my albums, you’d see that the majority of my layouts are just like this one; of my kids being goofy, showing off for the camera.  Sure…there are some “perfect photo” layouts in them, where everyone is posed just so.  But layouts like these are my most favorite - because this is what our life really looks like, this is really who we are.
 
 
I think that’s what I like most about this collection - it’s about life, and keeping it real.  And…there literally are a GAZILLION pieces for you to embellish with!  My favorite of those are the new Washi Paper/Designer Washi Paper Tapes (I’ve used them on every layout), and the new self- adhesive Bradz.
 
 
These layouts are just us keeping it real.  So don’t toss those photos that are less than perfect, especially if they tell the REAL story.
 
Thanks for joining me today, and for joining me throughout the past year; it has been my pleasure to share with you.  Have a happy new year!

Supplies

Merry Christmas & Happy Holidays from our Simple Stories family!

Merry Christmas and Happy Holidays to all of my crafty friends! Just popping in to share two cards that represent the joy I am feeling this season! I admit, I don’t send handmade cards to everyone on my list, but I always carve out a little time to make special ones for my family. The Simple Stories DIY Christmas collection makes it so easy! Everything coordinates so beautifully, it makes creating a pleasure.

This card was fun to make! I kind of love that the elements are going down in a vertical line instead of horizontal. I also loved layering all those cute little elements.

This card was really quick to create; I used my triangle punch and went to town with the DIY Christmas 6 X 6” pad. Just fantastic for making multiples. After adhering the triangles, it was simply a matter of adding different sentiments and embellishments from the coordinating Tags and Banners. I made six of these cards in a matter of minutes!

Thanks for taking a peek – wishing you a relaxing holiday season and certainly a wonderful New Year!

Supplies

Hello there, Simple Stories fans! Teri here, and I'm here with another pocket page spread. I'm excited to share with you a couple pages made with DIY Christmas!
 
My pocket pages are usually built around specific events, but my pages this time are really just a quick snapshot from the last couple weeks in my life.
 
Like many of you, I've been gearing up for Christmas. I've been decorating, taking part in Christmas-themed events and even creating a few Christmas projects so these pages really feature a random grouping of pictures and thoughts related to those things. 
 
 
I think the DIY Christmas collection was the perfect collection to use for these pages because it consists of so many fun, holiday-themed elements. That's what life has been like lately! Plus, I just love the colors in DIY Christmas. The collection is the perfect collection for documenting things happening during this time of the year. 
 
 
On this first page, I wanted to include a picture of the mini Christmas tree I purchased for my living room so I used one of Simple Stories' Photo Flips. I decorated a SN@P! card for one side of the pocket and then slid a second card underneath it with a little typed journaling.
 
 
When you flip it up, you see a picture of my little tree. 
 
 
Fun, huh?
 
My right page is a lot like my left page.  I added a Photo Flip to it as well. 
 
 
This time I wanted to include a picture of my aunt. The two of us volunteered a Christmas-themed fun run. Talk about a fun afternoon! We helped pack 1,300 good bag for the fun run's participants. 
 
 
Once again, I decorated a SN@P! card with a few die-cuts and added some journaling on secord card.
When you flip it, you can see the picture of my aunt! 
 
 
Another fun element on this right page is "peace and joy" card. I embellished a journaling card with a couple die-cuts and then added two brads. And then things got super fun! I wrapped some floss right around the brads. I love the look and plan to do it again and again.
 
 
So before I go, let's talk once about albums. I've been using a 12x12 SN@P! faux leather album in red to document all my 2014 adventures and thoughts. I frequently scrapbook out of order so I like that the album's ring binding allows me to do that. I used the SN@P! Pocket Pages Design 3 for this spread. I love that Simple Stories offers so many different styles of pages. I love having choices!

Supplies

Hi everyone, Marie here today to share a Life Documented spread using Simple Stories' Cozy Christmas collection. I went back a few years and picked a Christmas I have never documented before. It was so easy to get these pictures displayed in an album with Pocket Pages.

CosyChristmas1


This was a year we had a lot of snow which went so well with the Cozy Christmas theme.  Lots of skiing, sledding, plowing, and snowman building was going on.  And of course I couldn't leave out the hot chocolate!


CosyChristmas2


CosyChristmas3


I think my favorite card of the whole set is the one which reads "Don't get your tinsel in a tangle" which I thought was a great match for this photo of my daughter who had fallen in the snow. Don't feel too sorry for her...it happened right after she threw a snowball at her little brother.


CosyChristmas4


I often have more Christmas pictures than a 2-page spread can handle, so a 6x8" insert came to the rescue. I used one with two 4x6 openings on each side and then added a sticker strip in between.


CosyChristmas5


If you don't want to make an entire Christmas album, just adding an insert or two can give you enough space for all of your photos.


CosyChristmas6


I hope whether or not you have snow where you are, you are enjoying this wonderful time of year!

Supplies

Christmas is almost here!!!  It’s Vicki here with a last minute gift wrapping idea!  As the kids get older I find all they ask for are gift cards.  Well here is a fun way to wrap them up!  I mixed some items for Cozy Christmas and DIY Christmas to create this Gift Card/Cash Pockets on a Ring project.  
 
Take a look…
 
 
The Cozy Christmas DIY SN@P! Pockets are perfect for this project!!!!  Here is another look…


This is a super quick project and so pretty.


I took the two small pockets and attached them back to back and add stickers and tags.


Here is the back side of the first pocket.


I used the tree from the DIY Bunting Banner set and added it to the back of the pocket to create a money holder.


I added a little tag holder inside this pocket.


I attached the third small pocket to the back of this larger pocket.  The gift cards fit PERFECTLY!!!!


The last pocket has a little tag inside to hold the gift card.


Take a closer look at the paper clip detail.  It is great for this project because you can utilize both sides.


Here is the flip side of the paper clip.  I just added some the DIY Christmas Layers.  FUN!!!
 
One more close up shot….


I hope you can find a use for this little gift card holder!  Thanks for stopping by and have a WONDERFUL CHRISTMAS!!!!  

Supplies

Happy Holiday Greetings!  Shellye here to share a quartet of Cozy Christmas shabby chic-style gifting tags with you today.  I've pulled together chipboard stickers, cardstock stickers, brads, enamel dots, bits 'n pieces, insta squares and SN@P! cards from the collection, along with a few other basic office supplies from my stash.

To begin I started with basic manila shipping tags, as well as a couple of metal rim key tags (these can be found at office supply stores).  I soaked the key tags in a tea solution overnight to give them an aged look.

Next, I prepared the tags by inking around the edges with a brown distress ink.

I started each tag with a mat of paper that was cut from a larger SN@P! card or placed two of the smaller Insta Squares together to form a background. 

Add dimension by layering small stickers and die-cuts with foam adhesive.  When adding the brads, I made sure that I attached them to a piece so that the prongs wouldn't show at the back of the tag.

Use dies to create your own mats for the different bits 'n pieces die cuts.  And of course I had to add some pom pom trim and ribbon bows to the tops of each tag!

A bevy of beautiful, handmade tags can be whipped up in no time and they make lasting keepsakes for the recipients (or for yourself!).  Have fun tag making!

Hello there everyone! Donna here today, your host for the blog, and I have a few projects to share with you using the DIY Christmas collection.

To start, I want to share this countdown calendar I created for the DIY Christmas Simple Inspiration eBook:

If you haven’t had a chance to download the eBook, now is a great time to do so! (Just click on the link above.) It is free, and filled with lots of great ideas for cards, home décor projects, and more. I know there isn’t much time left until Christmas, but honestly I don’t think it’s too late to create a few simple homemade cards or tags.

With that in mind, I wanted to show you a couple of easy cards that you can put together quickly using items from DIY and DIY Christmas. I started with the Kraft A2 Card Bases, and added a layer from the A2 Card Fronts:


I then embellished with various other bits and pieces from DIY Christmas to create these:

I have always been a fan of the pockets made by Simple Stories, and now that they come in kraft they can be customized to match any collection. 

I decided to use them to create some gift card holders.

The Kraft Pocket Foundations and Pillow Boxes are the perfect size for gifts cards or cash. The pillow boxes would also easily accommodate a smaller gift such as jewelry. What’s better, both are small enough to make a perfect stocking stuffer!

Before I go, this will be my last blog post as a member of the Simple Stories design team. I have been on the team for almost three years now, and it has been a truly remarkable experience. I have loved sharing my projects with you here on the blog, and working with the fabulous team at Simple Stories, but as they say, all good things must come to an end, and it is time to say goodbye.

Thank you for stopping by the blog, and I wish all of you a very Merry Christmas!


Supplies

Hi Simple fans...I wanted to share a layout I made with the DIY Christmas line, using only a 6x6 pad and embellishments. Being a pocket page fan, I don't always go for the 12x12 papers but I love the smaller scale of the 6x6. Rather than the 'traditional' tree layout, I wanted to use this photo from the tree lot last year. It's a different kind of tradition, but one that is important to us.


This lot is literally in the middle of nowhere, and ran by a gentleman who lives in a camoflauge painted Winnebago during the Christmas tree season. He may seem a bit rough around the edges to some, but he remembers us every single year.  How I make my husband stand 20-something trees in the aisle for me to look at yet always end up with the first, lol...we laugh with him each year in the freezing cold. It would be 10x easier to go somewhere else, but that just wouldn't be the same. :)


I snapped this pic of his make shift lot with the spotlights strung about and it still makes me happy to look at. I wanted the layout to be simple to focus on the story, so I opted for a few strips from the 6x6 pad and some embellishments. 


Loving all of the fonts + phrases in the 8 sheet sticker sentiment set, I settled for the cream 'love'...just added an outline all around with a fine black pen to help it stand out a bit on the ledger paper. Some chipboard stickers here, a die cut there and I was set.


If you don't have the clear stickers yet, you're missing out. They have all of the cool phrases and look of rub-ons, without the need to rub. ;) They look awesome right on top of my photo...and I just added a few enamel dots & sequins here and there to finish things up.


Keeping it simple is 100% ok, especially at this time of year. What matters most are the things that you remember about the season...tied up in a neat little layout to remind you that good things come in small packages. 

Supplies

Hi friends, Heather here.  It's been a fabulous year working with Simple Stories and I am thankful for the opportunity to delight you all with inspiring projects using their incredible collections.  For my final design team project, I am soo excited to show you a fun layout I created using the Snow Fun collection.  It's doesn't get snowy here in the part of Texas where we live but this collection was PERFECT for documenting this year's Halloween, which was all about Frozen, for my my 6 year old.
 
 
How to: Cut and stitch the "Do you want to build a snowman?" card to the front of the "mountain top" card so that it creates a pocket for journaling.  Add a frame around your photo using the Frostbite and dark blue papers from the Collection Kit. Apply the pocket and the photo in the middle of the "Flurries" background paper, slightly offset from each other.
 
Cut the letters "LET IT" from the Elements #1 paper and adhere it over the journaling pocket. To complete the title, cut a super sized "Go" using your electronic die cut machine. I used the offset function to create a white background to ensure the word "GO" stands out on the page. Lastly, decorate the pre-printed snowflakes with enamel dots, brads and other embellishments.
 
 
Many thanks to Simple Stories for an amazing year. I'd love to connect with you all via Instagram (@heatherleopard) or my blog. I wish you all an amazing 2015!

Supplies

Hello Friends! 

It's Kristine Davidson with you today and I am here to share a fun project with you. A beautifully decorate wreath created with paper! 

 I will admit this wasn't my idea - I did get this from Pinterest and if you'd like to see the original post CLICK HERE

I always love creating fun projects during the holidays. This year is no exception.

Here are the instructions and I would LOVE to see what you create! 

I used a 10" Foam Wreath for this project.

6 sheets of 12x12 patterned paper ( you could use more if you want a fuller wreath)

Cut strips of paper into 1/2″ X 12″ 

Curl each individual strip of paper with a bone folder

Add a bow or extra decorations such as balls, tags, candy canes etc!

I sprayed mine with Therm-O-Web Glitter Spray.

I hope you enjoyed my project today and perhaps you'll give this a try!

Supplies

Hi! Angella here with you today, sharing a gift for giving this festive season. There is nothing more wonderful than giving a handmade gift to loved ones, especially when it is made with love. Take a cute little chipboard box, combine with DIY Christmas products and you have the perfect gift for giving!

I covered the box using patterned paper from DIY Christmas, then attached a couple of the die cuts using foam pop dots.

I then decorated the top using DIY twine and clothespins and some berries.

When I was done, I filled with chocolates!

I would like to take this opportunity to wish everyone a very merry and safe holiday season. May the New Year bring love and peace for all.

Supplies

Scrapbooking the holiday season fills me with the spirit of Christmas! I spent an afternoon going through some of my favorite photos when I came across this one of my niece dressed as a snowgirl last year. She’s two now and absolutely crazy about Olaf of Frozen fame. Was this a sign?  I knew it was a story that I wanted to tell. The Cozy Christmas collection with it’s warm feel and classic Christmas color palette was the perfect way to highlight the photo and story.

​I started the base of the design by cutting two patterned papers diagonally, combining the large snowflake print and wood background. I thought this would make an interesting backdrop. I placed the 4x4 photo in the center on a bed of patterned paper layers.  To keep the layers from overshadowing the photo, I used the scaled down prints from the 6x6 paper pad.


The chipboard candy cane and heart add dimension and pops of color to the neutral photo mat. A few snowflake stickers in the upper right add movement to the design.

At the bottom left of the layout, I added a cluster of embellishments to balance out the layout and add pops of color to the dark background. The sewn line grounds the cluster of snowflake brads, die cuts, chipboard accents and stars.

The Cozy Christmas collection makes the season bright. Happy holiday scrapping!

Supplies

Hello everyone, Wendy here today to share some holiday layouts with you.  
 
 
I had so much fun creating with Cozy Christmas, especially using the fun SN@P! Pages!  I began this layout, Merry and Bright,  with a SN@P! Page as the focal point to house my picture of the kids Christmas morning.  The Bits & Pieces were my next pieces added as I built a scene around the existing Sn@p page.  
 
 
My green background paper was a little too green so I added in a 6x12 piece with the warm wooden snowflakes to warm up my page.
 
 
A few red touches to bring some pop to the page were the finishing touches to my page.


My next layout, Merry Little Christmas, began because I love to multi-task!  
 
 
I had a piece of the green paper left from my last layout and some of the red striped paper, they looked great together so naturally I went to look for a neutral background that I could build my next layout on.
 
 
I am not the best at coming up with titles (or fonts to use), so I love the the border strips.  I used the wooden one to to again give some warmth to my page and tone down the colors as my picture was already colorful.
 
 
I next grabbed the Bits & Pieces to add some fun touches to the page.
 
 
I wanted to add the photo frame to the empty spot on my layout, but it needed a little bit more.  The insta squares fit perfectly in the frame so I chose the Santa hat to match my picture.  A few enamel dots added in were the finishing touches to my layout.
 
 
I couldn't stop creating there as I still had leftovers :) so you can find another Cozy Christmas layout on my blog if you'd like to stop by, http://antenucci.blogspot.com

Supplies

Pages