Hi everyone!  It's Wendy with you today to share some recent layouts I made using the Cozy Christmas collections!

My layout Dec 25 came together in just a short amount of time with the use of the SN@P! Cuts card. conveniently also my title.  I placed my pictures on either side of the card, but I needed a little more interest to my page - hello SN@P! Journal Page!  These pages work great on layouts, and it just takes a little creative planning to cover the holes.  A border strip grounds my design and gives it some visual interest.  I love the border strip of stamps and couldn't resist cutting them out to use as elements scattered on my page.  

A few die cut pieces and chipboard finished out this simple page.


Sometimes you just have to make a layout based on the product; when I saw the sticker "We can build a snowman", my layout Meeting Olaf was born.  Even though I was working with a Christmas collection, this picture was taken in the summer, so just have fun with papers and make them work for you!

My design was very similar in this layout as my Dec 25 layout (and a lot that I create), I used a border strip to ground my design and I used various Sn@p cards and Sn@p cuts to layer behind my photo.  These cards not only make great title and journaling spots, but the are so easy to layer behind your photos.  

You can see I snuck in another one of the fun stamps from the border at the top of my page.

A few sprinkles scattered throughout my page (You can see a fun tip here, http://www.simplestories.com/blog/autumn  for placement.) were the final touches.

I hope you were inspired to pull out your collections and just play, make them fit and just enjoy creating!

Supplies

Hi Paper Crafters! Nichol here today with two new projects showcasing the gorgeous new Legacy Collection. The rich colors and antique-style collection lends itself perfectly to scrapbooking those heritage photos we have sitting in shoe boxes. Don't feel like you're limited to only heritage layouts, though. This collection would also make stunning pages for those guys in our lives, scrapbooking a European vacation or combine elements with other collections to make one-of-a-kind designs for any theme!

For my layout share today, I created a page around a very favorite heritage family photo that my mom had printed for me. It's always been a favorite photo and I absolutely love how the Legacy Collection perfectly compliments it.

To create my page I first spritzed the Dark Wood/Newsprint 12x12 paper with white Mister Huey to add some distressing and let the droplets dry completely.

Next, I layered a 4x6 Legacy Journaling Card under my 4x6 photograph. A transparency frame from The Story of Us Collection worked perfectly with the design of my page and dressed up the photograph. I printed the date on a Legacy label sticker and placed it near the bottom of the photo. I tucked a couple of tab stickers along the left edge of my photo and adhered the layered piece in the upper left quadrant of my page.

Next to my photograph I layered a couple of the 4x4 journaling cards, distressing the edges of the cards with my fingernail. I added some string to the Legacy tag stickers and stapled them to the left corner of the layered 4x4 cards and added a phrase sticker near the bottom before adhering the embellished cards to the top right quadrant of my page. I tucked a tab sticker under the top edge of the cards and added Legacy Enamel Dots and a clip to finish this square.

In the lower left quadrant of the design I layered two 3x3 journaling cards on a 4x4 journaling card, distressing the edges with my fingernail. I added a phrase sticker, enamel dots and a mini clip to finish this square.

For the lower right quadrant of my page I layered a few of the 2x2 journaling cards, adhering them in a square. I embellished the squares with buttons, and trims from my scrapbook stash. I die cut a couple of tags from one of the Legacy 4x6 journaling cards and embellished those with buttons, trims and a Legacy sticker tag before securing to one of the 2x2 squares.

Finally I printed my journaling on one of the Legacy 12x12 patterned papers, trimmed it down and attached it to my page as shown.

I love creating layered tags. Whether you use them to embellish scrapbook pages, cards or like me, are attaching them to a pinboard to create a fall inspiration board, tags are a great way to unleash your creativity on a small canvas! I am a big fan of using repetitive designs on my pages and could easily incorporate several of these tags on a scrapbook page when I no longer am displaying them on the pinboard.

I layered lots of the Legacy journaling cards on my tags, finishing the pieces with bits of ribbon, ephemera, washi tapes and other embellishments from my scrap stash. I die cut a butterfly from one of the journaling cards and adhered it to the first tag (top left). I die cut the tag itself from a 4x6 journaling card (top center) before embellishing with ribbon and a wood charm. I trimmed down a 4x4 card for camera tag (top right) and trimmed the 3x4 card from the 12x12 paper to adhere on top. I distressed the edges with my fingernail and "secured" the pieces to my tag with washi tape. A couple of small tags die cut from Legacy 2x2 journaling cards and embellished with a Legacy heart sticker, a phrase sticker and ribbon finish this tag.

I have been obsessed with all this shaker lately so I created a shaker tag by die cutting a leaf shape from one of the 3x4 Legacy journaling cards, adhering a transparency cut to the same size behind the "window", then applying a layer of foam tape, inserting sequins and finishing the shaker by adding another 3x4 card as the backing! A hole punched through the top makes this shaker card an instant tag (bottom left). Some wooden letters, twine and a Legacy word sticker finish the tag.

I attached the "F" Legacy 2x2 journaling card with buttons to a tag wrapped with organza trim and burlap (bottom middle). The wooden clothespin from the DIY Collection works perfectly with this fall themed set of tags. For my last tag (bottom right) I die cut a couple of the journaling cards with banner die cuts and attached them to a tag. I wrapped some ribbon around and tied it in a bow, added a Sweater Weather phrase sticker, metal key and ribbon to finish the tag.

Hello Simple Stories fans!

I'm excited to share this layout with you because it has happy memories for me.  This was during this past summer when my cousin was visiting and it was time for the girls to get together for a Tea party!

My photos had a rather soft tone to them and I decided to use the Hello Baby collection because the colours were just perfect. Yes, I used a baby collection and there is definitely no babies on this layout!  It's a great collection with soft blues, pink and neutral tones as well.

I used my Silhouette Cameo to cut out out the centre design (Lattice) from the Wood Veneer paper and then backed it with some patterned paper.

On the centre section I then cut out the title banner 'It's a lovely day' (a Simple Stories cut file which you can find in the Silhouette Online store).

After adhering my photos in place along the top & bottom edges I adhered some of the cut-out pieces (from the centre) along the sides using foam squares for some added dimension and visual interest.  In the centre of each block I adhered an Enamel Dot from the Hello Baby collection.

Thanks for stopping by.

Supplies

Hi there! Donna here with you today, and I’m really excited about today’s project! I don’t keep a Life Documented album, but something that I’ve always wanted to do is to find the best way to include all the “extra” photos I take each year into our family scrapbooks. You know, the ones that never make it onto layouts. Today I want to share with you the photos and stories that fill in gaps of 2013 using Pocket Pages and Sn@p! Collections:

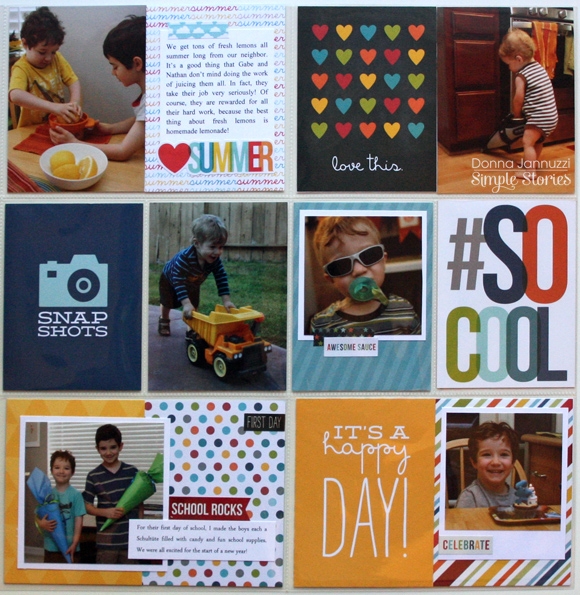
Even though the idea behind this project was to include my extra photos, I knew that I needed to set limits in order to make it manageable. To start, I decided to use only two Design 3 pocket pages which altogether make 32 slots for photos or journaling/title spots. I knew that to keep the project doable, I wouldn’t be able to include all of our extra photos. When choosing photos from the year I aimed to pick somewhere between 25 and 28.

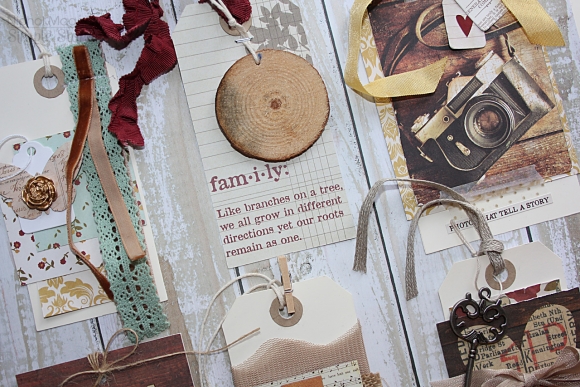
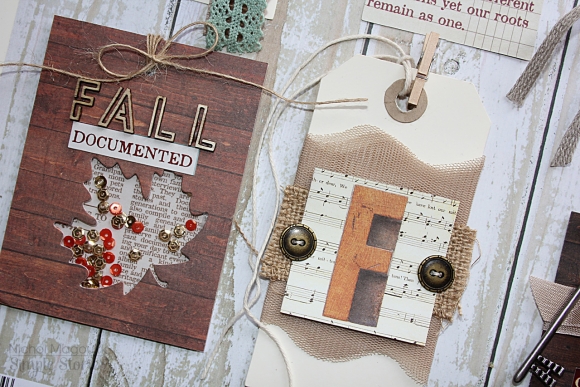
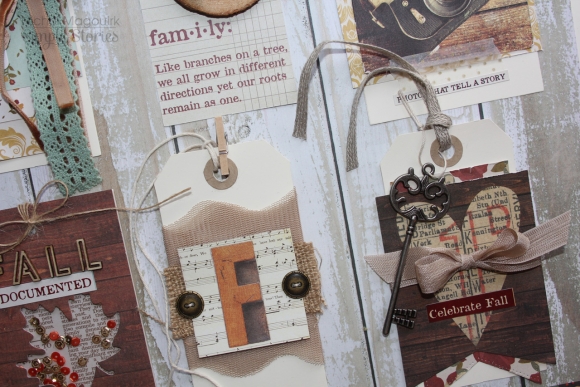
Part of why I’ve put off this endeavor before was because it seemed too overwhelming. So, I also limited my product choices deciding not to use any embellishments other than stickers, and keeping mainly to using SN@P! Sets already in my stash. I relied most on the Him and Everyday SN@P! Sets, but also used Baby Boy, Family, Christmas, and Summer.

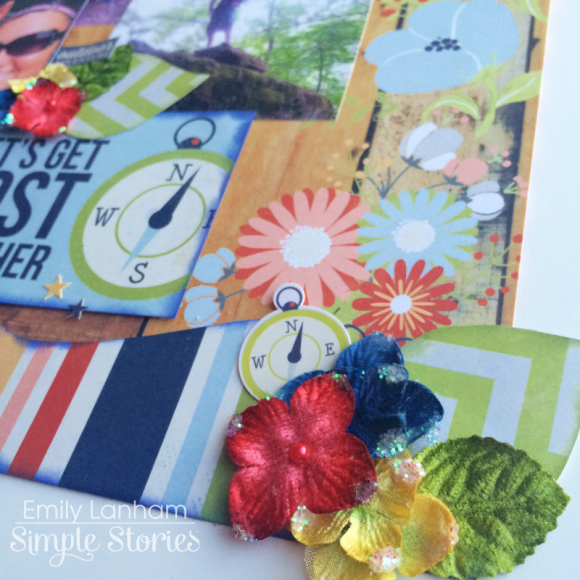
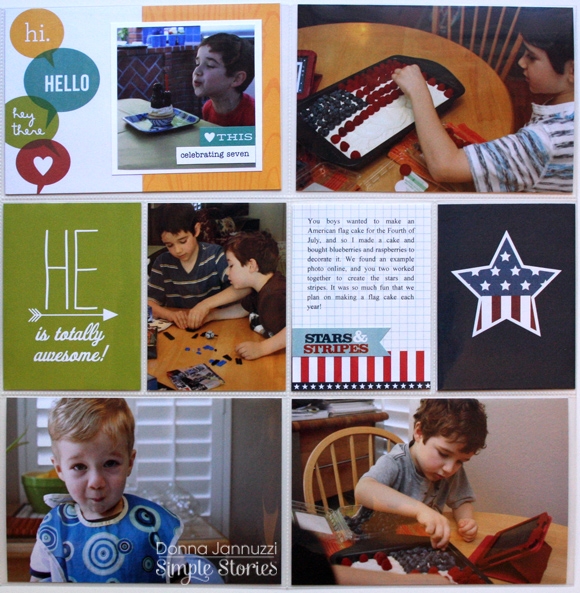
As you’ll see below, I also included two cut-out elements cards from Sea to Shining Sea. I really wanted to include one photo of each of my sons creating our Fourth of July flag cake. They had so much fun doing this, but I never made a scrapbook page to document it.

It feels good to finally have that story recorded!

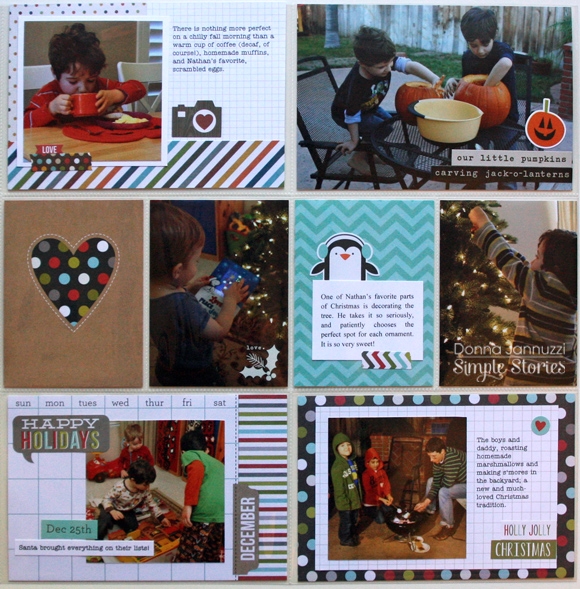
I don’t take tons and tons of photographs, but I take enough that they can’t all make it onto layouts. Plus, some of them, while cute, aren’t all that great. Perhaps they are too dark, or maybe out of focus. Sometimes, there really isn’t enough story there to warrant an entire page. This third page includes a few photos that fit into those categories.

Also, while I don’t create my layouts in chronological order, I do store them in my albums in chronological order. So when I created this fill-in-the-gaps project, I decided to put the photos in order as the year progressed. So you’ll see on this last page photos from fall, Halloween, and Christmas.

These two pocket pages will be placed behind the year-in review spread I make each year (which is more a highlights layout of photos already scrapbooked) and together they will give a more complete picture of our year.

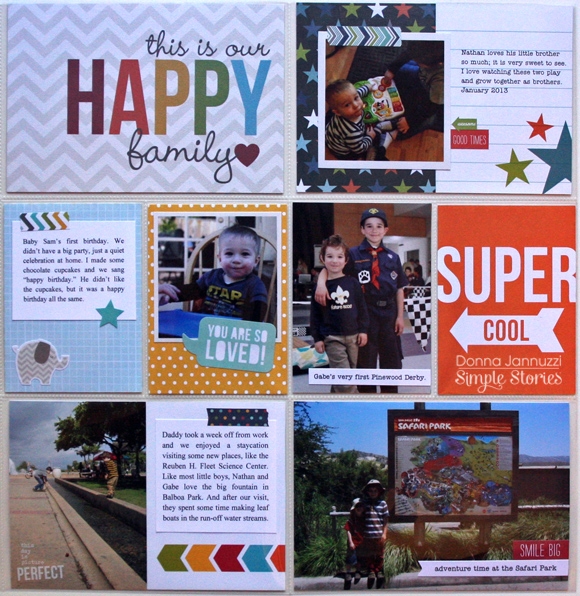
Some more close-ups of the pages, here is a birthday photo of Sam:

As it says in the journaling, we had a very simple celebration at home. And because Sam did not like the cupcakes, I really didn’t have all that many photos of him, well, celebrating. But again, it is good to finally have at least one photo in our albums documenting that special day.

The photo below is from our first day of school last year.

In this case, I actually do have more photos from the day and have meant to scrapbook them, but have just never got around to doing it. I may go back and to do that, but if I don’t, I’ll at least have some record of that day.

Finally, in some cases there really isn’t much to say about a photo. I do get bored sometimes scrapbooking the same types of stories over-and-over again each year. So for instance, while I love our annual trip to the pumpkin patch, carving the pumpkins isn’t really my thing. But I did take a photo of the boys cleaning their pumpkins last year:

The photo is pretty self-explanatory, but I decided to embellish it simply with some stickers from the new Frankie and Friends collection.

With all the product choices available to scrapbookers today it is so easy to get overwhelmed with options. Add to that feeling the multitude of photos that we take in the course of the year. As I worked on this project I kept repeating to myself, keep it simple! In the end, my project fulfills my goals, and it is in keeping with my style.

The best part of completing this project is that my boys saw the pages on our kitchen table as I was photographing them, and they were so happy to see all our memories from the previous year in one place. This project was easy, fun, doable, and honestly, fast too. Thanks for stopping by and letting me share it with you!

Supplies

Hi everyone! Allison here with a Life Documented layout using the Sweater Weather collection and I've got a new sketch to share with you that combines traditional scrapbooking with the SN@P! Pocket Pages.

You can download the full sketch with measurements and placements here.

The left side of the sketch follows a traditional style of scrapbooking design and the right side uses the SN@P! Pocket Page, Design 6.  Here is my layout based on the sketch:

I can't believe that Fall is right around the corner! There is a part of me that is sad that Summer is coming to an end but I can't deny that I'm really looking forward to Fall! One of my favorite things in the Fall is our annual trip to the pumpkin patch. We pack so many great activities into one day and it's always a fantastic time. Sweater Weather was such a terrific complement for documenting our trip to the pumpkin patch.

The 4x12" Elements strip is always one of my favorites to use in every Simple Stories collection. Not only do I love the designs on them but also how easy it is to use them on a layout and add a design around/on them.

For this layout I used the 4x12" strip with the Autumn quote as my title and added some detail photos on the left edge of it.

Along the bottom of the 4x12" strip I used a row of photos. You could easily adjust this part of the sketch to fit what you want to use and could around with different photos sizes.

I added an little extra photo to some of the empty space on the 6x4" photo. A lot of times I like to sneak in photos where I can! I take so many pictures that I try to use as many I can!

On the right page I used a combination of cards and photos with the SN@P! Pocket Page, Design 6

I added a few extra details, like the "love" and heart pieces, to some of the photos.

On this picture I added a little cluster of hearts and the "family" piece to the edge of the photo. I also added some detail stitching to the largest heart. I love the sweater look to that heart!

On the "together" card I added a few sweater hearts cut from patterned paper and added a few stitched lines over them.

I'm using the 12x12 SN@P! faux leather album in black for all of my Life Documented layouts. I love the quality of the faux leather and the pretty accent stitching! I also used the 12x12 SN@P! Pocket Pages, Design 6 from the Variety Pack. I love how many great designs and options you get with the Variety Pack!

Hello again, Simple Stories fans! Teri here today, and I'm here with another Life Documented project. I'm excited to share with you a couple more  pages made with the Good Day Sunshine collection. 

I just love the bright, happy colors of this collection. I think it just screams Summer so I thought it would be perfect to use to document a late-Summer trip to the fair. I had signed up to take part in a 5K race at the fair and then got enjoy the fair's sights and sounds afterwards. It was such a fun day and totally worth remembering!

One of my favorite elements of these pages are the pockets along the top of this page. I took some of the SN@P! Cuts and then added layers of twine and paper to them. One of the things I really love about Simple Stories' products is you can use them as they come or you customize them by adding embellishments, paper and stickers to them and really make them your own. That's so cool! 

If you look really close here, you'll see one of the Good Day Sunshine SN@P! pockets. I typed some thoughts about the day on a journaling card and just slid them into the pocket. To make the pocket a little more customized, I added a die-cut and a little twine to it. 

I sure had a fun time putting together the second page of my spread. Believe it or not, I made my own decorative tape with some Good Day Sunshine patterned paper! 

It was so easy! I cut strips of patterned paper and then applied two-way tape to it. When it came time to use it, I just tore off a little bit of paper... just like real tape.

One other fun thing about the right page is that top right pocket. I had a bunch of different die-cuts, stickers and brads from Good Day Sunshine collection that were left-over from other projects I worked on and I thought, "What if I mix them up?" Sure enough. That's what I did. I went to town, mixing them randomly together to make the card for the pocket. I think it turned out pretty cool!

I also used one of Simple Stories' Photo Flips on my page so I that I could add another picture to the mix.

By the way, are you guys familiar with the Photo Flips? http://simplestories.com/products/photo-flips They are amazing! Here's why: They are like little pockets. You fill them up with photos, SN@P! Cards or anything your heart desires. Then you adhere the Photo Flips (which have adhesive on them) to your page. 

And one more thing I should mention. After I completed my pages, I still had my race bib to scrap. So what did I do? Easy! I grabbed a 6x8 Pocket Page and slapped it in it and added it right to the spread. If you run or know someone who runs and want to scrapbook those bibs, I've found those pocket pages fit many of the race bibs out there. 

So before I go, let's talk about albums. I'm using a 12x12 SN@P! faux leather album in red to document all of my 2014 adventures in. I often scrapbook out of order so it's really nice that the album's ring binding allows me to do that. I used the SN@P! Pocket Pages Design 3 for these pages. I also used one of the 6x8 Pocket Pages.  It's cool that Simple Stories offers so many different styles of pages. I dig being able to mix them together. I think it helps keeps my pages interesting!

See you again,

Teri

Supplies

Hi everyone, Marie here to share a 6x8 Sn@p! album using the new Legacy collection.  I've been researching our family's genealogy for the past couple of years, and I'm finally getting all of those stories and photos organized into an album. 

LegacyCover

Legacy1

I have to admit the Legacy collection made putting this album together a breeze.  There were blank genealogy cards and charts included, so all I had to do was add our family's information.  I was also a big fan of the colors in this collection. The muted red, aqua, and yellow colors really make a pretty backdrop for black and white photos.

Legacy2

DSC_5247 copy

I added in memorabilia in Sn@p! Pockets througout the album. I even have a copy of my grandfather's high school report card in there.  I also used vellum to print out several photos and letters in this album.  I think it adds a nice vintage touch.


Legacy4

Legacy5

The 2x2 Insta-Pocket Pages are still my favorite way to add in a lot of pictures in a small space.  I love that Simple Stories has a variety of Pocket Pages to choose from. 

For this album I used a 6x8 SNAP! Faux Leather Album in brown.  It was the perfect size and color for this project!     

Supplies

Hi everyone!  It's Emily with you today.  I've recently discovered hiking.... ok, I'm a little late to the party, but I have been out of shape for years and never thought that I would be able to "take a hike" per say. A few weeks ago my husband and I decided to go hike some trails that were located by a lake, really scenic and very beautiful! So we took a few photos. Of course, I HAD to make a layout! 

The "Under the Stars" collection isn't just for camping. This collection was perfect for my hiking photos! I love that the collection is small, so I have no problem using it all up with these photos. I'm not a campy type person, but I do love being outdoors. This collection is a must have if you are outdoorsy! 

I used some templates from Kiwi Lane Designs to add a little extra to my layout. I wanted to layer the papers in this collection because they are all such beautiful papers and need to be seen! 

Thanks for joining me today! 

Supplies

Hey everyone!  Andrea here with you today, and I’m super excited to share a cute Halloween tree I made using the new Frankie and Friends collection.  I LOVE THIS COLLECTION!  Halloween is my most favorite holiday, and I’ve been waiting for Simple Stories to make a collection specific to it for a long time - and I’m so glad they did!

Here it is:

I found a black urn and branches at my local craft store and that became the “canvas” to work with.  Think of decorating your Christmas tree; that’s exactly how I tackled this, except that I wanted to include photos of my family in their Halloween costumes from years past.

I decorated pieces of chipboard with papers from the collection and photos, and jazzed them up with the embellishments.

I strung them with ribbon and tied them to the branches.

This will sit on a table in the corner of my living room, and I’ll be able to add photos to it each year.  I had a blast doing this, and I hope it inspires you to use your scrapbook supplies to capture your memories in a fun, different way.

Thanks for joining me!

Supplies

Hello, Simple Stories friends!  Shellye here today with a sweet treat holder using the brand new "Frankie & Friends" Collection.  I found this idea for a cat-shaped treat holder using a paper plate on Pinterest and adapted it by using patterned paper instead!


The great thing is that you can make these in any size up to (almost) 12" in diameter.  If you need to make several for a class project, just use a smaller circle.  I used a dinner plate for my cat, which measures about 10" round.  After tracing and cutting out, I placed the plate back onto the circle so that it covered just the top edge.  I cut around the plate to create the crescent shape and the area that will be open for treats.  Next, make a matching back panel by tracing around the design and cutting out. 


For the ears, I cut triangle shapes and curved them a bit to follow the contour of the cat's head.  I machine-stitched them in place, but faux stitched would also work nicely. This is all of the machine-stitching that I had planned for the front of the cat's face, so next I machine stitched the back panel to the front by using a zig-zag stitch around the perimeter...just be sure to leave the opening at the top!


For the hanger, I used a heavy-gauged wire and strung it through two small holes that were made on each side of the ear.  I cut one of the 4X12 Page Elements down to roughly 3X12 and attached it to the top of the wire.  To do so, I left a margin to the left (by the "happy") and wrapped it around the wire and then glued in place.  The chipboard spider was added to the center of the bow with fabric glue.


There are so many ways that you can choose to decorate the cat's face!  I decided to go ahead and add the mouth by drawing it with a black marker, but it looks very adorable without it.  I used two different round punches to create the layered eyes and then two large black enamel dots for the centers.  The whiskers were made from small strips of black cardsock that I curled at the ends.  Pink chalk was used for blushing the cheeks.
 
Again, use a 6" circle template to make-up smaller versions...perfect to give to your favorite 'lil trick-or-treaters!
 
Thanks for joining me today at Simple Stories!

Supplies

Hi everyone! Lisa here with you today to share two layouts I made with the fabulous new Cozy Christmas collection. I don't usually create holiday layouts in August when the sun is shining and the temps are soaring (I'm more of an "in season" scrapper), but this collection was a breeze to work with and these pages came together so easily (even without snow on the ground or holiday music playing in the background to get me in the spirit of things).

First up is a page about my daughter's cat. He likes to take up residence under our tree. When he was a kitten, he actually liked to climb the tree, nestle among the branches, and just hang out.

The base of this page uses the 2x12 Border & 4x12 Title Strip Elements 12x12 Paper. I love how it looks like a number of different papers have been pieced together but without all of the choosing and all of the work. After all, that's what Simple Stories is about, right? Making it easy to scrap our memories.

Let's take a closer look at this page...

I added a number of embellishments to the bottom strip of the paper, not only to extend the one element already printed there (the word "believe"), but to give the page added dimension. One way to do this is to layer the die cut Bits & Pieces with Expressions and Fundamental Cardstock Stickers. Enamel dots give the Bits & Pieces even more depth.

Embellishments are also a great way to fill an empty space on a photo, like I did here in the bottom left corner of my photo. Again, I used a mix of Bits & Pieces, along with a snowflake sticker (cut in half since I didn't need the whole thing).

Chipboard pieces can also add dimension and another element to your pages. I decorated the tree with enamel dots and a mix of stickers.

This last shot shows how I decorated one of the Sn@p Pockets. There are times when I use the pockets to house a journaling tag or card, but other times I like to decorate them and use them as another element on my pages.

Now let's take a look at a page about my daughter's love of all things crafty. I wonder where she got that from? :)

Once again, I used a number of Bits & Pieces. In this case I layered a snowflake die cut over the mug, using foam adhesive to give the snowflake dimension.

Here's a look at the top right corner of the page. Enamel dots added to the "ho ho ho" die cut give it a bit of whimsy. The candy cane die cut piece gets dressed up a bit with a ribbon bow.

This last image shows the adorable snowman die cut peeking out from behind the photo, almost as if he's waving hello. Layering this piece over a tag helps to ground the die cut.

I hope you enjoyed this look at the Cozy Christmas collection and the different ways you can use the papers and embellishments. I hope you have a fun and crafty day!

Supplies

Hello there! Kim here sharing two cards that I recently created using the brand new Sweater Weather and Legacy Collections. Both lines share some of the same warm fall colors, but each line sure has its own personality.

My first card is just full of lovely layers and vintage touches from the Legacy collection. I think this card will go to a friend who just bought a new house, what a wonderful chance to fill that home with memories and love.

The Sweater Weather collection is the spunkier side of fall. Ha, ha! I love all the critters and fun icons included in this line. I let Mr. Fox take center stage on my card, what a cutie! This card had a modified matchbook fold: the bottom edge is folded up about ¾” and secured with a brad. Might be a fun way to add a little interest to your next card!

With so many amazing products just arriving from Simple Stories, I am feeling the urge to brew up some coffee and escape to my craft room! Won’t you join me?

Supplies

Hi Simple Stories fans Rebecca here! I LOVE Halloween. My kids LOVE Halloween. They are both still on the young side, so cutesy is the mainstay for their costumes. And that's ok with me! I featured two pictures of them in their costumes and went with a SIMPLE color block design.

When I am creating a color block layout, I pretend like I am dealing with a jigsaw puzzle and start with one piece that I know from the beginning where it is going to be. For this layout it was this un-matted photo.

I am not really big into measuring and rulers so I just do quick checks on the basics. The photo was 5" tall so I cut a piece of patterned paper to that height. Then I eye ball how much room I want inbetween the two pieces and how wide I want it to be (remembering to have a border around the whole page).

That block ended up housing a smaller matted photo. From there it is pretty easy to have two long blocks one for the top and one for the bottom.

Finally I used some Simple Stories Bits and Pieces, Brads, Cardstock Stickers and Chipboard stickers.

So if you are a Halloween fanatic like my family, you will definitely want to get every bit of Simple Stories Frankie and Friends and start having fun!

Supplies

Hi everybody ! It's Mindi here with you today. I am very excited to be sharing a Life Documented layout using the Sweater Weather collection. Here is a look at both pages. 

I just love this collection, with its rich colors, fall inspired pieces, and it's wood grained patterned paper. It has definitely left me dreaming, yearning, and wishing for all things fall. Especially since it's still very hot (105+) here and the kids are swimming daily.

Here is my title card. I left it fairly simple, using the chipboard banner sticker as a focal point. 

A close up of one of the journaling cards. I started out with the chipboard stickers that spell out fall, doodling around it with a pen to make it pop. 

One of my favorite things about fall is the changing colors. The trees were starting to turn colors this particular week and I made sure to stop and snap a photo. 

I printed out my photo of the tree in color as a base for this pocket. I took some vellum and cut it down to 4x6 to go on top. I didn't want to hide the whole photo so I took the vellum piece and punched a 3" hole in the middle. I used my pen around the edge of the circle to draw attention to the colors of the tree. Then I layered it with some die cuts from the Bits and Pieces set and some enamel dots. Love those things !

Here is the second page. 

Some close ups.

I saw this card on the sheet of 4x6 cards and knew that it would make a great frame. I carefully cut out the middle and placed it on top of my printed journaling. I used some of the die cuts from the Bits and Pieces set and some of the chipboard stickers as well to embellish. 

One of the ways that I like to maximize my "space" on my pocket page layouts is to use the empty space in a photo. This particular week I had a lot of photos and stories that I wanted to add to my pages. This photo of my son in his pilgrim hat was perfect to help me solve my space problem. I added the journaling right on top of the photo. I decided to print my journaling onto a strip of vellum for a see through look.  

Hi Angella here to share with you a mini book made with the new Legacy collection

I do love creating mini books about memories, and I find that the 4x6 Vertical Element papers are great for creating my little mini books, all the guess work is done!

I don’t know about you but sometimes I take more time picking the papers then I do creating.

The colours in the Legacy collection are great for all your heritage memories, this mini book is about my mum's story growing up in the Australian Outback! And I love how all the elements in the 4x6 fit in with the era. 

The Bits and Pieces in Legacy are great embellishments on your pages, to give that extra touch.

I like to mat my  fundamental stickers and fussy cut them a lot, as it gives me the option to adhere with pop dots for extra dimension. 

Hi  Wendy here today :) 

Here in FL where there is no Autumn I had this picture of the one tree that dropped its leaves (in January).  Since my photo was so pitiful I had to rely on the amazing journaling cards in the new Sweater Weather collection to carry the layout.  To do this I also framed the card to add some more weight/interest.  I embellished the area further with leaves falling (wishful thinking) and some flower bits & pieces.

To further add interest to my sad Autumn page, I started with the sticker "Count your Blessings" at the top of the page and finished with some stickers and die-cuts beside my page, "even when they don't fall" 

Some sewing and enamel dots added texture on my page giving me a perfect Autumn page, even without pictures to prove the story!

This layout was built because of all the fun pieces in this collection.  I loved the die-cuts and brads and the cute foxes; perfect for our little boy!  I loved the red and black floral pieces, but they were too intense for my layout, but by using the woodgrain as the base I was able to use smaller portions of my other colors.  I then lined up my journaling card and insta squares and filled in with the various bits and pieces that matched my theme.  

The layout came together really quick as Simple Stories thought of everything you could want in this collection.

I love the enamel dots that are now a part of the collections, but how do you get them in the perfect location?  Here's a little trick I found, grab a few wooden veneer pieces and scatter them.  

Then when you are happy with your scattering that is natural since you didn't have to place them, remove the veneers one at a time and put your dot.

As you can see on this version, the base of my layout is complete, but my layout feels empty and unbalanced on the bottom, so...

add some lines and put in your journaling!  It is an easy way to include the who, what, where, when of a layout and it doesn't have any weight, but can balance the empty areas of a layout!

I have one more layout using Sweater Weather on my blog and some more fun journaling tips, http://antenucci.blogspot.com, see you there!

Aloha everyone! Heather's here on the blog today and I just got back from a wonderful vacation in Hawaii. I was eager to jump in and start scrapping our vacation photos with the Good Day Sunshine collection. The rainbow of colors and the gradients just epitomize the bright, sunny days we spent on the beach. We were lucky enough to spent our second week in Hawaii with friends who live there. They took us to all the local stops, which included secluded beaches that we had to ourselves, like Makalawena. My oldest daughter claims that the sand is "angel soft" and she couldn't be more right.  It was the perfect sand for drip castles...

I was looking at this collection and I knew I wanted to scrap these photos with it but I didn't have a design in mind. As I was looking through all the great pieces of the collection, I was drawn to the SN@P! Pockets and SN@P! Cards. They inspired this offset grid design and it all just fell into place.

The cards are great by themselves but it's a fun part of the creative process to dress them up. I also cut little strips to use as a border on the top, bottom and left. I added enamel dots to add some dimension.

This cute little journaling card fits perfectly in the SN@P pocket. Simple Stories is just cool like that!  You can also see the "HELLO" SN@P! Cut card. I love that it has the word pre-cut. You can leave it as it or do what I did and back it with solid or pattern paper. I added a die cut and sticker on top to dress it up a little more.

So who else is scrapping their summer photos with me? Are you doing individual layouts, a mini album, Pocket Pages or something else? I have a gagillion photos from this trip so I think I will do a combo of individual layouts mixed with Pocket Pages but I'd love to know what you are doing. 

Supplies

Hello Everyone! It's Kristine Davidson here today with a Life Documented post using the NEW Sweater Weather Collection.  In my previous posts I shared with you that I would document 2012 and I'm happy to say I'm right on schedule! As for 2014 that's another story. Today, I'm sharing the month of September 2012.

The first page of this spread is a simple one. I added a picture of our home with the glow of the sunset. We have really beautiful sunsets here and it's something i want to remember.
I used quite a few of the 3x4 cards from the Elements page. It was easy to use by simply cutting up the entire sheet and using the cards for journaling or filler cards.

We constantly have deer in our yard. This day in September was special because i  was walking down to our basement and this face was literally staring at me!
I also added a currently page to document a few things that I never took pictures of.

Layering Bits & Pieces is something I love to do on my spreads. Adding one on top of the other and maybe adding a brad is a great little added touch without the bulk.

I added a little tag from the Bits and Pieces pack and cut out from the 2x2 4x4 Element sheet a few elements such as So Very Grateful and the maple leaf.

We were in Ottawa and i thought this was a great way to add that Canadian Symbol!  

I used a 4x3 picture on my top card. I cut it in half, added some elements and created a little mini layout that fit in my 4x6 pocket.

The bottom card I used tons of little stickers from the Combo Sticker Sheet and added a brad, enamel dots and a piece of chipboard to finish off. I love that I could use up some stickers and it makes a cute card!

For my Life Documented 2012 album I am using the 6x8 Sn@p! Leather Album in black. The sturdiness, metal corner accents, and stitch details are fantastic features to this album but I really like the fact that it's timeless and because they are so well built will endure the  many years to come.   

I used two varieties of inserts for this monthly spread - in the 6x8" size featuring 3x4" and 3x4"/ 4x6. The Sn@p pocket pages come in a variety that you can add to your album. PERFECT for any project!

I hope you enjoyed my LIFE DOCUMENTED post today !

Supplies

Pages