Hi everyone! Cari here with you today, welcome to Day 1 of the Simple Stories & Perfect Paper Crafting Blog Hop Week!  We’re so excited to team up with Perfect Paper Crafting to share some inspiring projects with you this week.

We’ll be giving away a great Perfect Paper Crafting prize package at the end of the week, so be sure to play along and check back tomorrow to see if you’re the lucky winner!

Here are the different ways you can play along –

  1. Like Simple Stories on Facebook
  2. Share this blog post on your Facebook wall and tell us you did on our Facebook wall
  3. Follow Simple Stories on Pinterest
  4. Follow Simple Stories on Instagram at simplestories_
  5. Comment here on our blog or on Facebook

Perfect Paper Crafting is also posting projects and giving away prizes, so be sure to check out their blog and Facebook page, too!

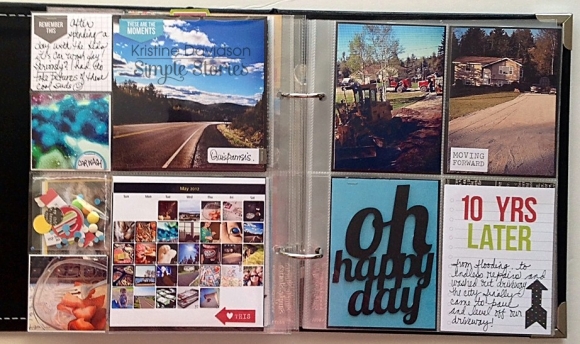
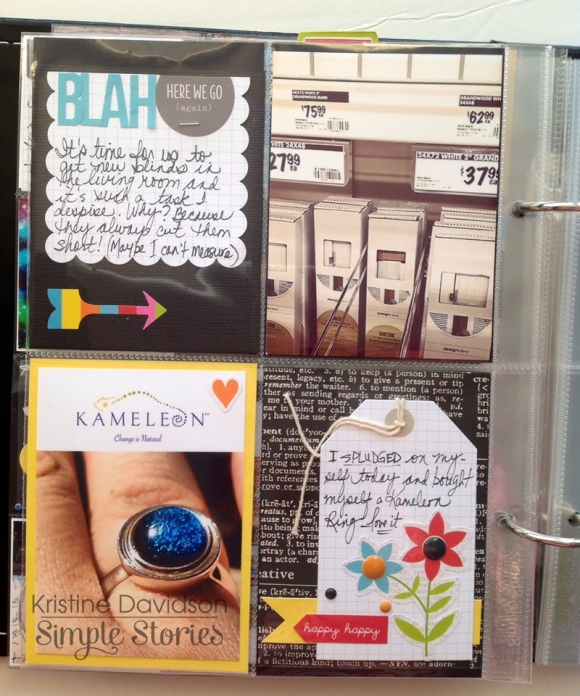
I received the Perfect Layers - set of 3 different 'rulers' each with 4 different measurements - I was thrilled to be able to play with this fabulous tool. The possibilities are endless and definitely make creating mats so easy!

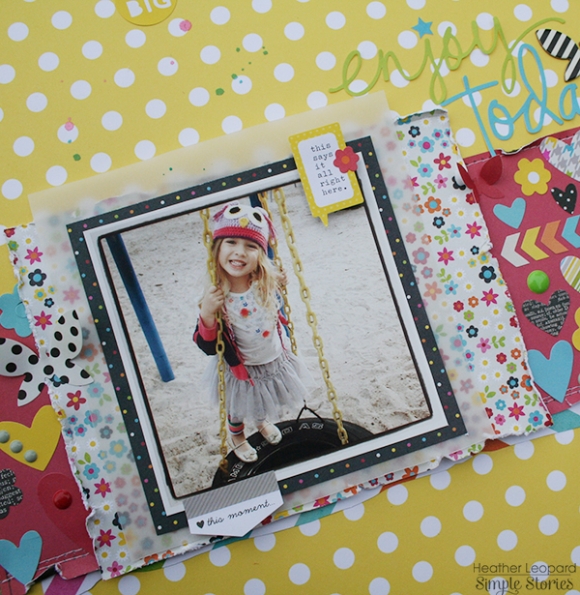
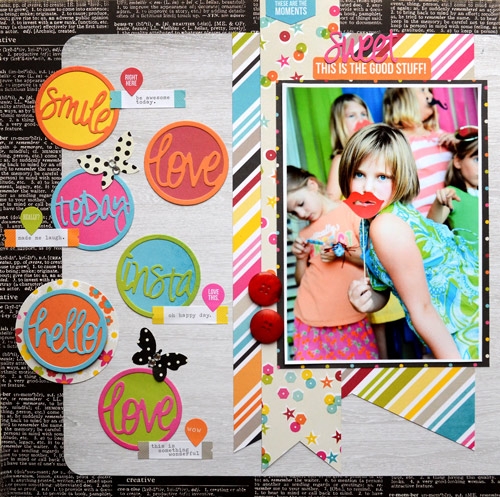
I decided that I would mat my photo with a few layers and then mat the papers on my layout as well, so I began layering my photo. I first printed it with a white border and then matted it onto some turquoise card stock. I adhered the photo to the card stock first and then used the 1/4" measurement to trim around the photo.

I then matted the turquoise card stock onto some orange card stock using the 1/8" measurement.

I matted a piece of black card stock onto a piece of the diagonal striped patterned paper using the 1/4" measurement. I then matted that entire piece onto some orange card stock using the 1/16" measurement.

Adding layers is a great way to add dimension to your work.  After matting your pictures you could also adhere them to your layout using foam squares for even more dimension. I decided to just adhere my main photo flat because I wanted to pop up my title instead.

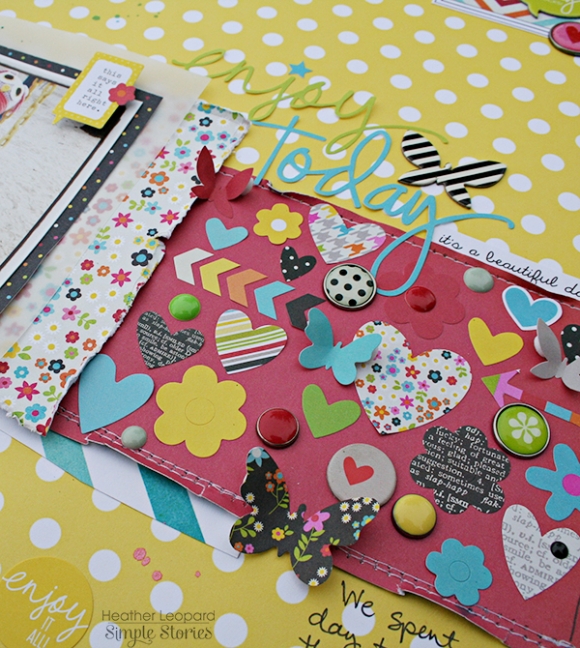
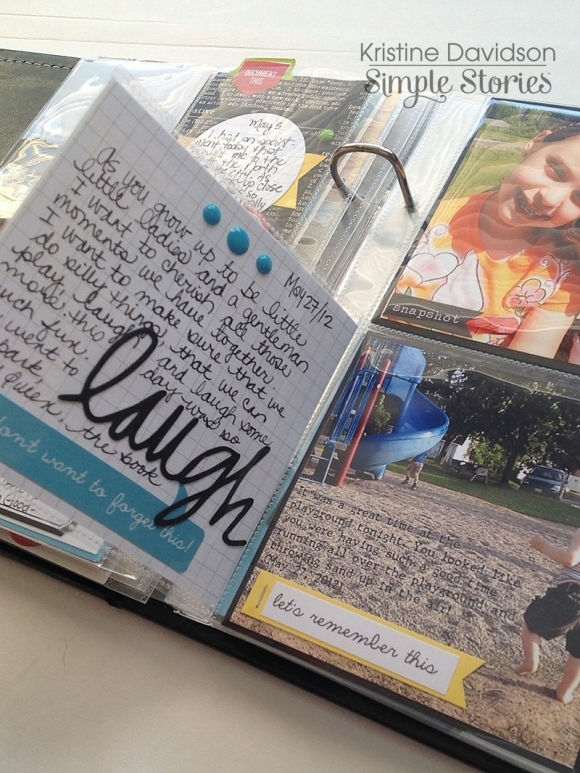
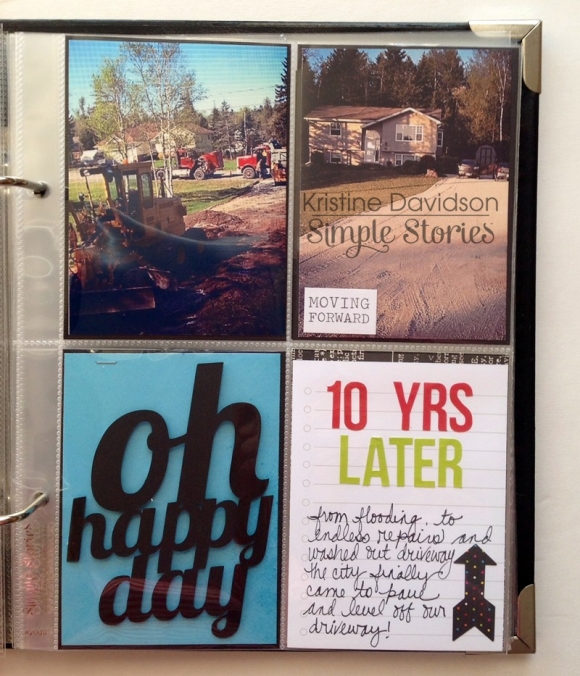
I used a Simple Stories Silhoutte cut file for the 'Sweet & Sassy' title.

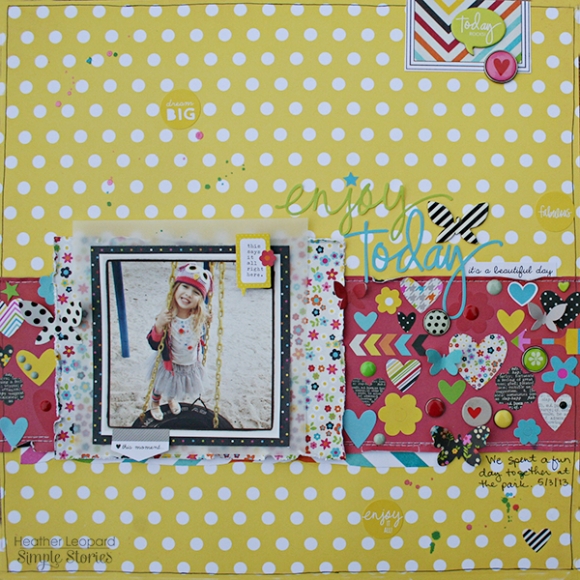
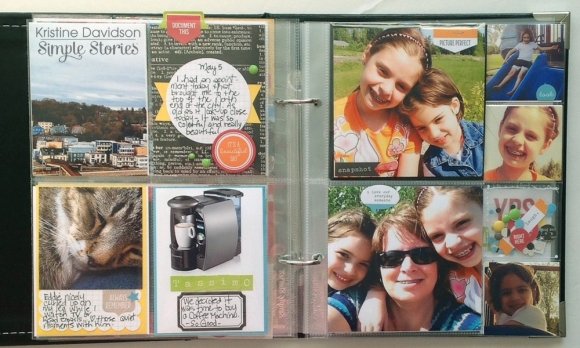
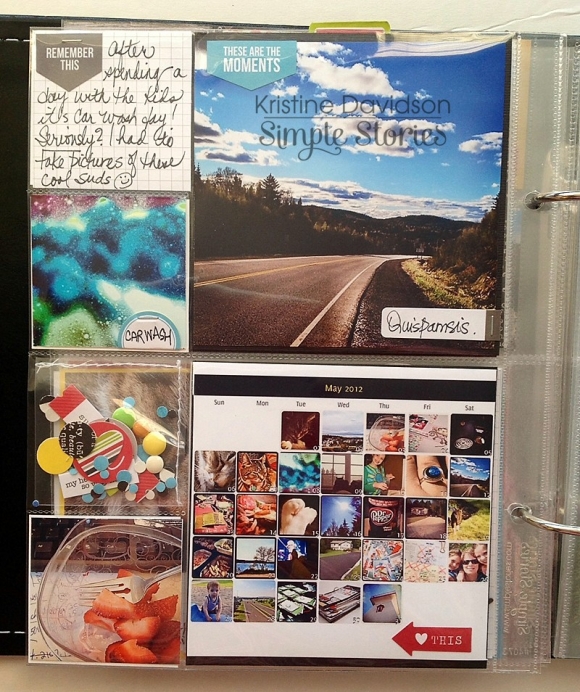
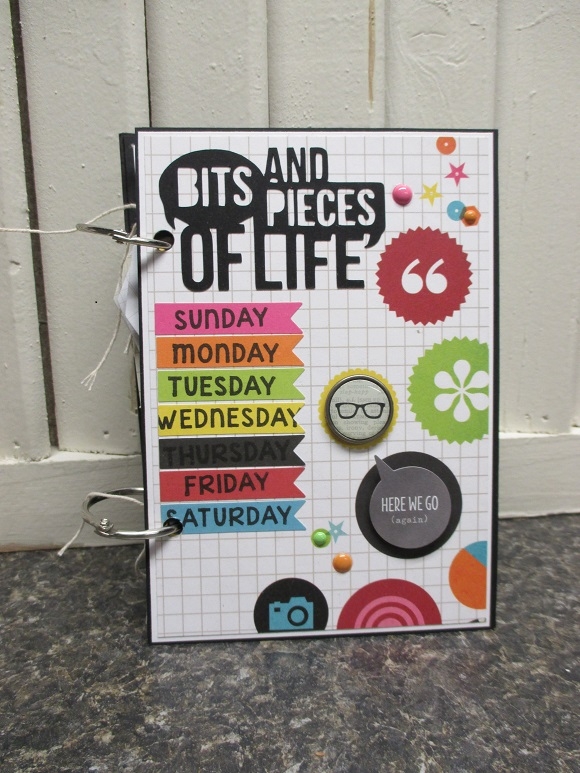
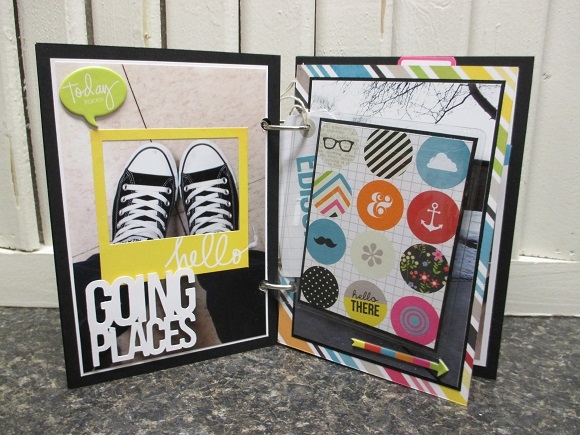
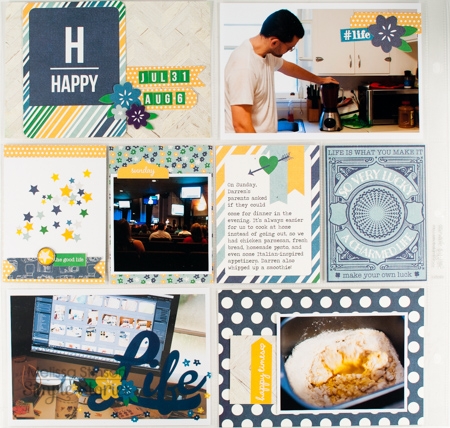
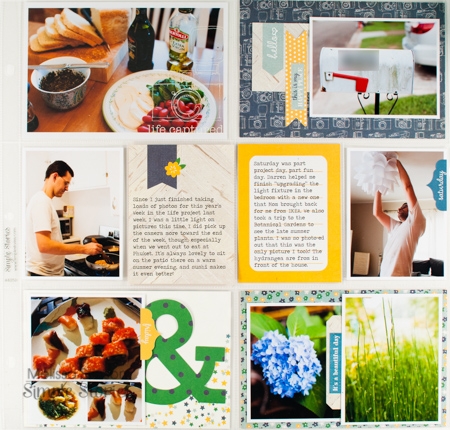
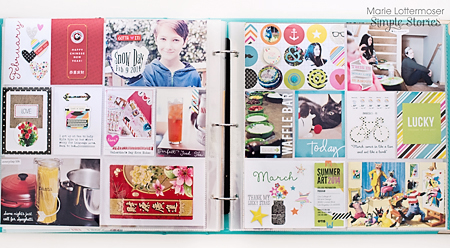
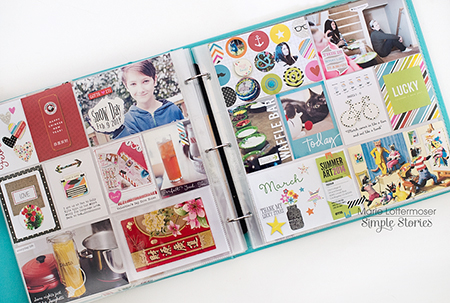
Here's my finished layout.  

I like this tool because it allows you to create such straight lines with so many different widths!

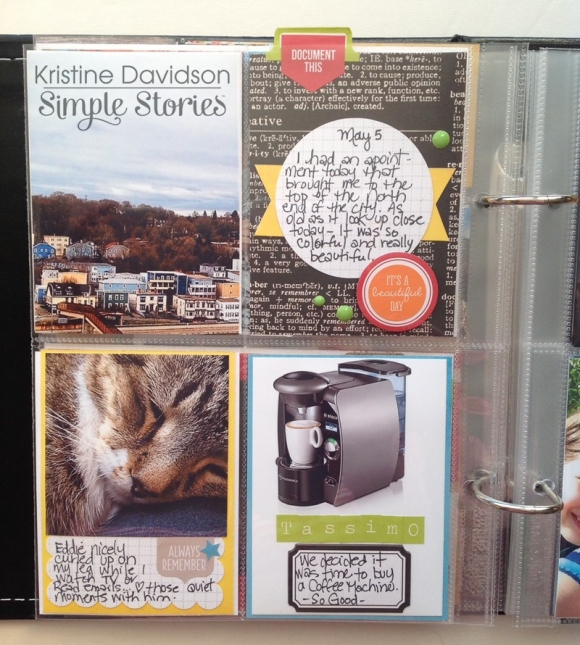
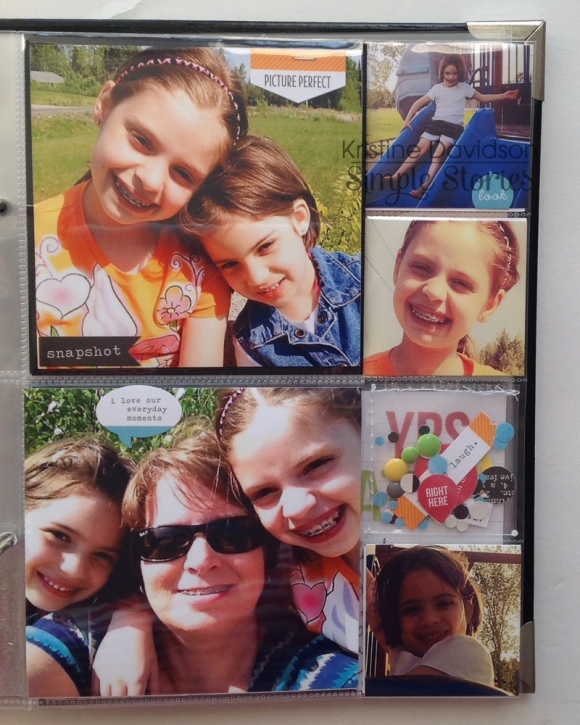
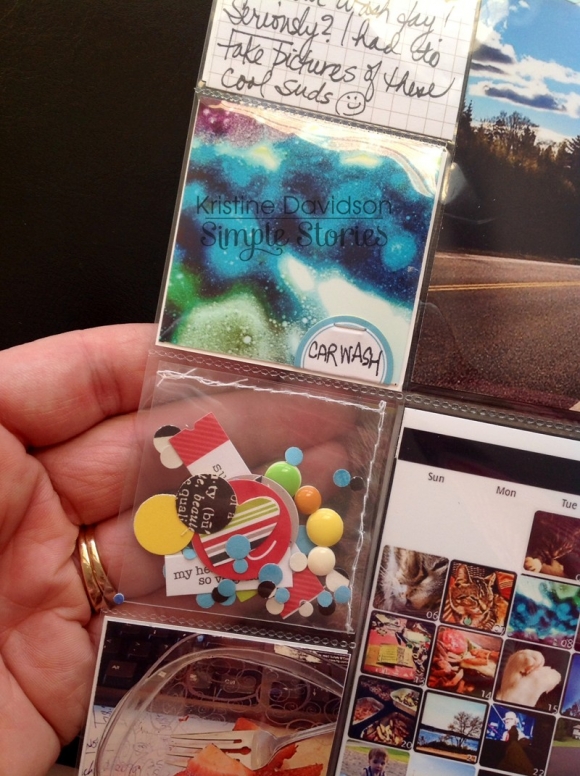
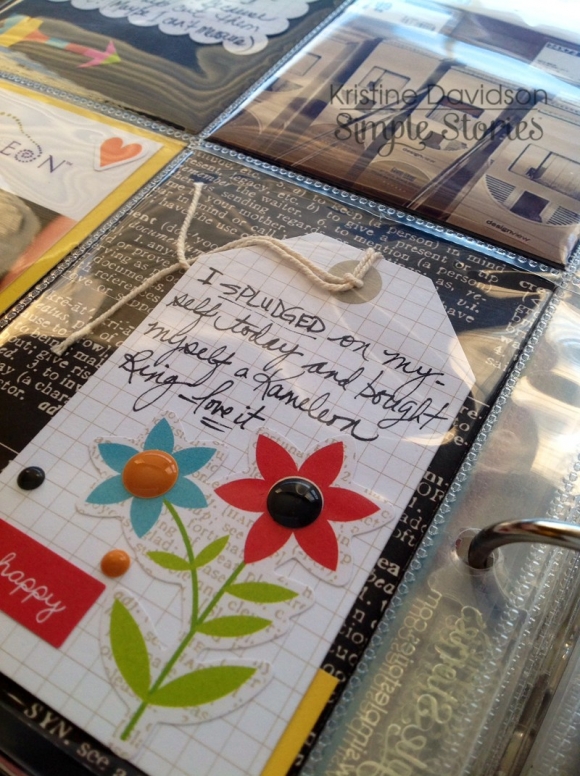
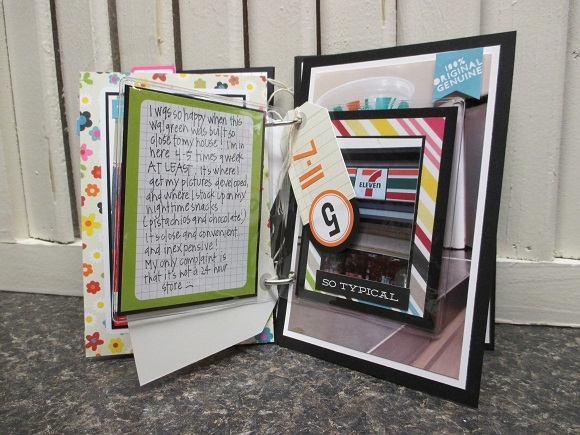
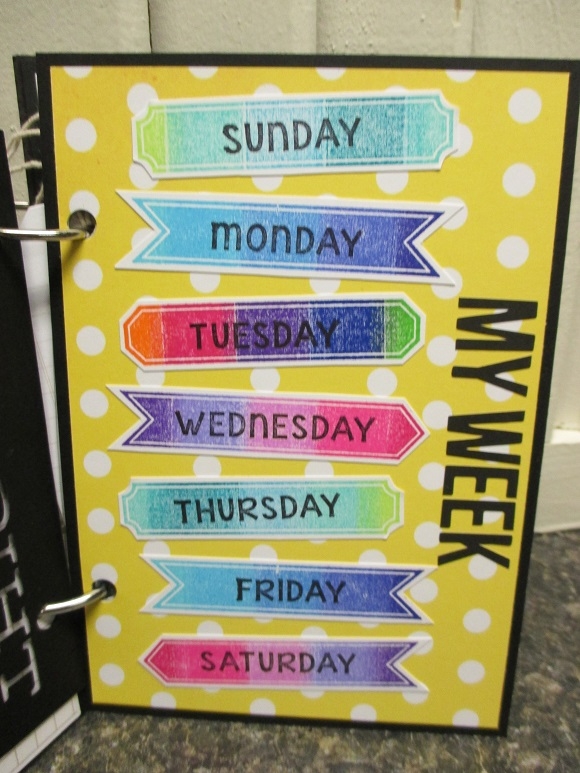
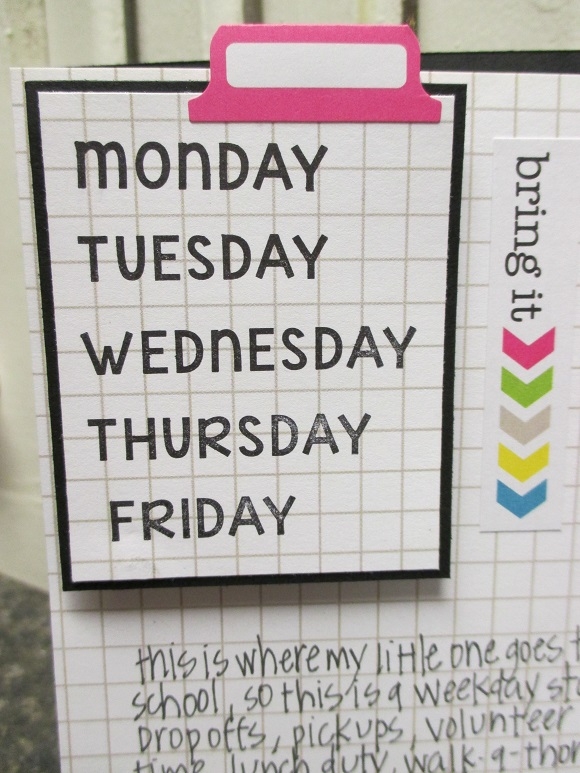
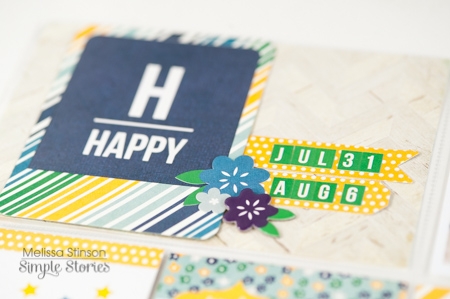
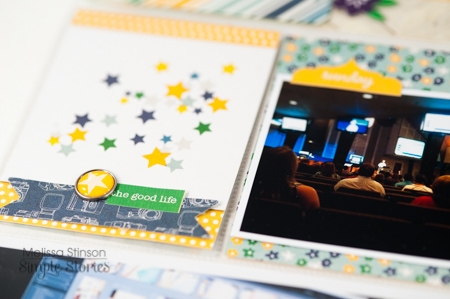
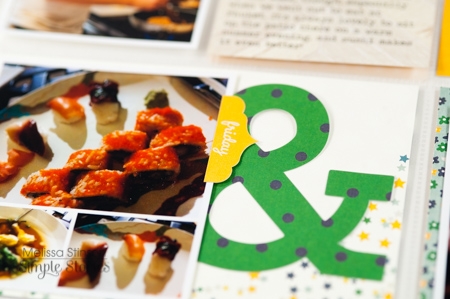
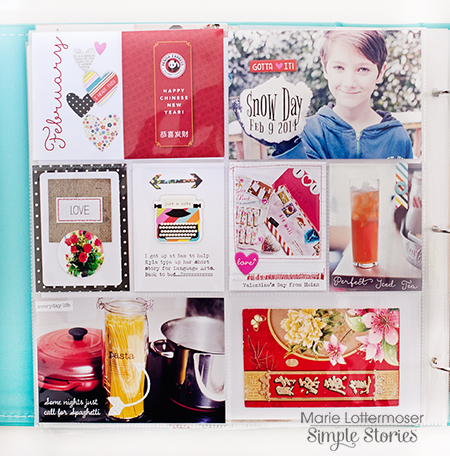
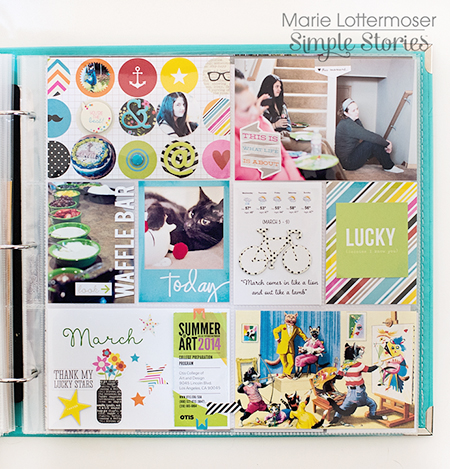
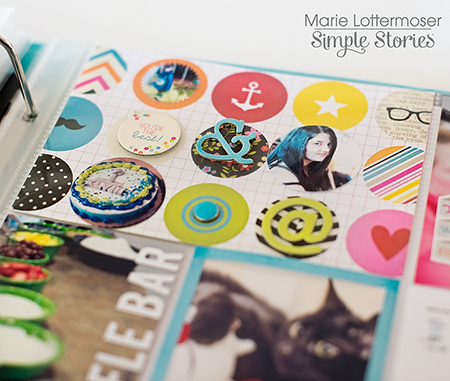
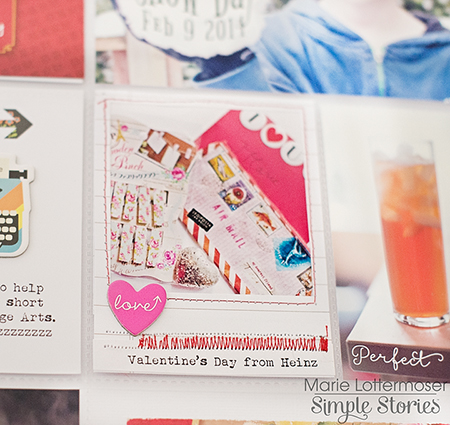
Here's a few close-up shots.

Thanks so much for joining us this week for the Simple Stories & Perfect Paper Crafting Blog Hop.  We'll announce the winner tomorrow, so if you've entered, make sure and check back with us here tomorrow!


Hello! Donna here with you today, welcome to Day 4 of the Simple Stories & Perfect Paper Crafting Blog Hop Week!  We’re so excited to team up with Perfect Paper Crafting to share some inspiring projects with you this week.

We’ll be giving away a great Perfect Paper Crafting prize package at the end of the week, so be sure to play along and check back on Sunday the 20th to see if you’re the lucky winner!

Here are the different ways you can play along –

  1. Like Simple Stories on Facebook
  2. Share this blog post on your Facebook wall and tell us you did on our Facebook wall
  3. Follow Simple Stories on Pinterest
  4. Follow Simple Stories on Instagram at simplestories_
  5. Comment here on our blog or on Facebook

Perfect Paper Crafting is also posting projects and giving away prizes, so be sure to check out their blog and Facebook page, too!

I have a layout to share with you today that I made using the Perfect Ruler. I have completely fallen in love with this tool! While I do use a paper trimmer when scrapbooking, I also heavily rely on my metal ruler and craft knife for making finer cuts and trimming photos. What makes this ruler different? It is double-sided with a clear plastic edge on one side and a metal ruler on the other. It also has the coolest feature called a grip strip. You simply press down on the center button

and the strip holds your paper or photo in place. I used my ruler to trim my photos and the paper strips on my layout.

This feature also helps keep your fingers safe and away from your knife blade. Pretty smart!

Here is the layout I created:

I cannot seem to get enough of Daily Grind. With three little boys, our lives are very colorful indeed and this line has been the perfect fit for so many of our stories. One of my favorite parts of this collection are the die cut Bits & Pieces -

There are so many fun little bits and pieces, and they add just the right accent to your layouts.

I also love adding a little detail to my titles:

A simple thing like using a brad to dot your i’s makes it more dynamic and interesting.

Thank you for stopping by! Don’t forget to come back tomorrow for more awesome projects from Simple Stories and Perfect Paper Crafting!

Supplies

Hi Simple Stories fans, Rebecca Keppel here; welcome to Day 3 of the Simple Stories & Perfect Paper Crafting Blog Hop Week!  We’re so excited to team up with Perfect Paper Crafting to share some inspiring projects with you this week.

We’ll be giving away a great Perfect Paper Crafting prize package at the end of the week, so be sure to play along and check back on Sunday the 20th to see if you’re the lucky winner!

Here are the different ways you can play along –

  1. Like Simple Stories on Facebook
  2. Share this blog post on your Facebook wall and tell us you did on our Facebook wall
  3. Follow Simple Stories on Pinterest
  4. Follow Simple Stories on Instagram at simplestories_
  5. Comment here on our blog or on Facebook

Perfect Paper Crafting is also posting projects and giving away prizes, so be sure to check out their blog and Facebook page, too!

I got to work with the Perfect Paper Crafting marker spritzer called the Perfect Airbrush. I was going to do a little mini video showing how to use this ingenious tool, but you know what? It is so easy to use, it doesn't even need a video! I paired the Perfect Airbrush with Simple Stories DIY collection and came up with this layout:

I knew I wanted to create a rainbow background using the colors from DIY so, I pulled out some stickers from DIY and found Copic markers to match.

I unscrewed the pen barrel since my markers were too wide, inserted the marker and screwed it tight. This is how you want the tip of the marker placed:

Then you just squeeze! You can play with how dark or light the spray is by moving it closer or further away from your paper.

 I sprayed an entire background with a ROYGBV of the bright colors found in DIY.

I loved being able to create my own background with perfectly coordinating colors!

And the playfulness of the DIY collection makes it a perfect compliment to a spritzed rainbow background.

Thanks for joining us!  Check back in tomorrow for day 4 of the Simple Stories & Perfect Paper Crafting Blog Hop.

Supplies

Hi everyone! Mindi here with you today, welcome to Day 2 of the Simple Stories & Perfect Paper Crafting Blog Hop Week!  We’re so excited to team up with Perfect Paper Crafting to share some inspiring projects with you this week.

We’ll be giving away a great Perfect Paper Crafting prize package at the end of the week, so be sure to play along and check back on Sunday the 20th to see if you’re the lucky winner!

Here are the different ways you can play along –

  1. Like Simple Stories on Facebook
  2. Share this blog post on your Facebook wall and tell us you did on our Facebook wall
  3. Follow Simple Stories on Pinterest
  4. Follow Simple Stories on Instagram at simplestories_
  5. Comment here on our blog or on Facebook

Perfect Paper Crafting is also posting projects and giving away prizes, so be sure to check out their blog and Facebook page, too!

I am so excited to be apart of the Simple Stories/Perfect Paper Crafting Blog Hop. I received the Perfect Tears tool  - a set of 3 rulers with 6 different tearing edges.  It was so easy to use and there are lots of different possibilities.   Along with the Perfect Paper Crafting tool I used the Travel SN@P Set. 

All throughout my Pocket Page layout I used the Perfect Tears tool to tear my journaling cards and papers. For this card I used 3 different shapes for a great layered look. I used 4 different SN@P cards and layered them on top of each other before adding the sign.

Here is a close up of what the card looks like all put together.  

This is another journaling card that I used the Perfect Tears Tool on. 

I had a blast using the Travel SN@P set. I took this photo of the hotel stationery during our stay. I knew the moment I took the photo that I was going to use it as my title card for this weekends spread. It was the perfect starting point for all my embellishments. 

I love all the different SN@P cards that come with this set. They are all so versatile. Instead of using this one for a journaling spot, I put a photo at the bottom and added just a bit of journaling and some embellishments. 

Here is one more close up. I used this fun SN@P card and cut out the middle. I thought that it would make the perfect frame for a photo. 


Thanks for joining me today; check back tomorrow for Day 3 of the Simple Stories & Perfect Paper Crafting Blog Hop!

Hi everyone! Wendy here with you today, welcome to Day 1 of the Simple Stories & Perfect Paper Crafting Blog Hop Week!  We’re so excited to team up with Perfect Paper Crafting to share some inspiring projects with you this week.

We’ll be giving away a great Perfect Paper Crafting prize package at the end of the week, so be sure to play along and check back on Sunday the 20th to see if you’re the lucky winner!

Here are the different ways you can play along –

  1. Like Simple Stories on Facebook
  2. Share this blog post on your Facebook wall and tell us you did on our Facebook wall
  3. Follow Simple Stories on Pinterest
  4. Follow Simple Stories on Instagram at simplestories_
  5. Comment here on our blog or on Facebook

Perfect Paper Crafting is also posting projects and giving away prizes, so be sure to check out their blog and Facebook page, too!

I'm here today to give a little mixed media inspiration using both the DIY Boutique collection and Summer SN@P! Set.  I chose the Perfect Airbrush from Perfect Paper Crafting to play with for today's hop, having never used an airbrush I thought that this would be a ton of fun!  When I first received the product I pulled out all of the markers I could find and began to play...  I found that when you airbrush you have to cover your area because a fine mist goes everywhere!  I found that my Faber-Castell big brush markers were too big to fit in the holder.  I found that Crayola markers work nicely, but the skinny ones didn't achieve much spray.  I really liked using highlighters, Expo markers, and my copic markers that I had, they achieved a nice amount of spray.

I began my layout Bring It On, with the idea of using frames - the photo frames and the paper Freeze Frame, as I was cutting out the frames I realized that my picture nestled perfectly in the empty spots.  

I grabbed SN@P! Cuts from various collections looking for the right touch and fit in my frames.  After I laid out the basic page, I removed everything (remember the tip that the mist goes everywhere!) and taped my SN@P! Cut down on my cardstock and began to spray with the Perfect Airbrush.  

Once my spraying was finished, I adhered the photo frames and pictures, popped up a few of the frames that I had removed from the paper, added a few stickers, chipboard pieces, and some penwork and my layout was complete.

My next layout, Soak Up the Sun, began with the idea of using the airbrush to give a water feel.  

I began this layout by using a stencil (Heidi Swapp) and forming a diagonal of bubbles using my airbrush.  

I loved what my scrap paper looked like with the overspray so I decided to put some overspray on my edges furthering the idea of a watery page.  

After my messy fun was done, I grabbed my little wallet photos and a few Insta Squares from the Summer SN@P! Set to form the focal point of my page.  I loved the look of the black sunglasses from the 4x6 cards which I added in as something to ground my layout.  A few die cut pieces, stickers, and enamel dots were the finishing touches to my layout.

Thanks for joining me today for some mixed media fun!

Check back tomorrow for Day 2 of the Simple Stories & Perfect Paper Crafting Blog Hop!

Hi Simple Stories friends. It's Heather  and I gotta shout from the roof tops just how much I LOVE the DIY Boutique collection. The colors are just so bright and fun and it has such a great mix of patterns, from stripes, to polka dots, chevrons, flowers, basics, you name it, it's there. And if you haven't learned yet...I love mixing patterns.

Let me walk you through this layout I created to document a day at the park with my littlest girl.

I wanted to pull out the yellow color in the tire swing so I chose to use the yellow and white polka dot paper as my background. And, I knew I wanted to use the floral paper because it matches my daughter's shirt perfectly. Third, I knew I wanted to use all those fabulous sticker, brads and enamel dots in a big way. First, though, I had to create a foundation for them so I stitched a strip of the red paper across the page and then folded the edges up, allowing them to tear here and there.

See? See how perfectly that floral paper matched my daughter's shirt. I couldn't have planned it any better. LOL. I added a multi-colored black polka dot frame over a section of vellum to help soften the floral pattern just a bit. I offset the photo to the left of my page. I used foam dots to adhere a couple of sentiment stickers.

To create this cluster of embellishments, I knew I needed to use at least 3 different shapes. I chose hearts, flowers and butterflies. I started by placing the largest shapes first and then the medium pieces. I tucked a few under my photo mats and let some hang off the left and right side of the page. Then the little bits filled in the gaps perfectly. If you look closely, you can see that I added 3 yellow sentiment stickers on the yellow paper. I like the subtly of it scattered here and there.

So, that's my layout today. I hope this inspired you to grab all your embellishments packs you've been hoarding and put them to use to create a fun little clustered embellishment page. I think that would make a great weekend project.

Thanks for stopping by today.

Hello Everyone! It's Kristine Davidson here today with a Life Documented post using the NEW DIY and DIY Boutique Collections.  In my previous post I shared with you that I would document 2012 and today I'm sharing the month of MAY 2012.

I used the 6x8" album but included different pocket pages. You'll see in this post that with so many varieties of the 6x8 pocket pages you can mix and match to create a uniform album for your LIFE Documented projects.

Page 3 includes 2 4x4" pockets and 4 2x2" pockets. I thought this was perfect to add 2 large photos and a few small ones on the sides.  Once I started decorating this page I realized I wanted to add more but didn't want to add another page so instead, I added a 4x4" Photo Flip. You can add these in different ways but I adhered mine to the left of the pocket page. This allows a great Flip to view journaling and another photo.  I love this format, it's like a little secret pocket!

I added a confetti pocket to this page, they add such fun details to a spread and you can add anything you like. In my Mini Confetti pocket I added some enamel dots, stickers, word phrases, and some small punched out pieces of patterned paper.  My technique for creating this pocket is simple : you can add your items and sew them to the page protector or you can make a small sized pocket with the items, sew them together and then add them to your pocket.   

As you flip the page, I again used a monthly calendar showing the days of the month and a few pictures of what happened that day. Some aren't exact dates but I'm ok with that.

This following page is OH HAPPY DAY, a Simple Stories Silhouette Cut File. I added pop dots under the die cut to add a bit of dimension.

The last page for May 2012 has a few photos and journaling about misc days in the month.

I am using the 6x8 Sn@p! Leather Album in black for all of my Life Documented pages for 2012. It's sturdiness, metal corner accents, and stitch details are fantastic and durable. The album will be handled often so durability is a must - this SN@P! album is so far the best I've been using.

I used a variety of inserts for this monthly spread - a 6x8" size featuring 2x2" to 4x6 and also a full 6x8. The Sn@p pocket pages come in a variety that you can add to your album. PERFECTO!

I hope you enjoyed my LIFE DOCUMENTED post today - and don't forget to share your pages or projects on the Simple Stories Facebook page and Instagram.

Supplies

Hi everyone! Allison Davis here with a Life Documented layout using the Dog SN@P! Set & along with it I have another sketch that mixes the Sn@p! Pocket Pages with traditional scrapbooking.

You can download the full sketch with measurements and placements here - Simple Stories Life Documented Sketch #10.

The left side of the sketch uses a combination of SN@P! cards and photos to create a traditional 12x12 scrapbook page,  while the right side of the sketch uses a combination of SN@P! cards and photos in the SN@P! Pocket Page, Design 6.

Here's my layout based on the sketch above:

I adore our chocolate lab, Chewy, and I have a ton of pictures of him but, I'm really bad about scrapbooking with them. He's such an important part of our family and I want to make sure that I document his sweet relationship with our boys. I immediately loved the cute Dog SN@P! Set and couldn't wait to use it. One of my favorite things is that the set includes so many adorable types and colors of dogs and I immediately saw one that reminded me of our lovable Chewy.

On the left page I have a large block design made up of a 4x6 card and photo and 2x2 squares and photos. If you aren't a fan of using 2x2 photos you could always just use a 4x4 photo or card in place of those areas on the sketch.

I love adding hand stitched elements where I can on my layouts. I was immediately drawn to the 2x2 squares with the different shapes on them and knew that stitching around them would be a great way to add some texture and dimension.

I love finding fun ways to play around with the theme and design of my layouts. I wanted to find a way to make it kind of look like a dog had walked across my layout. I created a wavy line,

I used the "Life is Better With a Dog" card for my title and added two small photos above it.

On the right page I used a Sn@p! Pocket Page. This design of Pocket Page, design 6, is one of my favorites. Since it just has the standard 4x6 and 3x4 pockets, it really makes putting a page together a breeze.

I kept everything pretty simple with the right page. Each 4x6 pocket has a photo and each 3x4 pocket has a card.

I had an extra photo I wanted to include and it just so happened that one of my photos had a lot of empty space. It was the perfect space to add that smaller photo and a few embellishments.

I added stitching to outline the paw print and then added a heart to the center. On the dog card I added a small punched heart and then added glitter to it.

I added some stitching to the top and bottom of the "bow, wow, wow" card along with a washi tape sticker and a small punched heart. I added my journaling in strips on the journaling card and then added our dog's name with letter stickers.

I'm using the 12x12 Sn@p! Leather Album in black for all my LIfe Documented pages; I love the details like the metal accents and stitching.  I used the 12x12 Sn@p! Pocket Pages, Design 6 from the Variety Pack. You get so many different options and great designs with the Variety Pack!

Good morning Simple fans. Nancy here with a look at the bright and bold DIY Boutique collection. I love the pops of color and fun in this line. It reminds me of the colorful parade photos I have from our trip to Disney World.

I paired this graphic check print with white cardstock to highlight the colors and provide a place for my photos and journaling.

The pack of letter alphas were perfect for a colorful title that mimics the patterned paper and gives it a fun, party feel.

The polaroid frames are perfect for bringing a smaller photo front and center. I printed the journaling on vellum before placing in the frame to add a soft, see-through look to the area.

The die cut vellum stars add movement to layout without overpowering the page. A simple white dot was placed in the center to add dimension.Enamel dots were used to reinforce the Disney theme. Placing the symbol in a circle sticker with some stamping, gives it a ground spot.

Pretty pops of color and bold design are what DIY and DIY Boutique are all about. I love that it fits any theme, event or everyday scrapbooking moment. It’s the perfect collection to have on hand!

Hi everyone! Andrea here with you today, welcome to Day 6 of the Simple Stories & Taylored Expressions Blog Hop Week!  We’re so excited to team up with Taylored Expressions to share some inspiring projects with you this week.

We’ll be giving away a great Taylored Expressions prize package at the end of the week, so be sure to play along and check back on Sunday the 30th to see if you’re the lucky winner!

Here are the different ways you can play along –

  1. Like Simple Stories on Facebook
  2. Share this blog post on your Facebook wall and tell us you did on our Facebook wall
  3. Follow Simple Stories on Pinterest
  4. Follow Simple Stories on Instagram at simplestories_
  5. Comment here on our blog or on Facebook

Taylored Expressions is also posting projects and giving away prizes, so be sure to check out their blog and Facebook page, too!

Today I'm excited to share with you a mini book I made using the DIY Collection along with Pockets and Pages stamps from Taylored Expressions.  It was fun to team up with Taylored Expressions and use their cool line of stamps in my scrapbooking - a first for me!

I worked with the “What A Day” stamp set, which consisted of day of the week stamps as well as banners to stamp on.  I struggled for a bit wondering how I could incorporate those into a mini book, but then I thought about how I spend my days.  It seems as if I live in my car, and I always end up at the same places over and over.  Viola!  That was it - seven days in a week and the seven places that I’m at most in those days; and the concept for the album fell into place.

At first I thought it might be silly to make an album of “places”, but these seven places take up a lot of my time and really do make up the bits and pieces of my life.

So here it is:

The album is based on cardstock and is held together by o-rings.

The front cover is paper from the DIY Boutique Collection and is matted on black cardstock.  I used a Simple Stories Silhouette cut file for the album title.  The banner stickers are from the collection as well, and I stamped those with the stamps from Taylored Expressions.  I embellished with enamel dots (think “candy buttons” from when we were kids!) and pop dotted a brad and a sticker to give the cover some depth.

I used ID Badge Holders from my local office supply store as the photo pockets for the book, and built the book around those.

They were great because the smaller Card Foundations from the collection fit in them perfectly.

The pages of the book are filled with photos of my seven places and a little write up about each place.

I incorporated the Taylored Expressions stamps throughout the book.

I used tags to title each of my places with sticker letters and a sticker number; those let you know where one place ends and the next one begins.

I’ve got to tell you…this was my first time working with the DIY collection, and there are SO many items to choose from as far as embellishments go!

This book was a lot of fun to make, and it documents how I spend the majority of my time in a week.  It was fun to team up with Taylored Expressions and do something that was new to me - adding stamping into my scrapbooking.  Thanks for joining me today!  As always, I hope this project inspires you to try something new and exciting in your scrapbooking projects.

I hope you enjoyed seeing how you can easily pair any of the Simple Stories collections with Taylored Expressions fabulous stamp sets! 

Head on over to the Taylored Expressions blog and check out what their Design Team has created using their stamps & dies and our Simple Stories products! They’re also hosting giveaways as well, so what are you waiting for – head on over! 

Thanks so much for joining us this week!

Hi everyone! Lisa here with you today, welcome to Day 5 of the Simple Stories & Taylored Expressions Blog Hop Week!  We’re so excited to team up with Taylored Expressions to share some inspiring projects with you this week.

We’ll be giving away a great Taylored Expressions prize package at the end of the week, so be sure to play along and check back on Sunday the 30th to see if you’re the lucky winner!

Here are the different ways you can play along –

  1. Like Simple Stories on Facebook
  2. Share this blog post on your Facebook wall and tell us you did on our Facebook wall
  3. Follow Simple Stories on Pinterest
  4. Follow Simple Stories on Instagram at simplestories_
  5. Comment here on our blog or on Facebook

Taylored Expressions is also posting projects and giving away prizes, so be sure to check out their blog and Facebook page, too!

Today I'm excited to share some fun layouts I made with Simple Stories new DIY Boutique and Fresh Air collections. I paired these collections with some fabulous stamp sets from Taylored ExpressionsPockets & Pages {Documented} and Pockets & Pages {InstaFun}.

This first page features the DIY Boutique collection (with embellishments from the DIY collection added in). This is such a fun collection, full of fabulous bright colors. I embellished the circles already printed on the paper with enamel dots, stickers, chipboard and some of the Taylored Expressions {InstaFun} stamps. This stamp set worked perfectly with this selfie of my daughter. I love the style of the font and all of the hash tags.

Here's a detail shot of the top right corner of the page:

Here's a look at the area to the left of the photo, showing some of the Taylored Expressions stamps in action:

The Fresh Air Simple Set worked so well for this page about my daughter's love of Starbucks. She likes trying things from what she calls the "secret" menu — items that are not listed in the store, but are drink combos people have tried and posted online. I think I'll stick with my favorite, a tall chai tea latte with skim milk :)  On this page, I used the Taylored Expressions {Documented} set to stamp a journaling card (inside of the text frame) and used some of the word stamps around the page.

Here's a look at the stamped journaling card inside of the frame:

This is a detail shot of the bottom right corner of the page where I included the product packaging from my daughter's drink:

This last shot shows the detail to the left of the photo, including a sentiment I stamped onto cardstock and used on top of the bitty bag that holds the journaling:

I hope you enjoyed seeing how you can easily pair any of the Simple Stories collections with Taylored Expressions fabulous stamp sets!

Head on over to the Taylored Expressions blog and check out what their Design Team has created using their stamps & dies and our Simple Stories products! They’re also hosting giveaways as well, so what are you waiting for – head on over! 

Check in again with us tomorrow for more inspiring projects from Simple Stories & Taylored Expressions!

Supplies

Hello friends! Kim here, welcome to Day 4 of the Simple Stories & Taylored Expressions Blog Hop Week!  We’re so excited to team up with Taylored Expressions to share some inspiring projects with you this week.

We’ll be giving away a great Taylored Expressions prize package at the end of the week, so be sure to play along and check back on Sunday the 30th to see if you’re the lucky winner!

Here are the different ways you can play along –

  1. Like Simple Stories on Facebook
  2. Share this blog post on your Facebook wall and tell us you did on our Facebook wall
  3. Follow Simple Stories on Pinterest
  4. Follow Simple Stories on Instagram at simplestories_
  5. Comment here on our blog or on Facebook

Taylored Expressions is also posting projects and giving away prizes, so be sure to check out their blog and Facebook page, too!

I was super pumped to pick the Taylored Expressions Bars of the Week die set to use on my project. I had originally planned on using it for my pocket pages album (which I am sure I still will), but something else popped into my head.

My husband and I have agreed that planning the week’s menu ahead of time is such a stress reliever. I’ve been wanting to make our boring weekly list a little more inspiring. So, here’s what I came up with.

I used the top half of our magnet/message board as a weekly recipe card holder. (I use the bottom half for shopping and To Do lists).

First, I created tags with the adorable Taylored Expressions die. Of course, the set includes all seven days, but we mainly plan for Monday through Friday, then kind of “wing it” on the weekends with grilling, leftovers, etc. I was really impressed with how well the dies cut so cleanly, even with these dainty letters. I layered them up with bits and pieces of our Homespun Collection. 

Naturally, I couldn’t resist adding a cute little header to my board. I don’t know about you, but “I’m hungry” is like our family theme song! Ha, ha.

Here’s a closer view of the Friday banner. I used little clothespins to clip my recipe cards to the board. (I also just love the SN@P! Recipe Cards in the homespun collection).

Head on over to the Taylored Expressions blog and check out what their Design Team has created using their stamps & dies and our Simple Stories products! They’re also hosting giveaways as well, so what are you waiting for – head on over! 

Check in again with us tomorrow for more inspiring projects from Simple Stories & Taylored Expressions!

Hey there!  Melissa here, welcome to Day 3 of the Simple Stories & Taylored Expressions Blog Hop Week!  We’re so excited to team up with Taylored Expressions to share some inspiring projects with you this week.

We’ll be giving away a great Taylored Expressions prize package at the end of the week, so be sure to play along and check back on Sunday the 30th to see if you’re the lucky winner!

Here are the different ways you can play along –

  1. Like Simple Stories on Facebook
  2. Share this blog post on your Facebook wall and tell us you did on our Facebook wall
  3. Follow Simple Stories on Pinterest
  4. Follow Simple Stories on Instagram at simplestories_
  5. Comment here on our blog or on Facebook

Taylored Expressions is also posting projects and giving away prizes, so be sure to check out their blog and Facebook page, too!

I've been steadily working through a backlog of photos that I need to edit from the end of 2013, which makes now the perfect time to finish up the remaining half dozen or so weeks in my 2011 album. I love skipping around while scrapping my weeks since it gives me lots of freedom when matching products to photos, and for this particular week I went with the A Charmed Life collection- along with some fantastic Taylored Expressions dies, of course!

My birthday is on St. Patrick's Day, so of course my first inclination is to use A Charmed Life to scrapbook photos from that event (and, honestly, I probably will be using it for that, too!), but I'm also a big fan of using collections for something other than their theme suggests. During this particular week in 2011 I was participating in Ali Edwards' Week in the Life project, so I had lots of great photos that reminded me of everything I love about my life and our home. "A Charmed Life" seemed to be the perfect sentiment to go along with them!

The two sets of Taylored Expressions dies that I used on this page were the inspiration for my title card for this week. The 3x4 Photo Frame from their Pockets and Pages collection was the exact size that I needed to frame up a 3x3 Insta-Square card, and the Label It die cuts make adorable banner strips (and a perfect parking spot for my dates!).

I used the Label It dies in several places on my layout as a grounding element for stickers and embellishments, helping to bring a bit more color and remove the "floating" aspect that can sometimes happen on my mages.

I've also put together a short video showing how this layout came together from start to finish!

Simple Stories' 12x12 SN@P faux leather albums in aqua are the perfect place to hold my layouts when they're finished, and for 2011-2013 I've stuck to Design 3 Pocket Pages to make things easy. I've pretty much got making layouts in them down to a science now!

Head on over to the Taylored Expressions blog and check out what their Design Team has created using their stamps & dies and our Simple Stories products! They’re also hosting giveaways as well, so what are you waiting for – head on over! 

Check in again with us tomorrow for more inspiring projects from Simple Stories & Taylored Expressions!

Supplies

Hey there!  Vicki here, welcome to Day 2 of the Simple Stories & Taylored Expressions Blog Hop Week!  We’re so excited to team up with Taylored Expressions to share some inspiring projects with you this week.

We’ll be giving away a great Taylored Expressions prize package at the end of the week, so be sure to play along and check back on Sunday the 30th to see if you’re the lucky winner!

Here are the different ways you can play along –

  1. Like Simple Stories on Facebook
  2. Share this blog post on your Facebook wall and tell us you did on our Facebook wall
  3. Follow Simple Stories on Pinterest
  4. Follow Simple Stories on Instagram at simplestories_
  5. Comment here on our blog or on Facebook

Taylored Expressions is also posting projects and giving away prizes, so be sure to check out their blog and Facebook page, too!

I am over the moon with the Taylored Expressions Dies I used for my layout today!!  I chose the Pockets & Pages Circle Words thin steel dies from Taylored Expressions for my project.  I paired these fun words with the Simple Stories DIY Boutique and DIY stickers.  Take a peek...

The Circle Word Dies are perfect for the DIY Boutique collection!!  Take a look at the layout I created...

I used the solid sides of the patterned paper from DIY Boutique to cut the die words out.  I found the words much easier to read with the solid patterns.  I have to say these dies work like magic!!  The cuts were super clean and detailed.  They released easily from the dies even though they are delicate.

I hope you can see how clean the cuts are in this image!!  To finish off the words, I simple punched 2" circles from solids again and layered them.  The DIY stickers were the perfect compliment to the dies.

Here's another look...

I have always been a fan of die cuts and I love that many of the Taylored Expressions dies also come with matching stamps!  I will be checking out more of their products...these circles have me hooked!!!

Head on over to the Taylored Expressions blog and check out what their Design Team has created using their stamps & dies and our Simple Stories products! They’re also hosting giveaways as well, so what are you waiting for – head on over! 

Check in again with us tomorrow for more inspiring projects from Simple Stories & Taylored Expressions!

Supplies

Hi all! Teri here, welcome to Day 1of the Simple Stories & Taylored Expressions Blog Hop Week!  We’re so excited to team up with Taylored Expressions to share some inspiring projects with you this week.

We’ll be giving away a great Taylored Expressions prize package at the end of the week, so be sure to play along and check back on Sunday the 30th to see if you’re the lucky winner!

Here are the different ways you can play along –

  1. Like Simple Stories on Facebook
  2. Share this blog post on your Facebook wall and tell us you did on our Facebook wall
  3. Follow Simple Stories on Pinterest
  4. Follow Simple Stories on Instagram at simplestories_
  5. Comment here on our blog or on Facebook

Taylored Expressions is also posting projects and giving away prizes, so be sure to check out their blog and Facebook page, too!

Today I'm excited to share with you a couple pages I made with the A Charmed Life collection and some fabulous steel dies from Taylored Expressions.

My approach to my Life Documented pages is fairly liberal. While many of my friends follow a strict schedule and put together pages every week, I tend to focus on events and only document things when I feel like it. Sometimes I have lots to document and sometimes I don't.  So this spread really focuses on two fun things that happened this month. First, I took part in a St. Patrick's Day run/walk.  Second, a couple of my neighbors created some fantastic chalk drawings and just had to share them with me! 

The first page is all about the run/walk. 

Let's be honest: I am the slowest runner ever. The cellar position in the final standings whenever I take part in a race is usually occupied by me. That's OK. I still totally love taking part in these runs. And this one, especially, was fun because it had a St. Patrick's Day theme. Almost everyone wore green or something Irish-inspired for it! 

With lots of green, a few clovers and an abundance of words like "lucky" and "happy" showing up in the A Charmed Life collection, I felt it was perfect for this project.  Two of my favorite elements on this page are the Super Happy and It Was cards.

The Super Happy card started out as a regular old SN@P! Cut card. I added the decorative Chevron elements over the Happy word with a die from Taylored Expressions' Pockets & Pages Essentials - 2x2 dies. I love the look!  

I created the card next it by die-cutting a piece of vellum with Taylored Expressions' Pockets & Pages - 3x4 Bubble In die and then layering it over some A Charmed Life paper. I sure dig how they look together.

I got daring with the picture of my race medal and die-cut it with a square die from the 2x2 dies from Taylored Expressions. I mounted a SN@P! Card in the open space and then slapped some letters onto it, as well as some additional stickers onto the picture.

This page focuses on my young neighbors and their artwork!  They were so excited to show their chalk art to me that I couldn't resist snapping a few pictures. Believe it or not, they spent two whole days sketching planets, moons and stars onto our street. They were so proud of the results!

For the left side of this page, I sliced up a 6x12 A Charmed Life Element into three 4x6 panels. I love how orderly it looks when you do that and then slide the pieces into a Pocket Page.  I embellished the bottom panel by adding some additional patterned paper and some die-cut squares. I mounted the star (from A Charmed Life's Bits & Pieces) with foam tape and then added a few brads.

By the way, I'm using a 12x12 SN@P! faux leather album in red to document all of my adventures in 2014. I am a huge fan of the album's ring binding because it lets me scrapbook out of order.  I used the SN@P! 12x12 Pocket Pages Design 3 and Design 10 for these pages. I love the variety of different page styles of Pocket Pages Simple Stories offers. It's nice to have creative options. 

Taylored Expressions Products Used:

Pockets & Pages Essentials - 2x2 dies

Pocket & Pages - 3x4 Bubble In die

Head on over to the Taylored Expressions blog and check out what their Design Team has created using their stamps & dies and our Simple Stories products! They’re also hosting giveaways as well, so what are you waiting for – head on over! 

Check in again with us tomorrow for more inspiring projects from Simple Stories & Taylored Expressions!

Supplies

Hey everyone!

Nichol here today showcasing the A Charmed Life Collection with a new layout and card featuring combining the Simple Stories Silhouette Cut Files for one-of-a-kind titles and greetings.

The Simple Stories Silhouette Cut Files are fabulous "as is" however they can make an even bolder statement when grouped together and manipulated a bit to create all new looks!

For my layout today, I combined the following nine cut files to create a big, bold title for this summer-themed page:

After manipulating and resizing the files in the Silhouette Software, I cut all the text from a single sheet of A Charmed Life 12x12 patterned paper. Then I trimmed and mounted that sheet on another piece of 12x12 paper and "filled in" all the open text by die cutting the words from 6x6 patterned papers from A Charmed Life and I Heart Summer.

The assortment of colors and patterns gives the title much more interest and adds lots of color to the page! I used a glue pen adhere the letters without a mess.

I layered some of the phrase stickers from A Charmed Life and I Heart Summer on top of the photo strips and "secured" the photo strips to my page with "washi tape" stickers from the Sn@p! Icons Stickers.

I printed my journaling directly on the DIY Office Journal Layers and popped it up with a bit of foam adhesive, tucking the cute cloud and sunshine die cut from the Summer Sn@p! Insta-Squares & Pieces

I created a coordinating card from the same 6x6 patterned papers using the following cut files:

I manipulated the 4 cut files to create my own title. (I used only the letter "I" from the "Can You Believe This?" arrow). 

I popped up the "Love You" greeting on top of the card and layered a contrasting color of paper underneath the die cut "Always Remember I". By layering papers this way it addds visual interest and dimension to a relatively simple design!

I completed the card by adding detail with a white opaque pen, gemstones and adding some sparkle with a clear glitter marker to some of the hearts and adding Glossy Accents to a couple of them as well.

Hi everyone, Marie here today to share a Life Documented project using the new DIY Boutique collection.  I've couldn't wait to work with this collection. By adding stickers, stamps, and embellishments to foundation cards you can custom make your own elements to put in Pocket Pages.  The possibilities are endless!

We have been pretty busy with home improvements projects and medical issues the last couple of months, so I didn't have a lot of photos to add to my album.  I decided to just use a single page for each month and add in some postcards and ephemera to round things out.  If you look at my pages you can see I used more reds and pinks for February and more greens and blues for March.  I thought it was a nice way to distinguish between the months, while still using the same collection and keeping the overall look cohesive.

In some cases I would add stickers and embellishments right over my photos, and in others I would add them on top of one of the foundation cards.  My favorite card to customize was this one full of colorful circles. I added brads, chipboard and circle-punched photos to it.

I also customized one of the new Insta-Frames.  I slipped a photo of some Valentine presents into the frame, and then stitched around the outside with red thread using my sewing machine.  I can see so many options for these frames, such as using them to make little pockets for sequins and other small items.

After using the DIY Boutique collection for these pages I can see I've barely scratched the surface of the different ways to use everything.  I'll be back next month with even more ways to use this kit.
 
I used 12x12 Pocket Pages in Design 3 | #4050.
 
I've been using a 12x12 Faux Leather Album in teal for all of my pages.  I've been using this album for quite awhile now and it still looks brand new.  The durability is fantastic!
 
DIY Boutique Products Used:
Insta-Frames | #5145
Chipboard | #5128
Brads | #5127
Card Foundations | #5126
Stickers - Boutique | #5141

Spring is LITERALLY right around the corner, it’s so close we can taste it! With that said, I could not wait to get crafty with the new “Fresh Air” Simple set!

I loved this card from the Elements sheet so much that I wanted to base a home décor project around it. After this crazy winter, we all really need something bright & cheery to hang in our homes, right?

I made this wall hanging out of some leftover pieces from an acrylic mini album. These are really fun to ink up and then embellish with fun papers & stickers, that’s why the Simple Sets are a must have! They are perfect for any project that you would want to create. I used some of the Fundamentals stickers to add some extra elements to this project.

Here’s a look at this lovely décor hanging on my wall. You can really see the difference the acrylic makes here.

I had so much fun creating this project to share today. I hope I was able to inspire you to go out and grab some of the new Simple Sets and get creative this Spring!

Products Used:
Simple Stories- “Fresh Air” Simple Sets  Collection Kit
Imagine Crafts/Tsukineko- Baby Blue StazOn Ink, Memento Luxe Angel Pink Ink, Monterey Pine Butterflies
The Crafters Workshop- 6x6 “Flutterby” Stencil
May Arts- Light Blue Solid/Plaid Ribbon
Clear Scraps- Acrylic All Mixed Up Album
Petaloo- Flowers


Pages