
Click here to download your free copy of the Summer Vibes SN@PBOOKING Guide! Visit the Project Downloads area of our website for more free downloads!
Click here to download your free copy of the Summer Vibes SN@PBOOKING Guide! Visit the Project Downloads area of our website for more free downloads!
Hi everyone, it's Audrey, here to share a couple of cards with you today made with the super fun and functional Lovely SN@P! Pack.  If you like pocket scrapbooking, you are going to go crazy for the SN@P! Packs. Each SN@P! Pack collection contains well over a hundred pieces of pre-cut journaling cards and die cut ephemera, perfectly measured to fit most standard pocket page systems. Talk about making things a snap! But as fabulous as the SN@P! Packs are for pocket pages, that's not all they're good for. They are also super fun to use for regular scrapbook layouts, cards, and so much more.
 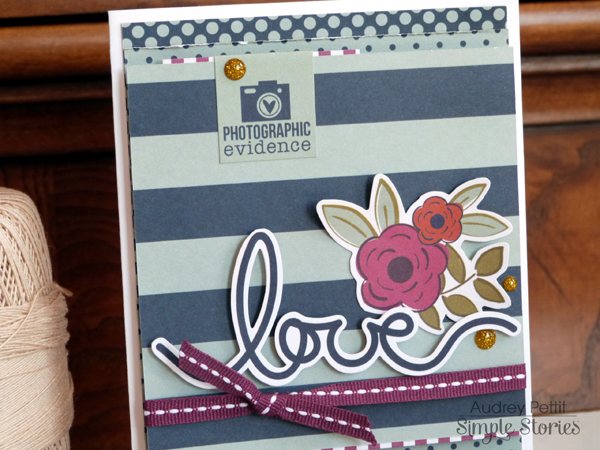 Both of my cards today were really fast and easy to put together using journaling cards and die cuts from the Lovely pack. For my first card, I pieced together several of the 4x6 journaling cards to create a fun background in a mix of polka dots and stripes. All you need to do is cut down a bit of length on each journaling card, and you have the perfect fit for a second layer on a standard A2 card base. How easy is that?
  I adhered a few of my pieces with pop dots for some extra interest. Wrapped a bit of matching ribbon around the bottom of one of the panels, and then embellished with die cuts from the Lovely Pack. Enamel dots from the I Am collection add a final little touch.
  Also included in the SN@P! Pack collections are these adorable little 2"x2" journaling cards, so fabulous for creating quick and easy blocked designs, and small enough to work perfectly on cards.
  At 2" square, these little journaling cards would fit on any number of card base sizes. For this card, I layered four 2"x2" SN@P! cards onto a panel of white cardstock, and then onto a 5"x5" square card base made from I Am Important 12x12 Paper. Boom! Instant blocked grid design. Seriously doesn't get any easier than that.
  One of the best things about SN@P! cards, of course, are the pre-printed images and titles that are great for journaling, but also make fabulous instant card sentiments, too. Love that these cards are all double-sided, for even more creative possibilities. I added a few more Lovely die cuts, a bit of twine, and enamel dots, and another super easy, but super cute, card is complete. Enjoy!


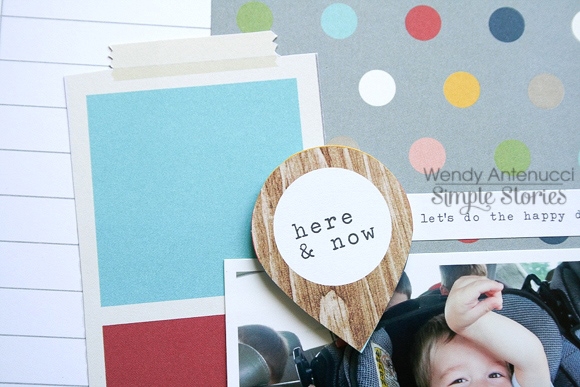


Hello Simple Stories fans! Nancy here with simple summery page using the I AM... collection. I love this flowery pattern, it reminds me of the tropics and has such a great summer feel. It was perfect for this story!
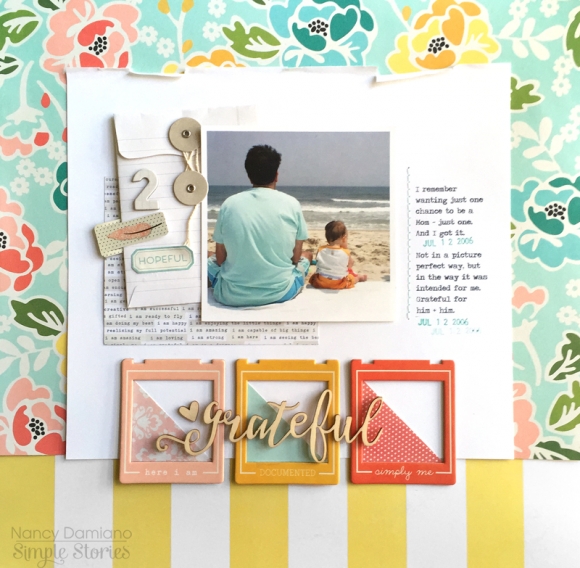
I started with a 4x4 photo and then built a large white mat to frame out the photo and separate the flower pattern from the yellow and white border. A few white one white layers of text paper, envelope, clips and stickers add texture while remaining neutral.
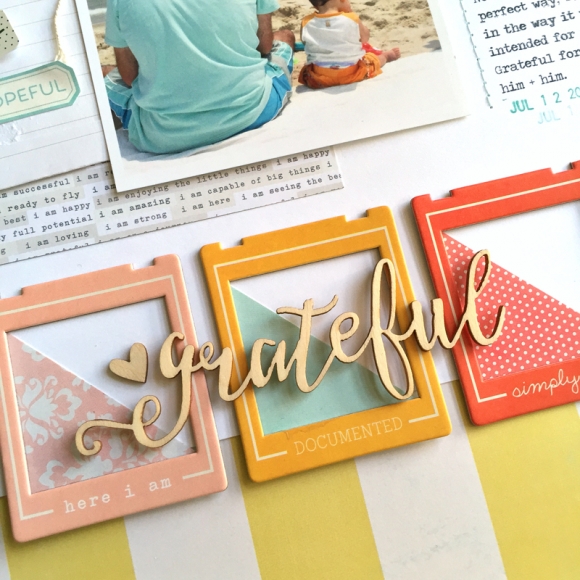
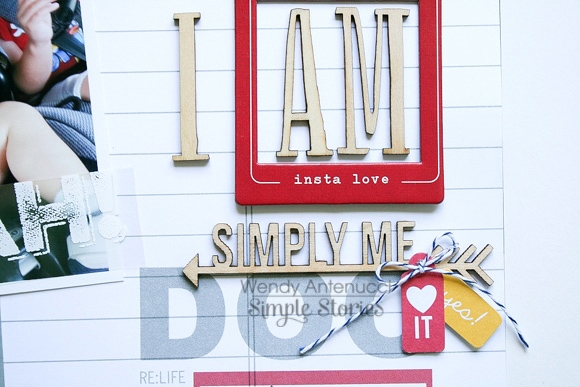
The final pop of color was created with three frames from the I AM collection that were backed with triangles of patterned paper in matching hues. This creates the perfect frame for the wood veneer title.
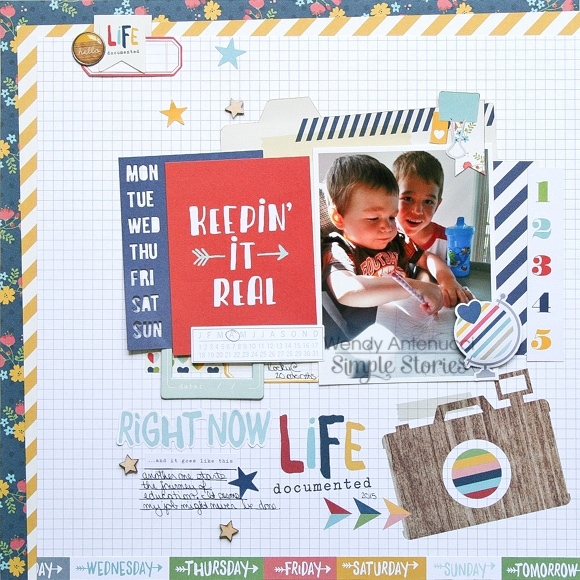
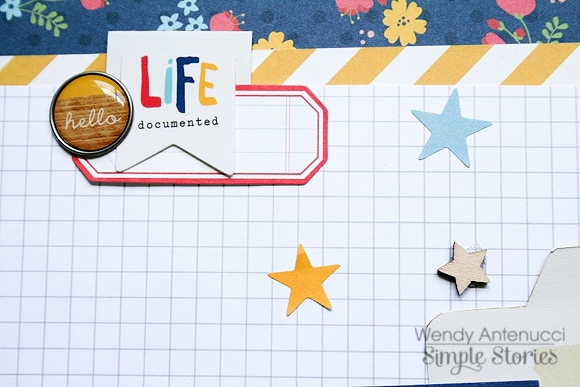
Did you know that we have free printable planner pages?! You can find them here on the Project Downloads page. They are a great addition to the Life Documented Planner! The 3 free printables I use below are all found in the Life Documented Free Printables - March download.
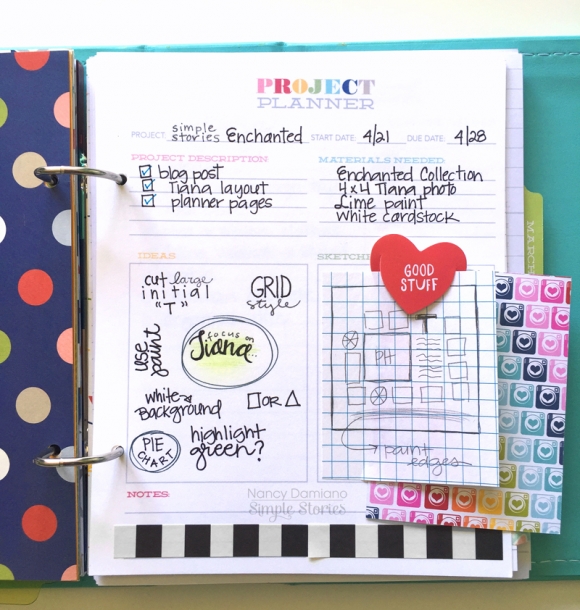
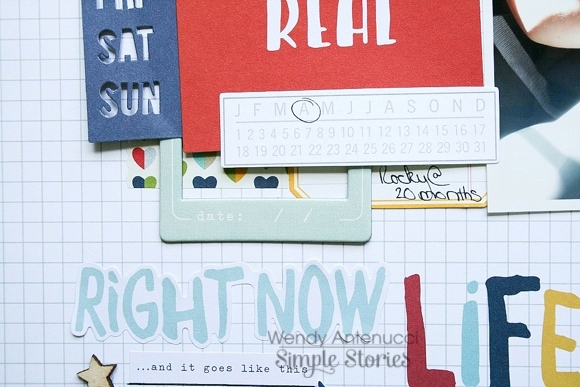
One of my favorite printable is this Project Planner page. I use these to map out layouts I want to complete. It’s a great spot to gather ideas, sketch out designs and list products you want to use. Some black and white washi tape for decoration and a little bit of graph paper make it functional.
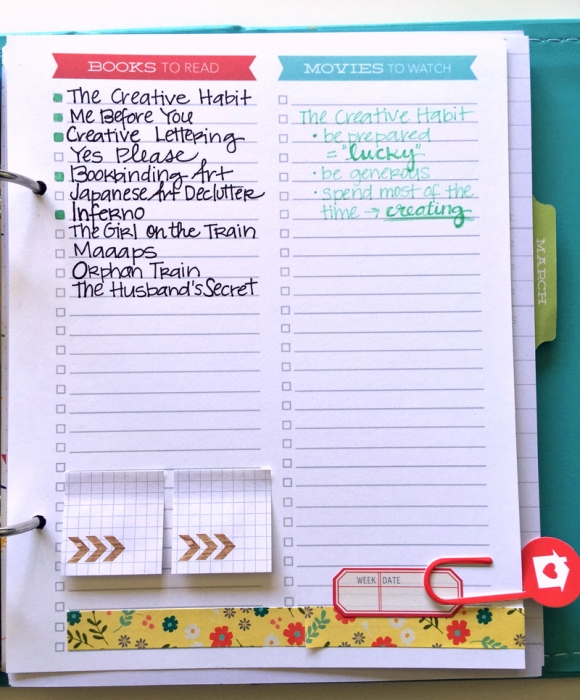
I also keep a running list of books I want to read and plan to read. This list also includes a “movies” column, but I covered that up since I’m not much of a movie watcher. Instead, I use this space to jot down takeaways from the books I’ve read.
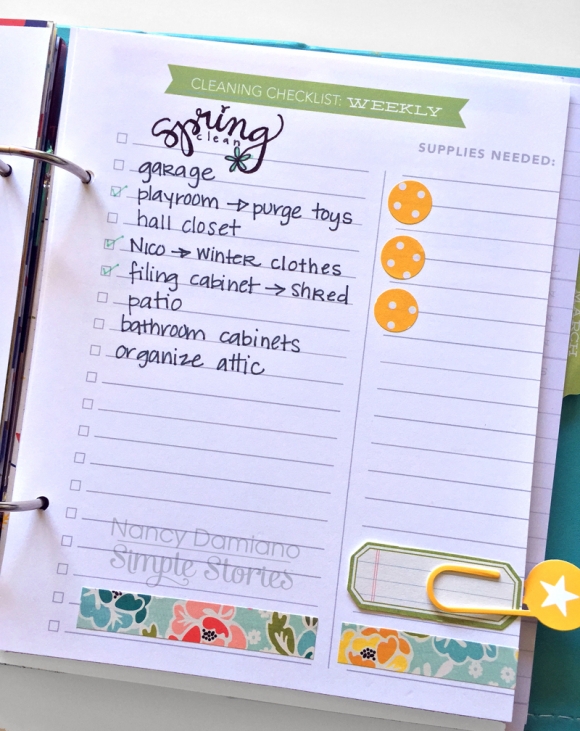
Hello Spring cleaning! I’m using this list to keep track of things that are need of a great big purge. It’s going to feel so good to check all of these off (one day).

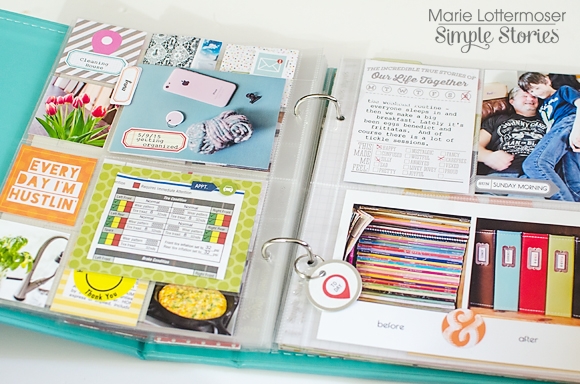
Hi Everyone! Marie here today to share my latest pages using the Fresh SN@P! Pack. These sets are such a great value. I think this is my third set of pages with this pack, and I still haven't run out of cards and embellishments!
It recently occurred to me that we are going to have a lot of house guests this summer, and our house isn't quite looking put together. I decided to embark on a 30-day organization plan and get things ready room by room.

I am using my SN@P! album to document my progress, as well as a place to write out my to-do lists. I think it helps to have a visual plan of what I need to get accomplished. The bright pops of color in the Fresh SN@P! Pack are a great inspiration for how I want my home to look.
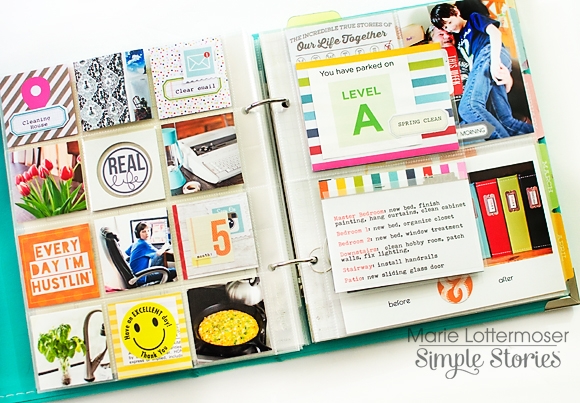
I added an insert in between my pages with some notes on things I want to accomplish.

The back side of the insert shows a couple more areas I need to get organized, including my car.

The best part of using a SN@P! album to document this project is that the 3-ring binder system will allow me to add more pages in as I get farther along with my plan. I've also been using some of the Life Documented stickers in these pages, because the colors coordinate perfectly with Fresh.

I hope you've enjoyed seeing the beginning of my organization plan. I will be adding to it for the next month. If you have a big task ahead of you, I highly recommend making a visual journal of your plan with a SN@P! album. It will make the whole project more fun and rewarding!

If you have a teen daughter, you most likely have plenty of photos lol...some you have taken, others she has snapped while with friends...there really is no lack of photos in our house. While I love some that I have taken, it ends up being the ones that she shares with me of good times had while we aren't around that really share insight into her world at 15. I had several that had been piling up and decided to slip them into one pocket page, paired up with the I Am... collection.

These photos weren't taken in the same week. Heck, I think they may be from two different MONTHS...I could care less. Not once has my family ever called me out on silly things like timelines...they seem to love that the moments they assumed were insignificant ended up being quite the opposite. They remember the birthdays, the holidays and the vacations. But the day to day stuff? The photo of a new hair cut or the one taken immediately after a muddy soccer game? Those may have slipped their minds.
Until they showed up on this pocket page. ;)

The generic theme that pulls this page together might be the start of her sophomore year, but the photos + words actually tell more than that. Enjoying Friday night football games with her friends is part of her world but the photo I included from the game isn't showing the scoreboard or even the field. Instead I used the pic she sent me of her sitting in the stands after she and her friends took a few bottles of paint and 'wore' their school spirit proudly, lol.

Just a reminder, not every pocket has to be a masterpiece...or filled with enough words to be worthy of a Shakespearean sonnet. I am perfectly ok letting a lovely card stand all on it's own, as seen above. A few flicks of spray mist were all I added, and I love the sentiments on both of these cards.
Bottom line?
This shouldn't be stressful.
ENJOY!

Hello there, Simple Stories friends! Shellye here to bring you a sweet "Welcome Baby" basket brimming with paper flowers and baby's info; such a wonderful keepsake for a new mom!

For this project I have used the "Enchanted Collection"...it's ideal for any of those little girl projects, even to welcome baby. The wooden box is one that I found at Michael's and measures approximately 4.25"W X 5.5"H X 2"D. I traced the front and back of the box onto a piece of the "Rose" Simple Basic paper and then cut out. Adhesive was applied with the Xyron Creative Station and attached to box.
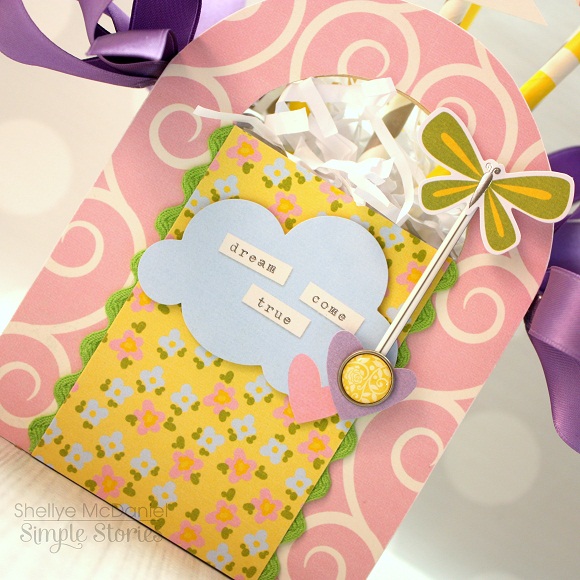
To the front, one of the printed sides of the 3X4 SN@P! cards was edged in green ric rac and embellished with a sentiment cloud from the Bits & Pieces pack. A butterfly was attached to a pixie stick straw and attached with a glue dot.
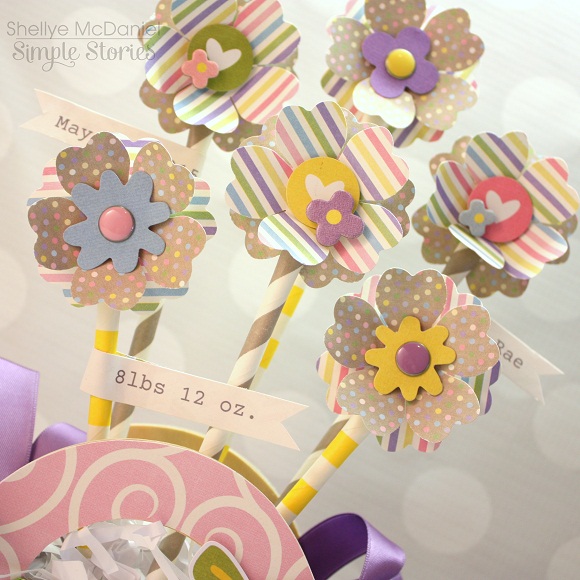

From the 6X6 paper pad, blooms were punched using the Floriana punch by McGill. Two blooms were layered together and then attached to a paper straw. Floral foam was inserted into the box and the flowers arranged in a staggered fashion. The baby info was printed off using my home printer and then cut into strips and glued to the straws. Various Bradz, Bits & Pieces and chipboard stickers were added to the centers of the blooms.
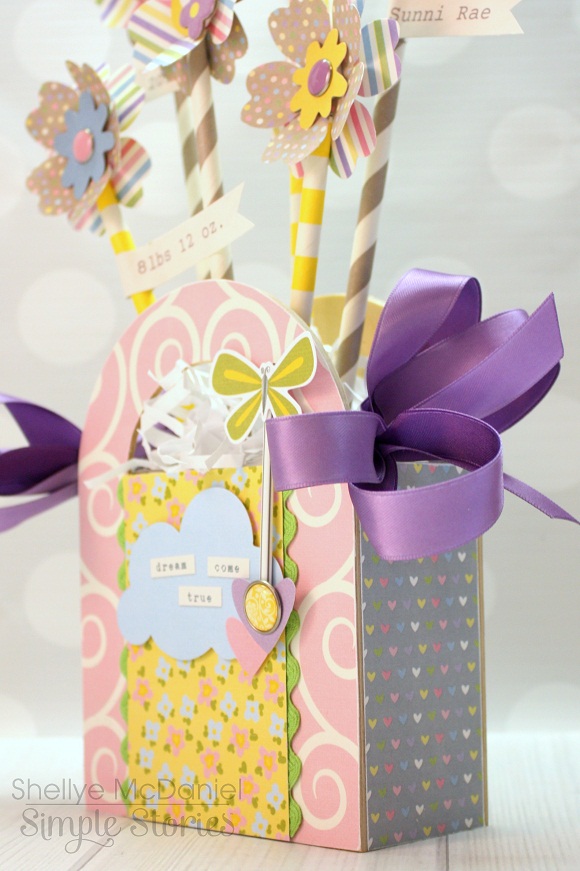
The sides of the box were covered with strips cut from 6X6 paper and satin bows were glued to the sides.
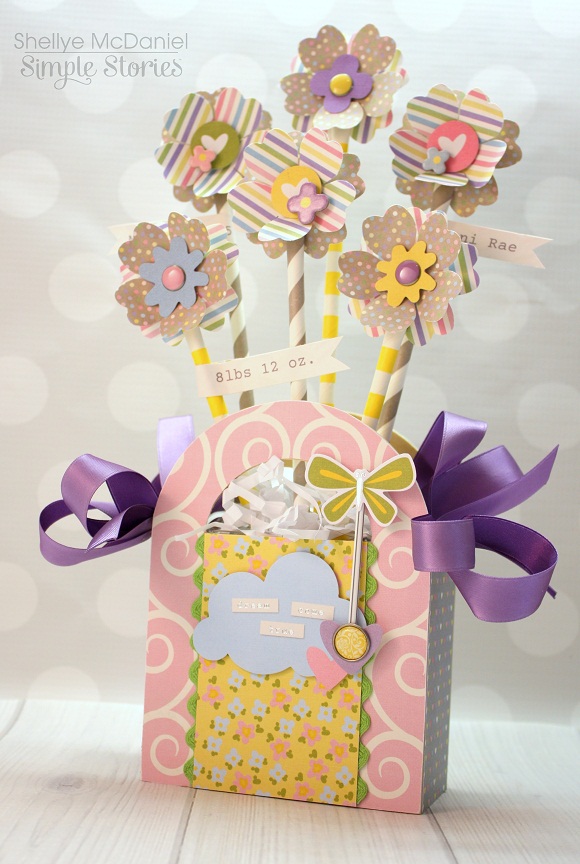
This would also make an adorable centerpiece for a baby shower or a nursery decoration!


Hello Friends!
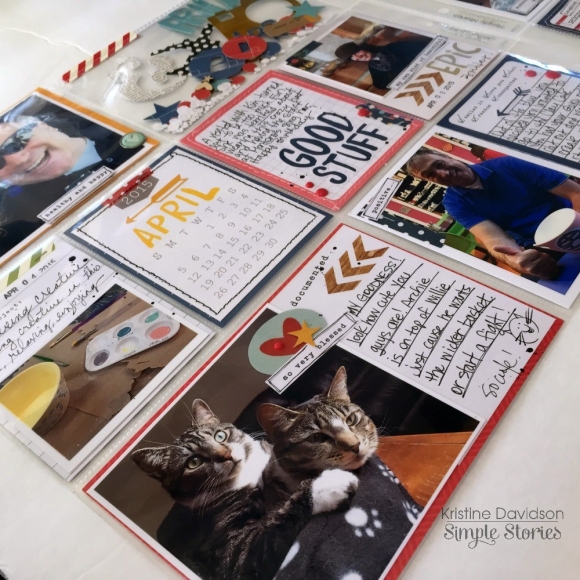
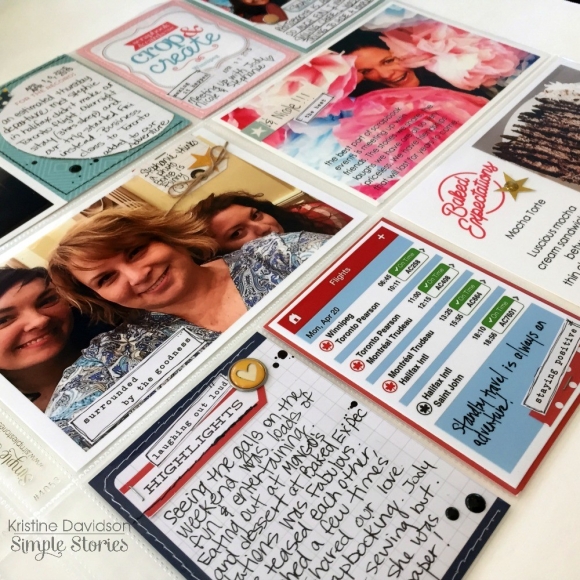
It's Kristine with you today and I am here to share a pocket page spread featuring a variety of collections today. I used Say Cheese II, and I AM Collections. I have the month of April in my spread today. April was a quick month for me, I was able to enjoy time with friends at a crop and some much needed time with my sister and her kids.
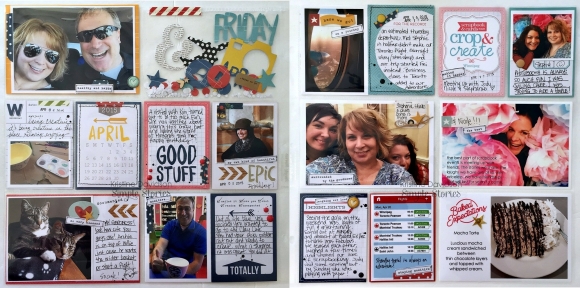
My spread is colorful this month. I used lots of colors to feature the pictures and to make it a fun spread. I love color and these colors in the collection are so bright and cheerful.
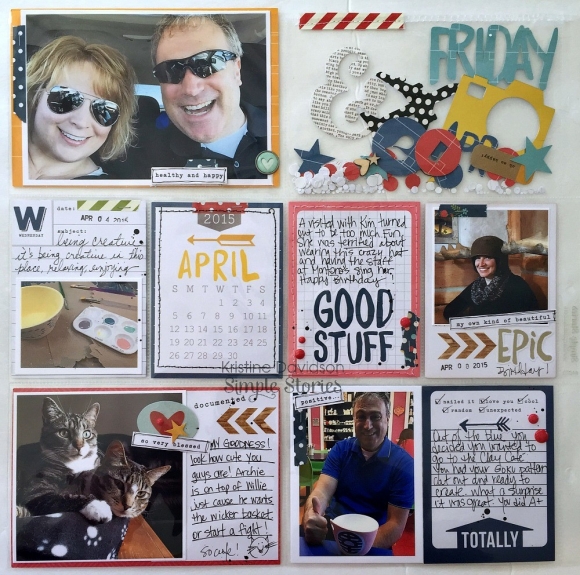

A fun thing to do in a pocket page is confetti! Lots of fun elements to create a great " interactive" pocket!
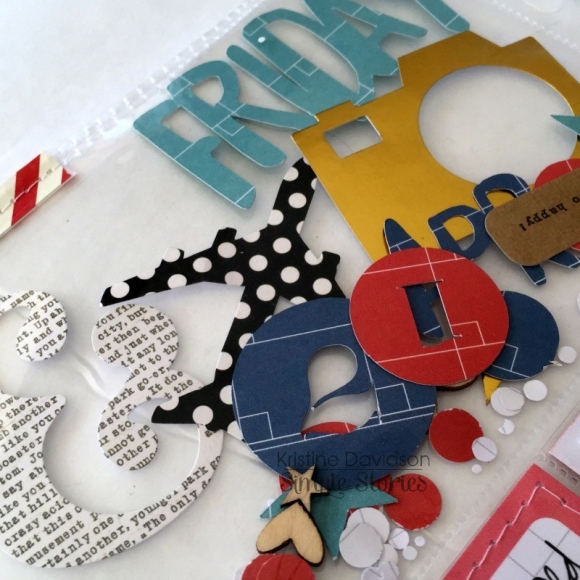
I included a few diecuts, some silhouette cut words and numbers, punched out confetti as well as wood veneers. It's fun to include these items in a pocket page spread! Have you ever created a confetti pocket? Don't forget to sew the top of the pocket so your items don't fall out ;-)
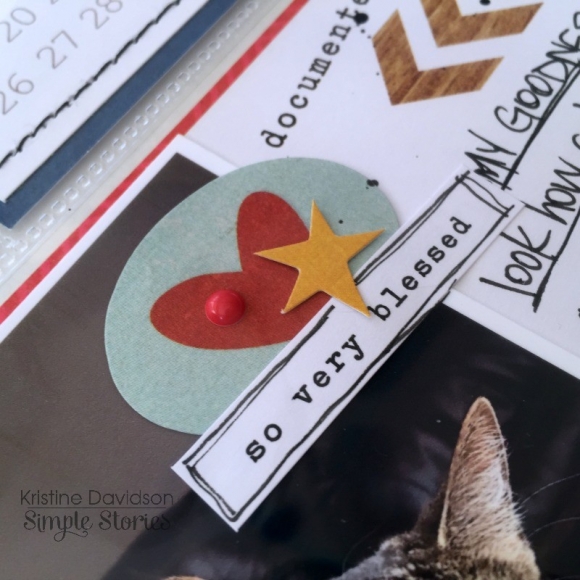
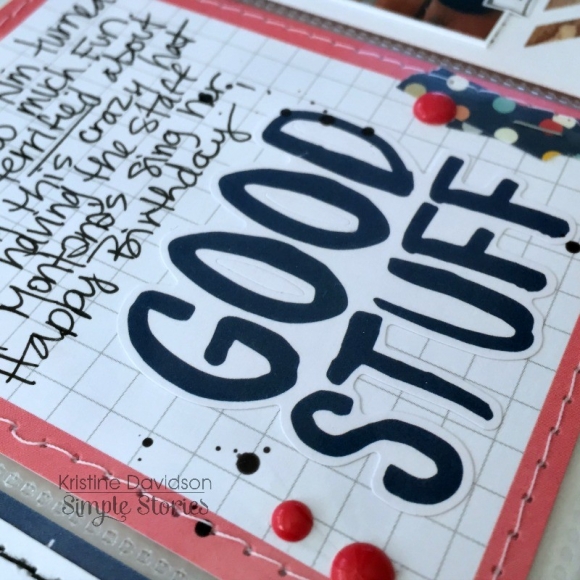
Here are a few close ups of my spread.

I hope you enjoyed my Life Documented post today and I hope you enjoy creating with your favorite Simple Stories Products!


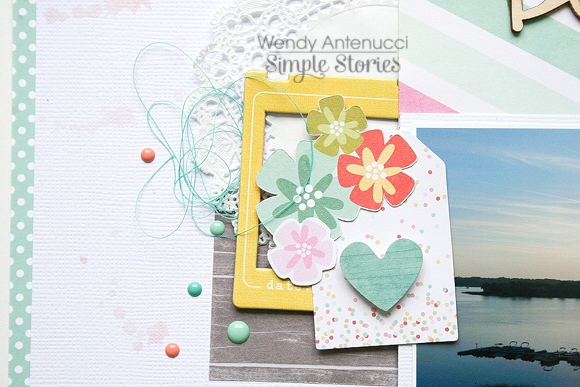
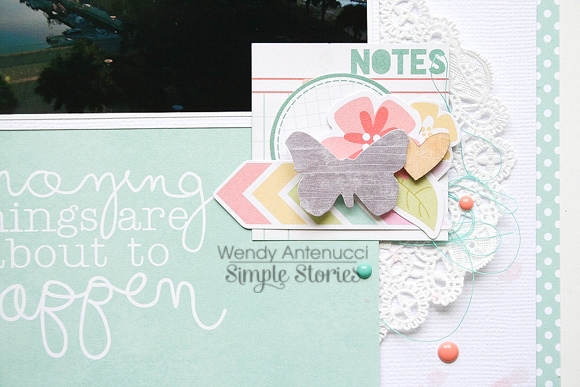
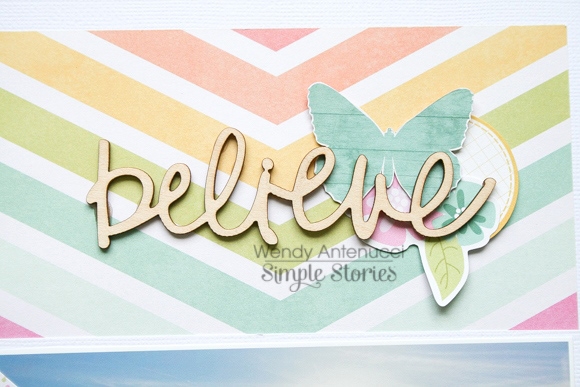
Hi everyone, it's Audrey, and today I have a couple of bright and happy, spring-inspired friendship cards to share with you, made with the adorable I AM... collection. 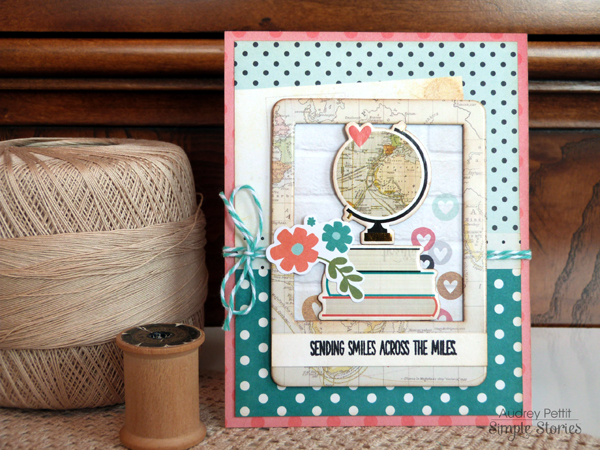 Today's cards are all about the polka dots. To me, there is nothing quite as happy and fun as a bunch of polka dots. So I decided to really focus on them with these card designs, and have combined a ton of dots here using prints from the 12x12 and 6x6 patterned papers and prints from the SN@P Cards. I've even thrown in some dots from the I Am Washi Paper Tape. One might not think that all those dots would work together, but I think they do. And what could be more fun?
  My first card is a sweet friendship card for those friends who live far away from you. The map prints on the chipboard globe and frame are fabulous images for long distance friends, and paired with the perfect stamped sentiment, you have a winning combination. I added a fun print from the 6x6 paper pad behind the chipboard frame for extra detail, and a Bits & Pieces die cut flower trio on top of the books to create lots of layers and depth. And a fun tip for you... This chipboard frame had a printed sentiment on the bottom that didn't work with my design, but was otherwise perfect. An easy solution is to just cover up the part that doesn't work with one that does, like I did with my stamped sentiment strip here.
  And on to the polka dots! As you can see, I used a ton here, including a large-scaled 12x12 print for the card base, and two pieces of dotted SN@P Cards for the second layer. I loved the printed postcard image on this SN@P Card and thought it worked really well with my smiles across the miles theme, but it, too, had printing on it that didn't work with my design. So I covered up the bottom portion with a second journaling card, and strategically placed the chipboard frame to cover the rest of the printing. A bit of dotted washi paper tape placed across the middle seam helps blend the two edges.
 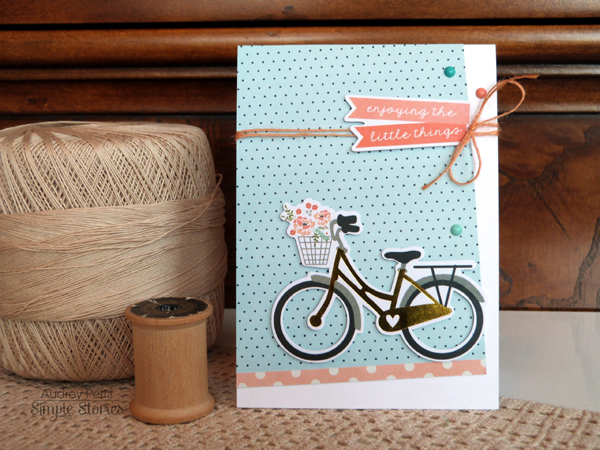 My second card also features lots of polka dots, in a simple and playful CAS card design.
  This card is a mini card at 3.5"x5", and is a more clean and simple design, yet still packs a lot of charm with all those happy dots. I love mixing different scales of prints, like I did here with the smaller sized dots for the main panel and the larger dot border at the bottom. It's a really easy and effective way to add interest to a design with very little effort.
  This card uses a mix of papers from the 6x6 paper pad and the SN@P Cards. Don't forget to look at the back side of the SN@P Cards for design possibilities, too. The flip side of this ombre polka dotted 3x4 journaling card was just exactly what I needed to balance the pinks from the top of the card to pull the whole thing together.
Hi there! Vicki here with something a little different for my post for the day. This past weekend I taught an I AM... 6x8 N@P! Binder workshop to a bunch of fabulous ladies. As we chatted throughout the class and played with a great mix of I AM... product, I fell in love with this line all over again. The ladies kept commenting on how pretty the I AM... collection is and what a great color combination it has. It was so much fun spreading the Simple Stories LOVE!!
The class was on Saturday and Sunday was Mother’s Day. I was greeted with some handmade gifts from my daughter and a lovely wrapped present. My family had purchased me a FitBit! I was so excited! I have been wanting to track my steps and they were thoughtful enough to get me just what I had been hoping for.
All of this background story was leading up to my project for today. I wanted to create something that I can journal in and track my food and movement down. So I covered a notebook in some goodies from I AM.  These two go hand in hand!! I can jot down all the details from my journey to a healthier me! Take a closer look at the notebook…


 I love that the I AM...collection was the perfect fit for something other than my traditional scrapbooking projects. It was just what I need to create a little something pretty to collect the list and notes I love to make! Thanks! Have fun creating something special to document your I AM story!

Hi there, Simple Stories fans!


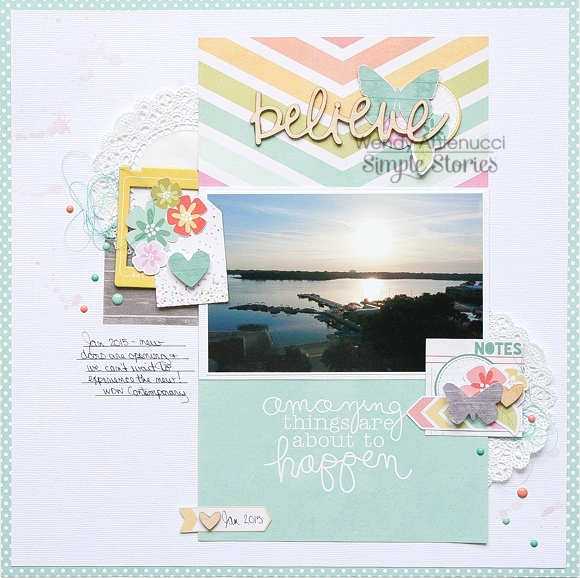


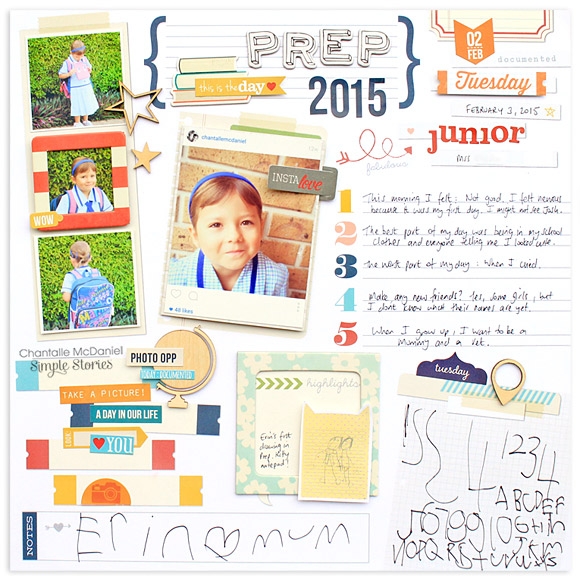
Hello everyone! It’s wonderful to be back sharing some pages I have created, with a bit of focus on my little girl. Settling beautifully into life in ‘big’ school, it’s with awe that I see her growing before my eyes, taking on board the new challenges that life has to offer. A bit of nostalgia led to the creation of my first layout. We must be having fun, because time feels like it’s flying!
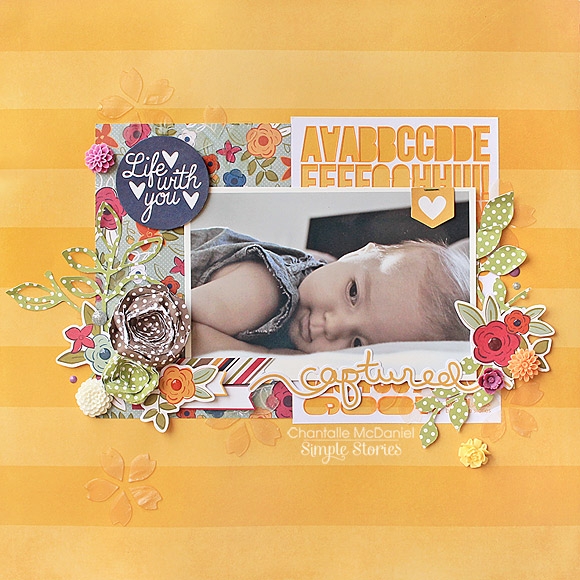
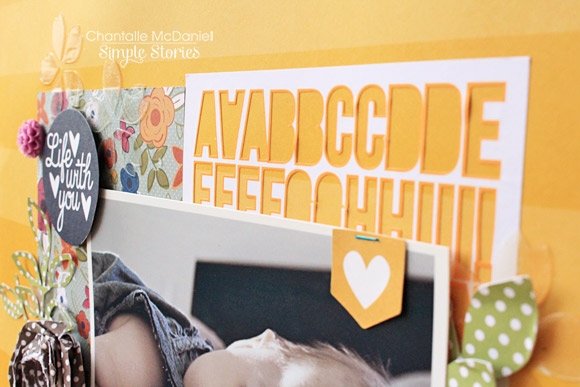
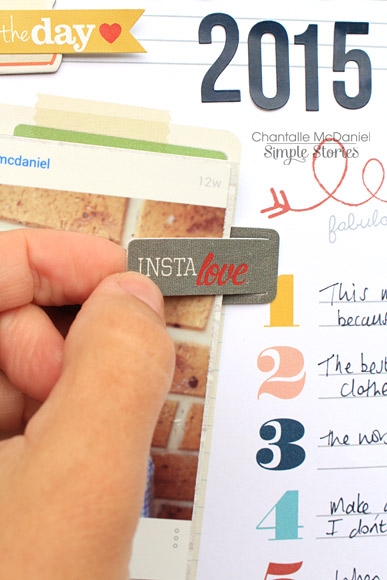
I have started this page using a beautiful, bright ‘I AM’ Important 12x12 sheet. I’m sure you have seen (and maybe even bought!) the new Sn@p Packs. I absolutely love them! I find them super versatile and love creating pages with mine, as they have pretty much everything you need, including die cuts! For this project, I have worked with the ‘Lovely’ Sn@p Pack and taken inspiration from the beautiful floral prints. My base layer comprises of a 6x4 card as well as some leftover Sn@p sticker remnants, which have been positioned in the centre of the page.
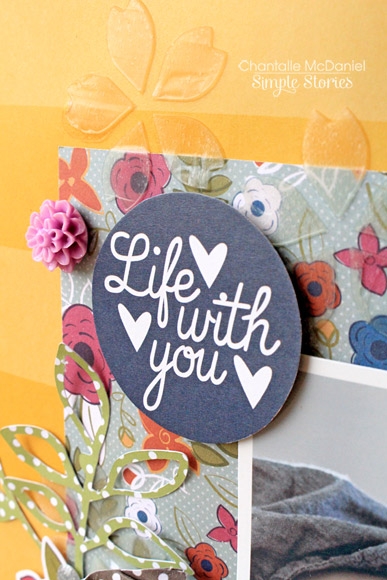
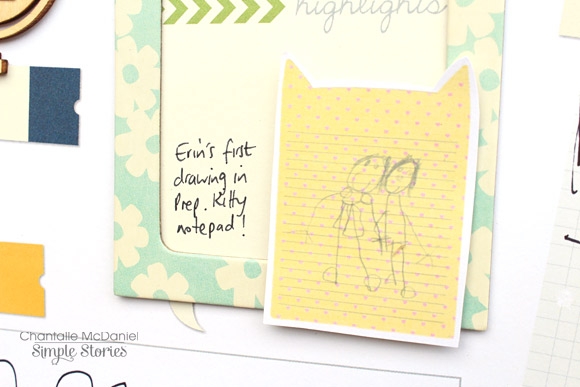
Next, using a 12x12 stencil, I went over specific areas with some Impasto to give a bit more texture to the page as well as continue the floral theme. I have used Impasto because it dries clear, which I love, as it doesn’t distract too much from what going on in your project. Here is a step by step pic. Note: It takes a fair bit of time to dry. Heat guns can speed this process up, but don’t apply the heat too close as it will bubble and spoil the surface. Once fully dry it will be transparent.
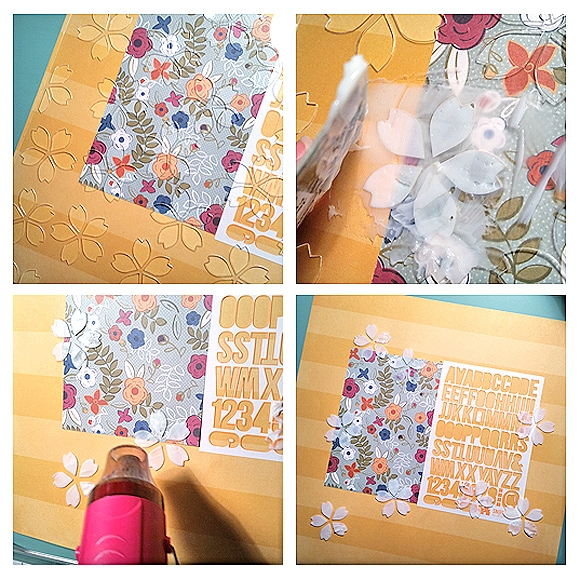
I then went about layering lots of little elements, including the pretty flower die cuts and some filigree leaves that I cut using my Silhouette Cameo.
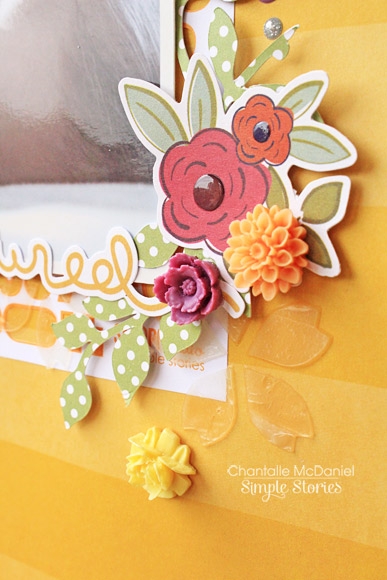
I also created some simple paper roses which add a bit of rustic charm.

‘Life with you’ was cut out of a 4x4 card and as a final flourish, I’ve added some resin flowers and a couple of small enamel dots.


Hey Friends! Rebecca Larson here to share some of the latest goodness available now in the digital shop!
There must have been something “written in the stars” this month with the release of 4 new digital kits! The Simple Stories powers that be must have known I needed something to show off a recent family trip to beautiful Southern Utah! The vibrant orange, lime green, and navy of the Under the Stars Digital Simple Set were calling my name. Not to mention they coordinated almost perfectly with my photos of the fiery red rock that draws travelers from all corners of the earth.


