Howdy!  Layle here with you again today for day 5 of our Simple Stories & Top Dog Dies Product Swap! 

Both design teams have swapped products and will be sharing on our blogs all week long.  Join us for some great inspiration as well as a chance to win a prize package from both Top Dog Dies & Simple Stories! 
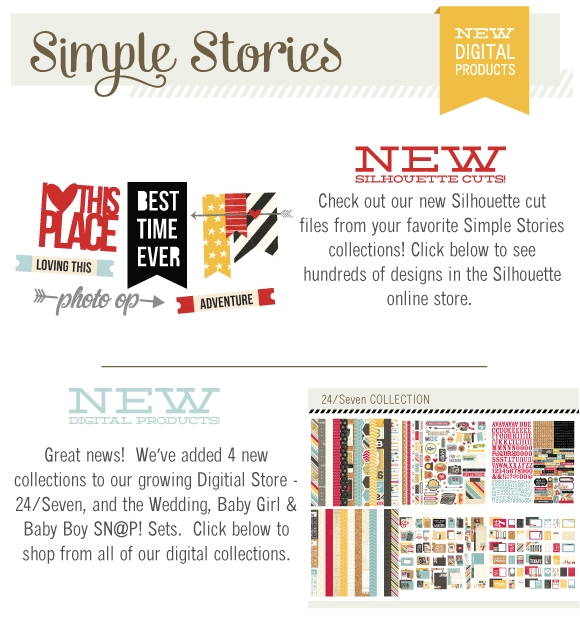
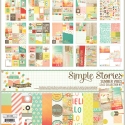
Today design team member Nicole Harper joins us with a pocket page spread using the new So Fancy collection -
_______________
I have a friend who is the mama of two boys. That being said, she immediately passes by anything pink as being 'meant for little girls'...and claims in the same breath that she wishes she had a girl to document. After years of nudging her to not count out pink/purple/gold/etc, she is slowly coming around...probably due to my nagging, lol. 


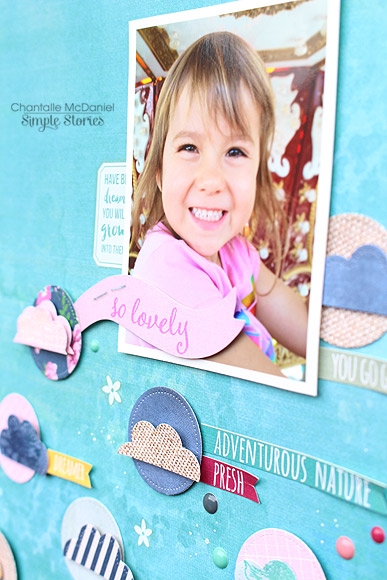
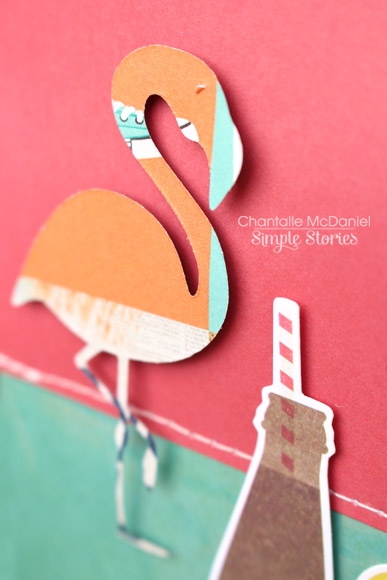
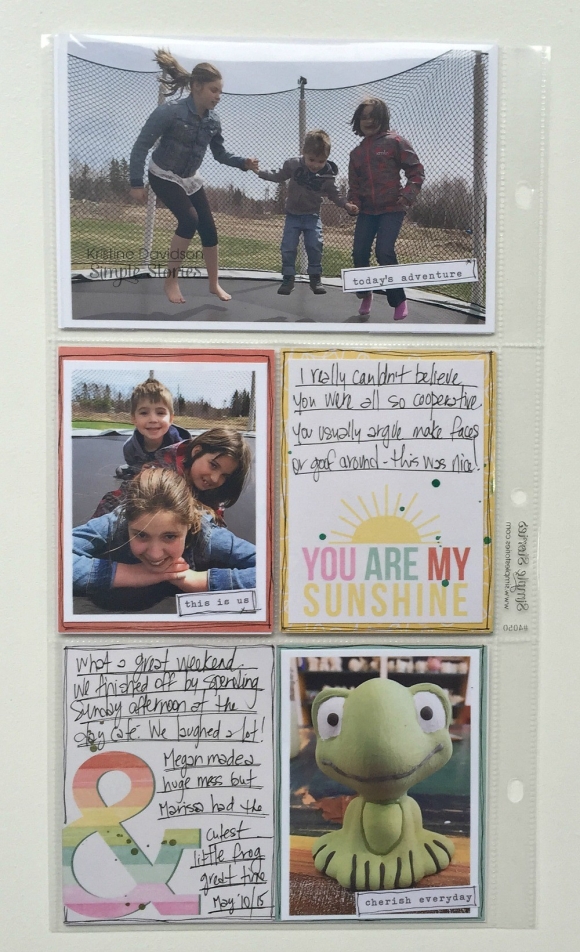
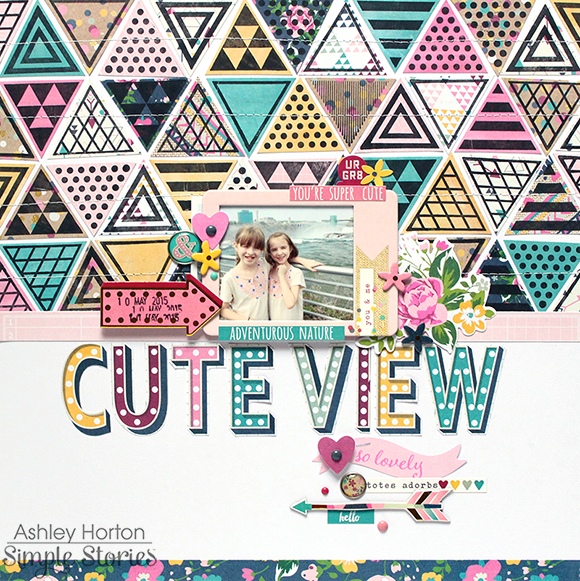
Sifting through the new So Fancy collection initially, I had planned on using it to document some photos of my daughter + her friends. It has great trendy phrases and images that I hear and see them using constantly, so it seemed meant to be. After digging further into the collection though, I realized it would be an even better fit for photos taken during a girl's weekend away with two dear friends. On top of that, I could show my friend that this collection isn't JUST for teen girls. ;)


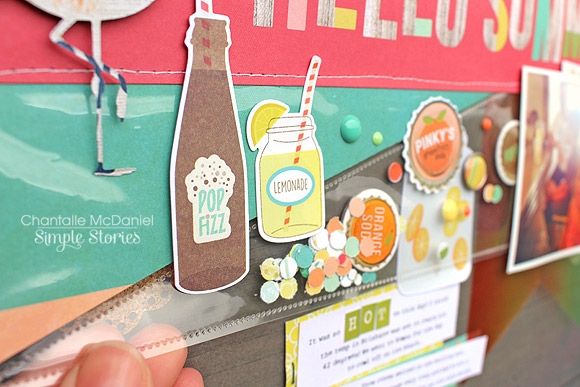
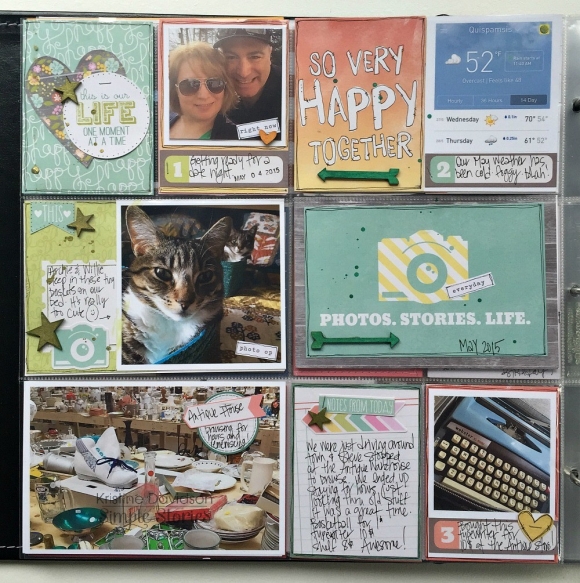
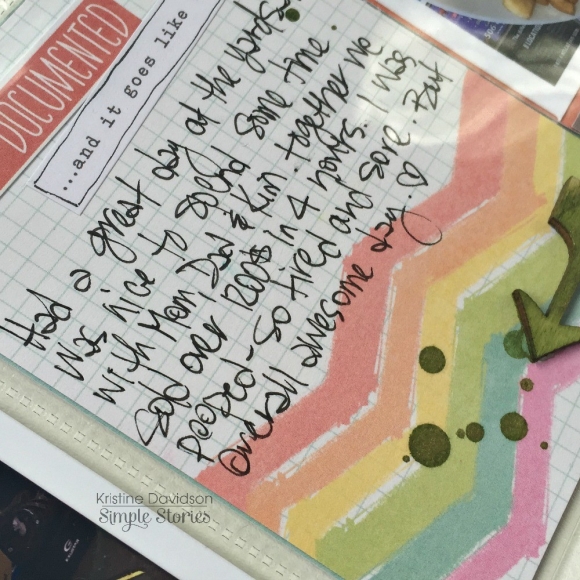
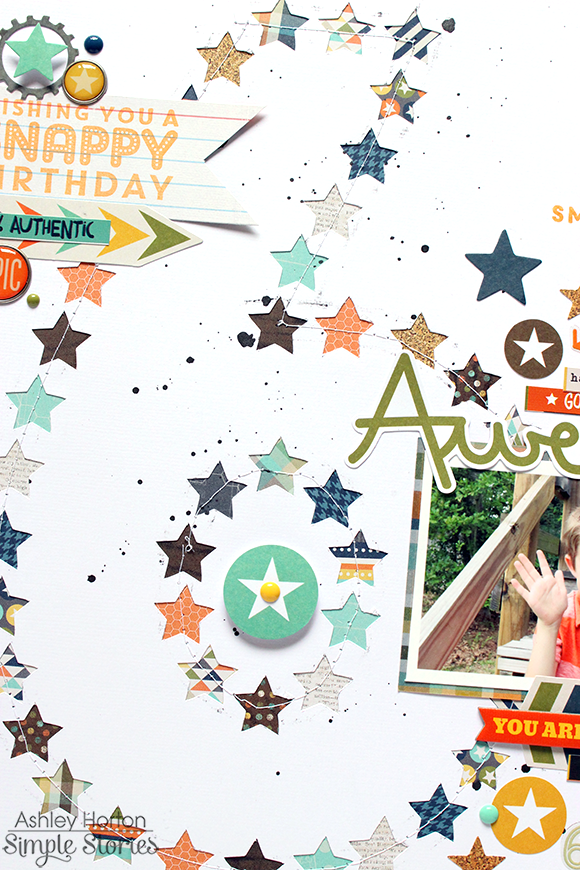
I still love the versatility of the Design 4 pocket page. The combination of vertical + horizontal + 3x4 + 4x6 + 2x12 pockets leaves you with more options than you'll ever know what to do with! I was able to simply print a few of my favorite photos and get started. As I often do, I loved several of the 3x4 cards from the collection, so I slipped (2) 3x4 cards into a 4x6 pocket to allow me to use my favorites.


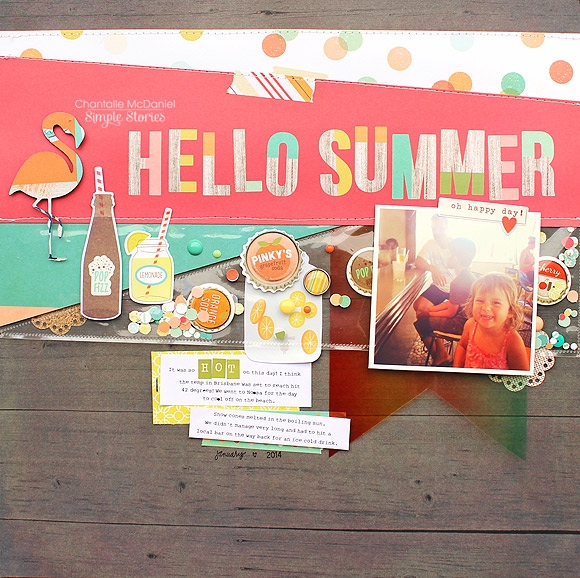
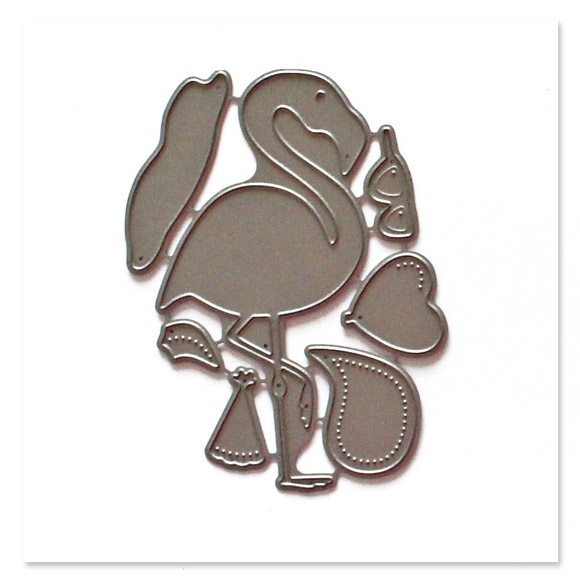
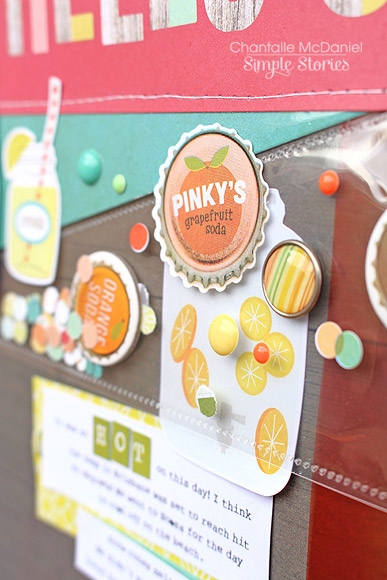
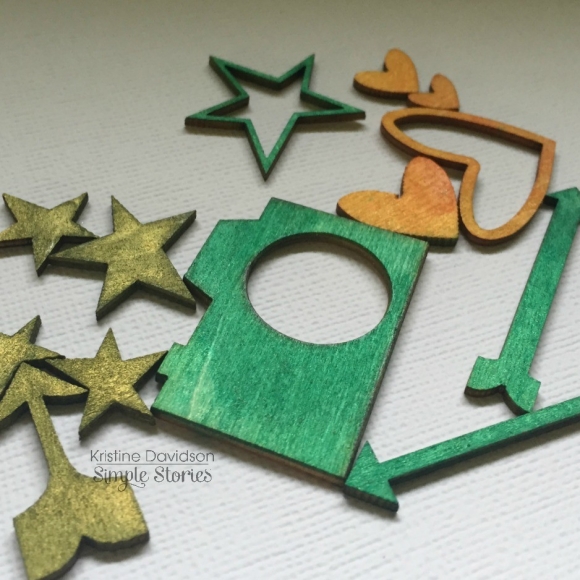
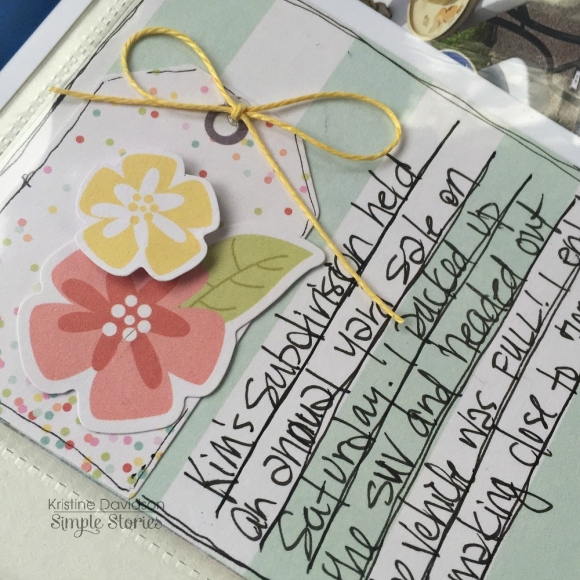
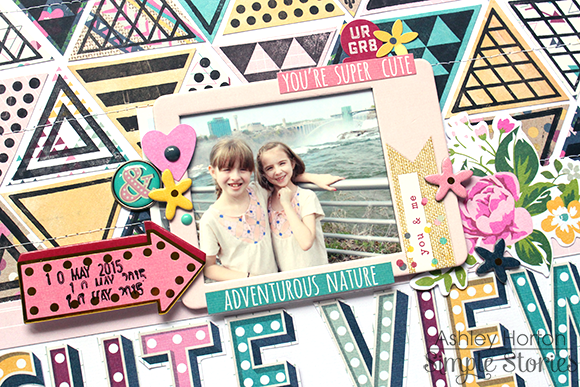
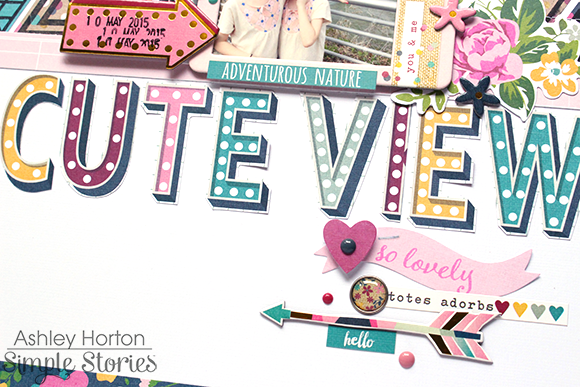
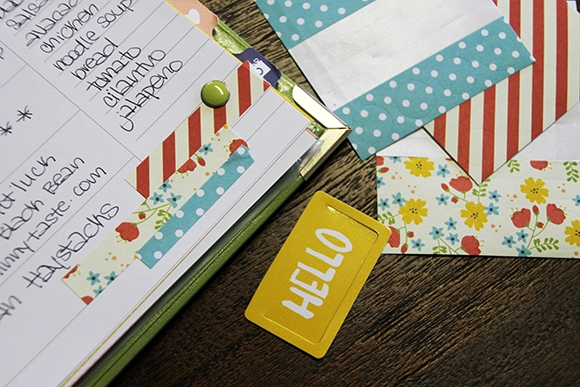
The Top Dog Dies for pocket scrapbooking helped me to fill the 2x12 pocket along the left side. I knew I wanted to include my boarding pass but needed to fill the space with something else...so I reached for the pocket die and designed my own card to fill the gap. The 'hello' die + shadow came in handy, repeated around the page to unify everything together. 


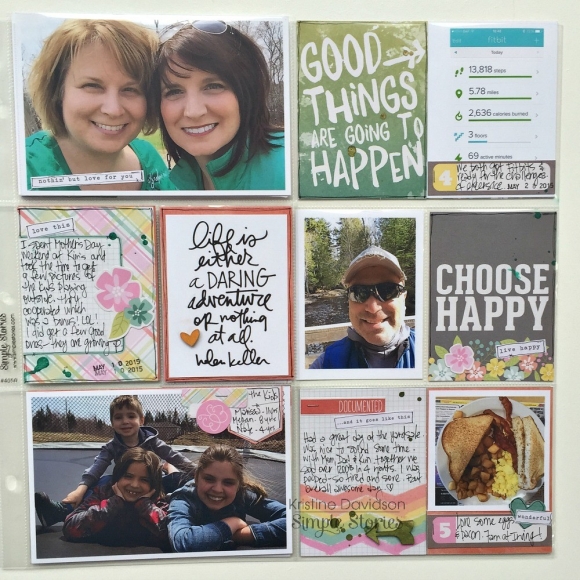
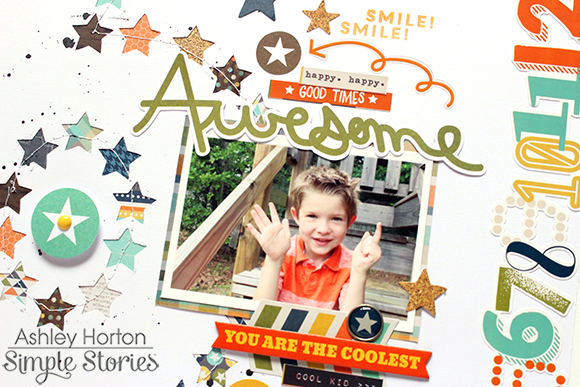
The mix tape card couldn't have been more perfect for this project...we joked after snapping the top right photo that we looked like we were a rock band posing for the cover of our first album, lol. Love when I happen along an element that just seems 'meant to be'. 


Bottom line?  Don't assume when you first see a collection that it may not work for you...sift through the patterns & embellishments. More often than not, I bet you'll find something you love.

:)
_______________
Now for even more fun!!  Enter via the Rafflecopter widget below and we'll draw one lucky winner on Sunday to win a Summer Vibes prize pack!  

a Rafflecopter giveaway

After you've entered, head on over to the Top Dog Dies blog to see what their team has created.  Make sure to enter there as well - they're giving away a $50 prize!

Want to follow Top Dog Dies and keep up with all of their great projects & products?  Here you go!

Instagram: @topdogdies

Facebook: www.facebook.com/topdogdies

Twitter: @TopDogDies

Pinterest: www.pinterest.com/topdogdies

Website: topdogdies.com

Blog: http://www.topdogdies.com/blog

YouTube: https://www.youtube.com/user/topdogdies


Join us again tomorrow for more the final day of our product swap with Top Dog Dies!


Supplies

Howdy!  Layle here with you again today for day 4 of our Simple Stories & Top Dog Dies Product Swap! 

Both design teams have swapped products and will be sharing on our blogs all week long.  Join us for some great inspiration as well as a chance to win a prize package from both Top Dog Dies & Simple Stories! 
Today design team member Shellye McDaniel joins us with two fun cards using our Summer Vibes collection - 
_______________

Hello!  Shellye here today with a couple of sweet summer-themed cards using the brand new "Summer Vibes" Collection and adorable dies from Top Dog Dies!

First up is a "Fun Summertime" card featuring the cutest hippo:

I've used the Top Dog Dies Hippo Die Set TC112 and the grey woodgrain paper found in the 6X6 paper pad to create the hippo. 
 

I chalked around the edge of the face and body with a darker grey and black chalk.  For the feet I used a black watercolor pencil.  The cheeks were also given blush with pink chalk.  I cut one of the "O" sticker letters in half to make the mouth.  And the chipboard sunglasses are a perfect fit!
 

I made the card a 5X7 size to accommodate the large die-cut title.  The sides of the title were embellished with die-cut and chipboard flowers with enamel dot centers.

Next up is a layered card featuring waves and sand using Top Dog Dies Water Die Set:

At the top of the card I used the sunburst clear overlay and placed it on top of the multi dot paper.  The waves were die cut from the blue floral and bits of solid blue paper that I found throughout the 6X6 paper pad. 
 

All of the layers were pieces together to form a 5" square so that it could be added to the 5.5" yellow woodgrain mat.  One of the Top Dog Dies Mini Tags TC044 was cut from a solid paper and a clear sticker attached to the center.
 

Foam adhesive was placed just along the top edge of each layer, with the bottom edge simply glued in place.  I finished the card by embellishing with enamel dots and Bradz.

Thanks for joining me today!
_______________

Now for even more fun!!  Enter via the Rafflecopter widget below and we'll draw one lucky winner on Sunday to win a Summer Vibes prize pack!  

a Rafflecopter giveaway

After you've entered, head on over to the Top Dog Dies blog to see what their team has created.  Make sure to enter there as well - they're giving away a $50 prize!

Want to follow Top Dog Dies and keep up with all of their great projects & products?  Here you go!

Instagram: @topdogdies

Facebook: www.facebook.com/topdogdies

Twitter: @TopDogDies

Pinterest: www.pinterest.com/topdogdies

Website: topdogdies.com

Blog: http://www.topdogdies.com/blog

YouTube: https://www.youtube.com/user/topdogdies


Join us again tomorrow for more projects using Simple Stories & Top Dog Dies!


Howdy!  Layle here with you again today for day 3 of our Simple Stories & Top Dog Dies Product Swap! 

Both design teams have swapped products and will be sharing on our blogs all week long.  Join us for some great inspiration as well as a chance to win a prize package from both Top Dog Dies & Simple Stories! 
Today design team member Vicki Boutin joins us with a fun summery layout using our Summer Vibes collection & lots of great die cut flowers - _______________
Hey there!  Vicki here with a cute project using Top Dog Dies and the brand new Summer Vibes collection!  I am a huge fan of die-cutting and I love the ease of use steel-rule dies offer.  It sure makes cutting paper pieced images a lot easier than when I did it all by hand!  I used three set of dies from Top Dog Dies to create today’s project.  Here are the sets - Pretty Petals #2, Leaves Set and Gift Tag Die.
 
Take a look at the project…
 
 
These dies were super easy to use!!!!  They cut through the paper like butter and the images are so clean!  I think they go splendidly with the new Summer Vibes line!
 
 
Here is a little peek at the dies and some of the flowers I cut out.  
 
 
Take a closer look at the details these dies offer.  I LOVE the “pinholes” and intricate designs.
 
 
I used the Gift Tag die as a label.  Love this one and will be using it often!
 
 
The Summer Vibes Chipboard and Fundamental Stickers layer perfectly with the “customizable” die cuts.
 
 
Another fun way to use the Top Dog Dies is to create a pattern from the “negative” cuts like I did with the border here.  When I cut the leaves out I repeated a pattern on the strip of paper I was cutting from and then backed it with a strip of red paper.  I LOVE how this turned out.
 
Thanks again to Top Dog Dies for sharing their wonderful dies!  
 
_______________
Now for even more fun!!  Enter via the Rafflecopter widget below and we'll draw one lucky winner on Sunday to win a Summer Vibes prize pack!  

a Rafflecopter giveaway

After you've entered, head on over to the Top Dog Dies blog to see what their team has created.  Make sure to enter there as well - they're giving away a $50 prize!

Want to follow Top Dog Dies and keep up with all of their great projects & products?  Here you go!

Instagram: @topdogdies

Facebook: www.facebook.com/topdogdies

Twitter: @TopDogDies

Pinterest: www.pinterest.com/topdogdies

Website: topdogdies.com

Blog: http://www.topdogdies.com/blog

YouTube: https://www.youtube.com/user/topdogdies


Join us again tomorrow for more projects using Simple Stories & Top Dog Dies!


Howdy!  Layle here with you again today for a 3rd project for day 2 of our Simple Stories & Top Dog Dies Product Swap! 

Both design teams have swapped products and will be sharing on our blogs all week long.  Join us for some great inspiration as well as a chance to win a prize package from both Top Dog Dies & Simple Stories! 
Today we'll have 3 (yes, 3!) posts from design team member Chantalle McDaniel with 3 stunning layouts using our 3 newest collections & 3 Top Dog Dies.  Here's Chantalle's last project -
_______________
My final share today is this airy page using the new ‘So Fancy' collection and the Circle Die Set from Top Dog. 
 
 
When I was testing this die out, I initially thought about using the shapes in a circular pattern on the page. One of the shapes came out half cut, where the test paper had failed to cover the area, and I thought how much the shape looked like a little cloud. Total change of plan and I ended up with this arrangement instead. I love how that kind of evolution takes place in a project sometimes!
 
 
I wanted to keep the page uncluttered, so I have kept lots of space between the elements - topping the circle shape with half the middle, flower-like shape. Some have been raised on foam tape for dimension and one has been given a sparkly finish with the addition of some fine glitter. Some others have been stamped for interest.
 
 
To compliment the ’So lovely’ banner, I have snipped the edges of a couple of phrases from the So Fancy Expressions sticker sheet and added them at intervals behind the circles. A few enamel dots and photo stickers add whimsy and as a final flourish, some small paint spatters (fake the really tiny ones with a good white pen, like a Uni-ball Signo.)
 
 
Thank you so much for stopping by today. If you would like to see more of what I get up to, you are most welcome to pop by and say hello on Instagram @chantallemcdaniel.
_______________
Now for even more fun!!  Enter via the Rafflecopter widget below and we'll draw one lucky winner on Sunday to win a Summer Vibes prize pack!  

a Rafflecopter giveaway

After you've entered, head on over to the Top Dog Dies blog to see what their team has created.  Make sure to enter there as well - they're giving away a $50 prize!

Want to follow Top Dog Dies and keep up with all of their great projects & products?  Here you go!

Instagram: @topdogdies

Facebook: www.facebook.com/topdogdies

Twitter: @TopDogDies

Pinterest: www.pinterest.com/topdogdies

Website: topdogdies.com

Blog: http://www.topdogdies.com/blog

YouTube: https://www.youtube.com/user/topdogdies


Join us again tomorrow for more projects using Simple Stories & Top Dog Dies!

Supplies

Howdy!  Layle here with you again today for another project for day 2 of our Simple Stories & Top Dog Dies Product Swap! 

Both design teams have swapped products and will be sharing on our blogs all week long.  Join us for some great inspiration as well as a chance to win a prize package from both Top Dog Dies & Simple Stories! 
Today we'll have 3 (yes, 3!) posts from design team member Chantalle McDaniel with 3 stunning layouts using our 3 newest collections & 3 Top Dog Dies.  Here's Chantalle's second project -
_______________
Howdy!  Chantalle back with you again for my 2nd layout.  This layout uses the new ’So Rad’ collection. Totally perfect for the dude in my life!
 
 
I’m also working with a Top Dog Banner die. I’ve made the most of the So Rad 6x6 pad and cut multiple banners which I have adhered in the centre of the page, to draw the eye in.
 
 
Experiment with different media. I used vellum with the die and tried to cut acetate (although the type I had was too thick, so it didn’t work this time around.) I’ve arranged the banners overlapping each other and then stitched them to my page using a sewing machine.
 
 
The photo sits in it’s own ‘cheat’ pocket. I was inspired by the awesome bonus pockets and die cut shapes you get with the So Rad Sn@p Cards!
 
 
• To create the pocket, I used a craft knife to carefully cut along the striped line on this Sn@p card. I didn’t cut all the way to edge, just enough to tuck my photo inside the slit. To prevent the photo from falling all the way through, I popped a bit of foam tape near the bottom of the underside of the card.
 
• I dislike my handwriting, so I used the notebook shape from the So Rad Bits & Pieces pack for journalling. I then attached this to my photo using an eyelet. 
 
• Finally, I punched a hole into a star shaped chipboard sticker and threaded a small chain through it to connect it to the photo.
 
 
A couple of pencil doodles are a commitment-free way to add personality to your project. If you are happy with the result, you can always go over the line work in pen.
 
 
_______________
Now for even more fun!!  Enter via the Rafflecopter widget below and we'll draw one lucky winner on Sunday to win a Summer Vibes prize pack!  

a Rafflecopter giveaway

After you've entered, head on over to the Top Dog Dies blog to see what their team has created.  Make sure to enter there as well - they're giving away a $50 prize!

Want to follow Top Dog Dies and keep up with all of their great projects & products?  Here you go!

Instagram: @topdogdies

Facebook: www.facebook.com/topdogdies

Twitter: @TopDogDies

Pinterest: www.pinterest.com/topdogdies

Website: topdogdies.com

Blog: http://www.topdogdies.com/blog

YouTube: https://www.youtube.com/user/topdogdies


Join us again later today for 1 more project from Chantalle using Simple Stories & Top Dog Dies!


Supplies

Howdy!  Layle here with you again today for day 2 of our Simple Stories & Top Dog Dies Product Swap! 

Both design teams have swapped products and will be sharing on our blogs all week long.  Join us for some great inspiration as well as a chance to win a prize package from both Top Dog Dies & Simple Stories! 
Today we'll have 3 (yes, 3!) posts from design team member Chantalle McDaniel with 3 stunning layouts using our 3 newest collections & 3 Top Dog Dies.  Here's Chantalle's first project -
_______________
I have a confession to make… I am a stalker. Of my poor postman that is! I’ve been SO excited about creating with the new Simple Stories collections, that when my goodies arrived, I literally jumped for joy! I’m sure you will agree that it’s impossible to pick a favourite.  Combine this excitement with some super cute Top Dog Dies and I am in scrappy utopia!

Another confession… I love to hoard woodgrain print papers. It was really difficult not to squirrel away the beautiful shades in the Summer Vibes Simple Basics kit! I have chosen the dark brown so the gorgeous summery colours really stand out. For this project I worked with the Flamingo Die Set from Top Dog Dies. Flamingos are trending right now and I am thrilled to add this little beauty to my collection. The dies are lovely and slim which makes them lightweight and very easy to store. I used them with my Cuttlebug and popped a scrap sheet of cardstock as a shim under my ‘C’ plate to make up for the density of the die and ensure I got an even cut.

The angle of the 6x12 ‘Hello Summer’ element played a big part in the composition of this page. I loved the uneven pattern distribution and that confetti print was begging for a shaker pocket! Enter my new toy, a WRMK Fuse Tool. I trimmed a section off a 12x12 page protector sheet (12x3inches) and used the Fuse to section off angled pocket areas, into which I placed some patterned paper, chipboard stickers and confetti.
 
 
I created my own confetti by simply punching along a multi-coloured sheet from the Summer Vibes 6x6 pad. TIP: Use different size hole punches for variety and throw in some sequins or punch glitter cardstock for a bit of sparkle.
 
 
I love the result. I’ve placed some bottle top chipboard stickers into the pocket and adhered a couple of them down so they stay in place while the confetti moves around them.


Hello my fine-feathered friend! He also comes with party accessories in the die set and would be perfect for fun invitations.
 
 
_______________
Now for even more fun!!  Enter via the Rafflecopter widget below and we'll draw one lucky winner on Sunday to win a Summer Vibes prize pack!  

a Rafflecopter giveaway

After you've entered, head on over to the Top Dog Dies blog to see what their team has created.  Make sure to enter there as well - they're giving away a $50 prize!

Want to follow Top Dog Dies and keep up with all of their great projects & products?  Here you go!

Instagram: @topdogdies

Facebook: www.facebook.com/topdogdies

Twitter: @TopDogDies

Pinterest: www.pinterest.com/topdogdies

Website: topdogdies.com

Blog: http://www.topdogdies.com/blog

YouTube: https://www.youtube.com/user/topdogdies


Join us again later today for 2 more projects from Chantalle using Simple Stories & Top Dog Dies!

Howdy!  Layle here with you today.  We've got a fun week planned for you - a Simple Stories & Top Dog Dies Product Swap! 

Both design teams have swapped products and will be sharing on our blogs all week long.  Join us for some great inspiration as well as a chance to win a prize package from both Top Dog Dies & Simple Stories! 

Today design team member Teri Anderson joins us with a a fun collection of cards -

___________________________

Hi there, Simple Stories fans!

Teri here, and I'm pretty excited to share with you some cards I made with Simple Stories'  So Fancy collection and some dies from Top Dog Dies.
 
I love it when it's easy mix and match different products.The So Fancy is just plain luscious! With gorgeous colors and hip and fashion forward patterns, it's so fun! And when you add to it shapes cut with steel dies from Top Dog Dies, you get a whole lot of good stuff!
 
 
I just plain love the words on this card. 
 
 
When I saw the "You are..." phrase on a sheet of paper in the So Fancy 6x6 paper pad, I knew I was going to make a card using it! I have a friend, who will get this card as a reminder of how wonderful she is. It's such a great phrase!
 
 
To give the card a little extra kick, I cut a couple circles out of various patterned papers from the So Fancy collection with the Circle Die Set from Top Dog Dies. I love especially that pink scalloped circle turned out! The heart is from the So Fancy 6x12 Chipboard sheet
 
I whipped out the Circle dies for this friendship card too.
 
 
I cut a bunch of random circles from various patterned papers from the So Fancy collection and then I just laid them onto the card. To make them a little more interesting, I added a chipboard heart, some enamel dots and an arrow sticker. I think those little details just make the card a little more interesting.
 
 
I was feeling festive so I made this hello card with Top Dog Dies Pennant Banner Die.
 
 
I cut the banner out of three different patterned papers and then decorated them with enamel dots and some chipboard and sticker flowers from Simple Stories. I love how they look together.
 
 
This last card is a bit festive as well! (Wink!)
 
 
Flamingos in party hats? Oh yes, my friends! I'm there!
I cut the flamingo from patterned paper with the Flamingo Die Set from Top Dog Dies. Isn't he just a kick?!
 
 
I thought the fabulous phrase (cut from a piece of paper from the So Fancy 6x6 Paper Pad) was just perfect to use with it! 
Thanks for stopping by today! See you again.
 
Top Dog Dies used:
Flamingo Die Set - TC114
Pennant Banner Die - TC107
___________________________

Now for even more fun!!  Enter via the Rafflecopter widget below and we'll draw one lucky winner on Sunday to win a Summer Vibes prize pack!  

a Rafflecopter giveaway

After you've entered, head on over to the Top Dog Dies blog to see what their team has created.  Make sure to enter there as well - they're giving away a $50 prize!

Want to follow Top Dog Dies and keep up with all of their great projects & products?  Here you go!

Instagram: @topdogdies

Facebook: www.facebook.com/topdogdies

Twitter: @TopDogDies

Pinterest: www.pinterest.com/topdogdies

Website: topdogdies.com

Blog: http://www.topdogdies.com/blog

YouTube: https://www.youtube.com/user/topdogdies


Join us again tomorrow for more great projects using Simple Stories & Top Dog Dies!

Supplies

Hi everyone, Marie here today sharing a mini album project using the new Stars and Stripes Simple Set.

The Fourth of July is a big event at our house. It's become an annual tradition for us to host a party which goes from early afternoon until the last of the fireworks go off at night.  I have wanted to put together an album with photos from different years' celebrations all in one place, and when the Stars and Stripes Simple Set came along I knew it was a perfect match.

I started out using a 4x6 SN@P! Binder in red.  I added a simple sheet of patterned paper for the cover and then made a quick label for the spine on my computer.

I love the mix of friends, family, and neighbors who stop by every year.  Adding in journaling cards between photos keeps the 4th of July theme cohesive throughout the album.

Fireworks are illegal in our area, but we always set out a big box of poppers, and the next morning we can be found cleaning up piles of confetti from the patio.

When nightfall hits, we move things over to the neighbor's driveway where we have a better view of the city fireworks, and the kids enjoy sparklers and smores.

If you have an annual celebration of some type, I highly recommend using a SN@P! binder to include all your photos in one album. I'm already getting prepared for this year's party, and I plan to set out my mini album so people can look through it and see themselves from prior year's celebrations. 

Supplies

Hello fellow scrappers!  I'm back to showcase more goodies from the digital shop at Simple Stories! 
 
This time I decided to take a slightly different approach with one of the new digital SN@P! Sets - the baby boy SN@P! Set, which is a new addition to the digital shop!  I wasn't in the mood to create a pocket page this time around, so I decide to mix together two products to create a traditional 12x12 page using the cards and extras from the baby boy SN@P! Set and some of the digital cardstock from the Hello Baby collection.  
 
 
I dug up a photo from when my first baby made his grand entrance to the world, making me a little nostalgic since he's about to turn seven years old.  I really adore the colorful cards in the SN@P! Sets, so naturally I had to include a few on my page.  I knew I wanted to layer some of the sweet word strips somewhere on the page, so I made a little wordstrip corner in the bottom right of the page.
 
 
At the top, I included one of my favorite cards from the set and used a journal card to document my boy's name, birthdate, weight, and length.  I added a few extra decorative touches and put a bigger shadow on those to give the illusion of having used pop dots or similar to make them stand off the page.  
 
 
I can never say no to a great scrapbooking product geared toward boys - and I kind of love the colors, and how this page turned out.
 
Have a great day!

Click here to shop from the new Silhouette designs.

Click here to shop from the new digital collections.

Hello Friends! 

It's Kristine Davidson with you today and I am here to share a pocket page spread featuring the Happy SN@P! Pack!  At first I looked at the colors in this kit and really wasn't sure. I'm not much of a fan of pastel colors but this certainly fooled me! Once I started using it and adding my own personal touch to the cards It turned out - Awesome!

When I started my spread I wanted to add a few wood veneers but wanted a bit more color to match the papers so i took a few from the Say Cheese II collection and spray painted them. Super easy to do and adds a bit more color to your project.

This spread is from the month of May 2015, and I'm still on track doing my monthly spreads instead of weekly and I am enjoying it so far. This month of May I had a few things going on and one of them was a little photo shoot with my nieces and nephew. In order to add all those photos in my spread I created a little 6x12" pocket. Continue reading to find out more!

Here are a few close up pictures of the left hand side of my spread. - I added a few doodles on the cards and some ink splats as well. No sewing this time ;-)

Here's the right side of my spread -

Here are a few close up pics of my pages

Now for the fun part. I took a pocket page protector and cut it in half.  I wanted to add extra photos to my monthly spread and this was the perfect way to do so. I didn't want smaller photos or not include them in my spread so I added an extra pocket measuring 6" wide x 12". It was perfect!

Here I have the 6x12" page front and back

Here it the pocket page inserted in my album in the middle of my spread.

and to show you the finished pages - including the 6x12 pocket page

I hope you enjoyed my post today and I hope you enjoy creating with Simple Stories!

Supplies

I always love scrapbooking photos that I've just recently taken.  The pictures in both of these layouts aren't the greatest because I took them with my phone but I love the stories behind all of them so that's why I decided to scrapbook them right away!!

First off I'd like to share this layout "Remember" about my daughter & me.

I used some Life Documented products on this layout along with my Silhouette CAMEO and some Simple Stories cut files. I love how everything goes together so wonderfully.

I printed my journaling right onto the journal cards and embellished the surrounding areas with some cut files, stickers, washi tape and canvas stickers.

As you can see from the full layout picture I added some more of the canvas shaped stickers in some of the circles section of the grey cut out card stock.

I cut the title and accompanying large circle using my Silhouette. I also kept some of the negative shapes from the cut designs to use as added embellishments on my page.  (i.e. the arrows from the arrow tabs).

The second layout that I want to share with you today is from a recent hike I took my kids on. Good thing I took a picture of all of us at the very beginning though because by the end they were tired out!

I went through my papers and when I came across the Legacy collection I knew it would be perfect.

I used some of the alpha stickers to create my title - changing the font and sizes helps to create an interesting effect.

At the end of the title I added a brad - shape of a clock - because it fit perfectly with the theme of my layout.

I used my computer to print right onto the journal card and added some chipboard shapes, sticker and enamel dots.

It's always fun when collections have so many different types of products that match. As you can already see I've used a variety of products already and I just love the dimension that the chipboard adds to a layout.

I hope that I've inspired you to scrap those photos that have special memories & meaning to you.

Supplies

Howdy!  Layle here with you again today for the final day of our Simple Stories & My Favorite Things Product Swap!  

Both design teams have swapped products and have been sharing on our blogs all week long.  Join us for some great inspiration as well as a chance to win a prize package from both My Favorite Things & Simple Stories!  We've had a great week so far with some amazing projects & inspiration from both teams. Today design team member Suzanna Lee wraps it up with a fun-loving layout featuring our Summer Vibes collection -
_______________________

Hi there Simple Stories AND My Favorite Things fans! Suzanna here today to share with you a fun summer layout created using the new Summer Vibes collection from Simple Stories and some goodies from My Favorite Things.

The theme of this layout is none other than popsicles and what better way to share that than a row of stamped and die cut popsicles?! I used some of the MFT hybrid inks for the first time. If you have never tried these inks, I cannot recommend them enough. I definitely suggest you give them a go! MFT hybrid inks are pigment-based inks which dry like dye inks and are permanent on paper surfaces. They are acid-free, archival, and fade resistant. As these inks are fast drying and waterproof, they cannot be embossed with embossing powder.

I have always been a fan of MFT dies, I have collected my fair share over the years. The stamp and die combinations always stamp crisply and you always get clean cuts from the dies. For this layout, I used the You're the Sweetest Thing stamp set and cut them out with the Sweet Treats die set. These popsicles are the perfect compliment on the theme of my layout! I love the color combination of the aqua and yellow against the reddy, orange background!

This Summer Vibes collection is THE best! There are so many fun sub-themes within the collection and the colors are just sublime! The pocket scrapping cards, or SNAP cards as they called when referring specifically to Simple Stories' cards, are great for layout's as well. For those of you who are layer lovers, the SNAP cards make fantastic layers, as I've done here in this layout.

Thank you for stopping in today! Make sure to check out all the great projects from earlier this week and the MFT blog if you haven't already done so.

________________
 
Now for even more fun!!  Enter via the Rafflecopter widget below and we'll draw one lucky winner on Sunday to win a $50 Summer Vibes prize pack!  After you enter, head on over to the My Favorite Things challenge blog to see what their team has created.  Make sure to enter there as well - they're giving away a $50 voucher to their online store!

a Rafflecopter giveaway

Want to follow My Favorite Things and keep up with all of their great projects & products?  Here you go!

Instagram: @mftstamps

Facebook: www.facebook.com/MFTStamps

Twitter: @mftstamps

Pinterest: www.pinterest.com/mftstamps

Website: MFTstamps.com

Blog: MFTstamps.com/blog

Challenge Blog: www.cardchallenges.com

Thanks so much for joining us this week for inspiring projects from both teams!

Supplies

Howdy!  Layle here with you again today for day 5 of our Simple Stories & My Favorite Things Product Swap!  

Both design teams have swapped products and will be sharing on our blogs all week long.  Join us for some great inspiration as well as a chance to win a prize package from both My Favorite Things & Simple Stories!  We've had a great week so far with some amazing projects & inspiration from both teams. Today design team member Ashley Horton doesn't disappoint with 2 stunning layouts!
_____________________
Hi everyone!  It's Ashley Horton, and I'm joining you today, to share two new layouts using the brand new collections from Simple Stories, paired with the Trendy Triangles stamp set and the Picture This stamp set from My Favorite Things.


Before I received the Trendy Triangles stamp set and the new So Fancy collection from Simple Stories, I already had an idea for the design I wanted to do.  I wanted to create a custom background for my layout, by stamping the Trendy Triangles onto the patterned papers in the So Fancy 6x6 paper pad.


I used a variety of the large Triangles from the stamp set with a Black ink pad, and stamped them onto various patterned papers in the 6x6 paper pad.  I decided to use a White cardstock background, so the patterned paper Triangles wouldn't compete with a patterned paper background.  I also stopped the Triangle design halfway on the page, to create a resting spot for my title.


I added my photo to the center of the layout, and placed one of the So Fancy Chipboard Frames over it, to make it stand out from the Triangle design.  For my title, I fussy cut the fun letters from the Marquee patterned paper and adhered them right under my photo.  I finished the layout, by adding a few Chipboard Pieces, Bits & Pieces, Bradz, and Enamel Dots.
 

This is a really fun technique for creating a custom background, and you could get completely different looks based on the patterned papers you use, the ink pads you use and the way you arrange the cut out stamped images!
 

I don't know about you, but I always struggle with birthday themed layouts.  I'm not sure what it is, that throws me off.  I think one of the main things, is all of the color that ends up in birthday photos.  So I usually like to focus on a posed photo of the birthday boy or girl, and this week just happened to be our son's 6th birthday!  I have to say, I was really excited when I put the new So Rad collection together with the Picture This stamp set, to create a layout with his 6th birthday photo!


I wanted to create a fun number element on the layout, so I typed out a large number 6 in my Silhouette Studio software.  Then I grabbed a star shape and sized it down to just under an inch.  Once I had the right size, I went around the outline of the number 6, with the star shapes, to create a star outlined number.  Once all of the stars were in place, I deleted the number, and cut the star shape outline from White cardstock.


I backed each of the stars with different patterned papers from the So Rad 6x6 paper pad.  Then I machine stitched around the large 6, to add some more interest and texture.  Before I added my photo and embellishments, I splattered Black spray mist onto the background.


I placed my photo to the right of the number 6, and layered some of the So Rad Bits & Pieces, Chipboard Stickers, and Bradz to add interest around the photo.  I wanted to balance out the page, so I created a cluster on the top left hand side.  The "Wishing You a Snappy Birthday" sentiment from the MFT Picture This stamp set, was perfect for the theme of my layout, without creating an in your face birthday look to the page.  I stamped it with an Orange ink pad onto one of the So Rad Snap Cards, and then cut it into a banner shape.  I also used the Smile sentiment from the stamp set, to create a scattered look above and below the photo.
 

It's fun finding ways to use your collections and stamps to create layouts for an occasion, other than everyday photos, even if they are not specifically designed for that occasion!
 

_________________
 
Now for even more fun!!  Enter via the Rafflecopter widget below and we'll draw one lucky winner on Sunday to win a $50 Summer Vibes prize pack!  After you enter, head on over to the My Favorite Things challenge blog to see what their team has created.  Make sure to enter there as well - they're giving away a $50 voucher to their online store!

a Rafflecopter giveaway

Want to follow My Favorite Things and keep up with all of their great projects & products?  Here you go!

Instagram: @mftstamps

Facebook: www.facebook.com/MFTStamps

Twitter: @mftstamps

Pinterest: www.pinterest.com/mftstamps

Website: MFTstamps.com

Blog: MFTstamps.com/blog

Challenge Blog: www.cardchallenges.com

YouTube: https://www.youtube.com/channel/UC7BW_DbtLb_0CV9FgdRmvoA

Join us again here tomorrow for more inspiring projects!

Supplies

Howdy!  Layle here with you again today for day 4 of our Simple Stories & My Favorite Things Product Swap! 

Both design teams have swapped products and will be sharing on our blogs all week long.  Join us for some great inspiration as well as a chance to win a prize package from both My Favorite Things & Simple Stories! 
Today design team member Mindi Niebuhr shares how she used MFT stamps in her pocket pages
_________________

Hello everybody !! It's Mindi here to share with you a few pocket pages using the new Summer Vibes from Simple Stories and a fun stamp set from My Favorite Things Stamps !! Fun stuff right ?!! 

 
It is no secret that I love stamps, they are an easy way to add embellishments to your pocket pages. So I was super excited to use some MFT stamps this time around. 
 
Last summer was truly epic for our family ! Lots of travel, lots of swimming in the new pool, lots of new adventures. I decided to make a few pages full of fun regular summer highlights (meaning non travel photos). 
 
 
Can I just say that I am in love with these Summer Vibes journaling cards !! I chose this colorful "Summer" card to make a title card.  
 
The stamp set that I used for these pages is called Right This Way. I used one of the stamps over the word Summer for a fun layered look. 
 
 
As I mentioned before, I went through my summer photos and added in some of my favorite memories. The Summer Vibes collection is full of great cards and embellishments that these pages came together so quickly. 


The stamp set I chose to use from MFT was simply perfect for pocket pages, as it has all different sizes of stamps. Some larger ones to use as a title and some smaller ones to use as embellishments.


Here's one more closer look at the left side of my layout. 
 
 
Here in California the summer experience would not be complete without a trip or two to the beach. So of course I had to add in a few photos from a favorite beach trip. 
 
I used one of the chipboard pieces right on top of my photo as a frame. It draws your attention to that particular part of the photo and adds some texture.  I decided to add some embellishments to the bottom with a stamp and a clear photo sticker. 


This particular card was one of my favorites. It seemed to be made just for me, ha ha. I'm sure it will appeal to most of us in the summer time. I added in some journaling about how we like to stay cool in the summertime. I finished it off with some fun embellishments from the collection. 
 
 
Here is one last close up for you. All throughout my pages I loved using the clear photo stickers. They are a fabulous way to easily embellish your photos and journaling cards. 
 
 
_________________
 
Now for even more fun!!  Enter via the Rafflecopter widget below and we'll draw one lucky winner on Sunday to win a $50 Summer Vibes prize pack!  After you enter, head on over to the My Favorite Things challenge blog to see what their team has created.  Make sure to enter there as well - they're giving away a $50 voucher to their online store!

a Rafflecopter giveaway

Want to follow My Favorite Things and keep up with all of their great projects & products?  Here you go!

Instagram: @mftstamps

Facebook: www.facebook.com/MFTStamps

Twitter: @mftstamps

Pinterest: www.pinterest.com/mftstamps

Website: MFTstamps.com

Blog: MFTstamps.com/blog

Challenge Blog: www.cardchallenges.com

YouTube: https://www.youtube.com/channel/UC7BW_DbtLb_0CV9FgdRmvoA

Join us again here tomorrow for more inspiring projects!


Howdy!  Layle here with you again today for day 3 of our Simple Stories & My Favorite Things Product Swap! 

Both design teams have swapped products and will be sharing on our blogs all week long.  Join us for some great inspiration as well as a chance to win a prize package from both My Favorite Things & Simple Stories! 
Today design team member Candi Billman joins us with a ideas on customizing her Life Documented Planner with our Summer Vibes collection & MFT stamps
________________
Candi here today to share something really exciting with you all!!!  I am using some awesome planner stamps and inks from My Favorite Things (MFT), inside my Life Documented Planner...PERFECT combo!!!!!!  I am also using the latest Collection from SS called Summer Vibes and let me tell you it is the CUTEST!!!  Using scrapbook goodies inside my planner is so much fun & then adding planner stamps to the mix...this is exciting!!!  Let me show you...
 
I will be using several Hybrid Ink Pads and the following clear stamps designed by Laina Lamb Design:  Journal It-Calendar BasicsJournal It-Top TenOrganized Life Planner and Family Life Planner.


Ever since January I have had that same transparency (dashboard) in my planner that has 2015 on it, which I love!!!  Then behind that I usually put a decorative piece of scrapbook paper behind that to show through...I used the Summer Vibes 6x8 "Hello Summer" Journal Page from the SN@P! Journal Pages this time around.  It's fun to change it out from time to time!


Let's get to the month of June!!!  From the same SN@P! Journal Pages as mentioned above, I grabbed one of the Die-Cut Pages and made that into a little intro to the Summer months!  On the outside I added stickers from the Collection Kit and when you open up the tab, I have added more stickers along with stamping out the Summer months (June, July and August) from the Journal It-Calendar Basics clear stamp set.  I then stamped out "Top 10" from the Journal It-Top Ten clear stamp set...I thought it would be fun to fill out my Top 10 activities/events for Summer :) Once June is over with, I will move this Die-Cut Page over to July and then the same for August...


On the left hand side you can see the back side of that Die-Cut Page.  On the right hand side, that page was empty so I grabbed one of the 12x12 Element Sheets from inside the Collection Kit and cut out those words and adhered them down.


I have the Monthly Dividers in my planner and June is a navy blue color.  In my opinion, that color just didn't really go with the colors of the Summer Vibes Collection so I had to do some cutting!!!  I cut out the calendar grid from each side (left and right) of the Monthly Dividers.  Next I grabbed two different cardstock papers...1 from the Simple Basics Kit and 1 from the Collection Kit.  I used the June Monthly Dividers and cut out NEW Monthly Dividers, using the 2 cardstock papers...ahhhh, much better :) :) :) 


Here is June all loaded up with Summer Vibes and My Favorite Things!!!  As far as the dates go...I added a few number stickers here & there and then for the other dates, I used a very light grey marker to fill out the rest.
 
 
Time to get stamping!!!  I used the little shoe from Family Life Planner for the days that I want to hit the gym in the morning before work.  For my design team projects, I stamped out "Project" from Organized Life Planner.  


I grabbed the Organized Life Planner clear stamp set once again and stamped out "Grocery" for grocery days and "Bank" for pay days!  


In case I needed a little more room to jot down some notes, I added that cute Die-Cut Page from the SN@P! Journal Pages...just perfect!!!


Here is the backside of June...it originally was empty, but not much longer after I jazzed it up a bit!!!
 
 
Getting into my Daily Planner Inserts...I knew right away I wanted to punch a few holes in the "hello" transparency from the Collection Kit and place that in front of my current day.  I stamped out the "notebook paper" from theJournal It-Top Ten clear stamp set, trimmed it out, stamped out "Remember" and adhered it down to the front of the transparency.  I did the exact same thing to the back side!  Now I can jot down REAL important stuff and move that transparency sheet from day to day...


I stamped out "June" from the Journal It-Calendar Basics on every Daily Planner Insert so all I have to do is add the date...
 
 
Here is a little peek into June 1st...look at that, I get to relax at 7pm :) yesssss!


WOW...was that fun or what?!  I had a blast combining two AMAZING companies in this project!!!  Stamping in my planner is a lot of fun :) I hope you enjoyed this post and grabbed some inspiration from it!!!  
Happy Planning annnnnnd Stamping :)  xo
 
________________________
 

Now for even more fun!!  Enter via the Rafflecopter widget below and we'll draw one lucky winner on Sunday to win a Summer Vibes prize pack!  After you enter, head on over to the My Favorite Things challenge blog to take a peek at their weekly sketch challenge.  They'll be back with more Simple Stories inspiration tomorrow!  

a Rafflecopter giveaway

Want to follow My Favorite Things and keep up with all of their great projects & products?  Here you go!

Instagram: @mftstamps

Facebook: www.facebook.com/MFTStamps

Twitter: @mftstamps

Pinterest: www.pinterest.com/mftstamps

Website: MFTstamps.com

Blog: MFTstamps.com/blog

Challenge Blog: www.cardchallenges.com

YouTube: https://www.youtube.com/channel/UC7BW_DbtLb_0CV9FgdRmvoA

Join us again here tomorrow for more inspiring projects!


Supplies

Howdy!  Layle here with you again today for day 2 of our Simple Stories & My Favorite Things Product Swap! 

Both design teams have swapped products and will be sharing on our blogs all week long.  Join us for some great inspiration as well as a chance to win a prize package from both My Favorite Things & Simple Stories! 
Today design team member Amy Coose shares a layout using some pretty cool stamps!
________________
 
Hi everyone, Amy here to share a page I created using the I Am line from Simple Stories, and some wonderful stamps and ink from My Favorite Things.  I was so excited to participate in this product swap, and quickly picked out the DC Abstract Art set and the DC Jumbo Abstract Art set. I also picked up the Sno Cone Ink Pad, which matched the I Am line beautifully. 
 
I have to admit, I struggle with adding ink drops to my projects.  No matter what I do, they never seem to look like the perfectly placed drops I see on other projects. These stamp sets take all the guess work out of ink drops.  Here's the layout I created.
 
 
Here are some closeups. How perfect do the ink drops look??? Love! I used the ink pad on the title I cut out using my Silhouette Cameo.  This Simple Stories cut file can be found in the Silhouette Online shop here.
 
 
The stamps really take out all the guess work of the popular water color look.
 
 
I loved using the My Favorite Memories products.  Thanks for stopping by the blog today!
________________________
Now for even more fun!!  Enter via the Rafflecopter widget below and we'll draw one lucky winner on Sunday to win a $50 Summer Vibes prize pack!  After you enter, head on over to the My Favorite Things challenge blog to see what their team has created.  Make sure to enter there as well - they're giving away a $50 voucher to their online store!

a Rafflecopter giveaway

Want to follow My Favorite Things and keep up with all of their great projects & products?  Here you go!

Instagram: @mftstamps

Facebook: www.facebook.com/MFTStamps

Twitter: @mftstamps

Pinterest: www.pinterest.com/mftstamps

Website: MFTstamps.com

Blog: MFTstamps.com/blog

Challenge Blog: www.cardchallenges.com

YouTube: https://www.youtube.com/channel/UC7BW_DbtLb_0CV9FgdRmvoA

Join us again here tomorrow for more inspiring projects!


Supplies

Hello, again!   This is Amber, founder and creative director of Simple Stories.  I can't believe how fast this month has flown by - here I am for another installment of my monthly Document IT blog feature. 

Last month was super busy with our 2nd quarter release and design deadlines for our 3rd quarter release, so you may have noticed there wasn't a Document IT post from me in April; however, as part of our (inter)National Scrapbook Day celebration, we had some fabulous free printables, including April's Month in Review printable.  If you missed those, you can download them here :)

Can you believe it's the end of May already?!  Summer is just around the corner - YAY!  In fact, my kids are already out of school, and that means lots of activities for the kids this summer.  Thank goodness I've got my Life Documented planner to help me keep it all straight!  

During the summer I like to cook a lot, and that means lots of searching for recipes, weekly menu planning & shopping lists - anyone else out there like me?  If so, you're in luck.  This month's free printables are all about just that!

When I sit down to plan our menu for the week, I use the Menu from the Life Documented Basic Inserts pack.  I don't always decorate my weekly menu to this extent, but every once in a while it's fun to do!

I write my shopping list as I go through the recipes, using the Shopping List included in this month's free printables.  Once I have my menu set for the week, I write it on the days of the week card, also included in this month's free printables.

When I'm done, I add it to a cute decorative clipboard in my kitchen so the family can see what's planned for the week.  That eliminates all of those 'hey mom, what's for dinner' questions :)

You'll also find recipe cards in this month's free printables!  The Life Documented Envelope is a great place for storing your recipe cards & recipes printed from the internet for the week in your planner.

The Recipes to Try included in this month's free printables is a great place to list those recipes you want to try from different cookbooks, Pinterest, etc.  We've even included a 'made it' checkbox and rating scale for each recipe on the list.

Our Life Documented 3x4 and 4x6 cards are also a great place to note menu, recipe and snack ideas and insert directly in your planner!


FREE PRINTABLES!

Now we get to the really fun part!  We've designed these FREE printables for May to coordinate with your Life Documented planner.  Even better, we'll be offering free printables each month!  

Click here to download May's Free Life Documented Printables.

There are a 6 free printables this month, including:

May Month in Review
Recipes to Try
Recipe Cards
Menu Planner
Days of the Week Card
Shopping List

TIP: The May free printables are on a single PDF document with 7 pages - print off what you want and the quantity you need.  We've added cut marks to each printable, so you can easily trim your pages to size.  

Thanks so much for letting me share my insight and vision for our Life Documented Planner system - it's a dream come true for me to finally have my dream planner.  I already feel like my life is so much more organized.  I hope you're inspired to plan and organize your life with our Life Documented Planner system as well and follow along each month using our free printables for a planner stuffed full of fun resources, tools and planning pages!   See you back here again next month!


Supplies

Pages