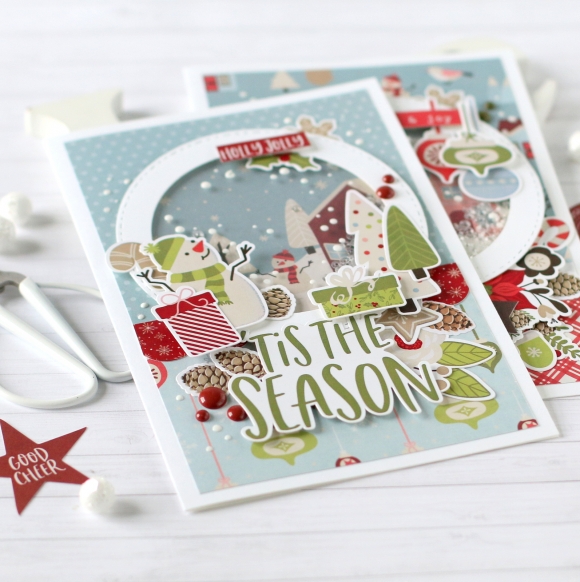
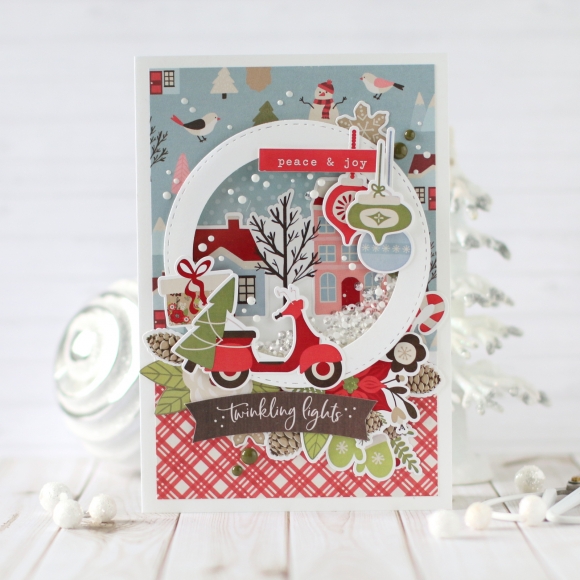
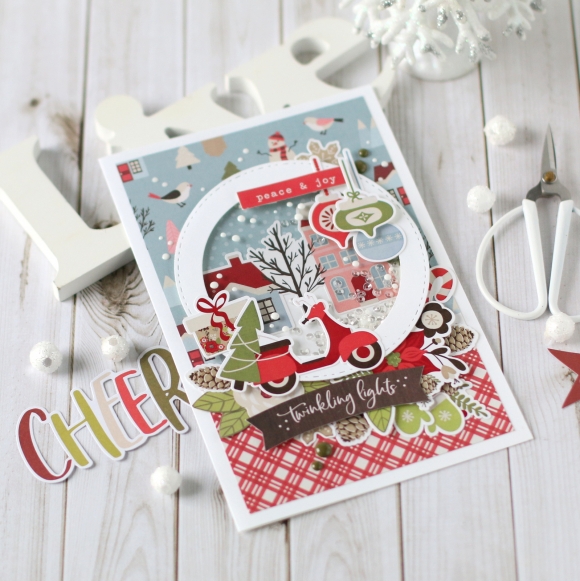
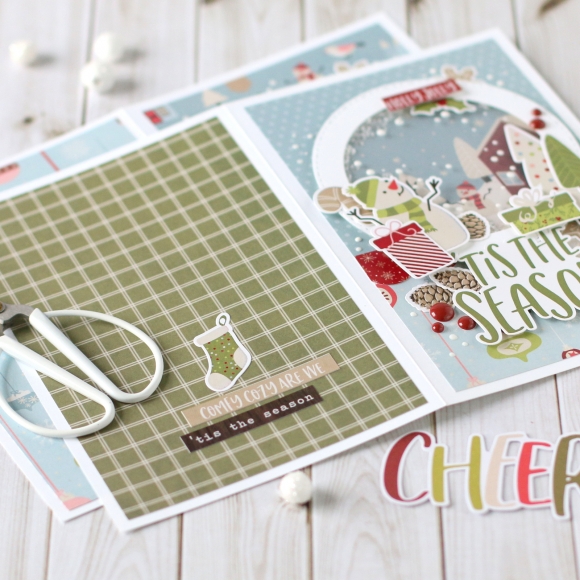
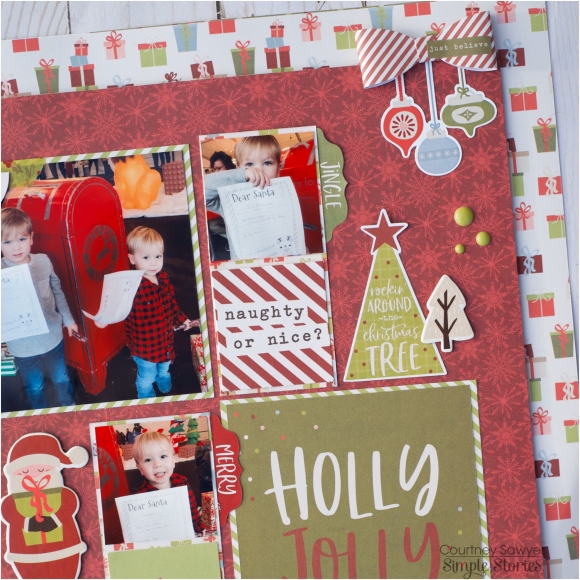
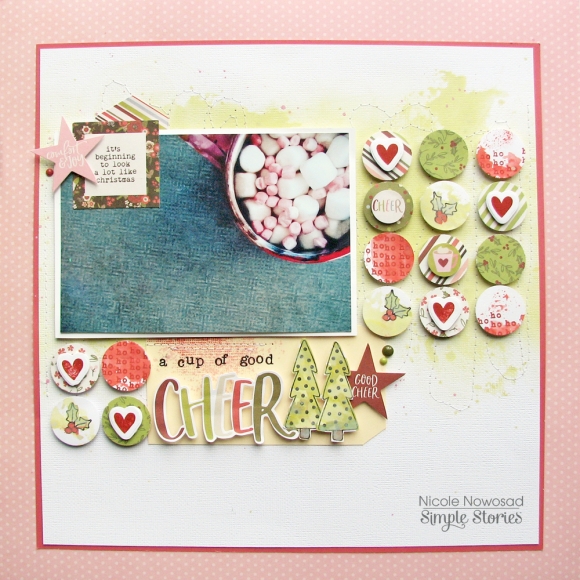
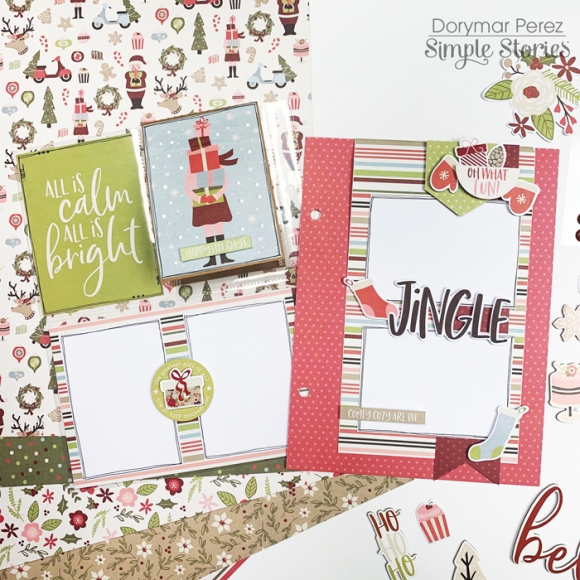
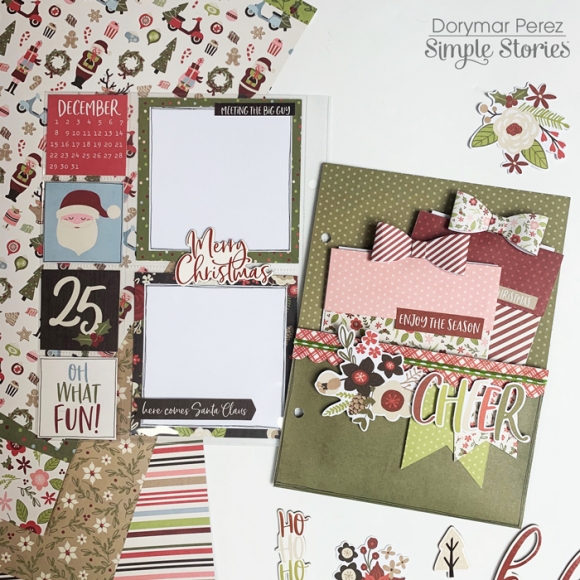
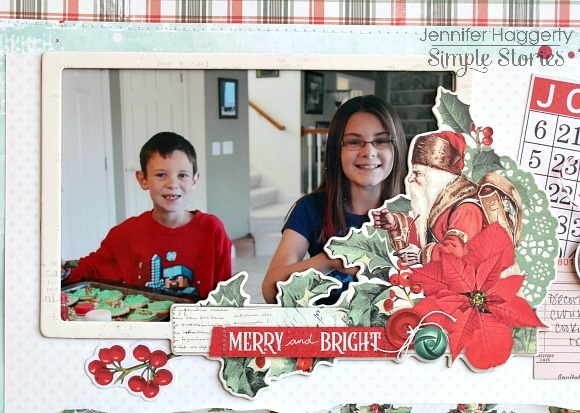
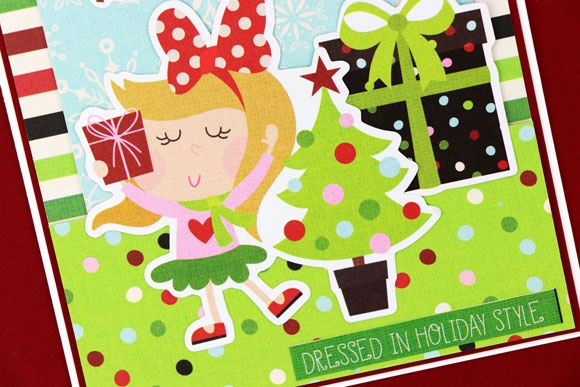
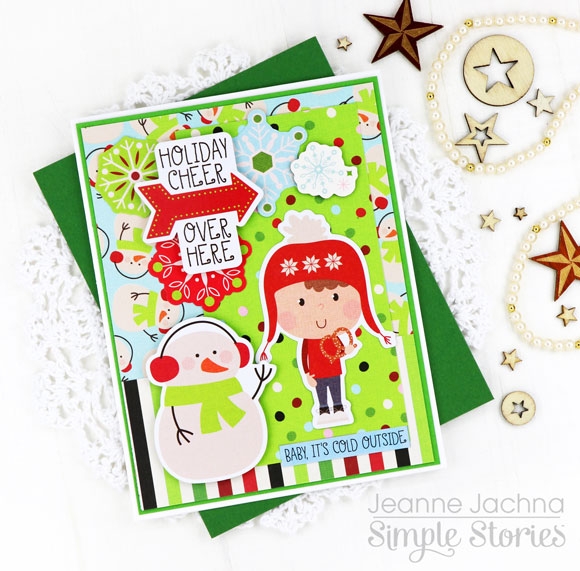
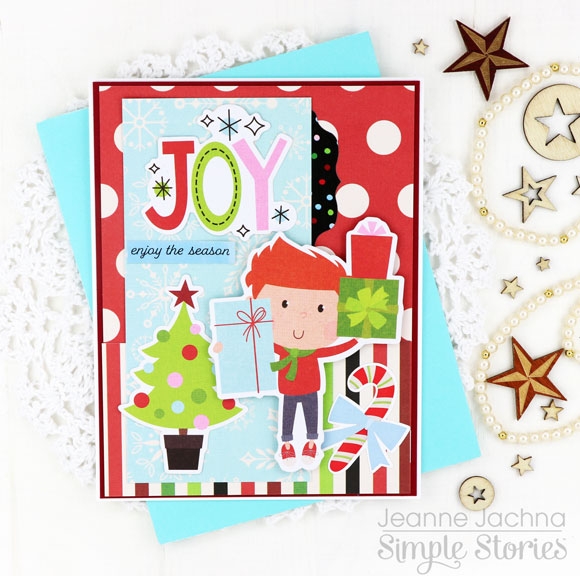
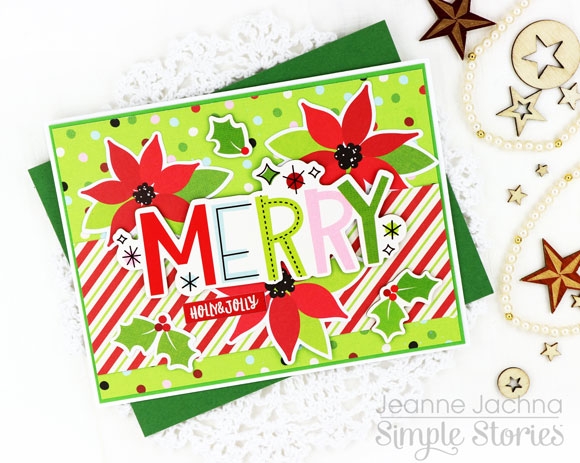
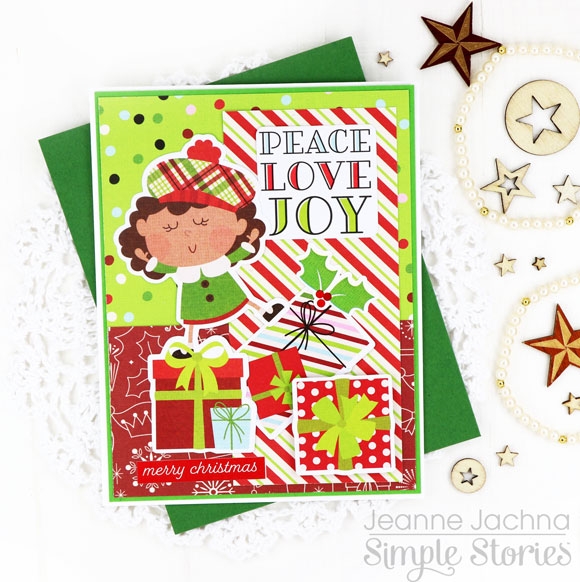
Hello Simple Stories friends!  It’s Jeanne here today and I’m happy to be sharing some Christmas cards made with the Say Cheese Christmas Collection.   This collection captures the childhood delight of Christmas as only the most magical place on earth can do!

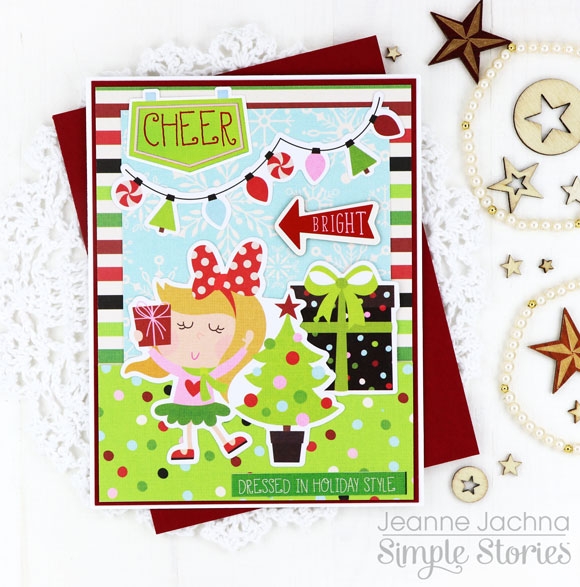
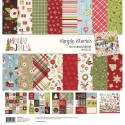
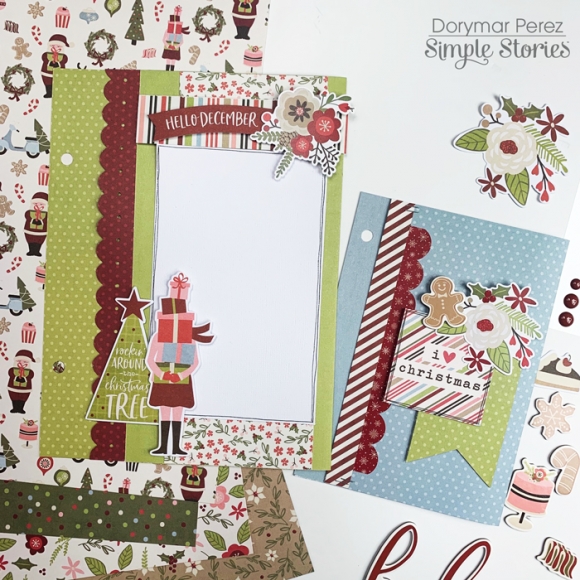
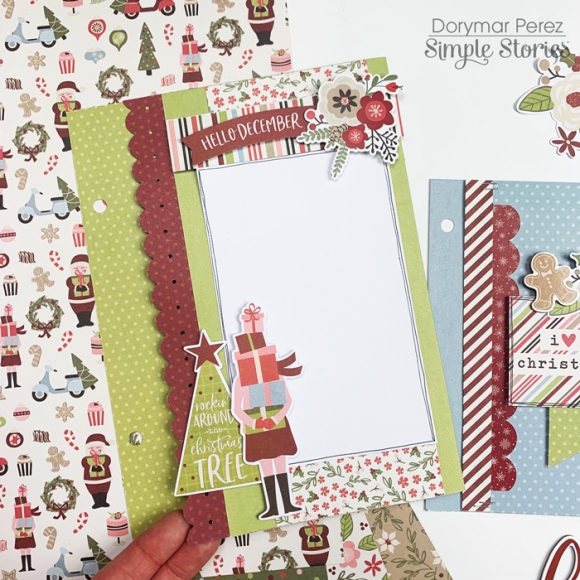
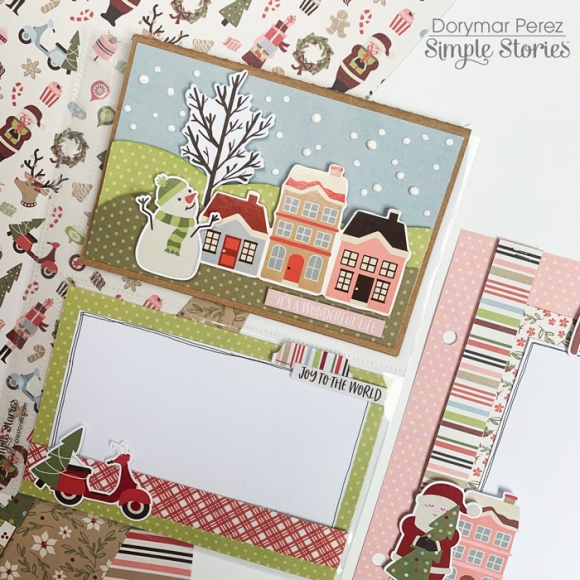
The collection is filled with bright colorful papers in traditional red and green with a touch off pink and pastel blue.  The patterns are candy cane stripes, sprinkle dots, poinsettias, snowflakes, and everything nice.

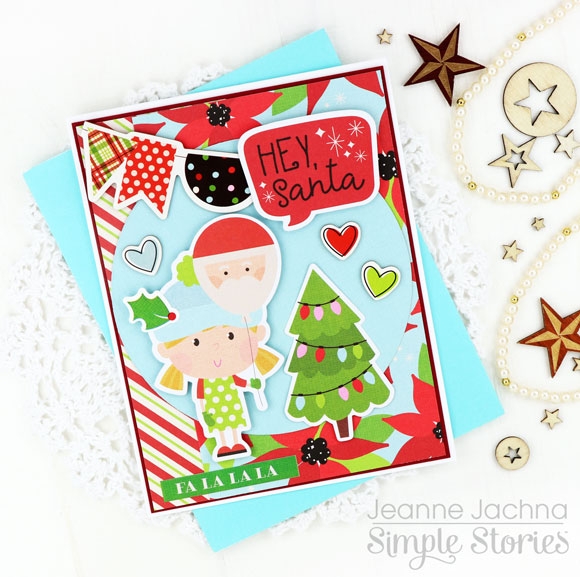
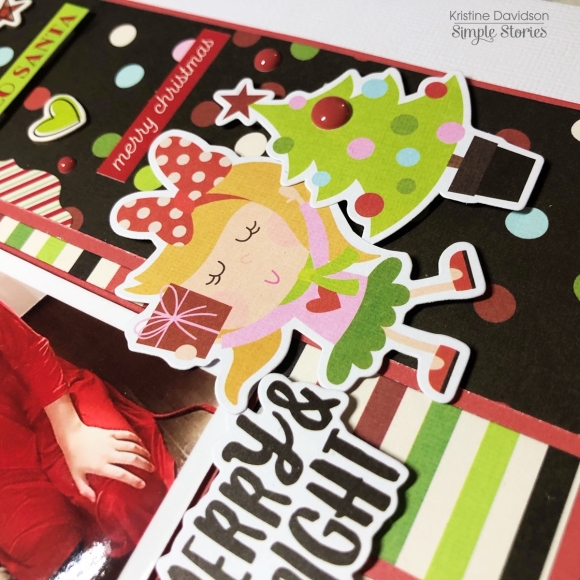
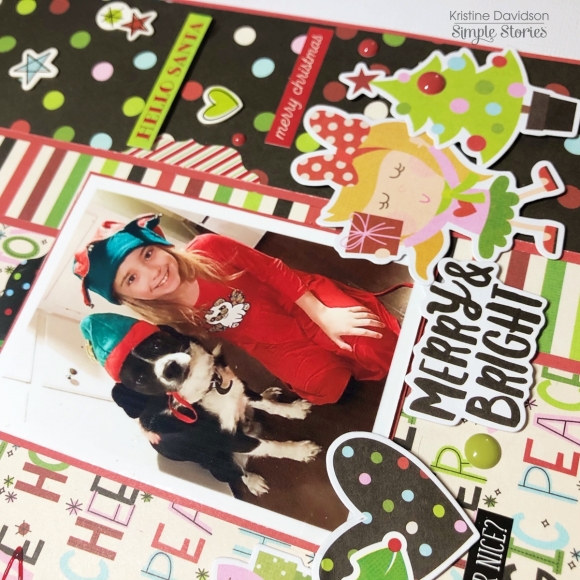
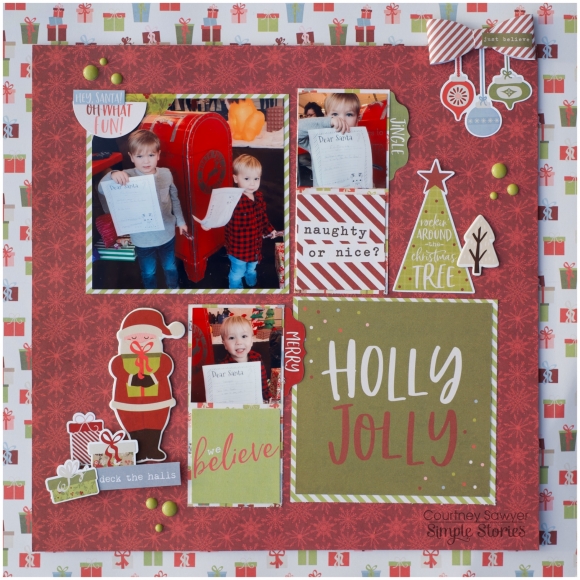
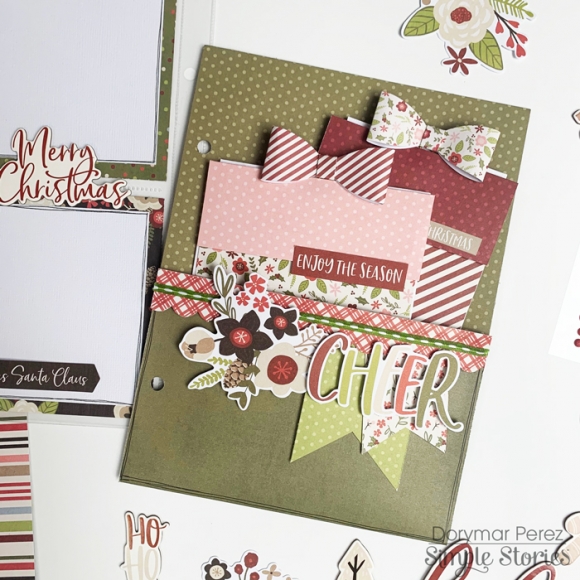
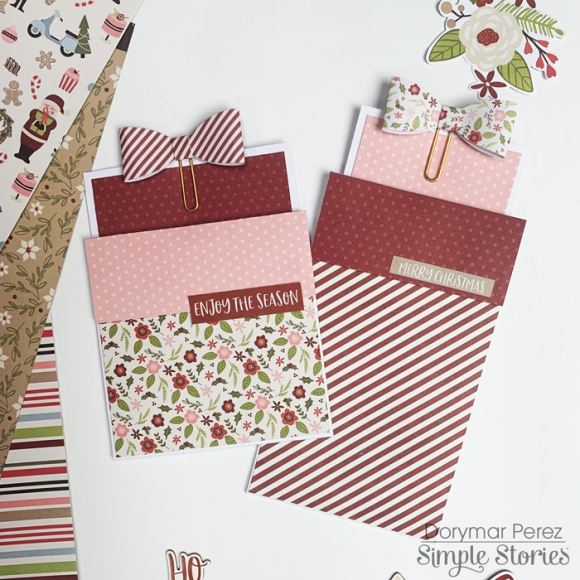
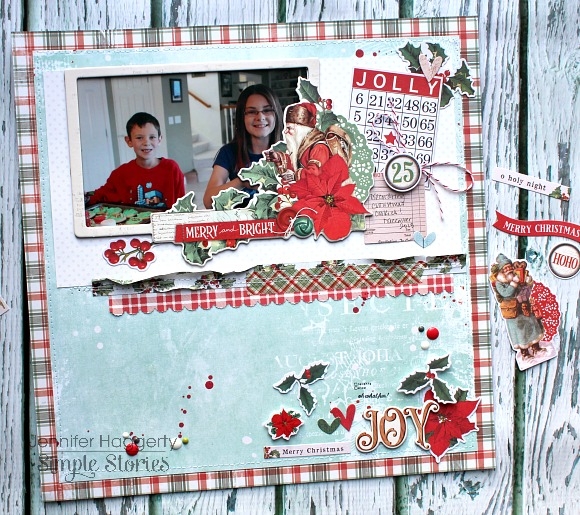
There are two sets of bits and pieces available in this collection.  The iconic bits and pieces that include lots of holiday images like ornaments, presents, flowers and sentiments.  There’s also a Happy Kids Bits and Pieces pack that includes all the cute kids you see on my cards today.  

The two packs of bits and pieces are sized perfectly to work together so you don’t have to worry about mixing and matching die cuts from both packs.

The sticker sheet that comes with the collection kit also has lots of sentiments, images and tabs too.  Again, everything is perfectly color coordinated so you know it will be a perfect match every time.

I had lots of fun mixing and matching the papers from this bright collection.  I always start by cutting the 12” papers into 6” squares.  I layout all the images on a piece of plastic the size of my card face and lay it over different pattern papers.  The clear plastic allows me to pick up the entire arrangement and see it over the papers before I commit and adhere everything in place.

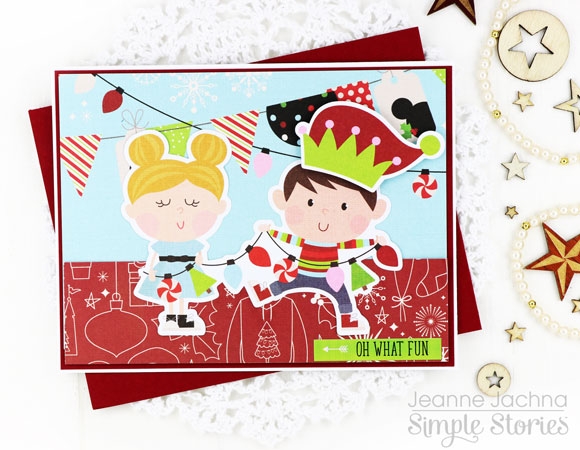
This set includes 6x12” Chipboard Stickers too.  These are my favorite to work with!   I love how the thick study pieces add dimension.  Because they have adhesive backing, they couldn’t be easier to make with.

This collection makes me feel as though I’m seeing the holidays through the eyes of a child.  What a magical world! 

You’ll have lots of fun making fun holiday cards with the different elements in the Say Cheese Christmas Collection, and because the fun is contagious, your recipients will be smiling too!

Supplies

Hi! Odessa here with some wintery SN@P! Pages using Simple Stories Winter Farmhouse. When I saw the new winter collections this one jumped out at me. It’s really wintery where I live so it’s really perfect for everyday layouts and my favourite, Christmas layouts! 

On this page I have some cute pockets on one side and a full page layout on the other side. I kept the pages nice and bright with lots of rich colour pops. The mustard yellow, pine green and cardinal red in Winter Farmhouse are so nice together!

Instead of using a 4x6 card in this pocket I adhered 6 2x2 cards to some cardstock to make a cute patchwork pocket with some of my fav elements from the collection.

Baking is one of my favourite Christmas traditions and throughout this album I have photos of some of the things I’ve baked along with the recipes. On this page I made a 6x8 layout on some woodgrain cardstock from Winter Farmhouse as my base. I layered torn patterned cardstock collections in some of those rich colours I mentioned before to feel like a stack of recipes with little tabs stickers and other things peeking out as well as a big title under the photo.

I used the scalloped border from the Winter Farmhouse Combo Stickers at the bottom of my photo to make the flip element a bit more visible. I adhered the photo to some folded cardstock from the collection so when it’s opened the recipe for the cookies pictured is on the inside with some cute stickers to make it a little more fun.

Here’s another SN@P! Page I put together with Winter Farmhouse. These photos are all about being in a rustic winter wonderland - it was a perfect match of theme and photos! 

I added a 4x6 vertical protector in the middle with a wintery photo. I used various phrase strips from the Winter Farmhouse Sticker Tablet, Combo Stickers and Bits & Pieces to add a poetry-like element and a cute cabin due cut from the Bits & Pieces that went well thematically. The Combo Sticker sheet always has some great tabs perfect for sticking on the side of these smaller page protectors to add more layers to albums.

I adhered a photo to a 4x6 card with a journalling spot in the middle and added a nice title to it. Using the alpha stickers in the Sticker Tablets is a great way to title a group of photos while maintaining colour and theme!

This full sized 6x8 photo of the rustic Otentik a few hours away in Riding Mountain National Park we booked for a few days right after Christmas was one of my favs so I kept it simple. A journaling spot from the Winter Farmhouse Journaling Bits & Pieces along with a snowflake chipboard sticker. I used the number stickers from the Sticker Tablet to add in the date and a cute phrase strip over the door.

I’m having so much fun working on my December album with the winter Simple Stories collections!


Supplies

Hello Friends! 

I am here to spread a little Cheer with my latest layout called Merry & Bright using the Say Cheese Christmas collection. I absolutely love seeing picture of animals dressed up for the holidays. This little one called Dev is with his favorite human Cabrelle getting ready for the holiday festivities. That look on his face just screams why am I doing this!!!? Right? 

This layout is very simple to create and all you need is a few sheets of this gorgeous and festive collection.  I used a sheet from the Holly Jolly Simple Basics Collection, which is a must have by the way, and backed up a few pieces of assorted papers in different sizes. I used a piece of white cardstock as my base but any color that matches this collection would be perfect. I added my assorted papers to the base in no random order and that was my background! Simple right?  

Once I added my photo I started embellishing the bottom and top left of the layout. I always use dimensional adhesive under my Bits & Pieces to create height and it also allows me to add more layers. 

Journaling was added on a small piece of white cardstock and adhered under the top left cluster.  My title was left simple using a die cut called Merry & Bright.  

You can create this simple layout in no time and you can even add a few more pictures if you'd like. 

This collection makes it super easy to create fun pages of you and your pets or something to make you SAY CHEESE!

Come visit Simple Stories and myself on instagram at @SimpleStories_ and @KristineDavidson. 

Cheers!

Supplies

Hello everyone! Anya here today and I am happy to share some holiday shaker cards with you! Winter themed shaker cards are my favorite to make, because the filling in the shaker window reminds me of a snow. 

For the first card I used one of the 3x4 elements for a background inside the window and decorated the card with stickers adding them with pop dots to keep the decorative elements even with the shaker window. A few white dots made with Nuvo Drops always look great on acetate and also reminds me of snow floating in the air.

For the background picture inside the window of the second card, I created a scenery with stickers using adorable houses. I decorated the top of the shaker window with ornament stickers and added more stickers and some bits and pieces at the bottom, alternating height and colors. 

Always love to cover the back of the card with patterned paper. Adding a few little stickers to the background panel makes it even more fun and extra special. I really enjoyed creating these shaker cards and can't wait to make more!

Supplies

Hey y’all Courtney here. Today I am sharing the layout that I created using the fun Holly Jolly line. This collection was perfect to document a few pictures of two of my littles writing letters to Santa.

 I decided to go with a grid layout to create my little scene. I used a 4x4 card from the SN@P cards to help balance my 4x4 picture. I backed both of those with a green stripe paper from the 6x8 paper pad. I also used two of the 2x2s from the 2x2 element sheet. My background sheet Winter Wonderland is cut down to 10x 10 and backed on the Seasons Greetings paper.

I used the fun candy stripe bow in the corner along with the cute ornament sticker from the combo sticker sheet. I added some tabs from the combo sticker sheet and popped up a few of the ephemera pieces to add dimension. Then I added the fun green enamel dots to finish the layout off.

I hope you like the layout and are inspired to craft some Christmas pictures!

Supplies

Hello Simple Stories fans! Nicole here today to share a fun holiday project with you using the Holly Jolly collection! 

For this project, I was inspired by the Holly Jolly clear stamps and wanted to find a fun way to incorporate them into my scrapbook page design. I chose to stamp some images and watercolor them in two different ways. First I stamped the HOHOHO sentiment repeatedly to some cardstock with red ink. Once it was completely dry and set, I smooshed some red watercolor ink over the entire stamped area and set it aside to dry. Once totally dry, I punched 1" circles to create my own patterned paper!

You can see that I also punched various patterned papers from the 6x8 patterned paper pad from the Holly Jolly collection too. I mixed the stamped patterns in with the patterned paper and laid them out into a simple grid pattern on my layout.

You can see I also stamped some hearts from the clear stamps and used the co-ordinating dies to cut them out, adding them to the centers of a few of the paper circles.

I also stamped some cute trees from the clear stamps and watercolored them with some green and then set aside to try - to be fussy cut out to use as embellishments for my project. I finished the project with a title using some diecuts and mini stamps too!

Supplies

Hello, there! It's Jana Eubank. Thanks for coming by the Simple Stories blog today! Christmas lights always put me in the holiday spirit, and so I decided to make them the highlight of my Holly Jolly layout today using the Enamel Dots.

I fussy-cut the large tree from a sheet from the 6x8 paper pad. I added the cookie star sticker to the top of the tree, tucked in the Santa from the Bits & Pieces to the left, and then added medium enamel dots on top of each of the color-coordinating christmas lights. I love all of the dimension the enamel dots add!

I used the "Holly Jolly" phrase from the Bits & Pieces as the title for my layout. There was an empty space in the top left corner of the photo, so I filled it in by overlapping the title right on top. To the right of the title, I tucked in a deer, gingerbread man, and candy cane from the Bits & Pieces. I also added a journal block from the Journal Bits & Pieces pack.

The colorful houses in the Holly Jolly collection make me so happy! I added the pink one to the right of the group photo along with a quote strip from the Journal Bits & Pieces pack and a quote sticker from the Combo Sticker Sheet. 

And then I added the green holiday house in an embellishment cluster at the bottom of the page.

This collection is so CUTE and makes me excited to use it to scrapbook more of our holiday photos this year!

Supplies

Hi friends, it’s Dorymar and today I will share with you the cutest Christmas Sn@p Album with the Holly Jolly Collection. The collection has very bright colors, but I felt in love with the blush pink touch. 

I selected the Red Stripe 6x8 Designer Binder because I think it matches perfectly with the collection. To create the cover, I selected various patterned papers from the 6x8 paper pad. I love layers!

To create the central focus, I fussy cut the cute Santa from the 4x4 journaling card and closer him I adhered with dimensional tape the 3x4 journaling card with the Christmas sentiment.  For the finishing touches I adhered a few die cuts cluster to the Santa, some enamel dots, ribbon, twine and glitter to the flowers and Santa’s clothes.

As this binder didn’t have dividers, I decided to create some with the Simple Basic Paper Kit. I also incorporated several Photo Booklets to have more space in my album, you know it is Christmas time and we take infinite photos.  In the layout on the right you can see that I made an open up flap and to decorate it I used a combination between stickers and die cuts. On this page you can put about 5 pictures and has space for your journaling.

I also created pages of different sizes, here you can see two of the pages that can be opened and houses a lot of space for photos.

The Christmas elements that I’ve used for this are beautiful.

In the layout on the right you can see how beautiful pink looks among the Christmas colors. In this page I created my own borders with a few die cuts and the lovely Santa sticker.

To decorate the outside of the photo booklets, I selected three different color papers from the Basic Kit and recreate a typical scene that I see during the Christmas season: snow, dry trees, snowman and beautiful houses with snow in their roof. To add a little texture, I created the snow with the crystal drops by Nuvo, they look fantastic!

I loved the 2x2 elements that this collection brings, they all have beautiful graphics and feelings, perfect for the occasion. In the spread on the left I selected some of my favorites, which describe only the theme of the project and has a space for two 3x3 pictures. Those spread are my favorites.

You all know I love pockets! For this big pocked I created two beautiful inserts that simulate gifts. And they also have room for more photo and journaling!!!

Here you can see the gifts, one is 4”x4” and the other is 3.5”x6”, both have photo cards in the inside. For the top I used the beautiful bow clips from the collection. They help to take out the photo cards.  I loved the result when I saw them, they are so funny!

I Hope this inspired you to create more beautiful projects to celebrate the Holidays with your loved ones!

Happy crafting!

Supplies

Hello friends! It's Jennifer here today to share a page with you I  created using the new Country Christmas collection!  If you are one who loves a vintage feel to your Christmas paper than this line is for you!  You also have soft beautiful hues of the traditional reds and greens with light blue and white mixed in.  I  scrapped an older photo of my kids decorating Christmas cookies!  

I  trimmed the B side of Winter Wishes down to 11x11 inches and adhered it to the eye-catching plaid of O Christmas Tree. I  then cut a piece of the Winter White/Dots from the Simple Basic Kits to use at the top half of my page.

I  used a favorite border punch on a strip of the red and white checker of Wonderful Life at the bottom of the Winter White/Dots. I  also adhered a strip of the B side of the 4x4 Elements and stitched through with my sewing machine.  You can also spy one of the three Washi Tapes that are included in the collection! 

At the bottom left of my page, I  used the woodgrain script "Joy" from the 6x12 Chipboard for my title.  I  adhered die cut poinsettias and leaves from the Floral Bits and Pieces as well as added in die cut hearts and a sentiment from the Bits and Pieces pack.

Also included in the collection are Layered Frames (which you have seen in previous lines).  You receive six different frames with varying sizes.  Here, I  used a 4x6 Horizontal Frame to fit my photo.

  I   love the Jolly Bingo Card from the Bits and Pieces and had to find a way to used it! I  tucked it under the edge of my Layered Frame as well as added the cute pink ticket for journaling.  I  popped up the circle "25" with foam tape and placed in between my two die cuts.  

Thank you for stopping by the blog today! You can check out the collection in its entirety by clicking HERE.  Have a great day!


Supplies

Even though I'm not a kid anymore, there is still a lot of anticipation and excitement in the days leading up to Christmas and one of my favorite ways to document that is with a December Daily! You can include a simple photo or memento along with a bit of journaling for each day through Christmas or even for the whole month and by making your December Daily mini in size makes it easier to log a memory for each day .

The new Simple Stories Country Christmas collection is full of gorgeously detailed vintage and woodland images that would make any project beautiful. Besides all of the stunning papers in traditionally classic Christmas colors, there are a ton of beautiful embellishments, including lots of numbers, that make creating a page for every day in December a breeze!

For my December Daily, I made a double sided card for every day and added numbers of varying shapes and sizes to each.  I knew all of these cards would be sitting in a decorative box and to give them more visual interest, I made each set of five a bit taller than the previous and used dies to cut fancy borders on the tops. Once all of the cards were done, I made a matching box from chipboard and more of the patterned papers!

Then each card was decked out and decorated with this fabulous collection. There are plenty of pockets, frames, tags and flip outs to hold all the special memories! These are the fronts of all the cards….

and this is the back of the cards!

These are just a few of my favorite cards in this December Daily but if you want to have a look at each and every card in detail, please visit my YouTube channel for a short video. I hope this inspires you to get started on making a beautiful December Daily of your very own!

Supplies

Hi there!

Nathalie with you today with a new layout that is all about those magical Christmas days.  I wanted to use the new Holly Jolly collection to document this happy memory of my nephew enjoying Christmas carols.   This new collection is just amazing, the colors, designs were ideal to document this happy memory.

My idea was to bring a colorful background that will use the beautiful designs of the collection, so i picked a cut file from Handipaper to create a cluster of Christmas trees on the page.

To add dimension to the page, i cut the trees three times from white cardstock and stacked them together, then backed each one of the trees with the beautiful papers from the collection.  I just love the colors and designs in the papers.

The papers in the  Simple Basics Kit are perfect to create backgrounds, so i picked the soft Blush/Dots serve as the frame for my page.   Once, i glued the trees to the page, i used the Journaling Bits and Pieces to add the stars at the top of the tallest trees.  Then backed the picture with the Home for the Holidays paper , nestled it in the background, and then added a cluster of stickers to  frame the picture.

To create the title of the page, first i added an extra Christmas tree (to help frame the title) and then used the alphas on the sticker tablet and a piece of ephemera to complete the title of the layout.

I created a small cluster of embellishments using stickers from the Sticker tablet and sticker combo sheet as well as ephemera from the journal bits and pieces.   To finish the page, i added a few lines of journal and enamel dots.

The new Simple Stories Holly Jolly collection is so beautiful and filled with amazing designs that it makes is so easy to document your memories.  Be sure to check it out.  You are going to love this new collection.

Supplies

Hi Simple Stories friends!  It’s Jeanne here today and I’m happy to share the new Country Christmas Collection!   If you’re a fan of traditional red and green, vintage images, and warm and cozy plaid prints then this collection is for you!  I’ve got EIGHT cards to share to day to give you lots of ideas for your holiday cards!

I made a few cards with scenes, hand cutting waves in green print paper for grassy hills adding chipboard and die cut bits and pieces as focal points.

I love the vintage images that make this modern collection seem like a classic. The bits and pieces include several banner sentiments perfect for card making and journaling.

I like to arrange die cut bits and pieces and chipboard on clear pieces of plastic the same size as my card base.   I mix and match pieces until I’m happy with how their arranged and then I slide different paper prints under the plastic to help me decide what papers to adhere them to.   Collage cards are my favorites because I can pile on lots of embellishments.

All of my cards start with a white cards stock base.  Simply fold an 8 ½ x 11” piece of card stock in half, cut it in half and you have two card bases.  I cut a slightly smaller matt of solid colored paper before adding my pattern papers.  Simple Stories Basics papers are perfect for these matts because they are color coordinated so you know everything will match perfectly.

These cards were all created using the 6x8 paper pad.  The patterns are the same as the 12” version but the prints are smaller.  One 6x8” sheet can be cut in half to cover two card bases.   The pad has lots of patterns and there are even some printed 3x4” journaling cards included for you to cut apart if you like.

This collection has two sets of bits and pieces die cut parts.  One set includes traditional images, sentiments and tags and the other is a gorgeous set of florals waiting to be arranged!

A mini sticker book is full of sentiments and images – what you don’t use on your cards you can use to decorate your monthly calendar or planner.  And YES!  There is even some washi  in a 3 pack that you can add to EVERYTHING!
 

The Simple Stories Country Christmas collection will have you dreaming of a traditional old fashioned Christmas spent with family and friends.

Supplies

Hi! Odessa here with some more Christmas SN@P! pages. Today I’m using the Holly Jolly Collection which is packed with fun!

The Simple Stories Striped Binders are my favourite albums to use for 6x8 scrapbooking so I was pretty excited about a new colour added to the line up! The red stripe binder coordinates so well with Holly Jolly. I love the striped exterior and polka dot interior as well as the nice metal corners on the binder. I kept it simple with a Holly Jolly chipboard flower sticker and a cute Bits & Pieces banner.

This is one of my favourite layouts in my December album so far! On the right I’ve filled my pockets with some photos from when we were putting up our tree. I added lots of phrase stickers in place of journalling and added a simple card with a tree on it. Throughout December I have a box that I fill with little bits from our life and notes so that when I finally get to working on my album I am totally ready. Inside my box was a sweet bag from when I was on our annual special ornament shopping trip which I used as the background for the page on the right. 

I mounted my photo on some cardstock that I tore the edges of to give it some dimension against the background. The layers gave me the perfect place to slide in one of the Holly Jolly Bow Clips.

On the bottom I made some clusters of trees, phrase stickers and emamel dots to balance out the layout and frame the photo.

The Holly Jolly collection has lots of cookies throughout it so it was perfect for documenting one of my favourite Christmas things, baking! I love that christmas cookie SN@P! card. I used one of the page protectors with spots for 4x4 photos just to use it. I also used a 2x2 calendar card on the bottom with one of the date stickers from the Sticker Tablet as a different way to date the layout. On the right I used a large 6x8 photo and kept the embellishing simple with a couple of cute handwritten style Bits & Pieces.

I love layers so sometimes I just fill a pocket with a few stickers or Bits & Pieces to let what’s underneath peek through. Here I used some Bits & Pieces inside my pocket and stuck some of the enamel dots on the outside of the pocket. 

I love to include recipes in my album so this layout is another one all about baking. On the right is another 6x8 photo with a journalling spot from the Journal Bits & Pieces with some cute icons sprinkled around it.

I used one of the journalling cards from Holly Jolly to add a cookie recipe next to a photo from a day well spent baking. The overall layout was quite busy so I kept it simple with an adorable SN@P! card on the bottom.

Supplies

We are always looking for ways to inspire you and what could be better than some spooky ideas on how to create with our Happy Haunting Collection!

Simple Stories is introducing all new FREE downloadable project idea guides! These guides will give you ideas and inspiration for layouts, cards, altered items, mini ablums, Sn@p! albums and so much more and will be available each month.

If you are not receiving our newsletters be sure to visit our website at www.simplestories.com and scroll to the bottom of the home page to sign up to receive notification of new releases, shipping dates and ideas and inspiration! Don't want to receive notfications or emails no problem! Just visit our website and click on the project download icon at the bottom of the page for this downloadable idea guide!

so if you are looking for a project or two to create this weekend? Download our FREE Happy Haunting Project Idea Sheet from the Project Downloads section on our website today!

Hey Y’all! It’s Courtney here with another layout and today I am using Country Christmas. This collection is so beautiful and vintage. It’s has the perfect Christmas colors.

I used the 6x8 paper pad to punch my 1 inch circles, I love how the prints are smaller and you get more in the circle. I paired those circles with all of the ephemera that I picked out and set it up  diagonally. I added a few other pieces of ephemera to add detail. I used the Christmas Greetings from the mini sticker tablet.

The background paper is the Scarlet/Dots paper from the Simple Basics Kit and it’s cut down by ½ inch on the sides so I could layer it on the 2x2 element page.  I fished the layout by ripping two spots on the top and bottom and adding some gold splatters. I hope you get inspired by this layout.


Supplies

Good morning everyone! Anya here today sharing two projects I created using one of my favorite collections this year – Simple Vintage Country Christmas!

With these projects today I wanted to share one of my favorite tips I go back to when creating. It's not a special technique or an unusual way of using products, but it's more about time saving! Do you ever feel like sometimes it takes more time to clean the table then to create a project? Sometimes I do! I like starting a new project with a clean table, it takes a lot of time to clean between each of them. Well, my tip for today: create a card or two while you have your supplies all over the table after creating a layout. For such cards I use the same color scheme and sometimes even scraplift a part of the  design. I found that once my mind is set to something specific, it's so much faster and easier to create another little project with the same supplies.

I loved the soft blue and green shades in this line and used them to record a Christmas Tree shopping tradition. I knew I would want to use that green polka dot paper for the card later, so I cut out about a 9” square from the middle of that 12x12” patterned paper.

I decided to keep the card pretty simple, basically repeating the background design from the layout. For the focal point of the card I used one of the 3x4” elements and decorated it with a few popped up die cut pieces.

Hope you'll give this tip a try next time you sit down to create. When you are creating a layout, it's always great to get a bonus project done!

Supplies

Hi there! Nicole here today to share with you a whimsical project made with the Country Christmas collection.

I decided to use the various patterns in this collection to create a bold title for my project. I used patterns from the 6x8 paper pad and used 2" squares to create a hand drawn title, cutting each letter from a different patterned paper. This adds a lot of color and whimsy to a typical holiday project.

I added a few diecut holly leaves to the sides of my title and used some circle stickers from the Country Christmas Mini Sticker Tablet as holly berries in my design.

It is easy to create a unique and whimsical project using traditional patterns and holiday colors - I hope you will give this a try!

Supplies

Hot cocoa, holiday movies, and time with family ... the holidays are just around the corner and I can't wait! Hi, everyone! It's Jana Eubank. The Country Christmas collection has a classic holiday vibe that makes me want to snuggle up in a blanket next to the fireplace and watch the snow gently fall outside the window. It also puts me in the mood to do a little Christmas scrapbooking!

I pulled out a Christmas Eve photo of my kids next to the tree and created this next layout. I layered up several sheets from the 6x8 Paper Pad to create a textured mat for the photo. I even fussy-cut the large wreath from one of the papers to tuck behind the left side. Along the bottom of the photo, I added stickers from the Combo Sticker Sheet and the Banner Sticker Sheet.

For the background I layered up even more patterns ... Can you tell I love patterned paper? Ha! I used the Cardinal Simple Basics paper as the base, and then added the 2x2 Elements Paper (green pine trees) matted with the plaid side of the Christmas Magic paper.

I always create several 12x12 layouts for our family album, but my favorite holiday project to work on each year is my December Album. I typically put the album together after the holidays are over, keeping track of our activities throughout the month to go with the pictures I've snapped. This year, I'm going to try a new approach! I created my album ahead of time with the Country Christmas SN@P! Cards, Bits & Pieces, Floral Bits & Pieces, Chipboard Stickers, and the 6x8 Paper Pad. I then placed white cardstock in the spaces where I plan to add photos. 

I have a photo printer at home and so this project should come together fairly easy, even if I only have time to work on it once a week throughout the holiday season. I'm excited to give this approach a try!

Of course I am using the coordinating Country Christmas 6x8 Holilday SN@P! Binder for this project! If I happen to need more space for a particular event, I can always add more pages, or move things around with the simple-to-use D-ring. I LOVE these albums so much!

I hope you have found some inspiration to get you excited for your holiday projects this year! The Country Christmas collection has everything you need to make your Christmas crafting beautiful AND fun!

Supplies

Pages