
Hi Simple Stories friends!
Nathalie here with a new layout all about my crafty life. I have been blessed to be part of the Simple Stories Creative Team for the past three years and are delighted to come back for a new term ( so happy to have been invited back. So, what better way to celebrate this new term than documenting the moment with the new Hey Crafty Girl collection.

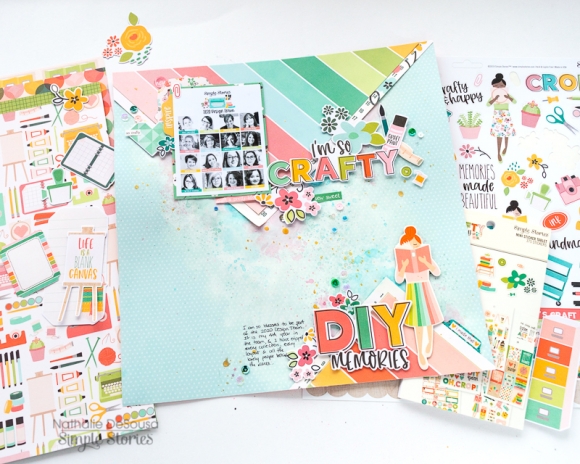
I started this page by creating a very colorful background. For this i reached for the Sky Dots basic paper as the background for the page. Then added a bit of mixed media just to help me add a touch of art to the page.
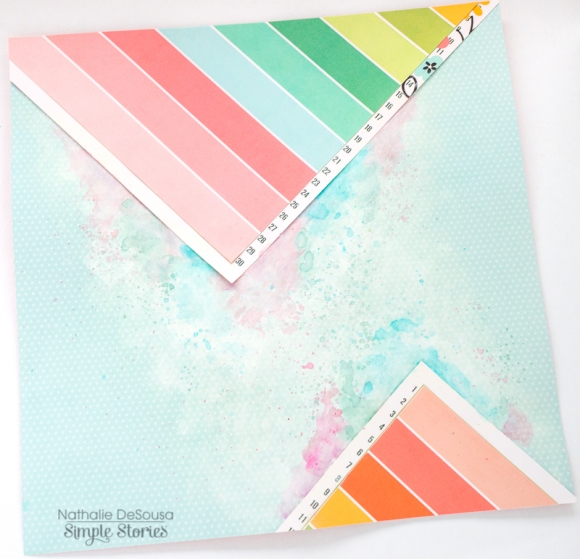
My design choice was to create large triangles of paper on the top and bottom edges of the paper. I layered the Happy and Crafty paper on top of the Create Beauty. These were then glued to the background forming the large triangles you see in the page.
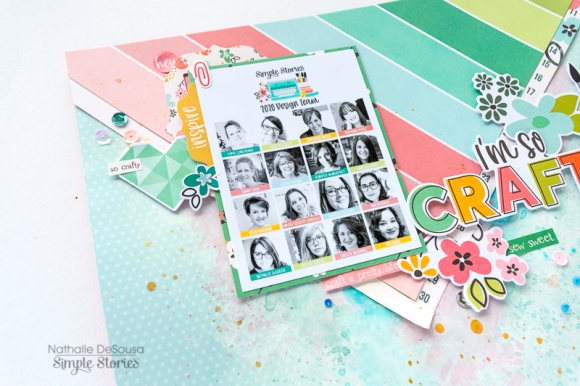

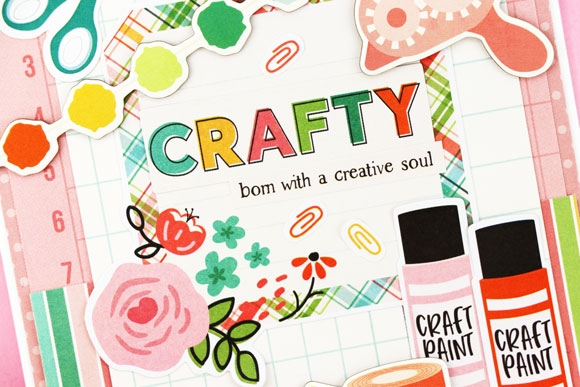
Next, i backed the picture with the So Artsy paper and then glued it on to the top left side of the page. Then started using Bits and pieces, Journaling Bits and Pieces, stickers, chipboard stickers to create clusters around the picture making sure to stretch them past the triangle shape. So many cute embellishments made this so easy to put together.
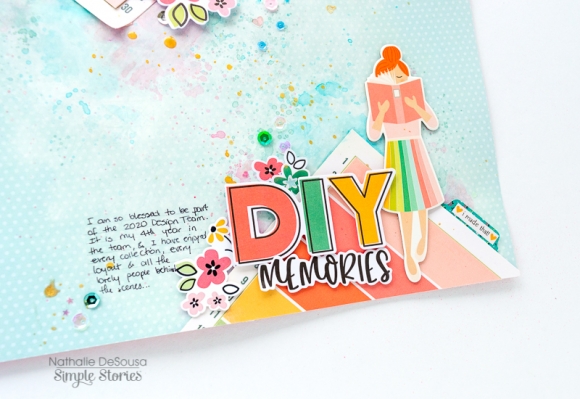
All that was left to do was add a large title to the page. I started with the large crafty girl image on the chipboard stickers - this helps balance the page- and then used the Bits and Pieces to add the title next to her. A few extra embellishments complete the title. All that was left to do was add my lines of journal and a few sequins all over the page.
I love how this page turned out! The colors and designs in the collection are so cute and versatile. What better way to document the start of this new term with Simple Stories than to use the new Hey Crafty Girl for it. Remember to check it out, you are going to love it!
XO
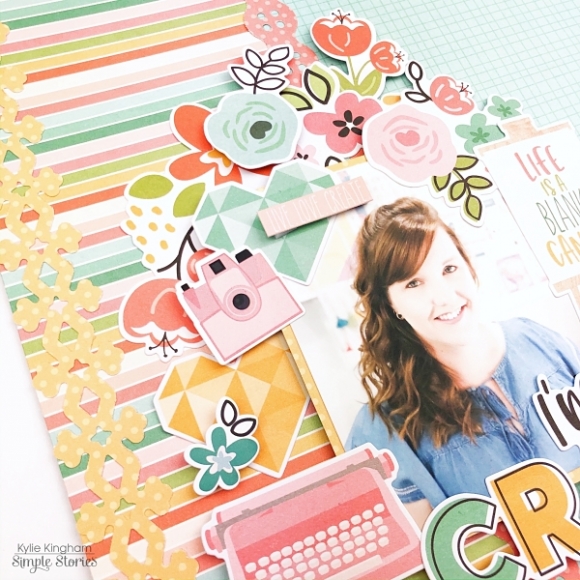
Hello sweet friends! It’s Kylie with you again today with a new layout I wanted to share.
I have a little confession to make! In all my years of scrapbooking I could probably count on one hand the amount of times I have scrapbooked a photo of myself! Is this something you are guilty of too?? I seem to be always the one behind the camera which is where I feel most comfortable. ( No selfie queen here folks). When I first saw the ‘Hey Crafty Girl’ collection I knew it was perfect for scrapbooking a photo of myself…..and do you know what?? I totally survived the experience and have since encouraged myself to do it more! It wasn’t so scary….

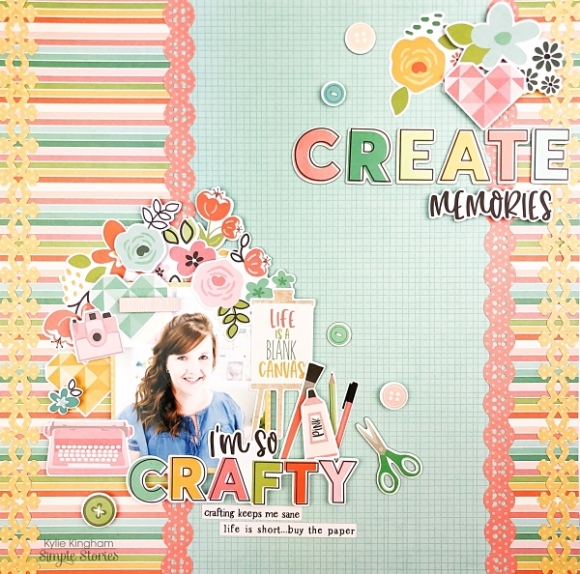
One of the many things I love with this collection is the colour palette. I selected the 2 x 2 elements paper and the 4 x 6 elements paper to form my background page. I did this by simply cutting some border pieces in the 2 x 2 elements sheet and adding them vertically over the top of the 4 x 6 elements paper. If you have seen my previous blog posts of late, you will know I have been trying to use more creative punches in my craft stash. I used some border punches again with the Simple Basics paper pack to create some fun interest to my background.
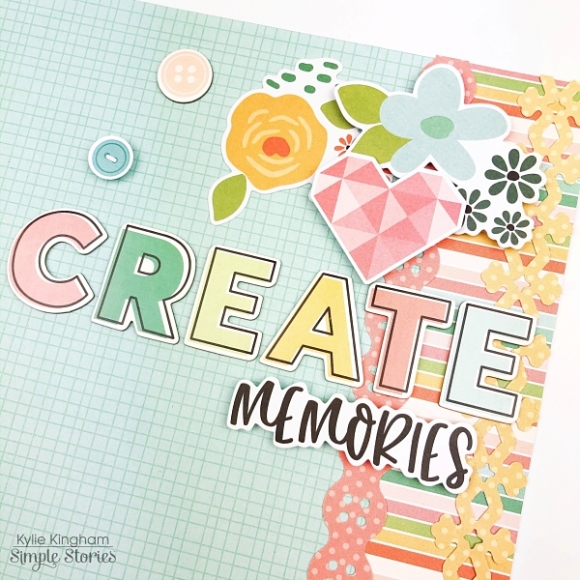
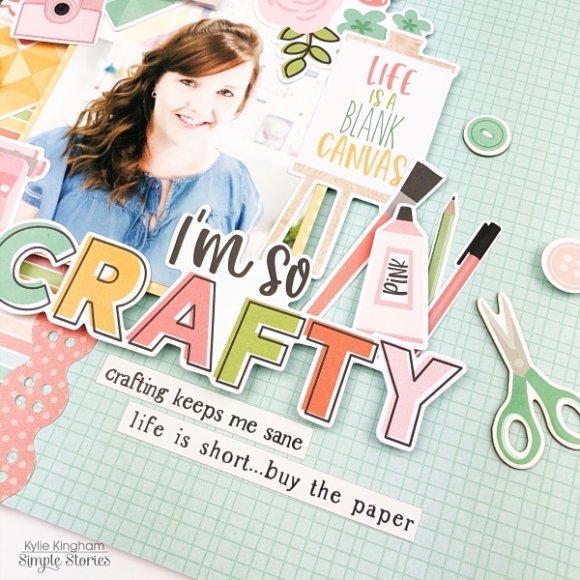
Once I was happy with my background, I created some embellishment clusters on opposite sides of my background paper. I did this using a mixture of the gorgeous chipboard stickers, die cuts and sticker sheet. Some were adhered with foam tape so that they sat up from the background with dimension.
I really love the main title I created for my page. This was made from the die cut pack and I added some phrases below from the sticker sheet. The positioning of these also gave a nice balance to my overall, completed layout.
Thanks for stopping by the blog today and for seeing my layout. I hope it gives you a little inspiration for your next crafty project and maybe even encourage you to take and scrap more photos of yourself.
Until next time,
Hi! Odessa here with a cute SN@P! 4x6 album using My Valentine. Valentine’s themed collections are one of my favourite themes to work with because hearts and pink and things like that are stuff I use every day. I used a 4x6 SN@P! binder to make a mini album about my fav people, my family.
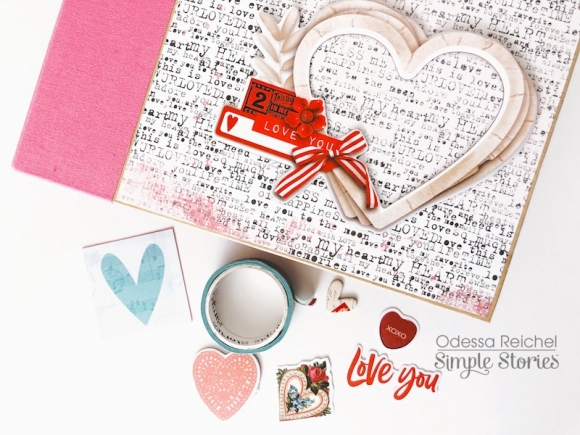
For my cover I used the newsprint-y side of the Be Mine cardstock with one of the My Valentine Layered Frames on top. Simple yet so sweet.
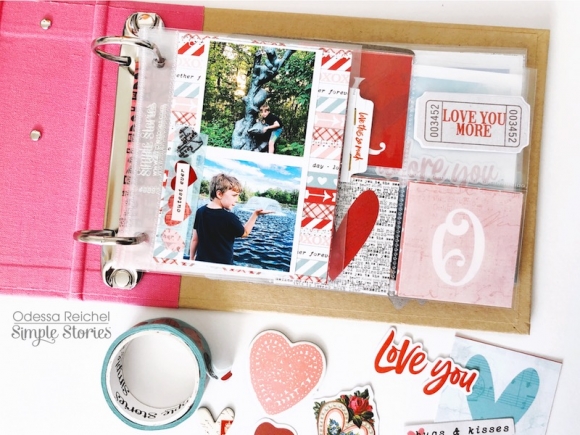
I used one of the single 3x4 page protectors and added a photo strip with simple embellishments. The Mini Sticker tablet has some great tab stickers that were perfect to add along the edge.
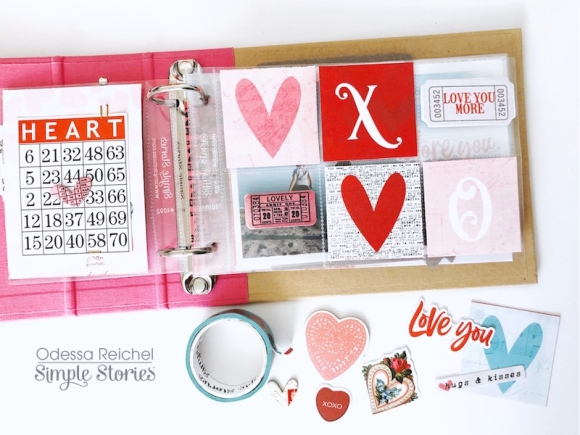
On the backside I adhered the fun bingo card from the Bits & Pieces and added a heart sticker in the middle. Next to that I used one of the protectors full of 2x2 pockets which I filled with cards cut from the 2x2 elements and some ticket embellishments from the stickers and Bits & Pieces
The other side of the 2x2 pockets are similar to the side before for a fun decorative page. I used a 4x6 photo of my boys that I just love with some simple phrase stickers from the Combo Sticker sheet and the Mini Sticker tablet to embellish.
I just love all the pink in My Valentine! The pink phrase stickers in the Mini Sticker Tablet might be my favourite thing in the whole collection.
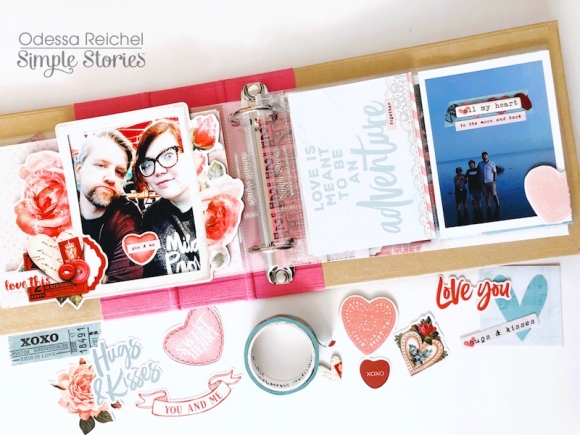
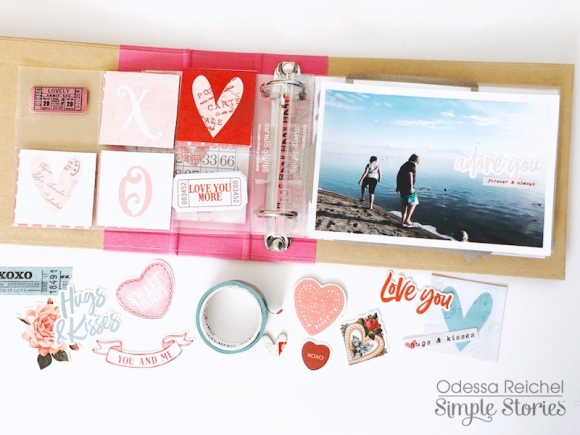
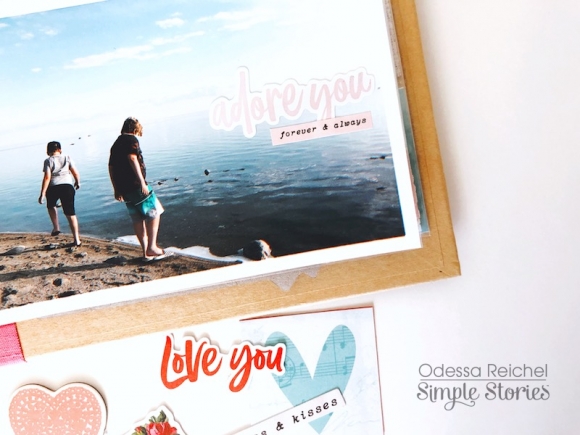
On the other side I cut down one of the coordinating Simple Basics cardstock sheets in Blush Dots and slid it in the 4x6 pocket. On top of the protector I attached one of the My Valentine Layered frames with a photo of my husband and I. Next to that is another cherished photo with some washi layered under phrase stickers and a cute chipboard heart in the corner. I used one of the 3x4 elements in the other pocket.
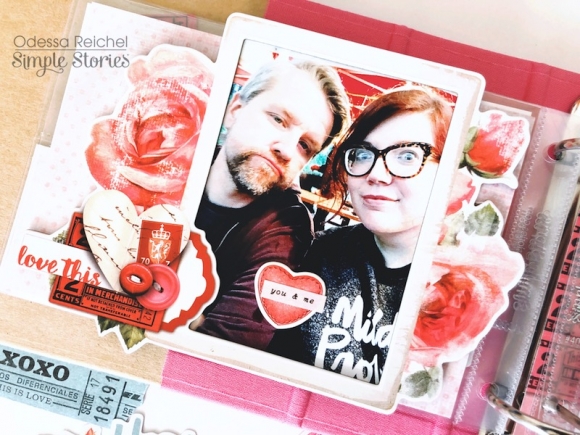
The Layered Frames are so fun to play with. While they seem like they’d be best for big single page layouts I also really like to use them on top of page protectors to add some dimensional embellishment without any fuss!
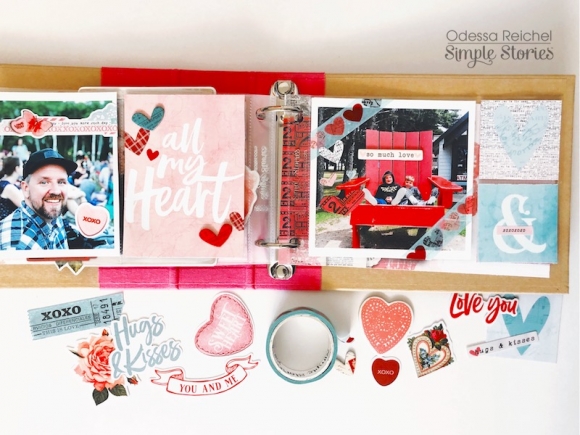
Finally I finished it off with a few more loved photos and great embellishments from My Valentine. Lots of chipboard hearts, the super fun heart washi, phrase stickers and one of the border stickers from the Mini Sticker Tablet on a photo. The best part of using Valentine’s themed collections like My Valentine is that when in doubt you can always add more hearts!
Hey y’all! Courtney here and I am sharing my last layout as a Design Team member. I’m using the collection, Hey Crafty Girl. I found it only fitting to highlight my two Design Team announcements from last year.
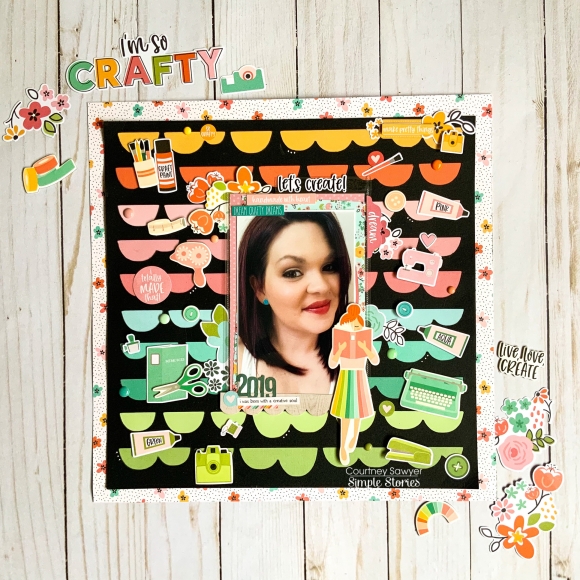
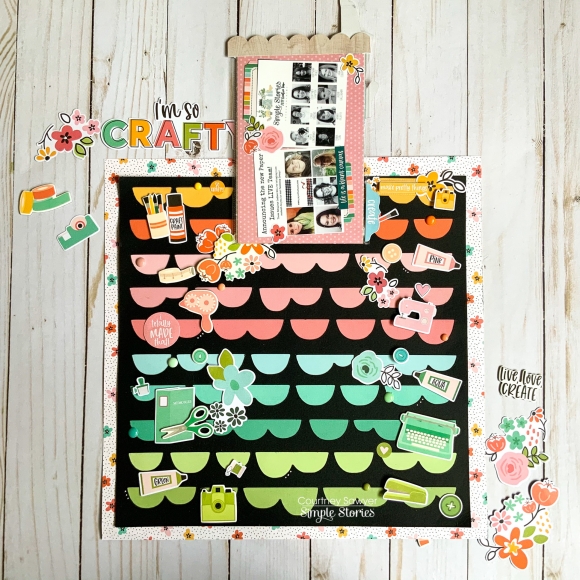
I knew that I wanted a colorful layout, so I picked the Crafty & Happy paper. Instead of just using it as is I decided to use a cut file from Paper Issues called Just a Few Bumps in the Road, and I cut it in black.i wanted all of the colors to really pop against it. I cut my pattern paper down to fill my cut file in rainbow order. I was super excited to see all of the embellishments that I could use to color block on my layout. I layered my photos on some dot paper and a 4x6 card to match the collection.
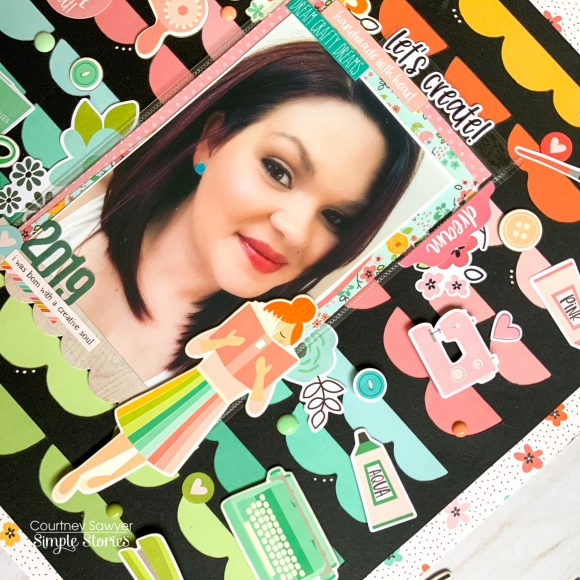
I went through every embellishment and matched them with their color and chose wanted I wanted to keep on my layout. I also used a 4c6 photo photo flip so I could add my design team pictures.
I added some enamel dots from multiple collection that matched the colors and then I used my white gel pen to add some finishing touches. I absolutely love how this turned out! This collection is perfect for scrapbooking the things I love! Thanks for stopping by and thank you for all of the love this past year!

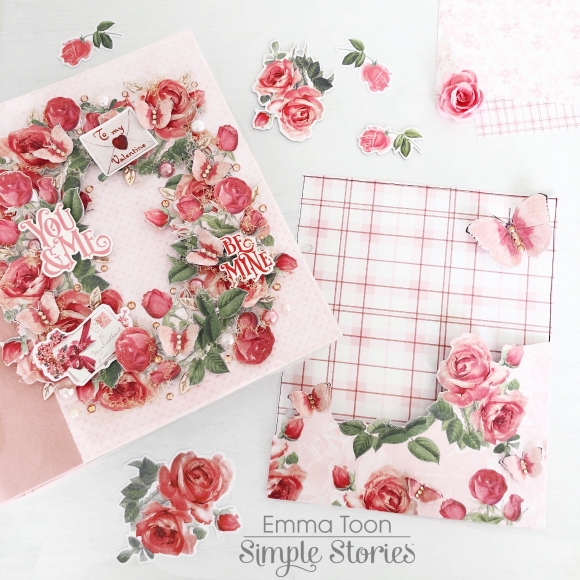
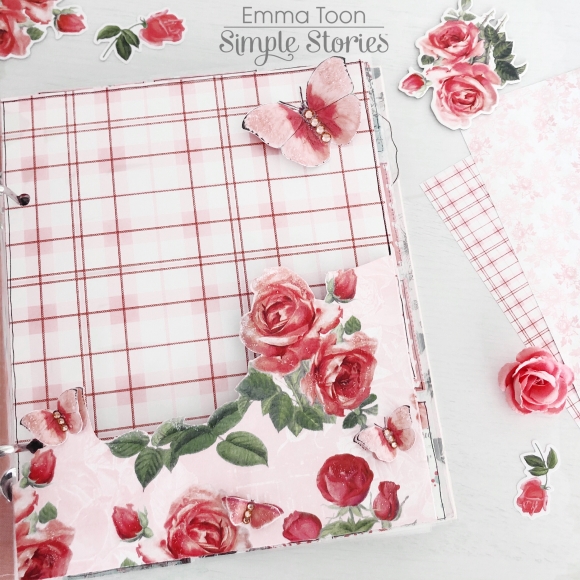
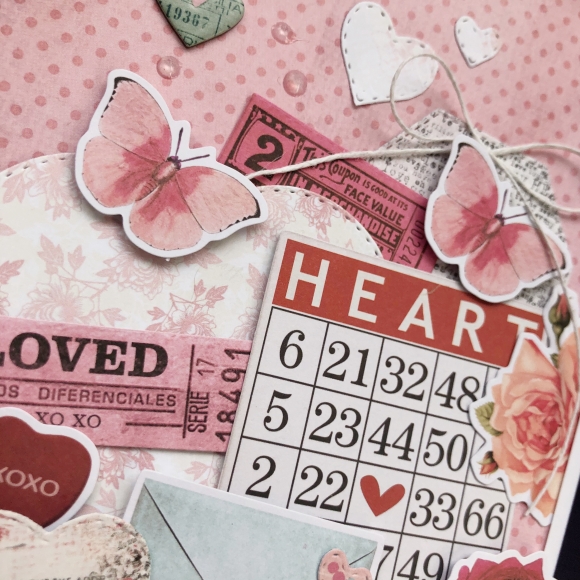
Hello again, Emma with you today! I’d like to share with you how I’ve decorated the front of my Blush Sn@p! binder with the beautiful My Valentine Collection by Simple Stories. This collection is so pretty, full of florals and fun retro style images! I adore florals so wanted to use them to decorate the front of my binder. I chose to fussy cut out lots, and I mean lots, of the roses from the ‘my sweetheart’ 12x12 sheet of paper. Dotted through this paper are butterflies which I also cut out.
Now the fun bit, firstly I covered the front, back and insides of the binder and then I placed out a rough idea of how I wanted the roses to sit. I gradually built up layers of roses in an oval shape.
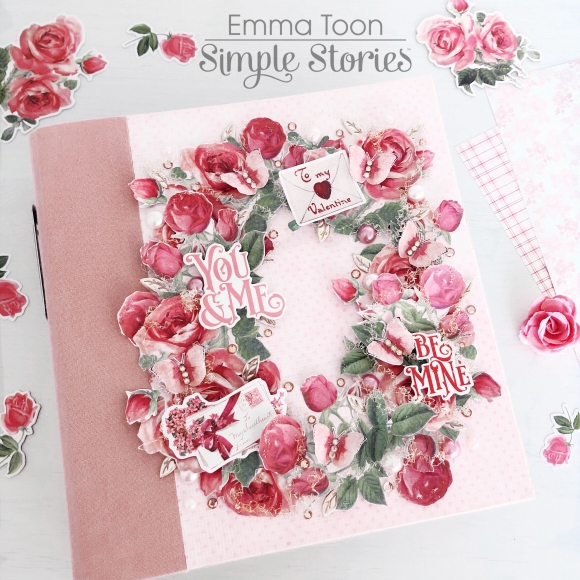
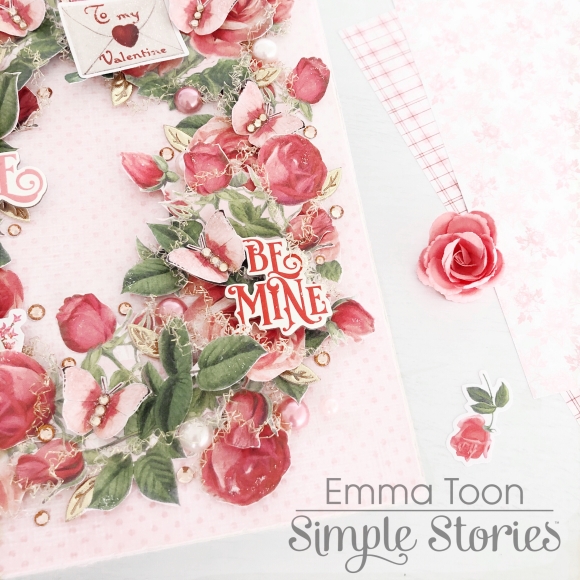
Once I’d got the roses all stuck into place I then used gold thread, pearls and little crystals to add more detail, also gluing the butterflies into place.
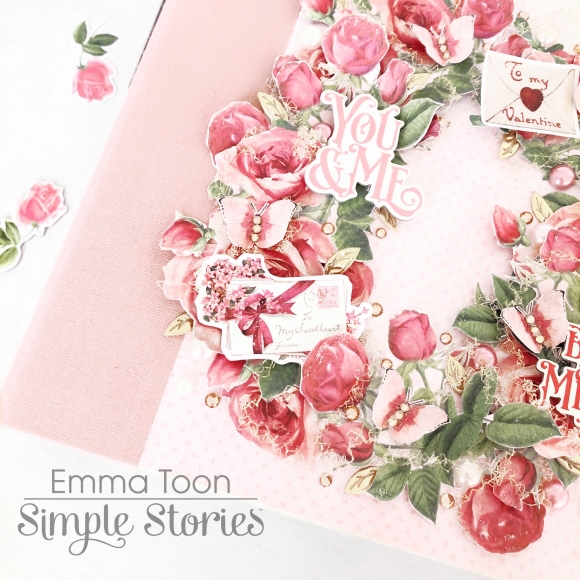
You can see on these close up pictures the layering and how I put tiny crystals onto the butterfly’s. As if that wasn’t enough detail, I decided to also add some of the ‘bits & pieces’ .
I’m a sucker for making pockets to fill with tags. Tags are such a simple way to include journaling and additional photos into your binder. I’ll let you into a little secret, I don’t like my handwriting as it’s quite messy, so tags are a great way to hide away my journaling on the reverse!! ;)

I had such fun adding more detail to my pocket divider, butterflies, gems and glitter glue all added to the interest!
So there we have it, the start of my project using the My Valentine collection.

I hope you enjoyed hearing a little bit about my valentines binder, you can see more of my projects over on my Instagram, which you can find here https://www.instagram.com/heartsbyemma
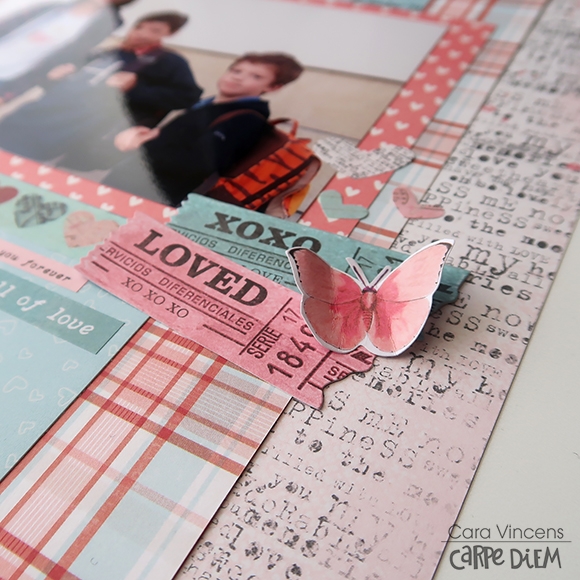
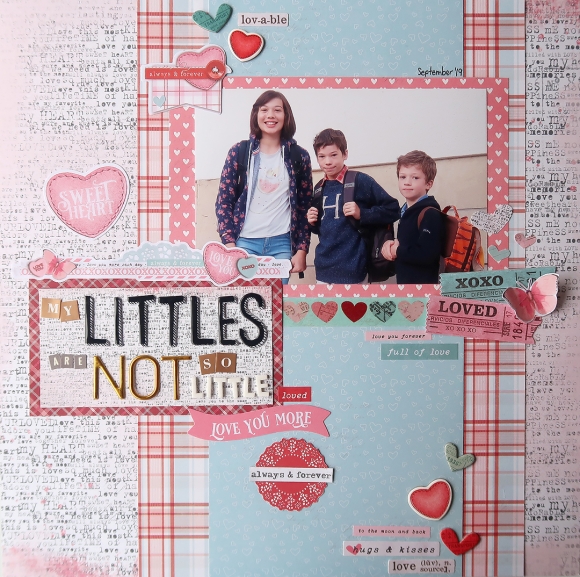
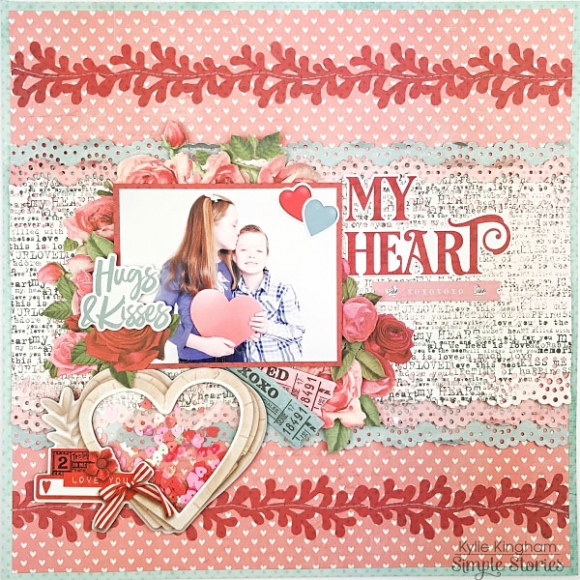
February is not far off and it’s the season of LOVE. My Valentine is a gorgeous collection to help you showcase your loved ones. It’s Cara here today and I’m not only sharing my layout but 3 of my favourite people (my teen boys aren’t included because they would be so embarrassed to be on a layout with pink hearts, haha!). So grab some photos of your favourite people and scrap along with me!
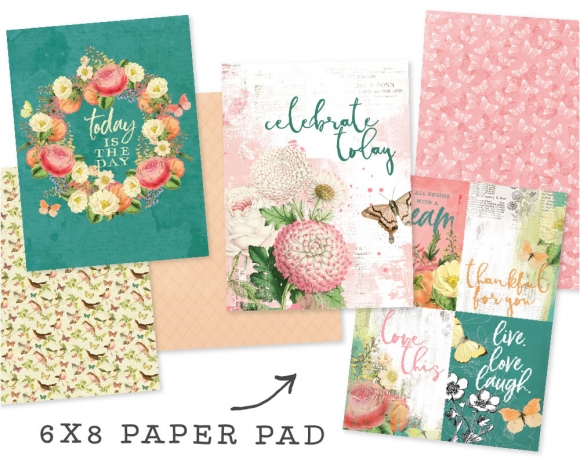
When I first saw the black and white typed patterned paper, Be Mine, I knew I wanted to use it as my background, even before I chose my photo. I also chose the smaller scaled version from the 6x8 pad to house my title. I layered some of my other favourite papers from the collection and made a strip down the middle to highlight the photo.
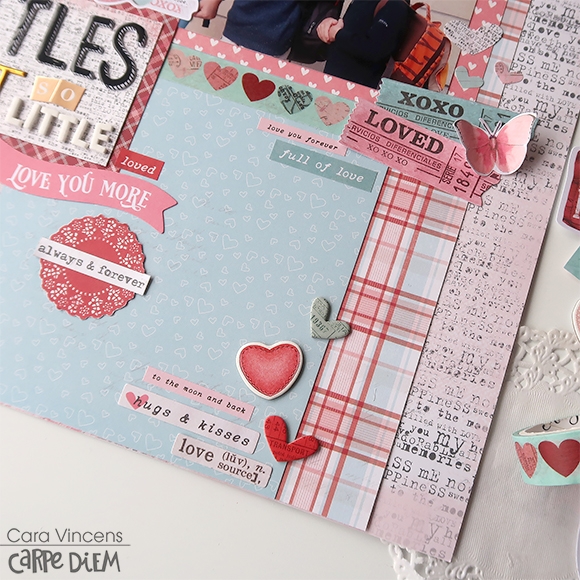
I matted the title with another paper from the 6x8 pad and that long xoxoxo sticker (from the mini sticker tablet) was the perfect little crown to top off my title. It actually was a happy accident, because I really loved that sticker, I mean REALLY loved it and I couldn’t find any where to put it. I tried on top of the title block and LOVED the result. It added a softness that really gelled with the rest of the layout.

I did not hold back on the embellishments and I scattered clusters through out the page. I fussy cut that red doily from the 2x2 elements and it fit perfectly under the curve of the ‘love you more’ banner. I added a few trios of hearts through out the page. I LOVE putting hearts on my pages in general, but here I may or may not have got a little crazy!
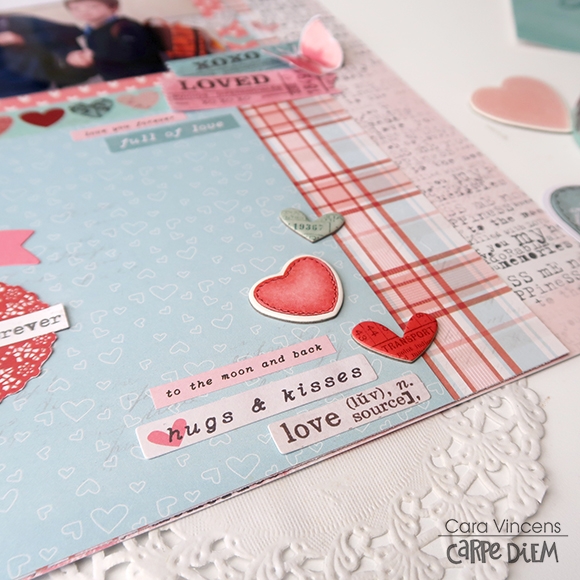
I mixed up the colour, texture and shapes of the hearts, there is such a variety in this collection. There are stickers and die cuts and there are stitched hearts, candy hearts and these fun, thinner hearts that almost look like rabbit ears.
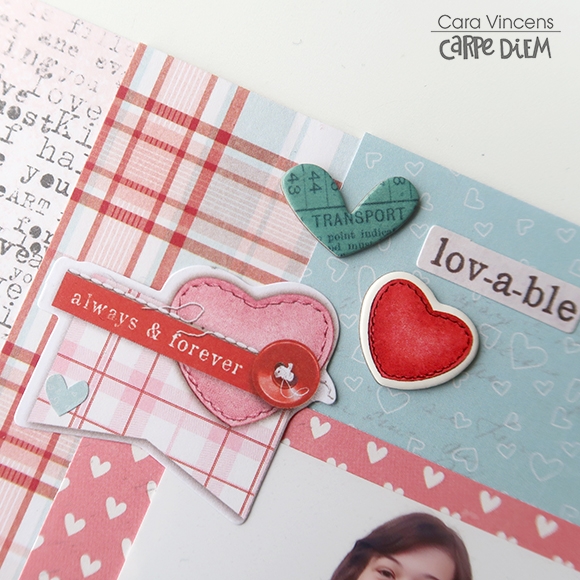
I LOVE butterflies so if there is even one butterfly in a collection, I will use it! The ‘xoxo’ and ‘loved’ ticket die cut looked a little bare without this little guy, so it’s perfect. There is also one on that long sticker from before.
Hope you have fun scrapping your favourite people!

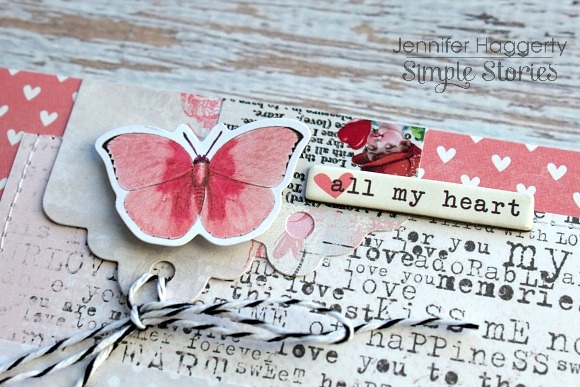
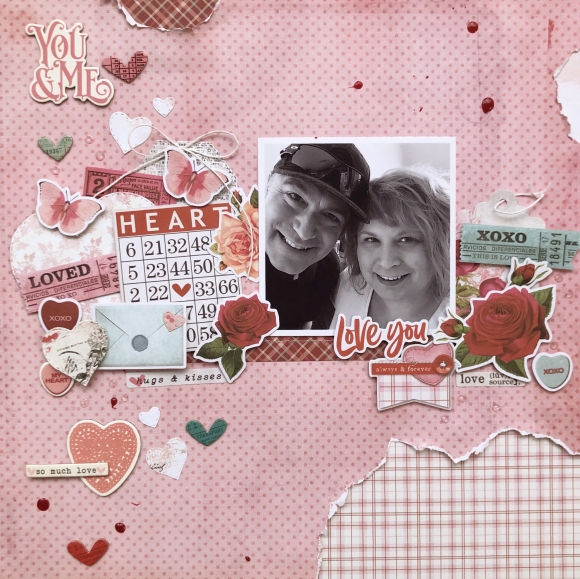
Hello friends! Its Jennifer on the blog today to share a layout I created with the very beautiful Simple Vintage My Valentine collection! The prints are soft with gorgeous florals and whimsical hearts. You not only have the traditional red and pinks you would find in a Valentine line but also coordinating pretty light blues and greys.
I began by matting the B side of Be Mine to the pink and white heart print of the back side of the 2x2 Elements. Then from the Simple Basics Kit, I cut a 7x11 piece of the Lace Dots and adhered to the center of my page to break up the type print. Just over the top I adhered a 6 x 10.75 piece of the beautiful floral of the B side of Just A Crush.
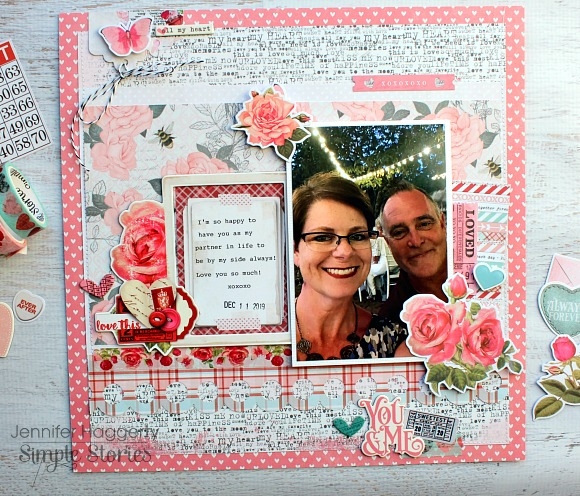
Before adhering my embellishments and photo, I used a border punch on the plaid of of the B side of Love Struck. I then used a strip of the gorgeous floral from the My Valentine Washi Tape.
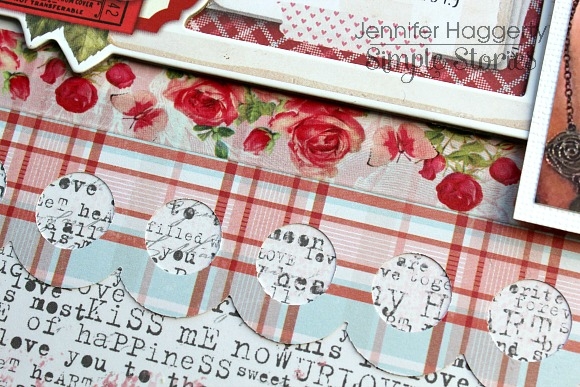
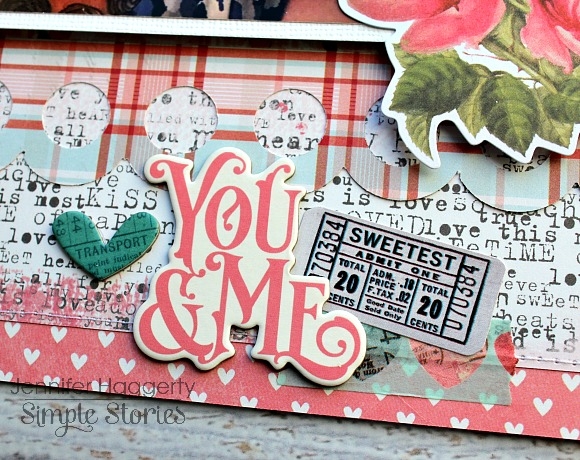
My title is from the 6x12 Chipboard which I layered over a ticket sticker from the Combo Sticker sheet as well as a small strip of the blue heart Washi Tape. I also loved the teal blue chipboard heart so I added that for accent.
Since the Layered Frames did not fit the photo I wanted to use, I decided it one would be perfect to frame my journaling! I cut one of the cards from the 3x4 Elements and adhered it under my frame.
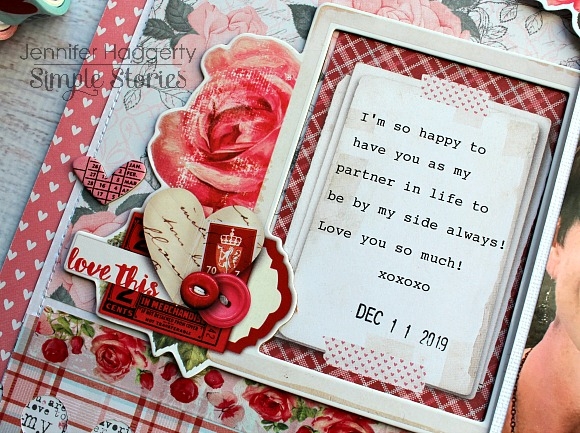
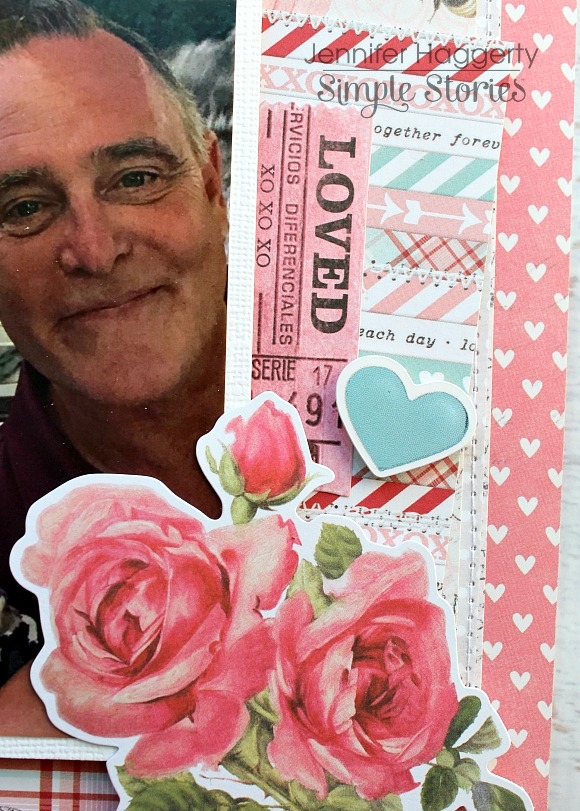
I matted my photo onto white cardstock and affixed it with pop dots to so it would lay even with my Layered Frame. I tucked another fun 3x4 Element under my photo then a layered this "LOVED" ticket and floral cluster to accent.
At the top left of my layout, I added tags found in the Bits and Pieces and on the Combo Sticker sheet and affixed both upside down. I added bakers twine from my stash as well as popped up this beautiful die cut butterfly. I thought the little "all my heart" chipboard sentiment was a nice added touch.
Thank you for stopping by the blog today! See the entire Simple Vintage My Valentine collection on the Products page! While you are there, check out the newest lines Simple Stories has in store for 2020! Have a great day!

Hi there!
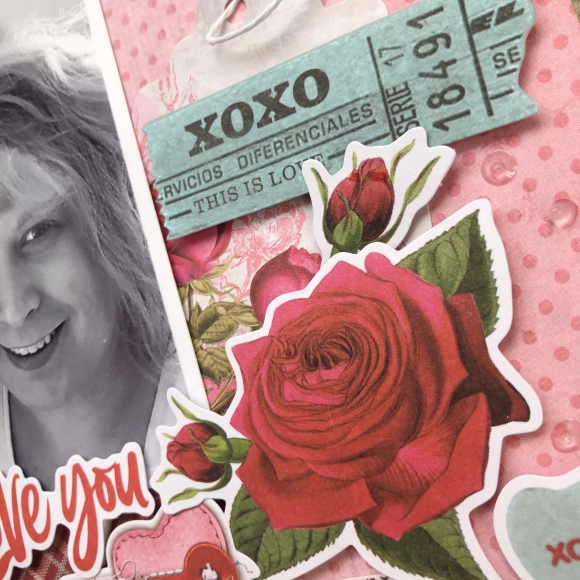
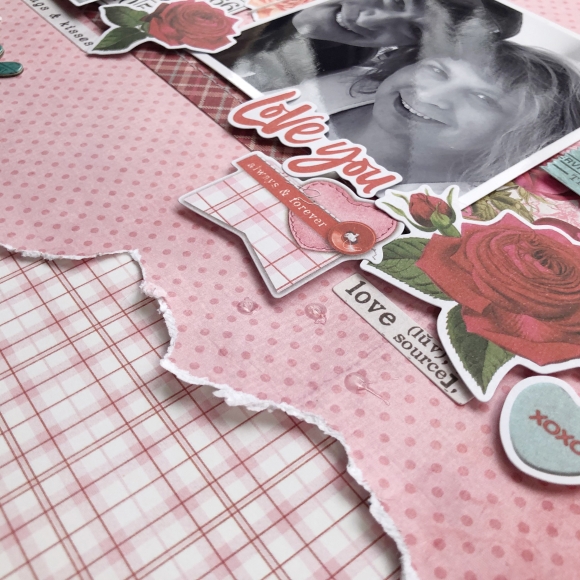
Nathalie with you today with a new layout that is all about documenting LOVE. With Valentine's Day approaching, i wanted to share with you a fun idea to create a page about your loved one using the beautiful SIMPLE VINTAGE MY VALENTINE collection from Simple Stories.
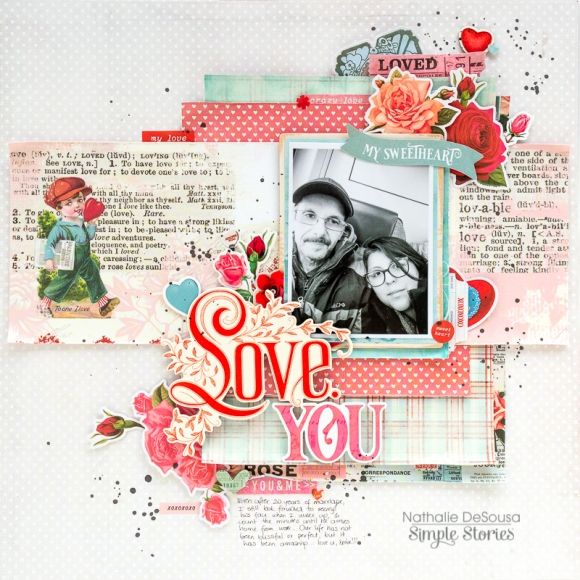
I love the Sn@p Basic paper packs as they are the perfect background for your pages. This time, I chose the lace dots as the background, and cut a large strip of the Love You paper to serve as the anchor of the page.
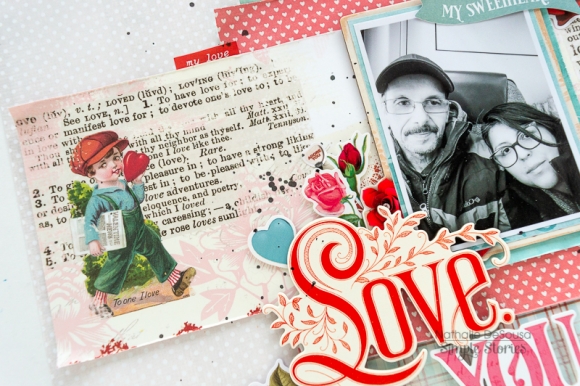
Before gluing the paper to the page, I pulled papers from the 6x8 paper pad and the 12x12 collection to create layers behind the picture. I added a bit of paint to some of the edges of the paper to continue the look of the Love You paper strip.
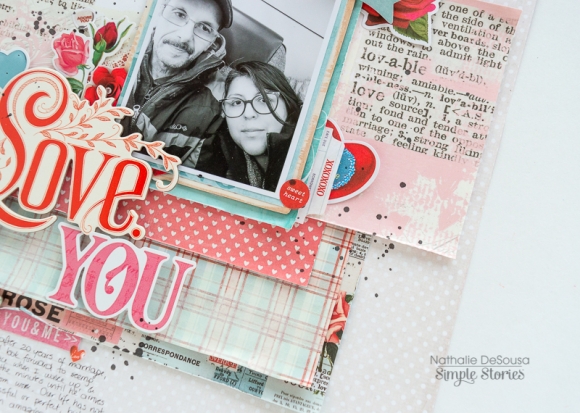
I made sure to distress the edges of all the papers I used, and glued them together to the center of the page. I backed the picture with one of the Chipboard frames, so that it peeks out behind it and glued it on to the paper strip.
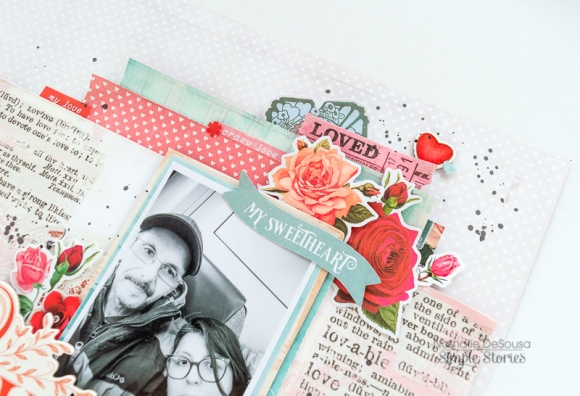
With so many cute embellishments -including all the flower die cuts- i just started layering them between the paper strips so that they formed a diagonal line on the page, and cluster at the corners of the picture.
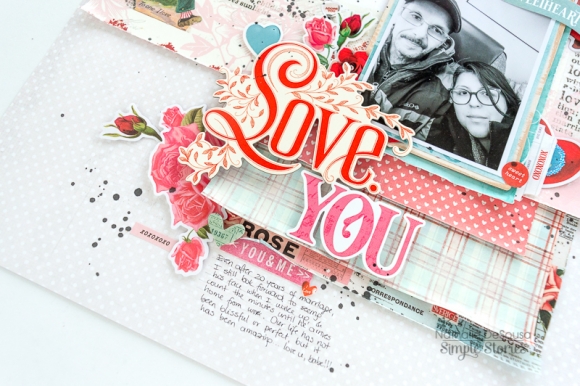
I combined the Chipboard stickers and Stickers to create the large title of the page, then layered a few more embellishments beneath the stickers. I added my lines of journal at the bottom of the paper layers and then added a few splatters of black ink to complete the page.
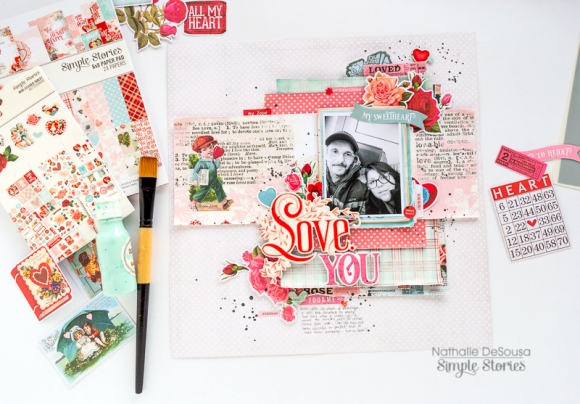
This was so easy to put together, and I just love how it turned out ( in a small amount of time!). The new SIMPLE VINTAGE MY VALENTINE collection is just perfect to document your loved one. Remember to check it out.
XO
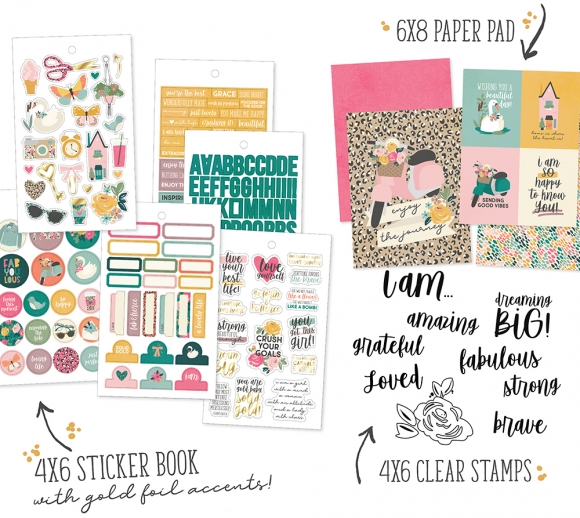
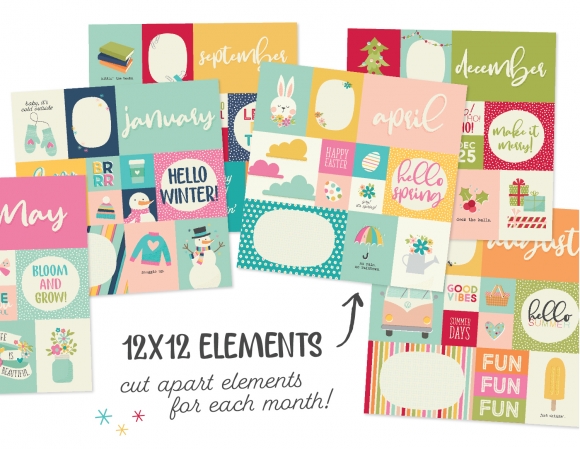
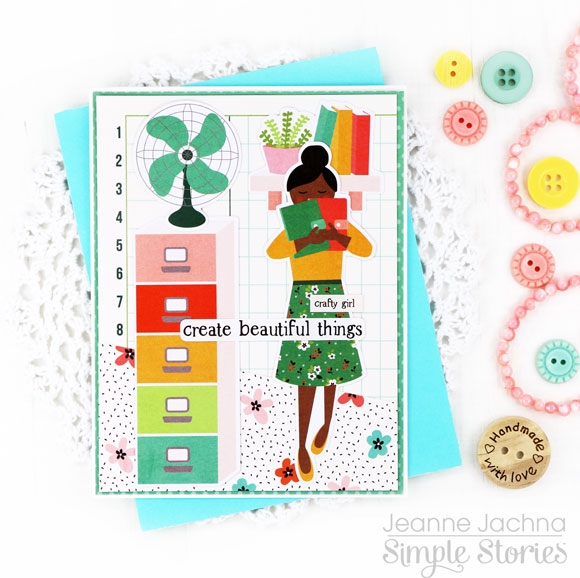
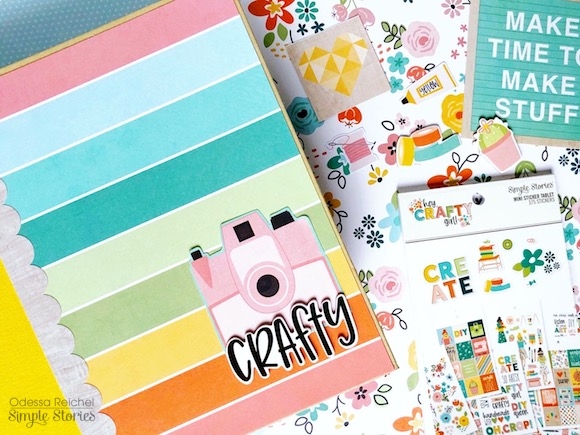
If you’re a DIY sort of gal (like me) then WOW! Do I have the collection for you! Simple Stories Hey Crafty Girl is going to steal your heart, because it’s all about your favorite thing.. MAKING! Just the name is practically calling out to you!
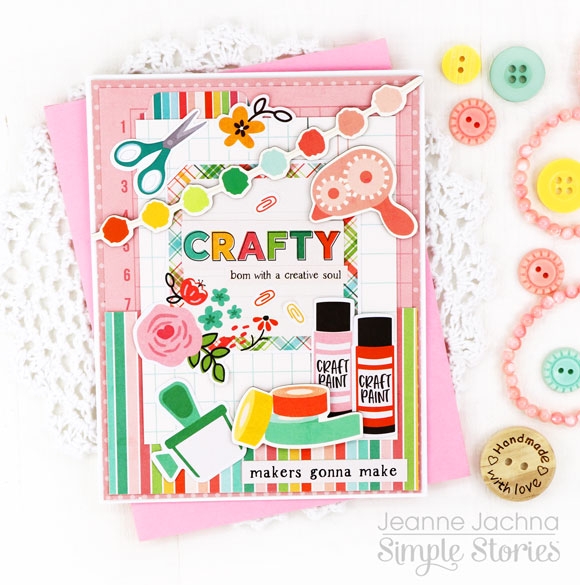
You’ll love the printed pattern papers with numbered grid marks, paint swatch rainbow colors, ruled lines, florals, plaids, dots and more.
All of my cards start out with a white card stock base topped with a slightly smaller matt cut from the Simple Stories Simple Basics papers. Each sheet is color coordinated to match the printed papers in the collection. The Simple Basics papers are solid on one side and have a soft dot print on their reverse. When patterns get a little busy, it’s easy to break things up with a panel of solid.
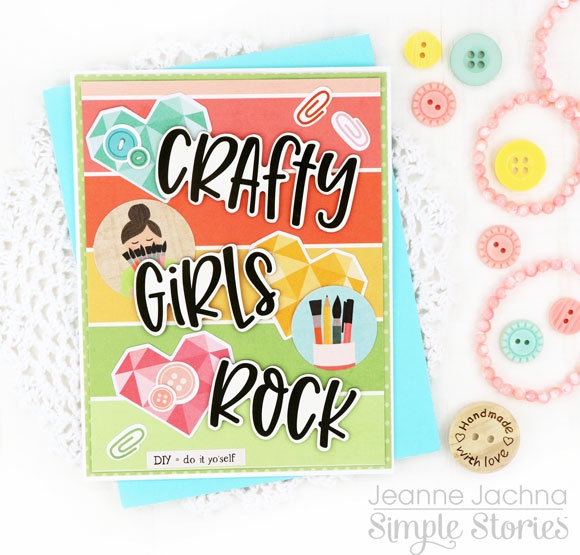
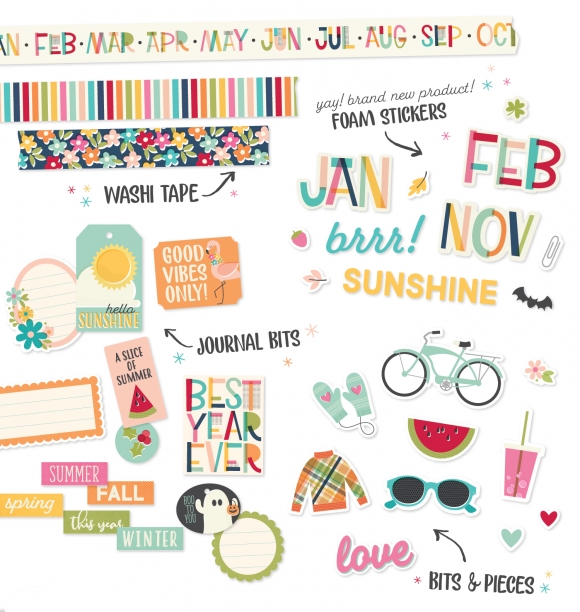
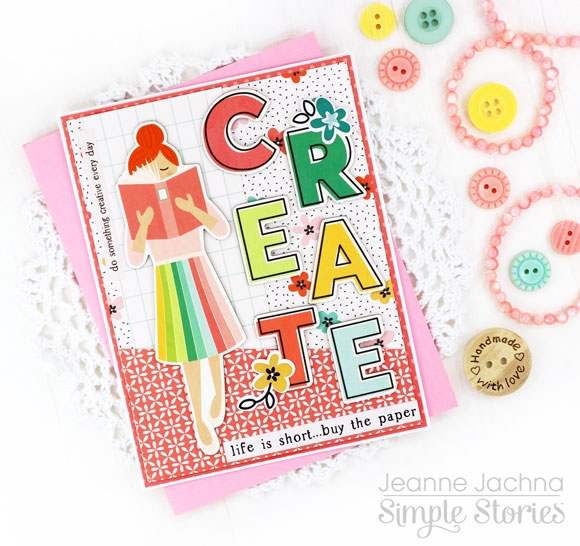
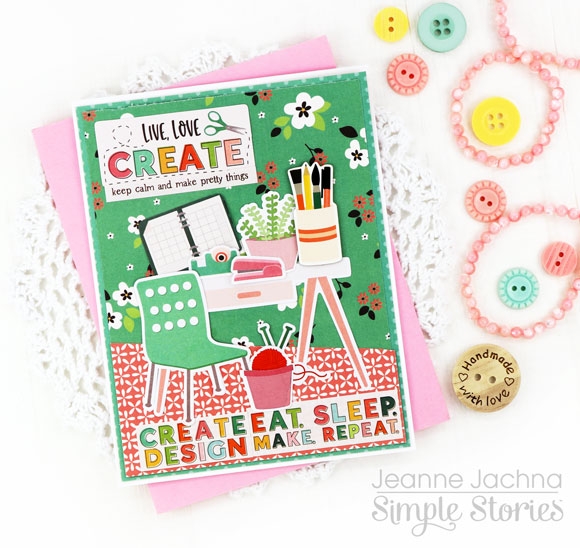
I’m smitten with the fun sentiments in the set that you’ll find everywhere.. in the Bits and Pieces, Stickers, and Chipboard. Sentiments like “Life is short – buy the Paper!”, “Crafty Girls Rock” and “Keep Calm and Make Pretty Things”. Are you smiling yet?
We all love showing off our crafty space. A place where we can create, dream, imagine and explore. And while our little hobby can get expensive. lets face it.. it’s cheaper than therapy! LOL! And the best part of all.. I feel so blessed that paper crafting has helped me find friends that enjoy making just like me.
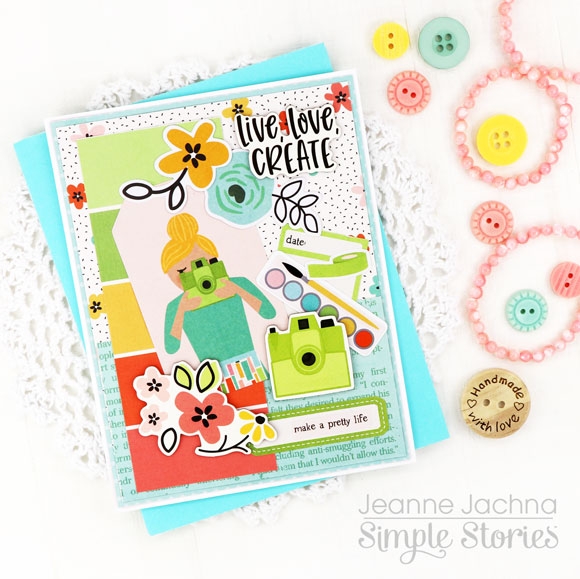
The images are all wonderful too! You’ll find tubes of paint, tape runners, washi, flowers and lots more! Most of us are multi taskers, and this collection is too. You’ll find embellishments for your inner photographer, decorator, journalist and fashion designer too!
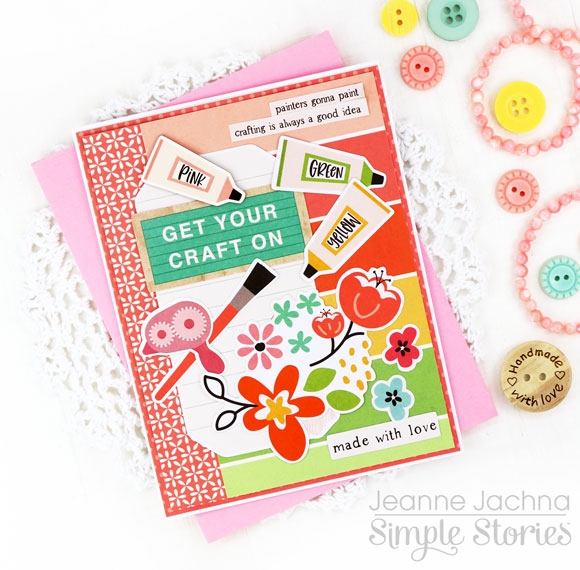
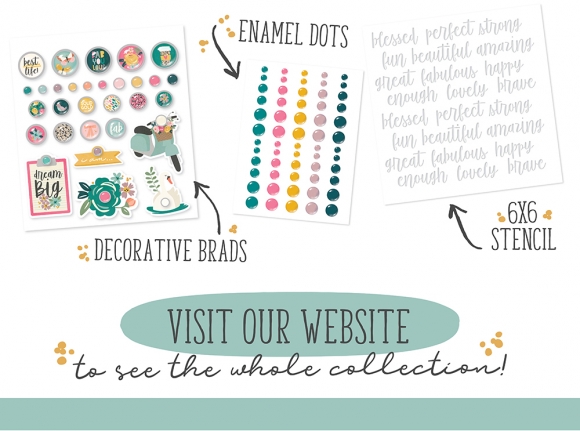
This collection includes traditional Bits and Pieces as well as Journaling Bits and Pieces die cuts. The journaling set includes tags, tabs and labels perfect for layering.
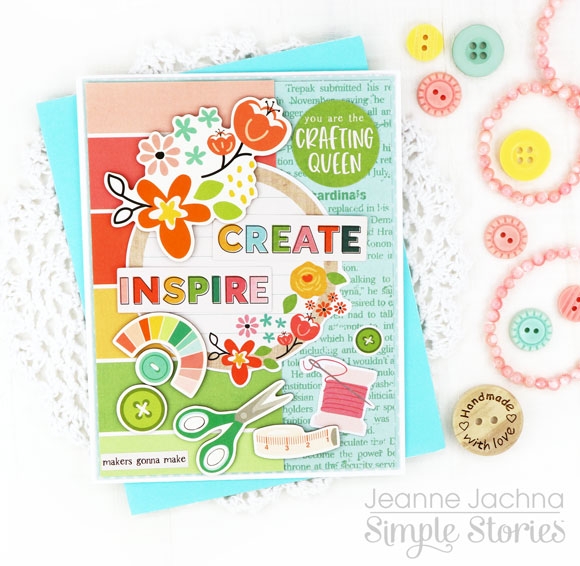
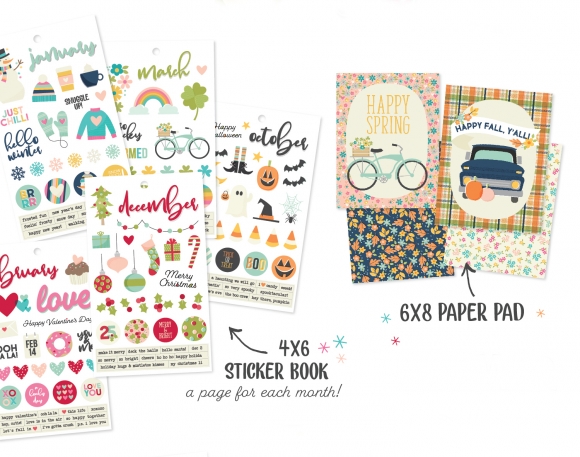
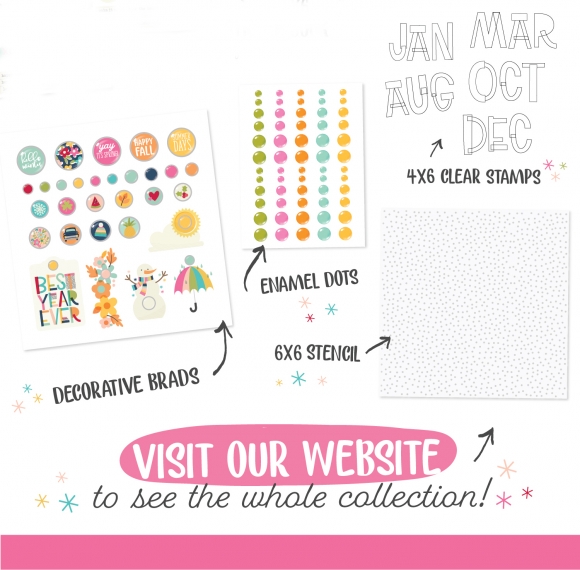
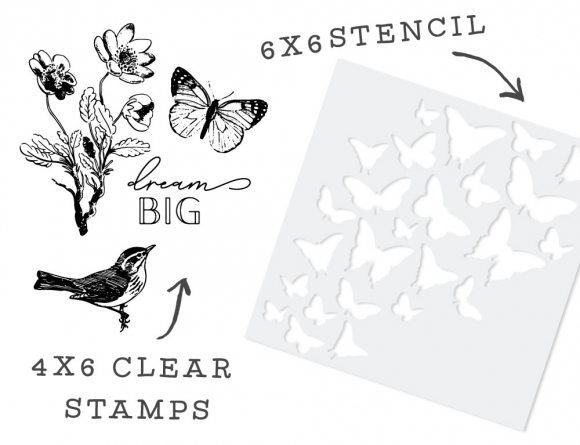
Simple Stories has expanded this collection to include a stamp set with coordinating dies, and a stencil too so you can explore even more ways to make with this wonderful collection!
Crafting is always a good idea and I can’t wait to share these pretty cards with my crafty friends! I know they’ll appreciate these fun images and whimsical sentiments that bring out the crafty girl in all of us!
Hello friends, and a Happy New Year to you all. It’s Kylie back with you all today with a new layout to share! I have been working with the super adorable ‘My Valentine’ collection and have scrapbooked a photo of my two munchkins from several years ago being all sorts of cute.
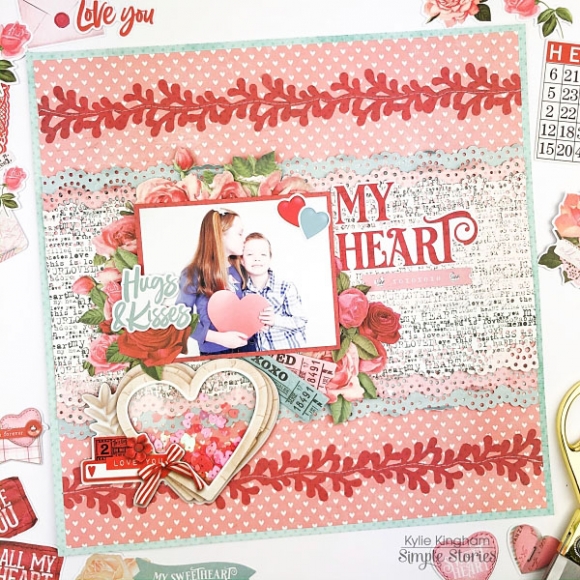
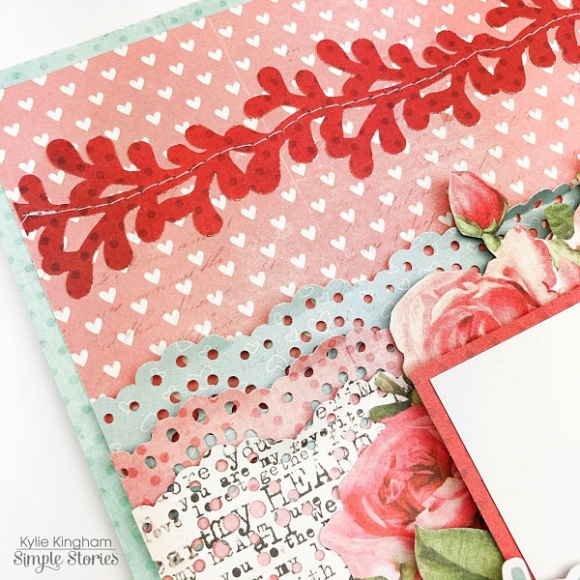
I was particularly drawn to the pink heart side of the 2 x 2 Elements paper, so this became my main background page. I used the Aqua/powder Dots paper from the Simple Basics Kit as a border page and loved the colour combo together. Since I wanted to add lots of texture to my page, I added some strips of Be Mine, 4 x 6 Elements and Carnation/Blush Dots paper throughout the middle of my background. I used a lace border punch on both edges, so it gave a sweet ruffled effect. Again, using a punch from my stash, I added a paper vine to the top and bottom of my page using the Rose/Lace Dots paper which I ran some machine stitching through.
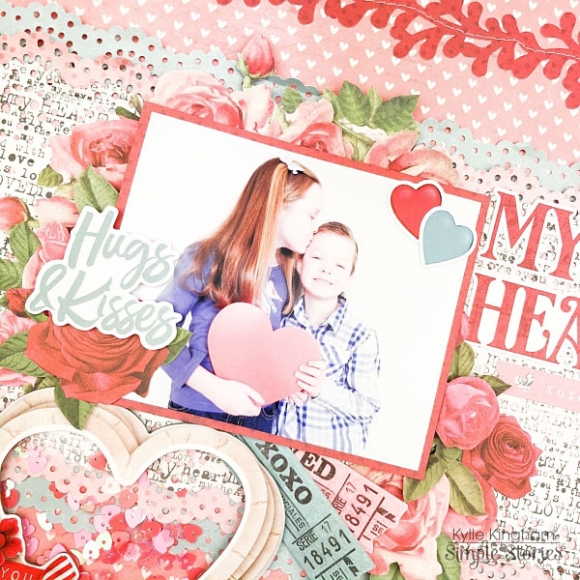
The Layered Frames in this collection are so cute so I decided to add a ‘shaker’ heart frame to my layout. The heart was backed with some clear acetate and I added some foam tape around the edge on the back. Once I knew where to position my heart, I poured some sequins onto my page directly before adhering the heart over the top. It turned out super cute!

Next, I adhered my photo into place, again with foam tape so that it sat up from my background for dimension. I trimmed the white edge off some of the floral die cuts and layered them in behind my photo for balance.
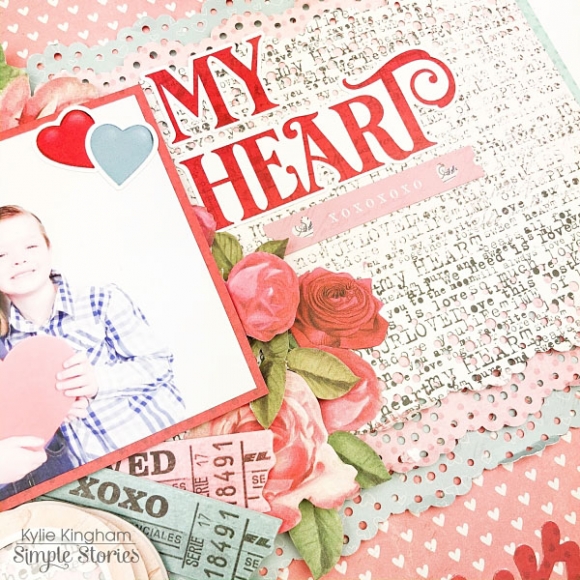
To complete my layout, I added a large title from the sticker sheet.
Thanks so much for taking a look at my layout today. I hope it gives you a little inspiration for your own creating.
Kylie.


Hello friends!
It's Kristine Davidson here today and I'm sharing a layout with you using the My Valentine collection. I wanted to create something different for this layout. I just felt like using more papers but I didn't want to layer them like I usually do. I ripped the edges of the background paper and added some different patterns behind it. It is different but I feel like the papers from this collection all go together so very well.
I added layers of clusters of course using some chipboard stickers and Bits & Pieces from the collection. Layering different elements on your page creates a wonderful dimension and creates texture when using different pieces.
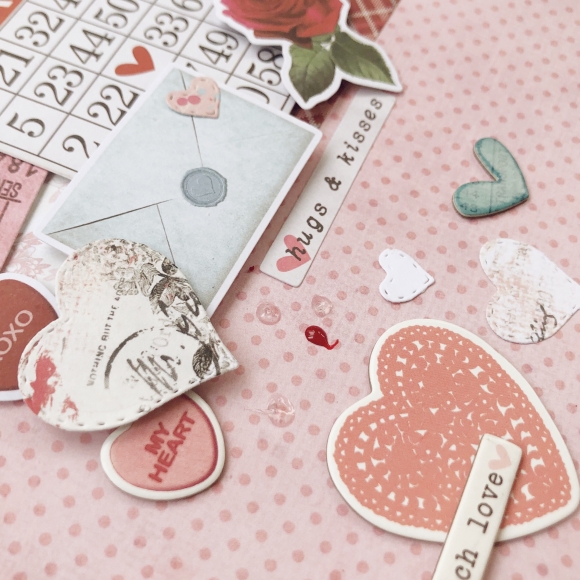
Here is another close up of my ripped edges. I added some pop dots underneath to create more shadows and dimension.
I hope you enjoyed my project today and please come share on instagram your recent layout using Simple Stories!

I like to set some crafty goals for myself at the beginning of the year and the Hey Crafty Girl collection was perfect for visualizing those goals! With bright cheerful colours and lots of different crafts represented it was so easy to start putting these pages together.
I used a SN@P! binder with a yellow spine and covered it with the Crafty & Happy cardstock. Love those stripes! I used the scallop border sticker from the Combo Sticker sheet along the edge to smooth out the transition between cardstock and album spine. To make it a little more fun I cut out a larger camera from one of the 4x4 elements and added a chipboard word sticker.
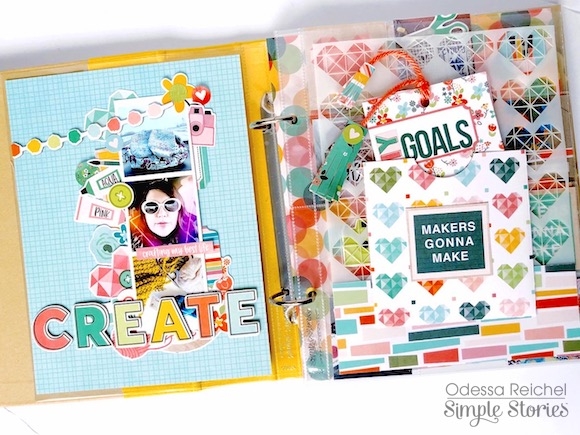
Inside the album the first thing is a full page 6x8 layout and an interactive page. I liked the idea of making my list a little more interactive with a tab booklet.
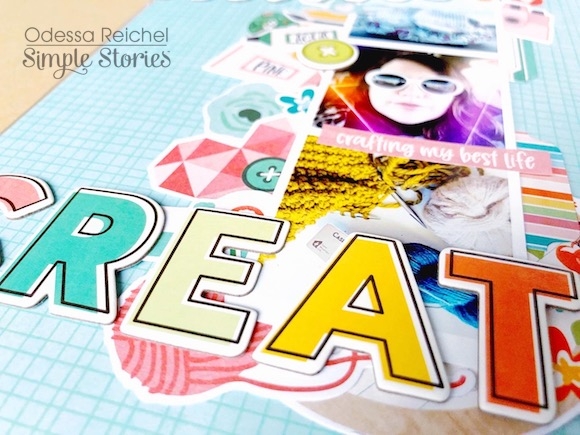
For my full page layout I printed out a photo strip with two current crafty projects and me! I picked some cardstock for the background (DIY Queen), loosely adhered my photo and started building around it! I added SN@P! elements, Bits & Pieces, stickers from the Mini Sticker Tablet and Combo Sticker Sheet and chipboard stickers. I like to start by finding my favourite bits and positioning them around my photo and then work on filling in the spaces until I’m happy. I added the CRAFTY chipboard stickers at the bottom and the chipboard pom pom garland on top to finish it up.
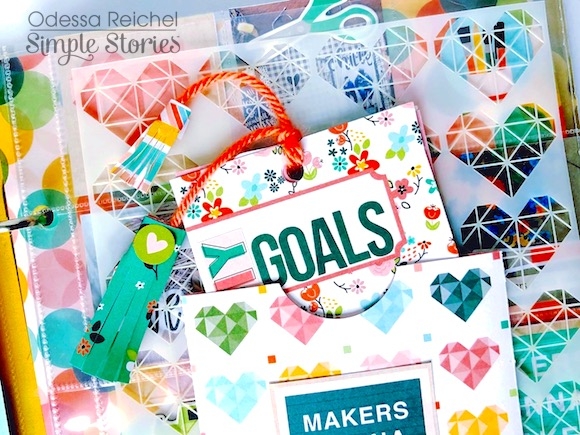
I had too much fun working on the page with my tag booklet. To start, I made a 4x4 pocket on top of a 6x8 page protector out of the Made With Love cardstock. I had planned to do some stencilling to go inside the page protector, but when the Hey Crafty Girl stencil was under my page protector I liked the way it looked so much I just added a 2 inch paper strip to the bottom so it would fill the whole pocket. I love how it adds more layers and you can see the page underneath peek out. Inside my little pocket is the tag booklet - I used a few different 3x4 elements and some actual tags from the Hey Crafty Girl Bits & Pieces and punched a hole in the top. I used some yarn to hold it together and made some cardstock tassels to go on the end. I just cut strips of cardstock and added fringe along the bottom and rolled them up around the ends of the yarn. So easy with a high fun factor. Little elements like that really encourage touching and actual interaction with layouts - I just love that!

Inside my tag booklet I used the big number stickers from the Hey Crafty Girl Mini Sticker Tablet to number off my goals. I also added in a tag made from the Simple Basics paper that coordinates with the colours of this collection and added lots of embellishments to make it fun,
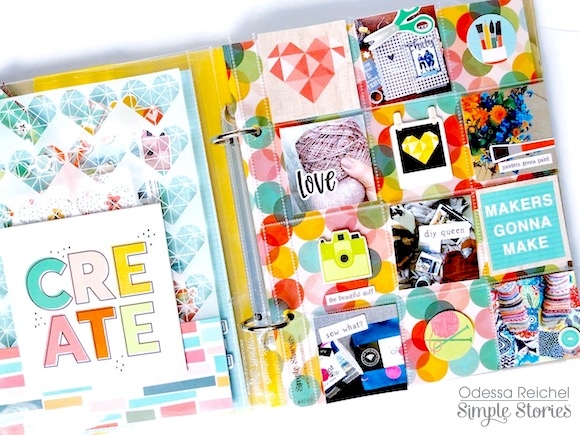
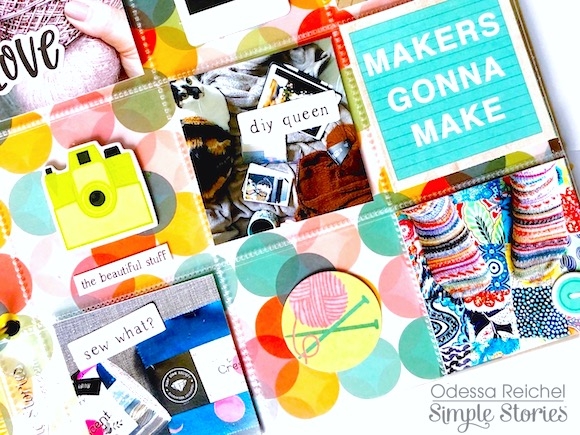
Since the backside of the pocket I made was visible through the stencil, I used one of the 4x4 elements to cover it up. I left the rest of that page plain because I wanted the layers going on to shine! On the other side I used one of the SN@P! pages with all the 2x2 pockets to bring together some visuals for my crafty goals. I combined 2x2 photos with 2x2 elements and some embellishments. I put the Happy Place cardstock underneath to play with the negative space around the embellishments.
Working with Hey Crafty Girl was great way to make my craft goals visible! Now I can look back and add to it as I craft my way through 2020.
Hey y’all! Courtney here and today I am sharing my layout that I created using the collection My Valentine. This collection has some amazing vintage images and beautiful colors. I loved using it with a cut file by Paige Evans
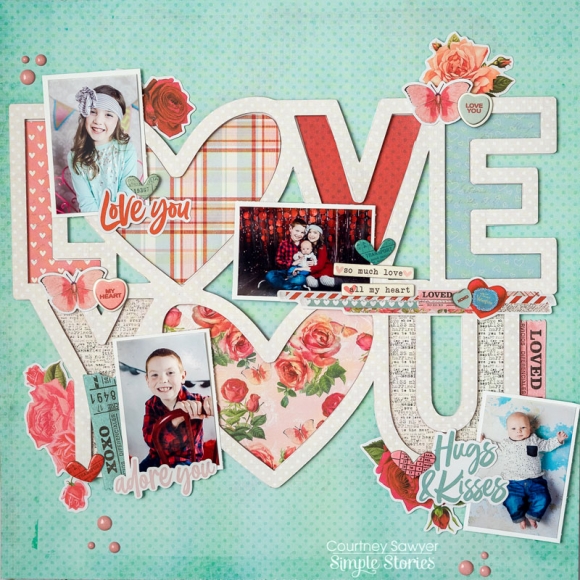
I cut the cut file out in the Lace Dots paper and then in white as a solid background. Then I cut each letter in various patterns from the 6x8 paper pad and the 12x12 sheets. I added foam to the top portion of my cut file and adhered the patterns to the white cut out to give it some dimension.
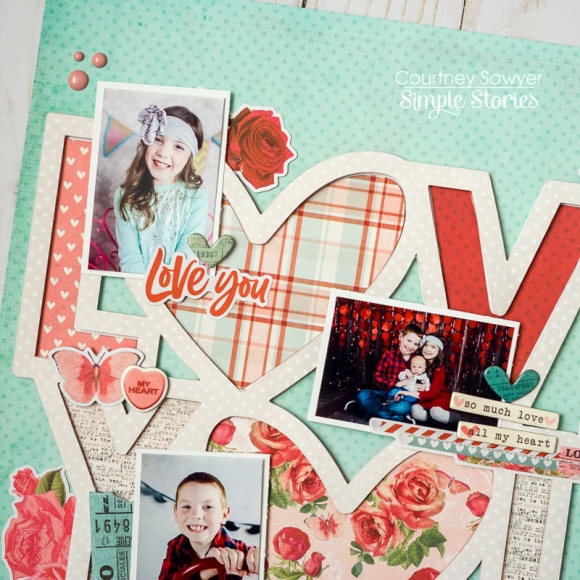
After I adhered my cut file I added my 4 pictures. They are approximately 2x3’s and I added a white card stock mat to them. Once I was happy with the placement I began to add my embellishments. I used the bits and pieces, My Valentine Card Ephemera, the mini sticker tablet, the 6x12 chipboard, and Combo Sticker sheet. Then, I finished the layout off with my clusters of enamel dots from the So Happy Together collection.
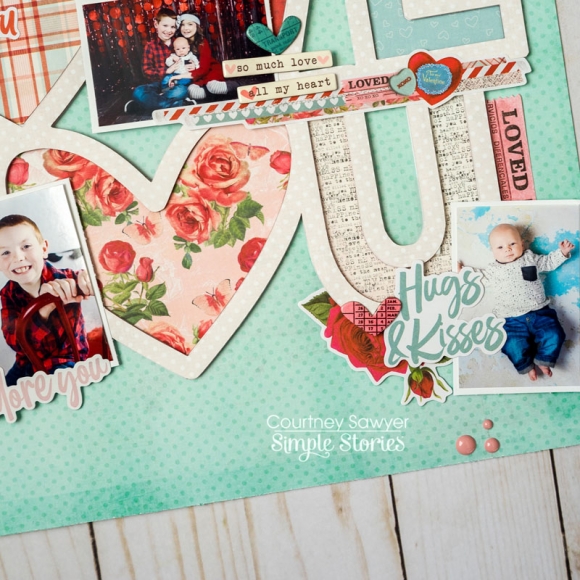
Thank You so much for stopping by!