Hi there!

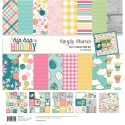
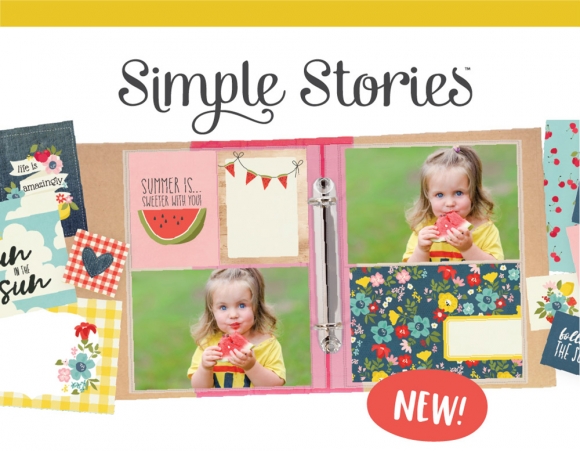
Nathalie with you today bringing you a new layout all about those sweet memories of Easter Egg hunts.   I think we all have memories of our children (or younger us) enjoying all the egg hunt finds, and what better way to enjoy them than to document them with the new Simple Stories Hip Hop Hooray collection.  It is just the perfect Easter and also Spring collection.

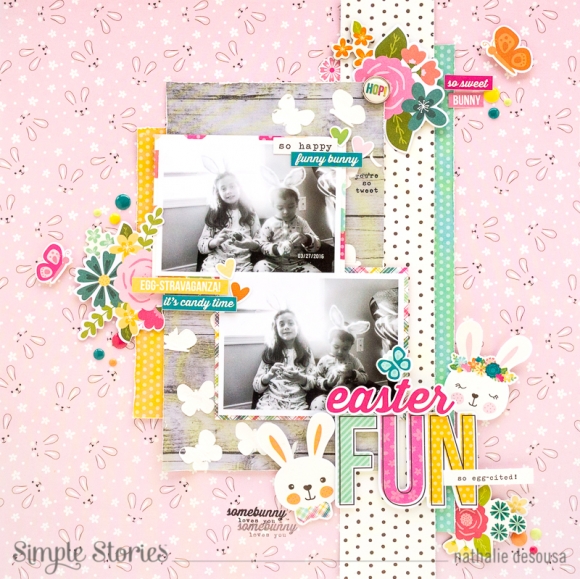
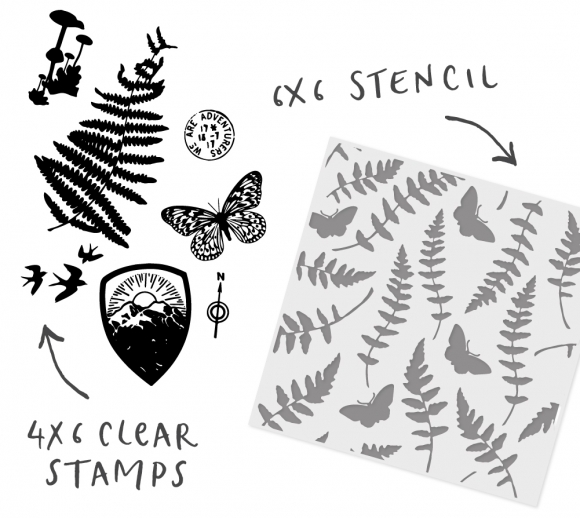
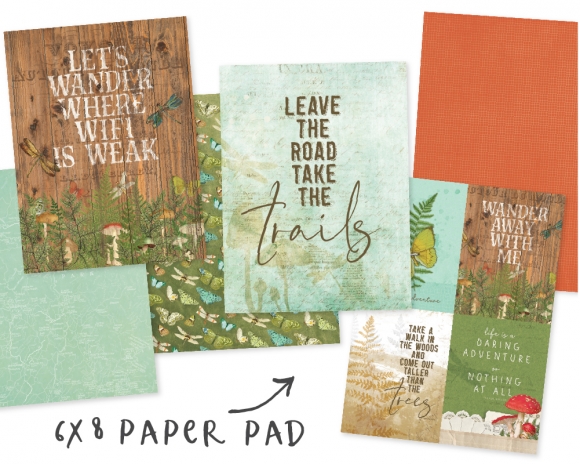
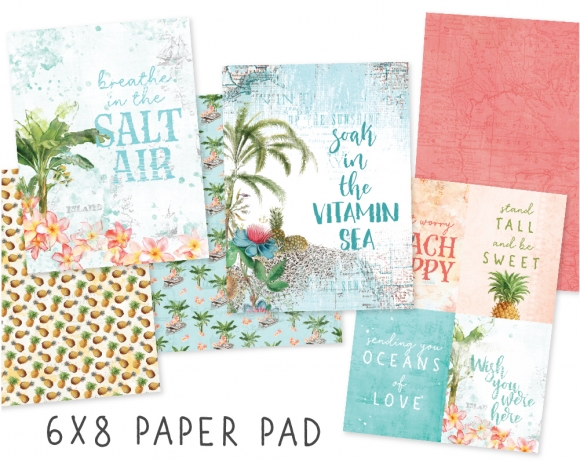
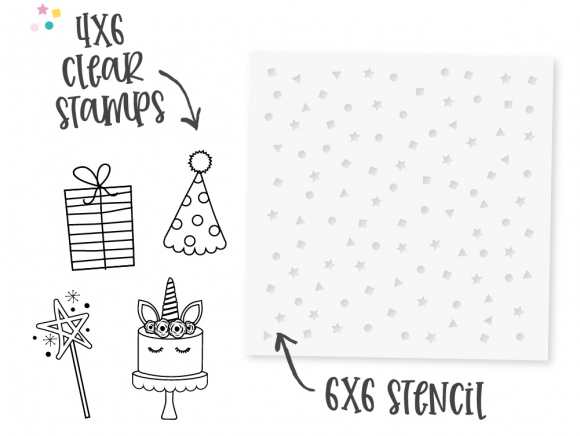
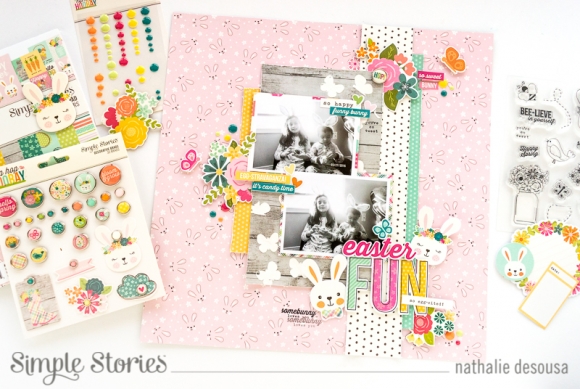
I created a simple design for the page so that i can mix all the beautiful paper colors and cute embellishments.  First i used the Butterflies stencil and some white texture paste to create a few impressions on a piece of the 6x8 wood grain paper. 

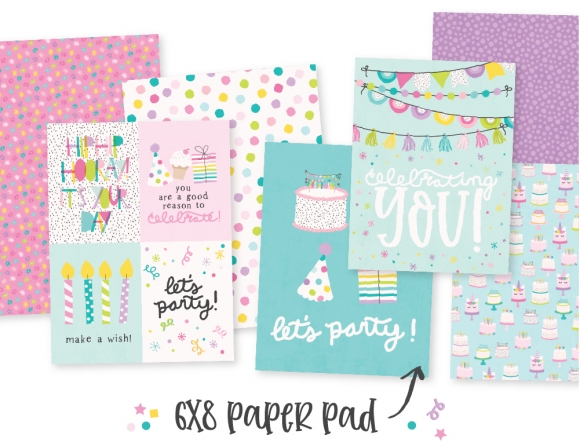
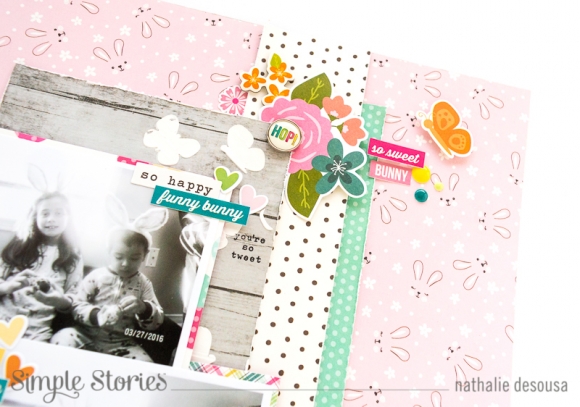
Since both my little (niece and nephew) are wearing bunny ears, i quickly chose the Hippity Hop paper for the background of the page.  First i chose a strip of the Puddle Jumper paper as an anchor for the page.  I decided to keep add a few more paper layers behind the paper strip from the 6x8 paper pad and Hello Peeps paper.

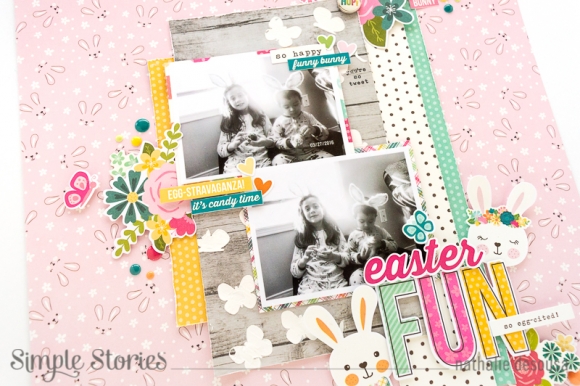
I used the Bunny Tails and Hello Peeps paper to back the pictures, and then set them on the wood grain paper piece ( once the texture paste impression had dried).  I set the paper on the middle of the page and  then started adding embellishments around the photos and paper strips.  With so many cute and colorful embellishments it was easy to mix and match them on the page.

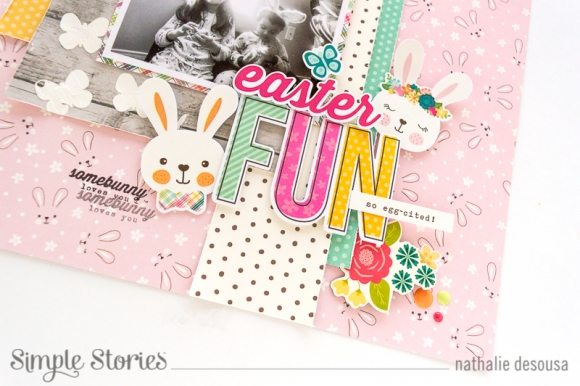
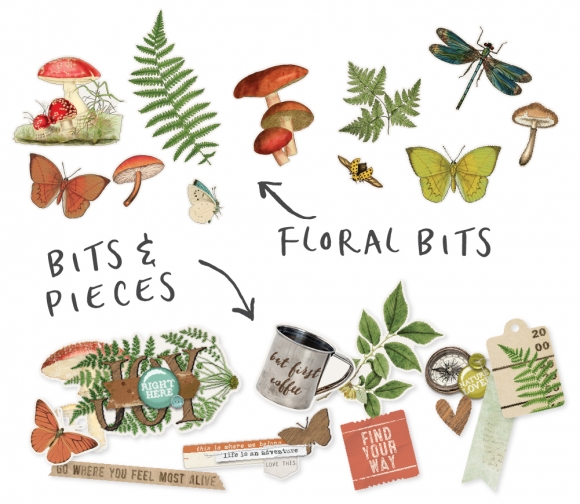
The cute little bunny embellishments are so adorable, and so perfect to embellish the title of the page.  I combined the sentiments from the Bits and Pieces and Combo Sticker sheet to create the title at the bottom of the page.  Here i added the bunnies and a few more embellishments in a large cluster.  To finalize the page, I used the Hip Hop Hooray stamp set to add a few sentiments to the page.

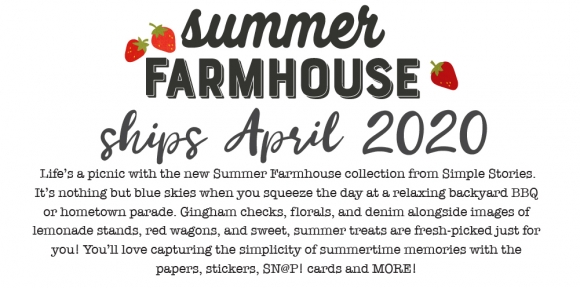
I just love all the color and cheery nature of the page.   The textures in the paste, papers and embellishments complement the picture of my littles nicely.  I am sure that you are going to love documenting your Easter/ Spring memories with the new Simple Stories HIP HOP HOORAY collection, make sure to check it out!

Til' next time.

Supplies

Hi Friends, It’s Dorymar today! This is my first project as a 2020 Creative Team Designer, I’m super excited to be back on the team. This 2020 will be a very creative year! Today I share with you a Gorgeous Snap Album with the New I AM Collection; I love every piece of this collection. Over the years this is one of my favorite Simple Stories collections, what I like most about this collection is that we as scrapers are always behind the camera, looking to document every perfect moment with our loved ones, but this collection allows you create from you and set aside everyone else. LOL!!!

The collection is full of refreshing colors and patterns, but as I love bright colors I wanted to focus on the pink and bluish tones. That's why I decided to select the 6x8 Pink Snap Binder, because it is super bright and will stand out perfectly with the golden details that the collection has.

For the cover, I selected various patterned papers and snap cards to create layers.  I selected the 3x4 card as a title of my album, around the card I added a file line with a gold pen and some cutest elements from the chipboard’s sticker.  To add texture, I added one of the new brads and enamel dots. To finish my cover and give a personal touch I added a gold twine on top of the side of the album. I am in love with the result!

This collection has so many beautiful elements that I wanted to use as many as I could. Inside the cover I created a series of pockets, full of space for journaling and photos, as well as using a lot of goodies from the collection. It’s gorgeous!

One of the new products that I liked the most, are the gold words, I used them in several parts of the project, above you can see how they stand out in the dividers of the album, in the pocket pages and in the journaling cards.   They look spectacula

Who doesn't like to create your own embellishments? Here you can see how I used the die cuts and stickers to create a fun piece to the pocket page.

The new decorative brads have a great variety of pieces, among them some ephemera with built-in brads that are beautiful, on the page you can see how I added it between the pieces and it is perfect to add phrases, dates or just some sticker with a message.

I love to create a layout for my dividers, they give me the opportunity to make different designs to add photos of different sizes. Here, I added space for 2x2 pictures and used the fun 2x2 cards to decorate it.

To add more golden elements, I used a golden page from my shelves and used my digital cut machine to cut some tabs from the Simple Stories design in the Silhouette Store. This gave the project a cute touch

I hope you've enjoyed a peek inside my snap album using the I AM collection and inspired you to create your own one.

Supplies

Hello Simple Stories friends! Anya here today and I would like to share with you a few cards that I created using the gorgeous “Simple Vintage Garden District” collection and a few cardmaking tips along the way. Here are all the cards we will be looking at today:

For my first two cards I used a sheet of patterned paper with 2x2” elements. I have shared a similar card idea before, but is is totally OK to repeat your favorite designs! With all the beautiful cut apart pieces Simple Stories provides in each paper lines, I feel like creating same card for every collection.

To create these cards I used six coordinating 2x2” element pieces for each card that were cut to 1.75” squares and adhered to a piece of white cardstock. I stitched around three of them with sewing machine to add texture and adhered that whole piece to a white card base. These pieces are pretty enough you don't need a whole lot of other decorations. All I did is added a few popped up stickers and a few enamel dots to finish this set of cards.

Next two card have an opening at the bottom instead of the usual side. To make them a little unique, I made the front panel a little shorter with a rounded edge. To create round edge you can use a plain desert plate as a template as I did here. I covered the bottom of the back panel with 2” strip of gingham patterned paper and decorated the front as usual.

Layers always look good in any project. I love adding layers to my cards, and sometimes I fell like adding more layers, while other times I like to leave them on a clean and simple side. Here I want to show you same cards with less and more decorations and you decide which option you like best.

This first option has enough layers and looks good just like that, but I also wanted to show you that adding a few more pieces also looks great. I found green foliage pieces and butterflies and added those on top of layered frames. Play with your choices and find the best balance that makes your eyes happy when you create.

And for my last card today I used three rolls of washi tape to create the background piece. I trimmed a piece of white cardstock and added strips of washi tape alternating colors and patterns that looked good to me.

After covering the whole piece you can either cut off edges or fold them to the back as I did here. I adhered this piece to another piece of white cardstock and then adhered everything to a card base.

From this point I treated it as a usual card with a piece of background paper. Added a piece of white die cut circle gave me a good spot to add decorations. Keep in mind, that our background is bright and colorful enough and does not require a whole lot of decorations. A few popped up elements and enamel dots finished this card.

I hope you found these tips helpful and may try applying some of them next time you create your own set of cards.

Supplies

Do you always feel like you are playing "catch up" when it comes to scrapbooking?  I scrapbook a lot and I am able to tell so many stories and yet I feel like I still leave a lot left untold AND pictures left not used.  So when I laid eyes on the Best Year Ever collection, I was completely inspired.  I knew immediately that I could use this collection to capture memories from throughout the year!  I formulated a plan for how I'm going to do this and hope to have a similar approach at the end of each month.  Christine joining you today to take a look at my first layout: January!

 
When I got the idea, I grabbed my phone and started loading photos into a January folder to print out.  I specifically went for pictures that I didn't think I would immediately get to for scrapbooking or for that matter, I might never get to. I also looked for stories that just had one picture - it's easier to tell a story when there are multiple photos for the layout - so if I only had one they defaulted to this folder. I printed them all off in a 2 X 3 format and all in black and white.  Black and white allowed me to keep the colors uniform without taking away from the story.  The very first step then in my layout was to lay all pictures out in a grid.  As you can see I trimmed some down further into a 2 X 2 square.
 
 
Knowing that I would have a lot of pictures on the layout, I knew I needed to keep my embellishing to a minimum. With that in mind, I decided to use one of the pieces from the 6 X 8 pad as a focal point.  I fussy cut the snowman/oval picture from that paper pad and added that above my picture collage.  I accented that with some enamel dots on limited snowflakes. 
 
 
The Journaling Bits package came with a variety of journaling spots.  I tucked these in under the top of the picture collage making a backdrop for my journaling. Rather than handwrite my journaling or write it in story format, I opted to print out a list of what the pictures were of.  Then I cut them out and added them to the tags. 
 
 
I wanted to create a subtitle that featured the month.  I fussy cut this out of the cut apart cards patterned paper. As I created my picture collage I intentionally left a space to add my subtitle.  I filled that space with washi tape and then added my January.  A few embellishments, including stickers from the 4 X 6 sticker book and Decorative Brads, adorn it as well.
 
 
I felt a major sense of accomplishment in doing this layout. So much of that month's story is told!!! My plan from here is to follow a format pretty similar to this making coming up with each month's page even easier.  If you'd like to check out the whole process video for how this came together you can find it here:
 
Thanks so much for popping in today and be sure to share with us how you are making the "Best Year Ever" collection work for you!


Supplies

Hi! Odessa here with some travel SN@P! pages made with one of the newest Simple Stories collections, Going Places. It’s really cold and wintery where I am still so it’s really nice to spend some time with photos and scrapbook supplies that make me think of warmer days. Travel documenting might just be my favourite kind so I always get so excited at new travel themed collections from Simple Stories.

I used a Teal SN@P! Binder because the teal goes so well with Going Places. I did some simple embellishing to the chipboard cover with one of the papers from the 6x8 Paper Pad, it fits so nicely. I added a tag from the Journal Bits & Pieces and layered on some cute stickers and the new foam stickers. Cute and simple!

I love bright colourful collections like Going Places! Here I had a full sized 6x8 photo and some smaller photos next to it. On the smaller photos I used a mix of the alpha stickers from the 4x6 Sticker Book. A good colour coordinated alpha sticker is a great thing to have and this book has two! I embellished my photos with another foam sticker, some washi disguised as photo corners and a cute camera chipboard sticker amount other things. There are so many great journalling cards in Going Places which is just what I needed to tell a silly story on this page.

Embellishment clusters always! In the corner of the large 6x8 photo of my boys I clustered together Bits & Pieces, stickers, chipboard stickers and more to tell the story using only embellishments. I love the pops of teal, yellow and red in there.

On these pages I used a lot of the teal, yellow and red elements found throughout Going Places because after working on the other page I was really into them. I used a 4x6 journal card with some Bits & Pieces along the edge to segment it. I added in phrase stickers to support my journalling. Above that I used some Here and There Bits & Pieces to support some nature photos  I wanted to include, they tied the photos into the rest of my pages well.

With this beautiful green-blue lake I went heavy on the teal and yellow to accent it. I added a yellow foam sticker along the bottom with a red foam heart to give the page a title. Foam stickers can go a long way when you have a photo you don’t want to embellish too much but tie into the rest of the page. Above it is a journal card with yellow elements along with my favourite pocket. Throughout Going Places there’s a pattern with passports and sunglasses and cameras and all things travel and I just love it! I cut down the cardstock to 3x4 and then added some embellishments on top. Simple but so fun!

I hope you enjoyed this look into my album and are inspired to try out Going Places with some travel pics of your own!

Supplies

Spring is around the corner and so is Spring decorating! Shellye McDaniel here today with an easy and fun display featuring the adorable "Hip Hop Hooray" Collection.

To begin I started with a clean peanut can and lid.  I covered the can with a strip of the Bunny Tails paper.  Next, I crafted a lid FOR the lid by cutting a circle and 1" strip of paper from the Egg-stra Special paper.  I scored the strip of paper 1/4" from one edge and then cut small slits up to the scoreline so that it would easily mold to the lid. A hot glue gun was used to attach the paper strip and pom trim to the plastic lid.  The circle of paper was finally added with foam adhesive. For the bunny design, it's as easy as twisting a couple of chenille stems together and topping with the chipboard bunny head!

The bunny's dress is simply a disc of patterned paper that was pleated and then attached to the front of the chenille body with hot glue. I also added some pom trim around the bottom edge of the dress.  For the bunny's "petticoat" I folded a yellow cupcake liner into a small triangle and glued under the pleated paper.

To the side of the can I attached the "SPRING" chipboard letters using foam adhesive squares.

I finished dressing the bunny with a mix of stickers, die-cuts, a brad and enamel dots.  And doesn't she look so cute holding the basket with a carrot tucked inside!

All sizes and sorts of bunny faces can be found throughout the collection, so I look forward to trying some different looks for more bunnies!

Thanks for joining me today!

Shellye

Supplies

Hello Simple Stories friends! It’s Jen today sharing my first project as a member of the 2020 Simple Stories Design Team. To say I’m excited is definitely an understatement, and I’m honestly still pinching myself to be certain it’s real.

Scrapbooking has always been a creative outlet for me and something I do to record my family’s stories so they will be remembered for years to come. However, I am really feeling a need to tell my stories . . . the ones that are hidden in my heart so that my children will really know who I was and what I went through in my youth and young adulthood. With that in mind, this year I will be on a journey to get my story written and I hope you all will accompany me and perhaps be inspired to do the same for yourself. It won’t always be pretty or fun or happy, but it needs to happen and what better way to get started than with the 2020 I Am collection?

For this specific project I am using a SN@P! Robin’s Egg Striped 6x8 Designer Album since it is one of my favorite colors. Before we look at my first spread, here is the outside cover using the I Am 6 x 6 Affirmations stencil, Flower 304904 Simple Stories cut file from the Silhouette Design Store, and title fussy cut from a 4 x 6 SNAP! Card.

Moving to the inside, I created a divider using the same Flower cut file with several I Am patterned papers. Adding dimension to my projects is an absolute must for me; so you will see cut files, paper tearing, stitching, and mixed media elements on most of my projects throughout the year.

The first spread uses a 2x2/4x4 Insta-Pocket Page with a 4x4 Photo Flip. I began by using the I Am Clear Stamp and 4x6 Sticker Book to embellish the top photo. Along the bottom I layered strips of washi tape on the photo and then stitched through them on my machine.

To give each element more texture and dimension, I machine stitched around the borders. I love, love, love stitching on projects to add that little bit of texture.

Inside the Photo Flip is a 4x6 SN@P! Card cut down to size where I added my journaling and a sticker. My second photo uses a bit of torn patterned paper and a sentiment from the I Am Journal Bits & Pieces. To the right of the photo is the other end of the SN@P! I used for journaling with the other half of the previous sticker.

On the opposite side of the spread I used two childhood photos of myself. I did not add any journaling to this side but will as I continue through the album. I decided to keep this side simple with few embellishments and a muted color scheme.

The I Am collection is a perfect beginning for this project and I can’t wait to see where it goes. I hope you are inspired to create today and get your stories recorded!

Supplies

Hello everyone! My name is Tya Smith, and this is my very first post as a member of the Simple Stories Design Team.  To say that I am SO EXCITED to be here is an understatement! I am looking forward to sharing my creations with you!

My first project was a labor of love for sure. I have always loved seasonal collections so when I saw the “Best Year Ever” collection and that it included ALL the months and seasons - I knew I had to make a card for each month. It’s going to be so nice to be able to stockpile these cards and pull an already made card out to send off!   Let me show you what I created!

January and February’s cards include a cute snowman that I cut from the SNAP cards.  These cards are perfect for placing on cards. The cupcake on the February card is from the 12x12 cut-apart sheet. I used a stitched circle die cut to cut it out. I place that on the card base with some foam tape for dimension. I used the new Foam stickers on both cards – they add great dimension. I also used one of the Decorative Brads for some added interest.

Next we have March and April. Time for flowers and bright happy colors! The March card features some adorable sticker decorations from the 4x6 Sticker Book. I added a yellow button and some of the Enamel Dots to the card. I tied some bakers twine to the button for a fun pop of color. The “Hello Spring” card sentiment is cut from the 12x12 cut-apart sheet. The adorable kite is from the Chipboard and I love the dimension it adds! I glued a cute butterfly die cut to the top right corner and then made a loopy bakers twine “trail” behind it. I think it’s fun to add little details like that to my cards.

Now for the May and June cards…these were a lot of fun to put together! The May card features decorations from the Bits and Pieces, Journal Bits , Chipboard and 4x6 Stickers! It’s so fun to mix and match all the different decorative elements of this collection.  The June card is made using 2 tags that I cut out using cards from the SNAP 3x4 cards.

Summer is here and so are the July and August cards! The July card features the “Good Times” sentiment that is cut from the 12x12 cut –apart sheet. I decorated the outside of the circle with stickers from the Combo Sticker and the 4x6 Sticker Book.  The August card has several cute stickers including that cute “Summer” banner coming from the 4x6 Sticker Book. I love these books!

And then just like that, we’re back to School and Halloween and our September and October cards. I have always had a thing for Converse sneakers so when I saw the bright red sneaker; I knew that had to be the focal point of my card! I used a notebook paper edge punch on the lined paper 3x4 SNAP card behind the shoe card for a little “school” themed accent. And how cute are those foam paper clips?  More tags on the October card, this one showcasing a few Bits and Pieces and Chipboard elements. I also really like using the small type stickers from the 4x6 Sticker book.  The tiny stickers are the perfect touch to add a little sentiment here and there.

Finally we welcome November and December with some fun and festive cards. I used the 6x8 Pad for many of the pattern papers on all of my cards. The plaid paper was the perfect background for the fall themed November card. The pumpkins die cuts were decorated with stickers from the 4x6 Sticker Book. I punched a tab out of some navy paper and added one of the Decorative Brads with a cute farm truck on it for a finishing touch. The December card is of course decorated all up for the Christmas holiday with a Chipboard Christmas Tree and a few other holiday themed die cuts and stickers. I love using the Journaling Bits to build little scenes on. So fun!

Wow! I seriously had the best time making these cards! Sorry for the lengthy post, but I wanted to make a card for each month to highlight just how amazing this collection is! It really will be the “Best Year Ever” when you use this collection to make some cards of your own! Thank you so much for stopping by today and Happy Crafting!

Supplies

Pages