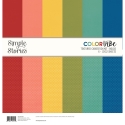
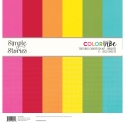
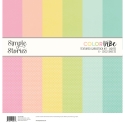
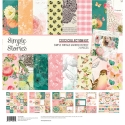
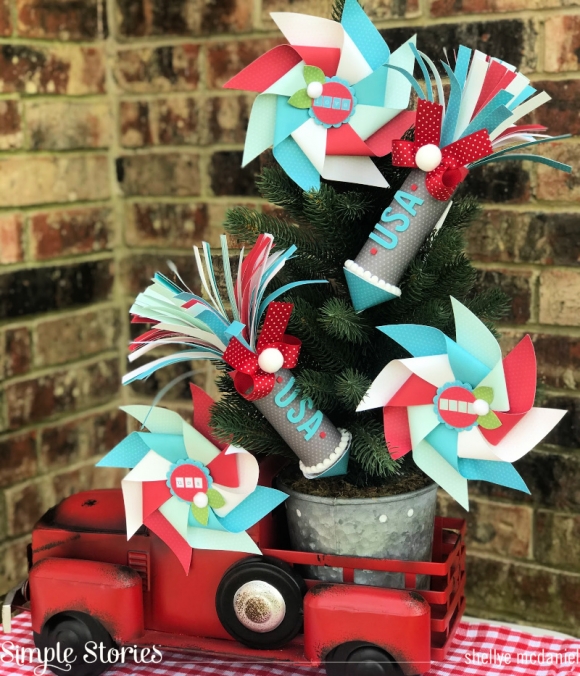
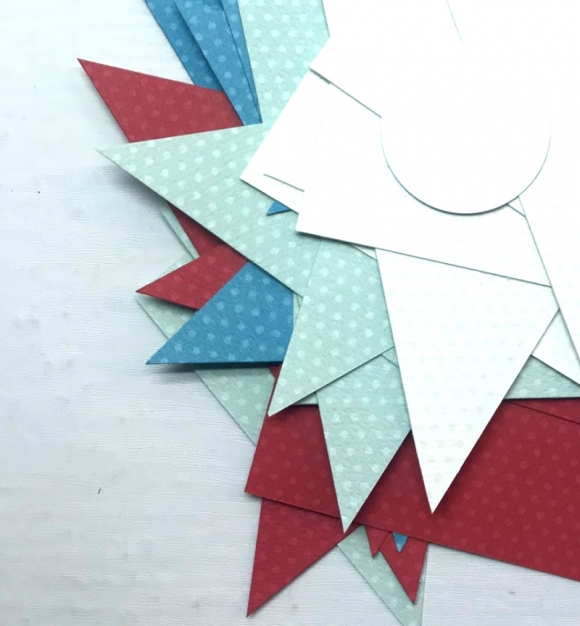
Pinwheels and summer just go together, don't you think?  Today I'm sharing not one, but TWO adorable summertime projects featuring the "Color Vibe Collection" First, let's start with a patriotic set that I'll be displaying from Memorial Day all the way through July 4th!

I ran across this pattern for making pinwheels and thought I'd give it a try.  The pinwheels that I created are approximately 7" in diameter, so adjust the triangle sizes accordingly for larger or smaller versions.

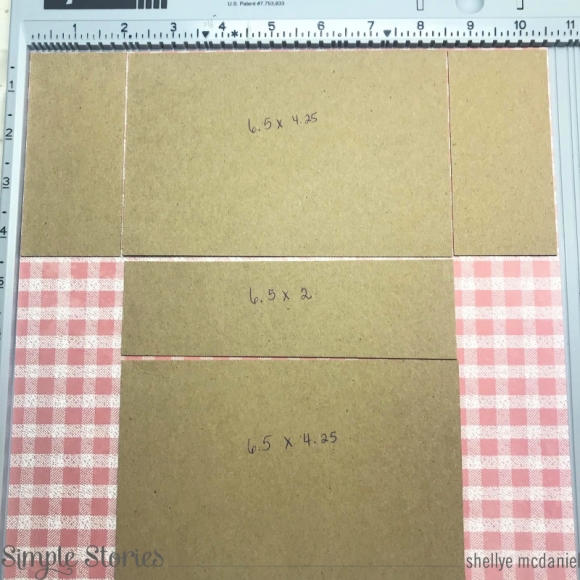
Each pinwheel requires four squares of various colors/patterns.  I cut my squares to 4" and then cut across diagonally to form the triangles. Next, I punched a 1.5" circle to use as an anchor point for building the pinwheel.

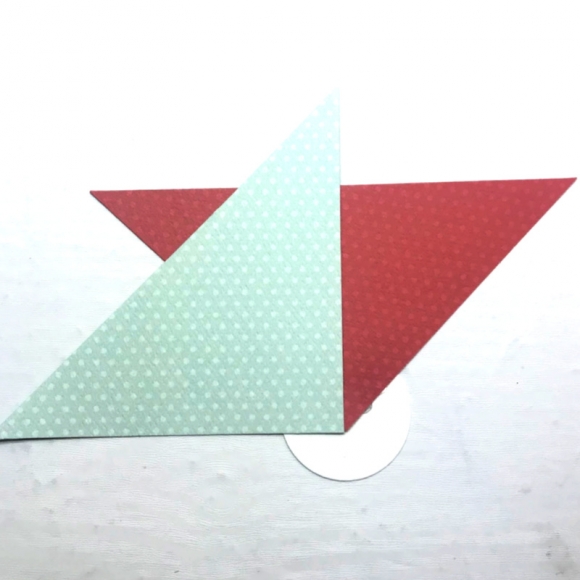
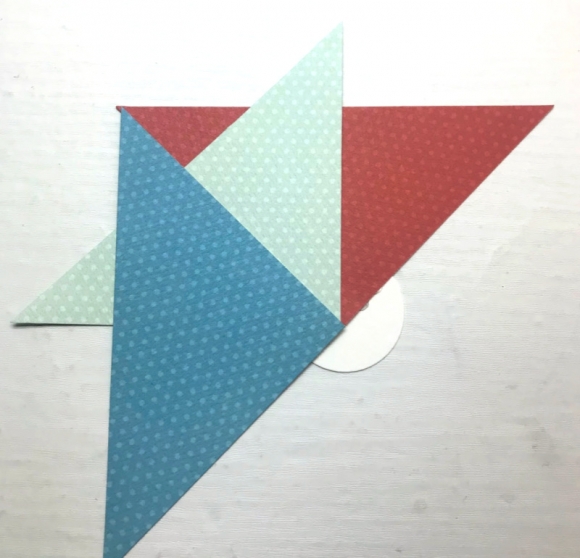
Working counter-clockwise, add the triangles as shown above. Alternate the colors as you go! The very last triangle will tuck up under the first one, so be sure that you don't glue it down completely.  

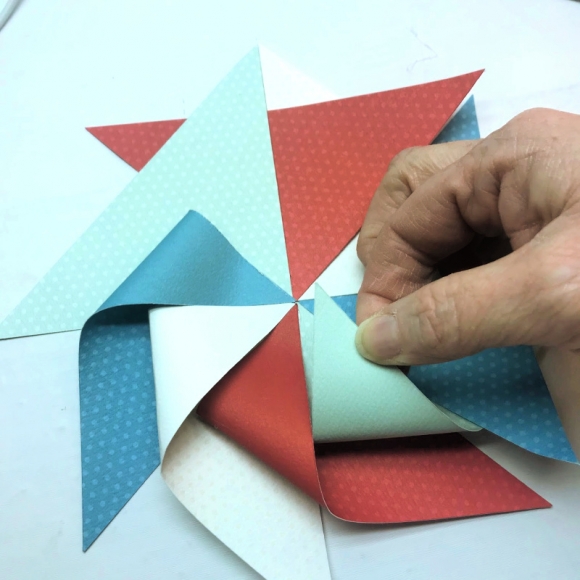
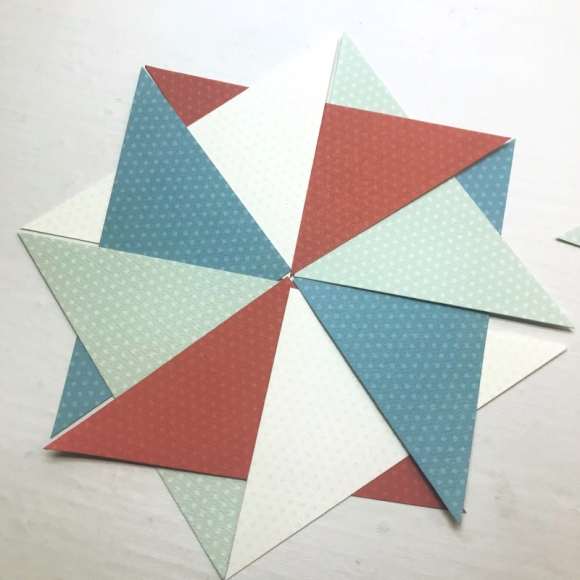
Next, take the left tip of any triangle and glue to the center; repeat with the remaining tips until the pinwheel is complete. You can add these to dowels, straws, or a large clothespin for clipping!

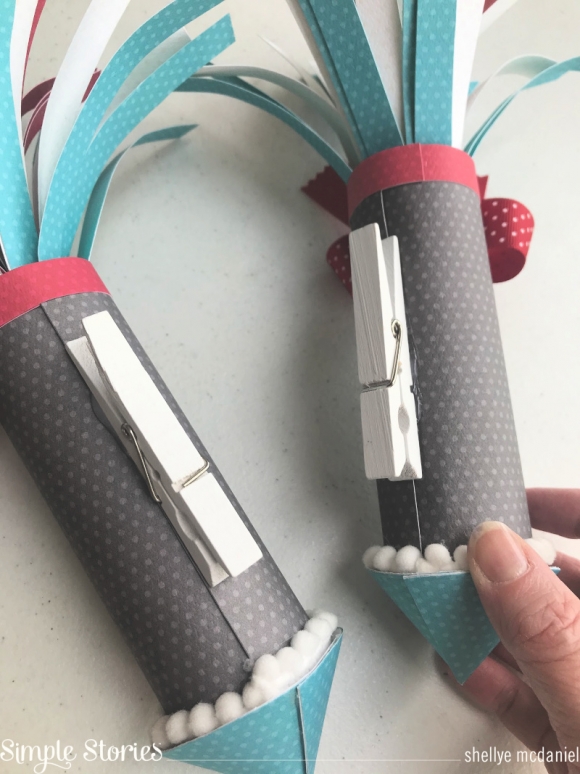
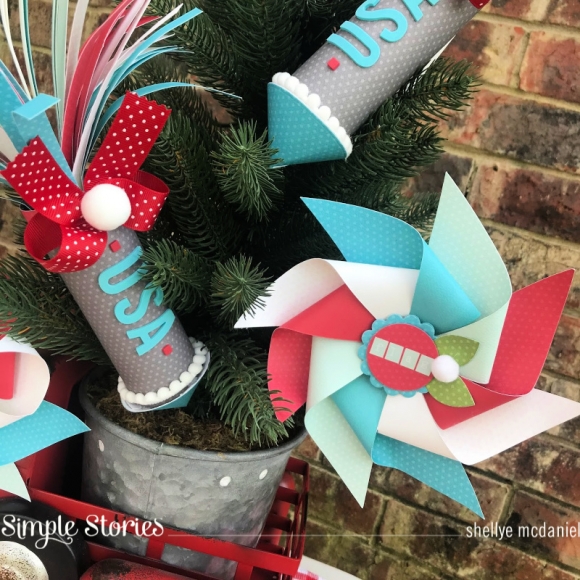
And how about a couple of fireworks to go along with the pinwheels? I made two of the fireworks from a paper towel roll that I cut in half. I covered each of the rolls in patterned paper and then constructed the top:

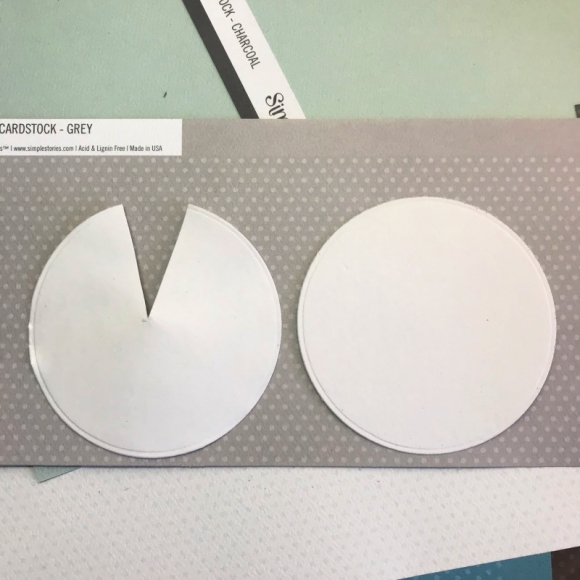
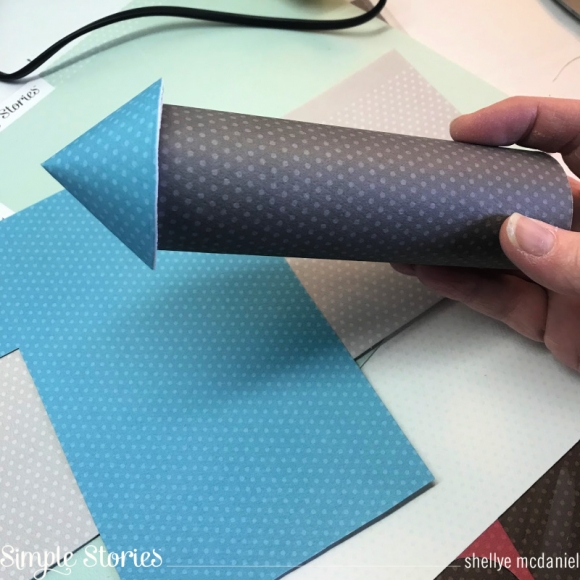
To make the top, I die cut a 3.5" circle from lightweight chipboard, as well as a circle of patterned paper to match.  I cut a notch as shown above and then gently rolled into a cone shape and glued in place on the tube.

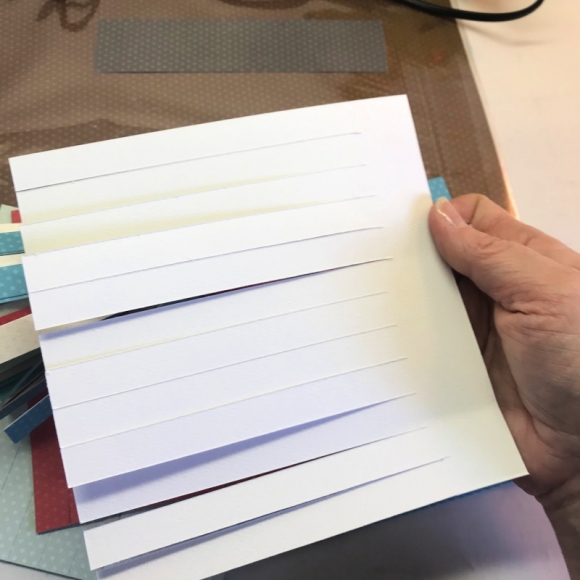
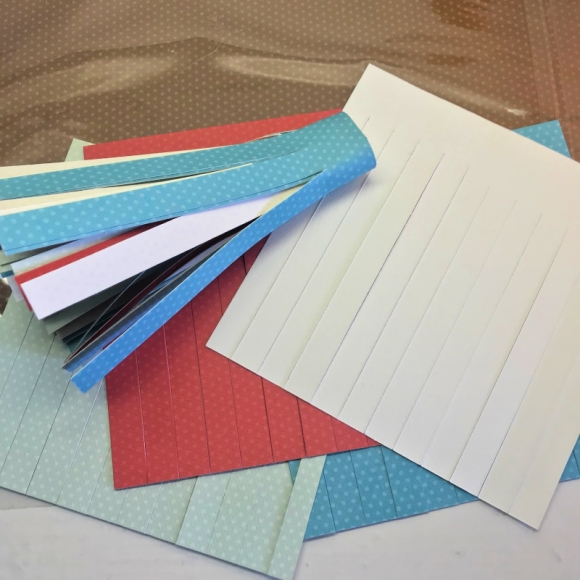
For the streamers at the bottom of the fireworks, I used the leftover 6X12 .  paper (from making the pinwheel) and cut 1/2" strips along the length.  I cut a small piece from each color strip and began winding the colored strips together to form a tassel.  I curled the ends slightly and then hot glued inside the open end of the paper towel roll.  

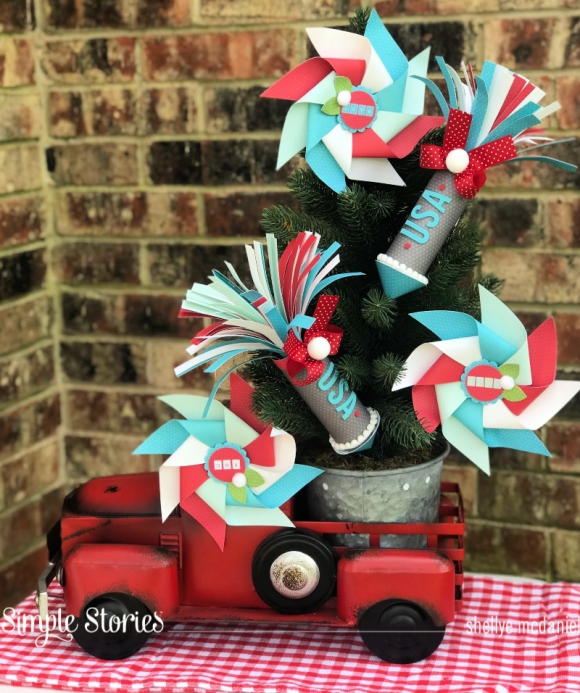
Again, I attached a large clothespin for clipping! Here is a look at all of the finished pieces after they were clipped on the little tree that I use for seasonal decorations!

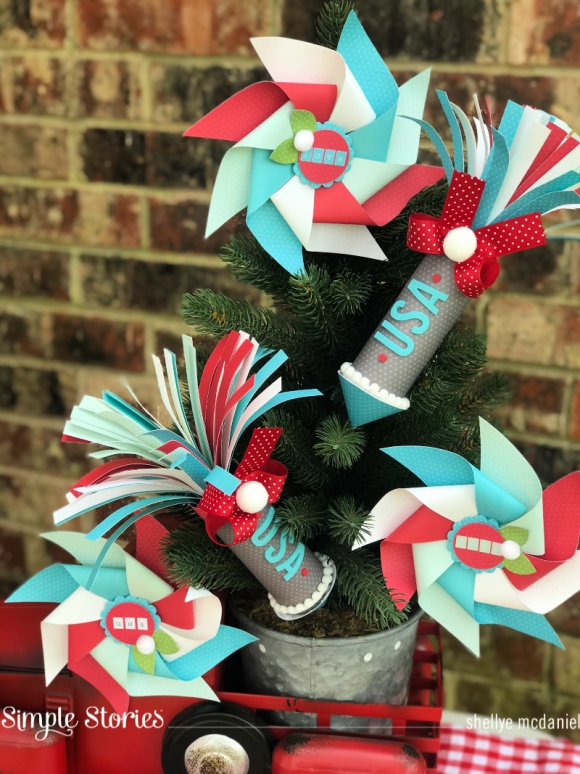
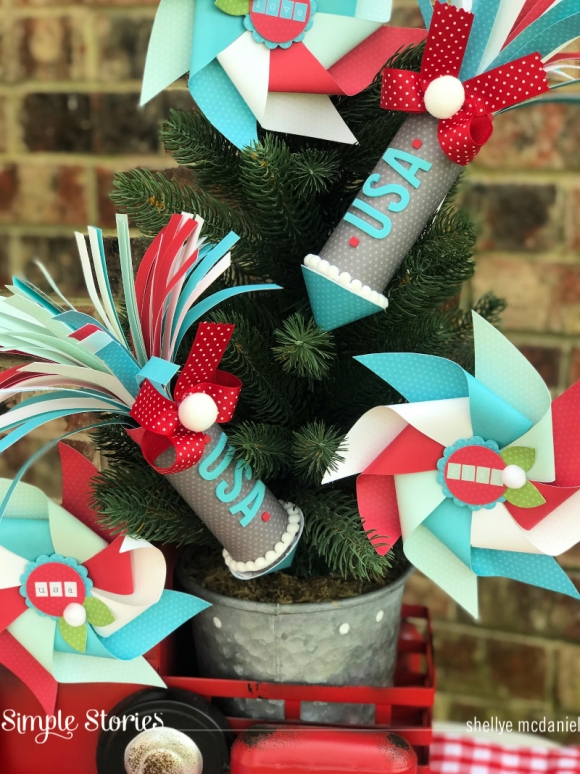
As you can see, I used the Foam Alphas and stickers from the sticker books to embellish.  I also used die-cuts of matching papers to create flowers at the centers of the pinwheels. 

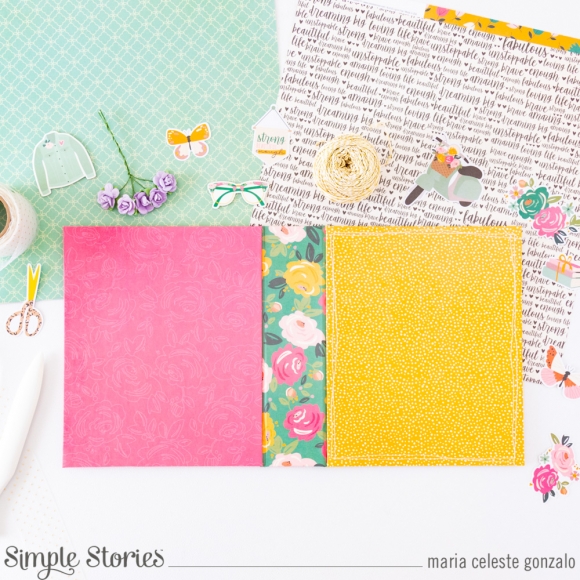
While making the patriotic pinwheels, I decided to make a few in the hues of summer!  I mixed and matched colors from the Brights, Lights, Bolds and Basics...they all coordinate beautifully!  

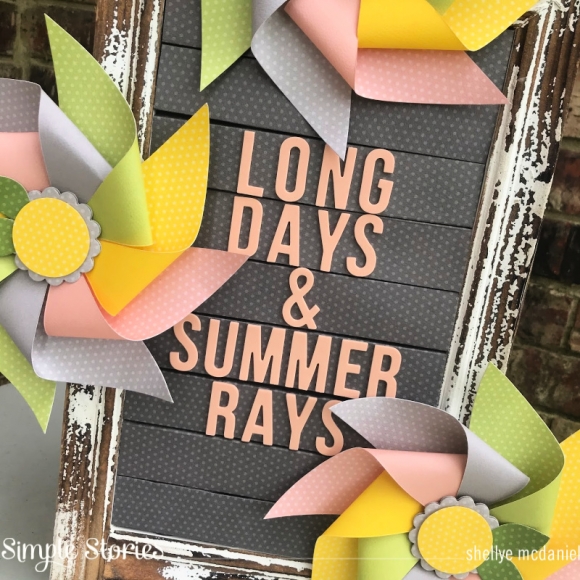
For this set of pinwheels, I decided to make a 'faux' letterboard from strips of dark gray paper.  Here's how it looked:

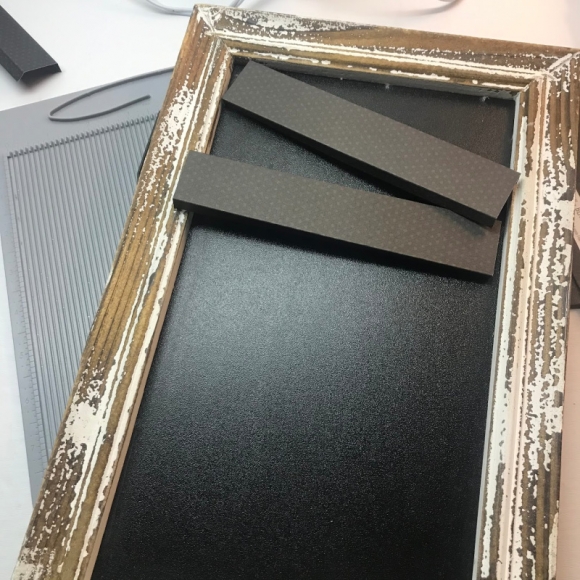
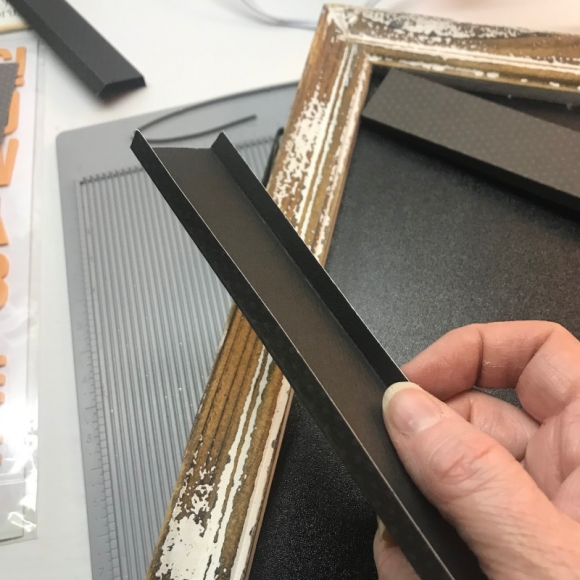
I simply created paper strips the width of a frame and added a fold to each side.  The sides were glued together and then attached inside the frame.  I wanted the strips to be the same width as the height of the Foam Alphas, so I made them approximately 1.25".  The stickers were attached to create the letterboard look!

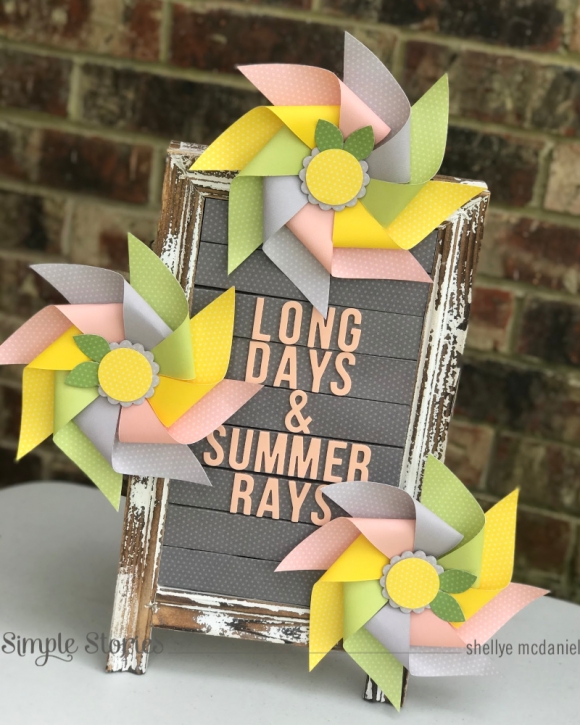
So whether you're needing pinwheels for summer parties or holiday decor, I hope that you'll give them a try.  Stay tuned to my YouTube channel, as I will be sharing a tutorial on putting these together. 

Thanks for joining!

Shellye

Supplies

Hello friends! It’s Jen today with a new layout using the bright, whimsical Magical Birthday collection. I have to say that I love absolutely everything about this collection – from the patterned papers to the stickers to the die cuts – it is all adorable.

There are so many cute elements included with Magical Birthday, that I had a difficult time not using more embellishments! I began the project by selecting several patterned papers and cutting them into shapes similar to a sunburst. I love the wow factor created by the vibrant patterns against the white cardstock.

To add even more of an impact, I machine-stitched down the middle of each patterned paper with gold thread. To fill in the white space surrounding the papers, I used the Magical Birthday stencil with gold molding paste and added a strip of patterned paper along the right edge for balance. The extra bit of bling looks amazing!

My photo was backed by pink patterned paper and adhere atop the bursts that I stitched to the cardstock. Next, I set about embellishing the project using the accompanying Foam Stickers, Bits & Pieces, Chipboard Stickers, Journal Bits, and 4 x 6 stickers.

In the bottom-right corner of the layout, added some stickers along with the number “3” to document my daughter’s age at the time of this birthday.

I just love all of the bright colors in this layout!

I hope this project using the Magical Birthday collection has inspired you to document all those sweet birthdays and memories in your life. Thank you so much for stopping by today

Supplies

Hi there friends –its Tya here, and it’s my turn up on the blog today to introduce the cutest birthday line! I made 6 cards using the awesome “Birthday Blast” collection. In a time when our world looks a little different, it’s not as easy as it used to be to just run out and purchase a greeting card. So why not whip up a batch of your own, handmade birthday cards to keep on hand and send out when you need to! We always need birthday cards so this collection came at the perfect time!

Let me show you some close ups of each of the six cards I created. Isn’t this color pallet just amazing! I love how bright and brilliant the colors are! And while this collection is themed a little more on the masculine side, you can always substitute some of the icons out and make them more neutral.

Card one features a fantastic element from the Chipboard – the “Party” chipboard makes a great focal point! I layered it on top of one of the 3x4 Journaling cards that also said “Party” on it! It is always fun to see if you can layer up the 3x4 cards with matching embellishments like I did here.

Card 2 has this awesome rocket ship 3x4 card that I layered on top of another 3x4 card to get the small teal border. I also trimmed the green dot paper on the diagonal and it creates a great visual interest to the card. Almost like the rocket is going to blast off the page!

Card 3 is a fun one! I loved the 6x6 Stars Stencil and it made for a fun background paper. I simply used some yellow ink on some white cardstock and then layered up my embellishments on top of that!

Card 4 is one of my favorites of the batch. I love using the Journaling Bits and Pieces to create backgrounds for the other embellishments I use. I used the bright yellow circle Journaling spot and then cut 2 strips of the red balloon side of the “Have a Blast” paper to create a ribbon badge type of look! Look for ways you can turn the most basic shapes like a circle into something fun!

Card 5 again uses a basic shape like a circle, and turns it into a decorative element. I used 4 circles from the Journal Bits and Pieces and layered them on bigger circles. I then placed all four of the circles on my card base with some foam tape and added little stickers to each one. This was super fun to make and I really like how it turned out!

Card 6 is our final card and it highlights some of the fabulous pattern papers that come with the collection. I loved the confetti pattern on the “Yay” paper. Mixed with the red and the plaid paper from the “Wish Big” paper, you have a bright and cheery background to the card. The collection also includes lots of banner type stickers and this fringe one is just one of the many found in the 4x6 Sticker Book! Those sticker books are worth their weight in gold I tell ya! So many great stickers in there that are  perfect for card makers! Don’t forget to grab it the next time you make cards!

I hope that I have inspired you to whip up a batch of your own cards using this collection! It is filled to the brim with cute accents, colors and embellishments! I could have created many more cards for sure! Whoever gets your cards will adore them because you took the time to create something for them to make them feel special- that’s what cards are all about in my book! Have a fantastic week and Happy Crafting!

Supplies

Hello friends! It’s Kylie back with you today to share some more scrapbooking inspiration. For my layout today, I have been having lots of fun creating with the Simple Vintage Coastal collection. It has a beautiful, tropical and beachy vibe with lots of fun prints and colours. Since I can’t go on a little vacay at the moment, I thought the next best thing is to scrapbook some memories instead!

To create my background page, I have layered together Guava/Sand from the 12 x 12 basic kit papers along with On Island Time and the 2 x 2 Elements papers. Each were cut slightly smaller than the previous sheet to create a layered border. I also distressed all of the edges quite a bit as I wanted to have a lot of texture.

To create the cluster of embellishments to the top of my layout I first added a triangular piece of Ocean/Coral Reef from the Simple Basics paper so that it looked like a corner folded over. Using various stickers, chipboard stickers and die cuts I was able to create lots of dimension across the top of my page.

My photo was printed to 4”x 6” before being added to the lower left-hand corner of the layout. I was then able to add some more die cuts and chipboard stickers. They were the perfect theme to match my photo!

The ‘Paradise’ title chipboard sticker, was added below my photo as the main title for my page. It also gave a nice balance to my completed design.

Thanks so much for stopping by the blog today. I hope you have enjoyed seeing my latest page and it gives you some inspiration for your own holiday themed scrapbooking.

Kylie.

Hello friends! It’s Mik here from Papermiks on the blog today! Today I’ll show you a Sn@p! inspiration using the beautiful SV Garden Disctrict. This collection is perfect for springtime and as a gift to your mom, too. By the way, Mother’s Day is coming!

To make the cover, I started by die-cutting the flower wreath from the SV Garden District 12’x12’ basics kit. Then, I backed the “Choose happy” paper behind the flowers and the “Live today” paper on the leaves. Once my die-cut was ready, I started to make the background. For this I used the “Never stop dreaming” paper to cover my album. I glued my die-cut on the center of the page and started to decorate my cover.

Oh, I almost forgot to say that I also cut some rolled flowers to add on to my decoration. I loved making them and also the dimensions that they bring. Don’t you? When the die-cut was ready it was time to combine some ephemeras, chipboard stickers and ribbons to make this special cover.

I definitely love shakers, so for my first page I decided to make one, using the layered frames and photo flip pockets. I have to confess: I love these frames to make shakers. I believe they’re perfect for it.

Inside, I used pocket pages and one insta-pocket. With this I can have more space for photos and it also gives my album an interactive touch.

I also love using the lined paper, so there I can write notes about the stories of the photos.

Shaker + photos = Love!

Here I decided to do something different. I wanted to use the kraft divider that comes with the binder, so I made a mini album inside the album. I hope you’ve got some inspiration from this idea and enjoyed it! If you have any questions, would like to talk some more about Sn@p! come and check out my IG account.

Thanks for stopping by and have a creative day!

Supplies

Hi beautiful Simple Stories friends, Cristina here with you today to show you a new project I made with a brand new collection Birthday Blast.

This collection is so perfect for parties, birthdays or any kind of celebration. It is full of warm and bright colors and so many amazing designs. Like all Simple Stories collections this one is also full of wonderful decorations to enrich pages, mini albums, cards or even use to creat your own decorations.

I started with a color vibe brights textured cardstock in a yellow color because it is so bright and it makes the collection colors just shine!!!! I chose to use yellow and red to take the colors of my photo and to add a touch of light I chose some decorative elements with silver details.

In the Birthday Blast collection kit I chose a patterned paper with delicious polka dots of various colors and layered it on the top of the torn bottom sheet to give it a little bit of movement. The result gave me the impression that the paper seemed framed.

This collection was perfect to show off this memory of delicious pizza made by me a few weeks ago. Surely because I was finally able to make it really good!!!

Decorating is the best part of making my pages. I love to use chipboard elements and combined them with die-cuts to create various decorative layers. The brads are my final touch to create a kind of symmetric sense to the whole composition.

Thank you for visiting and allowing me to share my project! I hope that it has inspired you to create your own bright and colorful celebration! Please don’t forget to leave us a comment below and tell us or show us you own idea on how to use this collection, It may be so different than mine. See you next time!

Bye.

Cristina xxx

Supplies

Do you have a special girl in your life?  A dreamer, one who loves pink, purple and unicorns?   Then you absolutely NEED the new Simple Stories Magical Birthday collection!!!  It’s fun, fabulous and a celebration for your princess.

I’ll be honest with you.. I don’t think this set is completely for the kiddos!  I know a few grown up ladies that would love this collection too!   I mean who doesn’t love unicorns?   I seriously think growing up is totally unnecessary!  LOL!

This collection has EVERYTHING… pattern papers, die cut bits and pieces, journaling bits and pieces, chipboard, decorative brads, enamel dots, and WASHI too!  With little UNICORNS with GOLD HORNS!!

I wish my photos showed all the gold foil to it’s full advantage here because it’s total eye candy!   There’s gold foil on the chipboard, stickers and bits and pieces.

I used the 6x8” paper pad for all my cards today.  The print is a little smaller than it appears on the 12” sheets making it perfect for smaller layouts like cards.

I love the rainbows on everything from the papers and die cuts to the brads and the washi.  I’m one of those people who think every color is their favorite color so this is eye candy for me!

Squee!! Isn’t that unicorn cupcake adorable?    The “hooray” sentiment is gold foil, and the gorgeous florals are thick chipboard.

If you look close you’ll see I added a little bit of washi on each card as well as some sentiments from the 4x6” sticker pad.   The decorative brads are colorful and shiny and totally fun – can you spot one on each card?

Hooray for this wonderful Magical Birthday Collection!  It’s sure to make the birthday girl feel like a princess!

Supplies

Hey everyone, Michelle here today with a new layout to share using the beautiful new Summer  Farmhouse collection.   There's something about this dark royal blue in this collection that just makes me happy.  I feel like this shade of blue goes with everything.  But then you add the red, yellow and teal and if just makes my heart happy!

When my kids were little, we would often do unplanned photo shoots. I would just grab my camera and take a bunch of photos, it's not that easy now that they are teenagers so I often go back through my older photos and find some gems.  I love this sweet one of my girl.  I was unsure about using the wooden title on the wood paper but I like that it created a soft look.

I cut up the Simple Pleasures paper and made little pinwheels with it.  They turned out so cute with the little enamel dot in the middle!

I then added a few phrase strips, stickers, a few pieces of ephemera and some stitching.

I love how the bright colors and florals look on the woodgrain paper!

Thanks for stopping by!

Supplies

Hello, hope you are all keeping well! Today I’d like to share with you how I’ve been using the beautiful Garden District collection in the Robins Egg Sn@p binder. 

I’ve always loved gardening and I’m very lucky to have a pretty little garden that over looks fields. Now more than ever, I realise how blooming lucky I am to have this safe outdoor space! What I’m going to use this binder for is to document everything I can think of to do with gardens...

...here’s some of the ideas I have, of what I’m going to fill the pages up with. 

Firstly, and probably the most obvious, I shall include pictures of us enjoying the garden, but also I’m going to document the plants that I grow, changes I’d like to make over time, new flowers I’d like to plant. Stores that I can buy plants, that of course will include the small online stores which are our lifelines at this strange time! 

In the 6x8 sn@p binders you get an assortment of pocket pages, patterned card stock, chipboard dividers and plenty of lined paper. So there’s everything you’ll need for setting it up!

I like to use the patterned card stock as a layout, here I use the lovely little 2x2 images from the Garden District cut apart sheet, and then I’ve made a little framed area where I can add journaling or pop a picture. I’m also going to add pictures from magazines that inspire me, you can even print off pictures you find on Pinterest. 

I hope that I’ve been able to give you some ideas on how you could set up a ‘gardening’ binder. I know that this will be a project that I will keep coming back to, adding more to it throughout the seasons! 

Supplies

Hello everybody! So happy to be back! We are living in very special moments in our lives… there is nothing better than to have the chance to share a beautiful moment creating together. I´m Maria Celeste from GuiadeManualidades.com and I have a wonderful idea for all of you!

I've been in my home for more than a month. Everyday is a new challenge. But I´m always thinking that we are very lucky because we love scrapbooking. We have this wonderful hobby/job to help us. I started to imagine a new project with the Simple Stories I Am collection and I was sure about one thing: it was going to be something just for me. A very special mini book full of details and things I love.

The I Am Collection has become one of my favorites. I'm sure I will keep it in my personal collection. I fell in love with it the moment I saw it and I feel it´s just for me.

This mini album has plenty space for photographs and personal memories. And I made lovely and special details with my sewing machine. Let´s get started! As I always tell you, remember you can make this mini album in the size you want. For my project I cut 3 pieces of stable cardboard : #1- 7” w x 8 1/2” h (cut 2 of it), #2- 2” w x 8 1/2” h.

I used three of the collection kit papers to cover all the structure. But, before doing it, I sewed it along the edge. You will see I do that in all of my mini books. Sewing details are a must in this project!

For the inside of my structure I used the same design paper and did the same sewing detail. But, you have to wait until you prepare the spine.

I made a very special spine. To make it cut a piece of white cardsotck paper of 10 1/4” w x 6 1/2” h. Then you have to scored it in 1 ½”, 2”, 2 ½”, 2 3/4”, 3 1/4”, 3 3/4”, 4” , 4 1/2”, 5”, 5 1/4”, 5 ¾” 6 1/4”, 6 1/2”, 7”, 7 ½”, 7 ¾”,  8 ¼”, 8 ¾”.  As a result you are going to have a classic spine with 6 hinges. But, before gluing it in the interior of the mini album structure, we are going to add small strips of the the same paper that we used to cover the middle stable cardboard piece. To do it, just sew them… you will love this detail!

Once it´s ready, you can glue the spine and then add the interior papers. You will find that the spine is smaller than your structure. Don't panic! It's ok! Just leave 1” up and down.

As we have a 6 hinges spine, we are going to make pocket pages.

To get them ready cut 6 pieces of  white cardstock of  6” w x 16 ½”” h. Place the paper on your scoring board (heigth) and scored in 8”, 16”. The last ½” is what your are going to glue to close the pocket. Repeat the proccess with all the other papers.  Pockets pages are ready! And you can add an extra page inside of them using the same white cardstock. One beautiful detail that I added was sewing to them some special words from the “Journal Bits Kit".

Now we are ready! Let's start with the fun work… Put all your decorating elements on the table and start playing with them. As I always say… let's make magic! Every design paper that I used to decorate the album was sewed first. I even sewed the die cuts while I was decorating the album.

First thing to prepare is the cover. For my cover I found inspiration in one of the elements of the collection. I used chipboards, paper flowers, gold and white baker twine, a very special ribbon (with gold details) and some die cuts. With the ribbon I made a small rosette and I combined it with a piece of paper. The result is a lovely and very romantic cover with inspiring words and phrases.

Let´s go to the inside! Use everything you have to decorate the pages. Die cuts, stickers, chipboard, enamels dots and combine them with pieces of papers. Feel free to prepare small interior structures as cascades or small pockets. And remember to use 4x4, 4x6 and 3x4 elements to combine with them. Brads will be a beautiful detail for your interior structures and you can have some small magnets on your desk to add to them.

I hope you like this idea and now you feel inspired to created beautiful mini album just for you. You will see that I Am Collection is lovely!

See you next time!

Supplies

Hi there Simple Stories Friends!

Hope you all are safe in  your little corner of the world. Though most of us are doing our part to beat this virus, it does not stop us from reliving ( and wishing to ) our travels.  The new Simple Stories GOING PLACES collection is perfect to bring the best of those memories.

I started with a Sn@p  basic ledger paper as the background for the page.  What better way to bring happy to a page than a rainbow.  I pulled some of the Sn@p  cards with the same background design in different colors, as well as some of the collection papers.  Then cut chevrons  and hand stitch them to the top right corner of the page.

With so many bright colors in the papers, i glued a few pieces as layers behind the picture an set it at the end of the rainbow chevron.    Here is where i had fun with all the stickers, bits and pieces and even fussy cut some tags from the paper to form a cluster at the top right corner of the picture.

Did i mention this collection has so many fun embellishments?  It was so easy to combine embellishments with some stamping to bring interest and sentiment to the page.

To balance the page, i cut strips of the Happy Travels, On Our Way, 3x4 Elements and set them at the bottom of the page.  Here, i added a large cluster of ephemera at the left side of the paper strips at the same level as the picture.


With all the color in the page, i pulled the Black foam alpha from the Color Vibes  collection to spell the title of the page under the chevron pieces.  I added a phrase sticker from the Combo Sticker sheet to complete the title, then used the coordinating stamp to add more sentiment to the title piece.

This collection is amazing, filled with color, fun designs, and just the perfect sentiments to document your past trips, or plan the ones you will go on once we are able to do so! I hope you check the GOING PLACES collection. You are going to love it!

'til next time, keep safe!!


Supplies

My daughter loves acting and singing and was so delighted to get the part of the dragon in their school play, Shrek Jr. I loved watching her on that stage because she was IN. HER. ELEMENT! Isn't it awesome seeing our kids shine in the things that they love to do?! I thought the butterflies and blooms in the I Am collection were a perfect way to record this "blossoming" moment of my daughter.
 
 
I love that the I Am collection includes "You are ..." phrases, too. I used one of the NEW Foam Stickers as the title here. The foam stickers for this collection are gold foil with all kinds of useful words. It's a set that you can use on many pages, which I love.
 
The journaling has a bit of a glare from the lights because I printed it on a transparency. This allowed me to fit the longer paragraph my daughter wrote onto the 4x6 SN@P! card. Once the page is in its sheet protector, you won't even notice.
 
 
I chose to crop the supporting photos into circles and place them together at the bottom of the page. To the right of the photos, I added a cluster of embellishments.
 
The bird and flowers were fussy-cut from a 3x4 SN@P! card, the envelope and 'Dreaming Big' phrase are from the chipboard set, and then the heart and the 'Killin' It' phrase are from the Combo Stickers.
 
I used a teeny, tiny flower punch to add the cutest little supporting flowers around each flower cluster on this page. I layered two punched flowers together, ruffled up their petals, and then added a golden center using a gold pearl pen. They turned out darling!
 
 
I love adding stitching on my page for a bit of texture, too. Even if it's a simple line around the edge of the page, it adds just the right touch, in my opinion.
 
 
I hope that you enjoyed my I Am page today and that it inspired you to record those shining moments in your family's life.
 
Have a great day!

Supplies

Hi everyone!  It’s Dorymar and I'm excited to share with you this Spring project.  I love the colors in this collection, the cutest bunnies, the flowers, birds, butterflies, etc. The new HIP HOP HOORAY collection is the perfect collection to document the beautiful Spring season.

For this project, I decided to use the 6x8 Pink Stripe Binder because the color is just the perfect match with the collection. On the cover, I used the Hello Spring chipboard letters and combined them with the bunch of flowers included in the bits and pieces pack, closer to them I added a few stickers from the collection. The binder design is so beautiful, I just had to add a few elements. It looks super cute.

Because the Striped Binder doesn’t have dividers, I prepared my own dividers with pockets and space to use the beautiful pieces that the collection has. This gives me the opportunity to play with the spaces of the album and create a fun interactive look.

This is one of the dividers that I like the most, it has a lot of space for photos and it also includes a pocket for a 4x6 card, it is fantastic and you have a lot of fun as you open the flaps.  I embellished simply with stickers, die cuts, enamel dots and journal die cuts to tell my story.

Below I show you the close ups.

I love adding the journal bits and pieces, because when I add my photos, I have little spaces to add my journaling. They are perfect and super cute.

One of the things I love the most about using Striped Binders is that I can add the pocket pages that I want among the variety that is included in the Insta Pocket Pages Pack.  The package contain 2 of each configuration and each one is divided into different combinations in both vertical and horizontal orientations. They are perfect to add the lovely 6x4 and 3x4 cards included in the collection. I also had space to decorate it with the beautiful elements of the Hip Hop Hooray Collection.   See the pictures below.

I loved the bunnies so much that I wanted to incorporate all of them, they are the cutest bunnies I have ever seen.

This divider is such fun because it has two big pockets and when you open it, you have space for more pictures. I fussy cut the bunny from one of the pages included in the 6x8 paper pad and used it as a decoration at the top of my card. Also, I added some brads from the collection, that gave a perfect touch to my project.

For my first page I created an open up flap using some different patterned papers from the 6x8 paper pad as a base. I decorated it with all the amazing elements of the collection.

I think this project is perfect to show off this gorgeous collection, I made all the adorable dividers and included many sizes of pocket pages to add all my Spring memories and I hope this inspires you to use this wonderful spring collection.

Thank for stopping by today!

Hello Spring!

Supplies

Good morning cardmaking friends! Anya here today and I'd like to share a few cards with you that I created using the Best Year Ever collection. This paper line is designed to cover so many themes and holidays! Actually, I challenged myself to create each card using only one sheet of paper. Must admit, it was so much fun, I could go on and on! But for today, here are my first five cards.

Isn't this amazing, that you can create a card for almost any occasion using just one paper line?

For these first two cards I used the January and February months papers and added some coordinating ephemera and stickers.

While I can never have too many Christmas cards, the card from the February paper doesn't have to be a Valentines Day themed specifically. This one can totally work for a girls Birthday card!

Same thing here, I used a patterned paper for the month of April, which has a Spring theme, but with a great choice of phrase stickers you can make a card that can be used for many more reasons.

For the last two cards I used the September and November patterned papers. I can always use a “thankful” card and with three students at home, a school themed card is a must to have on hand! I hope I have inspired you to try the same challenge of using just one piece of patterned paper for a card and maybe you could go all the way through and create at least twelve cards!

Supplies

I got my hands on the "I Am" collection a couple of months ago and if you had told me then what I would be using it to document, I'm not sure I would have believed you.  But here we are, mid-way through April with most of the United States in our homes and practicing social distancing.  So, it seemed only appropriate, to document this crazy moment in time!  I was glad I had a good collection to do just that!  Here's my layout!

 
With so many great patterned papers in this collection, I struggled to determine what to use.  I also was just struggling with creativity in general.  When that happens, I default to a grid layout.  Grids seem to always get me going with creativity!  As I created this grid, I knew I wanted a "solid" line for my title area.  I picked out four additional papers, two with the ivory background and two with the teal background, using some from both the 12 X 12 collection kit and the 6 X 8 paper pad.  By choosing two different background colors, I was able to keep things balanced between dark and light.
 
 
I put the most work into my title area. It combines chipboard, cardstock stickers, ephemera, and brand new Color Vibe letter stickers.  By adding the yellow hearts throughout, I was able to ground things and build beyond the title into the rest of my layout. It also creates some softer lines amidst the squares.
 
 
Although the title begins with chipboard - it continues with Color Vibe letter stickers.  Because I wanted some white in there - I used the white letters as shadows to the teal.  I did not try to make them fit in an exact way with each letter - allowing again for a softer look amidst the grid.  I also tore the top layer of the letters in at least one spot.  I wanted this to symbolize how we are "torn apart" by this pandemic.
 
 
I know most of us will want to document this time, I hope this is inspired to tell not only the story of your family, but also of you!  You can see the whole process for this video on my YouTube Channel!
 
Thanks so much for stopping by today!

Supplies

Hi everyone! I was SO excited when I first saw the Best Year Ever collection. It was just what I was looking for to work on my annual family album this year. Lots of great SN@P! cards and coordinating embellishments that go with all the months and seasons all ready to go.

I organized all the supplies from the kit by month so that when I print my photos at the end of the month I just need to pull out those things and it’s just so easy to pull together a few SN@P! pages and have another month documented. So far I’ve managed to stay current, fingers crossed it keeps up!

I paired Best Year Ever with my favourite album, the Robin’s Egg Stripe Binder. Its such a cheery colour that goes with everything!

I started my album with a big BEST YEAR EVER page from the Best Year Ever 6x8 paper pad. Next to it is the start of January. I love how many journal cards there are. I’ve been using these big oval ones to lay out what happened that month. Each month has it’s own colour scheme and icon set that works together great and highlights some important things that month. There is even a page of coordinating stickers in the sticker book for each Month with phrase stickers and icons and other cute things. It’s perfection!

I’ve been really into dividers lately and had a few saved up from some old SN@P! binders. I pulled them out and used some of the Best Year Ever cardstock and stickers to embellish them. Simple and cute! On the left side I got one of those big bold month cards from the SN@P! pack, the type is so cute! I also used the new Color Vibe Foam Stickers in blush on one of my photos, they are so fun!

There are also some great calendar SN@P! cards in the SN@P! pack. I included one for March for all the days we’ve been hanging out at home. I used one of the new Color Vibe alpha sticker books to add some matching alpha stickers. There are so many colours to choose from, it’s perfect! The Best Year Ever Foam Stickers had a perfect phrase to put over my not so lucky dolled up cat.

Playing with layers is my favourite thing after bold colour! I used one of the 2x2 filled SN@P! pages here with a mix of photos and embellishment. They are a great way to add in a lot more photos without taking up too much more space. I’m hoping to get the year into two albums so I can see more of these pages sneaking their way in. Aren’t those March colours gorgeous?!?

More layers and another one of those big bold month title SN@P! cards. All my favourite things. I really like these protectors with two 3x4 pockets in the middle with a row of 2x2 pockets on the top and bottom of them. It’s a great way to focus on a story or set of photos. February was a another favourite, all those hearts are perfect!

If you’re looking for a great collection to document the whole year check out Best Year Ever!

Supplies

With Mother's Day and Graduation around the corner, let's think about creating those "useful" gifts!  Today I'm sharing a tutorial on crafting a beautiful "Note Card Gift Box" using the Simple Vintage Garden District Collection.  This project is built from the ground up, but if you have an empty box and lid just adjust the measurements to fit.

Let's get started by making the box:

I started with three strips of heavy chipboard (use a cereal box, etc if you don't have sheets on hand).  You will need two pieces that measure 6.5"X4.25" and one piece that measures 6.5"X2". A piece of patterned paper was cut to 10 5/8" squared. The chipboard pieces were adhered to the square of paper, leaving an 1/8" gap between (to allow for folding).  Two pieces of 6.5"X4.25" scrapbook paper were attached as shown above and then the sides were folded in to create the box:

For the lid I have used the non-stick portion of an 8.5X11 laminate sheet from Scrapbook Adhesives; simply peel away the sticky sheet.  I scored the sheet at 1" and 7.5"; turned the sheet and scored at 4.5" and 6.5". The acetate is quite thick, so you may want to use a stylus to create a better score.  Next, only four small cuts were made at the sides where the vertical marks meet the horizontal marks.  After folding I used an extreme double-sided tape to attach at the 1"X2" tab.  For decoration, I added a 1" strip of patterned paper around the sides and top of the lid; you could also use ribbon or trim!

The A2 envelopes were crafted from solid sheets of colored papers.  I've used an envelope making tool, but premade envelopes could also be used.  

Next, I stamped and colored the fronts with colored pencils and used a pen and ruler to create the lines:

I chose a set of premade kraft card bases and then layered on mats with the leftover papers from the envelopes.  One of the layers was attached with foam adhesive, with the final layer being one of the 3X4 journal cards.  A band of scrapbook paper holds all of the notecards together.

Envelope seals were created from a simple duo of adhesive paper, scrapbook paper and a 1.5" circle punch!

To finish off the notecard set, I made six unique embellishments for card toppers!  Again, I used the leftover solid papers to die-cut a small design (circle, heart, octagon) and then layered them with all sorts of die-cuts, stickers, chipboard and enamels:

The front of the box was decorated with stickers, trim and a hand-tied ribbon.  Finally, the acetate top slides right down into the box opening for a perfectly completed gift!

I'm also sharing a YouTube video that includes a bit of a tutorial, as well as a walk-through of the pieces! 

Thank you for joining!

Supplies

Hello Simple Stories friends! It’s Jen today with a project that has me dreaming of vacation, and what better way to those document special trips than with the Going Places Collection. I have to admit that I’ve been in a bit of a creative funk lately. Whenever this happens, I look through layouts that I have made in the past as a source of inspiration. Today’s project is actually one that I lifted from myself!

The Going Places Collection is great for any travel-themed project you may be working on. While this layout documents a trip to California in 2017, I also have plans for using the collection again for one of our trips to Mount Rainier. The possibilities are endless!

After printing my photo, I cut 2” x 2” squares from a piece of patterned paper and aligned them all in a row across the page.

On each of the squares, I either added embellishments or doodled a border around the outer edges. I love adding all of the fun bits and pieces to the squares – they look so cute! This is also where I added a bit of journaling by fussy cutting tags from patterned paper. They were the perfect size!

Above and below the photos, I created clusters of embellishments to create a visual line that runs diagonally from the top of the layout to the bottom. To complete the project, I added a title using the foam stickers along with enamel dots for pops of color.

Lastly, I hand doodled a border around the entire project to tie in with the doodles on the smaller squares.

I love the whimsical feel of this project and can’t wait to create another with this fun collection.

Thank you so much for visiting today.

Supplies

Pages