Hey everyone, Michelle here today with a new layout to share using the  Color Vibe Collection.  These color vibes collections come in a variety of different packs.  I decided to use the pack of lights for my layout.

I started off my layout by cutting out a cut file from COAPA.  I knew I wanted to do a rainbow theme with the pretty colors in these collections.  I backed the cut file with the dots side of the papers and stitched with matching floss.

I used this sweet photo of my daughter walking on the beach.  The photo really went well with my quote.  It's so important to enjoy the little things in life.

The color vibes collection also has all of these gorgeous alphas!  They come in all the colors!!

Using this collection was a fun little challenge for me.  I'm usually pretty heavy on embellishments but this layout really didn't need much else. 

Thanks for stopping by!

Supplies

Hello, it’s Emma with you today and I’d like to show you how I’ve used the fab Birthday Bash collection by Simple Stories! Look how nicely the Green 6x8 Sn@p! Binder works with this collection! 

I used the 12 x 12 ‘Wish Big’ paper to cover the front of the binder and then made a fun shaker pocket and added a few of the chip board stickers for some extra detail. 

The colours in these papers are full of cheer so I decided to make some dividers, mainly so I could use as much of the papers as possible!! You’ll find on the 12x12 Sticker sheet there’s tab stickers, which are of course perfect to use on your dividers. 

This collection is bursting with fabulous designs, for one of my full page layouts I picked out the Robot and a journaling piece with the cogs on, as I thought they went so well together. 

For another of my full page layouts I used the foil rainbow birthday cake and teamed it with the matching lantern, and again used a journaling die cut where I can write a little about the photo that I decide to add to it. 

I also had fun decorating 6x4 cards to add photos and journaling too, my son has just had his tenth birthday so I’ll be adding photos from his big day! 

One of my favourite things to do when I’m setting up a new Sn@p! Binder is to make at least one pocket page filled with the 2x2 images, it looks so colourful and is a fun way to incorporate the theme! 

I thoroughly enjoyed setting up this binder and playing with the Birthday Blast Collection, if I’m honest I don’t particularly like ‘boys’ collections...but this one...it was full of colour and cheer! Which I loved!! Once again, Simple Stories have made an absolute winning collection!!

If you’d like to see more of my projects you can find them on Instagram here https://www.instagram.com/heartsbyemma

Supplies

Hi everybody! How are you? I´m Celes from GuiadeManualidades.com and I have a new project for you! Let’s get started… we have a lot of pieces to cut… YAY! The first time I saw the Kate & Ash collection I remembered my high school days… so much fun with my friends! The happiest days of my life. So that was the inspiration behind my new mini book.

Besides the happy moments, the times we went out together, the parties… all I can think about was… donuts! Yes! We loved to eat them. The idea came to my mind: “I will make the donut album”. So, here we are! I prepared all the cutting files for this mini book. You will find the archives in .FCM (Brother ScanNCut), .SVG (for other cutting machines) and .PDF (for printing and cutting by hand) at the end of this post.

The first thing you need to do is download all the cutting files. My final project is around  6 3/4” w x 8 1/4” h. I cut 2 pieces of the house silhouette in stable cardboard adding 1 piece of 2” w x 3 3/4” h.

I will explain some details of the cutting files first. You will find 4 cutting files. The first one is “BODY-PAGES DONUT”: use it to cut 2 pieces of stable cardboard and as many pages as you like. The final size of it is approximately 9” w x 8” h. The second one is “INTERIOR-PAGE DONUT”: use it to cut 2 pieces of design paper per page. The third one is “BANNER-SPRINKLES DONUT”: use it to cut as many sprinkles as you like and 1 banner for the cover. The fourth one is “SHAKER DONUT”: you will find 3 pieces. You have to cut #1 in solid pink cardstock (1 piece), #2 in solid fuchsia cardstock and acetate (1 piece of each material),  #3 in white foam (2 pieces).

When you have all the pieces cut and ready… time to start!

I used two papers for the mini book: one of the collection kit papers and one solid color paper. The solid color paper to cover all the structure and the other one for the inside. I cut the inside paper using the same body-page-donut file.

Next, we are going to make the shaker. You have to glue together the 2 pieces of white foam. Place the fuchsia piece at the center of the cover. Add the new piece of foam all around and the other one on the center. Then, put some chunky glitter, shape sequins or what you prefer to fill the shaker. Finally add the front pieces (pink pieces) with the acetate piece. Lovely shaker!

Now we are going to complete the cover. We need to prepare: die cuts, stickers, chipboard, foam stickers and brads. You will need the “Banner-Sprinkle Donut” pieces that you already cut. Combine all your embellishments as you like. Here you will see how I decorated my cover… I love colors and design! But you can change it as much as you like. It’s amazing how it looks! Remember to add 2 or 3 eyelets for binding your mini  book.

Let´s go to the inside! We are going to decorate all our pages. You can use all you have. Die cuts, stickers, chipboards, enamels dots and washi tapes. The idea is to leave as much free space as we can to add a lot of pictures. You will see that I added some hidden pockets and sewing details (I love the way it looks!)

IMPORTANT: If you are planning to make some inside structures as cascade or anything else, you have to add them before you glue the pages together. The same thing happens if you are planning to decorate with some brads as I did.

I hope you like this idea! Time to play with papers and your cutting machine and create something beautiful.

See you soon!

SVG Files

PDF Files

FCM Files

Supplies

Hello Simple Stories friends!!

Nathalie with you today with  a new project using the beautiful Simple Vintage Great Escape collection.  As soon, as I received this collection, all i could think about was documenting our hikes around the river bank.  We live next to a river, so a large part of our neighbourhood is a part of a provincial park, which means i get to experience nature 5 minutes from home!  So, I pulled a picture of my littles enjoying our hike for this page...

I loved the papers in the collection so much, that i decided to play with them to create the page.   I started by adding a little bit of white acrylic paint to the b-side of Born to Roam paper - that creates the soft white halo around the papers -. 

While the paint dried, i started to create the paper layers.  First, i backed the picture with a piece of the Fern/Juniper Basic paper.  I wanted to emphasize the color of the picture, so i decided to use lots of green and wood grain papers.   I cut layers from the Wild and Free, Time  for Adventure, Let's Explore, and Made to Wander  papers; along the way, i distressed the edges of the papers and added a bit of white paint to some of them, s too.

I love the layered Chipboard frames in this collection, and have learned that sometimes, i need to alter elements to make them work for my page.  So, i trimmed the frame part of the chipboard, and used the clustered elements as an embellishment for my picture.  In addition, i added a few more stickers from the collection.

To balance the page, i added a large cluster of embellishments to the top right corner of the picture.  First i added a strip of washi tape in between the bottom two layers -this helps to give the impression of more paper layers-, then used some of the banner stickers to add more layers to the right side, then just added the large sticker at the very corner of the picture.

The large chipboard "WANDER" word is the perfect size for a title. So, i combined it with some ephemera and those cute mushroom brads to create my title.  I added small butterflies to create movement through the page starting at the title, and zig zaggiing through the page.  In addition, i added a few stamped images to bring extra sentiment to the page.

I love how this page came together, i just played with paper and embellishments to bring the rustic look of nature to the page.  I am sure you are going to love the new Simple Vintage Great Escape collection for all your outdoor adventures.  Cannot wait to see what you create with it!!

XO

Supplies

Hi! How are you? I´m back with a very special project… Have you seen the new Sn@p! Flipbooks?  I'm completely in love with them! They are beautiful and their colors are amazing. I´m Celes from GuiadeManualidades.com and I’m inviting you to create a lovely flipbook for all your “crafty” memories of the year.

This is the perfect option to document in a very easy way my entire crafty year. I chose the Hey Crafty Girl Collection, it is such a wonderful collection! It had everything I needed. First thing I did was prepar the cover. I decided to use an embroidery hoop, white cardstock, some stickers and chipboards to make a small craft room. As you can see, I added foam 3D to some of them. Besides, I made a pom pom garland (I used felt pom poms). After I pasted  the embroidery hoop to the cover, I added a phrase and a crafty girl chipboard… it’s a beautiful cover!

Once the cover is ready… let the fun begin! We can start to add photographs, writing memories, stickers, chipboard, washi tapes… all you want! If you like, you can make special pages, pockets and tags to document all your scrapbook ideas, special moments and memories.  You will find the flipbook a very relaxing and easy way to document all your year. In just a few hours I prepared the cover and 7 pages… I love it!

I hope you like this idea and I would love to see your projects!

See you next time!


Supplies

Hello friends, it’s Dorymar today and I’m super excited to share with you my first Sn@p! Flipbook!  I am so in love with the new Simple Stories Flipbooks and the Bro & Co Collection.  I have two girls and making this project was a challenge for me because I wanted it to look super fun and youthful. But the collection helped me a lot because it is just fantastic!

I decided to use a black flipbook because is the perfect match for this collection. On the cover, I wanted to showcase the papers from this kit and of course the assortment of colors. That’s why I used a few patterned papers for my background and created a few layers.  The collection has the funniest and most youthful elements I have ever seen, so I used as many as I could to make my cover look perfect.

The flipbook allows you to add many pages and pocket pages because the binding system expands as you add. I used a lot of the really cute foam stickers because I love to add dimension to my project, I made a piece with a 1/2 "piece of chipboard and black cardstock folded and perforated in coordination with the pocket pages to bring more space to my dimensional pages.  So that the flipbook was not too open.

The flipbooks includes 10 pocket pages, but I love to create my own pages, to make them I used black cardstock from my stash and punched and scored to match with the bend of the pocket pages. This allowed me to have more space and to be able to use all of this beautiful collection.

I reduced one of the pocket pages from 6x8 to 4x8 to make two fun flip outs.

One of the elements that I adore about the collections of Simple Stories are the new foam stickers. They are super practical to add phrases, titles, and beautiful elements and dimension in the project. Here you can see how attractive they are and how they make my page look spectacular.

Flipping pages and pockets are my favorites in my projects, below you will be able you can see my favorite ones that I decorated with the beautiful goodies from this super cool collection.

Look how fun all of the die cuts and stickers from this collection are. They always are the perfect touch for every page.

This collection is too easy to use for any project of your handsome boy.  I hope this project inspires you to create your own!

Happy crafting!

Supplies

Hello Simple Stories friends! How is your summer? Are you making new memories that will be fun to document during cold winter months? Anya here today and I am happy to share with you another mini album that I created using a gorgeous Simple Vintage Great Escape collection! This paper line can go so many different ways and can be used to document travels, camping, hiking, picnics and so much more!

I can't say enough how much I enjoyed creating with this line, from patterned paper to chipboard and chipboard frames, to ephemera and stickers! Sticker book can also go a long way, and it always has just that perfect little addition I am looking for.

This mini book measures about 5x7” and has twelve page spreads with lots of space for photos and stories to be added later. As always, I love to create little “cards” from white cardstock which I decorate on the front panel with patterned paper or element cards and leave inside of this folded card for photos.

I used up pretty much entire collection to make this mini album and realized I just have to grab another set before it's gone. Thank you for visiting Simple Stories blog and we hope you'll stop by for more inspiration soon!

Supplies

My daughter is at a beautiful in-between age.  She's not a little girl anymore but not a full grown adult either.  That has called for a shift in my scrapbooking style for her as well.  The brand new Kate & Ash collection is perfect for telling her story as she grows into a young lady! Christine joining you today with a layout about my thirteen year old!

This collection showcases a variety of icons and shapes that will make telling that teenage story easy! There's a little bit of sass mixed in with sweet all tied together with a bunch of fun!

Kate & Ash has an amazing color combination that makes the patterned papers just gorgeous!  I wanted to use as many as possible!  So I created a huge layer of the papers on my layout. I used layers of large squares and then the top layer (before the pictures) was triangles put together to make a square.  I carefully chose my papers mixing light and dark backgrounds. The colors are some of my daughter's favorite - making it easy (as you can see) to match them to her pictures!  My title is made up of Foam Stickers in a fabulous script font.

Black is a big part of this collection and I wanted to make use of it with the other colors.  Having it in my title was a good start.  I also used the buffalo check paper for my layout border.  Additionally I cut out some tags from hat same paper and tucked those underneath my pictures.

Any time Simple Stories includes flowers in a collection, I gravitate to them.  This collection has flowers in all shapes and sizes, including chipboard, ephemera, stickers, and of course patterned papers. I used them for this layout to create a border beneath my pictures.  By adding foam adhesives, I was able to have a variety of dimension throughout.

If you'd like to see more of how the layers of this layout came together, you can find the whole process on my YouTube Channel!

Supplies

Hi everyone! Odessa here with a fun little project I just finished working on. The new SN@P! Flipbooks are soooo cute, I couldn’t wait to use them. Today I am sharing some of a mini album I worked on in an SN@P! Flipbook using the Simple Vintage Coastal Collection.

Hello beach vibes! I started off by decorating the cover of the Teal Flipbook. I used some paper from the 6x8 Simple Vintage Coastal 6x8 pad to cover the album and then used the cute little paint chip stickers from the Combo Sticker Sheet. The 4x6 size is perfect for documenting a short family trip.

I couldn’t stop there! I then matched up various Simple Vintage Coastal stickers, chipboard pieces and brads that matched the colour of the chipboard to add a little more to it. I love tone on tone layers.

This collection gives of a relaxing paradise feel so I started off my Flipbook with this journal card that sums it up for me. It’s not just a journal card in a pocket though, it’s actually a Photo Flip that I attached to a page protector that flips up for some interactive documenting.

Flip it up and there’s a lot going on under there! The top card is a piece of cardstock from the Simple Vintage Coastal 6x8 Paper Pad cut down to 4x6. On top I used one of the Layered Frames with some alpha stickers from the 4x6 Sticker Book to create a title for my Flipbook. Under that I used a blue Cardstock from the Simple Vintage Coastal 12x12 Basics Kit to create a faux instant photo frame for a landscape photo I wanted to use with a few embellishments on top.

Next up is a big 4x6 photo. I used the Coral Colour Vibes Foam Alpha Stickers on them with a phrase sticker from the Simple Vintage Coastal 4x6 Sticker book. Simple yet bold. The pockets next to it are a little busier with some journalling on a cut out from the 3x4 Elements page with layers of stickers and chipboard on it to tell a cute story related to the photo next to it. Which has brads and stickers and chipboard and die cut flowers to keep up the beachy vibes.

Here I have some more 3x4 Elements along with some photos and simple embellishing. Simple Vintage Coastal looks great all layered up, but also does simple well too. It’s a very versatile collection. Here I used brads, chipboard, phrases and labels to add some simple text to my photos.

These layered striped patterns in the Simple Vintage collections are some of my favourite and I always include them. Here I used the 3x4 Element with a die cut phrase for a simple yet adorable pocket. If you’re looking for some beachy and tropical cardstock and embellishments to go with your photos this collection is it!

Supplies

Who doesn't love Summer and Farmhouse!  Today I'm sharing a sweet summertime gift that features the Summer Farmhouse Collection and the Robin's Egg Flip Album.

I prepared the cover of the album by first using the gingham stencil and a drybrush of red acrylic paint.  After the paint dried I added a layer of die-cuts and a chipboard accent. I also highlighted a few of the squares of the gingham with small pieces of leftover yellow gingham paper. 

As a part of the gift set, I crafted embellished paperclips and also stamped and colored a collection of kraft tags!

Moving to the inside of the album, I incorporated the SNAP Cards as well as a couple of freestanding pages created from pieces of scrapbook paper. 

Below I'm sharing each of the pages throughout the album!  Take note of the flip-up cards that were attached to the outside of the plastic sleeves.  I also made tabs for several of the pages with scrap paper.

I had an extra sleeve from the album that I wanted to transform into a larger pocket page.  To do so, I crafted two pockets by folding scrapbook paper along the bottom and turning up to make the pocket.  I attached each page to the page protector with high tack adhesive as shown below:

To prepare the ensemble as a gift, I tucked the album and tags into a cellophane bag.  The paperclip embellishments were attached to a piece of scrapbook paper with repositionable glue dots and slipped into a clear bag.  A band of kraft paper was wrapped around the packages and completed with a tie of ribbon!  Add a to and from tag and it's ready for gifting!

Thanks for joining us today! Be sure to check out my YouTube Channel for a walk-through and a few how-to's!

Supplies

Hello friends! It’s Jen today with a fun layout using the totally awesome Bro & Co. collection.

A little-known fact about our house is that my husband has a collection of vintage arcades that he has restored. What was supposed to stay in the shop has now taken over our family room, which looks like Chuck E. Cheese. A couple of weeks ago he found a driving game, which has quickly become a favorite with our kids (and me).

If you have boys (or men) in your life, Bro & Co. is perfect for documenting all aspects of their lives . . . especially when they are reliving their childhoods. LOL!

When the guys were getting the arcade set up and making sure it works, I snapped these photos. Because the pictures are really busy, I decided to use the So Rad! Patterned paper. To begin, I cut the stripes from an identical piece of paper and distressed the edges. Next, I used the coordinating stamps on each stripe before machine stitching them in place and folding each edge upward.

Next, I backed each of the three photos and adhered them with foam squares before adding embellishments.

The title was next, which I place above and below the photos.

To keep with the flow of the stripes, I placed everything on an angle throughout.

With the title in place, I set about adding more embellishments to the project. Everything in this collection is so fun! I had a hard time deciding what to use; however, the driving-themed stickers and die cuts make the most sense.

In the bottom-right corner I stamped the date with black ink, which is slightly darker than the background paper.

This layout was so fun to put together, and I cannot wait to create again with this collection!

Thank you for stopping by today, and I hope you are inspired to create.

Supplies

Hello there friends! It’s Tya Smith here today. I am so excited to share my latest batch of cards featuring the amazing ‘Kate and Ash” collection. This is such a sassy and sweet collection and I simply adored the bright and trendy color pallet and icons in this collection- it was so fun to create these 6 cards that I am going to share with you today.

Here are some close ups of each of the cards:

Card #1 uses one of my go-to design tools when I make cards. I used 2 of the 3x4 Element Cards – one on top of the other to create my sentiment. Love the shout out to one of my all time favorite 90’s TV shows on this card. I added some Bits and Pieces Ephemera, some stickers and one of our cute Decorative Brads to decorate this card

Card #2 is full of a good mix of all the fun pattern papers in this collection. I also used one of our new Color Vibe Cardstock papers in Pink on this card.  These Color Vibe papers are great basics to keep on hand when you need a solid paper to work with. I like to mix solid and patterns on my cards so this came in super handy and made for a great pop of color on my card. Isn’t that drink Chipboard piece so fun? My teenagers love their yummy drinks! So a little shout out to them! J

Card #3 features one of my all time favorite sayings. “Happy Girls are the Prettiest” – and isn’t that so true! This sentiment is found in the Journaling Bits and Pieces. I layered some of the makeup themed Bits and Pieces and stickers on this card. Some cute black crochet thread wrapped around the center is a fun finishing touch on this card.

Card #4 features one of our super fun Foam stickers.  The “Fab” word is a foam sticker and it was super fun to be able to use that as a sentiment. I layered some of the beautiful floral Bits and Pieces Ephemera on the card as well as a cute word strip and label from the Journaling Bits and Pieces.

Card #5 is so much fun. I immediately grabbed that cute water bottle and built my card decorations around it. Every teen girl needs their cell phone to find out “Sup” with their friends, so I added those elements as well. The bottom of this card is decorated with the cute spotted border sticker found on the Combo Sticker sheet.

Card #6 is our final card and I turned to the 4x4 Element cards to decorate my card front.  The back pattern papers mimic the ones found on the card so there is some unity in the décor. I simply added the fun Scrunchie and Converse shoes as well as the super fun credit card Chipboard sticker to reiterate the “shopping” theme of the card. I love the cute yellow foam heart here to – the perfect finishing touch! It would be really fun to add a gift card inside this card and give to your favorite shop-a-holic!

Thank you for stopping by today! I hope I have inspired you to pick up this fabulous collection! If you have teenage girls this is the PERFECT collection for you! Make sure you pick this one up today! Happy Crafting!

Supplies

Hello friends! It’s Kylie back with you today with a new layout to share. This one is for the boys! I’ve been creating with the fun new ‘Birthday Blast’ collection to create a fun and bright layout, to document a special birthday.

To create my background I have layered together, papers ‘Wish Big’, ‘Birthday Boy’ and ‘Have A Blast’. Using a white, fine tip marker pen I drew a free hand border around the edge. This minor detail really provides a nice ‘framed’ effect for the completed design.

My photo size for this page was kept at 4”x 6” and adhered to my page with foam tape to give a lovely dimension and draw the eyes attention to it because it sits up ‘floating’ from the background. I added a few more co-ordinating papers through the centre of my page with two cut into a fish tail banner for interest.

Using a combination of die cuts as well as some of the chipboard stickers, I layered many surrounding my photo until I was happy with the overall balance. My main title for this layout was the ‘Hooray’ die cut which was adhered to the base of the photo. However, I have added a few ‘sub-title’ phrases to support my photo also.

I really loved the garland chipboard stickers which I added to the top of my page. Again, I found this added a lovely balance as well as even more colour!

Documenting a birthday would be one of my most favourite ‘themes’ to create in a scrapbooking layout.

Thanks so much for stopping by the blog today. I hope you have enjoyed seeing my ‘Birthday Blast’ scrapbooking page and it has given a little inspiration for your own scrapbooking.

Until next time,

Kylie.

Supplies

Hello, friends!

It’s Mik here from Papermiks on the blog today and I’m super excited to share with you this album. What do you most enjoy doing in the summer? I love going to the beach to swim. When I saw the SV Coastal collection, I was sure it was perfect for my holiday album. I have an August birthday and I’ve been planning a trip to the Greek Islands for some time now. I don't know if I'll be able to go to Greece this year, but I've already made my album to document this moment that will be incredible, no matter when it happens!

I started by making the frame for my cover. I cut the outer edges of a cardboard at the same size of my Sn@p flipbook cover. Then I cut the interior of the cardboard to make the frame. Once the frame was cut, I used a cotton string and wrapped all around it. To decorated it, I used some floral die cuts and a layered frame. For the background I chose a paper from 6x8 paper pad. Then, I cut the paper “Sea you soon” in the waveform to simulate a moving sea and embellished with die cuts and stickers.

For the first page I decided to make an embossing. So, I made a page using vellum and the stamp from SV Coastal collection.

Making tags is super common when we make an album, so here I made a big tag with layered frame.

Each flipbook comes with 10 pockets pages, so with them we can combine the cards and the pieces that match perfectly with the pages that we create.

I love adding envelopes and tags in my albums. It’s so fun to make.

I made this flap divide with a 12 x 8 paper. It provides a cool interactive touch.

I hope you’ve got some inspiration from this idea and enjoyed it! If you have any questions, would like to talk some more about Sn@p! come and check out my IG account.

Thanks for stopping by and have a creative day!


Supplies

Hi beautiful Simple Stories friends, Cristina here with you today to show you a new project I made with a brand new collection Magical Birthday collection. To celebrate the birthday of my dear Aunt. I wanted to remember this day with a pic of the beautiful bouquet of flowers that I had given her. The bouquet had the perfect colors to use with this amazing collection and I am very happy with the way that it turned out.

I chose some of the patterned papers from the Magical Birthday collection kit and cut several strips from each in different sizes. I then overlapped them by crossing them at a point that I sewed with my sewing machine. I chose a white card on which I spread pink and fuchsia acrylic using the stencil from the same collection. I let the paint dry and then I glued the bunch of paper strips on the colored background.

Under some strips I added thick double-sided tape to give movement and I then completed with the decoration.

I chose some elements that reminded me of the reason that I used this beautiful photo. I used chipboards, die-cuts and stickers. I just love these amazing designs and shiny and bright colors for memory keeping! I really enjoyed creating this bouquet of flowers with paper strips and simulating the flowers with the stencil. This collection is truly wonderful and full of many designs for every occasion. The colors are perfectly mixed together.

This is my project and I hope you are inspired by it. Please don’t forget to leave us a comment below and tell us which is your own idea on how to use these collections. Thank you so much for joining me today and see you to the next post.
Bye.
Cristina xxx
 

Supplies

Hi Friends!  Thanks so much for stopping by!  Today I’m playing with the Simple Stories Color Vibe Collection.  This is a series of double-sided card stock that comes in Bright’s, Lights, Bolds and Basics (neutral shades).    On one side of the textured card stock is a solid color and on the opposite side you’ll find a dotted print.  The paper is a sturdy heavy weight for all your crafting needs.  I approached the collection as a card maker and wanted to share the different ways that I reach for solid card stock every day, other than the most obvious way to use the papers – to compliment other Simple Stories Collections.

One of my favorite “go to” techniques is color blocking.  For this card I cut ¾” strips of paper from all three color packs and adhered them to a panel to create a colorful rainbow card.  I used the Warm White Color Vibe Foam Alpha to create a simple “HELLO” sentiment, and surrounded it with swirls of gems. 

There are lots of beautiful die cuts on the market that would look great for this inlay technique.  I simple cut the die from white card stock, and then cut it again several times using the Color Vibe Collection papers.  I adhered the cut pieces inside the openings with glue.  This is a great way to use up scraps of paper that you just can’t part with.   I also used left over enamel dots from other Simple Stories Collections on my cards today.  They add some hard candy shine to make you happy!

The dot print on the paper adds another level of interest to the inlayed design. Once you’re done you won’t want to cover up the pretty panel you created.  A simple sentiment allows your design the attention it deserves.

I like to make cards with scenes too!  This card is made with dies from several different brands – but you could achieve the same effect with a little imagination and some scissors.   Start with a blue sky and some wavy lines for grassy hills.   A circle punch becomes a sunshine and the rest is up to you.

Each collection also has a color coordinated Alpha Sticker Book so you can color match your sentiments.  I used sticker alphas from the Basics Sticker Book for a hand held label maker look.

I’ve also noticed layered die cuts becoming more popular lately.  These dies are beautiful but require several ombre shades of card stock to create the layered design.   Finding papers that match is easy when you use papers from these three collections.  If you look close, you’ll see four different shades on each of the florals that look beautiful together.   The background was created with a color block technique using three shades of teal blue from the collections.

If your passion is card making you’ll love these rich Color Vibe papers for different techniques including colorblock, die cut inlay, scene building, and ombre layering.  The saturated colors and playful dot print will make your creations a stand out.

Supplies

Hey everyone, Michelle here today with a new layout to share using the Simple Vintage Coastal collection.  I'll admit, I have a thing for beach themed collections.  But this one is more than pretty, the corals and teals are sooo very pretty.  I couldn't wait to work with this one!

I loved the grungy map on the back of the 4x4 elements paper but I was afraid it would be too busy if I used the whole paper.  I decided to use half and white cardstock for the other half.

By keeping half the layout white, it gave me a place to add lots of embellishments and phrase stickers. I always like to add lots of layers.

Look how pretty these flowers are!  And the little brads are always the perfect finishing touch!

I love hoe these chipboard phrases make such a big impact !

Thanks for stopping by!

Supplies

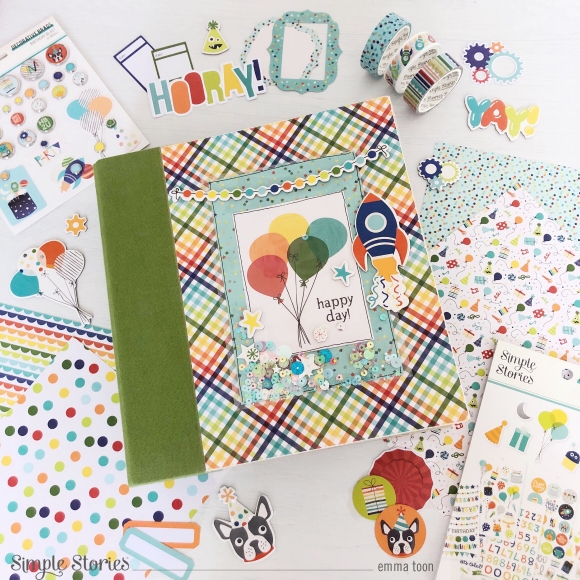
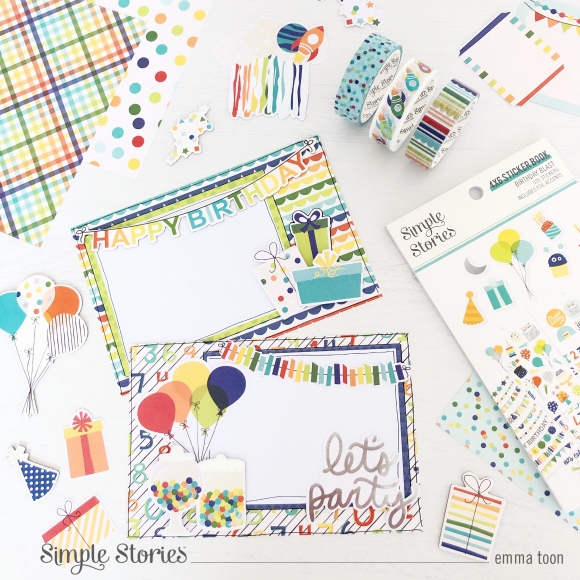
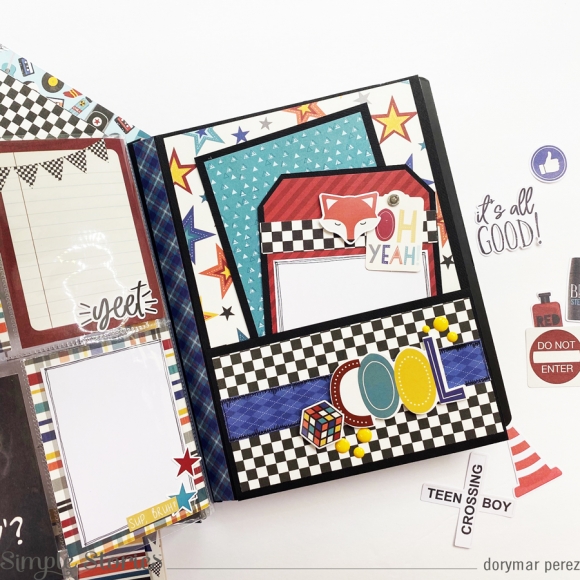
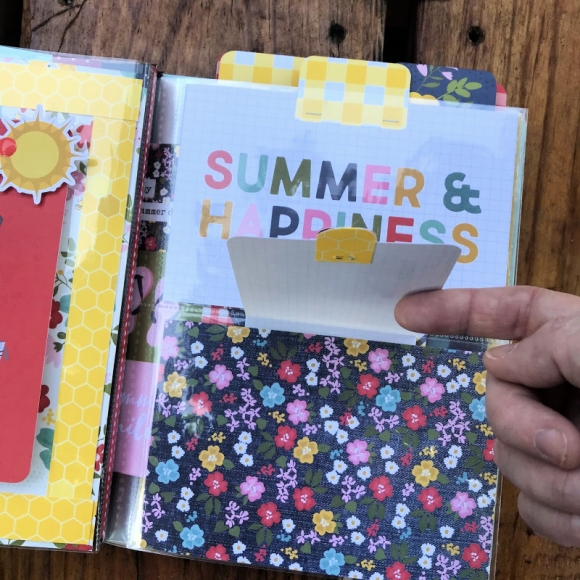
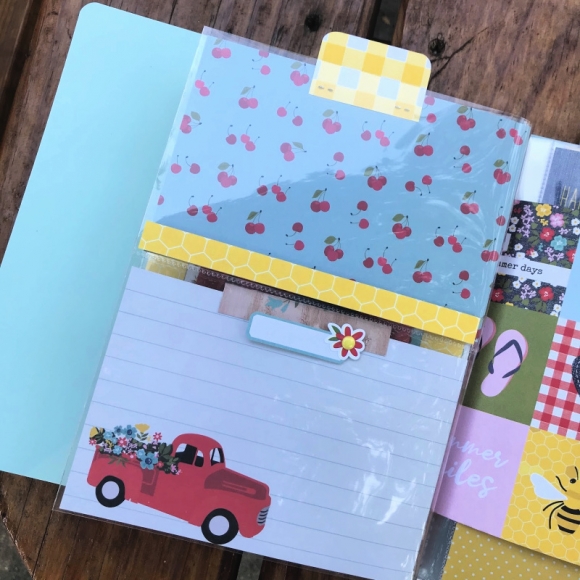
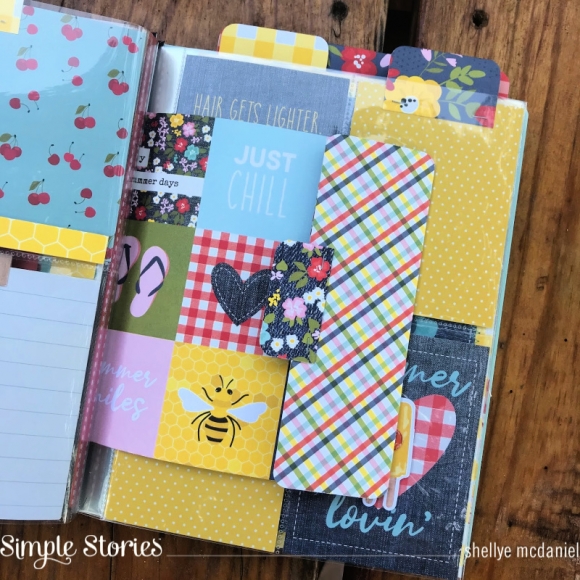
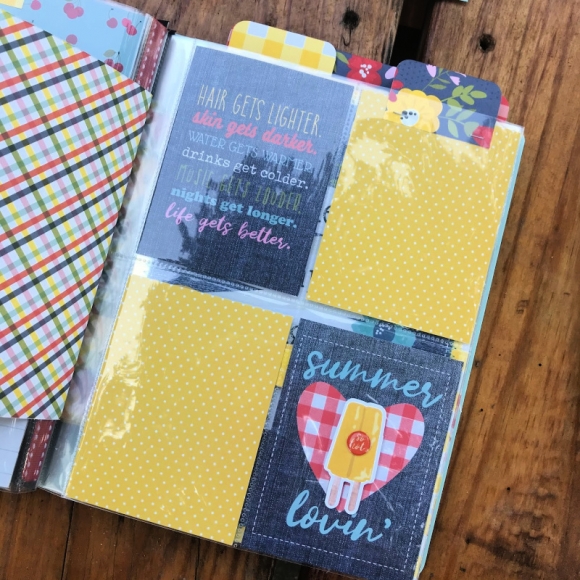
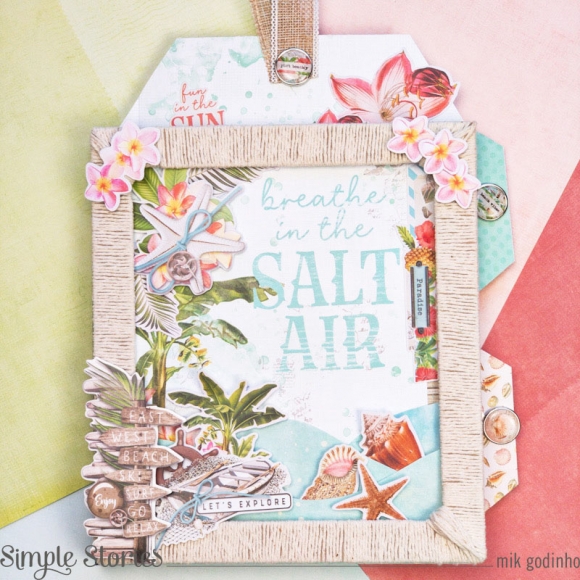
Hello, I’d like to show you something a little bit different this week, as you probably know, I have a new found love for  Sn@p! binders, pocket pages, and I also love planners and travellers notebooks...so, I thought it would be fun to show you how I incorporate them all together! 

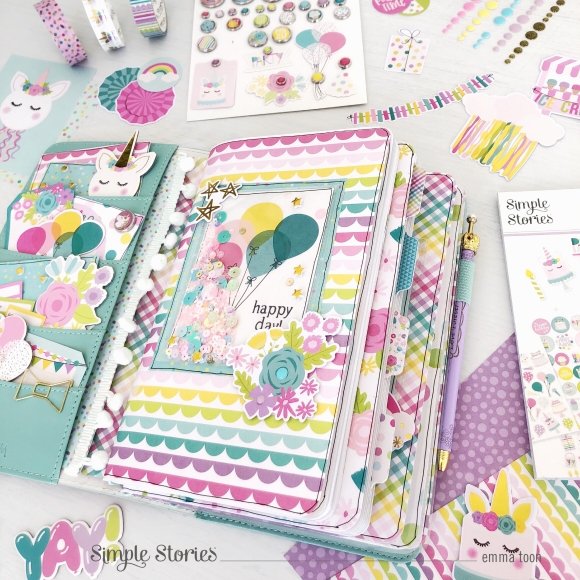
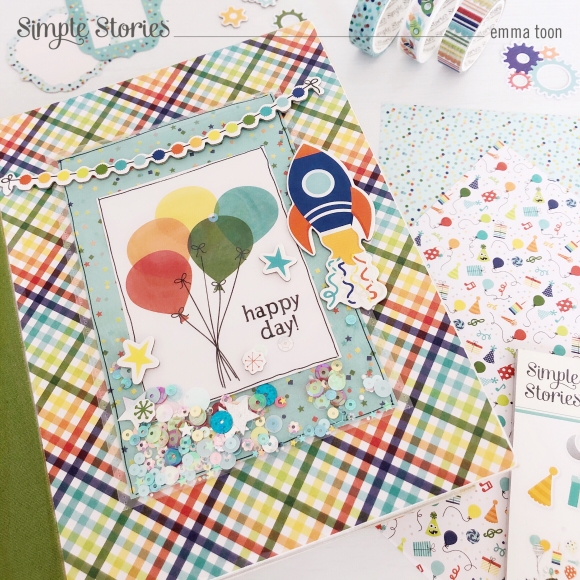
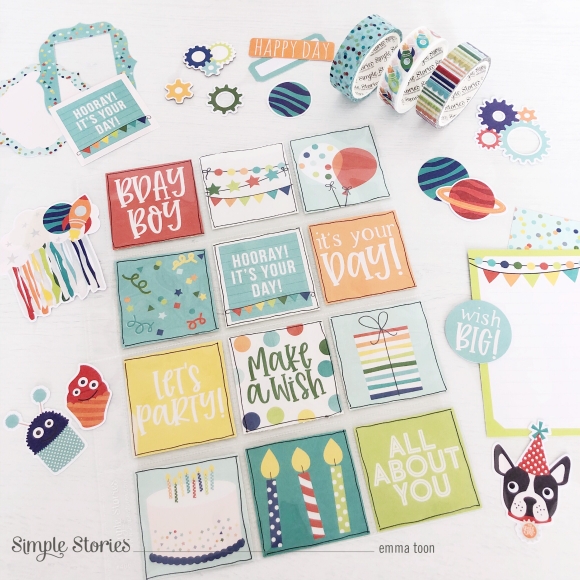
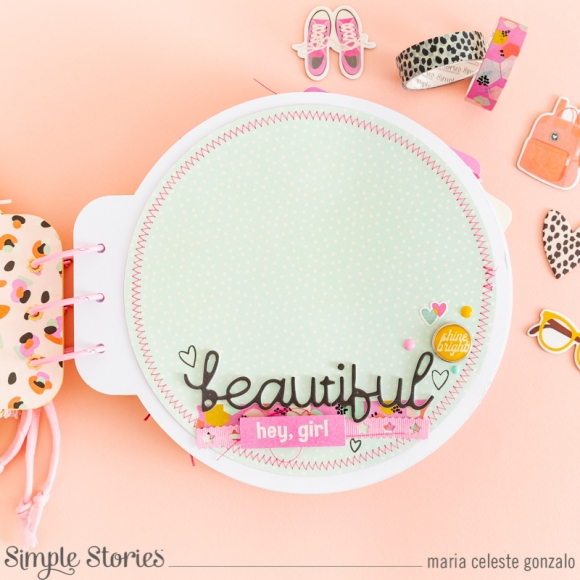
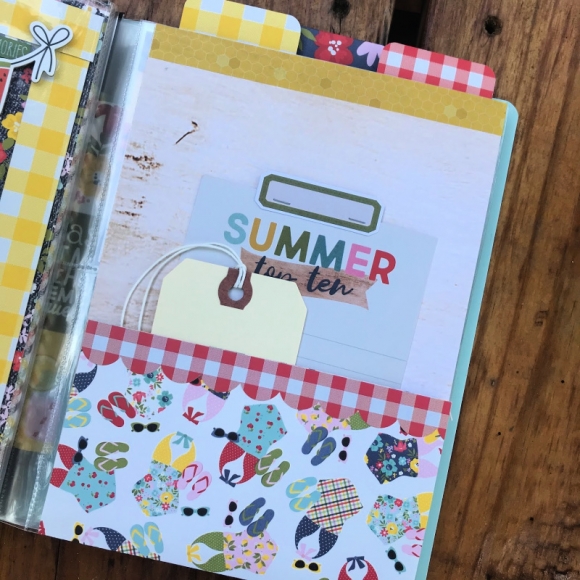
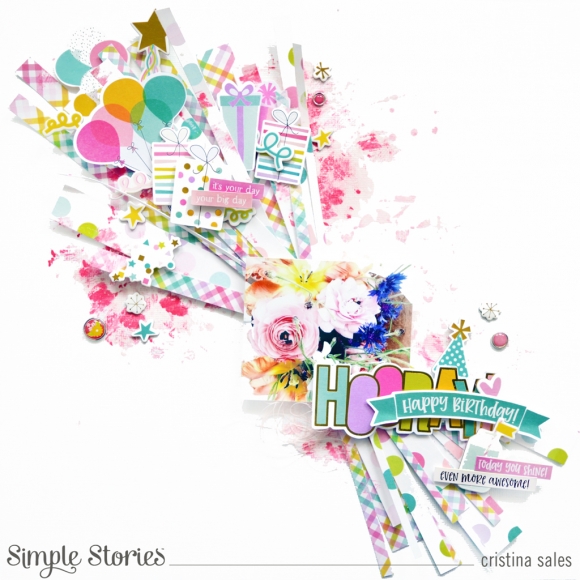
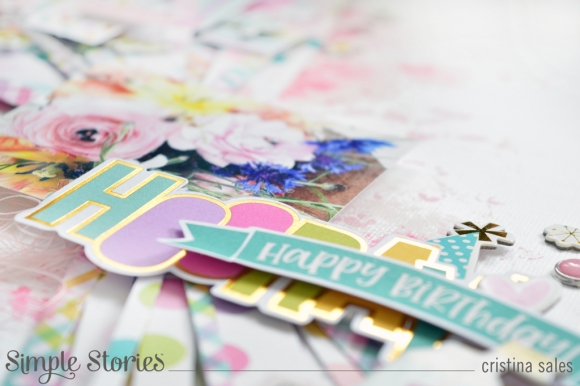
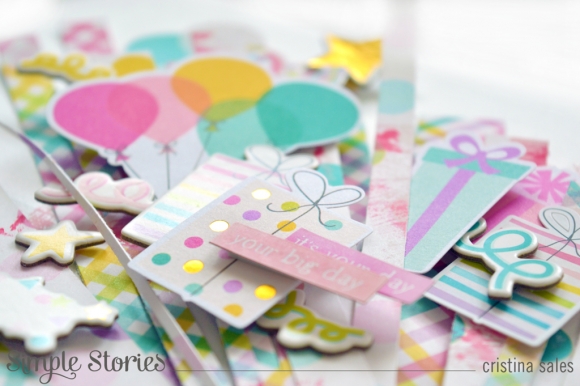
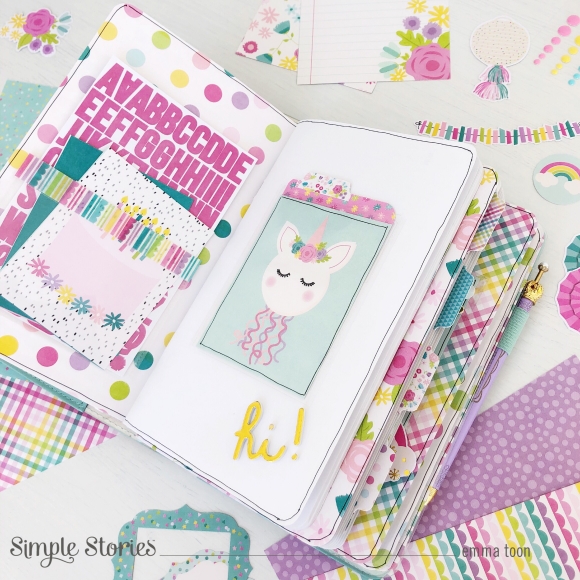
I’ve used the utterly magnificent , Magical Birthday Collection, and hopefully you’ll see how it can be used in any situation, not just for documenting birthdays! Just look how full the pockets of my TN are, bursting with unicorn magicalness! Ok, let’s look at where I’ve used the first Sn@p! product, here I’ve made a sparkly shaker pocket on the front cover of this insert. I made this one by sliding a 3x4 card into one of the 3x4 flip pockets, I poured a variety of sequins and tiny beads inside, sealed the top of the pocket with clear sticky tape and then stuck to the cover of my insert using double sided sticky tape.

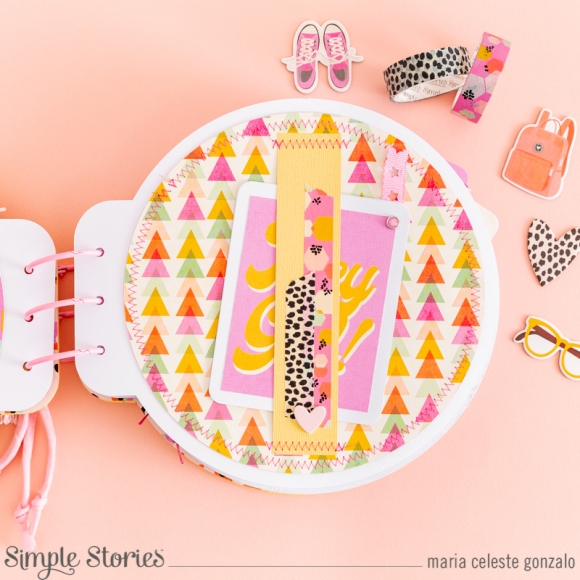
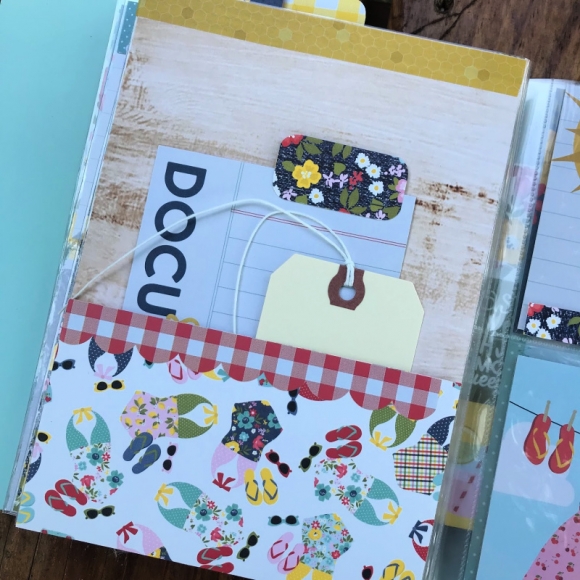
Next up, inside the front cover I wanted to make a pocket to slide in stickers and journaling cards, to do this I cut roughly an inch off the top of a 6x4 flip pocket, I simply decorated the edge with washi tape and then used double sided tape to adhere to the page. 

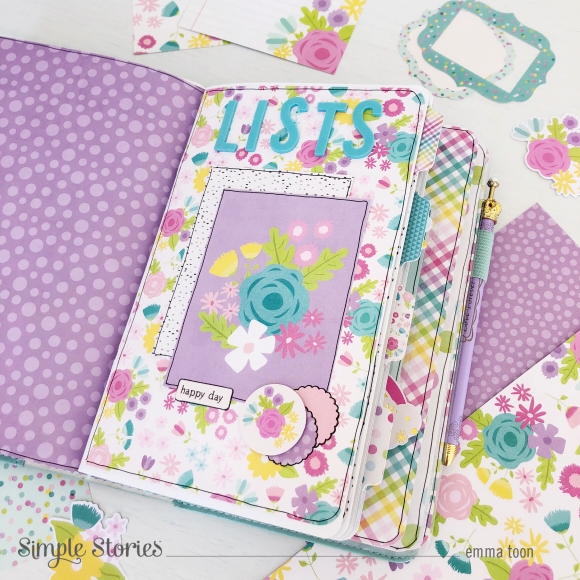
I’m sure by now you are seeing how easy it is to use this Magical Birthday Collection for anything, look here how cute this cover is using the floral paper, and floral images for my List’s insert. I used the fabulous new Color Vibe Foam Alpha stickers. 

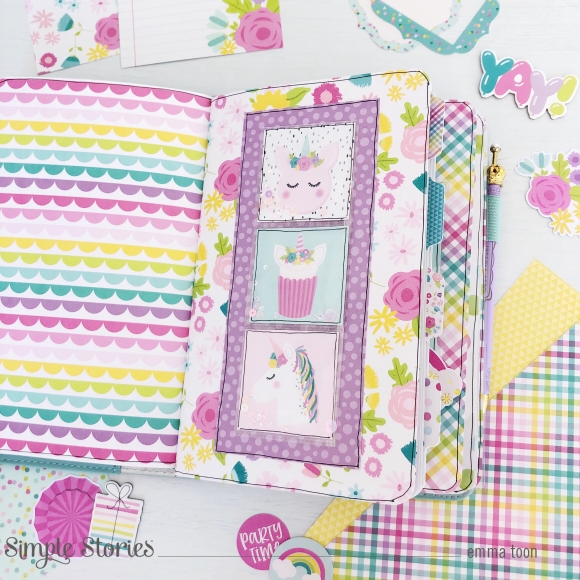
The shaker pockets can be used in numerous ways. You don’t just have to stick to flip pockets, here I cut a section of three 2x2 squares from a pocket page, filled each pocket with a 2x2 image and some sequins...all you need to remember is too always seal the edges so no sequins escape! 

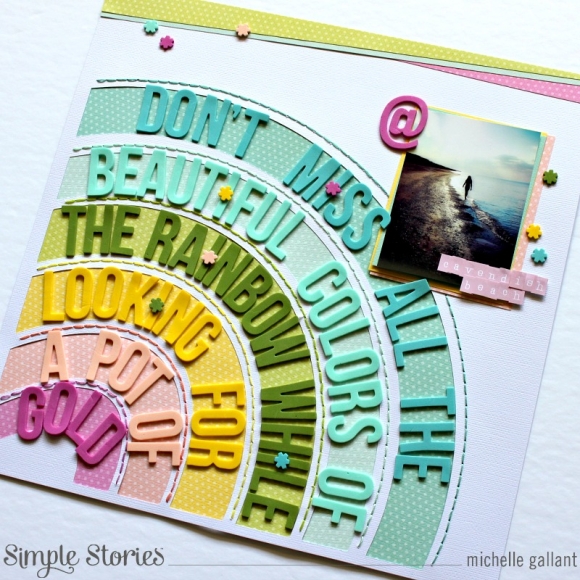
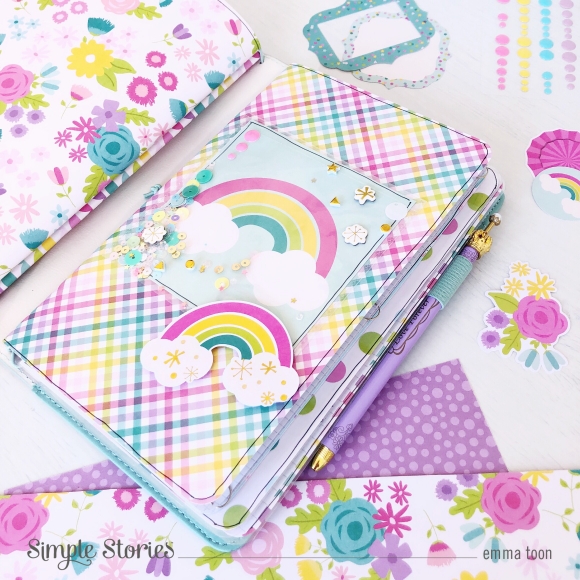
Here’s a 4x4 shaker on this insert cover, I used the rainbow image in the pocket and then the chipboard rainbow to add more detail! I even used some of the tiny gold foam stickers and gold foil chipboard stickers for extra wow! 

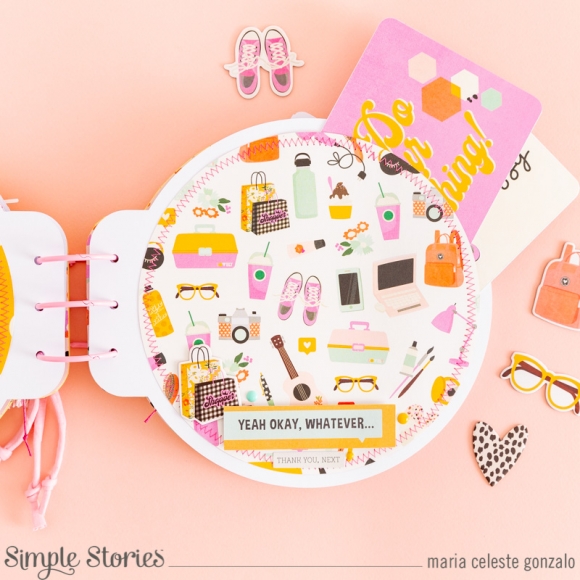
Inside my lists insert I decorated lots of pages ready to write my lists, the colours in this collection are so bright and cheerful! It will make any list into a super gorgeous list, don’t you think?! I like to use paper from the Sn@p! 12x12 Wood Basics pack for the areas where I’ll be writing my lists or journaling. 

Last but not least if you are feeling really brave and happy to play around cutting and sticking then you can make a full pocket cover for your insert. I used two of the full page 6x8 pocket pages and did some cutting and sticking to eventually get them to the correct size where I could slide in my decorated cover. It makes for a protective sleeve which can be reused as you can easily swap around the decorated covers. 

Well, I’m hoping that now you can see just how magical the Magical Birthday Collection and the Sn@p! Products are!! and maybe take away some ideas you’d like to use. 

If you’d like to see more of my projects you can find them on Instagram here https://www.instagram.com/heartsbyemma

Supplies

Pages