March 2017 Blog Posts

Hey there! It’s Lori again, and today I’m sharing more behind-the-scenes from the CHA/Creativation show. Today it’s all about our awesome Carpe Diem Emoji Love products!

The Emoji Love Carpe Diem collection is filled with OMGs, LOLs, and of course, emojis! Great for young and not-so-young planner users, this line has a little something for everyone!

Take a moment to walk through a virtual tour of the Emoji Love A5 12 Month Planner Insert Set and see all the FUN & functional products that are included!  Inside you’ll find over 270 pieces of goodies: 12 monthly tabbed dividers, weekly inserts, 1 main dashboard, 1 acetate dashboard, 6 die-cut dashboards, 1 storage pocket, and 3 A5 sticker sheets!

Inside the Emoji Love A5 12 Month Planner Insert Set, you can record your goals, birthdays, #TBHs and #LOLs. Clip and bookmark your pages with our Decorative Clips so you can flip to pages easily.

The 3 pages of Emoji Love stickers included in the insert set are filled with bitty emojis to accent line items in your planner, flags, labels and tabs as well. Aren’t these adorable?!

If the emojis don’t have you falling in love, the colors, the punchy acronyms, and the inspiring designs will surely have you twitterpated!

Grab your Emoji Love Insert Set at a participating retailer soon! To locate an online store or retailer near you, check out our store locator. Be sure to call ahead to make sure they have this insert set in-stock, because they’re selling quickly!

Can’t wait to get inspired? Be sure to follow our Live Love Plan Pinterest board for more than 600! Carpe Diem Planner ideas and inspiration!  

SaveSave

SaveSave

SaveSave

As the month comes to a close and we look towards the rest of 2017 and the exciting things we have in store for you this year,  we say a fond farewell to some of the amazing ladies on this past year's creative team. 

As J.M. Barrie, creator of Peter Pan, said -

"Never say goodbye because goodbye means going away and going away means forgetting.”

We'll never forget these talented designers we've had with us and the contributions they've each made to Simple Stories and the amazing growth we've experienced this past year.  So, rather than saying goodbye, we'll say a very fond farewell.

We thank these wonderful ladies for sharing their art with us the last 12 months, and for a number of them, the last several years.  We are deeply thankful for their contributions to Simple Stories and the creative ways they have shown you how to use our products -

Alexandra Sirgue-Macleod

Allie Stewart

Jennie Garcia

Laura Whitaker

Marcia Dehn-Nix

Mary-Ann Maldonado

Meka Allen

Missy Whidden

Shei Garcia Pena

Stacy Koo

Theresa Doan

Vicki Boutin


SaveSave

Hello friends! It's Jennifer here to share a fun mini album I created using the new Say Cheese III collection!  I am usually a layout girl but my second love is making mini albums! The SN@P! 4x6 Albums are the perfect size to document your favorite event or trip! Each binder come with a variety of pocket pages as well as eight different journal inserts! I was thrilled to see that Simple Stories added to their Say Cheese collection as all of the lines coordinate!  Of course a new collection means new embellishments such as washi tape, enamel dots, and decorative pins!  

I also love when a plaid print is included in a line; my eye instantly goes to that page and I can't wait to use it!  I layered a strip of the B side of Magical Memories  one of the 4x6 cards from the Say Cheese III SN@P! Pack.  I typed up my journaling on my electric typewriter then added a cute Epoxy Metal Clip and a strip of the 100% Fun Washi Tape!  To accent my journaling, I stamped some sentiments with the Say Cheese III Roller Stamp

The journal pages include grid and ledger prints which are my favorite! They are great for adding larger photos or telling more of your story!  I trimmed my photo down to 4x4 so I could add more embellishments! I layered pieces from the Bits and Pieces pack as well as the SN@P! Pack.  

Here is one of many different pocket pages included with your SN@P! Binder! I used 3x4 cards from the SN@P pack to include about my photo (I love the look on my son's face! LOL).    An easy trick to add depth to your page

I also love the 2x2 slot that are perfect as an accent page in your book!  I used inserts from the SN@P! Pack as well as the smaller stickers from the 4x6 Sticker Sheets.  It's always fun, too, to make a "shaker" space with sequins and smaller die cuts.  

I love utilizing the 3x4 Journaling Cards along with the SN@P Pack pieces! I added a strip of the cute Photo Op Washi Tape to the side of my journaling card. The 2x2 pockets paired with the 4x4 is a fun combo to add smaller accents such as the cut out stars and hearts from the Combo Sticker Sheet

I like to add my own flair to some of the cards in my pocket pages. I used strips of paper underneath the "Castle" Decorative Brad for one of my cards. Also using a favorite hand punch, such as a pennant is a great way to accent your card.   

​Thank you for stopping by today! You can check out the Say Cheese Collections in their entirety by clicking HERE! Have a great day!

Supplies

Hello Simple Stories friends! Marcia here today for some layout inspiration with the beautiful Simple Stories Faith collection. This collection has some gorgeous pattern papers along with faith based die cuts and verses and can definitely be used for scrapbooking and cardmaking in addition to Bible journaling. 


For my first layout I Have No Greater Joy, I am not scrapping a religious photo but the photo goes well with the biblical verse I chose to use for my title. I used one of my favorite pattern papers for the background. I didn't want to cover too much of the paper up, so I die cut a larger title and used a single photo in the lower corner. 


The negative space of my title is backed with white cardstock and to emphasize the word Joy, I backed it with a pretty floral pattern paper. Then I added the die cut words using a script font in navy over the top. Mixing fonts and colors in a title adds interest.


I kept the embellishments to a minimum, using only the chipboard sticker butterflies, enamel dots, and a couple of stickers.


______________________________


For my second layout I really wanted to scrap some photos from my nephew's baptism. In I Am A Child Of God, I used a big sun die cut to symbolize God's grace. I love how bright and happy this turned out.


I added texture by machine stitching the yellow sun rays. The Grace chipboard sticker adds dimension as does the butterfly.


I love this cute little sheep Bits & Pieces die cut. The verse was perfect for my baptism photos too.


Under the photos you can see one of the Faith collection's washi tapes with words of inspiration adorning it. Isn't it beautiful! I embellished with some chipboard sticker flowers, decorative brads and enamel dots.


The 3x4 journaling card makes for a perfect title.


Thanks so much for stopping by today. Have a great week!

Supplies

We’re happy to announce we’ve added some great new cut files to our Silhouette store that you're sure to LOVE & ADORE!  

Visit Simple Stories here in the Silhouette online store & check out these new cut files along with thousands more of your favorite Simple Stories designs!

SaveSave

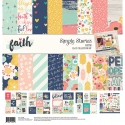
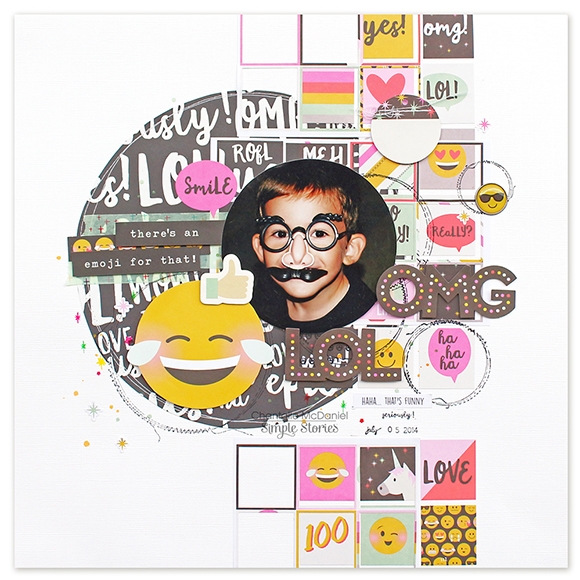
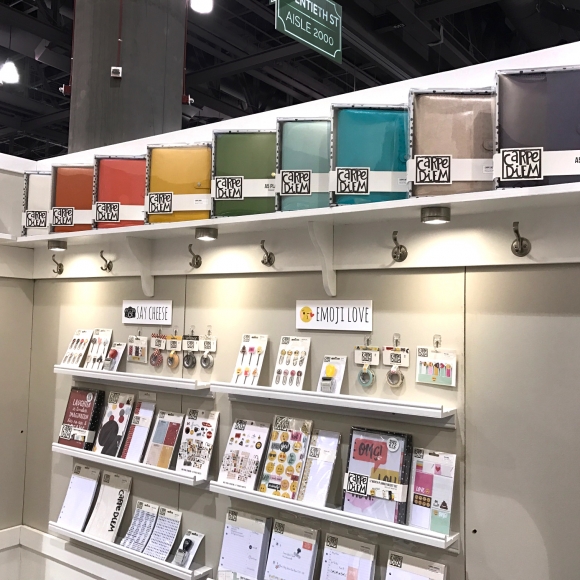
Hello everyone ! This is Mindi here and I want to welcome you to the blog today. I am going to be sharing some pocket pages using the new Emoji Love collection. I wish I could insert a bunch of Heart Eyed Emoji's right here to try and express my love for this collection. It is so cute and the colors are perfect. Let's get to it shall we. 
 
Here is what both of my pages look like together. I am so happy that my photos matched the products very well. I always try to make an effort and match them up the best I can to similar colors and products. 
 
 
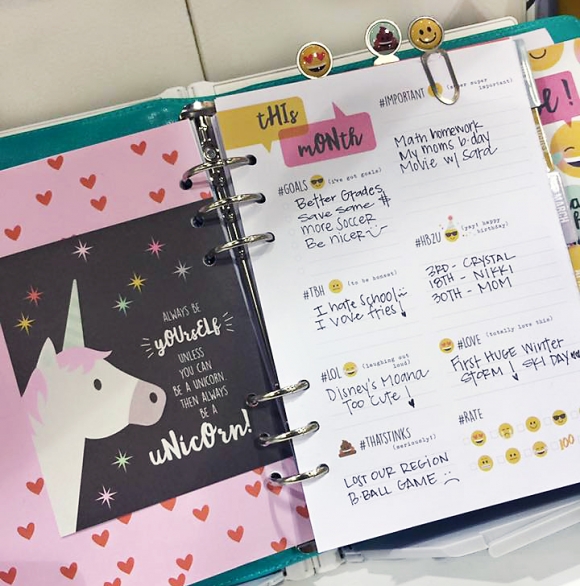
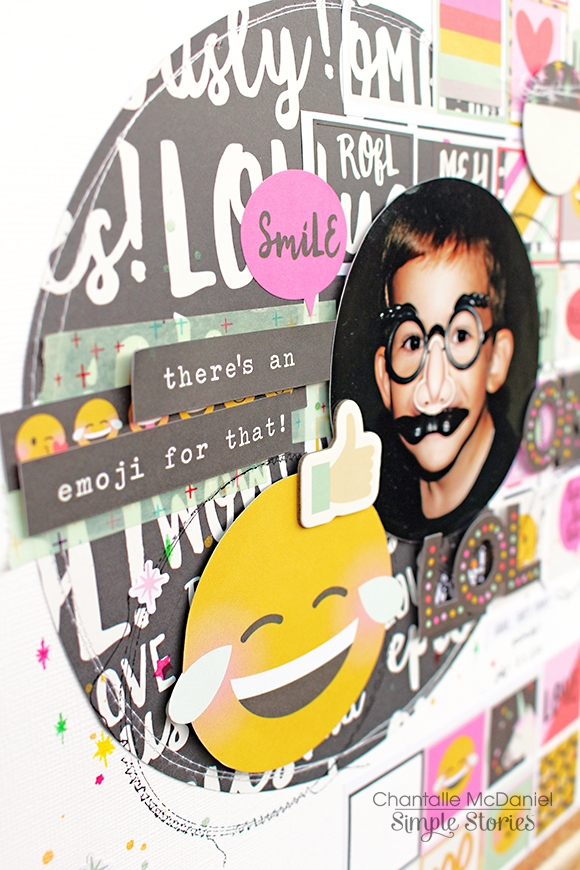
For my title card this time I chose to go with this colorful ink splattered pattern Journaling Card. It was perfect to add some misc. embellishments to. I choose to add in my everyday stories and photos that were all from week 9 and I love how the Emoji collection was a great fit. 
 
 
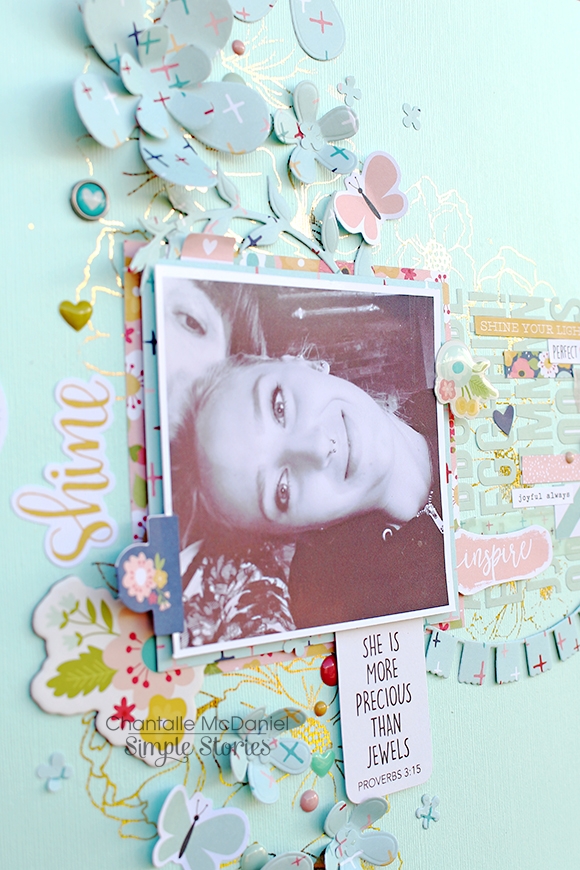
Back in January we went out to a local park and took some fun photos of my daughter Maddie. She is obsessed with Emoji's and I had bought her this Emoji themed shirt and hat. I thought that it would be fun to take some birthday photos in her Emoji attire. Even though the photos were taken a few months ago I knew that I wanted to include some in her birthday week. She turned 10 this particular week. I journaled about her and her Emoji love on this first journaling card. The next pocket has a close up of her Emoji hat. I was beyond thrilled when this collection came out, especially since she had this pink hat and shirt that totally matched the color scheme. 
 
 
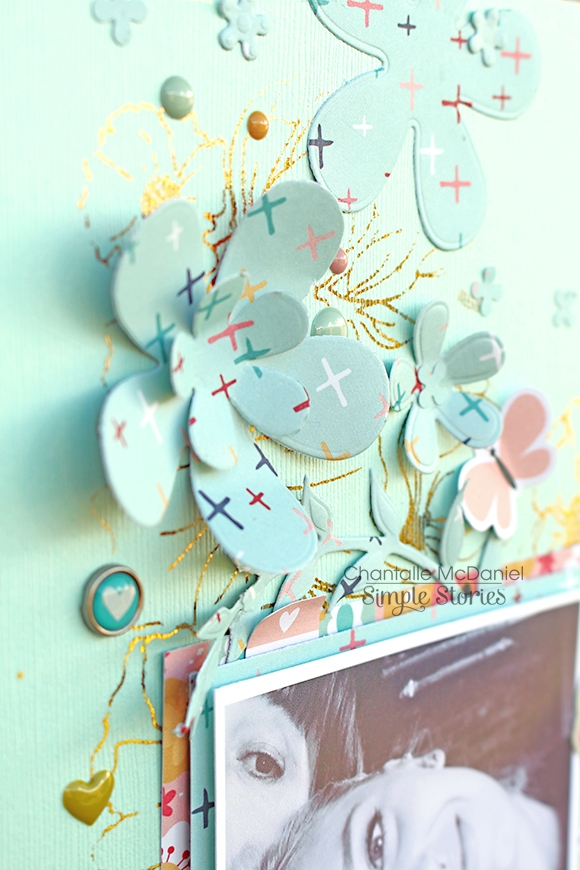
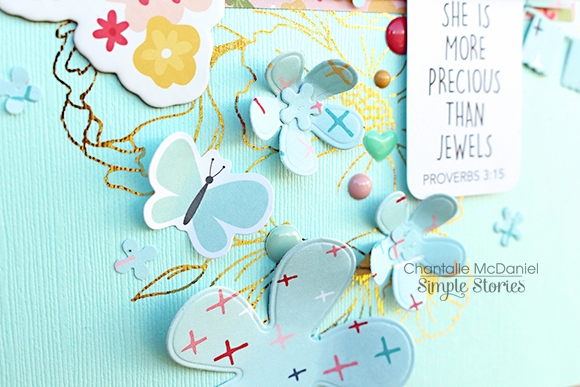
Here is a close up of the journaling card and photo. I knew I wanted to use this chipboard unicorn somewhere on this spread and since Maddie loves unicorns it seemed to fit. I also added a label on the bottom of the journaling card and added some stamps from the roller date stamp. 
 
 
Here is one last look at the left side of my spread. 
 
 
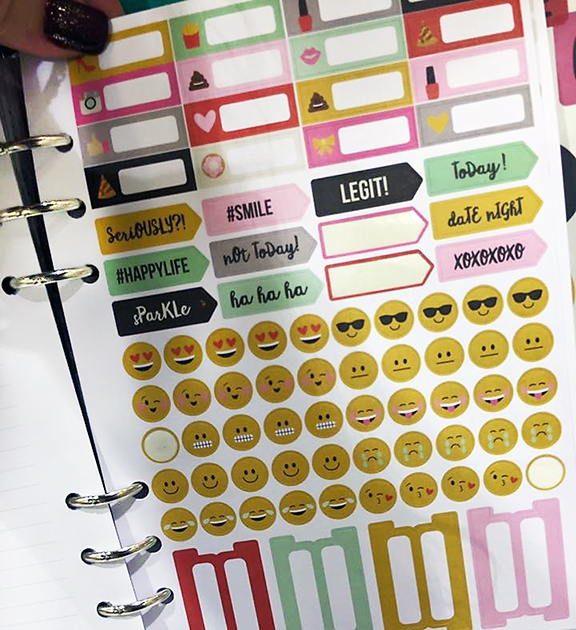
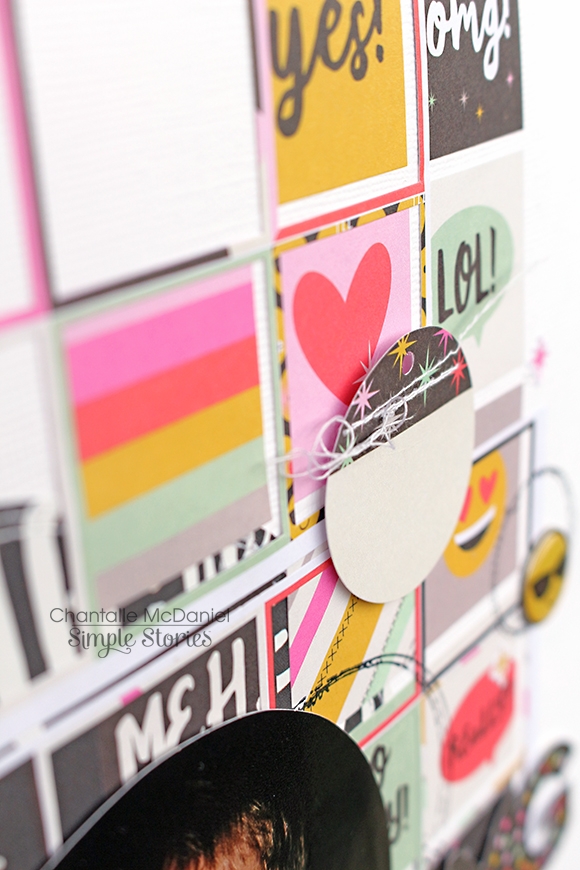
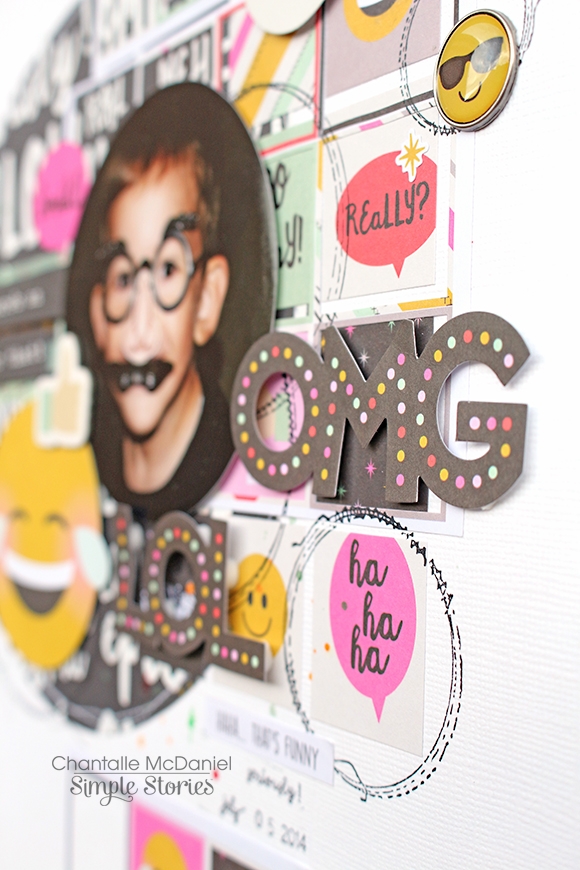
This is the right side. More everyday life, blooming flowers, pizza days and more emoji's. 
 
 
During this week we have been spending some time outside and even went away for a few days over the weekend. I added a few different photos of the outdoors and I was so happy that they matched the color scheme so well. 
 
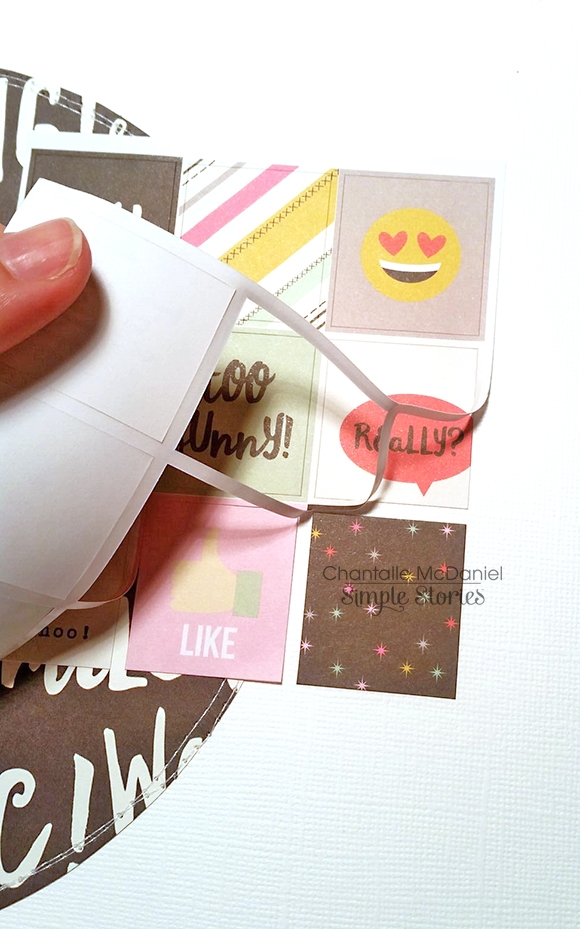
When I am putting together my spreads I typically will include a few 3x4 photos and then adding in journaling cards. I was able to add in a few fun stories about the week including one of them on that texting card. That card was so perfect for this day and age. I am not sure about you but I go to great lengths to add as many emoji's as possible in some of my texts. Especially the ones to my family. It will be fun to look back on this little piece of popular culture in the future. I added that clear sticker that says Talk Emoji To Me. It was one of my favorites and I am so happy that I was able to add it in this weeks spread. 
 
 
We happened to have a pizza night this week. I was out shopping with Maddie one night. We were out way later that we had planned and so I texted my husband and asked him to pick up some pizza for dinner. I snapped a photo of the empty pizza box the next day and decided to add the photo in a 3x4 size. That allowed me to add my story alongside my photo all in one 4x6 slot. 
 
 
One last close up that I want to point out. Over the weekend we had this amazing sunset that I wanted to document. I kept the embellishing simple with only adding a few labels in the bottom corner of the photo. I added a few random stamps from the roller stamp and then finished it off with a clear sticker and some enamel dots. 
 
 
That is a wrap for me everybody. Thanks so much for coming to the blog today. I want you guys to know that the emoji collection can be for so many different projects and scrapbook pages. It was so fun to work with and I hope I have given you some inspiration. 

SaveSave

Hello Simple Stories friends and welcome back to the blog today. Chantalle with you and I am excited to share two pages where I have made stickers a main focus for my background. The 4x6 sticker packs are definitely a favourite of mine, as each comes with a wonderful variety of alphabets, phrases, shapes and more! Indulge and use up a whole sheet on your next project, I dare you!
 
More Precious Than Jewels
 
This page, featuring my beautiful niece, was inspired by the cross pattern on a sheet of Faith ‘Believe’. I absolutely love all the prints in this line but I felt this one had a positive (excuse the pun!) and youthful feel. 
 
 
You’ll notice I have used a lot of tone on tone here. I like to do this when I want to add depth but keep focus. I started with a hint of floral foil and then layered a sheet of alphabet stickers over the top. This formed my base, over which I could add my elements.
 
 
In order to keep your sticker sheet intact, peel the backing paper off very slowly. Note: You may need to use one hand to steady the upward pull as you peel the paper back. Then, lay the stickers down on your project and again, carefully peel the rest of the paper surrounding the letters, off.
 
 
I’ve chosen to work in a sort of T-shape and being black and white, I think the photo stands out quite well against the more subtle colours. As I mentioned above, I’ve used lots of elements in a similar tone to bring the page to life. Lots of stickers - both cardstock and chipboard. The die cut shape provides the title and the stickers bring up the rear with little positive notes! 
 
 
I’ve die cut a few floral shapes using the awesome ‘believe’ paper again and brought out some of the pink tones with a hint of ‘Charity'. (The delicate florals of this paper also help to tie in the floral theme together.)
 
 
As always, I like to make use of little details to finish my projects off. Enamel dots are also a go-to for me. How adorable do these Reset Girl heart enamel shapes look! 
 
 
_________________________________
 
My next page, There’s an Emoji for That,  also uses a whole bunch of stickers to build up the background.  
 
 
I can’t help but be drawn to the sweet circular faces in this Emoji Love collection. The circular shape calls me! haha. 
 
I first thought to use a square photo but it just didn’t look right. I trimmed the photo into a circle instead and it instantly looked better!  I loved the bold black and white script of ‘Be a Unicorn’ but it would’ve overpowered the page, so I’ve cut a large circle as a base shape and placed it on some white cardstock and then, laid my stickers over the top. You’ll notice the design of this page is similar to the one above, but this time it draws the eye predominantly down the page, instead of across. 
 
 
These rectangular sticker shapes from a pack of Emoji Love 4x6 Stickers are fabulous for use in Carpe Diem planners as well as any other paper projects! I love folding them over the top of pages or using them in a title. Here, I have used two sheets of these stickers (removing one or two that I didn’t think added anything to the page) which left behind a few gaps, but I quite like the effect!
 
 
To give them a bit of a less ‘structured’ feeling, I have also used the excess bit of the sticker paper and used it as an overlay.
 
 
The title phrase was snipped from a sheet of Emoji Love 4x4 Elements.  Journalling cards are such a great resource - they can give you extra wording, phrases and shapes to hand cut. Plus, you get a few on a single sheet of paper - great value!  Other elements on this page include die cuts from the Bits & Pieces pack, decorative brads, some roller stamping and a few little hand-drawn elements using some coloured pens.
 
 
OMG - such fun! ;)


Thank you so much for stopping by today!  'Til next time!
 

SaveSave

SaveSave

SaveSave

Supplies

Hi everyone! It’s Lori, marketing manager at Simple Stories, and I’m excited to be sharing more of our behind-the-scenes goodness from the CHA/Creativation. Today, I’m sharing so many great things, and they're all from our most recent Carpe Diem planner release!

The gorgeous new planners, insert sets, and accessories have created a lot of excitement in the planner community as well as in the crafting community these past few weeks!  Look at the yummy colors and designs as they are displayed in our booth!  If eye candy had a taste, these collections would be super luscious and sweet!


During the 2017 CHA/Crativation show, we introduced two stunning new A5 planner colors: Clover and Grape. After lots of requests from our fans, we were happy to add these two colors to our line of A5 planners! The Clover green is fresh and springy while the Grape planner is vibrant and rich. Both colors are well on their way to reaching our top sellers list, so if you’re eying one of these colors, be sure to grab one soon!

Everyone was thrilled to hear that our new Carpe Diem 6 ring, A5 punch was announced at the 2017 show! These awesome punches can be used to create your own Carpe Diem dashboards, inserts, or simply to help you organize all of your papers and things to have in your planner. Are you excited to pick one up? They're shipping to retailers in May!

Once you get your planner organized and you’re busy checking off your to-dos, why not dress up your planner and personalize it just for you? Our new Planner Decals were announced at the show, and everyone fell in love with the many different designs. They’re decorative and easy to apply and remove, so you purchase a few to change out with your mood.

Want to see more of our booth and all of the fun new designs?  Take a personalized tour with Simple Stories owner and art director, Amber Crowell, in the video below. You’ll not only get to see all of the amazing designs, but you’ll also hear a bit about the creative process and ideas behind the products.

Stay tuned to the blog during the next few weeks for an up-close look at the many fun & functional insert sets that were introduced at the 2017 show. We’ve got lots of great things to come; you won’t want to miss it!

Can’t wait to get inspired? Be sure to follow our Live Love Plan Pinterest board for more than 600! Carpe Diem Planner ideas and inspiration!  

Pages