March 2017 Blog Posts

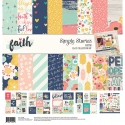
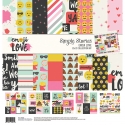
Hello! Jennifer here with you today to share layouts I created using the lovely Faith collection!  I adore the mixture of soft and bright colors incorporated into the variety of eye-catching patterns!  Even if you don't prefer to do faith based scrapbooking or biblejournaling, the Faith collection has many prints that can be used for a multitude of themes!   
 
For my first layout, "Child of God", I wanted to document a photo of my beautiful niece on her First Communion.  I love the wood grain background of the Charity pattern and decided to start with it as my base. I cut strips of the B sides of Shine and Grace and adhered them to the bottom of my page to add contrast. 
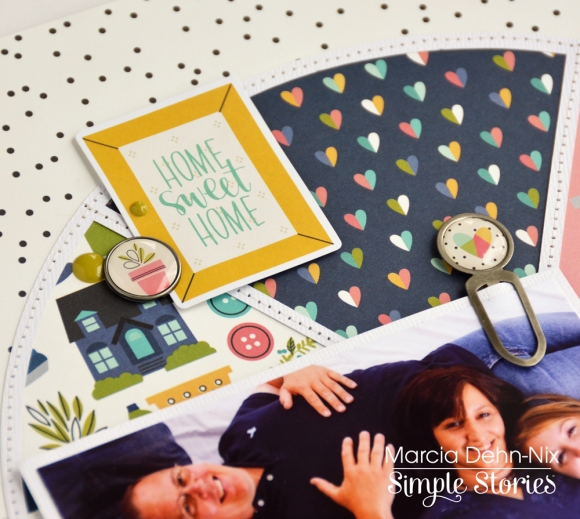
I didn't want to crop my photo down too much and tried to keep it as close to 4x6 as possible.  I layered some of the 4x6 Horizontal Elements underneath which is a great way to use them if you don't do pocket pages.  The 3x4 Journaling Card Elements can be used for your titles or to add journaling; I chose the former because I thought it was fitting for my page and I love the white/teal cabana stripes!  I added some of the cute feather Believe Washi Tape and one of the adorable Decorative Clips.
 
 
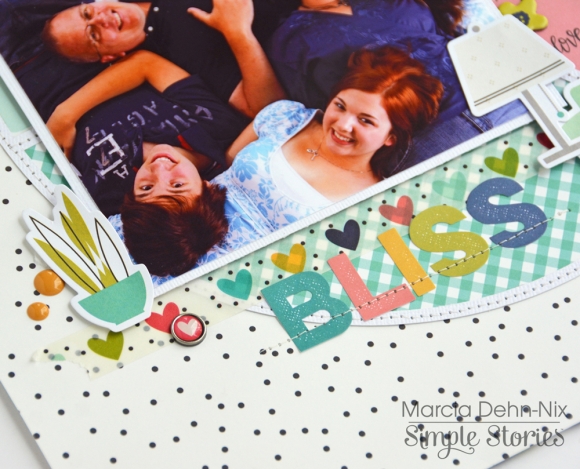
​I cut a floral circle cut file on my Silhouette using white cardstock and adhered it to the center of my page. I then used my sewing machine to add a couple layers of stitching to accent. Simple Stories never disappoints when it comes to embellishments and I had a lot of fun choosing mini die cuts from the Bits and Pieces pack, Chipboard, as well as Decorative Brads and Enamel Dots to accent the circle.  
 
 
I used pop dots to add dimension to the "believe" in the Bits and Pieces pack then clustered smaller embellishments around. 


​I love that Simple Stories has started to include Roller Stamps in their collections!   Here, I used the Faith Roller Stamp along side a date stamp from my stash.  They are such a fun accent for my photos! 
 
 
____________________________
 
For my second layout, "He Knows"  I used one of my all time favorite photos of our daughter from a mission trip to Haiti in 2015.  My husband and I were lucky to head a team to Northern Haiti to finish building a home for a family of five.  Our daughter seemed to bond with the kids right off the bat despite the language barrier.   I started with a kraft cardstock background then used a cut file from The Cut Shoppe using the colorful feathers of Inspire
 
 
The feathers are probably my favorite of this collection so I wanted to incorporate them into my page!  I used a few of the die cuts as well as one of the Decorative Brads.  Again, I used  pop dots on one of the feathers; this is my go to technique when I feel like my page needs an extra boost!  


​I am in love with this die cut from the Bits and Pieces and knew I had to use it as my title!  Again, its popped up to draw attention to it. The tiny brads and Faith Clear Stickers are perfect accents!
 
 
I don't always care for my handwriting so if I am scrapping at home, I use my electric typewriter and white cardstock for journaling.  I added a bit of splatters of spray ink to my page as well as more tiny embellishments.  
 
 
Thanks for stopping by!  I hope you will check out the large selection of products included in the Faith collection including planner goodies and the new Doc-It Journal!  Have a wonderful day!


Supplies

With spring just around the corner, what better way to start a new season with a new Fitness Planner!  This month I will be sharing how I used the Grape planner and the Carpe Diem Fitness products along with Emoji Love to help motivate and keep me organized, during my new journey of living a healthier life style.

I will be turning 40 in just a few months, and I already had set in my mind to get healthy. This fitness tracker is the most convenient page I've seen this far. I am absolutely in love with it!  On the top left corner is a section where I put a current picture of myself. I basically call it my monthly accountability page. You see numbers with measurements , whaaa!!! That was enough motivation for me! 

The daily tracker makes it easy to see what you have been doing with your time and eating habits. I needed this. Behind the daily tracker I added a folder to keep my fitness stickers in. The Fitness Planner inserts are so motivational it really encourages me to keep moving forward.

But my planner wouldn't be my planner if I didn't make a new dashboard and filled my pockets with happy planner goodies. Emoji Love went so well with the fitness collection I had to use both of them together! As I open up my planner it's a reminder of all the foods I need to stay away from. I added a huge sneaker emoji to the front of my dashboard to let me know just keep on moving! I used the epoxy metal clips as tabs, and decorative brads to some of my pocket embellishments.

My newest favorite addition are the fitness sticker tablets. It made planning for a healthier lifestyle super fun! My monthly view before the pen is on point! There were so many options and awesome quotes. I couldn't wait to go outside and start walking.

Here's to my new Journey in the new season with my new planner. Thank you Carpe Diem Planners and Simple Stories for adding this to the collection it couldn't have come at a better time! #LiveLovePlan


Page flags-8031
12 month planner inerts-8026
Faith
Washi-7727
Home sweet home washi-7822
Domestic bliss roller stamp-7824


SaveSave

SaveSave

Supplies

Marcia here today with some Simple Stories Domestic Bliss inspiration. This is such a fun collection for your everyday photos around the house. The tongue in cheek humor will make you laugh, guaranteed! The pattern papers are gorgeous with colors perfect for Spring paper crafting too. 


For my first layout, I wanted to scrap a family photo with the 4x6 journal card with a house and the quote "Love my home, love the people there". I thought it would be fun to mimic one of the pattern papers with pie charts and create my own super-sized pie chart. I sized one of the openings to fit the journal card, then backed the other spaces with different pattern papers. Here is how it turned out...


I embellished with a Bits & Pieces die cut house, sofa, lamp, and picture frame to reinforce the home theme. I then added some chipboard flowers and enamel dots for dimension.


This collection has some wonderful Decorative Brads and Epoxy Metal Clips.


For my title "BLISS", I used some stickers from the 4x6 Sticker Sheets. You can also see one of the Domestic Bliss washi tapes just under my photo. Aren't those hearts just perfect!


I also made a couple of box cards using the World's Best Mom cut file from SVGcuts. These are so fun. I love that they can be used as decor pieces too and give joy to the recipient for many days.


Wouldn't this make a great housewarming card! I used stickers from the 4x6 sticker sheets for my sentiment on the back of the card. This floral pattern paper is one of my favorites. I love those dainty flowers.


and check out that Decorative Brads alarm clock ... it makes the perfect stove timer, lol. Enamel dots are used for the burner dials on the front of my stove.


Here is what the card looks like from a top down view...


Box cards are a bit addicting, so of course I made a second one, For this box card, I created this wonderful teapot, This one showcases another gorgeous floral pattern paper combined with the pink dotted pattern paper. Chipboard sticker flowers and buttons are combined with a flower sticker and sentiment.


On the back side of the teapot I used a pretty vase of flowers and a "Mom Rules" sticker.
 
 
Here is another view so you can see the dimension. A gift card would fit perfectly taped on the inside.
 
 
The Domestic Bliss collection is a must in my book and one of my favorites from CHA. Be sure to check it out.  Thanks for stopping by today. Have a great week!

SaveSave

Supplies

Hey everyone! It’s Lori here on the blog today sharing more of the behind-the-scenes fun from CHA/Creativation. Today, I’m sharing some awesome projects made with our colorful and trendy Emoji Love collection.

Everyone at the show was buzzing about the awesome emojis (and poops!) featured in our new Emoji Love collection, and creating projects with this vibrant product has been such a blast! Check out our wall of goodness—it’s bright and gorgeous!

When I saw the punchy sayings and youthful colors in these products, I knew immediately I wanted to create a project about two of my favorite people—my two daughters! This black tray is the perfect backdrop for the punches of colors in this collection and will look great hanging in their room.

There are so many different sayings and emojis to create with in this awesome collection! The bright colors and touches of black make the emojis and talk bubbles pop off of this layout and card.

We displayed lots of wood décor projects at the show, and everyone loved the variety of creations! Next to this adorable pocket page of emoji-goodness, we displayed a simple wooden LOVE. Look how the colors and heart-eyed emoji add a playful flair. We love it!

Are you excited to create with this popular collection? We start shipping to retailers next week, so be sure to keep those heart eyes peeled!

If you’d like more behind the scenes peeks into the booth at CHA/Creativation, check out this live video from the show to see more of the Emoji Love collection!

In case you missed it, be sure to check out our behind the scenes posts for our Faith and Domestic Bliss collections for even more inspiring projects.

SaveSave

Hello everyone ! It's Mindi here with you today. I am so excited to be sharing some pocket pages that I have created from a Disney trip last year. The new Say Cheese line is one of my favorites ever ! It is the perfect collection to help scrapbook all of my Disney photos and memories. Let's get started. 
 
 
As do all of the Simple Stories collections the Say Cheese lll line includes the Bits and Pieces pack. I wanted to use some of them to make a title card. So I started with a journaling card and then played around with the embellishment pieces until I picked out the photo strip and the believe label piece. The red in the believe label went perfect with my photos and set the tone for the rest of my spread. I then finished off the card with a few stamps from the roller stamp and a few stickers and a brad. 
 
 
We as a family have Annual Passes to Disneyland and try to go often. Especially when there is a birthday. We went last May to celebrate my Husbands birthday. When we go for a birthday we make sure that the birthday person gets a birthday pin and wears it. I used the letter stickers to spell out button and then used a clear sticker on top of the word button. I thought it was perfect way to remember the tradition of the birthday button. 
 
 
When I was putting together my pages I knew that I wanted to use these adorable Mickey and Minnie journaling/filler cards. I used this Mickey card to create a filler card with some vellum and other embellishments. I paired it with a photo of one of our first stops that day, getting some fast passes for our favorite ride. 
 
 
Here are a few close ups of the left side of my spread. I added some simple journaling onto my photo there on the bottom before printing and then I added some embellishments on top. 


Let's move over to the right side now. I simply love the color scheme in this collection. The red, yellow, and blues were a perfect match for my Disney photos. I made sure to try and spread out the colors and also my embellishments to not make my spread to busy. 
 
 
One of my favorite things that happens at Disneyland is that all of us love to giggle together, hold hands, and have fun together. I snapped this photo of me and my daughter and added an embellishment from the Bits and Pieces on my photo. The word magic and the stars were perfect for this moment. 
 
 
As you see here I have used a 4x6 journaling card in the middle pockets here on the right side. I needed to break up the photos and the creme colored journaling card was perfect. I split the journaling card in half so that I could add it in the pockets. Once I had it cut in half I started to play around with adding some stickers and embellishments. Don't be afraid to cut up the cards to suit your needs. 
 
 
Here is another way I used the journaling cards in a different way. I had this photo of my daughter eating her turkey leg and I was all of of pockets. I had to combine the photo and the journaling card to fit into one of the 4x6 pockets. I think it turned out great and this way I was able to get more photos plus stories into my pages. 
 
I love this turkey embellishment piece so much and knew that I had to use it. I paired it up with another embellishment piece on this journaling card. One other thing I added on to this card was some stamping. I used the roller stamp to stamp the word dream onto the card. 
 
 
Thanks for coming over to the blog today ! I loved working with the Say Cheese line and can't wait to use it again. I hope you have found some inspiration. Happy crafting everyone ! 

Pages