September 2016 Blog Posts

Hey there, friends!  Missy here, and I have two layouts to share today using the beautiful Posh collection.  It’s such a versatile line, and I love that you can create different color schemes with it and make it look like two different collections.  There is a lot of navy blue, which I love.  But for my first layout, I challenged myself to not use any navy blue.  I wanted to create a soft and light look using a lot of the pretty floral images. 

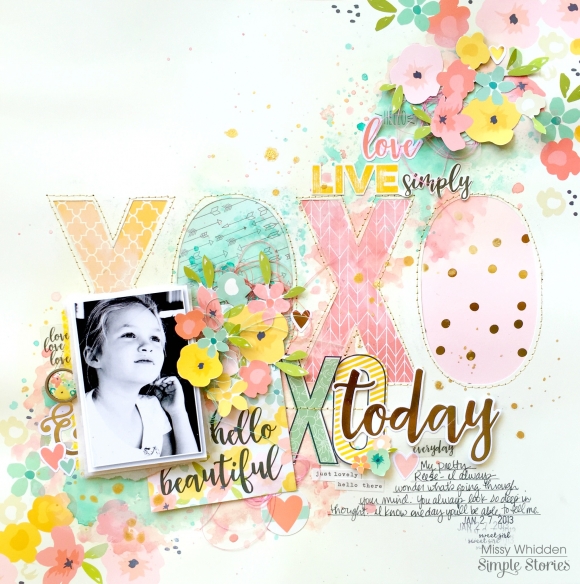
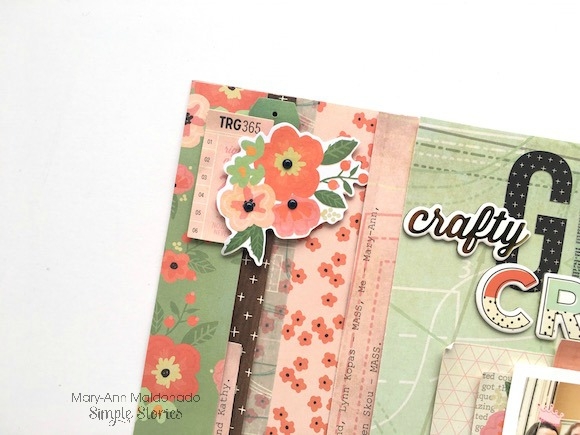
I used a black & white photo of my daughter, and I was inspired by a 3x4 SN@P! card covered in flowers.  I love the “hello beautiful” sentiment, and I wanted to use that as my title.  I used the Choose Happy patterned paper for my background because of the floral clusters and the white space.  I wanted to place the photo in the lower left corner since she’s looking up to the right.  So my design sort of goes in a diagonal to follow her eyes.

I decided to create a fun XOXO design in the background, so I created it in my Silhouette software and then cut it.  I backed it with patterned papers and then added a bit of white gesso over some it.  I used some watercolors to add some background interest and then stitched around the letters with shiny gold thread.  I fussy cut the XO from a 4x6 Snap card and then added a fun shiny gold die cut over it.  I love using the Clear Stickers and Word Label Stickers for embellishments, too.

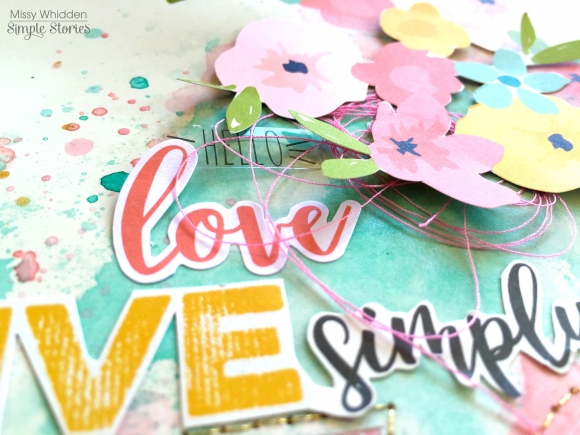
Here you can really see the gesso and watercolor area.  I love how that turned out!  The colors are so light and pretty, and the floral clusters are gorgeous.  I fussy cut those from Snap cards.  I added some tangled thread for extra interest, color & texture as well.  I think the stitching really gives it a finished look.

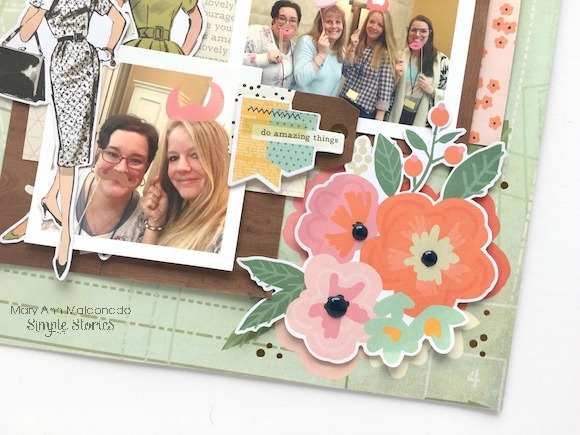
Here’s that beautiful card that I began with.  I added those fussy cut floral clusters for even more flowers…I just couldn’t get enough of them!  I added some white tissue paper and foam under the photo.

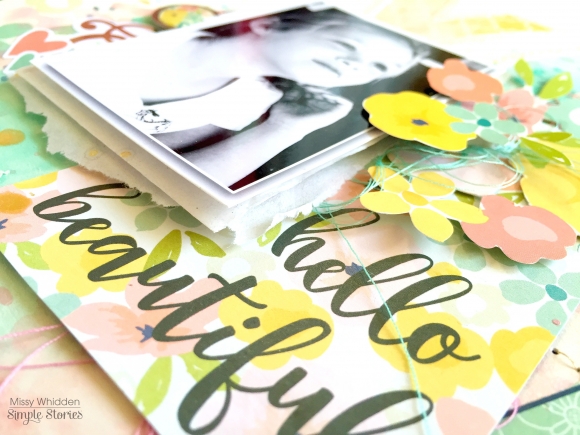
I love layering embellishments right on top of my photo if there’s room.  These flowers are perfect for that.  Plus, it looks like she’s looking at them.

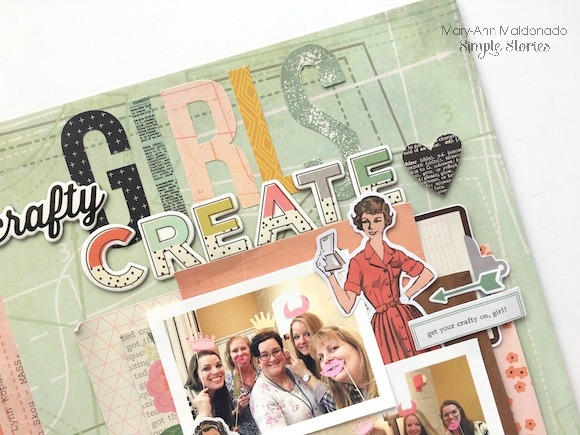
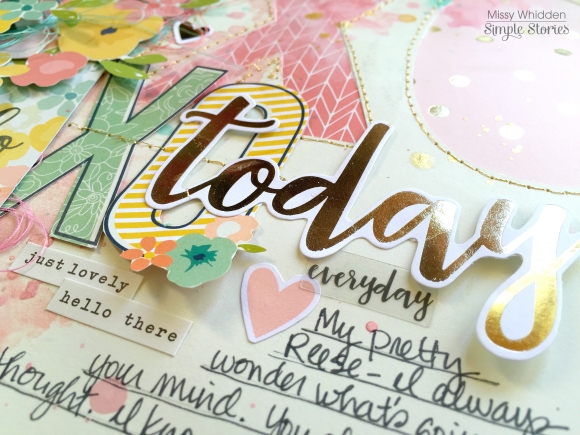
Here’s one last close-up of the top right area.  I added another fussy cut floral cluster, tangled thread, stickers and a fussy cut phrase.  Those Snap cards are a great source of images and phrases to cut to use on your pages.  This one was perfect.


I was very happy with how this turned out, and it shows how you can get a soft and light page using this collection. 

______________________________

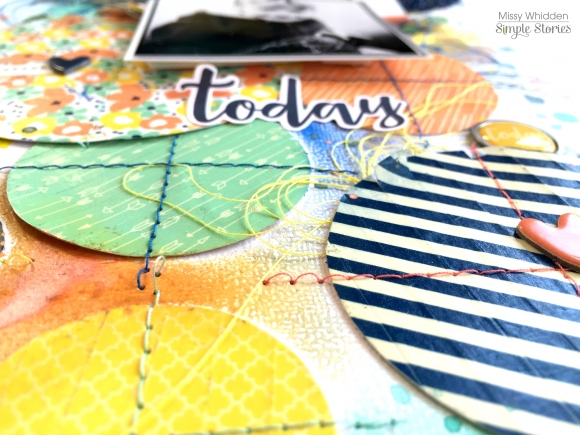
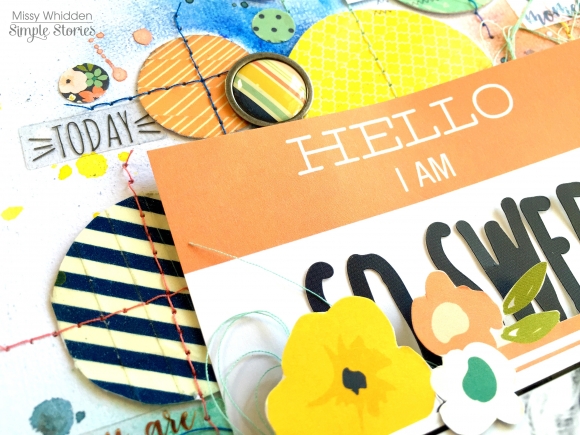
For my second layout, I did use the navy blue color, and it completely changes the look of everything.  I think by adding that one color, you can get totally different looks with your color schemes.  I decided to use lots of the Washi Tape for this layout.  There are two different washi sets, and they both include some navy blue.  I took some white cardstock and punched different sized circles.  I used all six rolls of tape to cover all the circles.  I created a vertical design with them, and I used my finger to smudge down some clear gesso all around the circles.  I used some oil pastels and gelatos to smudge some matching colors around the circles and where the photo was going to go.  It was really fun mixing and matching colors to match the colors in the tapes.  I used a small black & white photo because I wanted to use that cute 3x4 Snap card as part of my title.  The black & white really pops against all those bright colors.  I love how the navy color adds a different feel than leaving it out and going with just the light colors.

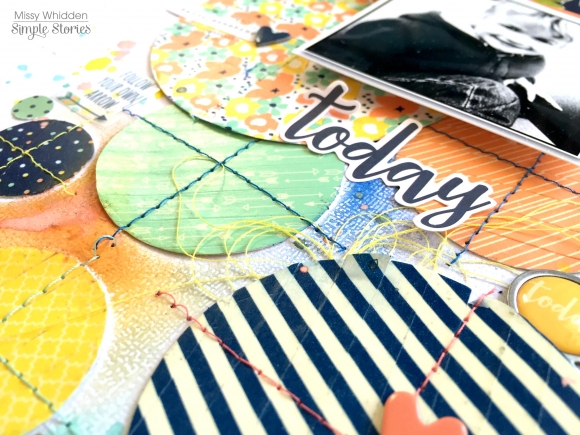
I love these colors!  Once I had my circles taped down and all the background color on, I machine stitched through all the circles in coordinating thread colors.  The stitching not only makes sure things aren’t going to move, but it also adds color & texture.  I also used a couple of the Epoxy Metal Clips as layering pieces behind two of the circles.

There are so many fun stickers in this line, and I added one under my photo.  The Clear Stickers were perfect for this because my background was mostly white.  You can really see those on a white or solid background.  I layered more thread under some of the circles & the photo.

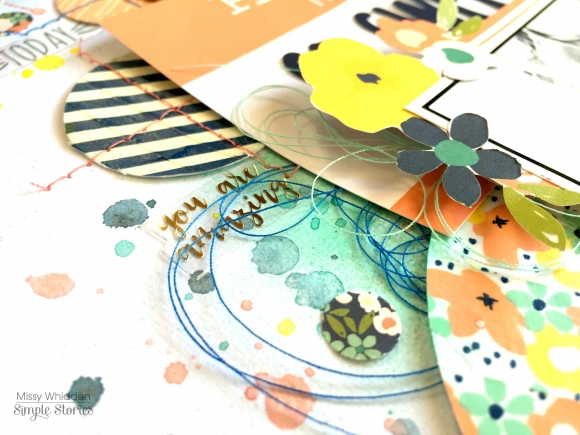
I added some ink splatters in coordinating colors.  I also fussy cut another flower cluster (this time with navy blue included) as a little layer behind my photo.  I used my craft knife to slice around some of the petals so they would overlap onto the photo.  I added foam adhesive under the photo to give it some dimension.

This SN@P! card was just begging to be part of my title, so I layered my photo on top of it and added some of the Combo Cardstock stickers to it.  I love how it turned out even though the photo overlaps some of the letters.  I love that cute little clear camera sticker!

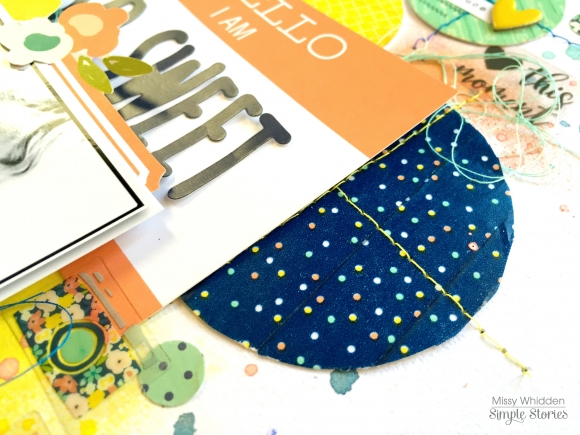
Here’s another angle of the top area.  I used a tiny circle punch to get a few smaller circles in the mix, and I also added more Clear Stickers as well as another Epoxy Metal Clip.  I love using those as a layering embellishment, or you can break off the clip part and use those like you would a brad.

I can’t believe both of these pages came from the same collection!  I love how different they look, and you know you have a great collection when you can make girly color schemes AND not-so-girly color schemes.  I hope you challenge yourself to try to get some different looks out of it.

Have a great day!

Supplies

Hey planner girls!

Meka here today, excited to share how I dressed up my Robin’s Egg Carpe Diem planner with Simple Stories’ Hello Fall collection.

My planner pockets are a place for inspiration and joy. I use motivational journaling card elements for words of wisdom.  For more fun and functional décor, I used epoxy metal clips and chipboard stickers with paper clips attached.

To create the pocket insert, I used the I {Heart} Fall and Sweater Weather 12x12 scrapbook papers as the base. Then I embellished with Bits & Pieces and scraps of larger papers.

These dividers and tabs were so simple to put together!

After cutting more papers from the Hello Fall Collection Kit to page size, I punched tabs using a tab punch. If you don’t have a tab punch, you can just cut rectangles about 2x3 inches. From there I used tiny scraps, stickers from the 4x6 pack, and cardstock stickers  to embellish the labels.

I spread the tabs and dividers out, and mixed and matched contrasting colors and patterns to make everything pop.

An extra tab was added to the top of my completed calendar divider for quick access.

For the week’s planning layout, I started with a wash of what turned out to be way too much yellow watercolor!  I used washi tape and clear number stickers for the header, then embellished with Bits & Pieces and stickers. By the end of the week, I’ll add more writing, doodles, and stickers to tone down the excessive paint.

I uncovered some mini clothespins, and couldn’t resist another clip diy. I glued a few Hello Fall paper scraps onto the clothespins. I left some simple, and adorned another with fall bouquet.

Changing out my planner décor for the season is really motivating me to jump in and play with my planner more. Come visit me here on Instagram and let me know how you’re decorating your planner for fall.

Supplies

Hello friends!

Summer has crept away and we are now a week into our Fall season, I must say that I am a summer gal at heart and always find it bittersweet to say good bye to hot sunny days.  That said, oh how I love the colours and scents that Autumn brings.  Warm sweaters, comfort food and crunchy leaves are all happy things, but you can bet I will still be sporting flip flops for a while to come!

Today I am sharing two layouts that I have created with the gorgeous Hello Fall collection, and as we have come to expect Simple Stories, it does not disappoint.  It definitely elicits all of those warm and cozy feelings of fall.
 

I AM READY FOR THE LEAVES TO FALL
 
I began this page by adding a few sprinkles of water colour paints to my background to mimic the falling leaves and colours in  my photos, then I stitched it onto the orange patterned paper.
 

I placed my photo on top of a few pieces of patterned paper after matting them with some cut apart cards. Then I tucked a few die cuts and hand cut elements into my layers.
 

I love these multi coloured leaf die cuts from the "Bits and Pieces" package and used several of them on my layout, I did some hand-stitching to add the suggestion that a couple of these leaves were falling.
 

I also loved this quote, cut from a cut apart card, so much that I knew it needed to be my title.  I paired it with a die cut for more impact.
 

Always happy to add more embellishments, I took the opportunity to create a cluster to adorn the right hand side of my layout.
 

I finished off this page by creating a little Fall scene beside my photos.
 
VIEWS OF AUTUMN
 
I am a sucker for all things wood-grained and so this patterned paper definitely had to be used as a background piece for full impact! I added a few strips of other patterns to the top and bottom of my page for colour.

I created this cut file to anchor my photo collage and backed parts of it with patterned papers.
 

Combining alpha stickers and a chipboard piece I created my title, which was adhered beside a cluster with die cuts, stickers and more chipboard accents.
 

How sweet is this little fox?  He definitely need to be in the spotlight!
 

I love these little banner elements for adorning my photos.
 

To balance my title, which sits low on my layout, I added a small cluster of fall coloured flowers to the top of my page.
 
Thank you so much for visiting today!


Supplies

Good morning friends! Brenda Smith here with you this morning to share some pocket pages using Hello Fall. I live in the Southern California desert so we don't have much in the way of traditional Falls here, but this line is perfectly versatile enough to be used with non-specific Fall imagery. 

I strayed away from a lot of the more specific Fall embellishments like bushels and pumpkins, but the vast majority of embellishments are usable for everyday pictures. 

I used a mix of full-sized photos and smaller ones to fit atop my 3x4 cards. I find this creates a good balance of color from the embellishments and cards but still gives plenty of focus to the pictures. 

I made good use of the 6x6 pad for layering under smaller photos. The patterns of the papers are perfectly scaled down for a smaller format such as this. I find I can add more pattern when it's at a smaller scale. 

I used a bit of foam dimensional adhesive to make the various layers stand out a little more. I buy the thinnest foam adhesive I can find for the purpose of pocket pages so I can add dimension without too much bulk. 

Whenever I'm struggling with layering, I often turn to a doily as the bottom-most layer. I find that adds enough visual interest but since it's lacy, it doesn't overwhelm the photos. I'm a label-lover so I was really excited to see how many there were included in the Bits and Pieces pack. They are perfect for adding journaling to layered cards. 

 
I used a lot of the little white flowers from the 12x12 Cardstock Stickers all around the spread. I like to find a small, unobtrusive embellishment that I can place all around the spread as a unifying element. 
 

I loved the sentiments on this card so much that I wanted to add very minimal elements on top to keep the focus on the words. I added a sunset photo and a couple of embellishments from the cardstock stickers. 

As you can see, you do not have to have pumpkin patch or apple-picking photos to go with this collection. The colors are a gorgeous combination not often seen in scrapbooking collections so the uniqueness is fun and refreshing and perfect for your Fall photos, wherever you are!


Supplies

Hi planner friends, Vanessa here! Now that the Fall season is in full swing, it’s time to update our planners and have fun with the new Hello Fall collection!
 
 
The Hello Fall collection is full of pumpkin spice, cozy prints, and adorable woodland creatures.  I just simply switched out my stickers and journaling cards to match The Reset Girl’s Persimmon Carpe Diem planner.
 
 
I used the Piles of Smiles cardstock to make a pocket page and added a few of the Bits & Pieces from the same collection to store any extra planner stickers and journaling cards.


For my weekly spread, I used mostly the 4x6 sticker sheets from the Hello Fall collection to break up the blank spaces and to add a seasonal touch.
 
 
The trim along the bottom is from small strips of cardstock I had cut and I used a few Bits & Pieces cover up the edges.


I love making new paper clips for each month and the Hello Fall chipboard stickers are sturdy enough for paper clips.  I just picked a few of my favorites and used a strong adhesive to attach to the clips.  
 
 
I hope you enjoyed this quick and easy update inside of my planner for Fall and I look forward to sharing my next set up for October!

Supplies

Hello!  It's Jennifer on the blog today to share pages I created with the new Happy Haunting Simple Set! September is coming to a close and Halloween is right around the corner!  Happy Haunting is perfect for all of your spooky creations!   Truth be told, Halloween is my favorite holiday and I am in love with the colors of this collection!
 
My first layout, "Happy Halloween", I started with the wood grain print of All Hallow's Eve as my background.  I dabbed a bit of black and white ink to my paper using a hexagon stencil before embellishing.  I added strips of both sides of Trick or Treat to the top and bottom of my page; I think the plaid print is my favorite!
 
 
The set includes a double sided page of 3x4 and 4x6 Journaling Card Elements that are perfect for accented your photos or as a layer underneath your embellishments!  I love this adorable "SPOOK" bingo card!

 
At the top corner of my page, I added the spider web/spiders from the coordinating 6x12 Sticker Sheet!  There are many cute Halloween shapes as well as small sentiments, and squares.  I had some coordinating enamels dots as well as wood veneer stars in my stash to add to the web!  
 
 
You can also create your own embellishments using a favorite paper punch or your die cut machine.  I created my tag using a hand punch and one of the 3x4 Journaling Cards! I then affixed some black/white ribbon with a staple! 

________________________________

For my next layout "Oct 31", I used black cardstock  and a cut file with my Silhouette to create a grid pattern. I then cut square patterns from the different sheets and stitched them onto my page.   I am loving the ombre effect of the B side of All Hallows Eve!  

Did you know Simple Stories has a large variety of cut files available in the Silhouette shop here? I used the "Oct 31" file with white cardstock which I lightly misted with gold spray ink.  I then affixed it to one of of the squares.  

Showing another one of my squares which I included more of the adorable stickers!  The stars are tiny but oh so cute! 

I love the little ghost sticker...I paired him with the "Keep Calm and Boo" square sentiment sticker.  I used a couple pop dots under the ghost to give it some dimension.  

Thank you for stopping by the blog today!  Visit the Simple Stories Products page to see this collection as well as the rest of the new releases! Have a great day!

Supplies

Morning!  Have you ever been to a crop with a bunch of your crafty friends?  Well, last year was my first.  I meet up with some fellow scrapbookers on Cape Cod.  One of them even traveled from The Netherlands!!  It was so much fun and inspiring being with other crafty folks.  


Today, I used The Reset Girl collection for my layout.  I pondered over what to do with those classy girl dies cuts.  Finally, I decided to add them on this project.  I layered them like they were just a group of girls, hanging around gossiping!  I think they worked perfect for this, helping to add a little class to our silliness.  


For the base paper, I used the 'You Got This' paper.  I cut off the polka dot side, flipped it over and used the pink side.  I attached this all to a scrap piece of white cardstock.  I then began layering my papers to the left and added my journaling along with a strip of washi.  


I felt as though this corner of the paper layering needed a touch of decor.  This brought in a little floral clump to match the bottom right, helping your eye travel around the busy page.


Here I used foam to layer the floral clump directly on top of the existing flowers that were printed on the paper.  


The sticker sheet and the chipboards already provided most of my title.  All I needed was an 'S'.  I found one that was similar in size in the SN@P! Pack and fussy cut it to complete my title!  It is a little larger but it works!


_____________________________


I may be a little embarrassed by this layout!  1 -  Because of the silly photos and 2 - because I had never used Snapchat before and needed to be schooled by a 12 year old!  Ignore the photos and lets take a look at my page!


I used The Reset Girl collection in a completely different way than my first layout.  The collection tends to lead you towards scrapping about paper projects or planning, but can be used in so many other was as well, if you pick out the perfect items.  


I used a cut file to create my title with a delicate green paper from the 'Simple Basic Kit' peeking from behind.  


I decided to use a Library Pocket for this layout.  I wanted some of my journaling to be hidden, so tucking the pocket behind the layered papers helped do that.  (I may need to retype that journaling with a crisp new ribbon!)  


Because the photos are silly, the clump of glasses towards the bottom of the page help emphasis the changes on our crazy faces.  


Empty corners just beg for a little embellishment.  I used a few word strips from the 'Word Label Stickers' to convey some of the feeling I had towards the photos.  

Supplies

Hello dear Friends! Alexandra here. I finished the first album documenting the first six month of our life in 2016 and I'm thrilled to be starting the second one using the beautiful The Reset Girl collection. 

The first page is a trimmed pocket page. This is a "trick" I do when I don't have too many photos to document the week. I also enjoy the look of such a page as an opener. As always, I included some of the world event which took place that second week of July.

We spent a couple of days in Sedona, Arizona on WEEK 28 and I just love how the earthy tones of The Reset Girl collection match the photos.

I added some stickers and a piece of washi tape, Modern Meadow, to one of the journaling cards.

Here is a look at the two pages on top of each other.

Thank You!

Supplies

Pages