February 2017 Blog Posts

When I saw the Carpe Diem recipe products, I fell in love!  I'm sure many of you out there are just like me, I have recipes everywhere!  Bookmarks, Pinterest, emails, print outs, etc.  Sometimes I forget to save recipes and have to search again for them.  I'm really excited to get all of our family favorites organized into one book and have fun with it!  

When I started flipping through the Recipe sticker book, and saw these scripted words, I knew I wanted to make some fun, faux, die cut dividers with them.  

I started by placing the stickers on a sheet of cardstock.  I cut the cardstock down to the width of the sticker.  

I fussy cut around the sides and top of the stickers.  I left a few inches of cardstock below the stickers.

I adhered these to cardstock that I cut down for the dividers.  

After I had all my dividers set up, I started adding my favorite recipes.  The Recipe Inserts have exactly what you need to record your recipes.

And the sticker pack has a lot of fun, colorful stickers to brighten up your pages!  

My kids love to help in the kitchen, and I always take pictures of them while they are busy being little chefs, so I thought the Recipe Doc-It Journal would be the perfect place to document this!  

 I love how this recipe planner is coming together! I hope you have just as much fun recording your recipes and time spent in he kitchen as I have! 

SaveSave

Supplies

Hello everyone! Chantalle with you today to share some pages which both capture lots of action!   I’m absolutely smitten with the new releases - Domestic Bliss and Say Cheese III. They are both so full of fun. Even though we live far away from anything Disney, Say Cheese III was perfect for documenting a wonderful day out!
 
Kiss the Cook
 
I just love looking back on old photos. My DD and I were revisiting her kindergarten folder the other day - how adorable does she look in her special chef outfit?! The school had a special cookery programme where they would cook with one of the mums or a teacher. I once had the privilege of creating pizza lollipops with her little friends which was so special! Of course, as soon as I saw these photos I knew they would be a perfect match with Domestic Bliss!
 
 
I knew I wanted to use a lot of photos on this layout. Those busy little hands cooked up a storm over the year! I liked the idea of running the photos in two lines with the title in the middle. I worked up a kind of sketch in Silhouette Studio which gave me an idea of not only how big I could print the photos but also how big I could make the title in the centre. I’ve backed the cut area with some lovely yellow ‘Domestic Diva’ and ever-so-pretty floral touches of ‘Work it Girl’. Adding a teensy Chipboard Sticker as the dot in the ‘i’ adds a cute bit of consistency.
 
 
Here you can see how I have added a bit of dimension to a die cut shape from the Bits & Pieces pack by mirroring the pink heart shape. The smaller heart-shaped die cut has been raised on foam tape so it lifts the title and also ties in with the height from the oven glove die cut, on the opposite side of the word ‘cook’.
 
 
I just LOVE how well this little phrase sticker from the Domestic Bliss 4x6 sticker sheet works with this image! (Does anyone else have that song in their head now?? haha)
 
 
There is a lot going on in the embellishment department on this project too! I’ve added some stickers, some Roller Stamping and a few little splatters (batter can escape the bowl, right?) I really also love the new Brad sheets. Incorporating cardstock shapes, phrases and brads in one product, makes for lots of versatility!
 
 
Another way to add a bit more info to a page is with a Clear Sticker. I find them useful for adding a little extra chit chat, which doesn’t impact on the rest of the elements as they’re within the shape of the photo, plus they can be a great way of masking areas with less information in a photograph.
 
_______________________________________
 
Magical Day Out
 
I remember how amazed I was, to learn of a castle, right here on our doorstep! Who would’ve thought that in the middle of the tropics was a medieval magical land just waiting to be explored! The Sunshine Castle proved to be brilliant day out. We all loved it so much, we would love to visit again.
 
 
I had lots of photos that I wanted to include in this page - there was so much to see and do! I’ve framed a few of the highlights using die cuts shapes from the Say Cheese III Bits & Pieces pack.
 
 
I’ve paired the large ‘magical’ chipboard sticker with a script font which I have cut using my Silhouette.
 
 
The chipboard castle sticker had a little flag on the top, making it iconic. I have snipped that flag off which makes the castle a bit more generic and suits my subject matter perfectly. I love the outlined stars and was excited to see them appear in Say Cheese III. I’ve repeated the shape in the form of Washi Tape, the Roller Stamp, clear stickers and ephemera. Something you will almost always see on one of my pages is a little bit of ‘chit chat’ as I like to call it. Phrase stickers are so handy and add just a little bit of extra personality to my projects.
 
 
Beneath this throne, you will find...
 
 
...Some more photos and journalling!
 
A great way to add more memories without overcrowding your design is to hide them. In this case, I have used a punch board to create a mini file folder which opens to reveal our thoughts on our adventurous day out and a few more images.
 
 
I’ve used a typewriter to journal onto some coloured vellum, which I have machine stitched inside the folder. Using a word processing programme or a photography app is a great way to squeeze multiple photos inside one shape.
 
 
Thanks so much for joining me today, wishing you lots of happy crafting!


Supplies

Hello Friends! Alexandra here with a new double Pocket page documenting our life on WEEK 7.

It's a week full of hearts and pretty flowers since we were celebrating Valentine's day. The Love & Adore collection is absolutely perfect to illustrate any types of love! 

I made a collage of photos taken on Valentine's day and added a sticker directly on it. 

Miss Lily had organized a Secret Valentine which was a lot of fun. We exchanged little gifts we had either made or purchased for no more than ten dollars and in the evening DH and I watched the beautiful movie The Light Between the Oceans. Anybody else out there totally smitten by Michael Fassbender?

Here is another example of stickers added directly onto the photos.

We move from pink to blue with the right page which is essentially about our sunny week-end in Chicago.

I used a small tag that I cut from the 6x6 paper pad

Thank You! Merci!

SaveSave

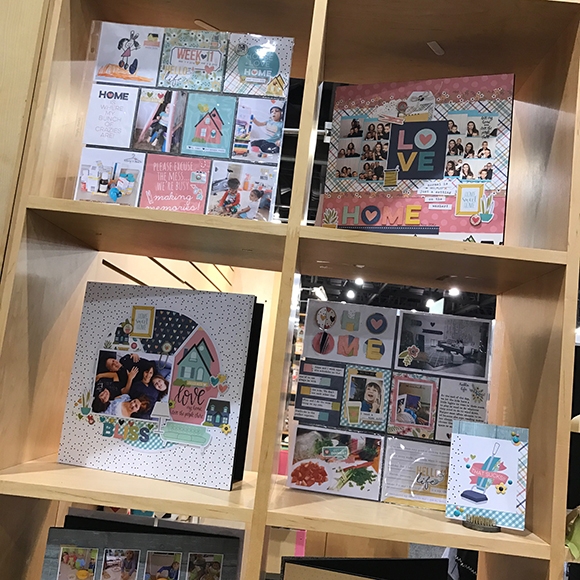
Hello everyone, welcome back to the blog! It’s Stacy here on the blog today, sharing 2 layouts using the Domestic Bliss collection. I am in love with this new collection, the colours and embellishments really fit my recent photos!

Sweet
The sweet colours of this collection made me think of my niece, Sophie! She is the first niece in the family, and therefore very much doted by everyone. This photo was taken at the age of 2 months, and I really love how comfortable she looks, sound asleep with 2 guardian angels taking care of her! Therefore, for the first layout, I just had to use a photo of my dear niece.


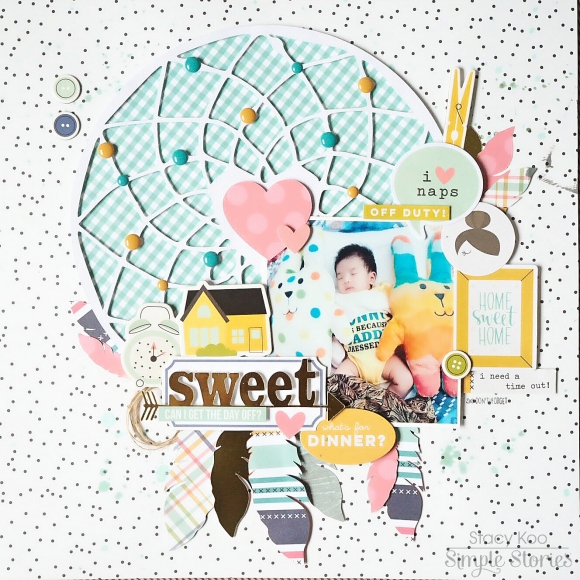
Such a sleeping beauty isn’t she? I decided to use a dream-catcher as the background, since I often wonder what she is dreaming of when she is sound asleep.


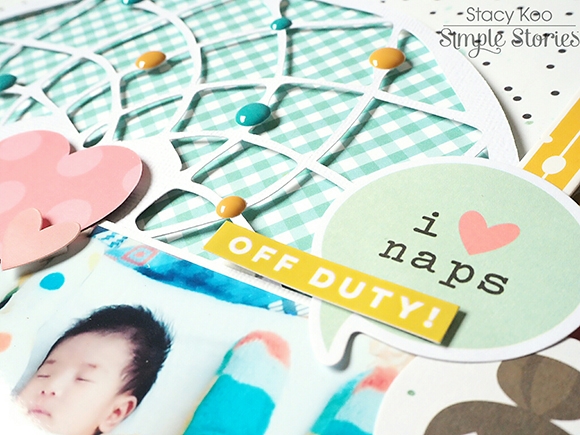
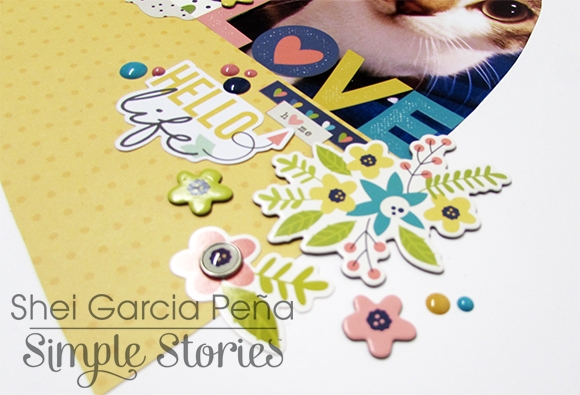
I added some enamel dots of the same collection onto the dream-catcher; they add dimensions to the background! Next, I rummaged through the bits & pieces pack – there were some awesome looking callout signs which suited the story I wanted to tell. The sticker sheet had complementing stickers too which I could not resist!


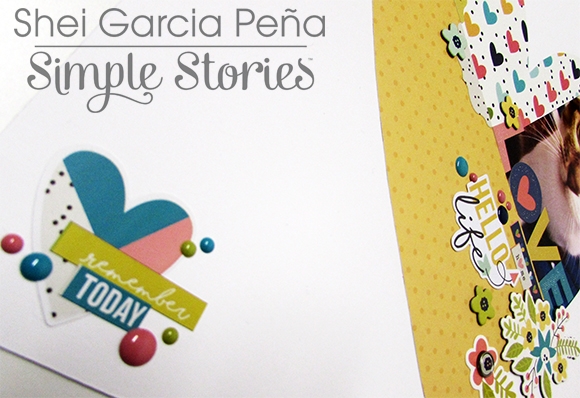
Some more ephemera selected in conjunction with my story. This pack is really handy in a lot of ways.


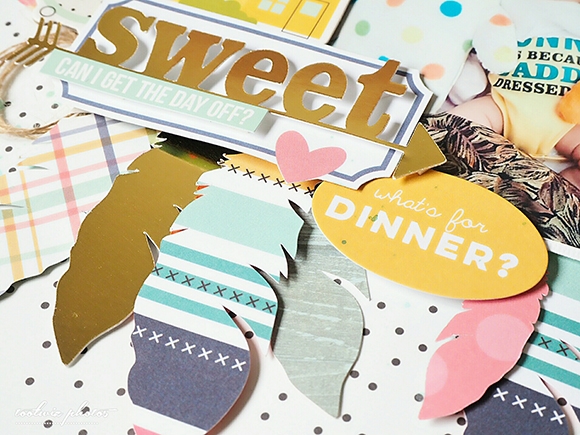
The feathers and title were also cut using my silhouette cameo. I love the array of colours on the feathers! This collection has the best colour combination ever! Here I am using the pattern papers Mom Rules & Bless this Mess.

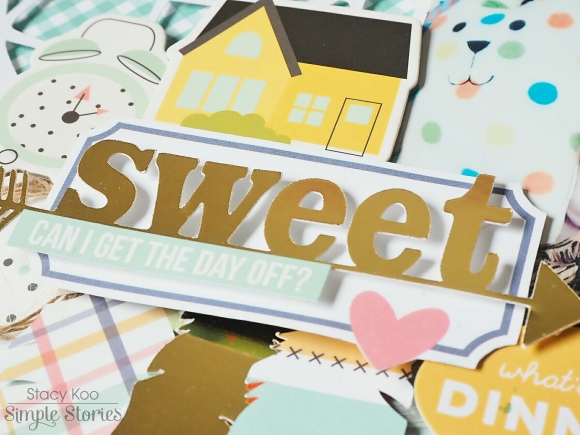
Chipboard embellishments are another of my favourite decorations. They add dimensions and layering to the entire layout. Try layering the chipboards to create different dimensions.

____________________________________

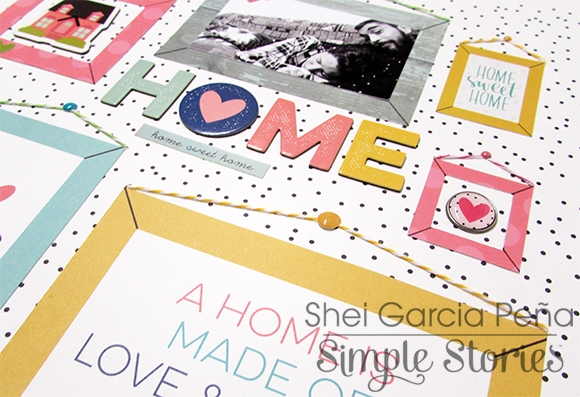
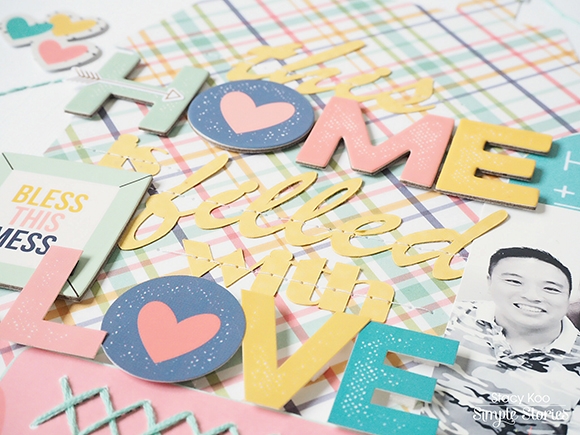
This Home is Filled With Love
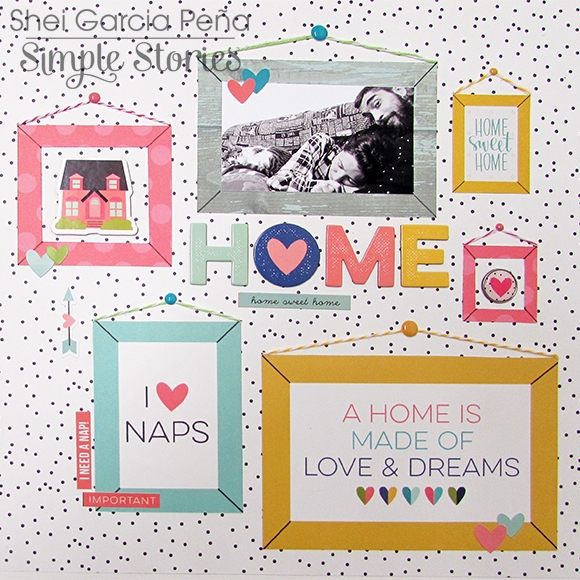
This layout uses the same collection, Domestic Bliss. The photo was taken recently during a family gathering, and I knew I wanted to use this photo with this collection. I started planning the page with circles and a home cut file.

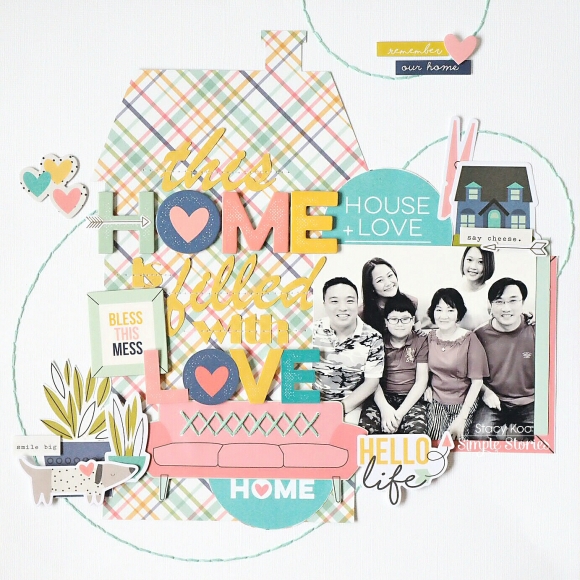
The title was inspired by the elements found on the chipboard pack and the combo sticker. While going through the supplies, this title literally jumped on me and I thought it might work well with the house as the background.

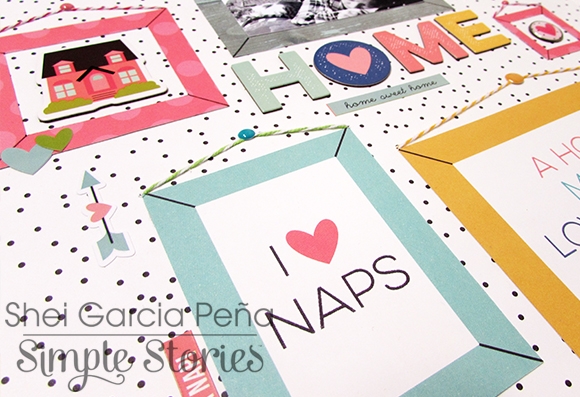
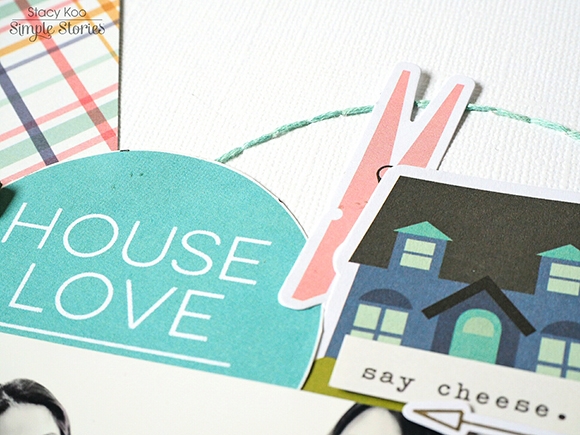
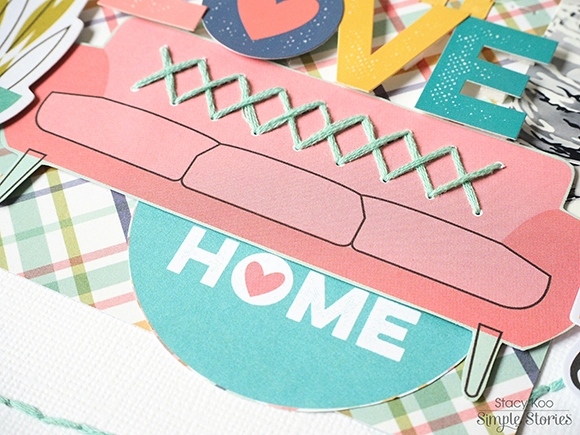
I wanted to prevent the layout from looking too squarish, and at the same time flowing with the circular elements which I wanted to add. Therefore, I did some simple running stitches in circular form, highlighting parts of the layout. Here I have added some ephemeras from the Bits & Pieces pack, and I deliberately cut the lower part of the circular element (from one of the pattern paper in the collection) to be used on another part of the layout. There are really no rules about cutting up ephemeras, use it to suit your layout!

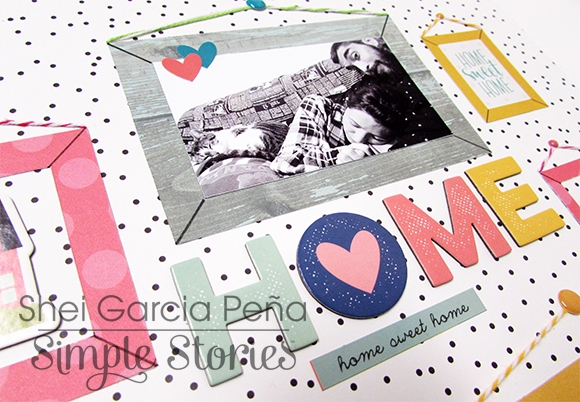
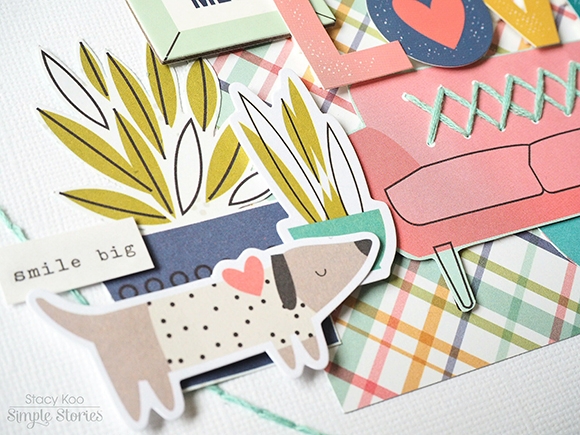
On the lower part of the layout, I laid out the embellishments so they look like my living room in order to tell the story. The elements in this collection are perfect! I did some fussy cutting on one of the pattern papers for this couch. There is a part of me that yells “Stitch it!” when I looked at the couch, so I went ahead to do some simple stitches! I love how different it looked before and after the stitching! Stitching does give some added dimensions, and that is why I enjoy doing some stitching on layouts. Just below the couch, I have added the part of the circular element.

Added ephemera to form my living room scene with some potted plants and of course, Winston!

Hope you have enjoyed the walk through today, and thank you for joining me today!


https://simplestories.com/product/roller-stamp-1


Supplies

Hello Friends! 
 
It's Kristine Davidson here with you today and I am so excited to be sharing some new pages with you that were created for the January CHA/Creativation Show! I used the new funny, fabulous & fun collection called - EMOJI LOVE. Oh my goodness, when I first saw the cute emojis on a sheet of paper I was like WHAT?!!! Too much fun. 
I created 2 layouts with this collection and I can't wait to create more fun projects with it... mini album, birthday card you can do so much with this fun collection. 
 
My first layout is of my niece. She has now reached the title of "teenager" and my photos of her are rare.  I sent her a message saying - hey I got this cool collection I have to play with, can you send me a cool pic?  Well safe to say I didn't get one.  So as an aunt and scrapbooker I searched her Instagram feed until I found a cute pic and then I just added a little fun to it with some filters. Those glasses were perfect for me to play with this Emoji Love Collection.
 
 
I first started my page with a black cardstock. I am loving the black lately and this collection has so many great papers that go so well with black. Something different than the usual go to white cardstock. 
 
I added strips of papers, and I layered some washi tape on top of those papers too!  I had some fun emoji brads that I wanted to add so I placed them on top of the strip of paper that has tons of emojis. 

 
I layered some chipboard pieces, some journal strips, and instead of adding another photo or journal card I used a journal card. 
I used some stickers, and called this layout OMG Seriously?! Which is something my niece says often when I ask her stupid questions! ;)

 
How fun right ? Those green glasses? Perfect!

______________________

 
My second layout is a story. This layout was created using tons of great stickers, bits & pieces, enamel dots and more!   I didn't use any photos on this layout - I just wanted to create a little emoji story! 

 
The Story: 
 
Guy: Hey Smile!
 
Girlfriend: Hey Love, Come to a Party with my BFF?
Guy: Yes I would love to party with you. 
Girlfriend:YAY! I'm getting ready doing my nails and getting my dancing shoes! Seriously! 
Guy: OMG, I have my shades and Vans and good to go!
Girlfriend: ROFL 
Guy: Having a snack; fries and pizza. Oops gotta poop! LOL 
Girlfriend: OMG Poop? LOL 
Guy: That Stinks .. WOW 
Girlfriend: LOL Awkward! 
Guy: Kisses! 

 
That's my story! I had a blast using this collection. I am sure with today's teens you can come up with your own page using some emojis, screen shots of text messages or facebook chats. Have fun with it! Please share your pages on Instagram with #SimpleStories and you can tag me as well #KristineDavidson, I would love to see your EMOJI LOVE pages!

Supplies

Good morning friends! Brenda Smith here sharing my planner set up and a planner spread using the Emoji Love collection.

I couldn't resist filling my planner pockets with all the cuteness Emoji Love has to offer. I mounted the "Sparkle and Shine" (taken directly from the Emoji Love 6x8 pad onto some white card stock for an easy dashboard. I make sure to keep the 4x6 sticker sheets tucked in my planner because I use them so often. 

To make this memory planner spread, I started by trimming down some patterned papers from the 6x8 pad to fit in the vertical boxes. I also trimmed some of the papers to work kind of like washi to cover the headers. 

I used hole reinforcers and number stickers from the Posh collection. I usually have issue when there's too much dimension on my planner pages so I typically steer clear of chipboard elements. But the Simple Stories chipboard pieces are thin enough to go into your planners without causing too much bulkiness.

I had some fun with fringe scissors at the bottom of the spread. I like how it adds texture and flair without too much extra work. 

I am still loving those calendar stickers from the Posh collection. I love that I can see the month at a glance on each spread if I wish. I love the little starburst embellishments in this collection and I used them all over the spread as my uniting element.

I love that I have such a fun space to document all the funny and smart things my kids say.  Even if they never make it onto a scrapbook page, I'm happy to have these stories told.

Are you following Carpe Diem Planners on Instagram? Be sure to follow for daily inspiration! 

Supplies

It’s Shei here today. I’m so happy to be back on the blog sharing two layouts. Let’s get started!

For my layouts I used the beautiful Domestic Bliss collection, I love the colors of this line!

To create my first layout I was inspired by the cute tricoloured heart included in the combo sticker. I started with a white cardstock as a background and I cut a heart contour in the middle of it. Behind the heart I used the “Domestic Diva” double-sided paper and one photo of my cat to form the three parts of the heart.

For the title I used the word "LOVE" from the Expression Combo Sticker and I glued it at the bottom of the picture.

Then, I added enamel dots and some pharses, flowers and hearts from the Combo Sticker, the 6x12 Chipboard and the Bits & Pieces. I love all the embellishments!!

Finally, I added the original heart sticker with some enamel dots and words at the bottom left of the page.

______________________________________

My second LO is dedicated to naps. During the week I'm working and I can't take naps, but at the weekends I enjoy taking long naps on the sofa. My cat always does this with me as you can see in the picture, hahaha!

First, I used the white polka dot paper ("I can't Adult" b-side) as the page's background. Next, I chose three frames with different sizes from the 3x4 Journaling Card Elements and the 4x6 Vertical and Horizontal Elements. Then I created another three frames with some papers (Bless This Mess b-side and Mom Rules b-side) in which I have include the photo, a chipboard house and a heart brad. Finally, I "hanged" them on the LO using some colored baker twines and enamel dots as if it was a home wall.

I used the word “HOME” in my tittle from the 6x12 chipboard. I like it ‘cause it gives more dimension to the project. To finish I added some hearts of different colors and pharses from the Combo Sticker.

Thank you so much for taking the time to read my post! I hope you enjoyed my layouts! See you next month!

Never stop smiling! Kisses!!

Supplies

Hey everyone! It’s Lori again, and I’m here on the blog today to share more behind-the-scenes awesomeness from the CHA/Creativation show last month.

The reveal of our new products here on the blog was so exciting, and now we’d like to share an up-close look of our Domestic Bliss collection as it was displayed in our booth. While it’s not as good as touching and feeling the products on your own, it’s pretty darn close!

Just like we showed you in our Faith behind-the-scenes look, our ‘wall of goodness’ for Domestic Bliss is filled with color and inspiration!

The Domestic Bliss collection is all about home and the people you share it with. These layouts and cards were created by some of our amazing design team members and share the fun side of cooking, chores, and chilling with coffee. And how cute is that teapot and stove?!

The home décor pieces we displayed at the show were a huge hit! Everyone loved the cute spring display, butterfly and home vingnette. This line is full of fun patterns and stripes and can be used many different ways!

Something we’re hearing from our customers about this adorable collection is that they’re excited to use the products to document their everyday pics, photos-of-the-day, and more. This line is a great backdrop for those photos of your daily routines, too!

The Domestic Bliss collection is shipping to retailers now, so contact your local store or online retailer to find out if this fun collection is in their store!

If you’d like more behind-the-scene peeks into the booth at CHA/Creativation, be sure to check out this live video showing more of the Domestic Bliss collection!

Pages