December 2016 Blog Posts

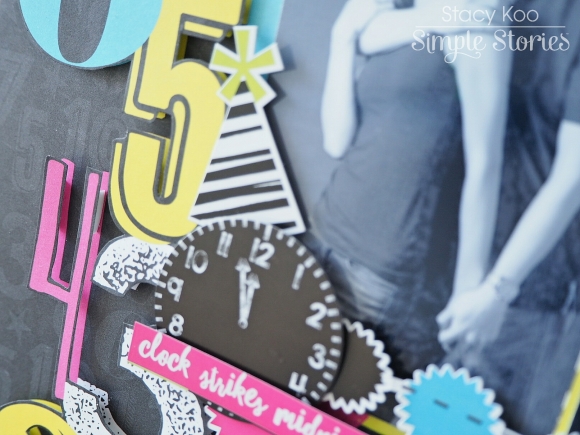
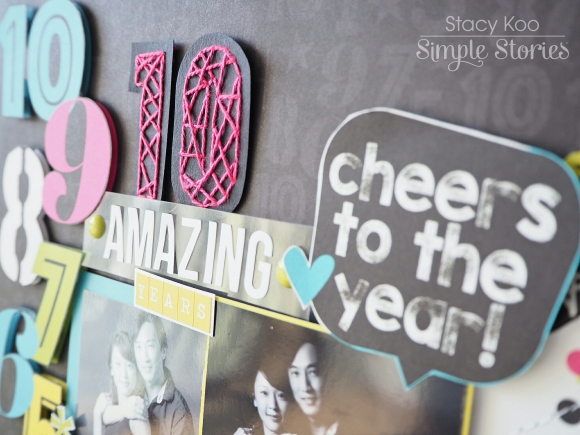
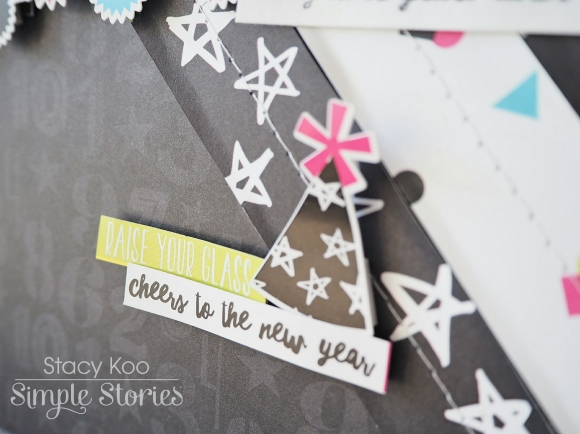
Hello crafty friends! Leah here to show you a few super fun decorations I’ve made for my Carpe Diem planner using the Happy New Year Simple Set. I really want to show you a few of the MANY ways you can use any of the Simple Sets to decorate your planner on a budget, with very few supplies; they include six 12x12 papers (3 designs, 2 of each) and a 6x12 sheet of cardstock stickers.

The kits come with a cover page that shows you what products are in the kit. Many people throw this sheet away but I like to repurpose it and cut it into a bunch of little ephemera pieces. I use these pieces to embellish my planner.

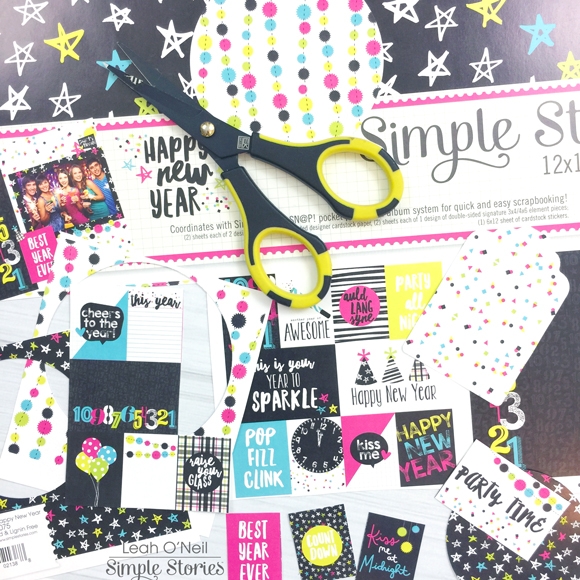
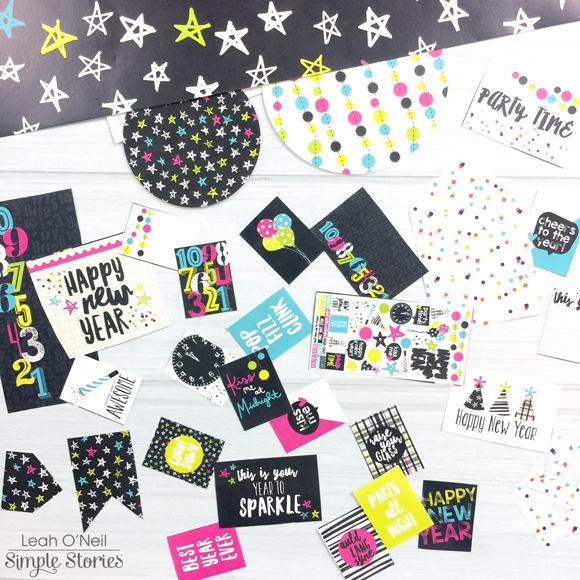
Much in the same way, the 12x12 papers in the collection kit are very versatile. They can be cut down to make dashboards, dividers or pocket pages. You can also punch out different patterned shapes, or use scissors to fussy cut some of the designs to create more of your own die cuts.

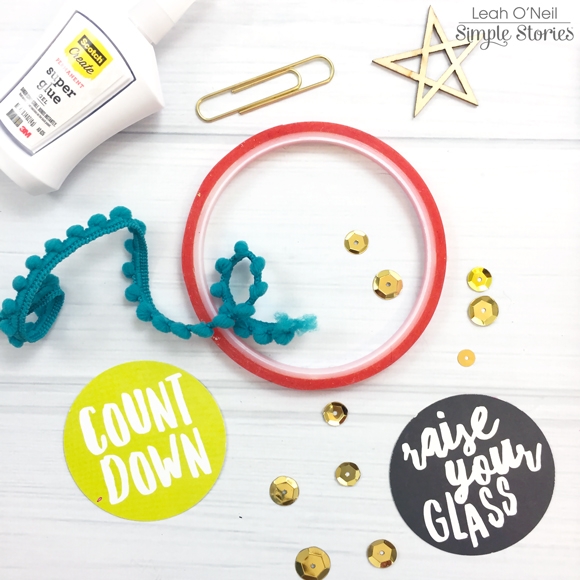
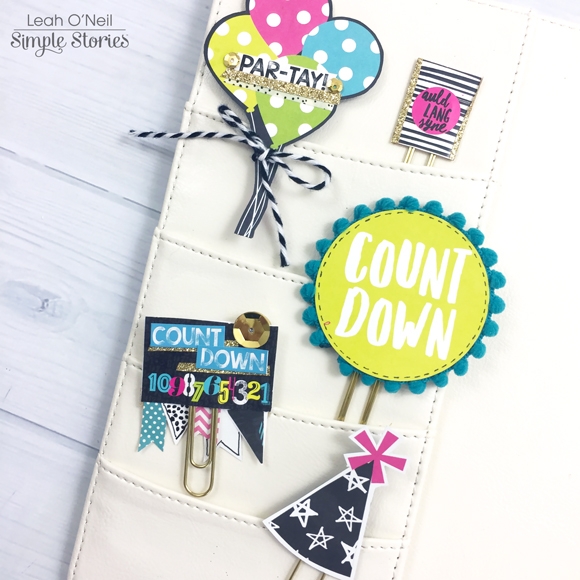
After I created all of these die cuts, I used a few to make decorative paper clips. Some were as simple as gluing a couple of shapes together with the top of the paperclip sandwiched in between. I embellished the clips with gold sequins, washi tape, string and a few cardstock stickers from the collection kit.

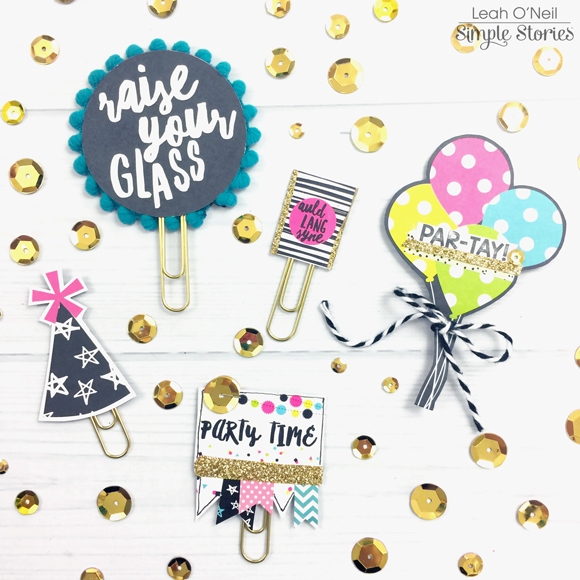
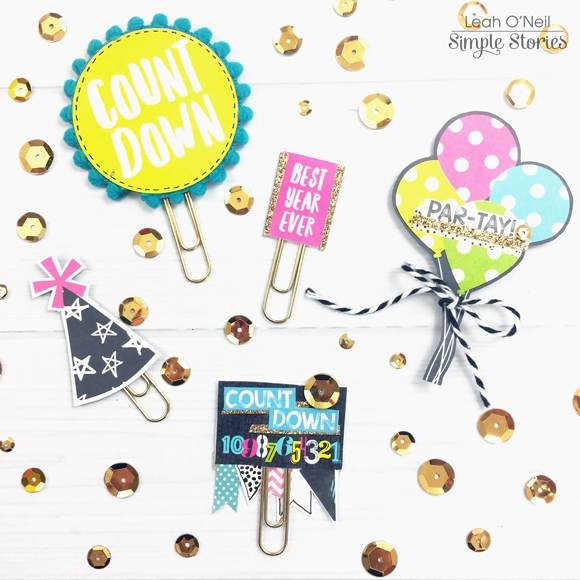
The balloons and party hat are both fussy cut from a 12x12 elements sheet. I used a superglue gel to stick a paper clip to the back.

The circle paperclip is double sided and it’s made with circles punched out from the 12x12 elements sheet as well. I used a 2¼ size circle punch. Rather than just gluing the circles together, I wanted to add a little more interest by adding some cute string from my stash. Whenever I need things to REALLY stick, I always use red line tape. I lined the edge of the circle with the tape and then wrapped the string around the edge.

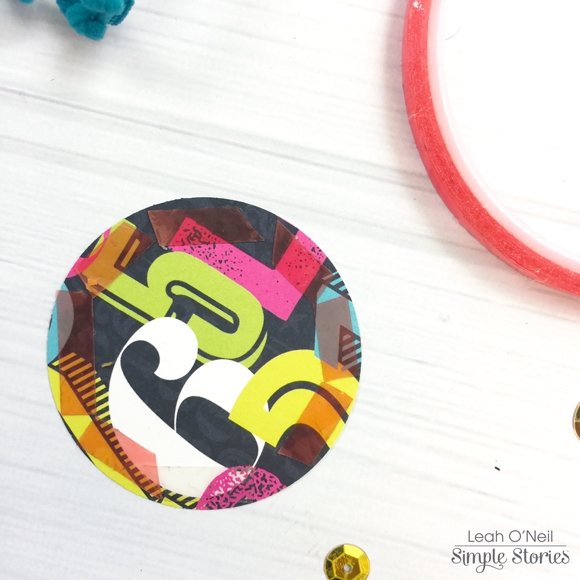
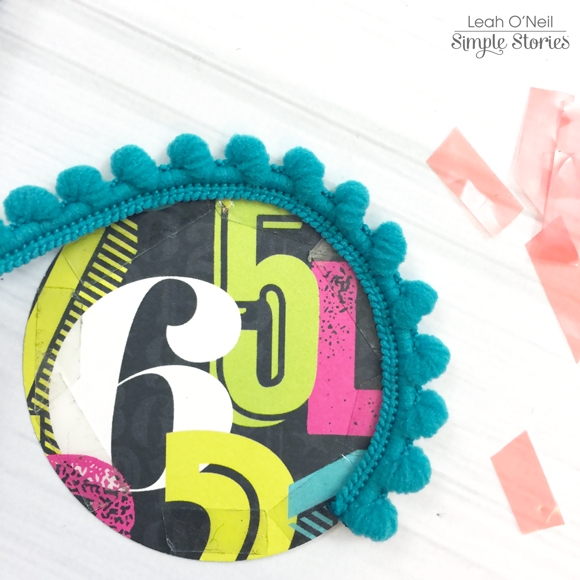
I failed to get a photo of the next step unfortunately, but all I did after this was use a glue dot to stick the top of the paperclip to the inside of the circle and then I stuck on the other circle die cut to hide the mess.

The other two paper clips were made using pieces cut from the collection kit cover page. Since they are made of thinner paper, I made them double sided. My favorite paperclip is the one with the little banner at the bottom. That was so easy to make! I just cut a few triangles and banner shapes from patterned paper and the cover page of the kit and glued them along the bottom. Because this clip is double sided, the part where the banner pieces are glued on is hidden, as is the area where I glued the paper clip.

I really love how all of these turned out and I can’t wait to make more! I purposely chose designs that I can re-use after New Years as well, for any party/celebration or count down marked in my planner.

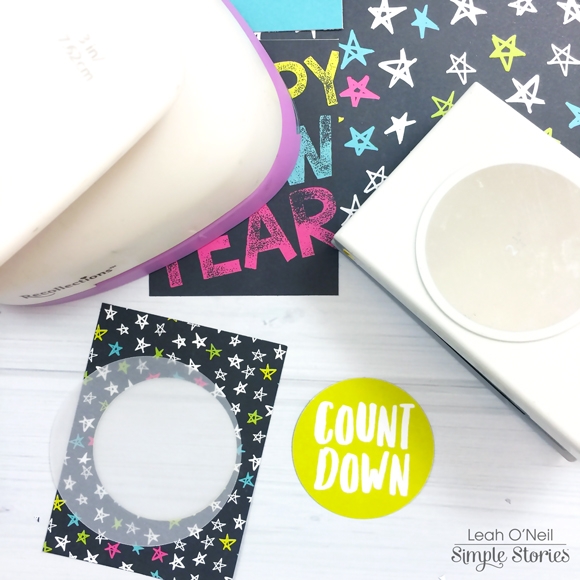
The next thing I made with the Happy New Year collection kit is a little shaker card. I made this using a couple of 3x4 cards cut from the 12x12 elements sheet. I used a 2 ¼ in. circle punch to punch a circle into both cards; I punched them both at the same time so that the circle was in the same place. These will be the front and back of my shaker card. I then used my 3in. circle punch to cut two vellum circles. I made these larger so that I have room to add glue around the edge of the vellum and stick it over the open circle on the 2x3 card.

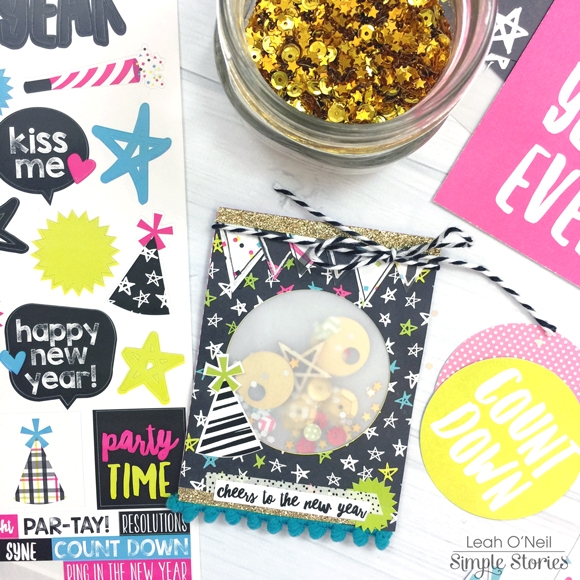
Then I added glue around the edge of the second vellum circle, but not all the way around. I left the top part of the circle unglued and stuck the circle down on top of the first vellum circle. This created a small vellum pocket (with the top open) that I then added some glitter and sequins into. After that, I glued the other 2x3 card down to the back to cover the mess. Then I embellished the front of the shaker card using washi tape, more of those banner pieces I cut earlier, washi tape, some string from my stash and couple of stickers from the collection kit.

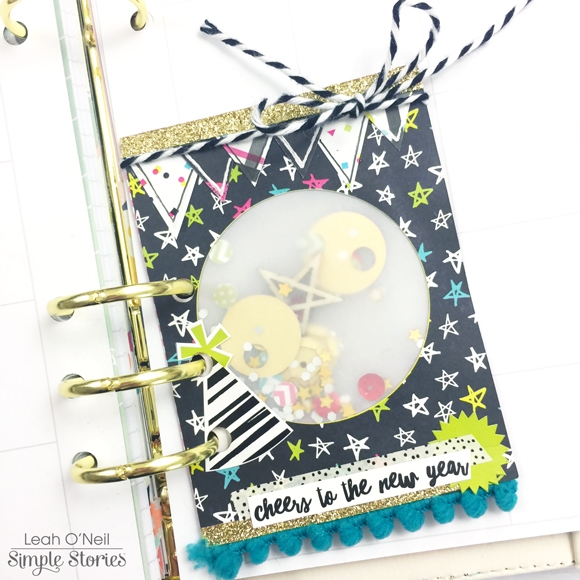
Here are what all the decor pieces look like in my planner. I still have tons of this kit left to decorate my January pages too!

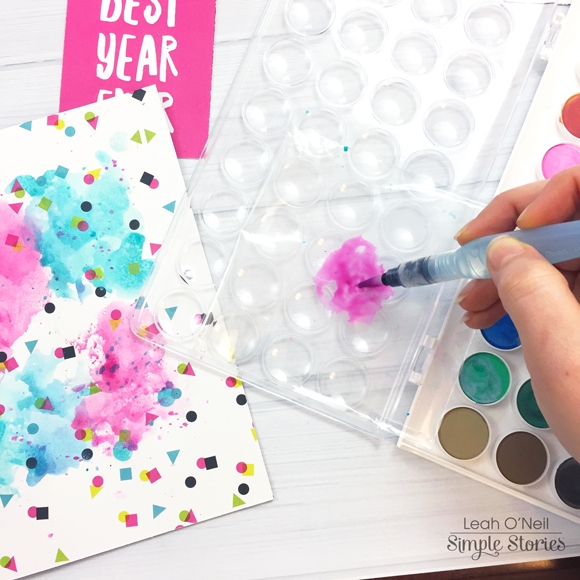
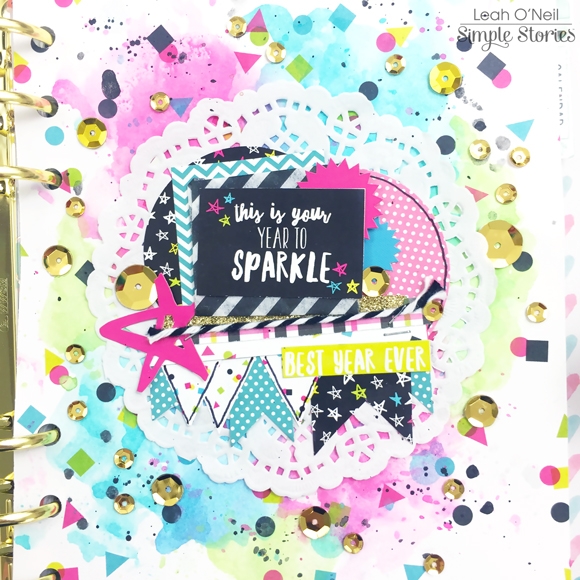
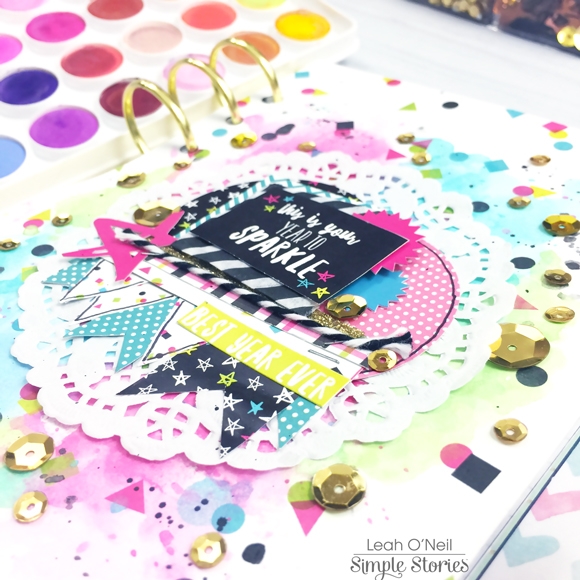
The bright colors in this collection kit really inspired me to get creative with my watercolor paints. I made a dashboard for the front of my planner to inspire me for the New Year. I cut down this 12x12 paper from the kit because I LOVE the confetti pattern. I used the colors of the confetti to choose the watercolor splashes I wanted for the background. I had to mix a few colors to get the shades I wanted but this palette from Michael’s makes it so easy to blend colors.

I used the packaging technique to create the background. For those of you who are not familiar with this technique, it simply involves adding paint and water to a piece of plastic packaging and then turning it over onto the page and “smushing” it down (how is that for fancy terminology?).

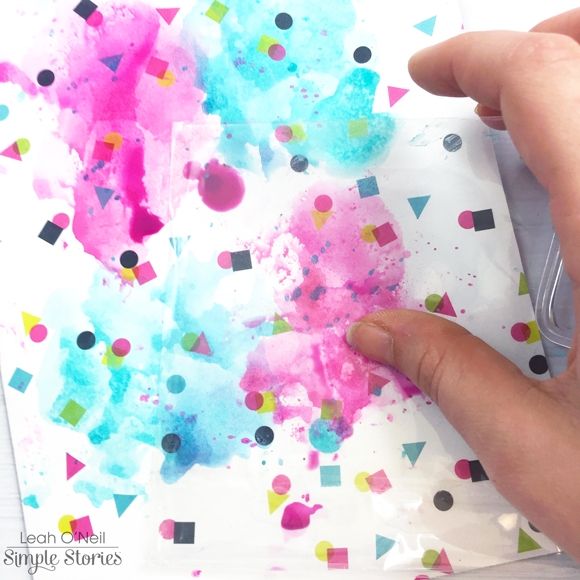
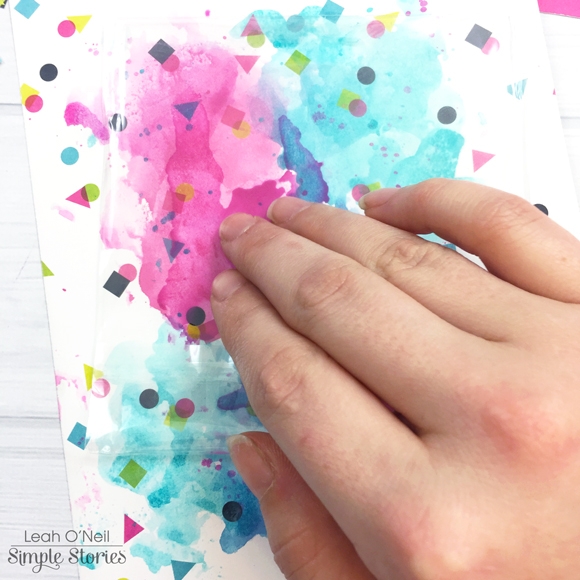
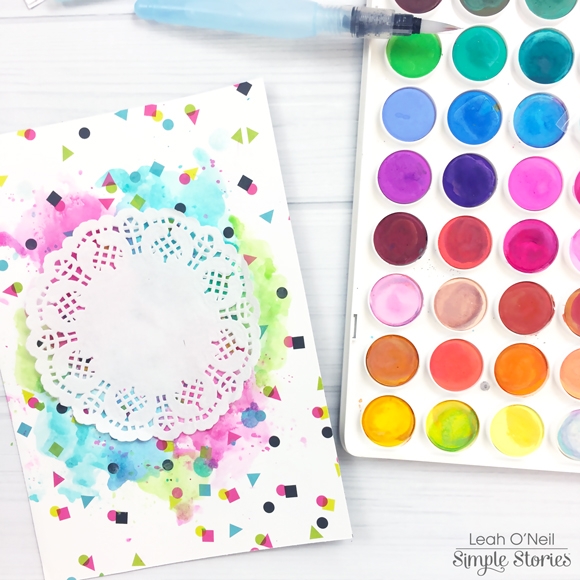
I put a couple of paper towels over the top and put the page under a couple of heavy books while it was drying to help flatten out the slight warping. After it was dry, I added a doily and started layering. Normally, I wouldn’t add quite so much dimension to my planner pages but since this dashboard will be in the very front of my planner, I added as much dimension as I wanted.

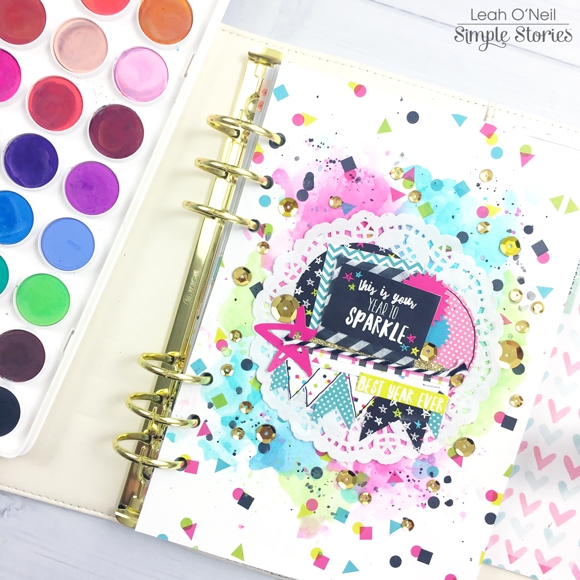
I added another banner here, tissue paper, a couple of the die cuts I created earlier, some stickers, sequins, string, washi tape…lots of embellishing. I have the MOST fun creating mixed media layouts like this! I am absolutely in love with this dashboard and it is the perfect thing to greet me when I open my planner. All of the vibrant colors are so inspiring and the message reminds me that 2017 is my year to sparkle, which for me means pursuing more creative endeavors, taking more time to create, and hopefully inspiring others to create.

Have you been thinking about what your goals are for 2017? I would love to hear what they are! I am hoping to finally launch my blog I’ve been putting on the back burner for all of 2016. I am also currently working on video content, which is a little scary and intimidating. I hope you will pop over to my Instagram and the Carpe Diem planners instagram for more creative inspiration for your planner. I will talk with you again soon!


Supplies

Hello Friends and Happy New Year! 

I am going to be honest I can't wait for 2016 to be over so I can turn the page to 2017. I always love the start of a new year since It seems to be time for a new outlook, new resolutions, new ideas, and really a fresh start. 

I created a layout and 2 cards for you today using the Happy New Year Simple Set. This collection has all the bright colors with a bit of black to showcase those festive pics. I really love a pop of black on my pages and this collection was soooo easy to use.  

My first layout is called "Countdown"

I've had this picture of myself and my friends for the past year or so, it was suppose to be a serious rock star pic but ending up being me looking angry, Tanya looking like she wants to punch someone and Stephanie's happy go lucky LOL!!! Love those girls. It was the perfect picture full of " Happy New Year " colors. I couldn't resist. 

I created this layout with a pattern paper foundation instead of cardstock. I really liked the numbers on the left hand side to be my countdown to the new year. I wanted lots of color under my picture so I created layers with die cuts stickers and also cut up pieces from the 3x4" journal cards.  

The Simple Sets have great stickers and being a die cut addict I sometimes need more. I chose to use the 3x4 and 4x6 cards exactly for more " die cuts". I cut up a few cards for more patterned papers, and I used a circle punch for the " Count Down " title. It's so easy to add more details by just cutting up some patterned papers. This collection has 2 sheets of each patterned paper, perfect to cut up! Don't be afraid! Instead of hoarding some papers for something else in the future, use what you have on a current page. Cut up shapes, small strips of papers, and even extra " party hats! " to make that special page. 

Have Fun with it ;) 

__________________________________________

I decide to create a few cards to show you how versatile this simple set is.  The first card I create is called "POP FIZZ CLINK" - a little champagne?  I added a sticker and some dimensional adhesive to create this card. Adding a mini clothespin to that little sticker tag was necessary ;) 

The second card is Par-tay! 

Send out an invite for a countdown party! Your guests will love the personal touch and think you are super creative! I took a 4x5 piece of paper and cut it diagonally to add stars at the top and and a black bottom. I added some dots under my die cut gave it dimension and then a few stars and enamel dots -- voila!

Thank you so much for reading and being a fan of Simple Stories!  To see more of my work you can find me on instagram @KristineDavidson 


SaveSave

Supplies

Hello everyone ! I am so happy to be with you today on the blog. I am going to be sharing some pocket pages that I have created using the new Simple Set called Happy New Years. I was really excited to work with the colors on this one. They are really super bright and playful. 
 
 
When I first started putting these pages together I knew that I didn't have enough New Years Eve photos to fill up both sides. These photos are from 2 years ago. I decided to add in photos of us from New Years Eve day and then also add in some from January 1st. Perfect ! It seemed to be a great way to include ending one year and beginning another. The title card is pretty simple this time. I combined lots of stickers from the sticker sheet onto some white cardstock to create my title card. I love the end result with all the pretty white space. As you will see throughout the spread I added in some hand stitching on some of the cards. 
 
 
Here is a look at the left side of my spread. 
 
 
This Happy New Year card is my favorite card of this set. I continued with the sideways theme and added some embellishments onto the card. I didn't want to add too much to the card but I did want to embellish it a bit. On the sticker sheet there are these confetti clusters. I cut some of the shapes out and added them onto the card. They were the perfect fit. 
 
 
On New Years Eve day the kids wanted to spend all of it outside in the snow. Earlier that day they went out in the backyard. Oh I should mention that we were visiting my parents at the time. It doesn't snow where we live. Maddie wanted to make a snowman so bad. It was so cold that week that it was an impossible task. The snow didn't stay together to make a snow man. She was heartbroken. I added my story on the photo and also added the number 4 to symbolize the temperature outside. 
 
 
While creating and putting this spread together I wanted to make sure that the darker cards, darker photos, and all of the white space was as evenly spaced as I could. It took some rearranging but I think I find a good solution. I also tried to make sure that all the colors were evenly spread out. 
 
 
Here is a closer look at some of the right side of the spread.


This fun countdown card was one that I wanted to make sure I used. It was the perfect thing to add some smaller photos on the top part. New Years Eve we did a lot of eating and playing games. 
 
 
The kids kept wanting to "Clink" their cups together all night. So I cut out the word clink from a filler card and used that as a starting point for my card. 
 
 
Thanks so much for coming over to the blog today. I hope that you found some inspiration to help you document and scrapbook your upcoming New Year's Eve memories. Happy early New Years everyone ! I wish you a fabulous 2017. 

Supplies

Hello planners, Theresa here!  Can you believe 2016 is coming to an end?  In our nearly 20 years together, my husband and I have always loved getting dressed up on New Year's Eve and going out to celebrate the coming of the New Year with our family and friends.  The Happy New Year Simple Set is the perfect little kit to document your celebration, whether it's a quiet night at home or a big night on the town!  I love the fun bright colors in all of the patterned papers, cards and stickers! 

I created a fun divider with the patterned papers and a 3"x4" card that says "another year of AWESOME".  Start off the year with some positivity right in the front my planner! This went right over the original divider. 

I used the daily inserts which has New Year's Eve and New Year's Day on one page

I love all the fun party embellishments like the party blowers, confetti and banner! 

The clock about to strike midnight is my favorite along with all the little New Year's phrases! 

I added a full size 6"x8" SN@P pocket page protector into my planner, all ready for photos from our night out!  If you would like to add one to your planner, you'll have to punch new holes.  I simply centered my planner page over the page protector as a guide for the holes, a quick and easy task! 

I also created a quick little party hat clip by placing two of the party hat stickers back to back over the top of a paper clip!  I hope everyone has a fun and safe New Year!  I can't wait to see what your planners look like for 2017! 

Supplies

Hello! Stacy here on the Simple Stories blog today! 2016 had been awesome and in no time, it will be 2017!

It has nearly been a 10 year tradition since we dated that we would spend the new year counting down at the comfort in his house and ordering pizza for dinner. This year, our first year as a married couple, is going to be slightly different as I promised my Aunt to go on a short trip with her. Feeling a little guilty, I decided to make this layout to accompany my husband! Of course, the 'Happy New Year' Simple Set is the best collection for this layout!

I love the fun and vibrant colors! I first started with some stitching to accompany the colors. Using simple back stitches to accomplish the title 2017. The sticker sheet has many great phrases to accompany the title!

Next, I fussy cut the elements from the pattern papers to decorate the layout. The party hats make the elements super fun and I totally love layering them!

Another set of elements! Here I used the star from the sticker sheet and another die-cut vellum star to accompany it.

_________________________________________________

The second layout today is inspired by the fact that it is also the 10th year since I started dating my husband! This is inspired by the pattern paper in the collection, where the countdown of 1-10 corresponds to the ten years of love! 

I am so inspired by the countdown, that I used 2 sheets of the same pattern paper for this layout. I fussy cut the numbers and layered it on the same pattern paper for impact.

Another part of the layout where I cut strips and sew it to the background. This helps to direct the attention to the photo as well. For a fun element, I curved the sides of the strips a little by folding it upwards slightly.

More party hat and phrases! 

Last but not least, adding some more stitched element to the title! I wanted to highlight the number 10. This time, I did random stitching inside the number so it becomes more bold.

Another important basic element that all should have is the Sn@p Basics 4x6 Basics Stickers! They are super useful - as titles or sub-titles! Here I used the white ones for the word 'Amazing' and I love how it pops out!

2016 had been an exciting year and I look forward to 2017! Here is wishing everyone a great crafty year ahead!

Supplies

 
Now that Christmas has passed and you most likely have a ton of photos to scrapbook & memories to document, we thought it would be fun to share an up close look at some of the popular Classic Christmas products & inspiring projects from our creative team!  
 
When it comes to paper crafting, it’s all about the paper, right?!  Regardless of what crafty project you’re working on, paper is the perfect starting point.  These are some of our Classic Christmas favorites, and judging by our diminishing inventory, they’re some of YOUR favorites too, including the beautiful Be Merry paper that would be great for framing for a quick & easy holiday decoration next year!
 
Washi tape, stickers, roller stamp and Holiday SN@P! Binder – OH MY!  With Classic Christmas, you’re sure to find just the right embellishment to add those perfect finishing touches to your projects.
 
From layouts, to home decor to planners, Classic Christmas is just what you need for adding a little seasonal touch for your paper crafting & planning needs.  Speaking of paper crafting & planning, here are a few projects to get you inspired to wrap up your holidays with Classic Christmas – or start thinking about getting a jump start on next Christmas!
Be sure to check out & follow our Classic Christmas Pinterest board for more Classic Christmas inspiration.  And hey, if you missed out on the 2 different sets of FREE Classic Christmas printables, make sure to download them here!

Now that Christmas has passed and you most likely have a ton of photos to scrapbook & memories to document, we thought it would be fun to share an up close look at some of the popular Classic Christmas products & inspiring projects from our creative team!  

When it comes to paper crafting, it’s all about the paper, right?!  Regardless of what crafty project you’re working on, paper is the perfect starting point.  These are some of our Classic Christmas favorites, and judging by our diminishing inventory, they’re some of YOUR favorites too, including the beautiful Be Merry paper that would be great for framing for a quick & easy holiday decoration next year!

Washi tape, stickers, roller stamp and Holiday SN@P! Binder – OH MY!  With Classic Christmas, you’re sure to find just the right embellishment to add those perfect finishing touches to your projects.

From layouts, to home decor to planners, Classic Christmas is just what you need for adding a little seasonal touch for your paper crafting & planning needs.  Speaking of paper crafting & planning, here are a few projects to get you inspired to wrap up your holidays with Classic Christmas – or start thinking about getting a jump start on next Christmas!

Be sure to check out & follow our Classic Christmas Pinterest board for more Classic Christmas inspiration.  And hey, if you missed out on the 2 different sets of FREE Classic Christmas printables, make sure to download them here!

Supplies

Hey Friends!  It’s Vicki here with a little holiday project fun using the oh so cute, Classic Christmas line!  One of my favourite things to make from paper is a minibook.  I love them in album form, tag form, from scratch…I just love minibooks!  For this one I decided to make a layered flip book.  Simple Stories paper is a great weight and when layered makes for sturdy pages!!  Take a look…


I mounted the flip book on a piece of cardstock and added it to they Tim Holtz “Oh Deer” clipboard.  I like that I can make a new one every year and just switch it out.


I cut six 4 1/2” x 12” pieces of Classic Christmas paper and folded the sheets in half.  I glued all of the pieces together to form a layered flap book.


To finish the top of the book off, I trimmed a 4 1/2” x 3 1/2” piece, created a border punched edge and added it to the top of the book.  I wrapped a foiled doily over the top and added baker’s twine.  The cover is layered Classic Christmas Chipboard and Bits & Pieces with some stamped greenery and diecut letters.


Page one- I added a pocket to the bottom of the page and layered Fundamental Stickers.


Page two- Here I added mats and Bits & Pieces.


Page three- layered flap- I added a 4” x 11” flap that is secured on the bottom of the page.


I layered Bits & Pieces and Fundamental Stickers on these pages.


Page four- Double flap- Trim a 3 1/2” x 12” piece of paper and score a 3 3/4” flap at the top and a 2 1/2” flap at the bottom.


Add a 2” cardstock circle with a the Merry Christmas Bit and Piece to create a tab.


This double flap is a fun, interactive way to add holiday memories.


Page five- Layered flap- This time I added the flap to the top of the page!


Add more Fundamental Stickers and Bit & Pieces.


Page 6- Accordion fold out- Trim a 4 1/2” x 12” piece and score 3” lines.  Fold the 3” pages “accordion style, add baker’s twine and add to the page.


This is a fun and rather quick project to make.


It could make a fun gift or just a little something for you!


Thanks for stopping by and have a fabulous Holiday full of laughter, food and fun!


Merry Christmas!!!

Supplies

Pages