December 2016 Blog Posts

Good morning friends! Brenda Smith here with you today to share a pocket page made using Winter Wonderland. If you’ve followed my work for any length of time, you may have noticed that I am always challenging myself with my projects. Because I live in a desert where it is 70 degrees F during Christmas time, the snow theme of Winter Wonderland wasn’t really applicable. But the colors worked perfectly for my photos so I set out to make it work for my pages. 

I attempted to edit my photos using tones that would best match the cards and embellishments from Winter Wonderlands. But with the beautiful, soft browns, blues, and reds of the collection, my photos of wintertime in the desert (read: lots and lots of sand) already matched pretty well. 

Because this is a smaller collection, there aren’t many coordinating cards and even fewer that aren’t specific to snow. However, I forged right ahead and used cards regardless of the phrases on them. If there was something specific to snow or something else inapplicable, I covered it up with something else. Don’t be afraid to use cards you love just because they might say something that doesn’t align with your project! 

In attempting to make the cards my own, I set out to do more embellishing on them than I usually do. I wanted them to be perfectly tailored to this spread. Three items that I turned to heavily in accomplishing this: the 4x6 stickers, the washi tape, and the enamel dots. I used the stickers to cover up things that didn’t apply. The washi tape served the same purpose in some instances but was also used to unify the spread. The enamel dots add dimension and pops of color. 

On this side, I employed the use of some of the winter-specific embellishments. It is, after all, still winter here and is cold to us even if it’s not really that cold. 

I had run out of 4x6 cards to use so I created my own using the 6x6 pad of paper and a die cut from the Bits and Pieces and some stickers from the Combo Sticker sheet. 

Some of the embellishments were used a little tongue-in-cheek like the pine tree behind the photo and the “treetops glisten” because my photo had an illuminated tree in the background.

 
As you can see, even heavily-themed products can be used for pictures that have nothing to do with the theme. It takes a little thinking outside of the box but the end results are so fun!


Supplies

Joy

Hi there!

It’s Shei on the blog today. I’m so happy to be back sharing two layouts. Let’s get started!

I am so excited for the upcoming Christmas because I love these dates!

For my first layout I decided to work with the magical “Mistletoe Kisses” collection. I started designing a Christmas tree with some hearts in Silhouette Studio, and cut it out from a white cardstock using my Cameo. As you know, I love to use light papers as my background, so I used this sheet for my work. Then, I’ve filled in the hearts gaps using all the colorful papers of the collection and I crowned the tree with a cute bow made with Oh What Fun! (b-side) paper.

I used a photo from my cat under our Christmas tree. My cat loves it, unfortunately, his love isn’t as harmless, he loves batting at the ornaments… but he is so cute I can’t stay mad at him. For this reason I have entitled it "Joy" and I added the Santa's typical “ho ho ho” from the 4x6 stickers. Under the photo I putted three funny phrase labels. At its side I added a perfect sticker that says "I’ve been…", like a choice list, and I marked the “I can explain…” option. Furthermore, I added the cute Santa from Bits & Pieces and a wonderful Decorative Clip. (These clips are my new favorite Simple Stories’ embellishments!!).

At the top of the page I glued three balls from Combo Cardstock Sticker and some hearts and a frame from the 4x6 stickers. Finally, to give a bit more dimension to my project, I added some enamel dots of different colors decorating my tree.

________________________________

The next layout I’m sharing with you today was again created with the beautiful “Mistletoe Kisses” collection.

I used “Oh what fun!” (b-side) paper as my background, but I glued a white cardstock covering a large part of its. 

As you can see I used three black and white photos for this project, but with one element in red: three balls that we use like our nose, posing like Rudolph, the red nosed reindeer, ha, ha, ha! I enjoyed a lot doing these family Christmas pics.

I glued them with a little frame using "Christmas Magic" (b-side) paper ‘cause it stands out the pic. For the title, I used the phrase “Merry Christmas” from the Bits&Pieces. And for the embellishing I used some stickers from the Combo Cardstock Sticker like the reindeer or the colorful hearts, some elements from the 6x12 Chipboard like the balls and some phrase labels from 4x6 Stickers.

Also, I added some enamel dots to give more dimension and, to finish, I decorated the top of the LO with the garland of lights from the 6x12 chipboard and with the super cute decorative clip.

Thank you so much for taking the time to read my post! I hope you enjoyed my layouts! See you next month!

Never stop smiling! Kisses!!

Supplies

Happy Holidays! This is Jennie and in this post I’ll share with you how I am documenting this very special month! Ever since I planned this project I knew my go to collection would be Mistletoe Kisses.

This is my fourth year doing December Daily and ever since I started I’ve used SN@P!  Binders. This year I used the Striped Holiday Sn@p Binder. For the cover I tried a little mixed media with white acrylic paint and a snowflake I made with vellum and just scissors.

The ornaments are from the Combo Cardstock Stickers. I put them into white cardstock so I could use foam tape. You can see how I made this cover WATCH THIS VIDEO.

The Striped Holiday SN@P! Binder comes with page protectors but I always add a 6x8 Pocket Pages Variety Pack because my albums tend to be super chunky! For the cards I used the 3x4 Journaling Card Elements.

The little words are from the Mistletoe Kisses Stickers and I layered them with Washi TapeI used Simple Stories enamel Dots to add to the Elf’s Eyes to make it more dimensional. I love the alphas from the Combo Cardstock Stickers.

Last year I added 6x8 layouts and I really liked them so this year I am repeating it. I just layered simple shapes and added 6x12 Chipboard Stickers.

I made a little pocket so I could hide another photo behind it. I punched out a peppermint circle so I could have a tab to pull.

These pink pages come in the Pink SN@P! Binder and I had these pages from a leftover project so I used it to type this S’mores Cookie Recipe. I used a bunch of adhesives brads from different collections to glue back to back and add to the shaker pocket.

I used white ink with the Classic Christmas Roller Stamp to add a little detail. 

I hope you enjoyed these pages! I’ve had so much fun documenting December! I can’t wait to show you the whole thing! 

Supplies

Hey there, friends!  Missy here, and I have two fun and festive layouts to share today.  There is never a dull moment with my youngest child, and she is constantly doing funny things to make us laugh.  These two layouts feature her in 2011 and 2013, and you can see she has quite the the spunky personality.  For my first page, I used the beautiful Classic Christmas collection.  I’m usually not a big fan of dark red and dark green, but this collection just wowed me.  I love the olive greens and light blues mixed in with it.  Those colors lighten everything up and make it so bright and cheerful!  Plus, all the colors in this line look amazing with shiny gold. To create this page, I was inspired by the big tree in the photo.  I decided to use half my background paper to make a big tree.  I used a 1-inch circle punch and went to work on a lot of the 6x6 papers.  I cut the shape of the tree on a scrap sheet of cardstock and glued down each circle.  I machine stitched through each row and then ruffled up the circles.  I love how it turned out!

Here you can see all the circles and stitching.  I’m so happy this turned out as well as it looked in my mind!  It really mimics the photo and creates so much color & texture.  I love how the deep browns look with the light blue and olive greens!

To embellish around my photo, I fussy cut a large flower from patterned paper and layered it.  I used JOY from one of the 4x6 Sticker Sheets and added foam to it.  I used a “Christmas” Clear Sticker to create my title.   I added some deep red tangled thread and more clear stickers as well as a sticker from the Expressions Cardstock Sheet.

I love these boughs and berries chipboard pieces!  They were the perfect addition here.  I also did some watercoloring on my background that you can see peeking out from behind everything.  I used white gesso first and then came in with some gold Color Shine and several Shimmerz sprays. 

Here’s one last close-up.  I love how the watercolor splatters turned out.  They remind me of Christmas lights!  I did add a little bit of tissue paper behind my photo, which I do a lot, but it seems even more appropriate on a Christmas page. 

____________________________________

For my second layout, I do believe I scrapped the cutest Christmas photo ever of my sweet girl.  Santa comes to school every year, and this year, she decided to lick him.  Yes, lick him!  She’s a very sensory-oriented child and went through a licking phase where everything was tasted.  Santa was no exception…haha!  Like I said, never a dull moment with this curious little comedian!  I used the gorgeous Mistletoe Kisses collection for this, and it showcases my photo perfectly.  I decided to go light and airy, so I began with white cardstock.  I already knew what my title was going to be, so I used the Bromello font in my Silhouette software and cut the title really large and at an angle.  I backed all the letters with patterned papers.  I smudged lots of white gesso over a good portion of the page and then came in with some Shimmerz sprays.  I used some light blue, pinks and reds.  I used the packaging technique, my brush and created splatters.

I did something I’ve never tried before on this page, and that is machine stitch around my entire title.  It turned out like I hoped it would.  It took some time, but I went slow and was careful to turn my paper in different directions as I went.  I embellished around the page with lots of stickers from the 4x6 Stickers.  My favorite is this string of lights!

I pulled this tree die cut from the Bits & Pieces pack and added foam under it to give it some dimension.  I also added some tangled thread under it as well as a few stickers.  This created the perfect pocket to the left for my journaling.

I used a few die cut trees as background layers and also a fun & colorful chipboard tree.  I just love how light and soft this collection is!  I added a few cut apart pieces and some tissue paper behind my photo.  The tissue paper softens everything up even more and adds a fun an subtle border around the photo.

Here’s one final close-up of the stitching.  I added that adorable little bird on top of the “a”…isn’t he so cute?  If you’re ever out of ideas on what to do for a background design, try enlarging your title like this.  It takes up a lot of room and then you only have so many little spots to fill in with embellishments.  Makes it a little bit easier, I think!

I hope these layouts give you some inspiration on how you can use these beautiful Christmas collections!  Thanks so much for stopping by!

Supplies

Hey planner friends! It’s Meka today here!  It’s been a whirl of a December, but I wanted to share with you the fun I’ve been having using Mistletoe Kisses in my Robin’s Egg Carpe Diem planner.

I used chipboard stickers, decorative clips, Bits and Pieces, Element Cards and cut out cardstock stickers to adorn my planner pockets, plus a couple of mini projects added in.

This page flag folder makes me squeal a little bit, not gonna lie! I used an element card cut from the 3x4 Journaling Card Elements 12x12 sheet as the base. Just a few stickers to embellish, fold it over, and here’s an absolutely adorable and functional planner accessory.

This shaker tag was made using a Simple Stories 3x4 Photo Flip sleeve with an element card tucked in. The front and back of the card have a design, so it’s double the fun! I sealed it with a Fuse tool, but you could use clear packing tape and cover with washi.

This dashboard was created in a similar fashion, but using a 6x8 Pocket Page. This time I inserted  Bits and Pieces inside for a little hide-and-seek. I didn’t snap a photo, but the back of the die cuts are solid white. I decorated the plain backs with stickers, smaller die cuts, and words. That way it’ll still be visually appealing on the back of the dashboard.

I used a tab punch to cut tabs for dividers, and then adorned them with sticker scraps, enamel dots, and labels from the 4x6 sticker pack.

Using existing dividers as a template, I cut out a set of dividers from the 12x12 papers. I couldn’t help but to adorn the fronts with some of the cheerful imagery in this collection.

This divider is interactive. Flip the sentiment up and you’ve got a hidden bit of joy inside. Wouldn’t it be fabulous with a favorite family photo? (Ha! Alliteration unintentional!)

Here’s one of my daily layouts this month. I used soft watercolors as a base, then added layers of stickers and coordinating washi tape from the collection.

I hope you enjoyed my Christmas set up in my Carpe Diem planner. Mistletoe Kisses has so much eye candy, it’s hard not to swoon! Come say hi at https://www.instagram.com/yespleaseplanning! And have a very Merry Christmas!

SaveSave

Supplies

Hey there! Laura here sharing a bit about my "December Daily" or as I like to call my album my "December Moments", which I am having so much fun working on!  Our family tends to be super busy or have nothing going on - rarely a happy medium.   As such, I didn't want to pressure myself to document something every single day, or even only one thing on any given day.  So I will be adding in memories as they are created and inserting dates where applicable.  So we may have 3 things for the 1st of December and then nothing until the 5th, and I am A-okay with that!
 

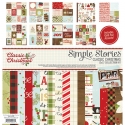
I would love to share a bit of what I have documented already.  I used loads of elements from the Classic Christmas collection and SN@P packs, they are absolutely perfect for this application and I am loving the way my album is coming together!.  I decided to keep my cover pretty simple, I kept the kraft cover in tack as I love it so, but I did add a hint of gold texture paste with a "falling snow" mask.  I chose a couple of simple stickers, I love the train snow-globe so much and feel it is a little nod to my late father in law that was an engineer for the British Rail Road.  I also used a die cut word and those fab gold foil number stickers and a small strip of washi.
 

I love this door shaped SN@P page, I have layered a die cut wreath over the wreath that was printed on the door so that it really pops, I have also used some (older) SN@P stickers to put our house number on the door.  I love that it welcomes anyone that peeks into my album into our holiday traditions, as well!
 

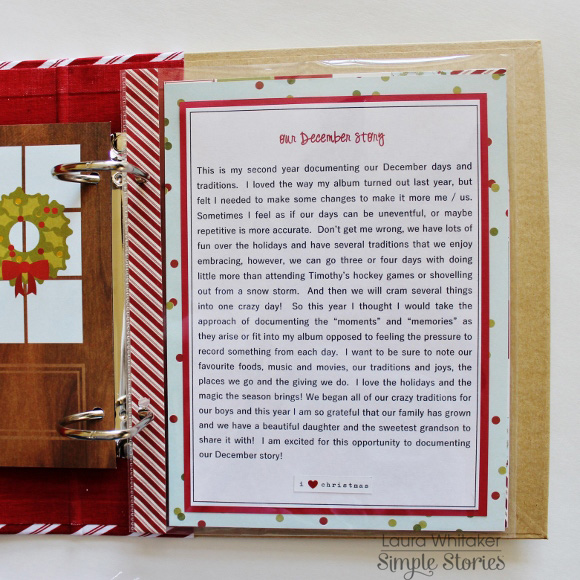
I added a printed paragraph about my love of the holiday season and my goals for my album.  I layered it onto cardstock and patterned paper and added a simple phrase sticker to adorn it. I also wrapped the leading edge of the page protector with washi tape.


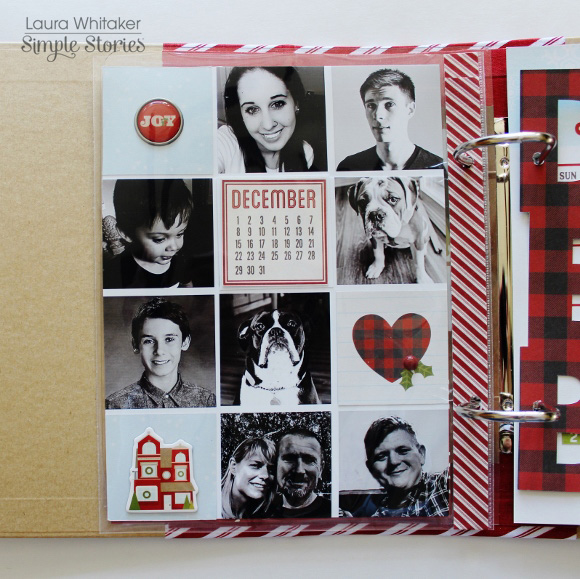
My next page is a photo collage of our family, including our 3 new additions this year (a daughter-in-law to be, a grandson and a puppy).  I embellished the empty squares with some fun accents! This is the backside of the previous page, so this page also wrapped with washi tape.
 

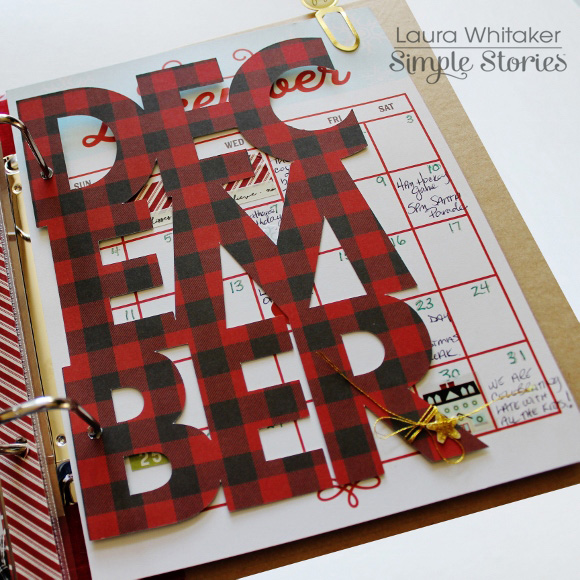
I love this buffalo check print that is on the back of the "City Sidewalks" patterned paper.  So I created a large die cut to showcase it, then I adorned it with some gold cord and an enamel star.  I saved the bottom portion of this paper (with the little shops on it) to use at a later date, as they are so stinking cute.


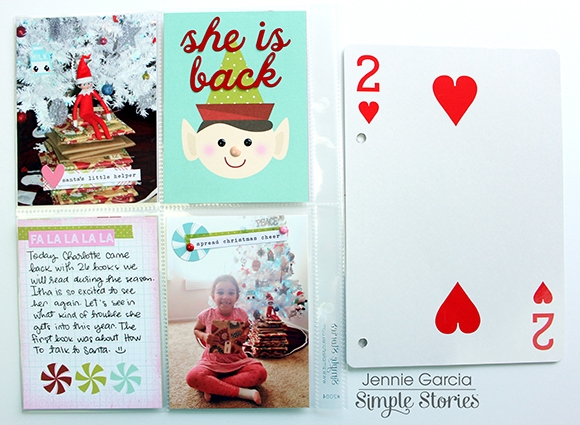
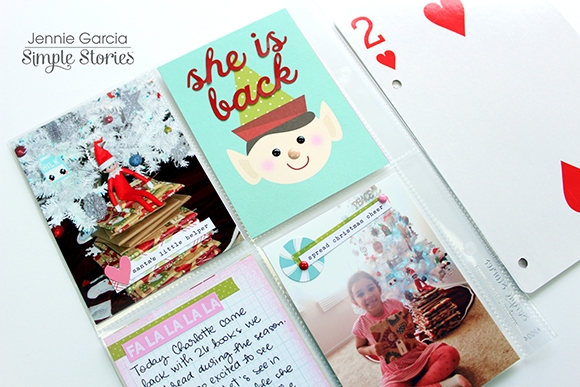
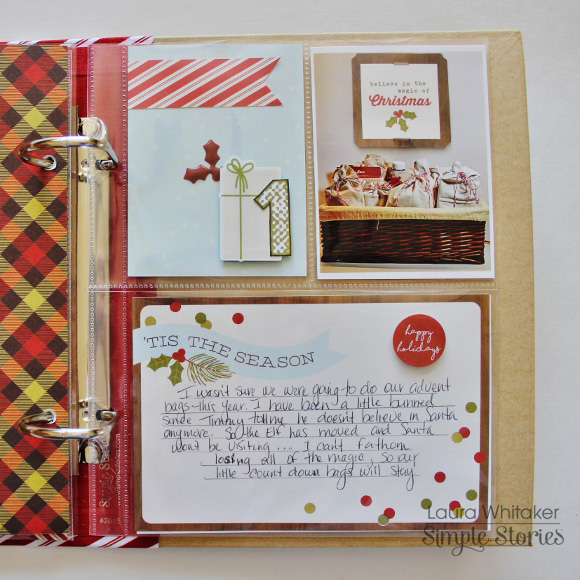
This is my first numbered page, documenting the return of the little advent bags that I made and filled for our youngest son. I journalled all about our son no longer believing in Santa, and about our Elf on the Shelf moving on to our grandson's home, and me toying with stopping this advent tradition, too.  But in the end I couldn't bear to lose so many of our fun holiday traditions.  The number "1" was fussy cut from a patterned paper and stacked on a die cut gift.  I love the way the die cut that is layered on the photo actually looks like it is a framed print in our home!


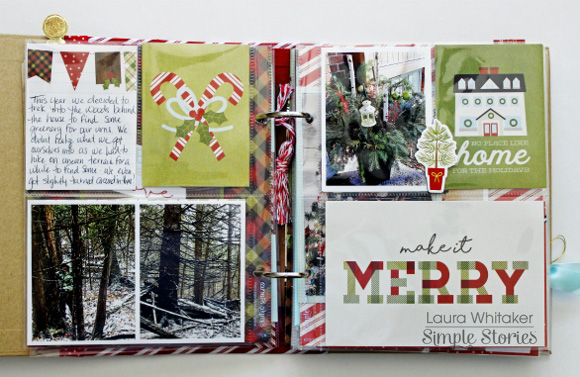
Our usual first hint of Christmas around the house is changing out the urns on the porch, this year we were given some greenery from our friends and we hiked through the woods on a grey and chilly day to forage for the rest.  Even though it was cold, it was a lot of fun! I documented our walk in the woods and how we got a little lost, as well as shared photos of the walk and our finished urn.
 

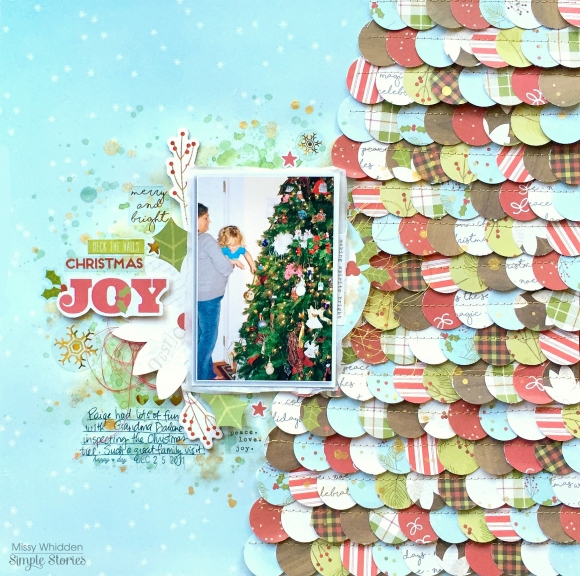
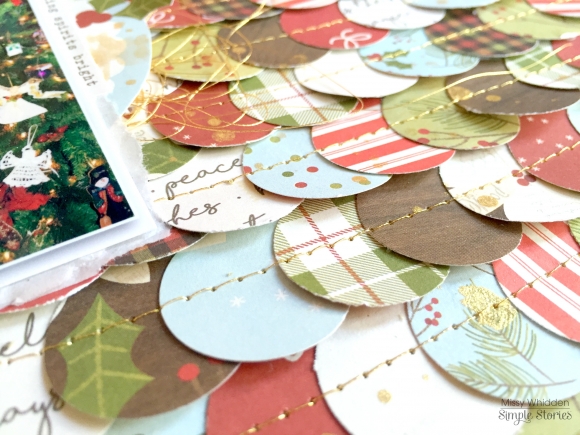
Day 1 was also the day that we put up and decorated our kids tree.  I wanted to add several photos and a fair amount of journalling so this ended up being a 4 page spread in my album.  One of our traditions has been to give our children a new keepsake ornament every year.  This was something my husband started with me when we were first married, and we carried it over to the kids once they started arriving. After many years of marriage and 3 kids, we have amassed an amazing collection which is why we now have a "kids tree" and a "grown ups" tree  I love that one is whimsical and one is elegant! When we were decorating the tree, my youngest point out a few of his favourite ornaments, so I took the opportunity to snap a photo.
 

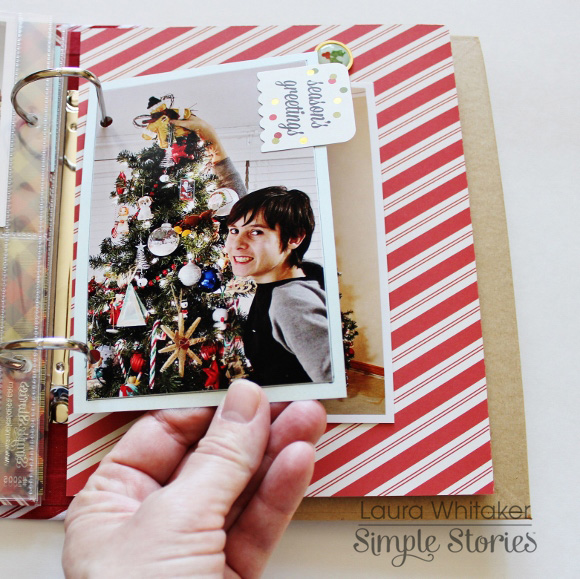
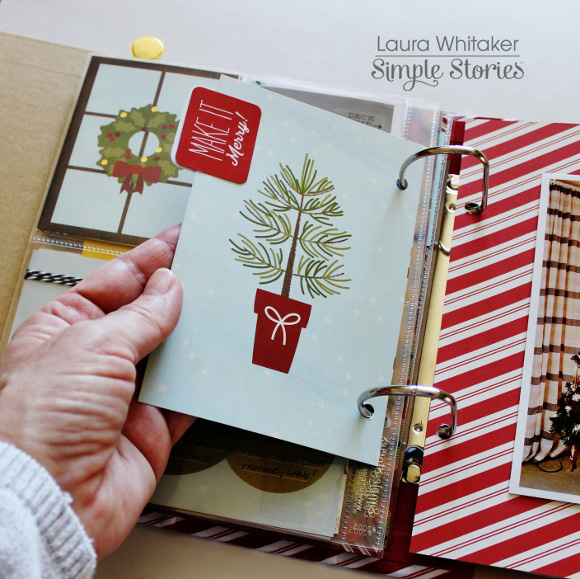
And then I took his picture as he was adding the last touch to the tree, the gingerbread man tree topper!  I used a 4x6 cut apart card to create a page for this photo and added a die cut tab to it.
 

Other than adding another die cut, I left the back of the cut apart card as is, so the pretty image is not obscured.
 

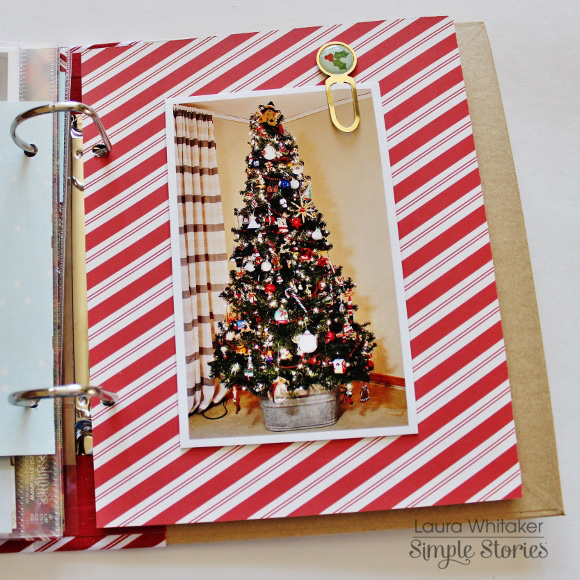
The last page for this spread is really simple with a 4x6 print of the tree layered on the patterned paper with some foam in between for a little lift, and adorned with a gold clip. I am seriously in love with those candy cane stripes!

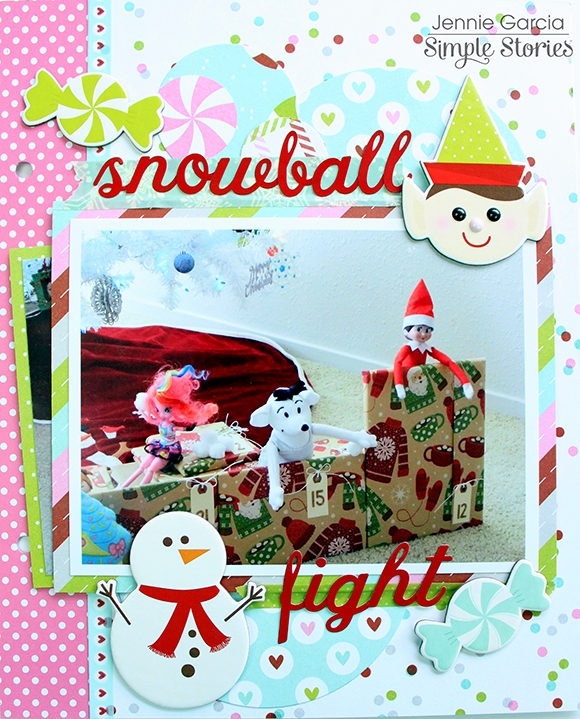
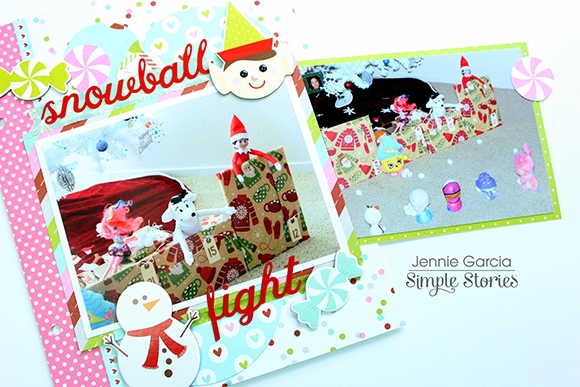
See what I mean about our all or nothing days!
 

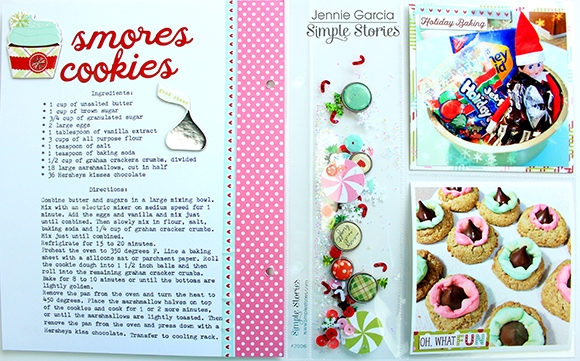
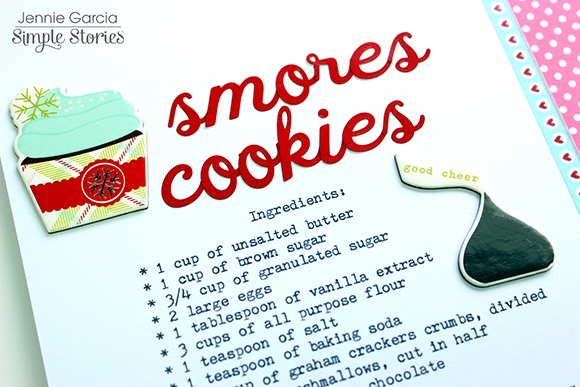
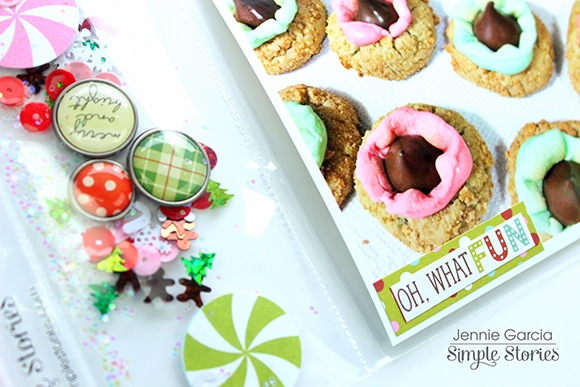
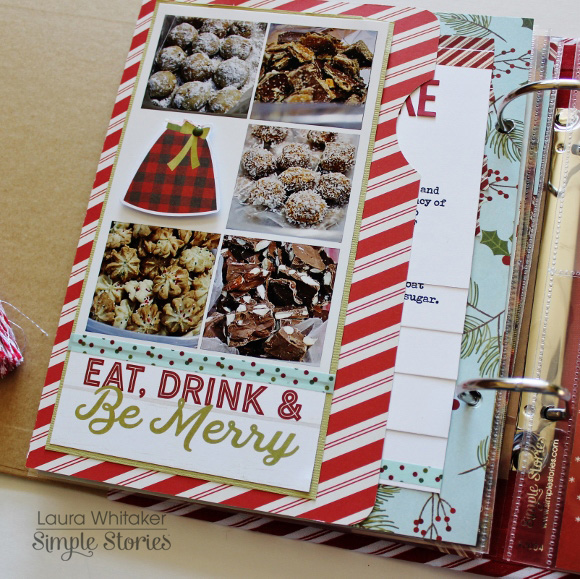
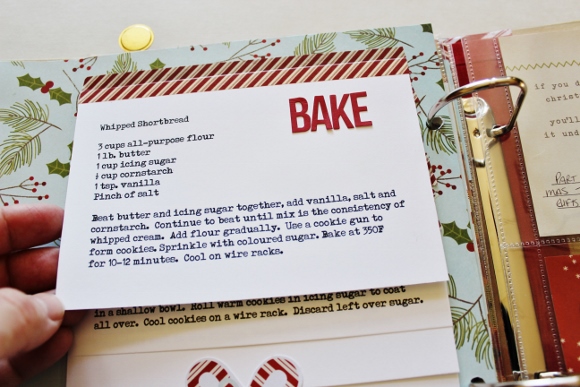
I also wanted to document that I have started my Christmas baking, a tradition I was influenced by my late mother-in-law to start.  Even thought I am not finished yet, I wanted to be sure to include this in my album.  I thought it may be fun to include some of our favourite recipes in my album.  I have paired down my baking to only 6 or 8 different things over the years.  Most of them remain the same, but a couple of things are changed up to keep it fun and fresh.  I created a page with a flap so that I could add a photo of some of my goodies to the front, and tuck the recipes inside.

I adorned my photo with part of a SN@P card, washi, and one of the Christmas dress die cuts cut down to resemble an apron.  I love the way that it turned out!


Inside I adhered the recipe cards with washi tape in a tiered effect. They are very simply embellished and are super fresh and clean looking. I will be sharing a tutorial on how I created this flap page on my blog in a few days.


Each year we donate toys to those less fortunate, it is a tradition that is truly important to me and one I hope our children will continue.  My siblings and I were fortunate enough to have received donated gifts during a few Christmas seasons when we were young, without which our tree would have been bare. Because of the importance of this tradition, I focused more on the words, the journaling and the sentiment rather than the photos. I love the bold red alpha stickers in the Classic Christmas collection that I used to write "spread magic", the "GIVE" text was die cut from white cardstock. And the sentiment on the SN@P card could not be more perfect. It reads, "If you don't have Christmas in your heart, you'll never find it under the tree." 

I am super excited to continue on with with my album!  I have a few more pages complete and some started that are waiting for photos.  I  have been trying to do my journalling, even if only on scrap paper, as the events happen so that I do not miss out on any details.

Thank you so much for visiting today!

Supplies

Hello dear Friends! Alexandra here with a double-spread about our Thanksgiving. 

Naturally, I turned to the beautiful Gather Together Simple Set to illustrate our week.

As you can see, I've included pictures relating to the world news as well as some gift received and even our new bed sheets! 

Don't you just love these faux-tags? they're perfect to add journaling and create added visual insterest!

I added an orange leaf and two gems on this green card

On that second page, I added pictures of the family, our home and the first Yule Log I baked right after Thanksgiving.

That card "What's on the Menu?" was perfect for my journaling because this year, for the first time we did not have turkey but Spaghetti!

Thank you!

Supplies

Hi planner friends! I’m back again to show you how I’m using the new Simple Stories Mistletoe Kisses collection in the Ballerina Pink Carpe Diem Planner.
 
 
I love the bright candy colors in the Mistletoe Kisses collection and how it’s different from traditional colors that you usually see for Christmas.  I filled all of the planner pockets with 3x4 Journaling Cards, the 4x6 matching stickers, and a few ephemera pieces from the collection.
 
 
December has been such a busy and blessed month and I wanted to include a photo from ultrasound visit and the day I found out the gender.  Since the photo is quite large, I kept it simple by using the Holly Jolly cardstock and used a couple of ephemera pieces.
 
 
I wanted the monthly spread to be really festive, so I used a majority of the 4x6 Mistletoe Kisses stickers to fill in the boxes and to add pops of color.  For the trim at the top, I cut a strip of the Ho Ho Ho cardstock and used it as sort of a “washi tape” border.


I hope you enjoyed seeing how I used the beautiful Mistletoe Kisses collection and I hope to see you use it in your planner as well.  Have a safe and wonderful holiday season and I’ll see you next year!

Supplies

Pages