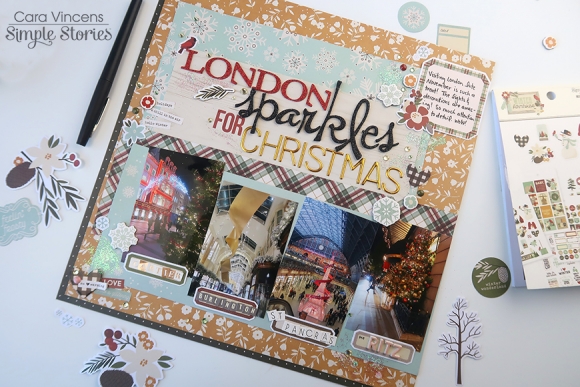
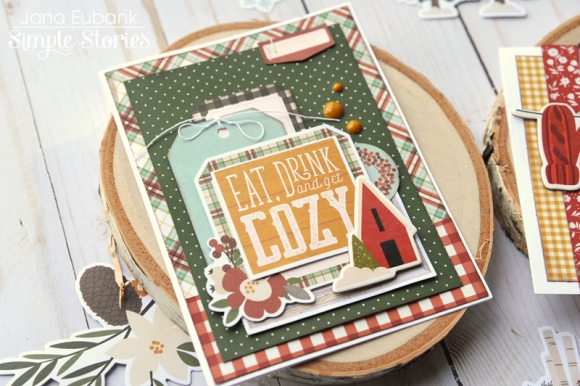
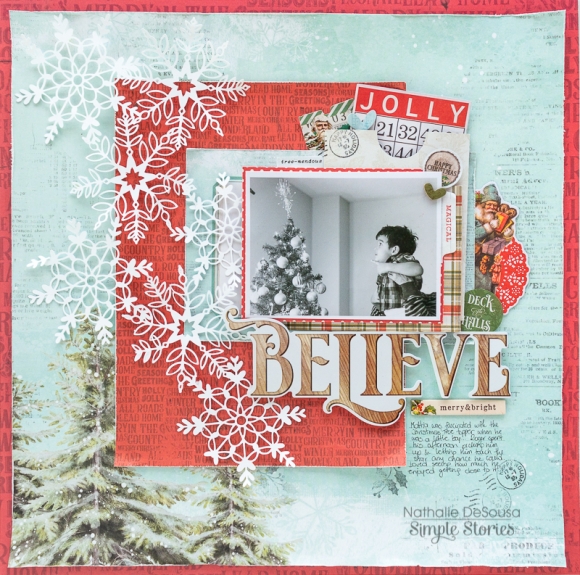
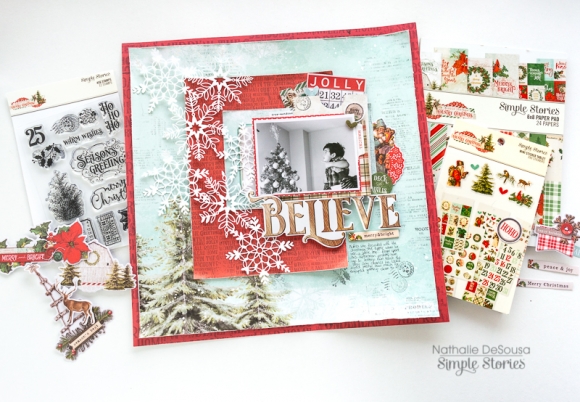
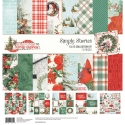
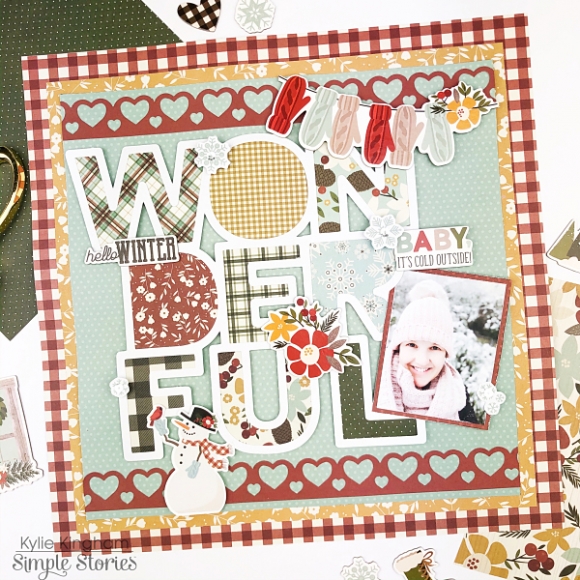
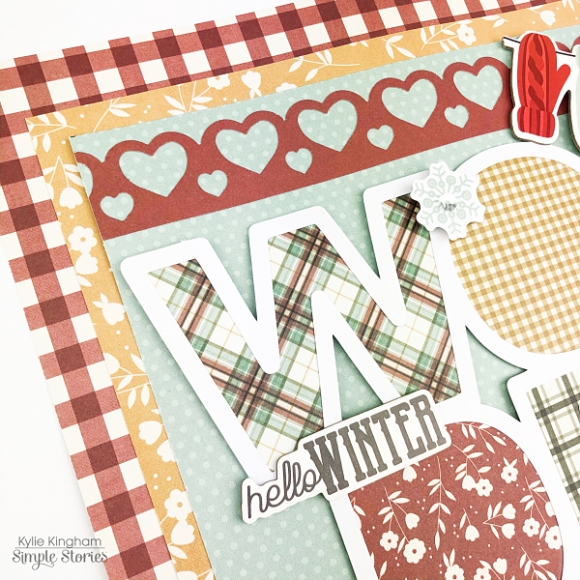
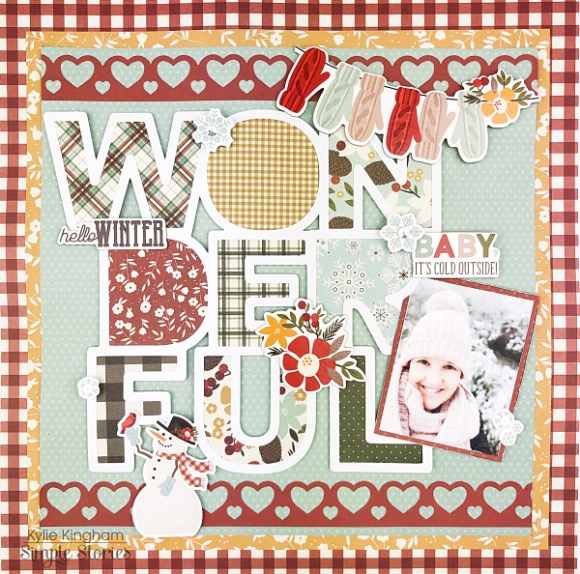
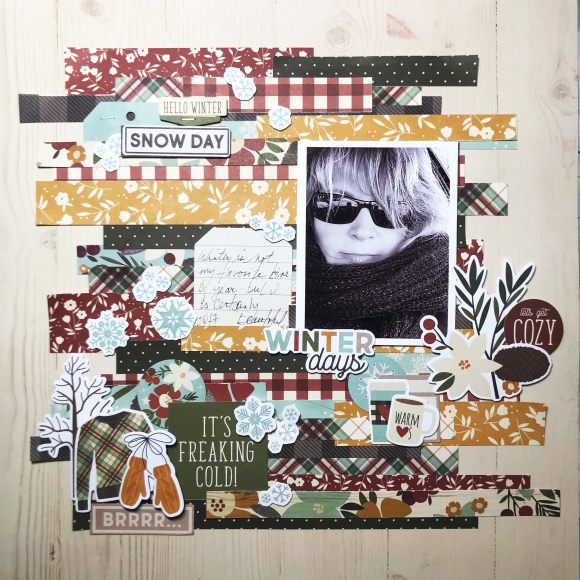
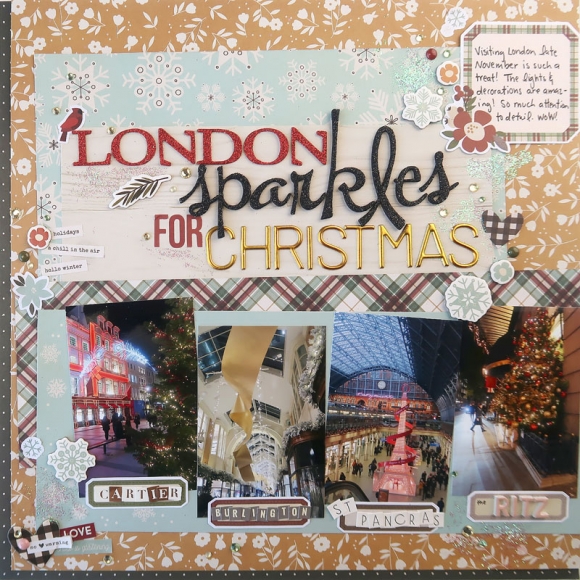
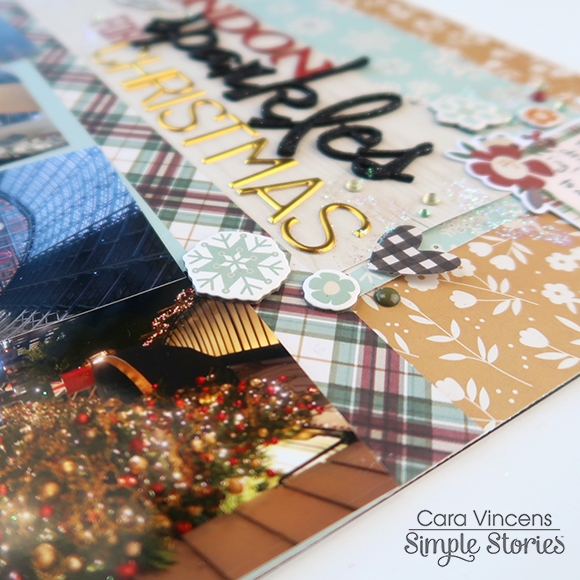
Hi, it’s Cara here today! I hope you are having a wonderful, festive December so far. I recently went to London and the Christmas decorations were incredible! I've never seen anything like it, I was amazed by the attention to detail and a surprise was waiting for me around every corner. I wanted my layout to showcase how beautiful it all was. The Winter Farmhouse collection not only matched my favourite London photos, but really highlighted them and made my photos stand out. I chose festive papers with a Christmas feel and I love how it all turned out. 

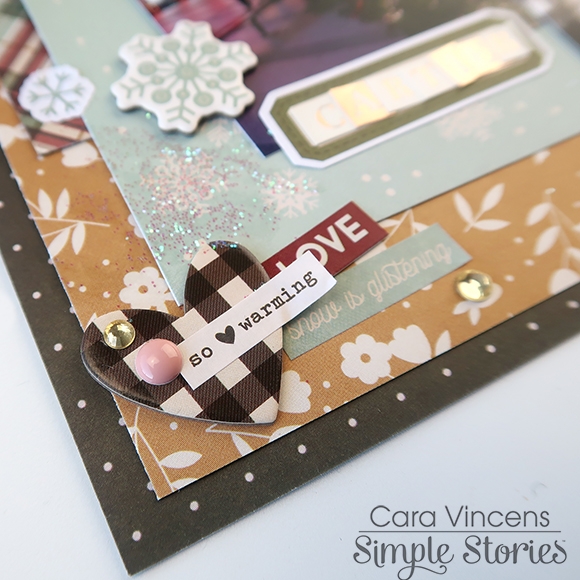
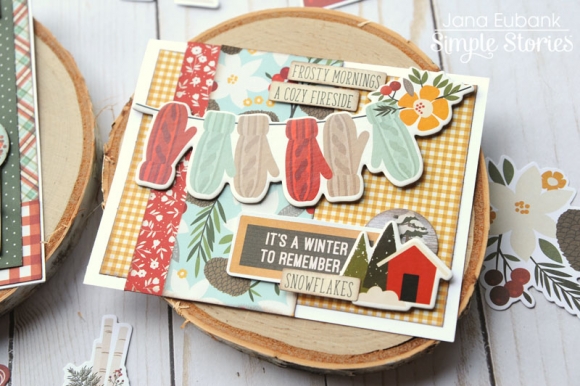
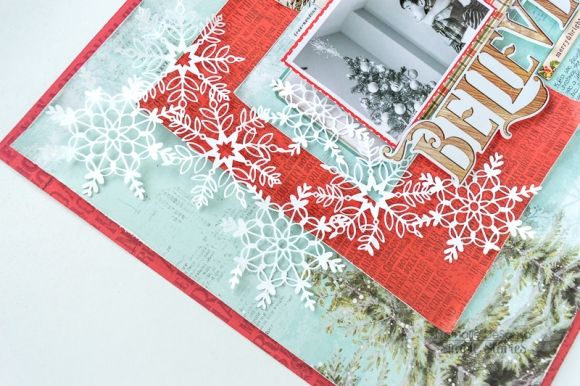
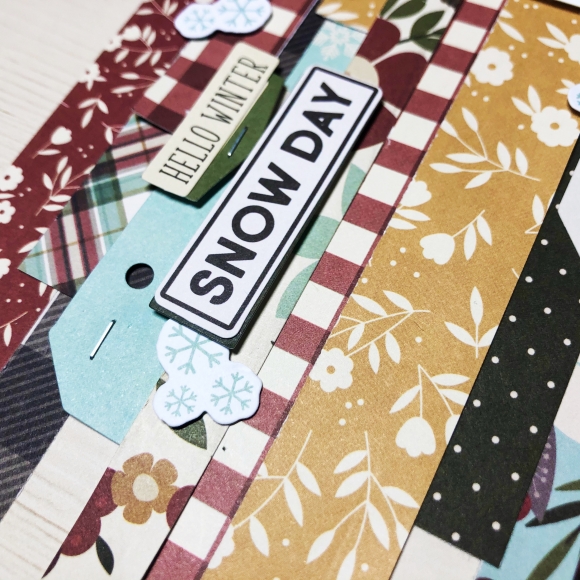
With so many lovely papers to choose from, I decided to go with lots of layers so that I could use as many of them as possible. I used the golden floral paper aptly named Warm and Cosy as my main background because it drew out the gold tones of the lights and decorations in my photos. I love having a peek of pattern at the edges of my pages, so I trimmed down the yellow paper to let a bit of the dark Falling Snow paper show on two sides.

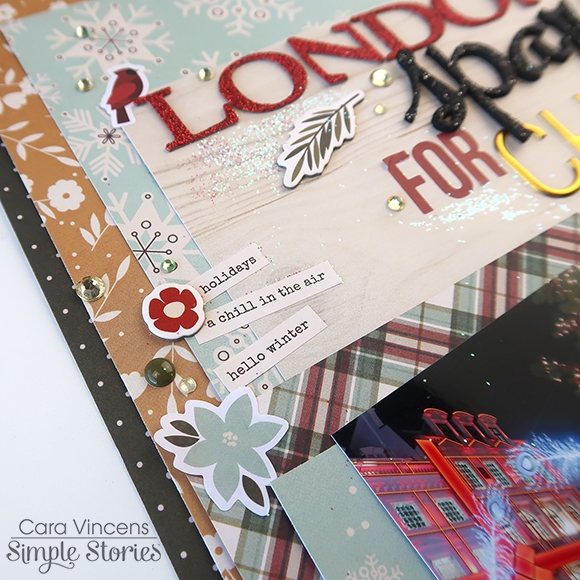
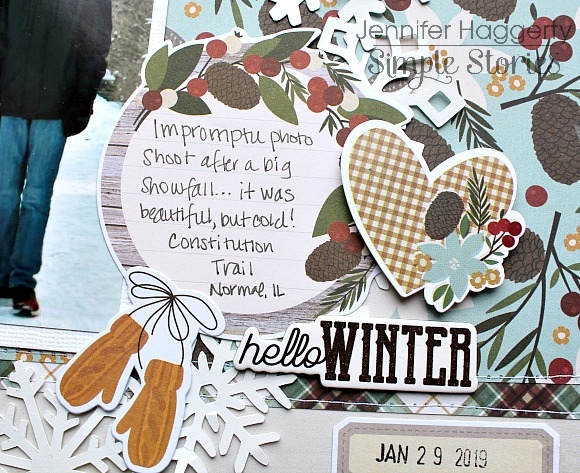
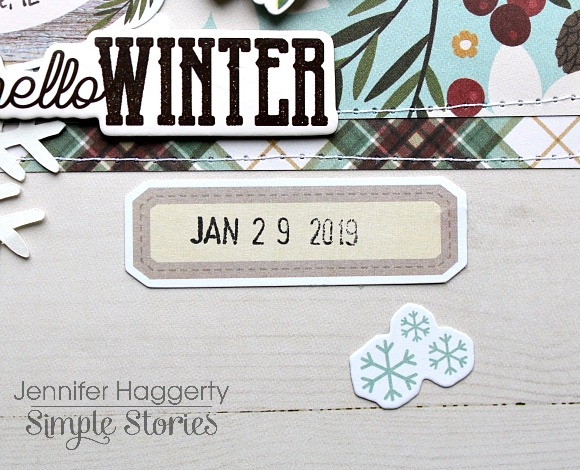
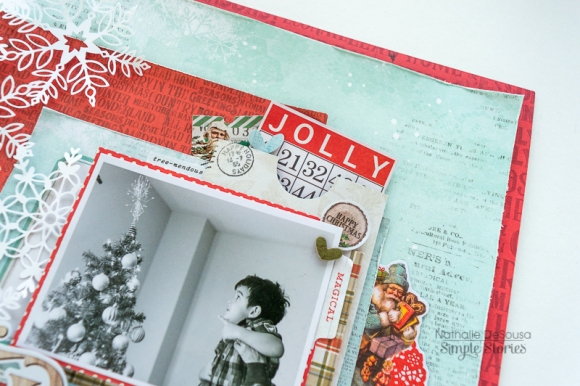
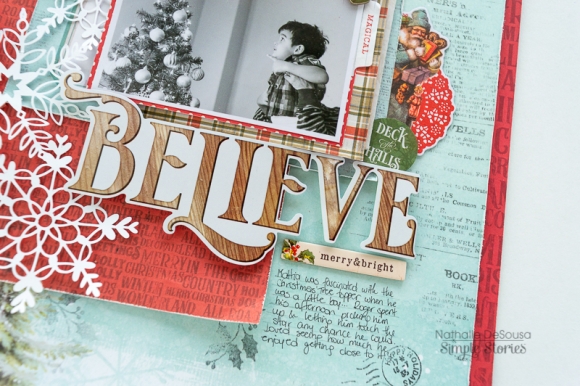
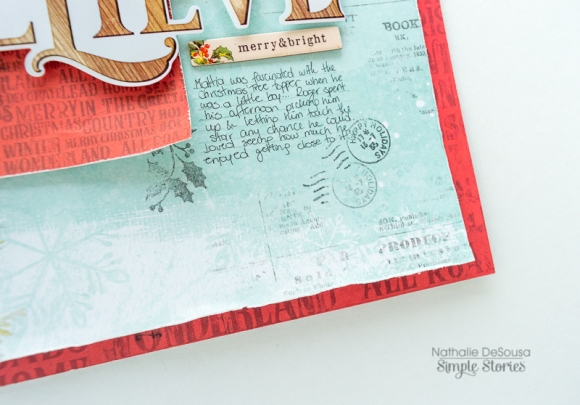
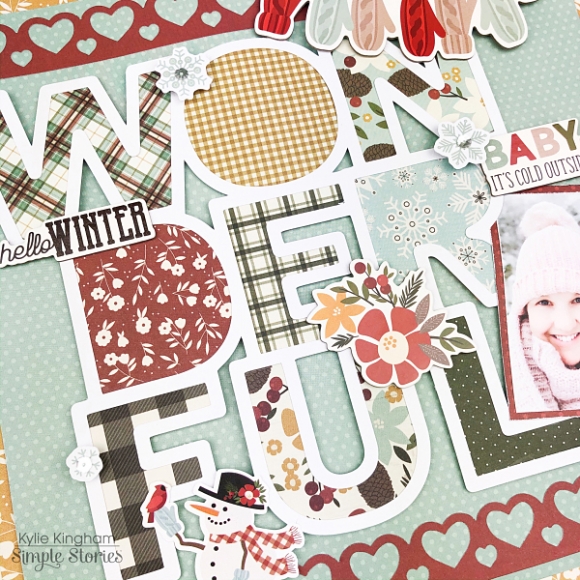
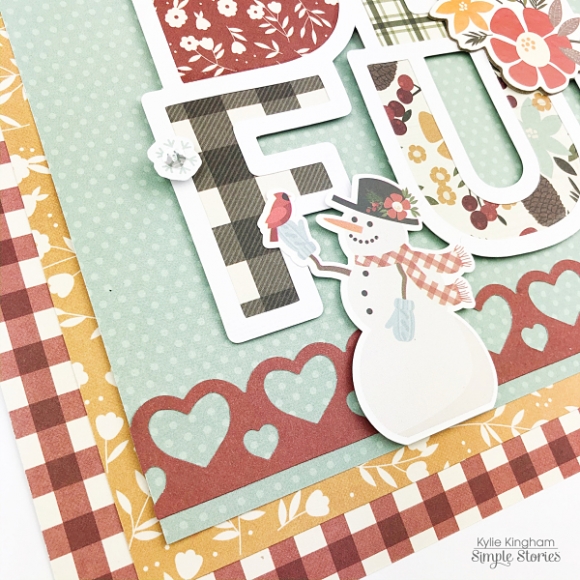
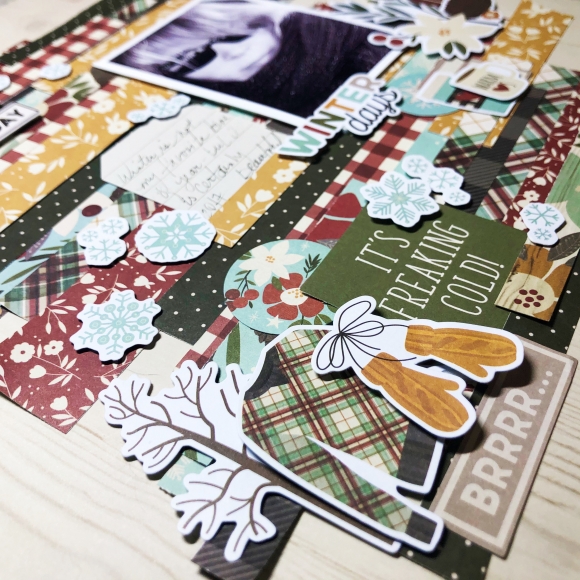
Hello Winter and the backside of the 4x6 elements paper matted my photos and I used both sides of Feeling Frosty for the backdrop for the title. 

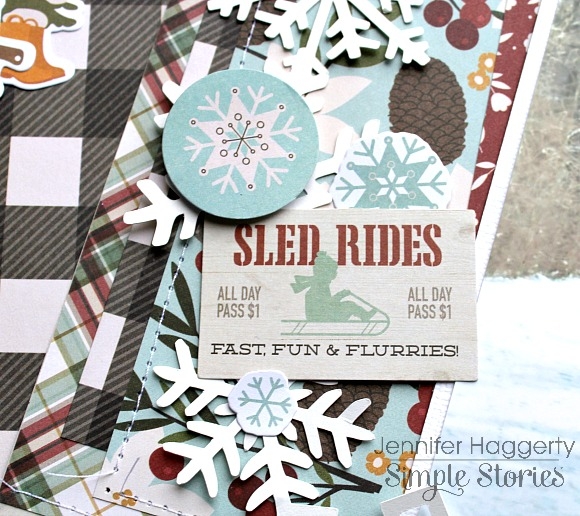
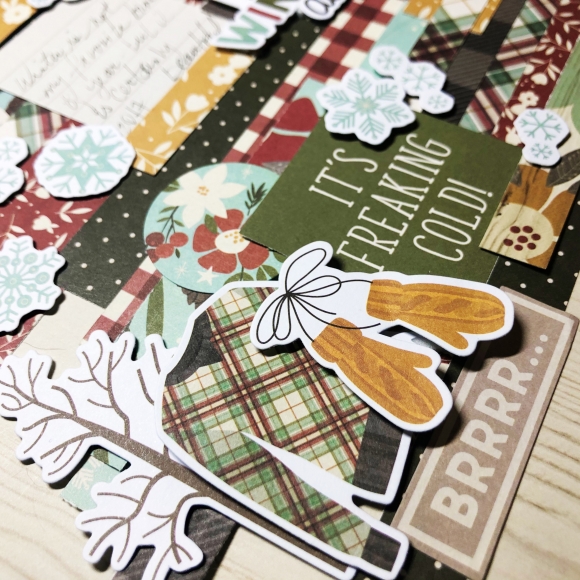
Little label die cuts from the Journal Bits and Pieces were the perfect spots to add the locations of each photo and a larger label was the perfect size for my journaling. 

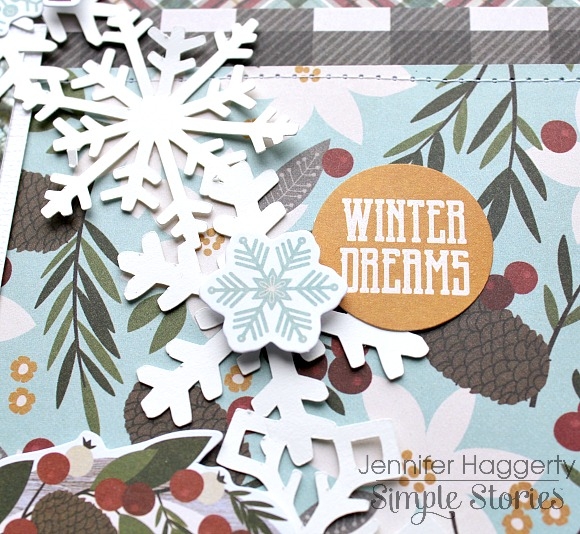
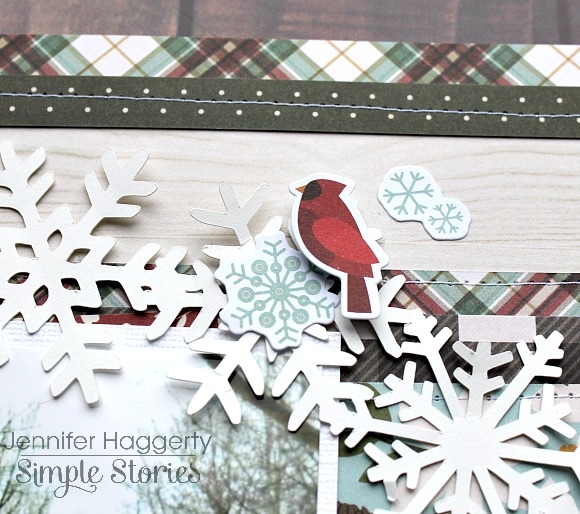
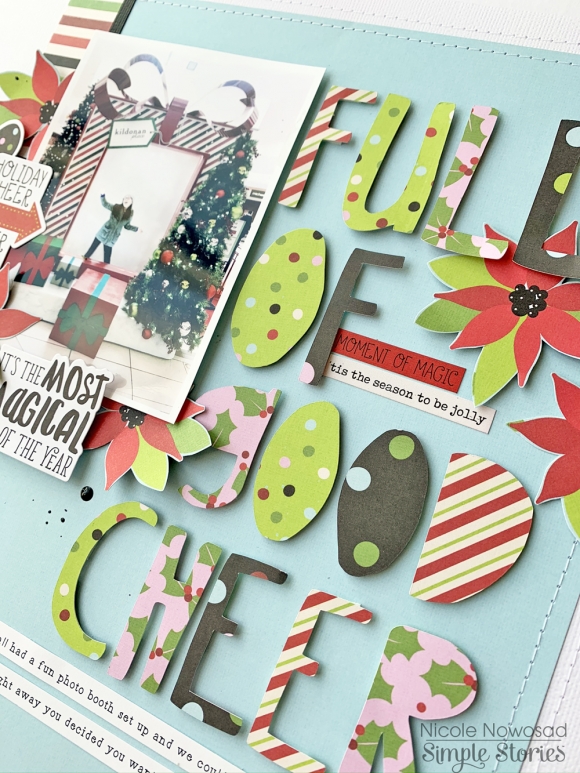
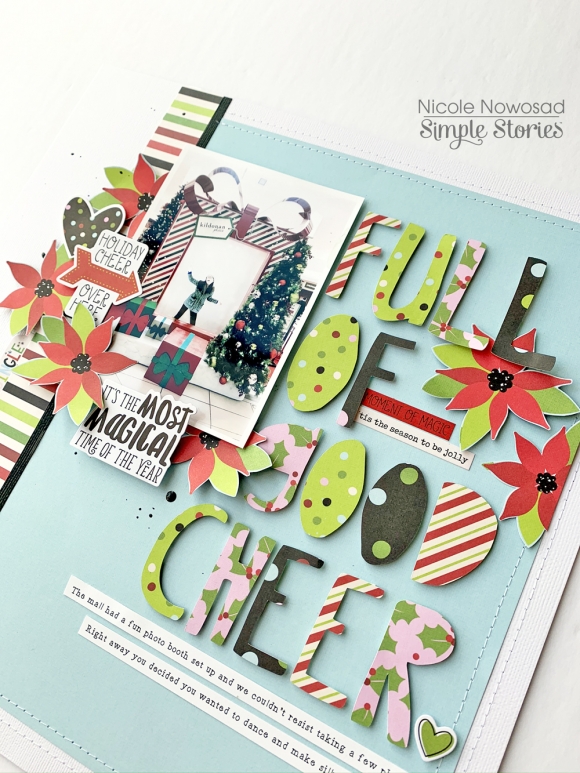
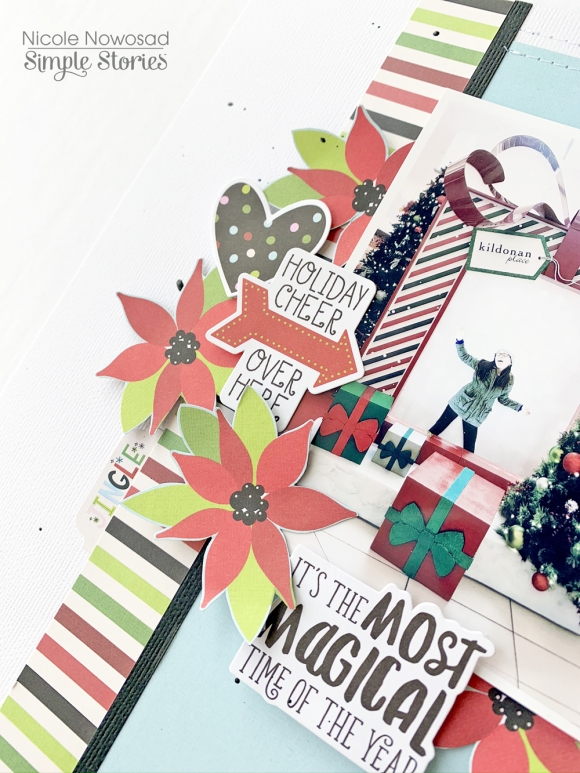
I sprinkled a mix of stickers, die cuts, and cardstock stickers around the page as embellishments and then I topped the whole thing off with some gems and glitter. 

Have you scrapbooked the Christmas lights in your town yet? What other festive decorations have you scrapped? 


Supplies

Hi crafty friends, It’s Dorymar today with a super fun Sn@p Album with the Hey Crafty Girl Collection! This collection is seriously perfect for all crafty girls.  It’s just fantastic! 

For the cover I want to recreate a craft room, to create it I used one of the 4x6 journaling cards in combination with the gorgeous chipboard stickers. I put all of them in 3d foam dots to create layers and dimension. I love how they look together.

The mini was decorated with all the beautiful patterned papers, ephemera die cuts, chipboard pieces, stickers, buttons, ribbons, etc.  Each divider is different from the others, this makes the album very fun.  In this occasion I decided to do something crafty in honor to the collection and created three-dimensional pages.

Inside of this spread, you have space for four pictures, two of them are in dimension. Closer to the photo mats I created a fun cluster with the die cuts and embellishments.

The collection has several crafty girls and I had a lot of fun playing it on different pages. For this spread, in particular, I created an open fold layout and I used the Crafty Girls chipboards as a title, inside of this spread I created a fun dimensional page.

When you open the spread, I’ve got a HUGE 3d pop up!  There is also room for photos or memorabilia to be stored. Closer to the pop up I created little clusters with the die-cut from the ephemera packs. 

Here is a close-up of the spread. The embellishments are so beautiful, I love them all!

This spread is very fun, on the outside I wanted to keep it simple but when you open it is so fun and pretty.

I wanted to showcase the papers in this collection, so I used as much as I could.  When you see each of the pages of this album you fall in love more with the collection. Here I show you some of them.

Many pages are pocket pages with inserts.  So again, LOTS of room for photos!!

This album could not stay if the pocket page for 2x2 cards. I love these pocket pages!

I had a lot of fun designing this project and I hope it inspires you to create your own with the stunning Hey Crafty Girl Collection! Thanks for stopping by!

Happy Crafting!

Supplies

The soft blanket of snow that covered the yard last week is so beautiful and always makes me want to cozy up in my craft room and do a little creating. Hello, friends! It's Jana Eubank. Today I have two new cards to share with you using the Simple Stories Winter Farmhouse collection!

Not only is the Winter Farmhouse collection perfect for your winter projects, but they are lovely for your holiday creations as well! If you're looking for a collection WITHOUT Santa and his elves, or you just want the versatility to bounce back-and-forth from holiday projects to winter projects, this collection is a great choice!

On this first card, I used the papers from the 6x8 paper pad to build up my background. I then layered up several of the Journal Bits & Pieces and added the adorable red house from the Chipboard Sticker Sheet. A sprinkling of deep yellow enamel dots adds a bit of shine.

I couldn't help but feature the mitten banner from the Chipboard Stickers on this second card! They are so cozy and CUTE! Again, I used the 6x8 Paper Pad to build up my background and then added a cluster of Journal Bits & Pieces die cuts and a red chipboard house in the bottom right corner. 

There's nothing like creating cards on a snowy day as you listen to Christmas music and enjoy a mug of hot cocoa. These cards will be perfect to send as a holiday greeting or to warm up someone's heart in January if they are feeling bogged down by the winter blues.

I hope you'll take the time to treat yourself to a quiet afternoon of creating this winter. It's the perfect remedy for a cold, winter day!

Enjoy!

Supplies

Hello friends! It's Jennifer here on the blog today to share with you another fantastic Simple Stories collection!  Winter Farmhouse is full of eye catching prints and embellishments that are perfect to document your snow activity photos!  Honestly, I'm not a big fan of the cold weather but I do love a good winter line!  And Winter Farmhouse does not disappoint! I  began with the beautiful wood grain print of the B side of Feelin' Frosty as my background.  I  then layered a few of my favorite prints across the center of the page:   both prints of Cuddle Up and the plaid on the B side of the 4x6 Elements.

Using plaid white cardstock, I cut a snowflake wreath using a cut file from the Silhouette shop and adhered it around my photo ( #238513 by Paige Evans).     As a focal point, I   used one of the larger journaling spots from the Journal Bits and Pieces then adhered the cute yellow gingham heart with pop dots.  For my title, I  used the "hello winter" sentiment found on the 6x12 Chipboard as well as added the yellow mittens from the Bits and Pieces

Underneath my title, I  added one of the smaller journaling spots which are the perfect size to add the date.   You can also see one of the many die cut snowflakes that I  added around my wreath to accent. 

I  adhered die cuts from both the Bits and Pieces packs around my wreath using pop dots on a few to add dimension. I  love the contrast of the yellow gold against the blues and greys of the background print. 

Here, I  utilized the snowflake die cuts to accent my wreath as well as this adorable "sled rides" sign. 

I  love the little red cardinals found in the Bits and Pieces. I   had to adhere one to the top of my wreath as they always remind me of my mom.  

Thank you for stopping by the blog today!  Visit the Products page to see Winter Farmhouse in its entirety! Have a great day!

Supplies

Hi everyone! Tara with Secretbees Studio! It is never too early to start craft projects. You never know what is going to come up and besides, all the beautiful paper is out just waiting to be made into something even more awesome!

Now that all of your Christmas decorations are up and your presents are wrapped (Ha!) you need something to do with your time. This mini album, made with the gorgeous My Valentine paper collection from Simple Stories, can go right on your to-do list!

This sweet album is 6 inches square and the base is chipboard, two covers and a spine, that were covered in some pearly faux leather along with some of the charming patterned paper. I took one of the layered frames of the collection and made it into a shaker filled with flowers, gems and pearls for the highlight of the cover. I then added in some Bits & Pieces, stickers and chipboard for even more pretty dimension!

There are five sections inside the album and they are all attached to the spine with coordinating twine.   All of the sections unfold to reveal more space for photos or mementos and there is a large double pocket section in the center. Each page has been beautifully decorated with the stickers, chipboard pieces, frames and Bits & Pieces of the collection that add even more charm to the gorgeous papers! Here are a few of the pages.

I'm sure you have your hands full with all of the things we do during the holidays but make sure you take time out to checkout this amazing collection from Simple Stories. You will not be disappointed and you will probably want to add it to your Christmas list! There is a short walk-through video on my YouTube channel that shows this sweet mini in more detail!

Supplies

Hi there!  Nathalie with you today to share with you a new layout about documenting the Magic of Christmas using the beautiful Country Christmas.   I love the vintage, classic designs of this collection, and  it was perfect to bring the sentiment of the season to this page.

I wanted to showcase the papers in this collection, so i started by trimming  and distressing the edges of the O Christmas Tree paper, and adhere to the b-side of the Glad Tidings paper.   The color combination of these papers makes the page so festive.

To make the papers shine, i chose a simple design for the page.  First, one of the papers from the 6x8 paper pad was glued to the background ( i picked the paper to match the Glad Tidings paper).  To bring the snow details in the background, i used a cut file from Handipaper to create the snowflake cut out, and then attached it along the left side of the 6x8 paper.

The Sn@p cards are perfect to create layers, and i used one of the 4x6 and 3x4 ones behind the picture.  Then used  the Simple Basic paper pack to create a small pocket that is also layered behind the picture.  Once i attached this to the page, i used a few embellishments from the collection to bring color and fun to the page.

To finish the page, I used the large "Believe" sticker from the combo sheet and  then a small chipboard stickers.   I  chose to handwrite my journal, but finished the paragraph with a few stamped images from the coordinating stamp set.

I love how this turned out, a simple page made perfect by all the papers and embellishments from the beautiful COUNTRY CHRISTMAS collection.   Remember to check the collection, you will love how it can easily bring the magic of Christmas to your pages.

XO

Supplies

A big hello to you friends!  I hope you’re having a great day!  Today I’m sharing EIGHT cards made with the Simple Stories So Happy Together Collection.  This collection celebrates everything that makes a house a home.

That could mean welcoming someone to their new home, welcoming a new addition to their home or just celebrating the friends and family that make our lives complete.  Being told your loved never gets old.

You’ll find lots of fun papers in this collection. florals, newsprint, plaids, gingham stripes, and more like this one covered with picture frames in coral, navy, yellow and mint.

The collection includes Bits and Pieces printed and die cut images of homes complete with landscaping, flowers and comfy chairs.   You’ll also find journal Bits and Pieces great for personalizing your one of a kind creations. I love the clever sentiments printed inside picture frames!

The chipboard pieces are my favorites because they’re thick and add lots of dimension to your projects.  Because they’re stickers you just peel off the backing and you’re read to adhere them anywhere you like.

If you’re a card maker like me you’ll love the 6x8” paper pads.   If you cut them in half, you’ll have two 4 x 6” panels perfect for A2 card fronts.  The patterns are the same as the larger size sheets but in a smaller size scale.  The pads even include sheets of journaling cards.

The Paper Basics sheets are solid print papers ideal for layering under pattern paper backgrounds for a clean look.

These cards are great way to welcome someone new into the neighborhood, celebrate a new addition to the family or just show appreciation for those who mean the most to you in life.

It’s true, home is where the heart is and that means it’s wherever we find ourselves together surrounded by all those that we love the most. 

Supplies

Hi friends! It’s Kylie back with you all today to share another layout I have created. I’ve been having loads of fun with the ‘Winter Farmhouse’ collection.

 Often, I get jealous of my friends in the Northern Hemisphere and all the lovely falls of snow they receive. It very rarely snows in my corner of the globe down under, however this year it did! Perhaps saying ‘snow fall’ is stretching it, it was more like a dusting! Nevertheless, I had some great photos to scrap and knew this collection would be perfect.

I selected the papers ‘Hello Winter’ and ‘Warm and Cozy’ as borders to my background page, which was from the co-ordinating Simple Basics kit.I loved the combination once they were all layered together. Using a heart border punch from my stash I also created a decorative border from the ‘Brick/Dots’ paper to sit at the top and base of my layout.

As a feature to my layout I used a ‘Wonderful’ phrase cut file which was designed by Paige Evans. Using my 6 x 8 paper pad I backed each letter with a different paper print and once completed I adhered it to my background using foam tape so that it sat up a little for dimension.

With so much colour already in my layout I decided to print my photo in black and white. This also helps to still draw the eyes attention directly to your photo. I also kept embellishments to a minimal and used a few of my favourite chipboard stickers.

To complete my layout and add a little more balance I couldn’t resist adding the cute snowman sticker to the base of my design.

Thanks so much for stopping by today! I hope you have enjoyed seeing my layout and it gives you inspiration for your own scrapbooking.

Take care,

Kylie.

Supplies

It's time for our annual Black Friday Digital Sale! Find all of your favorite Simple Stories collections in digital format at 50% OFF! You're sure to find just what you need for ALL of your digital crafting projects! Visit our Digital Store today to stock up on your favorites and enter code BFCM2019 during checkout. Hurry! Sale ends at 11:59 pm MT, Monday, December 2, 2019.

Hi! Odessa here with some more Christmassy SN@P! inspiration. I used the oh so cute Say Cheese Christmas collection to work on a couple of pages in my December album. The colours are so much fun and it’s all so playful!

I really liked the 2x2 cards that spelled out Merry on the 2x2 Elements page so I made a fun page focused on them with some cute Say Cheese Christmas Bits and Pieces and Chipboard stickers in the additional pockets. On the other side I combined some fun pics (new Christmas mugs!!) with some of the whimsical elements from the collection.

The pinks and greens together in Say Cheese Christmas are so good. I like putting die cuts in the 2x2 pockets to add some layers by letting what’s underneath peek through.

Under all those 2x2 squares is a bright photo of macarons and some general holiday ephemera. Say Cheese Christmas is perfect for fun and magical holiday stories.

On the bottom of my colourful photo I used the festive banner sticker from the Combo Sticker sheet with a big word from the Bits & Pieces pack. It’s perfect!

On this page I have a recipe on one side and just some more holiday fun on the other. The left side of the page is more subtle in colour while the right side pops!

I used one of the 4x6 Elements cards to add in a recipe which has been so important to me in this album. Baking is such a big part of Christmas for us that there are pages dedicated to recipes we made so we can look back on them. This big journal card was the perfect size. The other embellishments and cards on the page are similar colours and designs to keep it harmonious.

On the other side I went bold and bright. This particular page protector has a long 2x8 pocket along the side and 2 4x4 pockets. I cut a strip of squares to fill the 2x8 pocket - it fits and looks great! Next to it is a 3x4 photo on top of a cut down 4x4 piece of cardstock with those festively fun banner stickers to anchor the corners.

I thought the combination of the 3x4 Element that said “Not a creature was stirring, not even a mouse” contrasted with a photo of my cat in front of the tree would be really fun so I used the Photo Flips. I used a tab sticker so it’s a bit more obvious to flip it open with the photo of my cat adhered to the same cardstock as used in the photo on the bottom. I added some stickers like that little Santa hat on top of her head to be a little more playful. The Hello Santa 4x4 card really finishes it off.

Supplies

10774

It’s Kristine here today to share a layout I recently created using the Winter Farmhouse collection. 

I wanted to use so many patterned papers from this collection so I decided why not use them in strips. I took a few of my favorite papers and cut them in assorted sizes. What a great way to use many patterns and colours. 

I used the wood grain background to start my layout and then layered my strips of paper. I then added some Bits and Pieces to create clusters and add more colours to my page. 

This isn’t hard to recreate. You can also do this with leftover or any of your favorite simple stories collections! 

Supplies

I am so excited to share my very first Snap project and Oh my goodness I had so much fun creating my album. First off, I would like to show how beautiful this "So Happy Together" Collection truly is. The colors are so bright and cheerful. I fell in love with the yellow color so I decided to use the yellow stripe 6x8 binder
 
Just look at all these amazing papers. They are all so pretty. The  color combinations are pretty amazeballs.
My family is everything to me so this collection is perfect for memory keeping for my family's adventures. I will be adding more to this album in the future. I would love to fill these pages with photos and memories.
I really wanted the word "family" to stand out so I created a very simple cover for my album.

 I cut out these 2x2 elements from one of the 12x12 papers. I just arranged them how I wanted. Super easy to do.

 Most of the paper elements I used are from the 12x12 papers that I cut up.

 Tags, tags, and more tags. I decided to cut up small tags and inserted them inside these 2x2 pockets. I also added eyelets to add dimensions. I just thought they look really pretty and I can add photos or journals later on.

 I made this large tags from the basic kit papers. By adding the twines, it will make it a lot easier to pull out the tags.

 You can have so much fun with all the different sizes of pocket pages available.

 Home is where the heart is.

Thank you for stopping by and viewing my very first Snap project. I promise you that you will be seeing more Snap projects from me as I am totally addicted creating them.


Supplies

Hey y’all, Courtney here. Today I am up on the blog sharing a layout that I created using the Holly Jolly line. I used two 12 x12 sheets of paper to create my background, Holly Jolly and Peace and Joy.

I layered a few of the papers from the 6x8 paper pad behind my photo to add a little more color. Then I used a ton of the gorgeous florals from this collection to frame out my photo. I wanted to use all of them, but I decided I should save a few for another layout. I used the florals from the ephemera pack, the combo sticker sheet, the 4x6 sticker book, and the chipboard.

 For this layout I decided to create two clusters. One is a combination of ephemera, the combo sticker sheet, and the 4x6  sticker pad as well as one of the adorable paper bow clips that coordinate with this collection. I just love all of the snow globes and wanted to incorporate one in this layout. My second cluster is centered with my 4x4 photo. I used this adorable photo of my two oldest with Santa.

I hope you enjoyed the layout that I created using the Holly Jolly collection.

Supplies

Hello friends and family! Don't you agree that those two words are so important in our life and for that reason need to be documented more often? How about a cute little mini book? Anya here today and I am happy to share my scrapbook obsession – a mini book!

To create this mini album I started with a house shape. I downloaded mine from the Silhouette store, but if you don't have a digital cutting machine you can print a shape, fussy cut it and use it as a template to cut all of your pages. Digital cutting machines are helpful, but it didn't stop me from making shaped mini books when I didn't have one.

I covered all of the pages with coordinating patterned papers and decorated some them with different elements, leaving some of the pages blank for the freedom of photo placement. As always, one of my favorite ways to add more photos to a mini book is to add a small “card”, which has a 3x4” element piece on the front panel and has spots for two photos when you open it.

My favorite elements to decorate the cover for a mini book are chipboard pieces! They withstand the wear and always look awesome, adding details and depth. I hope you'll find some time to make a similar mini book soon, but I must warn you: creating these may become addicting, just like it was for me! Thank you for visiting and we hope you will stop by again for more inspiration from the Simple Stories team!

Supplies

Hi friends! Nicole here today to share a project with you using the Say Cheese Christmas collection. I just love the whimsical patterns and bold color in this collection and it is perfect for capturing those fun holiday photos!

I decided to use a lot of the patterns in this collection in the bold title on my project. I diecut each letter on my digital die cutting machine and then popped them all up with foam adhesive onto my page.

The fun mix of patterns adds a lot of color and whimsy to my project, without taking away from the photo on the page. I added in some fussy cut pointsettia flowers amid the title to fill in some open areas.

I finished off the page with a striped paper to bring together all the colors on the project and balance out all the fab color on the page!

Supplies

Hello there, so who’s feeling Christmassy? I’m starting too, for me it’s the smells that get me in the mood, the Christmassy scented candles, the gingerbread lattes, the mince pies!! I thought I’d start my Christmas preparations by decorating the 6x8 SN@P! binder that I’m going to use for documenting our Christmas memories. I’m using the red SN@P! binder and decorating with the Holly Jolly Simple Stories Collection. 

These binders come with chipboard dividers included and are so easy to decorate using the 6x8 paper pad.

I simply just glued a sheet onto the front of the binder, and used a ‘tab’ sticker from the 12x12 sticker sheet.

Then I decorated each one by layering up a 3x4 element and of course, you guessed...I drew around each layer with a black fine tip pen!

To add a little more detail I chose a floral sticker for each divider and also used a few enamel dots! Easy Peasy! To decorate the front of the binder, I did exactly the same...so simple!! The only difference is I used a 4x4 element and a chipboard floral piece instead of a sticker. Now I’m all set, ready to start filling my SN@P! binder!


 If you would like to see more pictures using Simple Stories products then checkout my IG account  Heartsbyemma (@heartsbyemma) • Instagram photos and videos

Supplies

Hello, it’s Cara here today with a fun layout with the adorable Holly Jolly collection! If I am able to get a photo of all of my 6 children with no one making a face (… almost), I’m going to scrap it, and that’s just what I did here!

I layered lots of pretty papers from the collection to frame the photo and then I just had fun putting as many pretty embellishments on this page as I could. I stopped just before it started looking like an elf throw up on it. 

Since it’s an Advent calendar themed page, I used the countdown numbers from the Mini Sticker Tablet along the bottom but using the larger ’25’ from the other number set in the same sticker book. Since the children all have their advent calendars still wrapped in the photo, I mimicked those gifts by stacking a few present stickers in a cluster in the corner.

I love all the chipboard pieces in this collection so I sprinkled a few throughout the layout, Pairing them with stickers and die cuts, is a great way to add variety and depth to your layout. And besides, you can never go wrong with a gingerbread man!

This fun and festive collection is really easy to add a little Christmas cheer to your page. 


Who is excited to start their advent calendar on December 1? I sure am!

Supplies

Hello Friends! It’s Dorymar back on the blog today to share a beautiful 6X8 Sn@p Album I designed with the stunning So Happy Together.   I fell in love with this collection as soon as I saw it: flowers, hearts, pastel colors, they work beautifully together! This collection is perfect to document memories of your family and friends, so here is my fun project!

This collection is full of beautiful pastel colors, that's why I selected the new 6x8 Blush Sn@p Binder, because it combines perfectly well with the collection.

The collection is dedicated to home, family and friends, on the cover I wanted to capture the main theme for what I’ll use this project, THE FAMILY. I used several elements of the collection to make the perfect combination. On the cover I used 6x8 papers, die cuts of the ephemera packs, chipboard, 3x4 journaling cards, etc.  All are glued with foam tape to create layers and each element can stand out perfectly.

For my first page I created an open up flap using the Sn@p page as a base and a 6x8 patterned paper from the 6x8 Paper Pad. I created two holes at the top of the page to add a beautiful ribbon, I selected the FAMILY word and a cute sentiment from the Sticker Sheet as a title.  I added cute bunch of flowers and white twine to finish it up!

On left page I added two removable mats using magnets. On the top they have space for photos and on the back there is space for the journal. For the layout on the right, I used as a base one of the 6x8 patterned paper, I cut different sizes of paper to create fun layers behind the photo mat.  I decorated around with stickers.

 I used some embellishments from the collection to create small cluster in the center of the page. They match perfectly together.

I love to create a different size of pages inside my albums, on the right page I reduced one of the pages of the album to 4.5 and used a 4x6 journaling card as a mat for the photo. Around it I incorporated messages from the mini sticker tablet, die cuts and the beautiful family word from the chipboard stickers.

On the back of the page I created two pockets.  To made them, I glued the 4x6 card from the front of the page with a pocket to the side and on the back, I glued the 4x4 card creating a pocket on the top. I used several paper sizes to create the inserts and tag.

The collection has many cute house elements, for this layout, I created clusters with the embellishments of the collection to simulates a house living room. They look super cool.

Since I love to have space for a lot of photos, I added a few flaps.  This gave me more space for extra photos.   

These two pages are ones of my favorites because I love the patterns, the colors and, the embellishments.  I was able to use many of my favorite beautiful elements of the collection and it has space for many photos.

Here are a few close-ups of the spreads.  As you can see, I used many of the collection’s beautiful embellishments.

I hope I've inspired you to document your home and family memories in a fun snap album with the fantastic So Happy Together collection.

Supplies

Pages