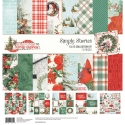
Hello everyone!  Dorymar here today sharing a beautiful Christmas Snap Album with the vintage and majestic Country Christmas Collection.  When I saw this collection, I fell in love instantly with the vintage look, the colors, elements, and designs. Christmas just around the corner and this project is a unique way to document your holiday season. 

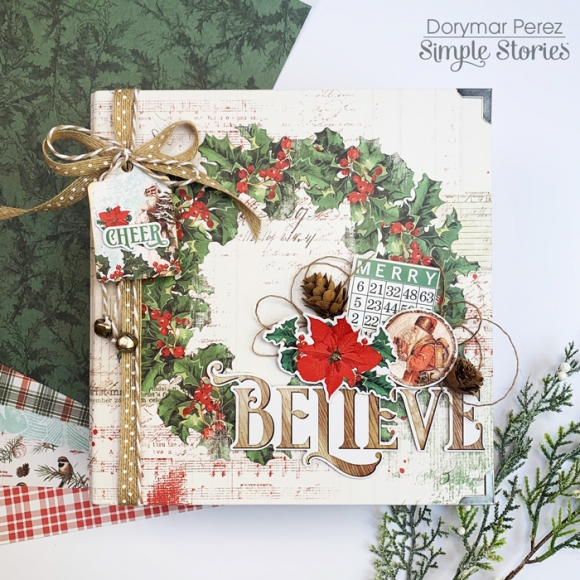
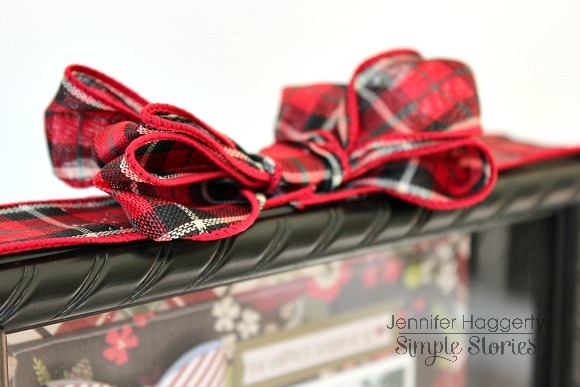
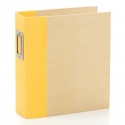
This Collection includes a beautiful Sn@p binder in combination with the collection, where if you wish you can add some element, or you can also leave it as it comes because it’s spectacular! But in my case, I always love to decorate my cover and to create it I use a few elements from all the beautiful embellishments that the collection includes.

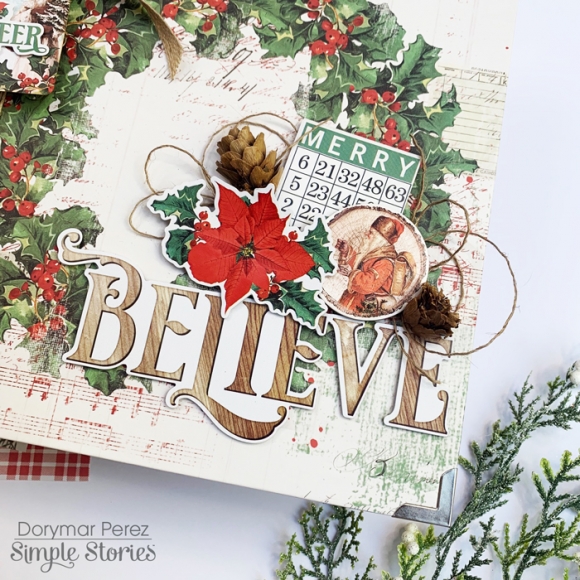
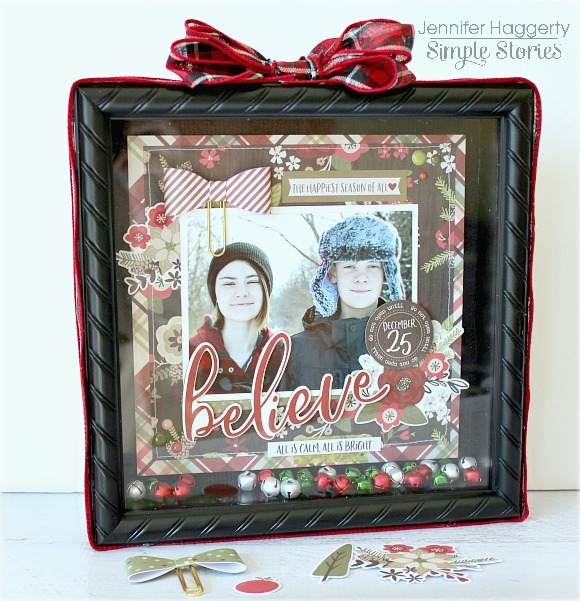
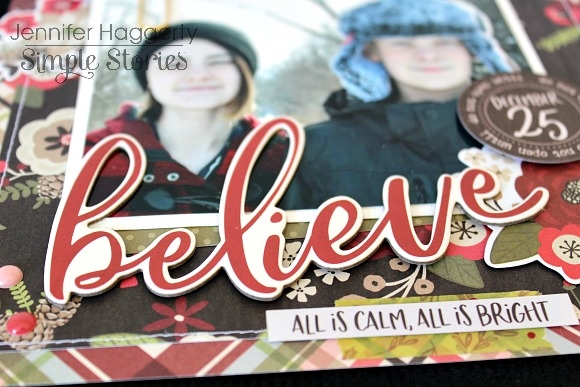
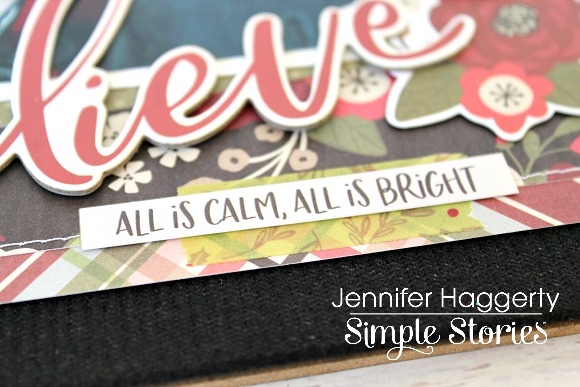
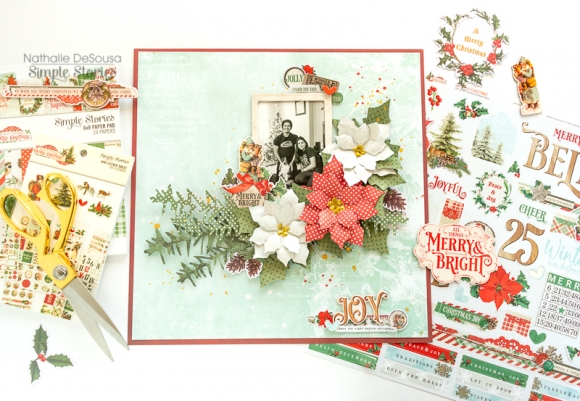
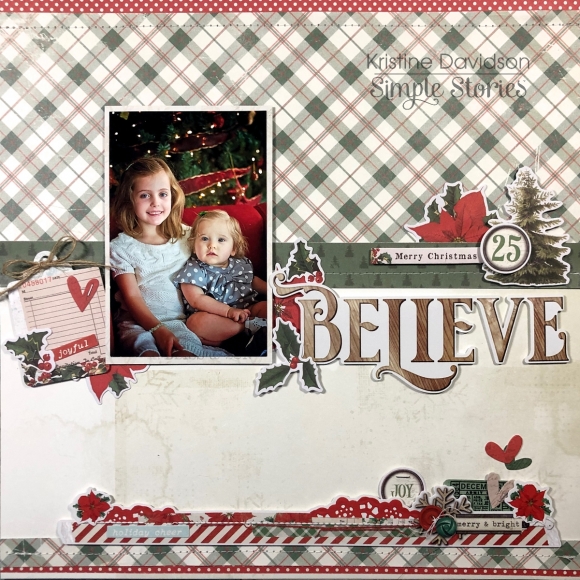
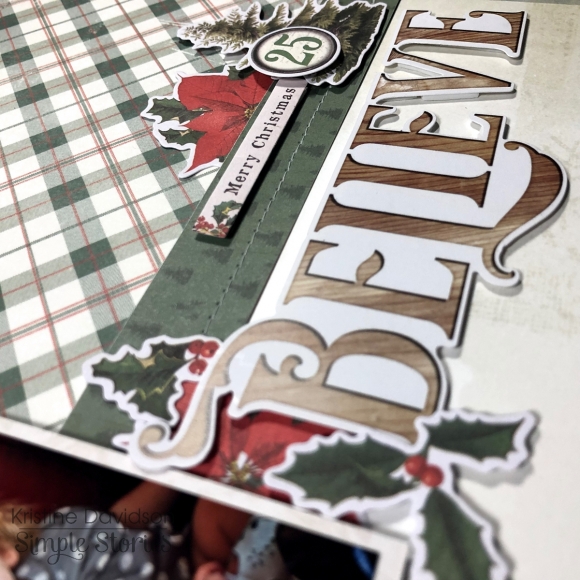
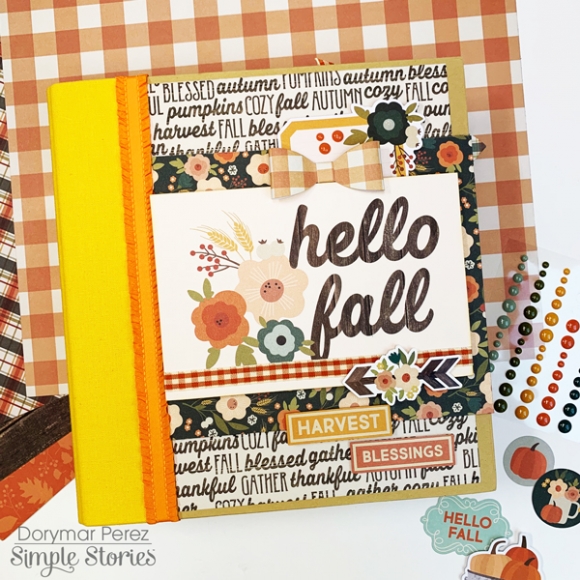
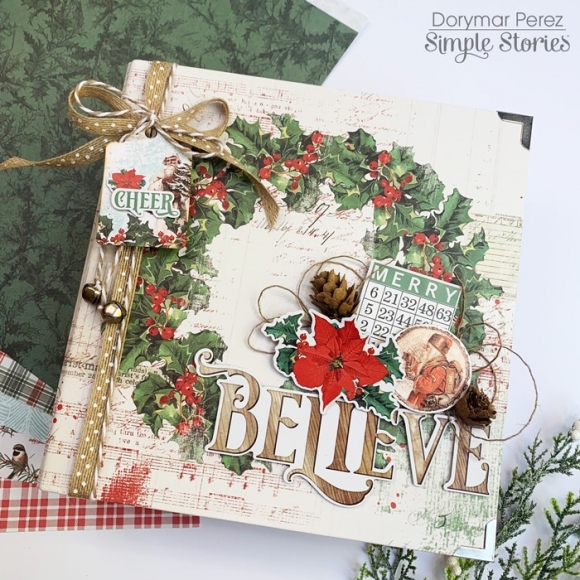
The cover design includes a big Christmas wreath, to personalize it I added a Giant “Believe” word from the sticker sheet and closer her I added the big poinsettia flower and bingo card from the sticker sheet too.  To give a cute texture I added 2 mini pinecones and twine.  I think looks AMAZING!

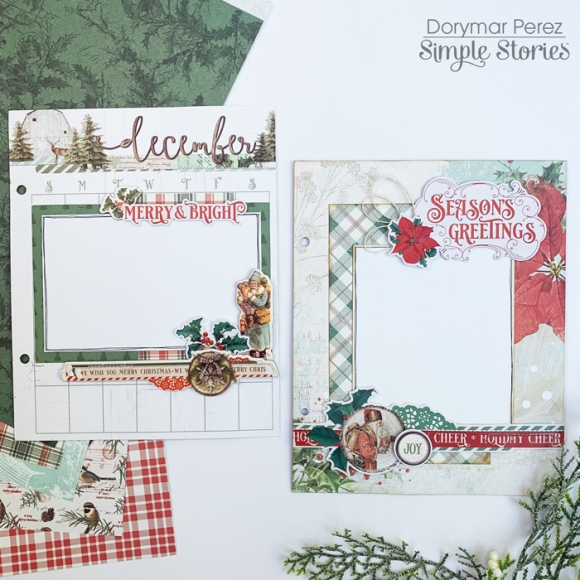
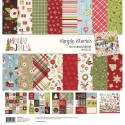
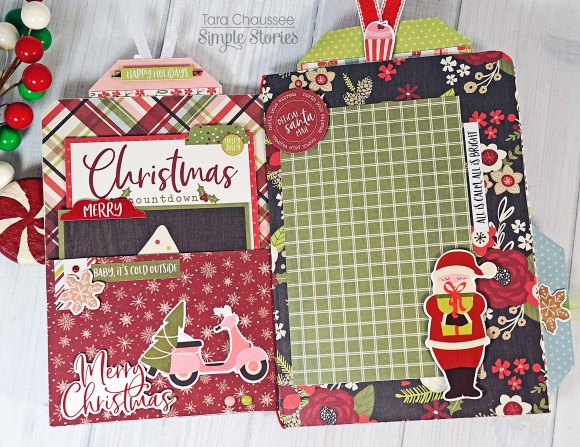
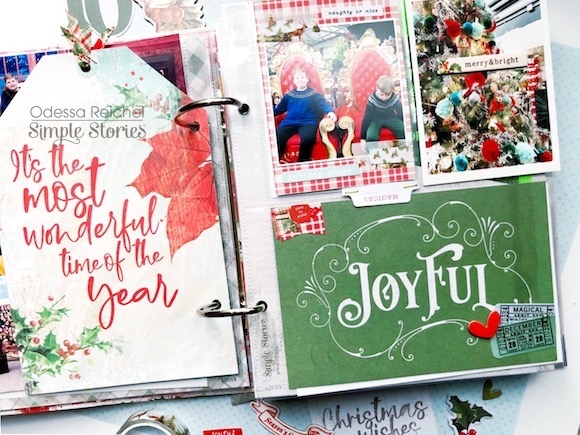
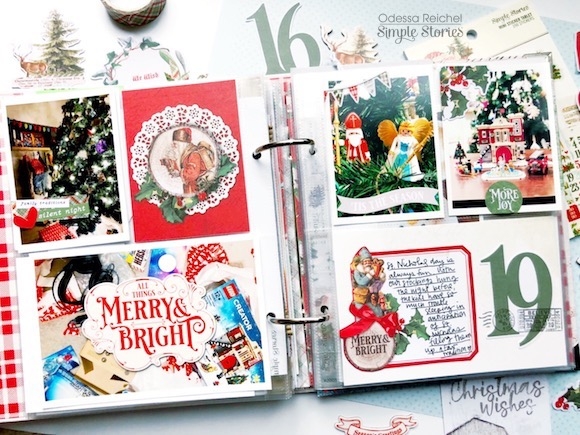
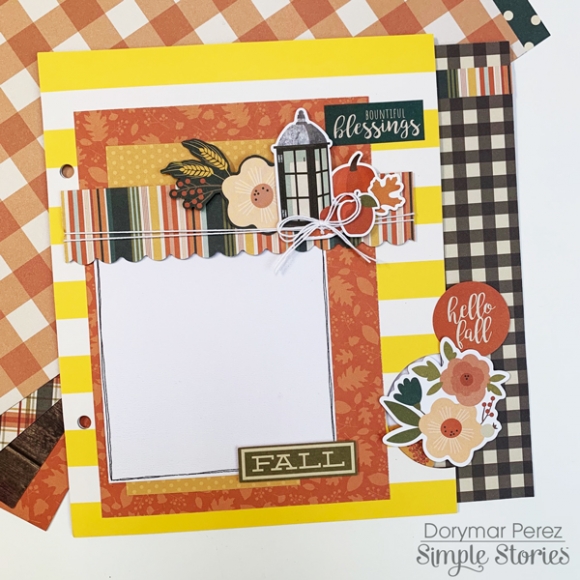
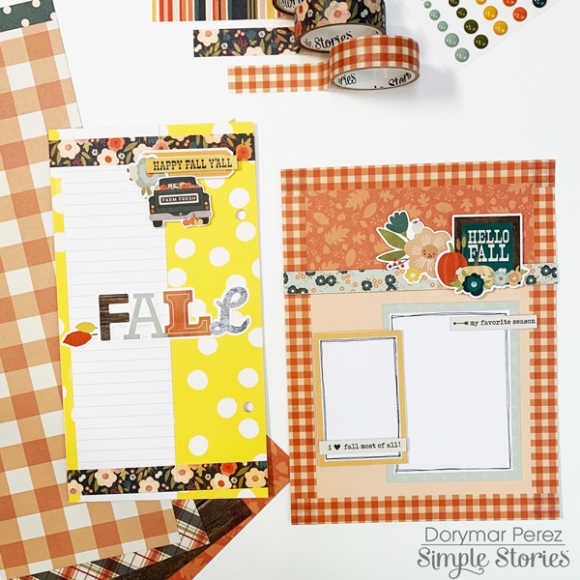
The Country Christmas Sn@p Binder comes with some great ready to go dividers which includes beautiful designs in combination with the collection papers.   I didn't have to work hard to personalize my dividers, I just added some elements and they were ready. For these pages I only had to add some chipboards, die cuts and stickers and the pages were ready.

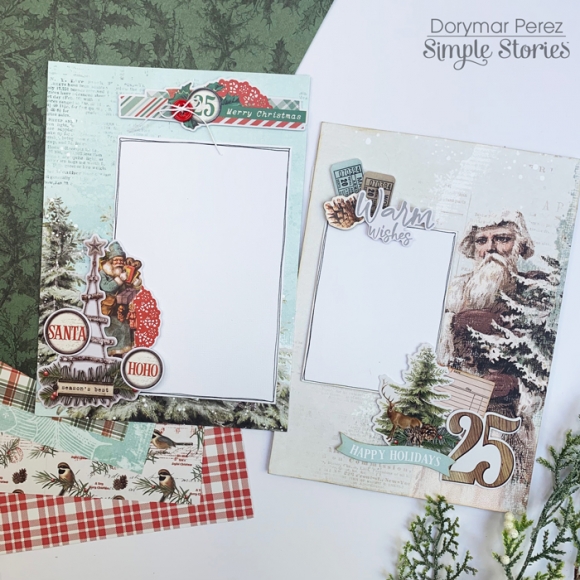
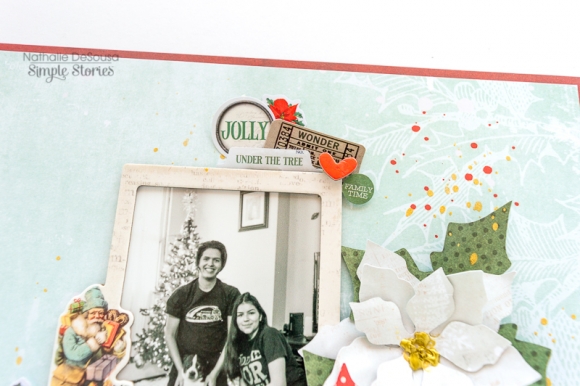
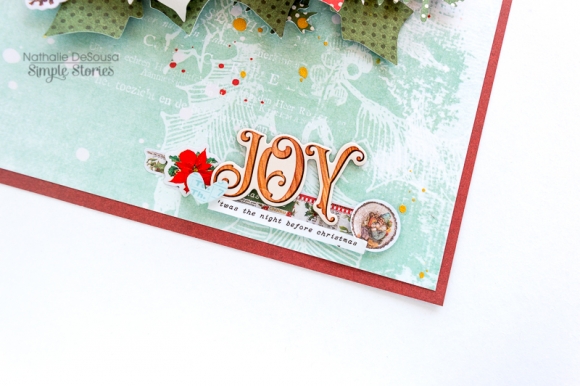
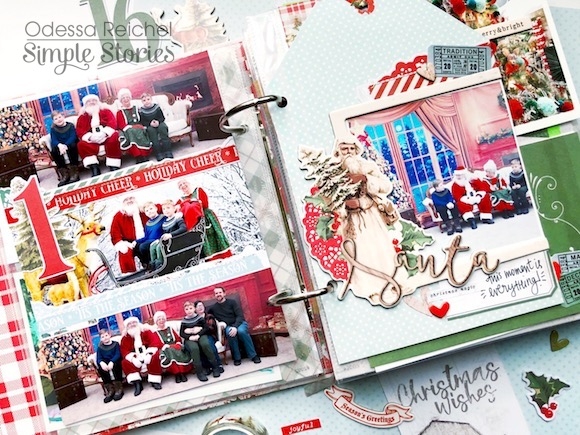
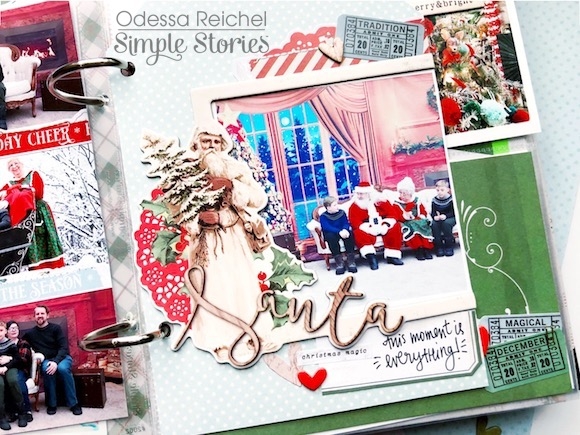
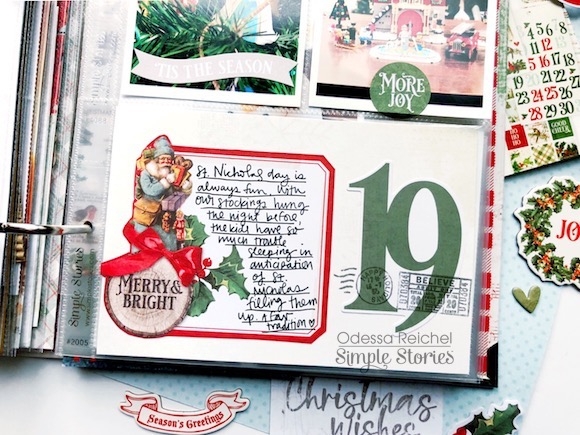
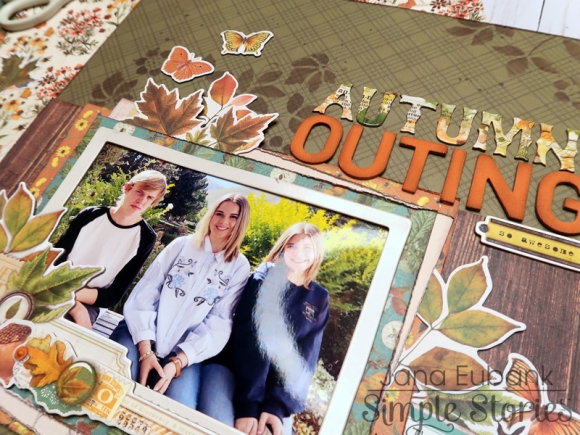
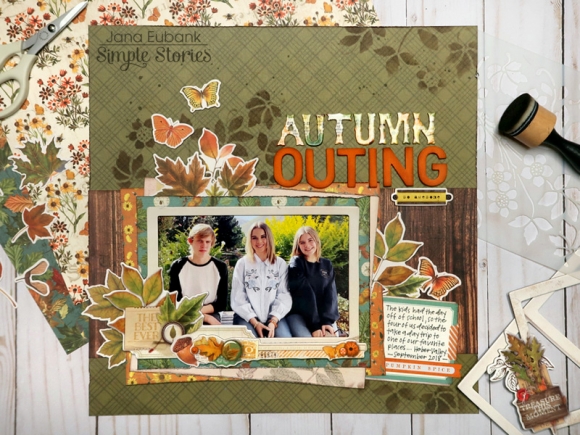
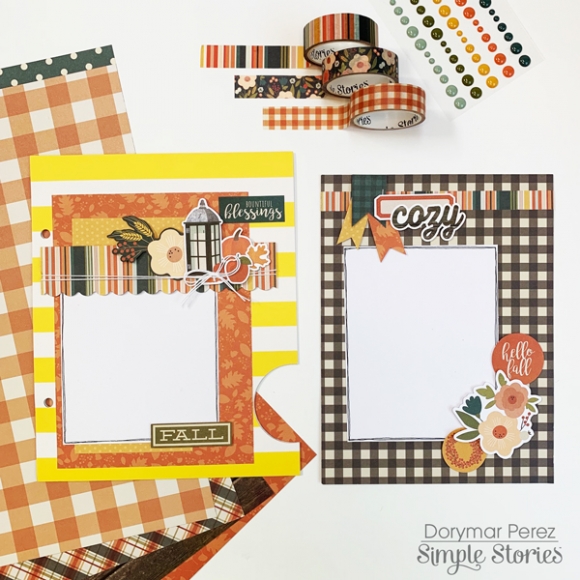
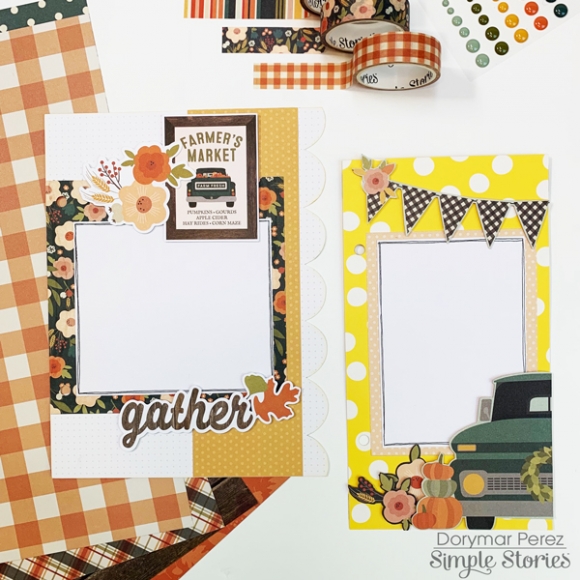
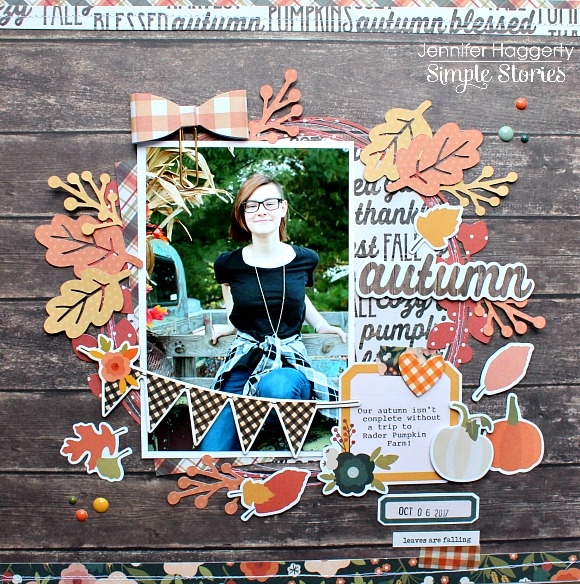
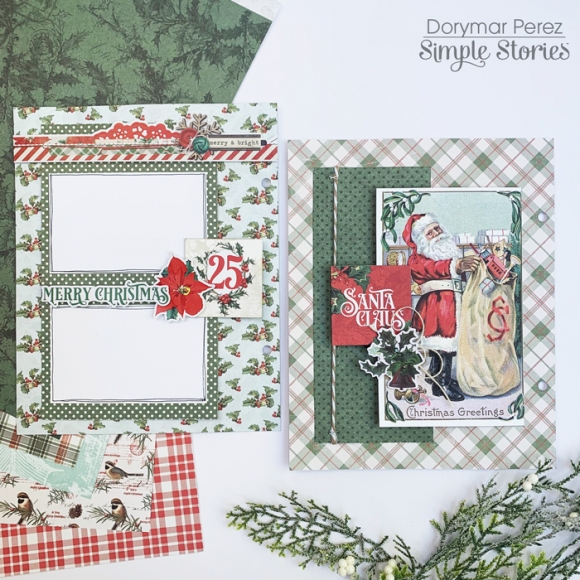
I used the Joyous Noel 12x12 paper to create these two beautiful layouts. The big vintage Santa, it’s Amazing, I love it so much!  To decorate the pages I used stickers, bits and pieces and chipboard from the Country Christmas collection to embellish the layout by creating little clusters next to the photo mat. 

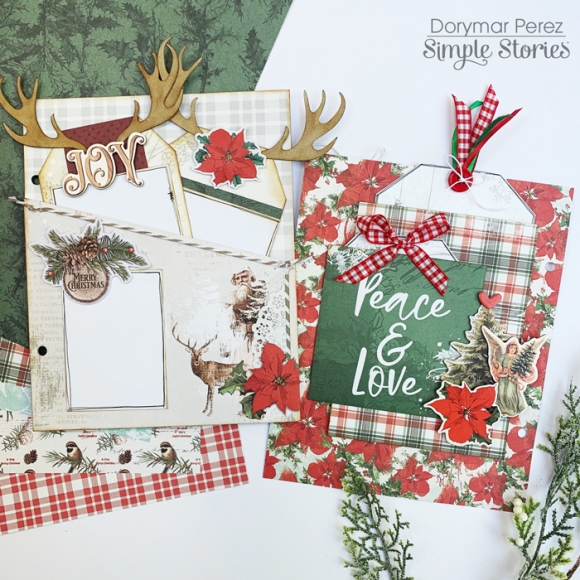
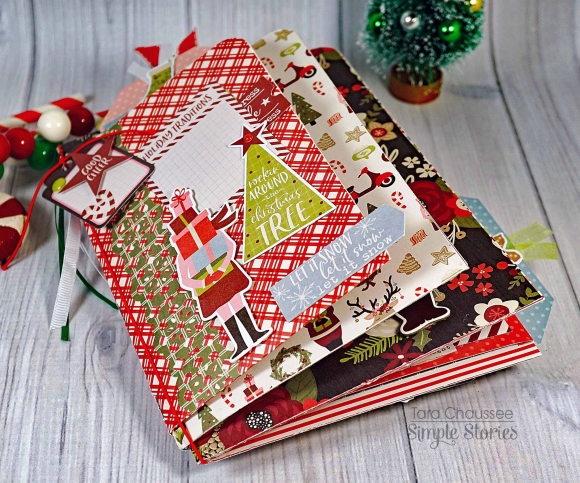
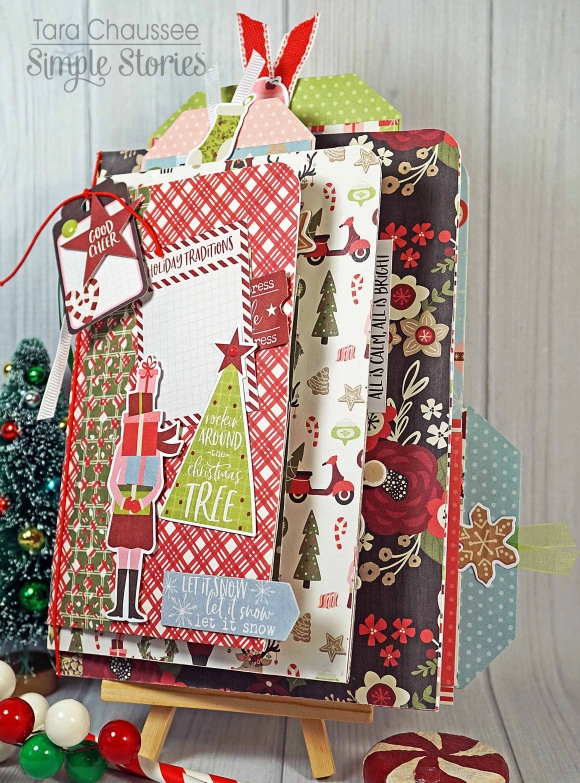
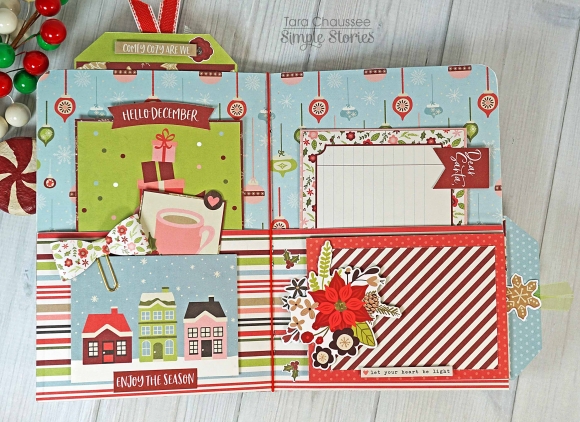
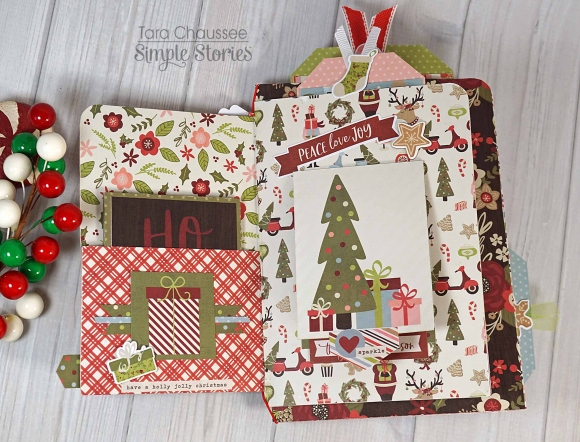
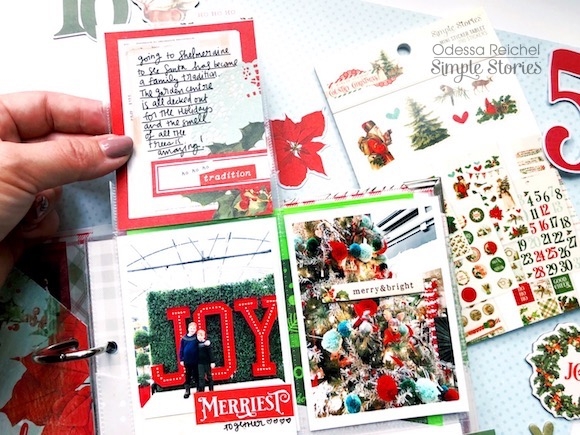
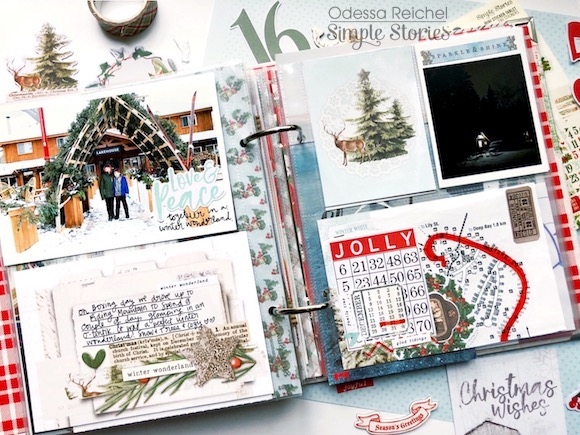
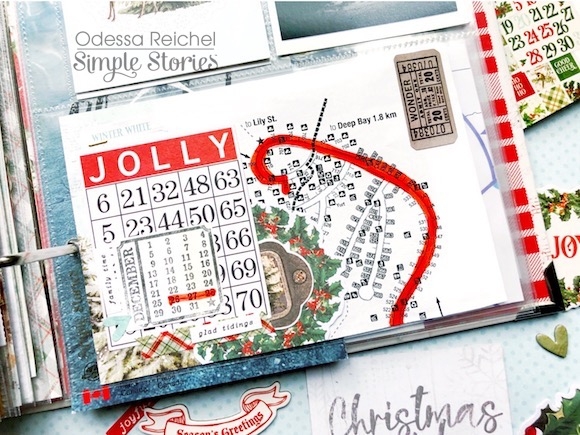
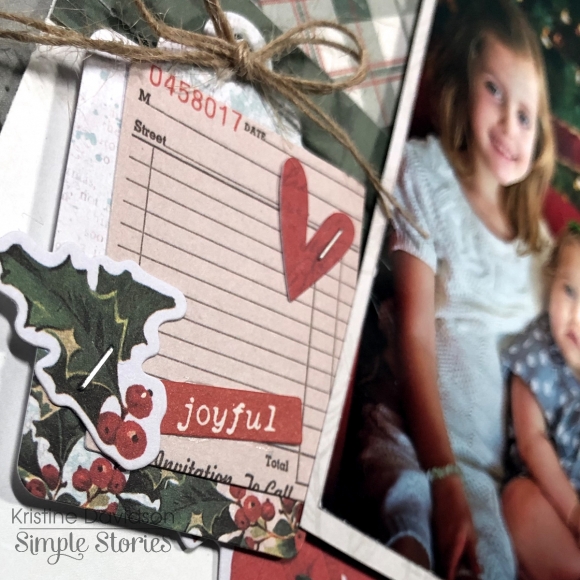
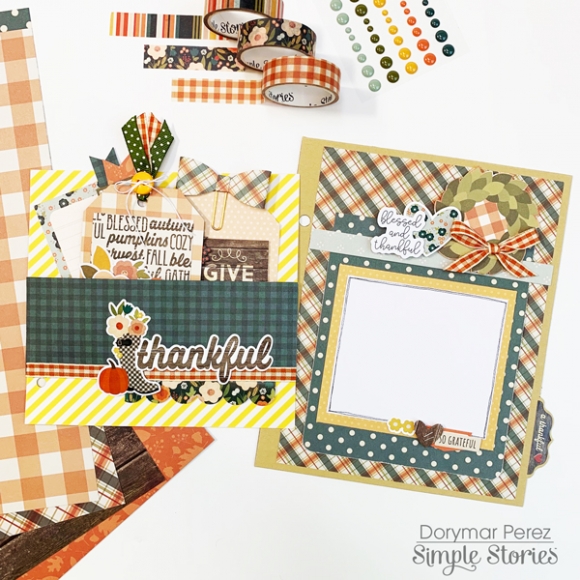
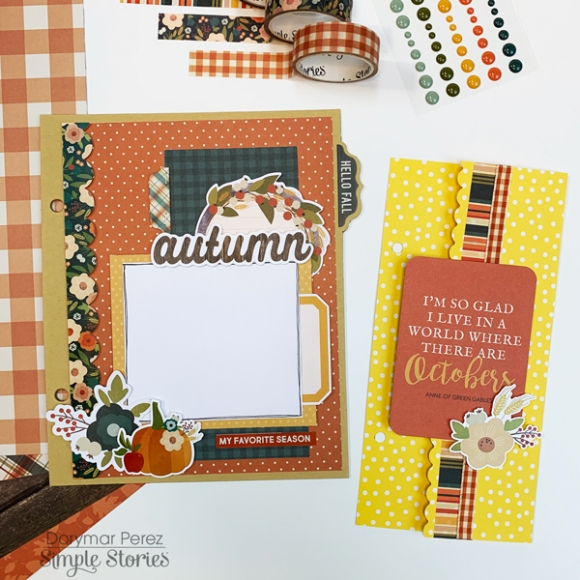
It fascinates me to add tags in my albums and in this case I used a fantastic pocket page that includes the album to incorporate my tags.  To create them I cut two pieces from the “Glad Tidings” 12x12 page measuring 3.5” x 7”.  On the next page I used several papers from the collection to create pockets and tags. I loved the 4x4 card with the "peace and love" sentiment.  Then I add ribbons to give a cute look.

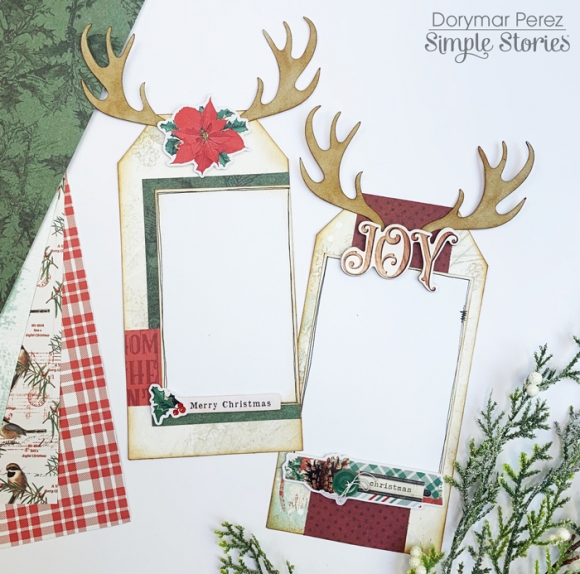
The collection has many deer, I wanted to match the collection with my tags and for this use a digital file to cut the deer horns. I think this gave a unique touch to these tags. They look very cute!

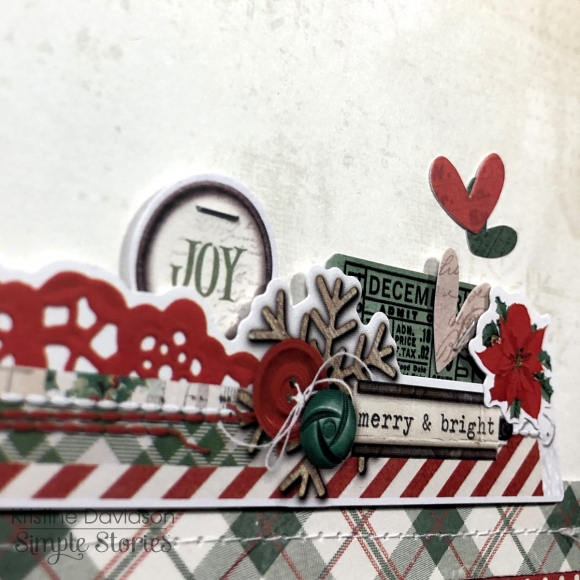
The album also includes beautiful little dividers that are super cute, you just must give it your personal touch. To decorate mine I used ribbons, buttons and elements included in the collection to make them look more beautiful than they are.

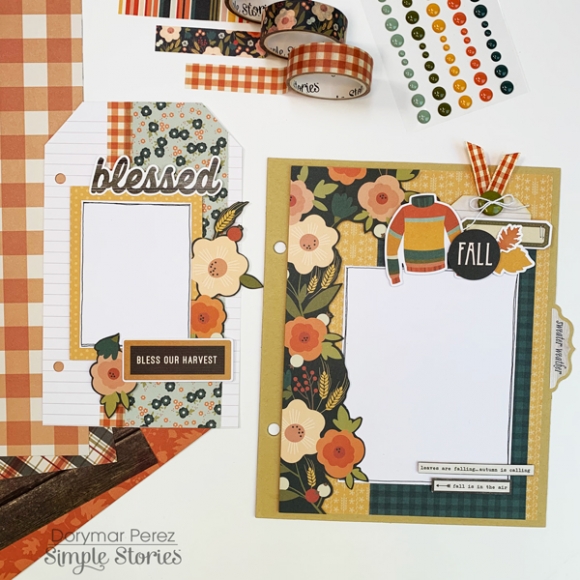
To decorate the back side of the album dividers I used papers and cards from the collection to create flaps, then decorated it adding stickers and one of the beautiful borders that includes the Border Sticker sheet.  These pages house space for many photos.

I love how my Snap turned out.  So, I’m ready to document my Christmas memories. I hope you check the entire Country Christmas Collection because it’s one of the most beautiful collections for upcoming Christmas season. 

Happy Scrapping!

Supplies

Hello friends! It's Jennifer here to share a project I created with the lovely Holly Jolly collection!  Most of the time you see layouts from me but today I    created a fun home decor project!  Using an 8x8 shadow box I  purchased at a local craft store, I  showcased a favorite holiday photo of my kids using the beautiful prints and ephemera of Holly Jolly!

I  am a big lover of plaid prints so I  knew I  wanted to incorporate it into my project!  I  cut a 7x7 inch piece of Cozy Christmas followed by a 6.75 x 6.75 inch of the floral print of Home for the Holidays.  I  adhered the two together and stitched around the edges with my sewing machine (I  sew on everything!).  From the 6x12 Chipboard, I  adhered the red script "believe" for my title just under my photo allowing some to overlap.  

Just below my title, I  added a small strip of one of the three Washi Tapes at the junction of my two background papers.  I  then added a small sentiment sticker from the Combo Sticker sheet.  

I  love that Simple Stories always offers so many choices on embellishments!  You can see the beautiful floral cluster from the Bits and Pieces that I     adhered the bottom right corner of my photo.  Using pop dots, I  added the wood grain "December 25" journal circle from the Journal Bits and Pieces

The Bow Clips are always a nice addition to your projects!  Here, I  slid one just under the top of my photo!  You receive four different prints in each pack! 

The Journal Bits and Pieces not only has shapes for jotting down information about your pictures, but also these cute sentiment strips! I  added one at the top border of my photo as well as a few coordinating Enamel Dots

Before assembling my shadow box, I  added these colored jingle bells I  had in my stash inside for a fun shaker effect!  

Using my hot glue gun, I  adhered plaid Christmas ribbon around my shadow box and added a bow on top!

Thank you for stopping by the blog today!  I  hope this inspires you to do some DIY home decor projects with your favorite Simple Stories collection! Have a great day!

Supplies

Hi everyone! It’s Tara with Secretbees Studio  I don't want to panic anyone but as of today there are only 92 days until Christmas! Believe me, it is never too early to start thinking about gifts, decorations and Christmas albums. I have already started my Christmas crafting and this sweet little album would fit any of the afore mentioned categories!

This mini album, which measures about 6 x8 at its largest point, is actually made up of three separate folders made from the brightly adorable Holly Jolly paper collection from Simple Stories. The smallest folder was cut to size from one of the patterned paper sheets and then the bottom portion was folded up to make a pocket. I then folded that whole paper in half to make the folder. The other two were made in the same way but I created hidden pockets in them by adhering another full piece of paper over the non pocket side and leaving spaces free of adhesive.

This cute album may be small but it sure packs a punch! It is full of interactive elements and will hold a ton of holiday photos and mementos. Not only are there the hidden pockets filled with tags,  but there are also some fold out pieces, photo flips and pockets on pockets!  

To fill some of the pockets, I used different sized element cards layered onto  coordinating pieces of the Simple Basics paper that goes with this collection. These cards are filled with super cute images and sentiments all in bright holiday colors! Of course I had to decorate and embellish every page, tag and pocket with all of the adorable stickers, chipboard, enamel dots and bits & pieces of the collection! Here are a few of my favorite pages!

This paper collection is so cute it almost (almost) had me wishing for snowmen and Christmas music and this album is a joy to flip through and will put a smile on anyones face!

There is a short video on my YouTube channel so you can see all of the fabulous details and interactive elements of this cute mini album!

Supplies

Hi there!

Nathalie with you today with a new layout that is all about the most wonderful time of the year, Christmas!  The new Country Christmas collection from Simple Stories is perfect to document all those memories of Christmas passed, just wait till you see all the details on the papers and embellishments.

I wanted to have a large focus for this page, so i chose to paper piece a poinsettia bough on the page.  For this, I pulled two cut files from Just Nick Studio and used them to build  the centerpiece on my page.

I cut the Poinsettia from the 4x6 elements  and Joyous Noel papers; for the flower's leaves I chose a paper from the Basic paper pack, and cut the Pineneedle boughs from Good Cheer and Holiday Greetings papers.

I assemble the flowers together, and then used foam adhesive behind the pieces to add a bit of dimension to the page. I chose the Winter Wishes Paper as the background for the page as it contrasted and complemented the colors of the flowers nicely.

The chipboard frames that are included in this collection are amazing as they already have embellishments on them, so all i had to do was add the picture behind it, and nestled it in the flowers.  A few small embellishments complete the look.

To finish the page, i trimmed a bit of the borders and glued it to the Scarlet/Dots paper from the Basic pack,then used chipboard and a few stickers to create the title at the bottom right corner of the page.  A few drops of gold ink complete the page. I hope this inspires you to check the new Simple Stories' Country Christmas collection, i am sure you are going to love it !!


Supplies

Hi It’s Jeanne posting today!  It’s beginning to look a lot like Christmas here at Simple Stories.  Today I’m sharing some holiday cards made with the Simple Stories Holly Jolly Collection !

You’ll love the candy stripes, plaids and prints in this fun collection!  There’s a little something for everyone…. pretty prints with florals, ornaments, houses and more!  All my cards today were made with the 6x8” pad of pattern papers and the coordinated Simple Basics Kit of 12” papers that are solid on one side and a polka dot print on the other. 

I had fun making cards with scenes like this one using chipboard houses, and bits and pieces trees, mountains and sentiment.

Everything is color coordinated to match so there’s no worry when mixing and matching the enamel dots, washi, bits and pieces, chipboard, and stickers.

The washi has just the right amount of adhesive. It stays in place where you want it, but if you have to lift it to place in a different location it doesn’t take any of the paper with it. 

The Simple Basics papers are great for adding a solid matt layer to your card base, or breaking up patterns.  I like to alternate solids and prints to keep things from looking too busy.

Stickers from the Mini Sticker Tablet make great sentiments, but there’s lots of image prints, numbers and more so you’ll have lots left over for other projects.  I think I’ll be dressing up my calendar with the stickers if my daughter doesn’t swipe them first!

Did you see the pretty Bow Clips?  These are bows fashioned from pattern paper attached to large GOLD (swoon!) paper clips. They can be tucked on your cards, tags, journaling pages, or how about holding a page on your daily planner?

There’s lots to love here, and plenty of time to make, Make, MAKE!   It’s a SN@P! with Simple Stories Holly Jolly Collection!

Supplies

Hi! Odessa here sharing some Christmas album inspiration. Christmas memory keeping is my favourite kind of projects to work on. They’re full of family traditions, magic and winter wonderland photos. I used the Country Christmas Collection to work on these pages and it’s so pretty. Lots of vintage-y images and traditional colours that go perfect with all kinds of Christmas photos. There are so many different SN@P! Cards, embellishments, stickers and more that it’s just so much fun to put together a page!

I started out my album with a simple cover page. I had printed some emoji versions of my family that I had made last december and attached them to some vellum. I layered some of the large Country Christmas numbers and a Christmas sticker from the Mini Sticker Tablet to finish it off

The Country Christmas SN@P! binder is so gorgeous and comes with some great ready to go pages including this lovely calendar. I used a bunch of the circle date and icon stickers that were all the same size from the Mini Sticker Tablet. It’s a great way to mark important dates and events that happened over the month, I really like how clean the stickers look on it.

Every year we go to my favourite garden centre to take photos with Santa. It’s so lovely all decked out for Christmas and the visit with Santa is always so special. We had three different Santa photos taken and I couldn’t decide on a favourite so I printed all three on one 6x8 page and used the Country Christmas Border stickers as a divider between them along with a big number. 

I had a favourite candid photo of my kids chatting with Santa that I wanted to feature so I used the Country Christmas 6x8 pad to make a tag to slide in my album. On it I used one of the Layered Frames to frame the photo and a few cute embellishments to finish it off. The Layered Frames are so sweet and a great way to make a quick easy layout to feature a special photo.

Next to that I have a SN@P! page full of fun photos. I had more photos than would fit on the page so I used a Photo Flip to get some more photos in. I used a cute simple paper from the 6x8 paper pad for the back of my giant tag with a great sentiment on it to keep the back simple.

Under my Photo Flip I snuck in some extra journalling and another cute photo. The Country Christmas Mini Sticker Tablet has some great little tabs I attached to the bottom of my Photo Flip to make it a bit more obvious.

St. Nicholas Day is a family tradition from my childhood I’ve continued with my kids. The vintage feel of the Santas in the Country Christmas collection double as St. Nicholas perfectly which I just love.

I used the Country Christmas Simple Basics paper to make a journal card, layering a fussy cut journal spot from one of the 4x4 cards and a big date from the Number Pocket Pieces. I layered some stamps from the stamp set over the big numbers to make it a bit more fun.

A new family tradition we made is going to spend a couple days together doing some cozy glamping at the closest National Park. It’s an amazing winter wonderland there so I pulled a lot of the blues and reds from Country Christmas to go with my photos.

I always save ephemeral bits over Christmas in a big box so that when I’m ready to work on my album I am all ready. I had a map that was not as cute as the rest of the page so I cut down the relevant parts and layered it with some ephemera and stickers to fill my 4x6 pocket. There was a really great calendar stamp in the Country Christmas stamp set that I added to the page to mark the dates we were away. It’s perfect!

Supplies

Hello Friends!

It’s Kristine Davidson here today to share a layout with you. I was fortune to be able to create using the newly released Holiday collection called “Country Christmas”. I know it’s September but it is time to start thinking about those Holiday photos and December Albums. This collection is filled with so many gorgeous Bits & Pieces and I used a few to create clusters on my layout. Let’s take a look !

To start my layout I used a piece of paper from the Basics Kit that matches this collection. It is perfect for background papers and allows me to add so many other pattern papers to my page and not have a standard white piece of cardstock.

I added a 1”x12” piece of red & white polka dotted paper to the top and bottom of my page to give some highlights to my layout. I added a larger piece of plaid paper 5x12  to the top and a 1/2” x 12” strip to the bottom.
The green paper was placed at the bottom of the plaid paper to tie up the layout. I added sewing for texture to the paper strips.

The Bits  & Pieces for this collection are plenty. I created a cluster of stickers and diecuts on the left of my photo, added another cluster to the bottom of the layout using a border from the Combo Sticker sheet. So many options with these diecuts, it’s unlimited what you can create with them.

I added a title for may layout which is a sticker with the word BELIEVE. I added some dimensional adhesive to the back of the sticker to give it some height on the page.

I hope you enjoyed my layout and could find some inspiration in creating your own layout using the Country Christmas collection.

Come visit us on instagram! Simple Stories or Kristine Davidson
 

Supplies

Hey y’all! Courtney here again and today I am sharing a layout that I created using Autumn Splendor collection. This collection reminds me of my child hood. We always had these amazing vintage calendars in our house and every year when they were done my mom would cut them up to use as ephemera or decoupage the cutouts on something artistic.

For this layout, I used  a cut file from Paper Issues called You and Me and cut it out in black to make it pop off the page. Then I backed the cut file in Seasons if Change, the B side of the 4x4 elements, Grateful Hearts, Autumn Leaves, and the b side of the 2x2 elements. I used the Elm/Cream Ledger paper from the SN@P Basics as my background.

I matted my photos on a piece of vellum and then on the Grateful Hearts paper. I layered them on either side of the cut file.

I created three clusters with another cut file from Paper Issues called Collecting Leaves that I cut out of the Turquoise Dots paper. I then layered different pieces of ephemera from the bits and pieces and the foliage bits and pieces.

I added a few pieces from the 6x12 chipboard and the combo sticker sheet. I always have to add enamel dots and the ones from Say Cheese match so perfectly.

I finished the layout with a little cluster in the top right corner and then splattered my gold mist. I hope you enjoyed this layout and I can’t wait to see what you create.

Supplies

Hello Simple Stories friends! Anya here today to share another set of fall cards. Oh, how I enjoy creating this time of year, when the air is fresh and crisp, and home is a little cleaner and quieter. I used the Fall Farmhouse collection and accessories that come with it to make these cards.

Every single time I saw a 2x2” elements paper by Simple Stories, I wanted to create a grid card, but just now I finally did. I cut the squares a bit smaller, about 2.75” and used six pieces per card. To make sure they look straight I used a ruler while adhering them. Also, I stitched every other square with sewing machine and decorated them with a few die cut pieces that were added with pop dots. It's such an easy and fun way to make a card.

I really enjoyed die cut pieces in this line. It was literally playing with them when I was making next two cards. I spread all of the bits and pieces over the table and started moving things around until something looked and felt right. It was like finding those perfect puzzle pieces that look right together.

Do you ever cover the back panel of your cards with a piece of patterned paper? I used to leave them white, but after adding that final touch once – I never skipped this step again. Cards look so much more complete with back panel covered!

Often I like to finish my cards with splatters of white dots, but since I am a bit perfectionist when it comes to paper crafting, I prefer to control where my “splatters” land, therefore I use Nuvo Drops to add white dots exactly where I want them to.

Supplies

Hello! Nicole here today to share a fall inspired project using the gorgeous Autumn Splendor collection. The inspiration for this project came from the new 6x6 stencil in this collection and it was my starting off point.

I used a needle and the stencil to pierce stitching holes onto the cardstock base of my project. Once the holes were in place, I added some stitching with some natural twine to show the stencil design.

Once the stitching was complete, I added in some watercolor paint to the inside of the stitched design and then got to work on the rest of my project.

I used several patterned papers from the Autumn Splendor collection and couldn't resits fussy cutting some gorgeous leaves from the Autumn Leaves paper. Once the leaves were cut out, I added them along my photo edges, and added in a few diecut leaves I had leftover from another project to add some dimension.  A simple title finishes off this fall inspired page! 

I hope you are inspired to create your own project using the rich tones and patterns in the Autumn Splendor collection!

Supplies

Fall is my family's favorite time of year to be outside! Whether it's drives through the mountains to see the colorful leaves, a visit to the pumpkin patch, or walks around the neighborhood, we can never seem to get enough of our favorite season!

The Autumn Splendor collection encapsulates everything we love about autumn with its color palette and beautiful, botanical images. It was so much fun creating this page for our family album!

I fell head over heels for the coordinating stencil for this collection and decided to add it to the background paper (3x4 Elements paper). I love the way the stenciled details look peeking out from behind the Foliage Bits & Pieces. I repeated the stenciling around the page in three areas to create a visual triangle in my design and to keep your eye moving around the page.

I framed the single photo for this page with a Layered Chipboard Frame and then added layers of additional patterned papers and Foliage Bits & Pieces leaves behind for texture. This entire grouping is popped up on foam tape.

I fussy-cut the journal block from the 3x4 Elements paper and then added it to the right of my photo at a downward angle. A pair of foliage leaves and a butterly connect it the journal block to the layered photo block and add even more to the outdoor-sy feel!

I combined the chipboard "AUTUMN" word with orange letters from my stash for the title. I added distress ink to the orange letters to tie them in with the inking in the background.

This beautiful collection makes me long for sunny Autumn days and fall drives in the mountains! I can't wait for the leaves to begin changing! Thanks for stopping by today! I hope you feel inspired to scrapbook some of your fall family photos, too!

Supplies

Hello friends, Dorymar here! I’m so happy to share a fabulous SN@P Album I designed with the Fall Farmhouse Collection. This collection is gorgeous! When I think of a Snap Album, I think of some wonderful dividers, full of details and elements that make my photos look great. That's what I am sharing with you today on this blog! Check it out!

All the elements are so beautiful that they are very easy to place, they look fantastic! I really enjoy customizing the pages of the snap, I love to find in my albums pages of different sizes, adding pockets, create flaps, etc. On this page I used two of the snap pages to create a giant pocket.

With a 1.5 "circle cutter I cut a half circle at the bottom edge of the page.  I used one of the flower die cuts from the Bits and Pieces to incorporate the insert with the main page.  As an insert of the pocket I used one of the pages of the 6x8 paper pad and decorated it with some elements of the collection.

One of the main colors in the autumn season is yellow, so I selected the 6x8 Yellow Sn@p Binder. Their pages match perfectly with this collection. In this photo you can see how I reduced one of the pages that includes the album to 4.5” x 8”. To decorate it I fussy cut from one of the 4x6 journaling cards the beautiful chevy and placed it on the bottom edge of the photo mat. Then I fussy cut the beautiful paid banner form another 4x6 journaling cards.

The washi tapes of this collection are spectacular and I need to incorporate them in my album! I used them on several pages and cards of my album, but on this pages in particular, you can see how I used them as borders on this pages. They look fantastic!

Pockets and Tags can’t be missing in my projects, I really enjoy decorating using the beautiful die cuts, stickers and sentiments included in the collection. I reduced the page of the Sn@p to 6.5" and created a pocket on top of the page, then I added some tags that I made with the paper o the collection. On the next page I created a flap that opens up. I’m adding some elements on this pages that look so beautiful.  On both pages you have a lot of space to play with your photos and your journaling.

Here you can see in detail the tags and how the elements of the collection match perfectly with each other, so you can make your project so beautiful. I used as an insert in this pocket a 3x4 card to add the journaling and to create the tags I cut from the Peach/Dots paper a piece of 3”x4.5” and ,  from the 6x8 peach paid paper I cut another piece of the same size. Then I decorate the tags with stickers and die cuts.  They look great!

The collection includes many beautiful sentiments and phrases. In this picture you can see some of them. To create de yellow divider, I folded the Sn@p page at 4” then I used a scallop border punch to create a beautiful ending. On top of the page I used washi tape an added with foam tape the beautiful 3x4 card with the lovely sentiment. For a finishing touch I added a flower from the sticker sheet.

I love mixing and matching the prints and adding layers of my layouts. This collection is too easy to match. In this page I used two beautiful papers from the 6x8 paper pad.  To add layers, I fussy cut the beautiful flower border from one of the papers and gave a little dimension with foam tape. To give the finishing touches to the page I created a fun collage closer to the photo mat using some die cuts and stickers from the collection.

I hope you enjoyed the project and I also hope it inspired you to use this A.M.A.Z.I.N.G. collection! Hope that you have lots of fun!

Happy Scrapping!

Supplies

Hello! It's Jennifer on the blog today to share with you a page I  created with the new Fall Farmhouse collection!  I  cannot tell you how lovely this line is in person with the soft fall colors and rustic prints!  There are so many gorgeous elements included in Fall Farmhouse to make your next layout or project perfect!  

I began with the wood grain print of the B side of So Very Grateful as my background. With my Silhouette, I  cut a 6.5 diameter circle from the 

Fall Memories print to go behind my photo.  Then using the B side of Simply Thankful, I  cut a circle wreath using the Simple Stories "Wreath" cut file from the Silhouette store (#214849).    The Fall Farmhouse Bits and Pieces pack includes many shapes and sentiments such as this script "autumn" I  used for my title.  I  adhered the die cut using pop dots to add some dimension. 

The Journal Bits and Pieces has many great journaling spots, small sentiments, and cute signs to accent your project! I  chose this fun gold colored framed journaling spot which I  added two die cut pumpkins from the Bits and Pieces. You can also spy one of the three beautiful coordinating Washi Tapes at the top! 

From the 6x12 Chipboard, I  adhered the buffalo plaid banner across the bottom of my photo!  I  know I've said this many times before, but I  love banners and am always excited to see them on the Chipboard or Sticker sheets! You will also notice a few die cut leaves sprinkled around my wreath as well! These can be found in the Bits and Pieces pack! 

One of the recent new embellishments from Simple Stories are the Bow Clips! You receive four lovely clips in each pack! They can be used in planners, mini albums, or slid under a photo as I  did here! 

From the Fall Farmhouse Simple Basics Kit, I  cut leaves and branches on my Silhouette to add to my wreath. I  love that you can choose from a solid color or dotted as shown here. 

Fall Farmhouse has a set of coordinating Enamel Dots which I    sprinkled around two different areas of my page! These embellishments make great accents! 

Thank you for stopping by the blog! Check out Fall Farmhouse in its entirety by clicking HERE! Have a great day!

Supplies

Hi everyone! Tara here with Secretbees StudioSummer may be coming to an end but the gorgeous season of Fall will soon be here and  a surefire way to get excited for a new season is to play and craft with some gorgeous paper!  The new Simple Stories Autumn Splendor is a rich collection that is bursting with deep colors and detailed images. All in all a great way to document your Autumn memories.

I wanted to create a large project that would show off this stunning collection and so I created a memory box that holds even more boxes and of course, mini albums! There are six separate boxes inside and four of them hold mini albums with lots of space for photos and mementos!

The box itself is made from chipboard that I then covered in the wonderful paper designs.  I even made a double layered frame for the front of the box that showcases a gorgeous paper from the collection as well as lots of the flower and leaf bits and pieces. 

The album is tied together with a piece of ribbon and opens up to a beautiful scene of wildflowers and insects. There is a small pocket on the left side that holds some adorable ephemera and you can see all of the boxes and mini albums on the right. Each album is encircled with a beautiful belly band that is layered with stickers, bits and pieces and chipboard of the collection.

All of the boxes are removable and can be moved around and I couldn't resist lining the back inside of the box with another pretty piece of the paper in the collection. This memory box is pretty inside and out!

For the mini albums, I used all of the different sized element cards of the collection and made them all a bit different. The 4x6 cards are separate with space on the back for journaling or photos. The 2x2 element cards I kept in a strip of six and folded them. They open up to reveal decorative fronts and on the back there are a few embellishments and places for small photos. For the 3x4 and 4x4 element cards, I adhered them to an accordion strip of paper and made them into booklets. All are perfect spots for Fall memories!

Please visit my YouTube channel and watch the walk-through video of this album and see it in all of its beautiful detail!

Supplies

Hi there!

Nathalie with you today with a new project that marks the beginning of the most wonderful time of the year,  FALL!!  I love Autumn, it is my favorite season and the new Fall Farmhouse collection from Simple Stories is just perfect to document some of our Fall traditions, Apple Picking.

As soon as i saw the collection, the idea for this page formed in my mind as i wanted to use many of the designs in one page. So what better way to bring the farm feel to the page than a simple quilt design.

First i  used the Leaf It To Me cut file from JustNick studio to create the large leaf from white cardstock.   Then cut 2"squares from various Fall Farmhouse collection to create the design.  I used the leaf to mark the area on the Peach Dots paper (Basic set) and then covered the area with the squares leaving about a 0.25" frame around the page.  I stitched each square and then ruffle the edges of the paper a bit.

To assemble the page, first i stitched around the perimeter of the leaf image (using the negative part of the cut out) and then used foam adhesive to attach it on top of the quilted papers.

I used stickers, bits and pieces, chipboard from the Fall Farmhouse collection to embellish the layout by creating little clusters inside the leaf. A large cluster was placed behind the picture.

To finish this page, I mixed some of the embellishments to create the title of this page.   I LOVE how this turned out, though it took a bit of time to construct, it is the perfect way to document this family tradition.   I hope this inspires you to check the Fall Farmhouse collection, you are going to love it!!!

Til next time,

Supplies

I’ve been noticing subtle changes all around!  Temperatures are dipping at night and birds are gathering for migration.  Fall is in the air!  Even though I know I’ll be spending more time indoors, I enjoy the thoughts of baking and the family gatherings that fall brings.

If you love Fall too then you’ll ADORE the Simple Stories Fall Farmhouse collection!  It’s filled with gorgeous colors of fall.. orange, golden yellow, greens and navy.   The images are all you’d expect… beautiful florals, pumpkins, and leaves with some added comfy cozy to make you fuzzy inside!

All my cards start with pretty background papers from the 6x8” pad.  The smaller sheets mean a smaller print making them  perfect for cardmaking.  The pad even includes cut apart 3x4” journaling cards.

I love mixing and matching the prints and adding layers of card stock.  I start with a plain white paper cardstock base and top it with a slightly smaller solid print panel cut from the Simple Basics Kit.  The  papers are perfectly coordinated to match the prints.

There’s two different packs of Bits and Pieces in this collection.  The Iconic bits and pieces include mostly images like pumpkins, florals, leaves etc while the  Journaling set includes tags, sentiments, tabs and pieces to customize with handwritten notes.

I love the chipboard stickers for adding dimension.  They take a card from flat and ordinary to exquisite and special.

The collection includes color coordinated enamel dots and YES!  Washi in three different prints… orange gingham, colorful stripes, and floral!

It’s a feast for the eyes isn’t it?  I just cant get enough of the orange and navy!

There’s lots to be grateful for!  What a great way to let your loved ones know they’re in your heart today and always.

Supplies

Hi, Odessa here with some fall-filled SN@P! pages! Where I am, the air has turned a bit chilly and leaves are starting to fall so I am ready to bring on fall with the Autumn Splendor collection which is full of brilliant oranges, deep teals and creams with lots of pumpkins and late season florals perfect for telling fall stories!

My family and I just took a quick road trip to do some back to school shopping. With all the fresh notebooks and pens, pumpkin everything and a need for sweaters Autumn Splendor was the perfect choice to go along with my photos! I decorated a Teal SN@P! Binder for fall. The teal contrasts really well with the colours in this collection and gives them a bit of pop! I used the Harvest Memories paper to cover the front of my binder.

I made a bookplate for my cover with one of the Autumn Splendor layered frames and filled it with Bits & Pieces and stickers from the new Autumn Splendor Mini Sticker Tablet. The new Mini Sticker Tablets are so fantastic! They’re full of perfectly coordinating stickers like alphas, word stickers, cute icons and more! The alphas in the Mini Sticker Tablet were just what I needed to add the year to the cover.

Inside I printed some fav photos from our mini trip and layered them on top of various cardstock - cute prints from the Autumn Splendor Collection Kit and 6x8 pad and coordinating coloured cardstock from the Simple Basics Kit. The papers and patterns are so pretty and a lot of fun to combine together. I used lots of Bits & Pieces, Chipboard Stickers and regular stickers of all kinds all over my pockets.

The floral 4x4 card and striped 3x4 card cut down from the Autumn Splendor cardstock might just be my two favourite patterns in the whole collection. I combined them in this pocket along with a photo and tons of embellishments here. If you’re looking for a classic feel with a modern twist to go with all your pumpkin spice everything photos Autumn Splendor is perfect!

On this page I filled my pockets with more photos and journal cards from Autumn Splendor. The oranges helped my very blue photo pop! This collection is all about layering which was really fun to play with. The Foliage Bits & Pieces are full of leaves and pumpkins and fall flowers ready to scatter on the page. I hope my SN@P! pages have helped to inspire you to get some fall stories in your albums.

Hello Friends! It's Kristine Davidson with you today. I am sharing a layout I created using the Fall Farmhouse Collection.  Fall is a wonderful time of year on the east coast of Canada. It's actually one of my favorite seasons. I love the colors in this collection because they remind me of those crisp fall days and leaves changing colors. 

The photo I am using on this layout is of my parents with their grandchildren. They always enjoy time with them. They laugh a lot and my mom usually cooks turkey dinner and some sort of dessert. It's a great picture of them with the kids and I wanted to do a layout about being thankful for those moments. 

I created my layout using the wood background. I added 4 strips of assorted pattered papers measuring approx 1-2" high by 11.5" wide. I used a picture that measures 4x5" and backed it with a piece of white cardstock and then framed it with a piece of yellow paper from the Basics kit. 

Once my background is complete and the papers are glued, It's time to decorate. I added flower clusters around the layout using the Bits & Pieces from the collection. I used mostly flowers, hearts and some words to decorate my layout. I actually didn't use any pumpkins or fall foliage because the photo didn't require any of them. I then added a title " Thankful ", and some journal strips to finish my page. 

I hope you enjoy creating with this gorgeous Fall Collection. Please share your creations with us on Social Media @SimpleStories_ and you can visit me as well @KristineDavidson. 

Supplies

Pages