It can be difficult to find time for crafting during the busy month of December.  We all have Christmas parties, holiday baking, decorating and so much more, that can cause our crafty time to be put on the back burner.  But I have some tips to share, that can help you get a layout or two, done in the blink of an eye!

I created two layouts using the Claus & Co. collection, and each layout only took around 45 minutes.  That's definitely fast for me, because each of my layouts normally take about an hour and a half to two hours.  My first tip for quick crafting, is let the paper do the work for you.

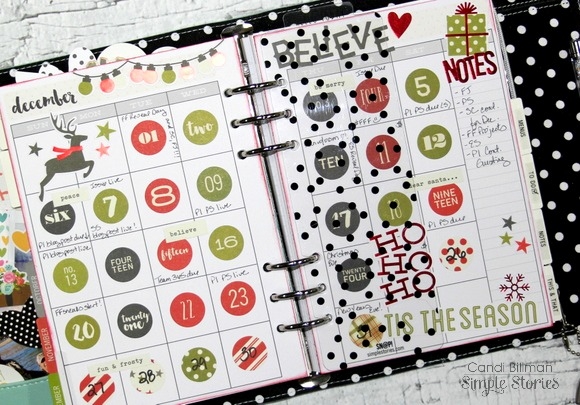
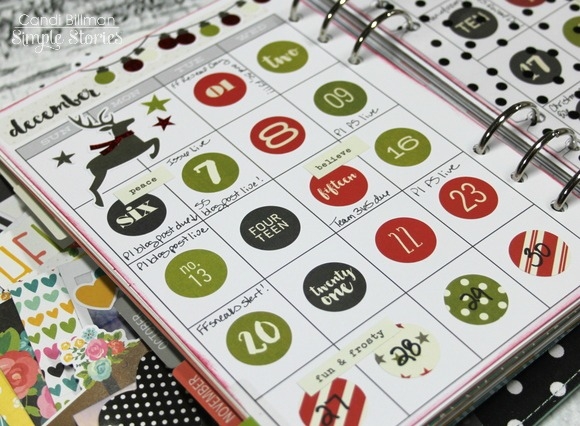
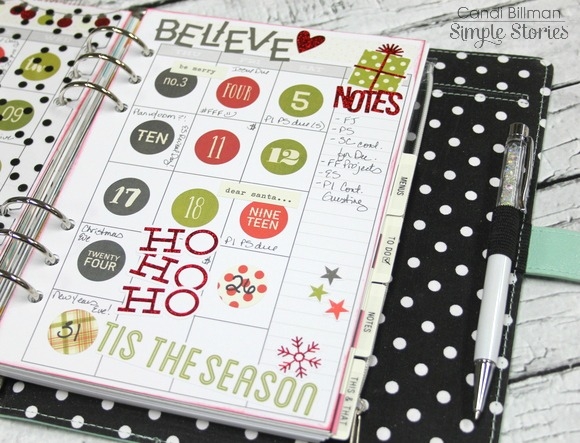
On my first layout, I used the "I Believe" patterned paper from the Claus & Co. collection.  This paper has a great circle design.  I started out by punching six 2 inch circles from the 6x6 Paper Pad.  I wanted a fast way to add stitching to my layout, and this was the perfect way to do it.  Once the circles were punched, I used my sewing machine to add messy stitching around the edge of each circle.  Then I just placed them over the printed circles on the background paper.


After the sewn circles were adhered, I printed out my photo and cut it into a circle shape also.  I placed it at the top left hand side of the page, and used letter stickers from the Expressions Cardstock Sticker sheet to create a wrap around title.  Then I used the large wood veneer "Ho Ho Ho" phrase beside the photo, to have a large element that would help draw your eye to the photo and title.


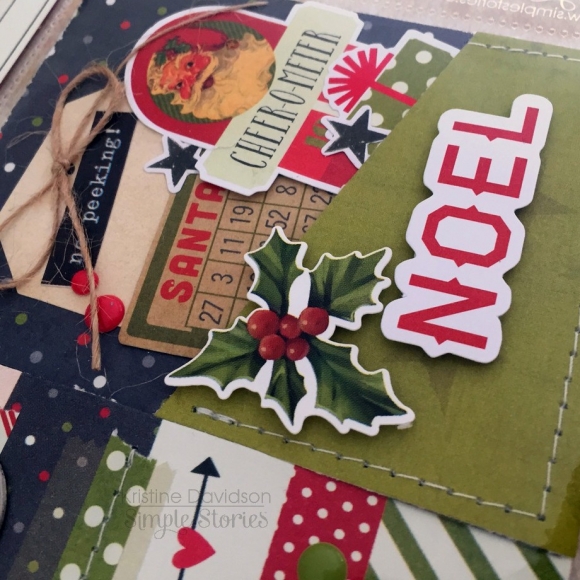
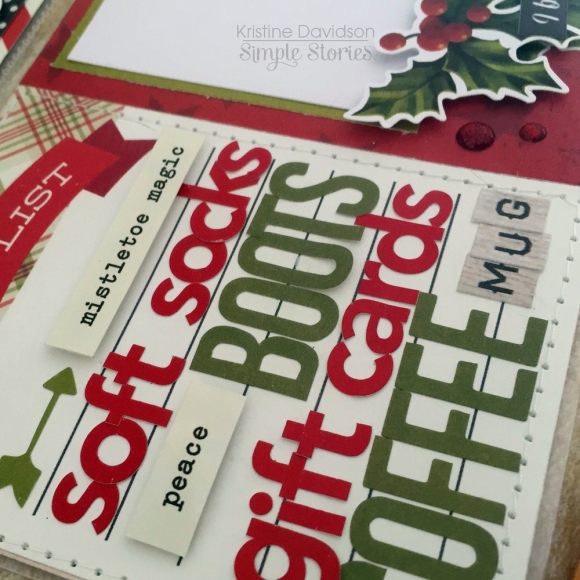
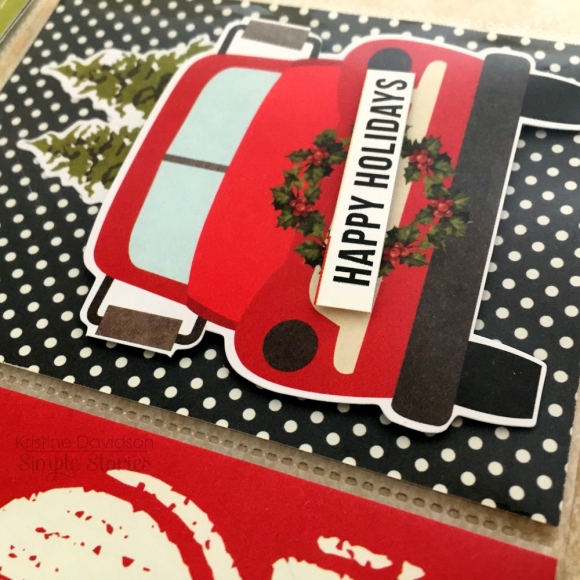
Next came my favorite part...adding embellishments!  I went through all of my packs included with the Claus & Co. collection.  I added a mix of wood veneers, enamel dots, Bradz, Chipboard, Bits & Pieces and stickers to each of the circles to finish my layout.


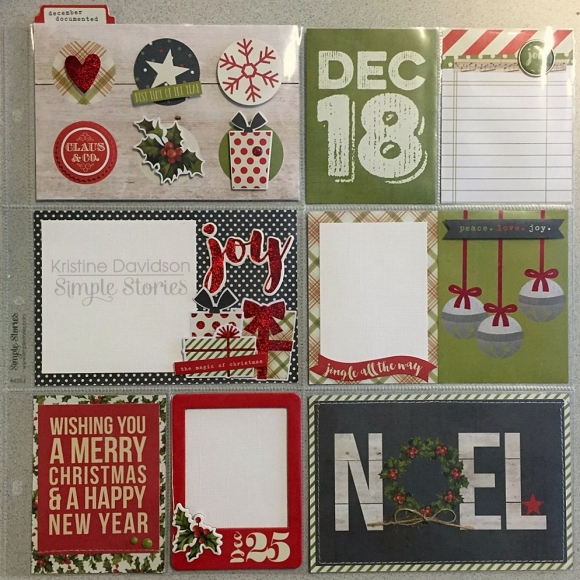
My second layout started out in the same way as the first.  I chose a paper that would cut down on my design time.  I love the overlapping post card look and large Santa on the "Ho Ho Ho" paper, and knew it would be perfect with the Chipboard Frames from the Claus & Co. collection.

This paper allowed me the opportunity for a larger photo and space for six of the Chipboard Frames.  I placed my photo in the lower center of the page and then placed the frames according to the spacing of the post card design on the background paper.  


Now, I had just the right spots for my embellishments and title.  I used the letter stickers from the Claus & Co. collection to add my title to the top center frame.  I love that there are four different types of alphas on the Expressions Cardstock Sticker sheet, because I like to mix the look of the typography on my layouts.  And that's another one of my tips for quick crafting...make use of those coordinating letter stickers.  They are on hand and already coordinate with your page, so it takes the guess work out of adding a title to your page.


And one last "quick" tip...instead of sitting down to create one layout, go ahead and have your photos ready for a second layout and use the same product from your first page.  That's what I did for these two pages.  I already had all of the product on my desk, but was able to use it in a different way on both layouts.  And if we're already at our craft desk, we might as well go for two layouts instead of just one!!


Hello again and thank you for popping in today, as I share this festive December countdown calendar with you. I’ve created it using a do-it-yourself tag calendar and some Claus & Co. goodies. It looks great on my mantle and my kids are having fun replacing the numbers as the days of the month go by.

After arranging the bits and pieces from the calendar I had a think about the amount of numbers I would need, as well as which papers and embellishments I wanted to use. I have been hoarding a sheet of ‘Charcoal Stars/Stripes’, as I just love the soft distress of this print. I think using the darker colour in the background along with the woodgrain print for the base has given this calendar a nice clean feel and I’m very proud to show it off in my home!

Here’s how I went about putting it all together:

The calendar kit comes flat packed, so I separated al the pieces, sanded down the tags and had my husband drill some pilot holes for the hooks for me. For the base, I have used a sheet of ‘Oh Joy’, creating a faux woodgrain effect.
 
 
For the body of the calendar and the edges, I have used ‘Charcoal Stars/Stripes’. As you can see, I used Helmar 450 to adhere my paper to the wooden base. It’s one of my favourite adhesives. (For a lasting finish, it would probably also be a good idea to seal your project so it looks beautiful for years to come.)


Next I moved on to the tags. They come pre-punched which is great as it takes the guesswork out of making sure everything is even. I chose to use mostly Claus & Co. Sn@p cards to cover my tags, as the sizing was pretty much spot on and I had a great variety of prints and foil details to choose from. The Sn@p packs also come with some bonus die cuts too!
 
 
If you want to show a specific area of a print, a quick way is to just hold the tag and paper up to a light source so you can gauge the area you want to cover.
 
 
If you want to cover both sides of your tags, be sure to cover one side, then punch the hole while you can still see it, then cover the other side and punch again.
 
 
When all the bases of my tags were covered, I set about embellishing them.
 
 
The fun part!
 
 
The numbers 1 and 2 would be used a couple of times, so there were two for each of those, along with a ‘0’ and a couple of blanks ones, as I didn’t want to do the numbers 06 for Day 6 iykwim. 
 
Here is the static ‘December’ tag. I’ve used some Claus & Co. wood veneer as well as some Bits & Pieces and cardstock stickers…
 
 
The veneer has been given a glittering finish. To achieve this I:
 
1. Coloured my veneer in using a red marker. This will give the base an even coat of colour and prevent show-through.
 
 
2. I then have it a good coat of Glossy Accents
 
 
3. Finally I gave it a good dose of fine red glitter. I thought it would dry with a more raised effect actually. Next time I will give another layer over the top!
 
 
Here’s a look at the rest of my tags. It’s the perfect time of year for a bit of sparkle!
 
 
A bit closer…
 
 
I’ve finished these off using Claus & Co. Expressions and Fundamental stickers, Bits & Pieces, wood veneer, Photo stickers (my current crush!) chipboard frames, brads and enamel dots.
 
 
I love how they each have their own little character.
 
 
The final little touches on the calendar were these adorable wood veneer snow flakes. I have again, used a couple of different markers to colour these. It’s quick and effective and a metallic paint marker is an easy way to glimmer up a plain piece.


This project would make a fabulous gift for someone special at this time of the year.
 
 
I hope you have enjoyed today’s post. You will find a list of materials used below. To keep up with my other crafty creations, you can find me over on Instagram @chantallemcdaniel. Thank you so much for stopping by!


Hey Simple Stories fans, Amy here to share a layout I created using the Snow Patrol mini collection.  This collection is perfect for, of course, winter pictures.  I created a layout of my littlest playing in the snow. I visited the Silhouette Design Store and picked out the Simple Stories snowflake cut file to create my background.  After I cut the snowflake pattern out of my white card stock, I backed them with different patterned paper.  I then used some of the white snowflakes as accents, and colored them with mist to coordinate.

Since this is a mini collection, there aren't as many embellishments offered, so I grabbed the I AM embellishments which worked perfectly. Here are some closeups.

The photo overlay was perfect to frame my pictures.
 
 
I cut out the large heart from the Element 2 paper for my title.
 
 
This next closeup features a chipboard frame, and several of the photo stickers from I AM, mixed in with some stickers from Snow Patrol.
 
 
Thanks for visiting the blog today!


Hi there Simple Planner fans, it's Nancy with a peek at my Christmas Planner. I'm using the 6x8 Holiday Sn@p Binder to store all of my plans (and some memories) this month. I customized the cover with white card stock, die cuts and stickers from the Claus & Co. collection.

The Holiday Planning Inserts include a November and December calendar as well as these square stickers. I love how the fill up the month blocks perfectly!

Here's a detailed look at some of the planner stickers included in the Planning Insert Pack. There are titles, phrases and icon stickers.

The inserts are a list lovers dream! There are some beautiful ones for Christmas Cards, Decorations, Wish Lists, To-Do's and an Online Checklist. Everything you could possibly need a list for has been included.

There is a fun section entirely dedicated to menus. There are several pages for Christmas Eve, Christmas and New Years. 

There are also pages for recording your favorite baking recipes. I love how this one is organized In theory, I won't forget a thing!

This is a second pull out December calendar. I love to track my online orders and received dates on this one.

The inserts also include some memory keeping pages. I love the holidays and "what I'm doing right now" sections. This is such a great place to get down the current memories.

The Holiday 6x8 SN@P Binder and Holiday Planning Inserts are a beautiful and organized way to keep all of your Christmas memories! The best part is the it's undated, so you can still pick one up for next year.

Hello Friends! 

It's Kristine with you today and I'm here to share a pocket page spread featuring the Claus & Co. Collection.

I am honestly not much of a December Daily kind of scrapbooker. I feel overwhelmed when I think about it, instead I created this 2 page pocket page spread to showcase my entire month of December. I have space for all my pictures, a few journal cards and I am happy with that. I can always add more page protectors to add tons of pictures of just leave it as is.  It works for me!

This was one of my favorite spreads to create. I was so consumed in decorating, matching, and creating - I had a blast! This Christmas collection is perfect for creating cards, mini albums, layouts, projects and so much more. One of my favorite Christmas collections ever! 

I created tons of layers in my spread using pop dots, washi paper tape, and sewing of course!

You'll see on my spread that I haven't added photos yet. That's because I wanted it left blank so I can add my own when the time comes. I have a few dates added by inserting 3x4" filler cards and I love that!

 Here are a few details of the left page

Adding washi tape and a few stars finished this 3x4" card perfectly. Of course I added sewing for some texture and fun detail. The little enamel dots created great little embellishments for my tree! Cute right?!

I created this next card with the snowman chipboard piece and the "cheers" from the bits and pieces. I added some pop dots under the cheer so I could easily add my 3x2.5" photo when I have it printed.

This next one was a cute filler card but I needed to add more. So I added some washi paper tape, a brad, enamel dots and some word strips. It just worked so well. You can also add this to a card and voila - a Christmas Card is done ;-)

Here are a few more photos of the inserts

The next few photos are of the " right side" of my spread

I added more cut out pieces and bits and pieces from the collection. I often add 2 - 3x4" cards into a 4x6" pocket insert. It gives me the opportunity to add a full 4x6 card of more of the same 3x4. I like that option. It fits more photos and of course more decorated cards ;-)

Now this next page is a little 6x8 insert. Yup, I added a December Calendar in a 6x8 pocket page to fit into the middle of my 12x12 spread. It works well. It's a calendar of the month showcasing important dates and I can add things to do on here as well; such as baking, shopping, visiting, etc ..

On the back of this calendar I added one of my favorite Christmas Songs. You can add a recipe, a large photo such as a pic of your Christmas Tree, the house decorate, a family pic or a Christmas card. So Many options for this little pocket!

Here is a picture of the 6x8 insert inside my spread.

Isn't that a great idea!?  

You can see how much I really enjoyed creating this spread - I will use this to document my December for sure!

Try and create your own little spread to add in your pocket page albums. Don't feel overwhelmed and pushed to document your entire month of December. Create a spread and add all the small details you'd like to remember for this holiday season.

I'd like to wish you "Happy Holidays" to you and your families.

4831 Enamel Dots, 4832 Stickers, 4835 Washi Paper Tape, 4837 Interactive Elements, 4838 Chipboard Fames;


Pocket Pages: 4053 Design 6, 4043 Album Black


I hope you enjoyed my Life Documented post today and I hope you enjoy creating with your favorite Simple Stories Products!


Supplies

When I first saw the Claus & Co. collection I immediately fell in love. I couldn't believe how MUCH I loved it considering I usually struggle with themed collections - especially Christmas-themed collections because I am never very happy with my Christmas photos. But, I could instantly see the potential for this collection to create a variety of fun projects. So I did! I made everything from tags:
 
 
to cards,


and layouts.


I even created the start of a December album. I have everything ready to go in my album and now that December is finally here, I can begin to add my photos and stories!


I have loved using this collection and will continue to enjoy making holiday decorations, teacher's cards and more this month with it! If you haven't already, go run and get yourself some Claus & Co. and have fun creating during the holiday season!


Hi there, Simple Stories fans! 

Teri here, and I'm happy to be bringing you some fun Winter-themed cards I created with Simple Stories' Snow Patrol collection.
 
I love this collection because it's got all kinds of traditional Winter icons - snowmen, mittens, snowflakes and much more. You can easily use this collection to make cards to send out for Christmas. You can also use it to make a lot of general occasion but seasonally appropriate cards to send throughout December and well into January. 
 
I can't wait to send this card to one of my friends. 
 
 
You can easily make one like it. Cover a card with patterned paper. Then take a circle punch and cut several circles from some of the Snow Patrol collection's other patterned papers. Adhere them to the card. Then take some of the Snow Patrol stickers and decorate each of the circles with them. It really is that easy! 
 
 
Another card I can't wait to get off to a good friend is this one. 
 
 
I just love the sentiment. I created it by mixing together some of the collection's different stickers. The "snow much fun" stickers started out as one sticker. I turned them into three with my trusty, old scissors. Two snips and I was good to go.
 
 
Speaking of "snow fun" cards, here's another card featuring a snowman.
 
 
Snow cute!   Again, I created a custom sentiment for my card. Again, I mixed together a bunch of different stickers.
 
 
I wanted the snowflake to stand out so I slapped an enamel dot in the middle of it. I think it just adds a little pop to the card. You just need that little pop sometimes.
 
This card would be fun one to give a loved one this Winter.
 
 
I mean all that cold weather makes Winter the perfect time to snuggle up! Right?!
I cut the hot cocoa panel from a piece of patterned paper. And then I just framed the panel by putting strips of other Snow Patrol patterned papers around it. Easy peasy!
 
 
I did add a heart sticker to the cocoa's whip cream. The heart seemed a little flat on its own so I added an enamel dot to it.
 
And here's another card to send a loved one. Well, more like, here's a card to send your sweetheart... wink
 
 
The card doesn't look like much on the outside, but you'll see this when you flip it open! 
 
 
Mmm...mmm
The words, hearts and snowflakes are all stickers. If you wanted to sauce up the inside a bit more, you could easily add some patterned paper strips to it too.
 
Thanks for stopping by today! I hope you enjoyed checking out these cards. I'll see you again real soon!

Supplies

Hello everybody ! It's Mindi here with you today, sharing a couple of pocket pages featuring some of my family's December memories from 2014. Can you believe it's already a week into December ? Boy does time fly. 
 
Every year I create a smaller mini book version of our December memories. I have yet to finish up my album from last year. Recently I took some time to get some pages done. 
Throughout my album each day of December is separated and has it's own page or pages. During day 22 I chose to tell the story of my son and his cars. We had a conversation that day that I just knew some of it would make it into the album. 
 
I printed out a photo and slipped it into the top pocket. I chose to add the photo sticker that says cheer to go along with his good cheer that day. I finished it off my adding a chipboard star and then some enamel dots for a balanced look. On the bottom of the page I started off with the adorable red truck and added some washi tape and other embellishments on the other side of my journaling card. There was a certain quote that I added in from our conversation that day. 
 
 
On the other side of day 22 I wanted to tell a longer story about our elf Harry. Here is a look at the full spread. On the right side of the album I used a 2x2 pocket page that I cut off the last line of pockets. This allowed me to have some different layers throughout my album. This size was super fun and allowed me to add in some more photos of our elf's shenanigans, some filler cards, and even a few see through pockets. Instead of using an office style tab I decided to make my own. I added the circle date sticker that shows that it was the 23rd. 
 
 
Over on the left side I printed out a larger photo and added them into the two pockets. I simply love bigger photos. My children still believe in the magic of our Elf on the Shelf. I added the word "believe" onto the outside of the page protector so that it covered both of the photos. I used a stapler to add it onto the page protector and also added the clear photo sticker. The overall look was perfect and simple ! 
 
 
Here is a look at the other side and conclusion of our Elf story. The left side I added in more photos, filler cards, ect. I got the idea to journal what our elf Harry did every night from the kids. They told me to keep track so that they could always remember. I used one of the SN@P Journal pages to keep track and it worked out great. After I had written down all my journaling I added some extra stuff to personalize it a little. 


This is what it looks like in the album all together. 
 
 
Moving on to day 24 | Santa cookies. 
 
On the back side of the SN@P Journaling page I thought it would be fun to add a flip up photo/journaling card combo. On this day me and the kids made Santa some sugar cookies. A flip up photo on the left and then another photo and journaling cards on the right hand side rounded out my day 24.
 
 
I printed out my photo smaller than the green patterned paper and cut the grey wood grained paper to the same width. Then I added my photo on the back side and folded it so that I could flip up the photo and reveal my journaling. Another thing I wanted to do was to add the red scalloped sticker on the bottom of the photo. I wanted to make sure it was on both sides of the photo/patterned paper. So when you flipped the photo up you could see the red sticker on the back side too. I just made sure I lined up the red scallops and trimmed off the edge after doing the front one. 


Included in the SN@P pack from the Claus & Co. collection are these journaling card that have numbers 1 - 25 on them. I used the one that had the 24 on it and it was simple and perfect. In the middle of the photo I added the chipboard Mrs. Claus cookie sticker. Love that one! 
 
 
That is a wrap for me today. Thanks for coming, I hope you have found some inspiration to help you document your December memories. I want to wish you all a wonderful and joyous Holiday Season. May it be filled with lots of love, laughter, and of course some scrapbooking ! 


Hi, Carpe Diem Planner Addicts!!!  Candi here today to show you how I "winterized" my Carpe Diem Planner :)
 
If you have followed me along with my Life Documented Planner Blog Posts from earlier this year, then you know that I love to take the  Simple Sets and use those goodies inside my planner!  I use just about everything in there from the 12x12 double sided cardstock paper to the sticker sheets!  I love every element inside each Simple Set!!!  Today I am diving in and using the newest Simple Set | Snow Patrol...this snow lover, LOVES this one!!!  Underneath the dashboard I trimmed down the 12x12 Let It Snow and it is perfect for the upcoming Winter months!


I want to show you a few things that I did with November!  On the back side of the November (month on two pages spread) I adhered five pictures from a day in November.  I used my Polaroid Zip printer and then I added some random Carpe Diem Planner goodies to jazz it up a bit!  I love how this highlights a busy and fun day from November 21st :)


Here is my November "Highlight" page...I love how it recaps everything in one place for you!


Let's get in and take a peek at one of my weekly spreads from a week in November!  I pulled goodies from the Snow Patrol Simple Set...cardstock stickers and a fun little element!  I also added another little photo too :)


Now for December...!!!  I used the adorable 4x6 Stickers from the Claus & Co. Collection on my monthly December spread.  I used all of the circle/number stickers for the whole month and placed each circle in the center of each day.  This leaves me just enough room to jot down my important to-do's.  I don't need too much space to write, so this worked out fine for me. 


On the back side of December I added more of the 12x12 Let It Snow!  If you look closely...I added a 3x4 Photo Flip!  Inside the Photo Flip I added a photo, some sequins and a few punched snowflakes.  I embellished this page with Snow Patrol Cardstock Stickers...


If you are playing along with a December Daily Project, then this is the perfect way to document each photo!!!  I grabbed a to-do sheet from the Basic Inserts pack and covered up the to-do with some 4x6 Stickers from the Claus & Co. Collection.  There are 25 lines on the left and 25 lines on the right!  You can jot down info of your photo for that day on the left and then if you need more space...you have room on the right! 


I hope you enjoyed seeing how I set up my planner for the upcoming Winter months!  Is your Carpe Diem Planner ready for Winter?!?!
 
As always, thanks for stopping by!


Supplies

Hi everyone! Allison Davis here with a layout using the fun Snow Patrol collection and I have another sketch to share with you that features both traditional scrapbooking and Pocket Pages.

You can download the full sketch with measurements and placements here.

The left side of the sketch follows a traditional style of scrapbook design while the right side mixes photos and cards with the SN@P! Pocket Page, Design 10.

Here is my layout based on the sketch: 

Sledding was such a fun memory from my childhood. In the small town that I grew up in, my grandma and grandpa happened to live at the best spot to sled in town. When it snowed all the kids in town came to that hill to sled. It was the highlight of our small town winter wonderland. Now, I no longer live in that town and each year when it snows I have wished that we could find a good hill to take our kids sledding on. Last year, we finally found the perfect place and Drew and Jackson got their first taste of sledding. I’ve never seen them smile that much and that big! What fun it was to see them enjoying one of my favorite childhood memories.


I instantly fell in love with Snow Patrol and knew that I just had to use that collection to document our sledding pictures.

I thought the snowman was one of the cutest elements with this collection and had to include in on my page! It was a perfect fit among the snowflake covered patterned paper and the “let it snow” title sticker.

I also added a small heart and word sticker on the two smaller photos to complete a large cluster of elements along that background piece above the pictures.

On the right page I used photos mixed with some 4 x 4” and 2 x 2” elements with the SN@P! Pocket Page, Design 10.

In two of the top pockets I used pieces the same size of the pockets, a 4 x 4” photo and a 4 x 4” quote.

For the third pocket on the top I used a combination of 2 x 2” photos and elements to create one 4 x 4” piece. I had so many great pictures of the boys and this was an easy way to add a few more to my layout.

Along the center row of 3 x 4” pockets I used four 3 x 4” photos and then added some hand stitched flourishes to kind of tie them together.

I added some snowflakes stickers, word stickers, and enamel dots to the flourishes.

I always love find different ways to incorporate stitching into my layouts!

I did the same thing with the bottom row of pockets as I did on the top row. I use two of the pockets for a 4 x 4” photo and a 4 x 4” element.

In the third pocket I used two 2 x 2” photos and two 2 x 2” elements to create a 4 x 4” piece. I hope you all enjoy using the sketch! Happy Holidays to all!


I love the holidays and once we hit fall each year, the countdown is on for when I can light up my house with twinkling lights and sparkle and pretty colors.  I've always been so inspired by people who document the holidays so fully and have so many fun activities and things to do during the holidays each day.  For a long time I've wanted to create an album focused on the fun my family has during the holidays, it's just never worked out to be a daily thing with my work schedule and school and all the crazy things that come up during the week for my little family.  What works better for me is a book documenting the highlights of the holidays - the traditions we've always held near and dear to our hearts, and the new things we try each year.  I love being the memory keeper in my family, knowing that someday my boys will look upon these albums with their families and hopefully want to carry on some of these traditions themselves.  
 
Inspired by this holiday memory keeping, I pulled out the digital 6x8 pocket pages again and of course, my love for bright, fun, and bold colors drew me right in to the Tis the Season SN@P! Set.  I kept it pretty light and simple this time, letting my photos and words take center stage, with some light embellishment to draw the eye in.  
 
 
I love the varying alphabet stickers included with this - I'm a big fan of mixing and matching and these worked perfectly.  I also "cut" the card in the top left corner to fit around the card, almost as if you would with an X-acto knife with a paper product, and I love how that one turned out.  
 
 
On this page, I ended up resizing and layering different cards to bring more colors and patterns into play, and "cutting" up cards to fit in other spots, like the hearts below the photo in the bottom left.  
 
 
I am really happy with how this turned out and excited to document the holidays in my own way.  
 
Happy holidays!

Hello there!  Shellye along with a set of "FRAMED SNOWMEN" tags that can also double as ornaments after the gift-giving is done!
 

To start, I grabbed a few of the "Claus & Co." Chipboard Frames.  For each snowman, you'll need a large and small square, as well as a round chipboard shape for the head.
 

 Next, I backed each of the frames with a matching-sized square of patterned paper from the 6X6 Paper Pad
 

The heads were covered in an off-white pattern from a section of the "Ho Ho Ho" paper. For the noses I used smaller sized hearts from the "Wood Veneer" pack and inked them with a burnt orange chalk ink.
 

 The cheeks were given some blush with pink chalk and black enamel dots were used for the eyes. 
To adhere the small and large frame together, simply use a scrap piece of heavyweight cardstock or chipboard piece.  Make a bridge at the back with the material by gluing one end to the large frame and the other half to the smaller frame.
 

Now for the fun part...embellishing!  I added different Wood Veneer pieces (that I inked with various chalk inks) and then accented the centers with Bradz.  The smaller alphabet stickers from the "Expressions Cardstock Stickers" were used to personalize with the snowmen.
 

To give a nice, finished look (as well as make into a gift tag), I traced the entire snowman onto a piece of cardstock and then trimmed out and glued to the back.  Use stickers or fancy hand-writing to add your To and From :)
 

With a small hole punched at the top, tie some string or twine through and your tag-ornament is framed and ready to go!

I hope that you enjoyed this fun Christmas craft and will give it a try!

Season’s Greetings friends! Rebecca Larson here to share with you a fun new holiday SN@P! Set that has recenetly been added to the digital shop! I was looking for a color pallet that could coordinate well with some black and white photos that I took of my daughter enjoying her first snowfall. We recenlty adopted her from the Philippines! Although this beautiful country is known to have the longest celebrated holiday season in the world, due to their island climate they lack the white stuff. So I was counting the minutes until I could introduce her to snow! Anyway, I was wanting some elements that were winter themed with a little mix of the Christmas holiday to highlight my photo. I found what I was looking for in the Tis the Season digital SN@P! SetAlthough the green and red are very much prominent in this kit, the aqua and gray can make any picture pop off the page!

I was first drawn to the cute snowman and snowflakes, and built the layout around that. I love the nontraditional holiday gray used here, and decided to also make the gray 4x6 snowflake cards a noteworthy part of my design.  

Using a crisp white sheet of paper (found at little dreamer.co) from my stash for contrast, I continued to build my layout with the 4x6 and 3x4 cards as background frames (drawing the polkadots from my daughter's jacket, to the matching polkadot 4x6 cards). It gives the right amount of color and whimsical pop! I love the alphas in this set, they give the reader an instant draw to my title.

I finished off my layout with using some of the adorable elements in this pack! The hearts and arrows were my favorite to highlight the main photo (isn’t it the cutest??) I added a small text box in the corner, and some drop shadows to give it some dimension, and uploaded it to my favorite print shop! Cant wait to add it to my book of stories! Thanks for stopping by!

While working on a pocket page for this post, I realized just how perfect the graphic elements of Claus & Co. really are. The charcoal greys, clean/classic fonts and images all made this collection a huge hit in my book. A touch of retro, while not too vintage...the more I worked with it the more I wanted to use it!

When your daughter is 16, that means you've likely documented MANY 'traditional' Christmas topics...and it also means that things are a bit different. I chose a pocket page to remember a few of those things, and am glad to have gotten the photos + words into an album. Since two of the photos were of my daughter trying to wrestle with the strings of lights for our tree, I opted for the 'farm fresh Christmas tree' card to stand front and center. I wanted to keep this page simple, mainly because I loved the photos but also to allow the text + graphics of the cards stand out.

All I added were a few gold sequins from my stash...other than that, this pocket page is pretty clean and simple. I did layer the ledger side of one of the cards onto the polka dot card to allow for some journaling about my most awesome 'Mom' pin that was a Santa's Secret Shop gift from about 10 years ago. ;)

The left 2x12 pocket houses a title that I made by pairing the black alphabet stickers with the tone on tone black star paper. I like the subtlety of it, and it balances out the darker polka dot card that I used for the journaling I mentioned above. The little 2x2 cards that say 'trim' and 'hang' were mounted onto a piece of 2x4 cardstock before slipping them into  the pocket, just to keep them from moving around. Again, just a few simple phrase stickers were all I used to jazz up the photos.

While it's tempting to go overboard when working on holiday projects/pages, try limiting yourself to keeping it simple. I can't think of a better time of year to slow down and focus on the stories. :)


Happy Cyber Monday!

Today only, your entire purchase from our digital store is 50% off!

WIth more than 45 of your favorite Simple Stories collections in digital format, you're sure to find just what you need for all of your digital crafting needs!  Visit our digital store here and enter code CM2015 during checkout!!  


Hey Simple Stories fans! Rebecca here! You may remember THIS POST where I showed how I was setting up my 30 Days of Thankful Album. 

Well, I am back with a nearly completed album! Every year this is one of my absolute favorite albums to work on. I love thinking about the things in my life I am grateful for and I really enjoy taking a photo a day. This year the album came together very quickly because I used a Simple Stories 4x6 album. If you are overwhelmed by the idea of a month long album project, this is the album for you. It comes with a variety of page protectors and inserts. Combine it with your favorite Simple Stories collection and you very quickly have an album you will cherish. 

I mentioned in my first post that I used the Pumpkin Spice collection and that it all came together so easily. Since I had so much pre-done I had extra time to add some special touches and I came up with 10 tips or tricks to share about this album.

#1: Mix It Up!

Use a variety of page protector sizes so you can see parts of pages peeking out. Round corners or punch bordered edges.

#2: Take a Photo a Day on Your Phone

It makes it easy to compile your photos if you are taking one a day with your phone. You can simply start with the first photo taken on November 1st.  Bonus Tip: I decided NOT to label each day in my album so as not to stress myself out in case I missed a day!

#3:  Add Hand Stitching 

There is something about hand stitching that adds such a homespun feel to your album. It adds dimension and texture too. I simply drew a heart, pierced holes around the shape, erased the pencils lines and stitched it up.

#4: Use Older Photos

On November 2nd I posted about being thankful for my "girl on fire."  I used my favorite photo from Halloween instead of one from November. Although the photo wasn't technically taken during November I figured it was close enough!

#5: Journal, Journal, Journal!

Journal as much as you can! I documented most of my days in Instagram and had little snippets there that I could copy for my journaling. Bonus Tip: Mix handwritten and typewritten journaling. This way you don't have to stress about your handwriting for the WHOLE album, but you are remembering and passing down some of it!

#6:  Mix Embellishments 

Combine stickers, die cuts, chipboard and more. Simple Stories makes this easy by offering so many adorable coordinating embellishments. The combination of them all creates visual interest and helps tell your story.

#7 Stamping

Stamping is a great way to connect journaling cards and photos without adding bulk to your album.

#8: Journal on Your Photos

This sunset photo had a ton of open space that was silhouetted and made it a perfect place to journal with a white gel pen!

#9 Fillers

Not all pockets have to be filled with photos or journaling. On the right hand side I stuck enamel dots right to the page protector inside a small chipbaord frame. On the bottom right square I placed a sticker on stop of the page protector. I mimicked both designs on the back so no white showed through.

#10: The Small Details

Don't forget the binding, back cover and book plate! I am not about to lie and tell you I've covered ever back cover of every mini album I've ever made, but I will say that when I do it makes for a much more completed look! I always love using some mini stickers to add the date to the book plate. The scalloped round sticker just seemed to fit perfectly on the binding. Bonus Tip: The Simple Stories border stickers wrap perfectly around this album. If you run out, just use a thin strip of patterned paper like I did on the back cover!

If you are documenting your 30 Days of Thankful, I hope you find these tips helpful! 


Supplies

Hello, again!   This is Amber, founder and creative director of Simple Stories.  I'm here for another installment of my monthly Document IT blog feature.  Today is Thanksgiving in the US - happy Thanksgiving from Simple Stories!

This month I've decorated my Carpe Diem planner for the holidays -

I used a mix of products from our Claus & Co. collection - I love the way they look against the black Carpe Diem planner, especially with the polka dot interior :)  The vertical & secretarial pockets are a great place to store the smaller cards & embellishments I plan to use throughout the month.  And those clips - super easy to make, I just adhered the Bits & Pieces die cuts to a paper clip with a glue dot, backed with a piece of washi and called them good!

I mixed in a few pages from the SN@P! Journal Pages, including this pocket insert.  Although they're sized for our 6x8 binders and albums, I just trimmed a bit off of the left edge of each of the pages and repunched the holes & voila! -  perfect Christmas themed inserts for my A5 planner.  The pocket insert is at the front of my planner and is a great spot to store the stickers and other bits I'll use throughout the month.

I've also incorporated the Holiday Planning Inserts in my planner.  They're also sized for our 6x8 binders and albums, I just trimmed and repunched again and they fit perfectly :)

The Holiday Planning Inserts include so many fun, different things - from tabbed dividers and calendar spreads to lists, dashboards and stickers, it's everything I need to customize my planner for the holidays, in one convenient little package!

I'm so excited for next month to start!  I'm looking forward to using my planner to help me stay organized and on top of things during such a fun & busy time of year.

FREE PRINTABLES!


Now we get to the really fun part!  We've designed these FREE printables for the holidays; the month in review insert will fit in your 6x8 Life Documented Planner and this month there's an A5 version as well!  In addition you'll find lots more fun printables that can be used for your in cardmaking, gift giving, home decor & more!  

Click here to download November's Free Life Documented Printables.

You guys!  There are a whopping 12 page of free printables we've included this month.  We wanted to share them with you as a thank you for being such loyal Simple Stories fans :)

The printables include - 

A5 & 6x8 November Month in Review
A5 & 6x8 December Month in Review
Printable Stickers & Gift Tag Stickers
Gift Tags
6 8x10 printables for framing


TIP: The November free printables are on a single PDF document with 13 pages - it's a larger file, so it may take a bit to download depending on your internet connection.  Print off what you want and the quantity you need.  We've added cut marks to each printable, so you can easily trim your pages to size.  

Thank you again so much for being such loyal Simple Stories fans - Happy Thanksgiving!

Pages