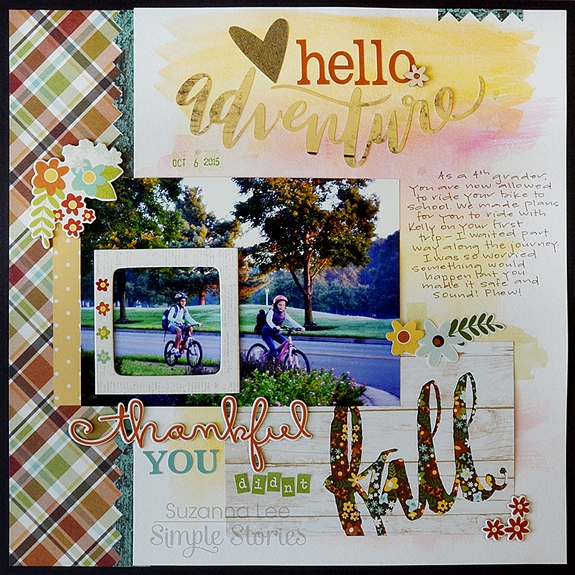
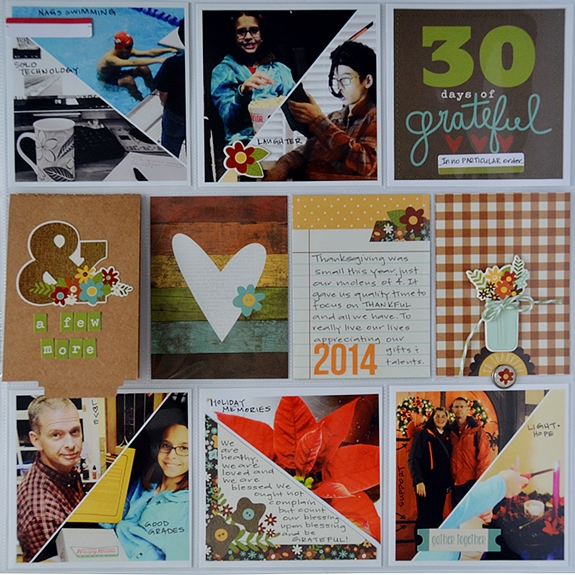
Hi y'all! Suzanna here today to share with you my quick version of 30 Days of Grateful. Everyday there are things that we ought to be grateful for. Some days there are more things than others. Rather than force gratitude, I want to really focus on the gratitudes that mattered most to me. Hence, the no particular order part of this process. No numbers, days or rankings, just plain gratitude!
 
 
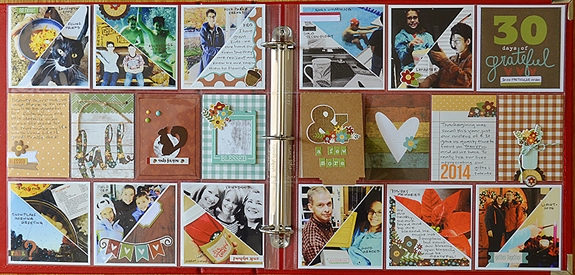
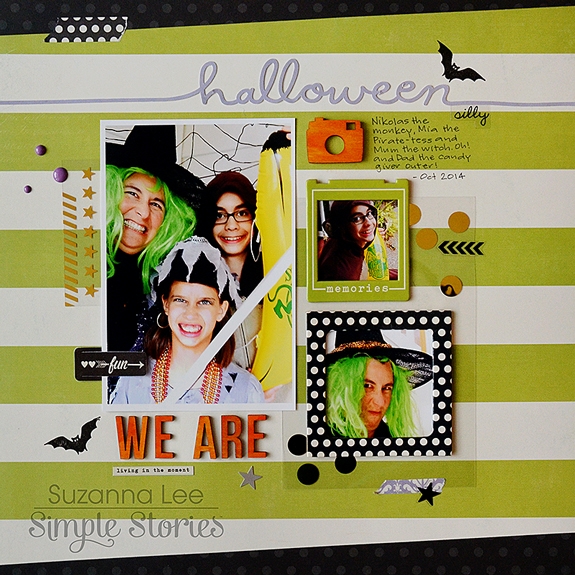
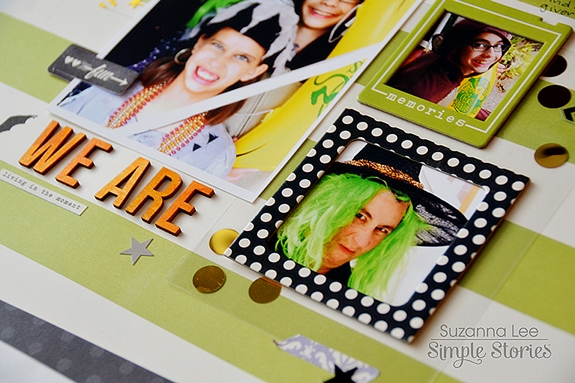
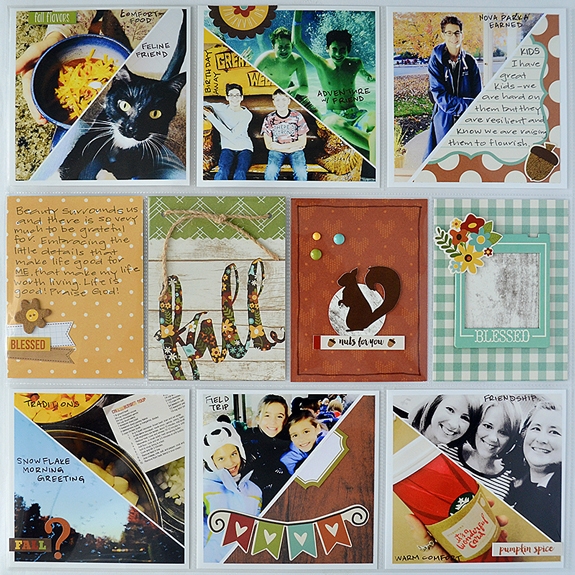
In order to be able to include a lot of pictures on my pocket page spread, I had to get a little creative. I liked the symmetry and movement of the triangle bisected squares that move around the top and bottom of the pocket pages. There is the occasion trimmed down 4x4 elements card for additional journaling and to the eye a break.
 
 
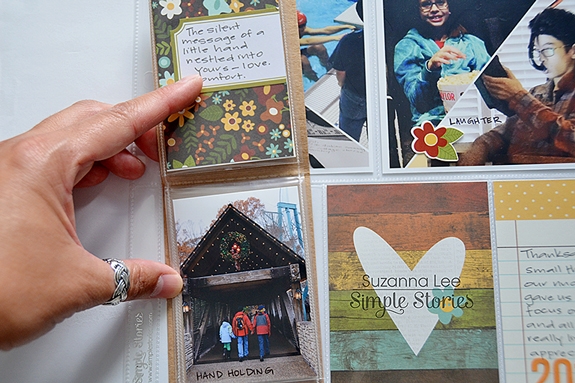
I also used a Simple Storied Photo Booklet on the right hand page to be able to include even more gratitudes and corresponding pictures. The back page fit perfectly into the 4x3 pocket of my Pocket Pages.


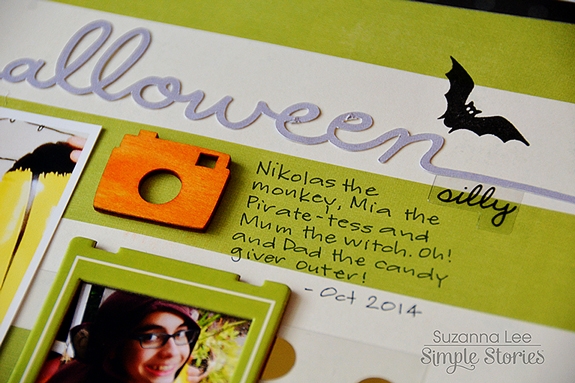
The SN@P! cards that coordinate with the Pumpkin Spice collection made easy work of this project for me! The hardest part was the lesson of gratitude; slowing down each day and acknowledging that things or things or person/people for which I was grateful. Gratitude's abound, there is so very much we have that fill our lives which we take for granted.
 
 
Thank YOU Simple Stories readers for stopping into the blog and reading our posts! I hope you, your friends and your family have a safe and blessed Thanksgiving!

Supplies

Hello Friends!

It's Kristine here today and I'm sharing a pocket page spread for November with a " thankful " theme. I used the Pumpkin Spice collection, it was perfect for my fall themed layout.  

These are photos of my family taken last season and a picture of my parents with grandkids that was taken this past July. The orange shirt my dad was wearing worked great for this Pumpkin Spice collection! Yes, I love it when a shirt matches the paper I'm using ;-)

I kept the same theme throughout my spread using yellow, pumpkins, a few flowers to decorate my filler pages.

Here's the left side of my spread

I did't have a lot of pictures that are " fall " themed. I always love to include my cats in the mix cause they are family too right?!  A Thanksgiving dinner, and my dad walking in the woods with my niece.

What is something I did differently on this page, can you tell?  Well, I actually added some embellishments ON TOP of my page protectors! Something different for me and I actually enjoyed it. I was able to overlap from one pocket to the next and also add dimensions to my page. It is a great way to add texture as well.

Here's the right side of my spread

I added a bit more journaling on this right side, nothing planned it just happened that way. I cut the pumpkin from a larger 4x6 journal card and added it to a 4x4 piece of paper to create my own journal card. 

This next photo shows the diecuts on top of my page protector.  I added foam dots to make it more dimensional.

As you can see, adding some extra stickers and embellishments adds a bit of interest to a page. Hope you can give this a try !

Enjoy creating with Simple Stories this month and please tag us on Instagram so we can see your work ;-) ( #simplestories ) You can also follow my work on Instagram @KristineDavidson

I love this time of year!  November means Fall weather, Thanksgiving, spending time with family and a lot of delicious food!  It's a time to be THANKFUL.  But it doesn't mean it's the only time for us to be thankful.  We can be thankful everyday and in everything.  I wanted to document an everyday kind of thankful on the layouts I'm sharing today.  These are just everyday photos, but they can easily be used with the We Are Family collection to create a thankful themed layout.
 

I started my first layout, We Are Blessed, by cutting a large arrow background from White card stock.  Then I backed the open space with the Our Story patterned paper and machine stitched around the arrows.  I wanted to use the open spaces between the arrows to place my photos, embellishments and title.


I added my two photos first, to give me a starting point for the rest of my design.  Once the photos were in place, I added my title to the top section of the arrows, using the We Are Family wood veneers mixed with a die cut word.  Then I moved on to embellishing the bottom section of the arrows, with a mix of Stickers, Bits, Enamel Dots, Wood Veneers and Bradz from the We Are Family collection.


After I have 95% of my layout design finished, I like to go back and add a few other touches.  I wanted to bring some embellishments to the title, so I added a small arrow Sticker, Brad and Bits & Pieces heart with an Enamel Dot in the center.  I also wanted to add a few things to the photos, to help draw your eye.  I kept it simple with a couple of Stickers and Bits & Pieces from the We Are Family collection.


On my second layout, XOXO YOU, I created a large typography graphic by welding several words together in Silhouette Studio.  I wanted to have a thankful themed text in the background of the layout.  I decided to cut the words from the Making Memories patterned paper in the We Are Family collection.  This pattern allowed me to bring in a lot of color, without using a lot of different papers.


Before I added the die cut words to the White card stock background, I created an offset design in Silhouette Studio and drew the outline of the words with a Brown Sketch Pen.  Once the words were finished drawing, I added the die cut words to the drawn image.  And before I added my photo or any embellishments to the layout, I added a few splatters with Brown spray mist.


I didn't want to cover a lot of the background words, so I placed my photo to the right hand side of the page, and added my title above it and some embellishments below it.  And I added a few of the Bits & Pieces, Wood Veneers and Enamel Dots from the We Are Family collection to the left hand side of the page to balance out the layout.


I hope these two layouts have given you inspiration for creating thankful themes, to go with your photos all year long.  The right collection, embellishments and title can bring a thankful look to any of your layouts!


Supplies

Hi there, Simple Stories fans!   Teri here, and I am excited to give you a peek inside my Carpe Diem Planner
 
I'm so geeked about this planner for a couple reasons. First, I love the planner's large A5 size because it gives you lots of room to write and embellish. And I love the ring binding system because you can take pages out and add pages in. You can really customize your planner to your heart's content. I love that!
 
The first thing I did with my pink planner was to rearrange the months. Since I started using it in November, I moved the November and December sections to the front of the planner. (Hello, friends! How could I possibly wait until January to start using it?! Kid in a candy store, but I digress.) I also moved the piece of pencil paper to the front of my planner. It had previously been in the back of the planner. It's just so cute! 
 
 
I immediately delved into planning November. I removed some of the "day" planning pages that the planner came with and replaced them with some "Who What Where When" pages from the Carpe Diem Basic Inserts pack.
 
 
I added a number date to each day with the Carpe Diem Number Stickers. Rather than being uniform about that, I randomly put the date circles into the three columns. I just kinda love that random, tossed together look. 


My handwriting is extra messy on these pages, but I think addition of colorful stickers made the pages fun and cheerful and distracted from that messy writing! I mean, how cute is that coffee cup? Yes, I know! 
 
I also created a cute little dog clip for November! It was easy to make! I adhered the dog (from the Carpe Diem Bits & Pieces) to a large paperclip with some glue dots.
 
 
Flip it over, and you'll see I added a little bit of paper washi tape to cover up the adhesive. Easy peasy! 
 
 
Speaking of paper washi tape, I used it to add a little color to the top of those Who What Where When pages, as well as the November month calendar pages. 
 
 
Finally, I included a "This Month" page (also from the Basic Inserts pack) to my November section.
 
 
It's great because I was able to add some important dates for the month that I definitely don't want to forget. I also was able to document some of my goals for November. Always good to have something to strive for... wink! 
 
 
I made the page a little more interesting visually by adding some stickers and die-cuts to it.
 
Thanks for letting me give a peek at my planner. I'll see you again soon!

Hey there planner friends, Nancy here with walkthrough video on how I've set up my Carpe Diem planner and organize my planner supplies. I was looking for a place to store all of my creative project deadlines, ideas and plans. I think I found the perfect spot!

​This monthly view is my favorite part of the planner. I love that the pages are perfectly plain so that I can add as much color and decor as I want every month. The quote stickers fit perfectly into the boxes and let you customize the design.

The weekly view here is dressed up with number stickers, dashboard insert and plastic divider. I use this space for my weekly social media plans. For a closer look at the entire planner, watch the video here:

The daily planner pages are where I list things that must get accomplished today, notes and an hourly schedule. I love the sticky dashboard notes and use them for pops of color and to add the things I want to remember.

This planner is the perfect example of form follows function. It's beautiful and practical all rolled into one!

Hello Planner Addicts!!!  Candi here today to show you how I set up my Robin's Egg Carpe Diem Planner!!!  I am still doing things here and there inside my planner, but I feel that this set up is working for me so far!  SS really kicked it out of the ballpark with this new Collection!!!  I am already thinking I need another color so I can change out my planner from time to time :)
 
I lovvvvvve the pockets inside this planner...so many slots to tuck in fun clips, washi and pics!  Makes me happy to see all of those goodies peeking out!
 
 
Behind my dashboard I added a Pocket Insert.  Inside the pocket I have several Carpe Diem Stickers and I attached a photo with a Magnetic Page Marker  :)


I am using the Basic Dividers to get myself organized inside!  There are 6 Dividers and each tab reads:  Information, Calendar, Menus, To Do, Notes and This & That.  The Basic Dividers come with 108 clear label stickers, which is GREAT!  I love how colorful the Dividers are...you can leave them just as they are or you can add embellishments to them!  I am still in the process of adding photos and embellishments to mine...the process of making your planner "your own" is so much fun!!!


Inside my Information Divider I have my "intro" page, contacts and a list of birthdays & anniversaries!  


For my Calendar Divider I am only storing October, November and Decembers Weekly Inserts.  My plan is, at the end of November, I will remove the whole month of October and add in the whole month of January.  Basically only having 3 months in my planner at one time.  My thoughts are if I have the whole year inside my planner and all of the "extras", it might get to be too much because I love adding extra photos here and there along with some memorabilia!
 
Below you will find my monthly view of October, decorated and competed with my important to-dos along with a weekly spread.


Another great feature about this planner is that nothing is dated...you can start whenever you would like!  I think it is fun to sit down and add the Number Stickers to the monthly spread and add some random Carpe Diem Stickers!  Below you will see how I decorated my November Divider with a Dashboard Insert and a few Stickers!  Plus you will find my November monthly all set to go and ready to plan...!  (I spy a little Pumpkin Spice goodness on my monthly view!!!)


I love how each month there is a "re-cap" sheet to fill out!  This is where I store my Sticky Notes Bookmark  :)


Here is the start of my Weekly Inserts for November...I set aside 5 minutes and stamp out each date in my Weekly Inserts with a roller stamp and a basic black ink pad! 


Loving the Basic Inserts!  I am always meal planning and the Menu Inserts are helping me out so much!  Right now I am using one side for each month...   


At the back of my planner, I have included the Plastic Storage Pouch to store some of my Bits & Pieces!  Those die cut shapes are fun to add to your planner pages :)  You could also store some extra Stickers andWashi Paper Tape too! I also added a Metal Charm to the zipper pull on the pouch!
 
 
I am so excited to see how you all set up your Carpe Diem Planner when it arrives!  You must share lots of photos on your social media accounts and make sure to use the following hashtags:  #CarpeDiemPlanner #SimpleStories #SnapPlanner.  Would love to see your planners in action!!!  
 
Have a great weekend ahead and...Happy Planning :)
It's Mindi here with you today. I am going to be sharing some holiday pocket pages using the wonderful Claus & Co. collection. 
 
 
Last December the kids and I hosted a Gingerbread building and decorating party at our house. We invited some friends and neighbors. It was something that the kids are now asking to do again this holiday season. 
 
These christmas lights are among my favorite thing in the collection. I played around with the string of lights and one of the chipboard frames. It worked out great to slide them up through and then on top of the frame for a fun look and finished it off with some embellishments. I used this as a title/filler card. 
 
 
I have always been a fan of using big photos in my pocket pages. It adds a different look and sometimes photos need to be enlarged ! I used a photo that I took of one of the kids's gingerbread houses and made it stretch over three pockets. In the bottom corner I added some journaling onto one of the labels I cut out from one of the 4x4 journaling cards. One other thing that I wanted to do was to add names or at least initials of who's house was who's. Except that one of the kids pretty much demolished her house before I could take a decent photo of it ! Oh well, at least I got two of them. 


Here are some close ups. 


I added a journaling card with some details that I wanted to remember. I love that there is a number sign included in with the letter stickers. It allowed me to make a hashtag as part of my journaling title. I also love the brads, they are both cute and self adhesive. No more making holes. 
 
 
Let's move on to the second page. 
 
 
Filler cards are so fun. They are some of my favorite things to do, they allow me to be creative with papers, embellishments, stickers, ect. I added one here. I wanted to add a gingerbread house somewhere. I found one online and printed printed it out onto some vellum. This card seemed like it was made to add one of the larger chipboard frames on top of it. Underneath the frame I added some strips of washi tape and some embellishments. 
 
 
Here are a few close ups 


I am so happy to have these photos and memories preserved using the Claus & Co. collection. It has gotten me very excited for the upcoming holiday season. Thanks so much for visiting today ! 

Supplies

Howdy!  Layle here with you today.  Welcome to the final day of our Simple Stories & Petaloo Product Swap! 

Both design teams have swapped products and will be sharing on our blogs all week long.  Join us for some great inspiration as well as a chance to win a prize package from both Petaloo & Simple Stories! 

Today design team member Chantalle McDaniel is back with her 2nd project - a fabulous holiday monogram 
______________________________

Hello everyone! Chantalle back with you today to share another project using Claus & Co. and beautiful Petaloo blooms. 
 
This next project was inspired by a toilet paper roll wreath I saw on Pinterest. I thought it would be fun to create a monogrammed ‘M’ for our family name, to hang on the door this season.
 
A combination of Petaloo flowers, Claus & Co. Bits & Pieces and wood veneer finish it off beautifully.
 
 
I’ve used the same principal as the toilet paper roll example and applied it to my own mix of papers.
 
* To start, I trimmed up a couple pieces of Claus & Co. patterned paper to 125mm (w) x 100mm (h). 
 
* I then cut the rectangle into strips. These were 20mm (w) by 100mm (h). I ended up with about 50 strips. The nice thing about this technique is that it’s super easy to measure up extra strips if you need to add more to the final design.
 
* I folded the strips in half and glued the flat ends together, right near the edge with just a thin strip of glue. (I used Helmar 450, which is my favourite liquid adhesive.) Note: Be careful not to squash the folder paper flat when you fold it. You want to keep that nice, gentle curve.
 
* When I had folded and glued all the strips, I arranged them into the shape I was after. I then set about gluing each piece to the other (a careful process) with hot glue. (I used hot glue because it was a fast, strong bond, but you could use the adhesive of your choice.)
 
The final result wasn’t as perfect as when I had initially laid it out in preparation, as I had to move each piece as I went, but like I mentioned above, it is very easy to quickly cut, fold and glue in extra pieces to make up gaps in the design.
 
 
Custom blooms, using a mix of Ivory and Green Moss textured layers with a icicle Claus & Co wood veneer, little Suga Berry clusters in Peach and sweet Suga Red minis in Burgundy look good enough to eat! The Claus & Co. die cuts add just the right amount of cheer. I had been hoarding the reindeer for just the right project ;)
 
 
Piercing a little hole on either side on the top of the ‘M and threading a twinkling bit of red glitter twine from a pack of Petaloo assorted trim was the final finishing touch. It was now ready to hang! I hope this project has inspired you to make a start on your Christmas decor. It doesn’t take much time to put together something pretty and unique. If you would like to catch more of that what I get up to, you can pop into my blog (www.copasetique.blogspot.com.au) Happy crafting!
______________________

Now for even more fun!!  Enter via the Rafflecopter widget below and we'll draw one lucky winner on Sunday to win a Claus & Co collection pack & Petaloo flowers!  

a Rafflecopter giveaway

After you enter, head on over to the Petaloo blog to see what their team has created.  Make sure to enter there as well - they're giving away a fun prize as well!   

Want to follow Petaloo and keep up with all of their great projects & products?  Here you go!

Website

Facebook

Instagram: petaloointernational

Blog

Thanks for joining us this past week!!  


Howdy!  Layle here with you today.  Welcome to the final day of our Simple Stories & Petaloo Product Swap! 

Both design teams have swapped products and will be sharing on our blogs all week long.  Join us for some great inspiration as well as a chance to win a prize package from both Petaloo & Simple Stories! 

Today design team member Chantalle McDaniel joins us with a fabulous creation for her Carpe Diem planner!  
______________________________

Hello everyone! Chantalle back with you today to share a couple of projects using Claus & Co. and beautiful Petaloo blooms. We have all seen the stunning new Carpe Diem planners which are set to hit retailers momentarily (yippee!) I absolutely adore my platinum one. The understated chic holds such bold fun within! To mark the upcoming festive season, I thought it would be fun to create a custom bellyband to give my planner a bit of Christmas cheer, without ruining the beautiful split leather finish. This is how it turned out…
 
 
To start, I measured a length of elastic (20mm width) to fit around my planner. Selecting the pretty Petaloo assorted trim in Glitz Red, I used my sewing machine to stitch it along the left edge of the elastic. I used red thread so you don’t see the stitching. Tip: To give it more stretch, I would suggest tugging on the elastic slightly as you sew, so when it’s finished, it has more ‘give’. Mine turned out a tiny bit rigid. Once the trim was stitched in, I sewed the elastic together to form the band shape.
 
 
This is what it looked like before I embellished it:
 
 
All the embellishments were applied using a hot glue gun. (I’m sure I lost fingerprint or two in the process! haha.) For the larger green flower I’ve used Petaloo Mixed Textured Layers in ‘Moss Green’ and the smaller white one is also Mixed Textures but in ‘Ivory’. The petals have a subtle curve to them already, which is really nice. I wanted to accentuate this height, so I adhered them with the curve facing upwards. I dabbed a blob of hot glue in the centre and pushed down using the back of a stylus to get them to set with the extra height.
 
 
I really loved working with the leaves and berries from the Suga Red Clusters. They were great to tuck behind larger blooms. Once I had created my custom flowers and chosen the rest of my embellishments, I went about arranging them on the elastic. Before I glued anything down,  I grabbed a sheet of baking paper and folded it over a couple of times and then tucked it under the elastic. I could then go about adhering my embellishments without damaging my beautiful planner. 
 
 
A brad makes a sweet floral centre…
 
 
I’ve chosen Claus & Co. chipboard stickers as they are more hardwearing.
 
 
I love how the band turned out! I can definitely see myself creating more to suit other seasons and holidays.
 
 
______________________

Now for even more fun!!  Enter via the Rafflecopter widget below and we'll draw one lucky winner on Sunday to win a Claus & Co collection pack & Petaloo flowers!  

a Rafflecopter giveaway

After you enter, head on over to the Petaloo blog to see what their team has created.  Make sure to enter there as well - they're giving away a fun prize as well!   

Want to follow Petaloo and keep up with all of their great projects & products?  Here you go!

Website

Facebook

Instagram: petaloointernational

Blog

Join us again later today for one more inspiring project from Chantalle!


Howdy!  Layle here with you today.  Welcome to day 5 of our Simple Stories & Petaloo Product Swap! 

Both design teams have swapped products and will be sharing on our blogs all week long.  Join us for some great inspiration as well as a chance to win a prize package from both Petaloo & Simple Stories! 

Today design team member Allison Davis joins us with a Claus & Co. pocket page spread along with her monthly sketch! 
______________________________

Hi everyone! Allison here with a layout using the Claus & Co. collection and some beautiful products from Petaloo. I also have another sketch to share that mixes up the traditional scrapbooking style with the SN@P! Pocket Pages.
 
 
You can download the full sketch with measurements and placements here.


The left side of the sketch is designed in a traditional scrapbooking style while the right side uses photos and cards together with the SN@P! Pocket Page, Design 9.
 
Here is my layout based on the sketch:
 
 
We always have several traditions that take part in our home on Christmas Eve. Most of them are intended to keep our boys busy because they are usually bursting at the seams with excitement for opening presents on Christmas morning. Maybe it was the sugar from the cookies we made (and ate) but they seemed to be a little more excited than usual. I didn’t think we were ever going to get them to settle down and go to bed. I took up the opportunity to take some pictures of them in their cute, matching “Ninja-bread Men” pajamas and tried to capture their excitement before we sent them off to bed. 
 
 
When I first saw the Claus & Co. collection I couldn’t wait to play around with the circles on the I Believe piece of patterned paper. I decided to use them to shape a big Christmas tree to use on the left page. I also used some of the Petaloo Fancy Trims along the bottom of the tree.
 
 
I used the larger circles to create the main shape of the tree and then used the circle stickers, Bradz, and enamel dots to fill in some of the spaces between the large circles. Then I added some hand stitching to a few of the circles.
 
 
Word/phrase stickers are always one of my favorite go-to embellishments to add to my layouts. I love how Simple Stories collections always have a bunch to choose from! 
 
 
For the top of the tree, instead of using a star, I used the Petaloo Textured Elements burlap poinsettias. 
 
 
For the title I mixed together several different alphabet stickers from the Claus & Co. collection. I had a hard time choosing between the white and green small block letters so I just used them both, mixed together!
 
 
On the right page I used photos, a 3 x 4” card, two 6 x 4” cards, and a 12 x 4” piece with the SN@P! Pocket Page, Design 9. This Pocket Page is one of my favorites because of the big 12 x 4” pocket!
 
 
I love the 12 x 4” “Believe in the magic of Christmas” strip! I used the open space on the left side of it for two photos.
 
 
On the right side I added my journaling. 
 
 
I used some of the Petaloo Fancy Trims as garland on the tree on the card and added some Bradz and enamel dots for ornaments. 
 
 
I added the Petaloo berry clusters to the scallop on the card and then added some hand stitching to the edges.
 
 
I added some work stickers to the 3 x 4” photo and the Dec 24 card.
 
I hope you enjoy using the new sketch! 
____________________________

Now for even more fun!!  Enter via the Rafflecopter widget below and we'll draw one lucky winner on Sunday to win a Claus & Co collection pack & Petaloo flowers!  

a Rafflecopter giveaway

After you enter, head on over to the Petaloo blog to see what their team has created.  Make sure to enter there as well - they're giving away a fun prize as well!   

Want to follow Petaloo and keep up with all of their great projects & products?  Here you go!

Website

Facebook

Instagram: petaloointernational

Blog

Join us again here tomorrow for more inspiring projects!


Howdy!  Layle here with you today.  Welcome to day 4 of our Simple Stories & Petaloo Product Swap! 

Both design teams have swapped products and will be sharing on our blogs all week long.  Join us for some great inspiration as well as a chance to win a prize package from both Petaloo & Simple Stories! 

Today design team member Amy Coose joins us with a Claus & Co. December Daily album -
______________________________

Hey everyone, Amy here to share the beginnings of my December Daily album with you.  I was so excited to participate in the product swap with Petaloo, and the items they sent went perfectly with the fabulous Claus & Co. line that I'm using for my album.
 
Before I share, I will say that I've never completed a December Daily before. I start them, but just can't seem to get 'em done. Hoping to change that with this fabulous album.  The Holiday Snap binder made this project well, a snap!  Here's the start of my December Daily 2015.
 
 
I kept it pretty simple on the album cover, because I didn't want to take the chance of stuff constantly falling off.
 
 
Here are some of my inside pages so far.  Seriously, get ready for photo overload.
 
This is the cover page.
 
 
I included a calendar page from the SN@P! Pages so I could jot down activities and other info for our busy month.
 
 
Here are some inside pages.


I'm loving how it's turning out so far.  Here are some peeks at some other pages.


I can't wait to get it finished, y'all hold me to it, OK?  You can check out my blog during December to see how my December Daily pans out. Wish me luck.
____________________________

Now for even more fun!!  Enter via the Rafflecopter widget below and we'll draw one lucky winner on Sunday to win a Claus & Co collection pack & Petaloo flowers!  

a Rafflecopter giveaway

After you enter, head on over to the Petaloo blog to see what their team has created.  Make sure to enter there as well - they're giving away a fun prize as well!   

Want to follow Petaloo and keep up with all of their great projects & products?  Here you go!

Website

Facebook

Instagram: petaloointernational

Blog

Join us again here tomorrow for more inspiring projects!


Howdy!  Layle here with you today.  Welcome to day 3 of our Simple Stories & Petaloo Product Swap! 

Both design teams have swapped products and will be sharing on our blogs all week long.  Join us for some great inspiration as well as a chance to win a prize package from both Petaloo & Simple Stories! 

Today design team member Wendy Antenucci joins us with two Claus & Co. holiday layouts -
______________________________

Hi, Wendy here today to share some inspiration using the Claus & Co collection.  This collection went so well with the Petaloo products we were given to work with, the flowers added just the right touch of elegance to my pages.
 
 
On my page, Disney Magic, I wanted to create a page that showcased all the Christmas magic found at Disney.  To fit all of my pictures on the page, I stuck with a horizontal approach with some overlapping for interest.  I chose a 4x6 card that had a pointsettia on it to match my florals that I wanted to add to the page.
 
 
I created an embellishment cluster full of floral goodies and chipboard to anchor my pictures to the page and to form a visual triangle with the poinsettias on the corners of the papers.
 
 
I completed the page with another embellishment cluster, again forming a visual triangle with my title and some fun holiday pieces.
 
 
A few stickers and some journaling completed this page.


On my next page, Ho Ho Ho, I used a cut file from the Cut Shoppe to create a backdrop of Christmas trees to showcase our tree.  I love to grab the 4x6 cards and my pictures and form what I call a "photo block" which is the basis of my layout.  Instantly you have a layout that now just needs some finishing touches.  To really make the darker pictures stand out I matted my group on the Charcoal Star paper.
 
 
I began adding some Bits & Pieces, a frame, and floral building my first embellishment cluster which will also form a visual triangle when I am finished.
 
 
My next cluster, was a large attention getting cluster full of my favorite Petaloo florals.  This large cluster also became my title area and gave me room to write my journaling.
 
 
My last cluster was another smaller floral bunch with the addition of the string of lights which went with my theme of decorating the tree.  A few stickers and my page was finished.
 
Thank you for joining me today, for more inspiration you can find another layout using the Petaloo flowers and Claus & Co. on my blog.
____________________________

Now for even more fun!!  Enter via the Rafflecopter widget below and we'll draw one lucky winner on Sunday to win a Claus & Co collection pack & Petaloo flowers!  

a Rafflecopter giveaway

After you enter, head on over to the Petaloo blog to see what their team has created.  Make sure to enter there as well - they're giving away a fun prize as well!   

Want to follow Petaloo and keep up with all of their great projects & products?  Here you go!

Website

Facebook

Instagram: petaloointernational

Blog

Join us again here tomorrow for more inspiring projects!


Howdy!  Layle here with you today.  Welcome to day 2 of our Simple Stories & Petaloo Product Swap! 

Both design teams have swapped products and will be sharing on our blogs all week long.  Join us for some great inspiration as well as a chance to win a prize package from both Petaloo & Simple Stories! 

Today design team member Audrey Pettit joins us with two Claus & Co. holiday cards -
______________________________

Hi everyone, it's Audrey! And today I have a couple of Christmas cards to share with you, made with our adorable Claus & Co. collection along with beautiful flowers and trims from our friends at Petaloo. AudreyPettit Claus&Co MerryOneCard I absolutely fell in love with the adorable old-timey truck die cut from the Bits & Pieces kit, and wanted to make it the focal point for my first card. So I created a background from SN@P journaling cards, and then popped the truck right onto the center using a bit of foam adhesive for dimension. I really love using the SN@P cards as patterned paper on my card designs. Of course they perfectly coordinate with the rest of the line, and they offer even more pattern choices for patterned paper lovers, like me. AudreyPettit Claus&Co MerryOneCard2 I raised the top paper piece on foam adhesive for some extra depth and interest, and added a scalloped cardstock border sticker along the bottom edge. Then I created a "road" for my truck using two trims from Petaloo's Shades of Green Fancy Trim pack. AudreyPettit Claus&Co MerryOneCard3 A couple of enamel dots make instant dimensional headlights. And a die cut Bits & Pieces banner is a quick and easy sentiment. And finally, I added a twine bow along with a flower and leaves from Petaloo's Tea-stained Darjeeling Petites pack. AudreyPettit Claus&Co SeasonofLoveCard My second card is a cute 4.25" square that once again features pretty Bits & Pieces die cuts against a SN@P Journaling Card background. AudreyPettit Claus&Co SeasonofLoveCard2 A pair of die cut holiday stockings are so fun hanging from a line... this time cream pom pom trim from Petaloo's Taupe Fancy Trims kit. I raised the stocking on foam adhesive for a bit of depth, and popped a few die cut stars all around. So quick and easy. AudreyPettit Claus&Co SeasonofLoveCard3 A sentiment, again, from the Bits & Pieces die cut pack, and snowflakes to top the stockings from the die cuts, too. And finally, a Petaloo Mini Red Poinsettia to top it all off. Enjoy! Supplies: Simple Stories Claus & Co. Collection
______________________________

Now for even more fun!!  Enter via the Rafflecopter widget below and we'll draw one lucky winner on Sunday to win a Claus & Co collection pack & Petaloo flowers!  

a Rafflecopter giveaway

After you enter, head on over to the Petaloo blog to see what their team has created.  Make sure to enter there as well - they're giving away a fun prize as well!   

Want to follow Petaloo and keep up with all of their great projects & products?  Here you go!

Website

Facebook

Instagram: petaloointernational

Blog

Join us again here tomorrow for more inspiring projects!


Howdy!  Layle here with you today.  We've got a fun week planned for you - a Simple Stories & Petaloo Product Swap! 

Both design teams have swapped products and will be sharing on our blogs all week long.  Join us for some great inspiration as well as a chance to win a prize package from both Petaloo & Simple Stories! 

Today design team member Cari Locken joins us with two Pumpkin Spice layouts -
______________________________

Hello everyone!  I'm excited to share with you some layouts that I created using the Pumpkin Spice collection and some gorgeous flowers from Petaloo.
 
My first layout is titled "I am so thankful".  I decided to not use any photos on this layout and just do some journaling. 
 
 
 I kept my design fairly simple but embellished it a fair bit with chipboard, stickers and lots of flowers.
 
I created clusters of flowers on the top left & right sections of my layout.


I used the Bradz for the centres of the larger flowers.
 
 
I added a few sticker strips and the chipboard pumpkin shape overtop of the one that was already printed on the card.
 
 
I used some letter stickers and a chipboard word to create my title.
 
 
My second layout is titled "Hello Fall". It's one of my favourite times of the year. I wanted to capture a few of my fall decorations this year and some of the signs that I've started making.  Again I kept the design quite simple and used a 2x12 strip along with a 6x8 journal card.
 
 
I added a few flowers around my main photo and also used a photo transparency.
 
 
I've been trying to do a little bit handwriting on my layouts just to give a more personal touch to my projects.
 
 
______________________________

Now for even more fun!!  Enter via the Rafflecopter widget below and we'll draw one lucky winner on Sunday to win a Claus & Co collection pack & Petaloo flowers!  

a Rafflecopter giveaway

After you enter, head on over to the Petaloo blog to see what their team has created.  Make sure to enter there as well - they're giving away a fun prize as well!   

Want to follow Petaloo and keep up with all of their great projects & products?  Here you go!

Website

Facebook

Instagram: petaloointernational

Blog

Join us again here tomorrow for more inspiring projects!

Hi guys!  It's Marie here today to share with you how I'm preparing for Christmas with Claus & Co.


I fell head over heels for the new Claus & Co. collection the minute I saw it.  Not only does it have everything you need to make a December memories album, but it's also full of lists and calendars to use as a holiday planner.  I'm so happy to get an early start planning out our holidays this year.  I usually just jot things down on scrap paper, or worse try to keep everything straight in my head.  This year I feel so much more organized getting things written down on paper, and being able to check them off.


I coordinate with my aunt to put together a brunch on Christmas Eve, so I've already started writing down recipe ideas and  notes on what we did last year.


I included a page full of Pinterest inspiration so hopefully I can tackle some diy projects and homemade gifts this year.


When I think of a gift idea it now goes straight in my Christmas planner, before I forget.  I've also been tracking my on-line shopping, budget, and packing lists.


Cute little dividers help break up my pages...


I'm determined to get my Christmas shopping done early this year, and I'm making a list and checking it twice!

Do you use a holiday planner?  After putting one together this year I highly recommend it.  I'm already feeling ready for Christmas!  Happy planning to you!


Hi Simple Stories Fans! Rebecca here today to share my favorite part of documenting fall! 


For the past few years I have followed along with Cathy Zielske's 30 Days of Thankful and created mini albums documenting a photo a day in November. Last year, I used a Simple Stories 6x8 Album and the Life Documented Collection. And the year before I used a Simple Stories 6x8 Album and the Daily Grind Collection. This year I decided to use a Simple Stories 4x6 album. I have to say there is a lot less pressure in the smaller format album! I am also using the Simple Stories Pumpkin Spice collection this year.


Today I'm sharing the basic structure of my album.  I'll be working in it throughout the month and will back here again at the end of the month to share my progress!


There are so many grateful-themed sentiments in this collection and the colors are perfectly fall-themed too! I love starting with the cover because you get to be creative and have fun.


To prep the inside of my album I cut up all my 3x4, 4x4 and 4x6 cards from patterned paper. I filled all of the page protectors that came with the album with my favorites.


I included the 4x6 transparency in one of the 4x6 pockets. I will keep it in mind to take at least one horizontal photo with lots of white space at the bottom!


I even cut apart all my 2x2 squares. Some of these will end up being covered by photos.


I kept a few of the divider pages that are included with the album. I may use the backs of these for longer typewritten journaling.


I backed two of the smaller chipboard frames and added enamel dots to the outside of the page protector...just for fun!


I am so excited to have the bones of my album completed so that during the month of November I can just slip in photos and add journaling!   I'll be back at the end of the month to share my completed album!

Supplies

Happy Halloween Simple Stories fans!!  Suzanna here today to share with you two layouts.
 
 
I just couldn't post on Halloween and not share a Halloween layout! That just wouldn't be right now, would it?! In lieu of a Halloween collection, I dug around in my stash and gathered bits and pieces that were black, purple and green and went to town layering the various bits and pieces.
 
 
The bulk of the goodies used to create this layout came from the  Enchanted and I Am collections, using the appropriate color coordinated pieces.
 
 
Knowing that the bright orange I wanted wasn't available in the collections I had on hand, I decided to use wood veneers from the We Are Family collection and paint them. What better way to provide the color you want?!
 
 
Our costumes clearly give the theme of the layout away but I wanted some "support" evidence. Using my Silhouette to cut "Halloween" out for the title and a bat stamp added just the right scattering of Halloween desired!
 
 
This layout is fall based, using the fall collection Pumpkin Spice, but really it is more about my daughter's bike riding adventure. At our elementary school, 4th graders are granted the privilege of riding their bikes to school. We had put it off and there was no putting if off any longer so we made arrangements for my daughter to ride with a neighbor down the street. The problem, more like, my problem, was that my husband was out of the country and I had to go to work… You know that "mother hen" moment. I was terrified that she would fall and I wouldn't know or be there to ensure a safe journey was completed.
 
 
In the above picture, I used the frame to emphasize my daughter in the overall scene of the girls riding to school. You can also see the breadth of the alphas available with the Pumpkin Spice collection. I used them with the chipboard and a SN@P card for my title work, incorporating existing words into a fun title.
 
 
The background was created using watercolors in order to "blend" the SN@P card with "fall" as part of the title  into the background. While it would have been okay on a light background, it felt like the card was floating. I wanted more of a seamless look and as I've been dabbling with mixed media, it was an easy solution to my problem.
 
 
I hope you have some great Halloween plans for this evening! 

Hello, again!   This is Amber, founder and creative director of Simple Stories.  I'm here for another installment of my monthly Document IT blog feature.  

This month rather than sharing how I've been using my Life Documented planner, I thought it would be fun to share our brand new Carpe Diem A5 Planners.  These planners & a la carte accessories will be in stores mid November, so it won't be long before you can get your hands on them!

We have so many talented design team members and employees that work with our products; this month I'm happy to introduce you to in-house designer Sue Kendall.  Sue has been so excited to start using her planner that she sat down and decorated each of the monthly dividers included in the planners with a seasonal theme for each month!

Sue combined different stickers from the collection - the Life Illustrated Stickers, Icon Stickers, Word Label Stickers and the Insta Quote Stickers to customize her planner.

The Insta Quote Stickers are some of our favorites - they were designed to fit perfectly in the squares on the monthly inserts!

The Illustrated Life Stickers were designed to include icons to cover each season/holiday of the year so that each month you have themed stickers to decorate with!

I love how Sue was able to spend a few hours getting her planner decorated for the coming year so that as each new month draws near, she's ready to go!

FREE PRINTABLES!


Now we get to the really fun part!  We've designed these FREE printables for October; the month in review insert will fit in your 6x8 Life Documented Planner and this month there's an A5 version as well!  In addition you'll find dashboards to fit your A5 planner as well!  

Click here to download October's Free Life Documented Printables.

There are a 6 free printables this month, including:

6x8 October Month in Review
A5 Month in Review
4 Dashboards

TIP: The October free printables are on a single PDF document with 4 pages - print off what you want and the quantity you need.  We've added cut marks to each printable, so you can easily trim your pages to size.  

Thanks so much for letting me share our Carpe Diem planner this month, I cant wait until they're in stores next month!   Happy Halloween :)

Pages