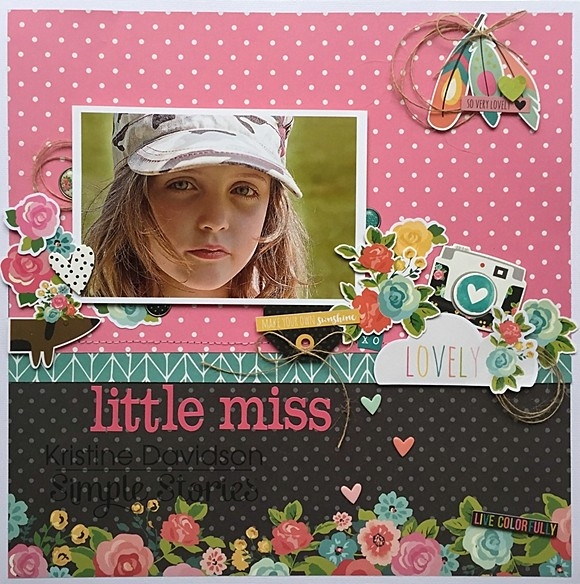
Hi there Chantalle with you today - sharing a layout I have created with the bold & beautiful Life in Color collection.  absolutely adore this collection and it’s amazing to see how it interpreted so many ways in projects I’ve seen online. I’ve gone with a bit of an irreverent feel, playing on those awesome drawn stars and edgy patterns.

Using the painted stroke Fundamental stickers as inspiration, I’ve used some brush stamps and pulled out some matching ink cubes. I then went about stamping in the top third of my page, creating a faux painted band. Just under that, I’ve also adhered some adorbs Life in Color Washi tape. Finally I machine stitched roughly over the strips to give a nice bit of texture.

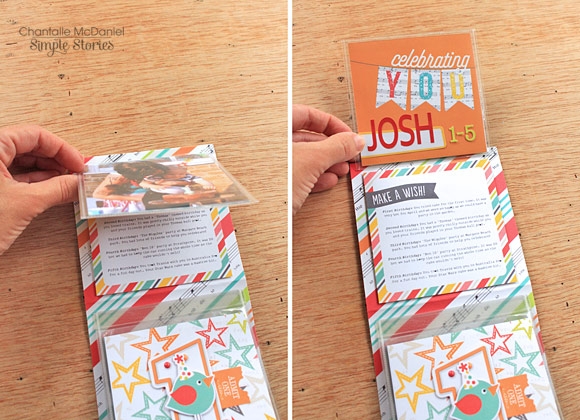
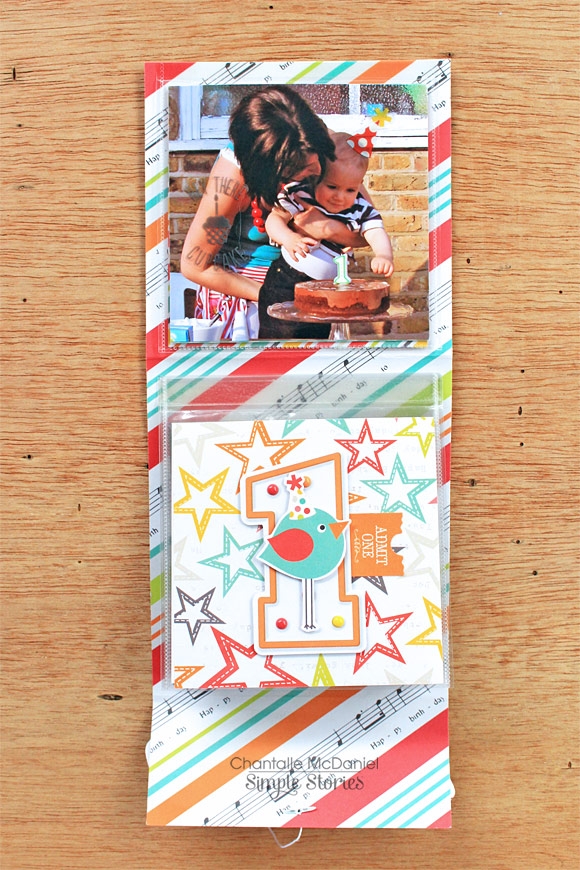
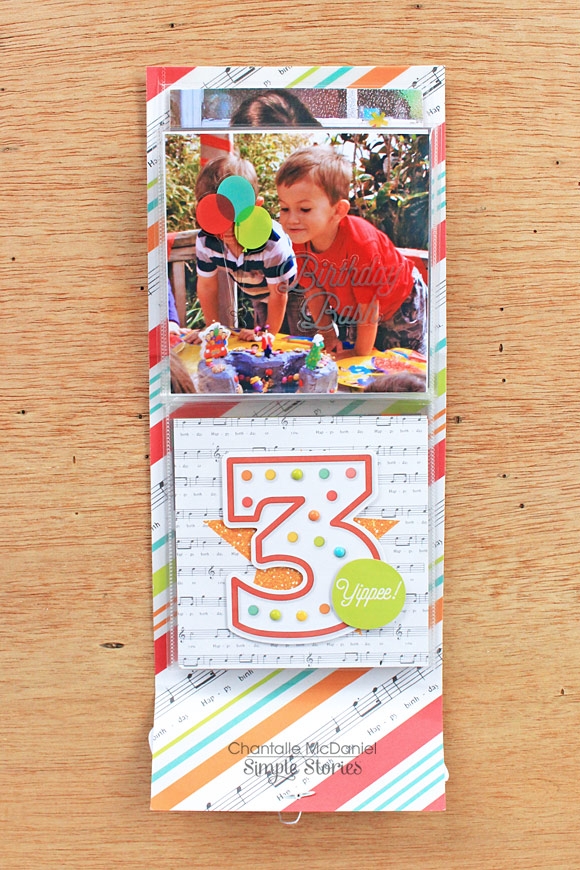
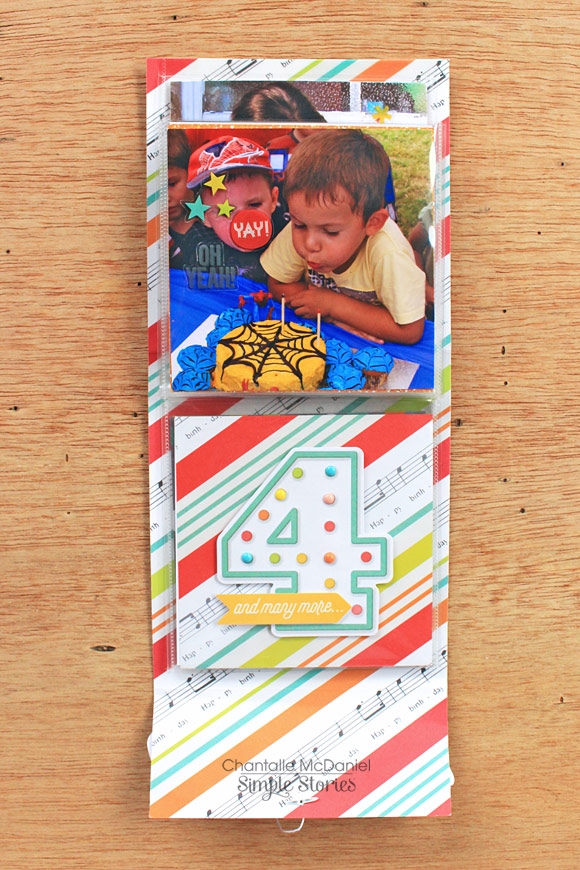
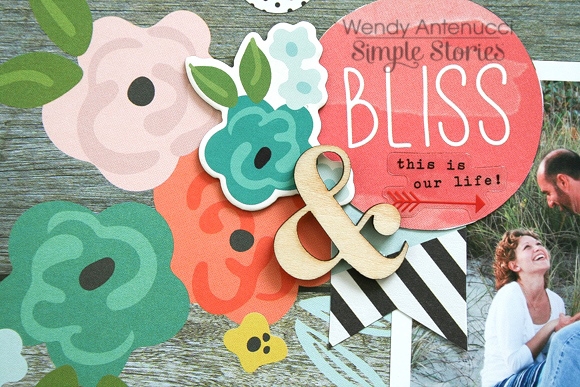
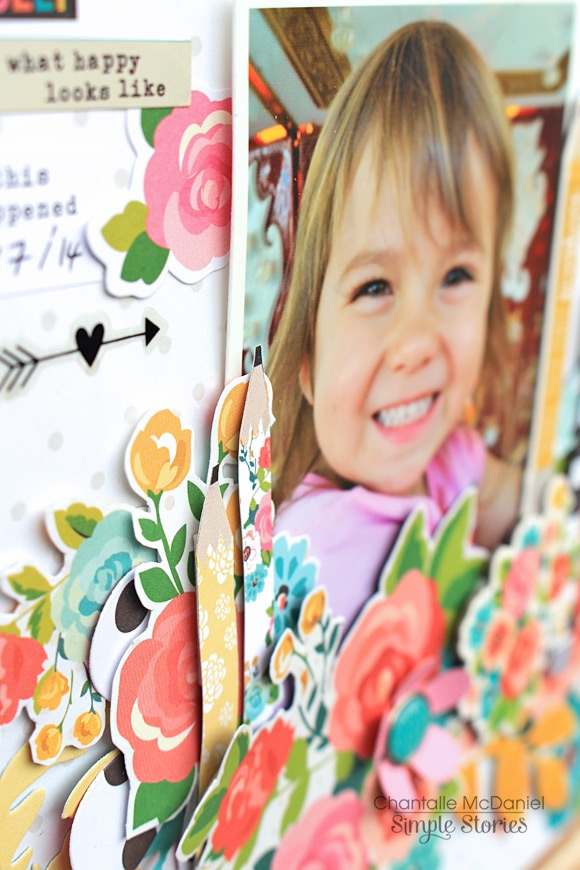
Decorative clips can be a fun way to add to a story plus hold a few layers in place!

This collection also has some of the BEST wood veneer shapes! (The paperclips have to be my fave.) Here I’ve used the ampersand in my title, along with the day of the week chipboard sticker. It’s fun to look past the obvious use for an embellishment, have a go at mixing the letter order in a word to come up with different options!

To get the dipped effect, I simply drew on the bottom half with a white Uni Posca marker. It has a decent opacity which is very useful when working with darker papers or embellishments.
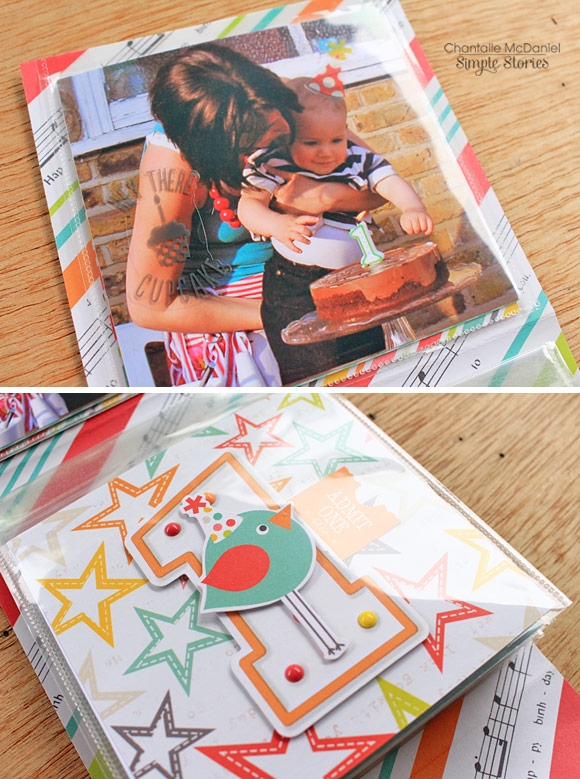
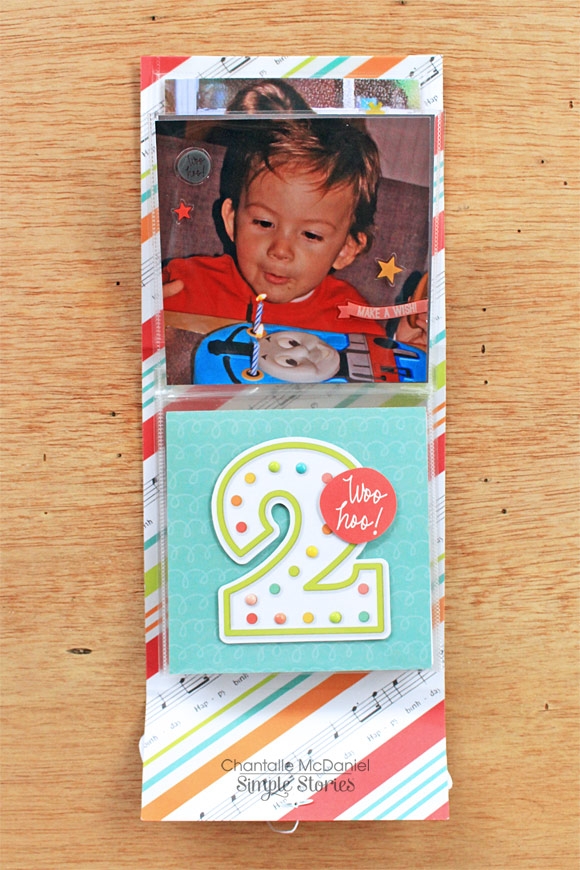
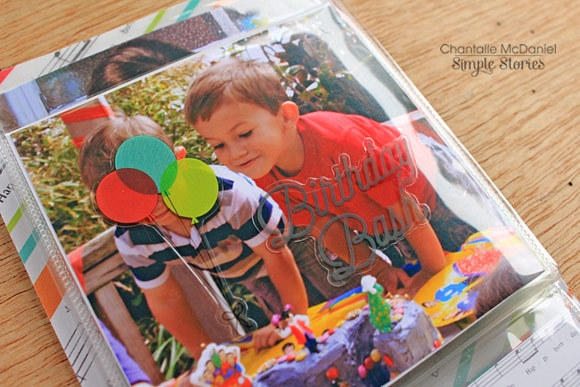
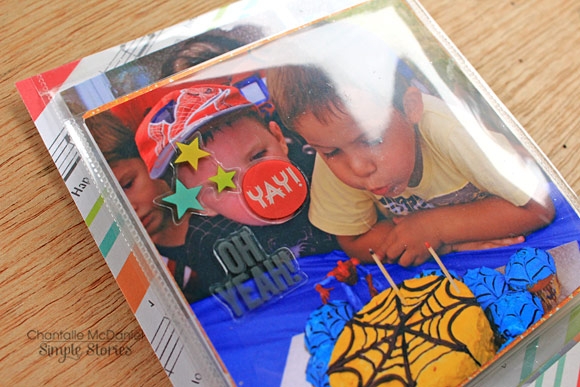
Layering fun!

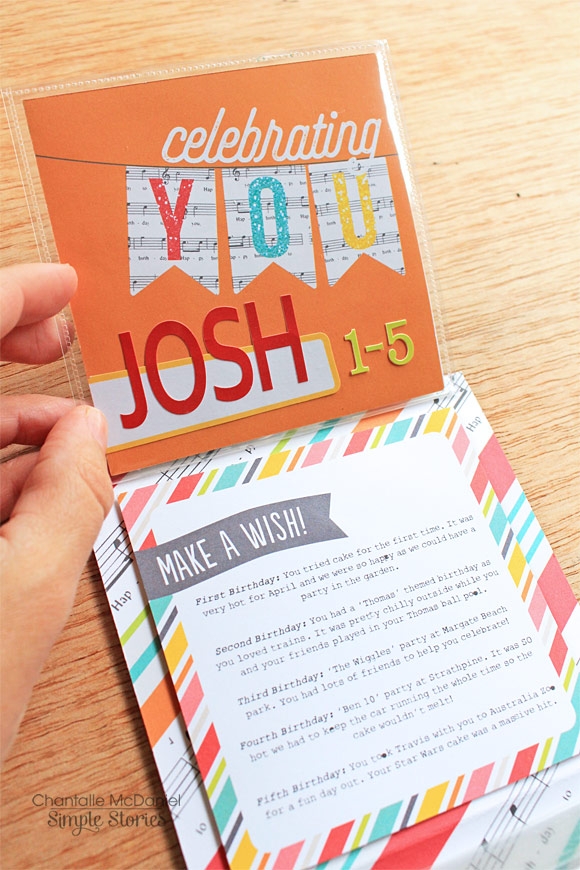
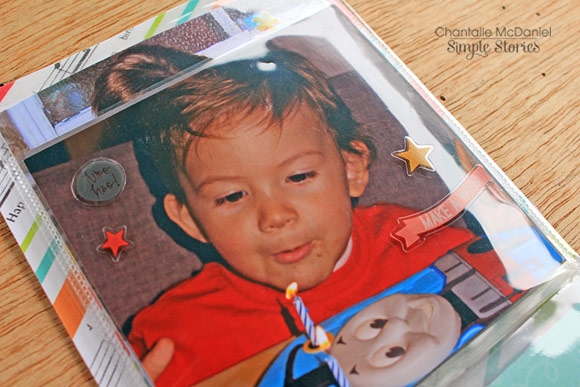
There’s that ca-uuute paperclip. Which actually works! LOVE!

Thank you so much for joining me today. Until next time!

Hi there Chantalle with you today - sharing a project I have created with the super fun ‘Let’s Party’. It’s a little birthday mini, created with a sheet of 12x12 HB2U which I’ve trimmed down to suit 4x4inch Sn@p cards inside clever little Sn@p Photo Flips. 

The front opens up (with the help of a couple of mini brads) to reveal info and pics of My DS’s birthdays between the ages of one and five.

The Photo Flips, which come in a variety pack. I used all the 4x4 ones and then used my Fuse Tool to resize some 4x6 ones down to the correct size. These Flips are awesome because the adhesive is already primed on the little sleeve, so all you have to do is peel and stick!

Under the first page, I have printed info of all the birthday info, directly onto a 4x4 Let’s Party Sn@p card. It’s pretty easy to do: I set the text in a text box, the same size as my card, in a word processing programme. Then I print out the page, tape my card in place over the top, using washi tape. I them make sure my text box has NO stroke and I send the page with the card adhered, through the printer again. This way I know for sure my text will be in the right spot and I can easily remove my card because I’ve used washi tape.

Hard to believe how quickly time has flown!

To represent the ages, I have used 'Let’s Party’ Pocket Pieces. They are double sided so if you are going to be using them in a Sn@p Album, you will be able to see it from both sides of the sleeve, which is pretty awesome. I’ve gone over with a bit of extra detail on the numbers, using coordinating enamel dots over the coloured spots.

I love using photo stickers. Sometimes I place them directly over the picture, but if I’m not feeling 100% confident about placement, popping them onto a sleeve makes them easy to move if you change your mind.

A low profile foam tape helps give the elements a bit of extra dimension, without bulking up your mini too much.

I remember this birthday was SO hot, we had his party in a park and we had to run the car with the air con on the entire time to keep the icing from melting! You can see how red their little faces were. 

Speaking of faces, Photo Stickers can also help protect privacy of party guests by being used over the ‘assistant-candle-blower’ hehe.

These cute 4x4 Sn@p cards finish off the album perfectly.

An idea like this could also work wonderfully for a birthday card with a hidden surprise inside!

Thank you so much for joining me today. Until next time!

Hey, Carpe Diem planner friends!  It’s Meka here today sharing my February planner setup. The pretty pinks and florals in the You & Me Simple Set are a must for February, and I love how well it all compliments my gorgeous #teampink Carpe Diem planner!

The Simple Stories designs coordinate so well across collections, so I couldn’t resist combining this kit with sprinkles of Life in Color, the Carpe Diem scrapbook collection, and Let’s Party.

My planner pockets are stuffed with washi paper tape, chipboard stickers, journaling cards, and adorable decorative clips. I transformed Bradz into something both decorative and functional by attaching them to paper clips. The secretarial pocket is full of everything I might need while planning throughout the week—most importantly the planner icon stickers. Those are a must for a quick, but effective way to make a task stand out on a page.

Beneath my “It’s a Brand New Day” transparent dashboard, I’ve inserted some floral paper trimmed down from a You and Me 12x12 scrapbook paper.  The front is minimally embellished with a super cute You and Me cardstock sticker typewriter and word labels.

The backside has a sturdy pocket I created from more papers from the kit. I’m using this pocket to house my memory-keeping goodies for the month.

For my monthly spread, I went with an insert from the Life in Color Planning Set. The pink pretty much sold me! Plus the fact that it’s larger than the regular Carpe Diem inserts makes it catch my eye and remind me to fill it in with cherished memories. I love how easy it is to turn the SN@P! 6x8 inserts from two to six holes to fit right in my Carpe Diem.

The monthly pages are decorated with stickers, Bits and Pieces, word labels, and washi paper tape from Life in Color and from Let’s Party. To accentuate February 14th, I used enamel dots for the first time ever…

I’m in love with the POP! from the inspirational Word Label Stickers (my planner must-have) layered over washi paper tape on opposite page corners - they help give the layout balance.  

I dug deep into the depths of my old school scrapbooking supplies to find this flower shaped brad. Now my Bits and Pieces tag is an interactive element. Eek, it swings! Something super special will be hiding here by month’s end!

I’ll leave you with my Friday daily layout. 

Most of my days are flexibly scheduled to-do lists, so I generally don’t need a large weekly spread (though I sure do love to decorate them.)  Daily pages help me focus on what I need to get done the day of, instead of being distracted and overwhelmed by the entire week’s lists. Stickers and washi paper tape shown are from the Carpe Diem line and from Life in Color. Since I’ve decorated this before the day of, I was sure to leave space for more tasks that arise.

Thanks for checking out the blog today. I hope you found some nuggets of inspiration for your February planning!

Hey everybody ! 
 
I am super excited to be with you today. The Life In Color collection is quickly becoming one of my favorites. It is so versatile making it perfect for any type of scrapbooking. Whether it be every day life, a vacation, or an event. This is why I am happy to be sharing some pocket pages with you today. 
 
 
In 2016 I am continuing to scrap our family life in a weekly format. Today I am going to share with you today week 3. The circle shaped embellishments were perfect for adding the week number. You could really use them for any type of numbering. I used a variety of washi tape, clear photo stickers, ect. to create this title card. 
 
 
The journaling cards in the SN@P pack are a perfect combination. Most of them being pre embellished for you with space left to journal and add your personal touch, as I did with these cards. 
 
 
Pocket pages are the perfect spot to tell those every day stories. For example, what happens around our kitchen table every day at 2 pm. The kids come home, snacks get put out, and we hang out and unwind before we start homework and chores. I placed this wood veneer ampersand onto my photo and I love how it turned out. 
 
 
Here is a look at the whole left side of my spread. 
 
 
I want to point out a couple things about the photos and cards shown here. The first one is the fun Month cards. They are a great woodgrained card and each one is so fun to embellish. Over the weekend the kids had fun having races down the hallway. I was able to add in 2 photos from that event. The smaller one I cropped so that I could embellish around the photo, I also added a strip of washi tape to the bottom. 
 
Week 3 really had some great moments. The left picture is all about my youngest figuring out how to tie his shoes all by himself. I decided to add in my journaling onto the photo and add some embellishments to the top. The last card I want to point out was the filler card that I made with the circle stickers and chipboard piece. As I was putting this spread together there seemed to be a theme of circles. The bowls, the bouncing balls, ect. So I wanted to add to it and I came up with this fun filler card. 


Moving on to the second page. 
 
 
The new Simple Stories Creative Team was announced during this week and of course that event was going to make it in the scrapbook. I added the photo of all of the talented ladies and put it on one side of my photo. I added some journaling and other embellishments to add my own personal touch. 
 
 
During those busy weeks I like to add a big 4x6 journaling card to fit in all the stories. I added some embellishments to the top and left lots of room for journaling. 
 
 
Thanks for visiting the blog today ! I hope that you have enjoyed a look at the new Life In Color collection as much as I have enjoyed creating with it. 

Hello everyone! It's Kristine with you today and It’s wonderful to be back this year to share layouts instead of pocket pages! I will be sharing pages of my nieces, nephews, my cats, and other family members. I love the Simple Stories Bits & Pieces packages and you'll notice a great deal of those cute diecuts on my pages.

The first layout I'm sharing with you today was created using the NEW Carpe Diem Scrapbooking Collection. The papers in this collection were created based on the Carpe Diem Planner Collection and if you have some pieces left over from your planner kit then you should really get this collection!

I started this page using the pink & black dot paper. I used it as my background and then combined it with the 6x12 paper from the Elements sheet. The picture of my niece was taken in the summer and I wanted to showcase the green and also the light pink in her hat. I used several bits & pieces and created layers with dimensional adhesive.

Adding layers and creating multi dimensional elements are always part of my pages.  The flowers, camera, and tag were used for this cluster. I often add a bit of twine to my projects and this layout was no exception!

I used the feathers from the Fundamentals Sticker sheet and created this little cluster on the top of my page. Just some extra elements wrapped in twine and a small Expression Sticker. 

I used the cloud with the saying " Lovely " and created my title with it. I added " Little Miss " with the alpha stickers on the Expressions Cardstock Sticker Sheet. I really love the contrast of pink of black. I often use white on my pages and adding a bit of black just makes me happy. I feel the colors just pop off the page!  

____________________________________

The next layout for you today was again created with the Carpe Diem Scrapbooking Collection. So many options with this collection for creating layouts or projects. I focused on the yellow and also a bit of turquoise. My nieces and I were playing outside one day and decided to get some paint and make a big mess outside on a huge canvas. We had a great time and that included a bit of paint on our faces! It was the best day!

Have I ever told you I love Bits & Pieces! Yes, this layout was based on tons of little diecuts and stickers. I couldn't help myself they're all so cute and went so well with Megan's happy face and turquoise paint splats!

I played with some diecuts and kept layering with chipboard, washi paper tape and of course dimensional adhesive. I added some journaling on a small piece of paper that was cut from a 4x6 journal card.  Don't be afraid to cut out shapes or adding pieces from the 3x4 or 4x6 cards on your pages.

I love sewing on my pages and wanted to show you that you can sew or create your own stitches without a sewing machine. Get yourself a ruler to keep things straight,  a black marker and draw a few lines on the edges of your paper to resemble stitches. It's that easy! Don't be afraid to mess it up, even real stitches aren't perfect ;-)

I wanted to create a fun title. I had so many little bits on this page that I wanted to keep it colorful and funky.  I added the "Captured" journal card behind the Yellow Dotted paper and added "such a" with the alpha stickers on the Expressions Cardstock Sticker Sheet. I added the word "fun" created with my silhouette cameo. I used the word " day " from the Fundamentals  Sticker Sheet that was combined with Brand New Day!  I was ok with breaking up that title to create my own.

You can see more of my work on my blog at KristineDavidson.com or Instagram @KristineDavidson

I hope you enjoyed my layouts and little details today and I'll be back next month!

Party on - that's exactly what I did, when the new Simple Stories Winter collections landed on my doorstep!  I was so excited to open each collection and check out all of the fun new designs.  So I got started right away, creating some new layouts, and I'm here to share two of them with you today.

The first layout uses the new Life In Color collection.  I love the saturated colors and embellishments in this collection.  I knew I wanted to create a grid design, so I used some of the cards from the Life In Color SN@P Pack, in the center of the layout.

Once the cards were in place, I placed my photo, and embellished.  I created my title with the letter stickers from the Expressions Cardstock Stickers sheet.  Since I wanted the focus on my grid design, I kept the photo, title and embellishments all in the center of the layout.


I wanted to bring in some more color and pattern, so I thought it would be fun to create a border on the outside edge of the layout, using the Washi Tape Paper.  I alternated the patterns and sizes from the Washi Tape Paper pack around the outside of the layout, and added machine stitching at the end, for some texture.


With 5 people in our family, we have plenty of birthdays throughout the year!  Our middle daughter's birthday is the day after Christmas, so i knew the Let's Party collection would be perfect for documenting one of her photos from last year's birthday.  I decided to use a black & white photo, because I really wanted the bright, happy colors from the collection to stand out.


I love the banners included on the Fundamentals Cardstock Stickers sheet and in the Bits & Pieces pack.  So I decided to make those a part of the design and title.  And the chipboard and sticker candle embellishments are so cute!  I used 7 of those on the layout to represent my daughter's age.


I wanted to also continue the confetti look at the bottom of the patterned paper, I used for the background, so I added a few stickers, enamel dots and Bradz from the collection.  I finished the layout, by cutting the word Seven, as a border from the Teal Streamers/Orange Stripes paper.


I'm sure you've had a chance to check out all of the new Winter collections on the Blog!  Which is your favorite?  I don't think I can choose just one!!  If you're ready to get these collections in your hands, keep an eye out -  theyre shipping to retailers now!

Hi there, Simple Stories friends!  It's bittersweet to be sharing my final project as a part of the Simple Stories Design Team; it has been an awesome four years (wow!) sharing with all of you!

Today I have a couple of quick cards using the precious "Let's Party" Collection.  I started with a 12X12 sheet of white cardstock, cut it in half and set out to make two 6X6 cards...one for boy and one for girl:
 

For the girl card, I cut a base paper into a 5.5" square and then added the 4X6 SN@P! card to the center of it with foam adhesive tape.
 

To the top of the 4X6 card, one of the 4X4 cards was added.  The cute girl with balloons die cut ephemera piece was attached along the left side with foam adhesive.
 

Various die-cut sentiments and enamel brads were added, as well as the smallest enamel dots to embellish the dress front.
 

I used a 2.5" circle and 3" scallop die to cut the shapes from two of the patterned papers. The pieces were layered together, cut in half and then adhered to the left side of the 4X6 card.
 

The boy card started with a layering of two of the pattered papers that were matted together.

The SN@P! journal card was trimmed into a square size and then corner rounded on the bottom before it was added with foam adhesive tape.  The small chipboard frame was glued over the 2X2 SN@P! square sentiment and then it was attached to the journal card.
 

Various die-cuts and chipboard stickers were used to finish up the colorful design!

Again, it has been my pleasure to be a part of such a wonderful design team and to help represent a company that stays tapped into the papercrafter's heart!

Hi everyone!
 
Teri here, and I'm excited to share with you some cards I created with Simple Stories' Let's Party collectionI just love the fun feel of this collection. You just can't go wrong with a collection that is all about celebrations!  And since birthday cards are some of the cards I find myself short but needing the most, I decided to use to make some fun and happy birthday cards! Need to make some yourself? These would be easy to recreate! 
 
 
I had fun with this first card.
 
 
I just love the happy little party kids that show up through the Let's Party collection. They are just so cute!
So I wanted to build a card that really highlighted them. Since the two of them are printed on a SN@P! card, I wanted to give them a little extra pop with some embellishments. I added some enamel dots to both of them, and then I placed a chipboard star on one of the balloons held by the little girl.
 
 
To round out the scene, I added a clustering of embellishments from the Let's Party collection to the left and right of the kids. The cool thing about Simple Stories' collections? Everything matches color wise! That makes mixing and matching different types of products easy! I love that.
 
Here's another birthday card! 
 
 
I think this one could easily be used as a congratulations card or a card to celebrate something like a work anniversary. Just remove the "HB2U" chipboard sticker and replace it with something else from the Let's Party collection.  To  really make that party hat at the bottom of the card pop, I simply added an enamel dot to the pompom. If you wanted to try this at home and add even more pop, consider applying a coat of clear glaze to the hat. It will really make it stand out.


There's just something about the cow on this card.
 
 
He sure makes me chuckle! How about you?!  To bump up the party feel here, I added the balloons and steamers. To make that top balloon stand out, I plopped a star Bradz right onto it. Easy peasy! 
 
 
This last card is just a simple card that could be used as a birthday card.
 
 
I was struck by all the circles in the Let's Party collection so I clustered a bunch them together. To round out the cluster, I added some stars, enamel dots and a couple Bradz.
 
 
And how about those glitter patterned paper pieces behind the circles? Are they glitter? Nope. They are SN@P! cards with printed glitter designs. I love them because you get the look of glitter without the mess of glitter. Totally dig that.
 
Thanks for stopping by today!


Simple Stories has done it again.

They've gone and designed a line that I am smitten with...Life in Color!  Simple, graphic details paired with on trend embellishments + colors made my heart skip a beat when I saw it in person. As is my 'norm', I kept this layout simple and focused on the photo + words. This is a HUGE year for our family...our girl will be applying to colleges later this year (Senior Year?! ACK!) and she earned a lead in the spring musical! It is a time that we all intend to soak up moments together and enjoy family life. I have loved every moment working alongside the team at Simple Stories, but also look forward to hanging on to every minute I can with my girl before she begins her new adventure!!

I could not possibly love the diagonal stripe paper more..but I wanted to leave room for my journaling, so I just used a corner of it behind my photo. The colors in this collection pair well with just about ANYTHING. I began my journaling on the actual photo and finished it on the cardstock.

I added various stickers + die cuts along the cut edge of the diagonal paper, overlapping some onto the photo. The silver foil in the die cuts package is LOVELY!! I am also digging the die cut labels that are in this line...I am a long time fan of labels, so this is perfect!

One of my favorite items included in Simple Stories lines are the chipboard frames. I rarely use them to house a photo, but love to cut them in half and use along the edge of a page, or next to a photo. I used clear photo stickers within the frame and on top of it to add a bit of interest near the bottom.

Again, thank you to Simple Stories (and their blog readers!) for the past few years!! I will remain one of their biggest fans!!
Nicole =)

Supplies

Hello Simple Stories fans!! I'm thrilled to be sharing my layouts with you but sad that this is my last post here.  I've been so lucky to have designed for SS for the past few years. It's been a dream!!  I'm so excited to see the beautiful creations that the new 2016 team will be sharing.
 
Today I'd like to share with you some layouts that I created for the SS booth at CHA.  The first one is titled "Happy 13th Birthday". I used the new Let's Party collection. Isn't it fun & colourful?!
 
 
I used many of the Bits & Pieces to add some interest to my page.  I used some foam squares to adhere them which helps to add dimension to the page. 
 
 
The wording of some of the diecuts and phrases are perfect for both male & females.
 
 
I did some hand journaling on one of the blank diecuts and added some coloured clear photo stickers. I love the coloured ones that they've started coming out with! So fun!
 
 
For the title section I used some of the number die cuts (Pocket Pieces)and added a few more little bits & pieces over top of them.
 
_____________________
 
I created another layout using the Carpe Diem collection called "I love being your Mom".
 
I just love the big white text on the background page.  I'd be happy just framing it and putting it up on the wall!


I love the feathers in this collection and clustered them together in various places on my layout.
 
 
I also added several die cuts & chipboard pieces for visual interest. Layering is always a great way to draw focus to a page.
 
 
I used a fun photo clip on my layout - for no other reason than to look pretty!
 
 
Some stickers, enamel dots, chipboard pieces and clear photo stickers can also be found on my page. These are some of my favourite embellishments!
 
 
Thanks for stopping by!

Hi Everyone!  I hope your New Year is off to a great start.  I thought I'd share some travel pages I've been working on with the new You Are Here! collection.  Simple Stories came up with the best idea in this set... they made die cut Pocket Pieces which are printed on the front and back!

That means you can make all of the see-through pockets you want without having to worry about what's showing on the back.  I can't tell you how excited I am about this! 

There are many different shapes from arrows to pink flamingos.   Most of the designs are a little different on each side, so there is some variety.  Having a design on the back side makes working with see-through pockets so much easier.

On this mini 4x6 page, the die cut says "paradise" on one side, and is a map when it's flipped over.  I used my fuse tool to add a few sequins as well.

The entire You Are Here collection is so fun to work with, and full of gorgeous colors and designs.  I hope you try it out for your next vacation.  Thanks for stopping by today!

Supplies

Hi Simple Stories fans, it's Audrey! Is everybody as excited about the new CHA winter releases as I am? I just love everything in the new lines! The hardest part is figuring out what to play with first. But as a cardmaker, I couldn't resist the new Let's Party collection. So perfect for birthday cards, and as every cardmaker knows.... you can never have too many of them. AudreyPettit LetsParty HipHipHooray Today I have two cards to share, made with the Let's Party collection kit and accessories. One for a birthday girl, and one for a birthday boy. These cards work great all on their own, or also make a wonderful set for yourself or for a gift. First up, the birthday girl. AudreyPettit LetsParty HipHipHooray2 I love layering papers and elements, and Simple Stories makes it so easy with all their amazing embellishments. On both cards today, I've put together some sweet little birthday scenes, thanks to the help of some die cuts, stickers, and chipboard frames. They look really fancy, but since everything is already pre-made, designs like these couldn't be easier. AudreyPettit LetsParty HipHipHooray3 The sentiment banner, girl, and party accents are all from the Bits & Pieces die cut pack. I added a simple twine bow to enhance the girly feel, and then dressed the scene up with a few stickers. Since the stickers are clear, I was able to add them directly onto the die cut balloons for some added fun. AudreyPettit LetsParty SpecialDayCard The boy version is similar in style. Another fun party scene built in and around another adorable chipboard frame. AudreyPettit LetsParty SpecialDayCard2 The twine bow is replaced by printed banners on the chipboard frame, in keeping with a more masculine design. I added machine stitching to this card, too, and a few enamel dots for extra detail. Such a quick and easy way to call extra attention to your design's focal point. AudreyPettit LetsParty SpecialDayCard3 Hope I've given you some ideas for our new Let's Party collection! Thanks for stopping by! 

Hey there friends!!

I'm so happy to share this new layout I put together!  And let me tell you why I'm happy… I loved the Carpe Diem planners & accessories when they first came out, but I'm a scrapbooker at heart.  Now with the Carpe Diem scrapbook collection I have all of those awesome bright colors and patterns to use on my pages!  

So here we go…a layout featuring Carpe Diem 

These papers and embellishments worked perfectly for a weekend outing with my family.  

The Bits & Pieces are always one of my favorite embellishments in the collections - they're perfect for lots of layering.

The Element papers are some of my favorites to use on layouts because they make great titles and bases.  I just used the 4x12 “Carpe Diem” portion of the  2x12, 4x12 & 6x12 Element paper as the starting point for my title and added stickers and Bits & Pieces.  I love the teal!

If you're looking for a general, happy, all purpose collection, definitely check out Carpe Diem!  Thanks for stopping by and happy crafting!!!

Wendy here today to share some inspiration from the brand new Life in Color collection.  I used this collection to capture some everyday moments in our life; there were so many pieces and colors that worked for any topic from a fun moment with my husband to some selfies on Dumbo!
 
 
I just couldn't resist grabbing the fun Here and Now paper with all the Polaroids to begin creating with.  This paper was perfect for all the many selfies I have taken with my boys while we ride Dumbo over and over again!  I began my page with some small wallet size photos placed throughout the page and then I began to decorate and bring the page to life.
 
 
I loved using the bold Life chipboard piece and I paired this boldness with a 2x2 Sn@p! card with the month of the pics.  One of the photo stickers allowed me to add in a thought without detracting from my grouping.
 
 
My next piece was the Hello Bit & Piece that added a pop with the black and it added to my title to make it more comprehensive and led your eyes through the entire layout.  I also took some Bits & Pieces and layered them to decorate the other Polaroid adding some interest and color.
 
 
My final touch were some of the chipboard binder clips that I "attached" my photos with giving each photo some pizazz with the shiny clips and forming a visual triangle of sparkle.
 
My next layout, Bliss Today, began with this picture I had just taken at our photo shoot and the 4x4 Sn@p! card that expressed love in the bold black.  
 
 
I nestled my "photo block" on the lovely woodgrain paper to match the sand color.  I loved the triangle pieces which I used to bring in some color that matched the grass and pulled your eyes from top to bottom.  By adding the darker colors I was able to get away with the pink (which I thought was lovely), but which my husband might have fussed about.
 
 
I dressed up the black Sn@p! card with some Bits & Pieces and added to my title.  I loved the sentiment on the 4x6 card which I cut out and used to bring your eyes down the paper.  A few scattered circular pieces carried throughout the layout also helped carry your eyes through the page and make everything cohesive.
 
 
A grouping at the bottom of the page incorporating the triangles, flowers, black, and circular elements continued the trend of bringing your eyes through the page.
 
 
And one last look at what gave my page its title and started the circular downward descent to tie the page together and create a lovely layout.
 
Thank you for joining me today, I hope you are as excited about the Life in Color collection as I am! 
Life is colorful indeed! And there is truly no better way to showcase that than with Life in Color, one of Simple Stories' newest collections. I have both a boy and girl and have used this collection for both of those children. I have used it in pocket pages, single pages, with lots of pictures and with only one picture. This is going to be one of those timeless classics that you can use throughout the years and still love, I'm sure of it!
 
 
Snapshots of a Happy Life. This is one happy child! She is often smiling, laughing, joking. This layout shares that laughter in her eyes. The 12x4 elements and 12x2 elements don't just have to be for pocket pages. Many of us on the design team have used them on our layouts. Here is another example. I trimmed this one down a tad and used it as a banner header for the page.
 
I created a photo collage in Photoshop with the three main pictures and left white blank spaces that I then filled in with all kinds of embellishments that come with the kit; frames, stickers, chipboard, washi. Fun, happy embellishments that reflect the fun, happy kid in the pictures.
 
 
You truly get your money's with and a huge selection of option with Simple Stories' products. Don't like chipboard, try the die cuts. Love washi, got that! There is a plethora of goodies to choose from and it all works so well on just about any paper crafting project you can dream up!
 
 
Here again is another use of yet another 12 inch Element, this time the 12x6 piece which I used in a pocket page. These larger pieces are great for journaling and smaller pictures as I have done here.
 
 
The right hand page of this spread is mostly pictures. I wouldn't think of using this collection with swimming normally but the colors in the collection compliment the colors in my pictures so well. And with the general life embellishments, it was so easy to support the topic.
 
 
This left hand side of the pocket spread includes two more interactive elements; confetti pocket and sequins. I could have included more pictures or more of the fantastic 4x3 cards but I like the white space that the see through elements create in a busy spread like this.
 
 
He's not the only swimmer, my daughter swims too and this is a page about her first 100 yard fly. She was 7 years old and just flew through the water. Butterfly is a tough stroke to pull together and she did a remarkable job of it. I have had these pictures printed for a long time (it was almost 2 years ago) and just couldn't find the right papers to scrapbook this momentous occasion. Until I saw Life in Color!
 
 
With the pictures and "main" part of the layout up above, I needed to create some balance below. A frame from the patterned paper and a 4x3 journal card from the SN@P! Pack were the perfect balance and provided a great place for my journaling.
 
 
There you have it my friends! Life in Color three ways! With so many more ways to come! I have already created an additional 4 layouts with this collection, all of which I'm pleased as pie with!  Look at all those exclamation marks, there really is so much to love about Life in Color. Here's hoping you love this collection as much as I do!
 

Supplies

We're thrilled to introduce you to the 2016 Creative Team!  Look forward to seeing work from these talented ladies beginning in February!

Hello! Chantalle (www.copasetique.blogspot.com.au) with you today and I’m so excited to be sharing a layout using the new Carpe Diem scrapbook collection!  Live Colorfully, Erin was inspired by the beautiful blooms in this collection. I’m so glad this line has expanded from planners into a scrapbooking collection!

Using a 12x12 sheet of ‘Don’t Mind Me’ as a base, I looked through all the papers and elements in this collection and pulled out everything that had the flower print. I wanted to carry on the floral theme to both frame and emphasise the photo of my Daughter riding the carousel.

By using both chipboard and paper elements, I was able to build up some nice layers and height contrast. So that the print didn’t blend in to itself too much, I also added a few plain floral elements which I cut using some metal dies I have in my stash.

Building layers can really use up lots of foam tape! I like to add height (especially with larger elements) by using some cardboard instead. It is easily found around the home. Thinner card can also be excellent to provide support for hand-cut items, like these pencils. They looked a little out of shape with foam tape, so I backed them with card first and then added foam tape to the card instead.

They now stand nice and straight on my page.

I hope you enjoy creating with Carpe Diem as much as I have!

Hey everyone, Amy here to share a layout I created using the new You Are Here line.  It is such a fun line, perfect for all your travel pictures.  I wasted no time in using it to highlight a family photo we took on our trip to Punta Cana.


I added a row of my favorite chipboard frames under the photo for my journaling, title and to highlight some of the cute bits and pieces from the line.


Make sure to check out all the new lines Simple Stories has created, they are all amazing!  

Pages