Howdy!  Layle here with you today.  Welcome to day 4 of the Simple Stories & Tombow Product Swap! 

Both design teams have swapped products and will be sharing on our blogs all week long.  Join us for some great inspiration as well as a chance to win a prize package from both Tombow & Simple Stories! 

Today design team member Marie Lottermoser joins us with a super useful altered notebook and a layout -
______________________________

Hi Everyone, Marie here today to share how I used my new Pumpkin Spice collection kit.  I have to be honest, when a new collection comes along there is so much in the pack I usually end up using only a small portion of it.  This month I decided to go all out and try to use as much of the new Pumpkin Spice collection as possible.
 
 
I started by making my 6x8" Pocket Page spreads to go into my Sn@p! Binder.  I love fall, and it's nice to be documenting football games, falling leaves, and pumpkin everything right now. 
 
 
Next, I decided to make some greeting cards.  I cut and folded patterned paper to make the cards, and then used foam tabs by Tombow, to pop up some die cuts to give my cards extra dimension.
 
 
I made envelopes to match my cards using some extra sheets of patterned paper.  I simply traced an envelope pattern straight on to the paper, and then cut them out and folded them.
 
 
The last thing I would want is for my envelopes to come apart when they are in the mail, so to keep them held together I chose Tombow's extreme adhesive to create a strong, permanent bond.
 
 
I finished by making a gift card holder, with more foam tabs to pop up the coffee cup on the front.  I can't think of a more fitting gift for this time of  year, than a gift card to a coffee shop.
 
 
It feels great to use up so many of my supplies, and know that some friends have a little surprise heading for their mailbox.
 
 
Thanks so much for joining me today.  Happy Fall!
 
______________________________

Now for even more fun!!  Enter via the Rafflecopter widget below and we'll draw one lucky winner on Sunday to win a Claus & Co. collection pack!  

a Rafflecopter giveaway

After you enter, head on over to the Tombow blog to see what their team has created.  Make sure to enter there as well - they're giving away an adhesives package!   

Want to follow Tombow and keep up with all of their great projects & products?  Here you go!

Website: http://tombowusa.com

Facebook: https://www.facebook.com/tombowusa

Instagram: tombowusa

Blog: http://blog.tombowusa.com

Join us again here tomorrow for more inspiring projects!

Supplies

Howdy!  Layle here with you today.  Welcome to day 3 of the Simple Stories & Tombow Product Swap! 

Both design teams have swapped products and will be sharing on our blogs all week long.  Join us for some great inspiration as well as a chance to win a prize package from both Tombow & Simple Stories! 

Today design team member Rebecca Keppel joins us with a super useful altered notebook and a layout -
______________________________

Hi All! Rebecca here! The Simple Stories team had the pleasure of swapping goodies with the Tombow adhesives team this month.  I received an assortment of Tombow adhesives and a set of Dual Tip Markers. For my first project I created an altered notebook. I bought a composition book from the Dollar Store, pulled out my Simple Stories We Are...Family collection and the several Tombow adhesives. I got to work changing it from a plain old black and white notebook into this...
 
 
I used the Tombow Mono Liquid Glue to cover the front and back with patterned paper.
 
 
I used Tombow Xtreme to apply cards and smaller pieces of paper.
 
 
I added layers to the front, back...
 
 
and inside.
 
 
I love how quick and easy it is to turn a plain composition book into a personalized gift with some pretty Simple Stories paper and stickers and some good adhesive.
 
 
I also created a layout this time using both the Tombow adhesives and markers.
 
 
I stamped the hot air balloons and colored them in with the Dual Tip Markers.
 
 
I used the Tombow Stamp Runner to adhere elements to my page. I used it as a roller on the larger pieces like the one on the right and as the Stamper to stamp out a square adhesive on the smaller elements like the small cloud.
 
 
For some extra dimension I used Tombow 3D Foam Tabs.
 
 
I like how they come in two sizes for different size embellishments or die cuts.
 
 
______________________________

Now for even more fun!!  Enter via the Rafflecopter widget below and we'll draw one lucky winner on Sunday to win a Claus & Co. collection pack!  

a Rafflecopter giveaway

After you enter, head on over to the Tombow blog to see what their team has created.  Make sure to enter there as well - they're giving away an adhesives package!   

Want to follow Tombow and keep up with all of their great projects & products?  Here you go!

Website: http://tombowusa.com

Facebook: https://www.facebook.com/tombowusa

Instagram: tombowusa

Blog: http://blog.tombowusa.com

Join us again here tomorrow for more inspiring projects!

Supplies

Howdy!  Layle here with you today.  We've got a fun week planned for you - a Simple Stories & Tombow Product Swap! 

Both design teams have swapped products and will be sharing on our blogs all week long.  Join us for some great inspiration as well as a chance to win a prize package from both Tombow & Simple Stories! 

Today design team member Vicki Boutin joins us with two fun cards -

______________________________

Hey there friends!  So happy to be apart of the Tombow/Simple Stories Swap!  I am a girl who likes to find time to be creative even if there isn’t much time available!  One of the ways I have mastered crafting on the fly is creating simple cards!  So today I made two super cute, super quick cards and focused on the Tombow Dual Brush Pens.  The cards were quick to make and the addition of the pens also helped feed my technique-y soul!!!

Here are the pens.  They are Water-based, blend with ease and the colors are bright and fun.

These are the Tombow items I gathered to create two cards using the We Are Family Collection!

I used the pens to add a little color to the We Are Family Bit & Pieces on this card.  It’s a fun way to highlight and customize premade embellishments.

Here is the completed card.  

For this card, I used a little Pointillism and created a pattern with two shades of green and a series of dots!

Take a look at the completed card.

Some We Are Family paper, Bits & Pieces and embellishments and Tombow products and lickety split 2 cards in 20 mins or less!!  LOVE it!!

 
Thanks for stopping by!!!  Hope you can grab 20 minutes in your day and feed that creative soul!!!
 
______________________________

Now for even more fun!!  Enter via the Rafflecopter widget below and we'll draw one lucky winner on Sunday to win a Claus & Co. collection pack!  

a Rafflecopter giveaway

After you enter, head on over to the Tombow blog to see what their team has created.  Make sure to enter there as well - they're giving away an adhesives package!   

Want to follow Tombow and keep up with all of their great projects & products?  Here you go!

Website: http://tombowusa.com

Facebook: https://www.facebook.com/tombowusa

Instagram: tombowusa

Blog: http://blog.tombowusa.com

Join us again here tomorrow for more inspiring projects!

Howdy!  Layle here with you today.  We've got a fun week planned for you - a Simple Stories & Tombow Product Swap! 

Both design teams have swapped products and will be sharing on our blogs all week long.  Join us for some great inspiration as well as a chance to win a prize package from both Tombow & Simple Stories! 

Today design team member Shellye McDaniel joins us with this awesome holiday planner -


Hello!  Shellye here to share my version of the "Claus & Co." Planner featuring many of the goodies from the collection, as well as several of the great adhesive products from Tombow!  Because the Holiday SN@P! Album is nice and large, it will work double-duty as a holiday planner and as a December-daily-style album...I cannot wait to fill it up!  To get a jump-start, I decided to have all of the cute pre-planned pages in place and then added a few embellishments that I'll share today.

To begin, I cut the "Oh Joy" (side B) paper down so that it covered the chipboard portion of the album front.  I used the Tombow Xtreme for attachment.  When you want something to really stay PUT, the Xtreme adhesive is what to reach for!
 

I wanted to create a fun 'bridge' between the fabric binding of the album and the patterned paper, so I used various sized circle dies to cut the motifs from the "I Believe" paper.  The circle sizes ranged from 1.5" to 2". 
 

After deciding placement for the circles and other embellishments, I used the 3D Foam Tabs, Multi and Aqua Mono Liquid Glue and Stamp Runner to adhere the different pieces.  The Mono Glue was perfect for adding the Wood Veneer pieces and small sequins (from my stash).

Here is a look at the completed album front:

As I said earlier, I did go ahead and add all of the inner workings to the album: the Claus & Co. SN@P! Journal Pages, Holiday Planning Inserts and the clear pocket pages that come with the album.  I mixed in some fun embellishments to some of the pages:
 

The introductory page to the album is the "Holiday Planner" tabbed page from the "Holiday Planning Inserts" packet.  I decorated it with some of the leftover circles that I didn't use on the cover.  Notice the two half-circles at the top and bottom...I just cut one of the 2" circles in half and glued it in place with the Stamp Runner!  The holly berry die-cuts were attached with 3D Foam Tabs.
 

Here I dressed up the banner insert page with one of the 4X4 Elements.  Again, I used the Mono Liquid Glue for attaching the sequins.
 

3D Foam Tabs were used when adding stickers and die-cut pieces.  I found the the Multi or Aqua Mono Liquid Glues worked best for the veneers.

The decorative insert pages are great places to add a splash of personality!  I tried to leave the pages, where a lot of writing would be done, without too much bulk so writing would be easier when the time came.
 

One last peek at the album cover.  I'm so in love with how this turned out...what fun! 
Thanks for letting me share it with you today!
______________________________

Now for even more fun!!  Enter via the Rafflecopter widget below and we'll draw one lucky winner on Sunday to win a Claus & Co. collection pack!  

a Rafflecopter giveaway

After you enter, head on over to the Tombow blog to see what their team has created.  Make sure to enter there as well - they're giving away an adhesives package!   

Want to follow Tombow and keep up with all of their great projects & products?  Here you go!

Website: http://tombowusa.com

Facebook: https://www.facebook.com/tombowusa

Instagram: tombowusa

Blog: http://blog.tombowusa.com

Join us again here tomorrow for more inspiring projects!

As I sat down to digital scrap and make my product decisions, I initially skipped right over the newly released Frankie and Friends digital collection thinking "Oh, I'll cover that next month when we're closer to Halloween!".  And then I looked at the calendar.  And this post is happening in October, which means no better time than the present to work with this frightfully delightful collection!  
 
I will admit that I am not a HUGE fan of Halloween in general, I participate in all the fun activities for the sake of my kids and I cannot resist a scrapbook product with traditional Halloween colors - and this one definitely fit that bill for me. 
 
I hadn't gotten around to getting my pictures from last year scrapped, so it worked out perfectly to use this super cute collection to showcase our pumpkin carving day.  Which really means our annual 'mom carves all the pumpkins herself' day!    I'm not quite ready to unleash them with the knives and saws just yet. 
 
 
I was really excited to use the digital 6x8 Pocket Page templates for this spread, too!  This is really the perfect size if you don't have a whole slew of pictures or for little special events that you can use for inserts in your full pocket album or even to make a 6x8 album! 
 
 
I kept my embellishments pretty basic to allow the focus to fall on my pictures and the awesome card designs.  One of my favorite favorite things about digital scrapping (which I've probably repeated a million times by now!) is that I can take bigger cards, or papers, or embellishments and crop them, or shrink them, or manipulate them in any way that suits my desire to fit them into a spot they might not have originally fit in.  And then I can just undo anything I've done to it and no damage done whatsoever!  It's brilliant.  I have such a hard time chopping up my paper supplies.
 
 
And with that, I'm out!  Happy Halloween (since you know, it IS this month and all!)!
Hi everyone! Allison Davis here with a layout using the delicious Pumpkin Spice collection and I have another sketch to share with you that features both traditional scrapbooking and Pocket Pages. 
 
 
You can download the full sketch with measurements and placements here.
 
The left side of the sketch follows a traditional style of scrapbook design while the right side mixes photos and cards with the SN@P! Pocket Page, Design 3. 
 
Here is my layout based on the sketch:

I always look forward to this time of year! It’s the “Pumpkin-flavored-everything” season and I love it! I have been trying for years to get my youngest son, Jackson, to try pumpkin flavored things and he refused. I finally, just this last weekend, got him to try pumpkin spice cookies with white chocolate chips. Needless to say, he’s hooked. 
 
 
I also love our annual trip in the fall to the pumpkin patch. Sadly, my boys have outgrown it so this will be the first year that we don’t go. I’m reminiscing by using some older pumpkin patch photos and what better collection to use than Pumpkin Spice!
 
 
Sometime I like to really play up the theme of my layouts by creating a scene on the page. 
 
 
I used the trees, wooden sign, pumpkins, a banner, and clouds to create my own little pumpkin patch on the layout. 


On the right page I used photos, a 6 x 4” card, the 3 x 4” chipboard frames, and 3 x 4” cards with the SN@P! Pocket Page, Design 3.
 
 
The “Pumpkin Spice” card was one of my instant favorites in this collection and I knew that I had to use it. I added some sticker flowers, enamels dots, a word sticker, and some hand stitching to the pumpkin to give it some dimension. 
 
 
On the top photo I used the “so very grateful” photo overlay and added a few flower stickers and word stickers.
 
 
In the middle row of 3 x 4” pockets I used chipboard frames and 3 x 4” cards. The chipboard frames are another favorite of mine in this collection.
 
 
I added more hand stitching to outline the pumpkin. I love using stitching to add some more details to the cards.
 
 
I added another photo overlay to one of the bottom photos and added another word sticker to the top of it. 
 
I hope everyone enjoys using the new sketch! Happy Fall! 

Hello, again!   This is Amber, founder and creative director of Simple Stories.  I'm here for another installment of my monthly Document IT blog feature.  

This month was all about decorating my planner for fall.  I loved using our Pumpkin Spice collection to do so; even though it's still in the mid 80's here, the warm colors and seasonal embellishments in the collection really got me excited for fall!  The yellow color of the September Life Documented Monthly Dividers even coordinated perfectly - I love that!  

This month I included several of the Pumpkin Spice SN@P! Journal Pages – these coordinate perfectly with our 6x8 SN@P! Binders and planner products so I simply inserted a few right in my planner.  My favorite of the Journal Pages is the book mark; I inserted it between the monthly dividers.  The front has a fun saying while the back is a quick list of all that I’m gratefull for – I listed the people in my life that I love! 

Like last month, I chose a paper from the Pumpkin Spice collection and covered the back of the month to coordinate with this month's overall look and feel; then I added a 4x6 journal card with embellishments.  The Life Documented Monthly Dividers are so neutral, I love that I can easily customize and decorate my planner as I need.   

At the end of the year I can't wait to combine all of the monthly pages and a few photos of that month for a quick year-at-glance look at our year and memories.

I love the Bits and Pieces to help add personality to the pages – this is my favorite part!

I also created my own insert by simply cutting from a 12x12 paper and using an existing journal page as a cutting and hole punch template – easy peasy! 

FREE PRINTABLES!

Now we get to the really fun part!  We've designed these FREE printables for September to give you a taste of the Pumpkin Spice collection!

Click here to download September's Free Life Documented Printables.

There are a 3 free printables this month, including:

September Month in Review
Things to be Thankful For List
3x4 & 4x6 Cards

TIP: The September free printables are on a single PDF document with 4 pages - print off what you want and the quantity you need.  We've added cut marks to each printable, so you can easily trim your pages to size.  

Thanks so much for letting me share how I've customized my planner this month!  Happy fall :)

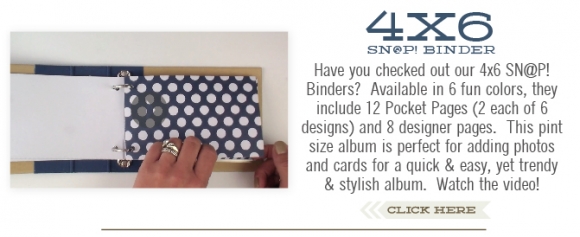
Click here to watch the 4x6 SN@P! Binder video!

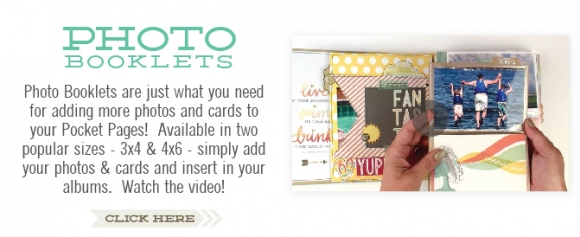
Click here to watch the Photo Booklets video!

Hi y'all! Suzanna here to share with you two layouts that I created; one using the We Are...Family collection and the other using Claus & Co
 
 
First up, my layout titled "Us." We take a lot of family selfies, documenting the times that we spend together, creating family memories. It's always entertaining taking selfies as our 9 year old daughter is the "odd man out" height wise and either she gets cut off at the bottom of the frame or we have to all remember to squat and utilize our quads. You can imagine the antics that occur!
 
 
I am a big fan for using the SN@P cards or other pocket cards cut from the patterned papers on my layouts; they make great papers to layer with or subtitles to layouts.
 
 
The wood veneer includes the brush script word "us" that coordinates with the other brush script found through out this collection! I used that for my title and just love the simplicity of it. I pondered inking it but decided naked worked best.


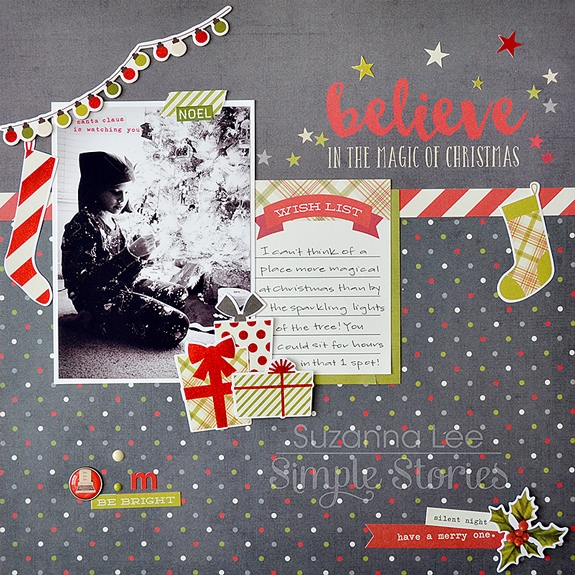
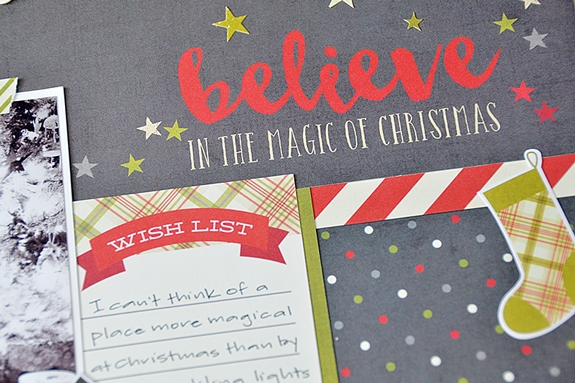
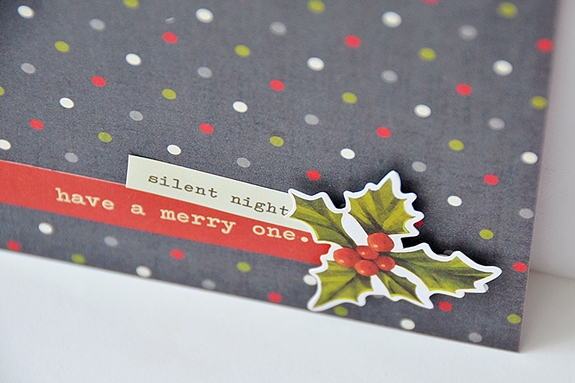
The other layout I have to share with you today is a Christmas layout that was created using the Claus & Co collection. It is a fabulous collection - one you will have to add to your stash for the upcoming holiday (it's not far away!). The classic colors and timeless holly leaves and all things Christmas are sublime.
 
 
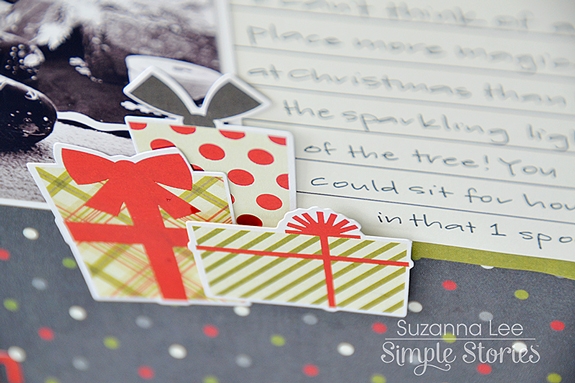
There are so many great embellishments for layering and creating scenes that support your story with Claus & Co like the presents shown here. I layered them for a fun cluster of presents like those under the tree that my daughter is kneeling beside. By using foam dots under one of the presents, some dimension and depth is added to the cluster.
 
 
I hung the stockings carefully among the divided background, the top section created using the 6x12 element and the bottom section was patterned paper.
 
 
The grey combined with the classic red and green really make for a striking look! And I love that the green isn't the traditional bright, kelly green but more of an olivey tone to it. It really is different and gives a more rustic feel to Christmas.
 
 
Thanks for stopping in today!

Supplies

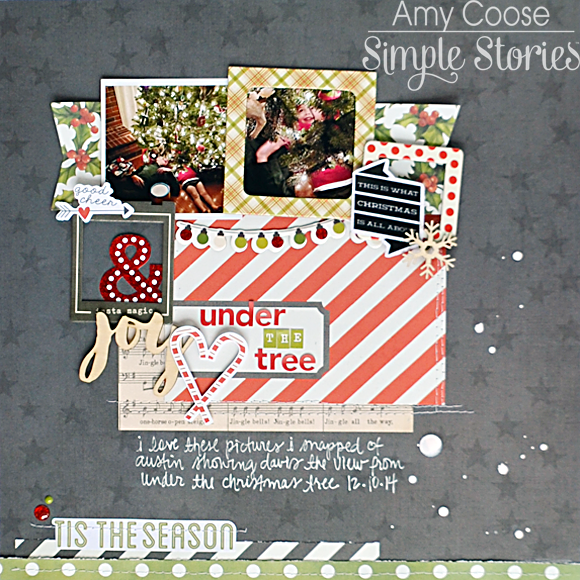
Hey everyone, Amy here to share a layout I created using the new Claus & Co. line, which is just fabulous!  It makes creating a layout about the Holidays super easy, and fun.  Here's the page I created.

Here are some closeups, I had so much fun with all the different embellishments that are included with this line.

The wood veneer is just perfect.

I just love the Bits & Pieces, they always add that special something to my pages.

Thanks for dropping by today, and make sure to check out the full Claus & Co. collection here.  It's fabulous!


Click here to download your free copy of the Claus & Co. SN@PBOOKING Guide.  Visit the Project Downloads page for other free downloads!

Supplies

Hi there, Simple Stories fans! 

Teri here, and I'm happy to be bringing you some fun cards and tags I created with the Claus & Co. collection.

It may be September, but I'm determined to get an early start on this year's Christmas projects. It seems like I'm making stuff up to the last minute for Christmas. This year is the year I put an end to that vicious cycle by getting going early on my cards! And the Claus & Co. collection is perfect to do it with because it's packed full of fun Christmas elements!
 
 
Up first is this wreath card.
 
 
I really love that pretty wreath. I wanted it to stand out so I added things to my card to draw your eye to it: the enamel dots, the sentiment banner and even the music circle stickers
 
 
Here's another card for you to check out.
 
 
I matted the grid SN@P! card onto cardstock and then I slapped a couple squares from the Claus & Co. SN@P! Pack on top. I kicked the ornaments up a notch by adding some enamel dots to them.
 
One of things I love about Simple Stories' products is you can use them as the come or you can really personalize them by embellishing them. I love that.
 
 
Speaking of personalizing things, let's talk about that sentiment. Well, it's truly one of a kind. I dreamed it up myself by mixing some of the different stickers from the Claus & Co. collection together. 
 
I did a lot of mixing and matching on this card too.
 
 
Something I really appreciate about Simple Stories is their collections are well thought out. Many of the collections feature lots of stuff, but all of it goes together. I think having matching colors and design elements that work together helps make making things a whole lot easier!
 
 
I always love a good grid design so I made a grid of sorts with the four squares on this card. 
 
 
And then I embellished the squares by adding a chipboard snowflake, enamel dots and Washi paper tape strips.
 
 
In addition to Christmas cards, I made some Christmas tags. Tags are a great way to add a handmade touch to simple holiday gifts.
 
 
I used SN@P! cards for each of my tags. I used a hole punch to pop a hole in the top of each one. And then I added a little twine.
 
 
I threw on a couple embellishments on each tag, just to make them seem a little more handmade.
 
 
These tags took me probably 20 minutes to pull together so there wasn't a huge time investment in making them. But I think they are sure going to make my gift recipients smile when they see them!
 
Well, thanks for stopping by today! I'll see you again soon!


Supplies

Hello Friends! Rebecca Larson here with one of Simple Stories' latest digital releases “Sweater Weather”.
 
With the cooler temps we have been experiencing here on the Wasatch Front, it is only fitting to pull out the boots, cozy sweaters, and snack on something pumpkiny (thats a word right?). With my longing for crisp nights, football games, and the changing of the seasons, I decided to pull out some photos from the depths of my hard drive. I think sometimes that its good to go back and resurrect photos and memories from days and years past. Its good for the soul! Each year we always look forward to fall break! A couple years ago, we decided instead of a full blown vacation that we would do a staycation of sorts. We live near some big ski resorts, and thought it would be fun to explore the area before the snow flies! Sweater Weather was the perfect way to highlight our adventure.
 
 
I love the warm inviting colors of this kit! The reds, oranges, and yellows seem to make my photos pop! And because I was running short on time, and had so many photos that I decided to use the digital 6x8 pocket page templates that are also available in the shop!  (Here is a great link for a tutorial using digital scrapbook templates, or google how to use a digital scrapbook template). After adding my photos, I used the fun fall elements to add demential balance to my photos. 
 
 
With a digital layout, you are not confined to the pockets that you would be using with a traditional pocket page, so it is fun to add a little flair all over your document. Come on! Break all the rules lol! I will print these off and slide them into the solid 6x8 plastic pocket (note: the page protector is slightly larger than a 6x8 print). A fun, fast, way to get those photos off the hard drive and into books for family and friends to enjoy!
 
Thanks for stopping by!

Hello Friends! 

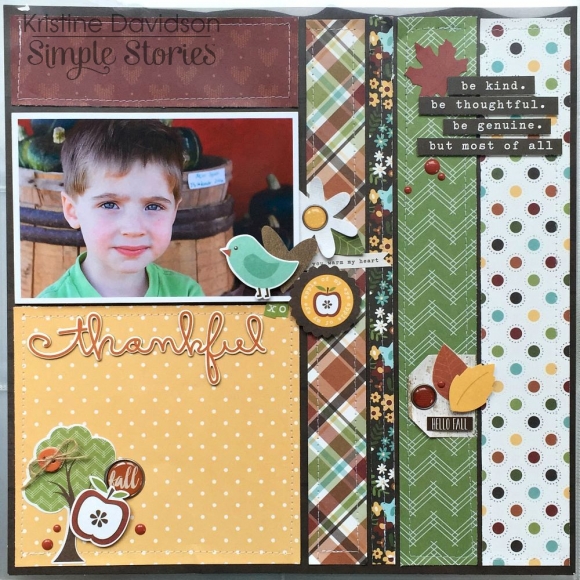
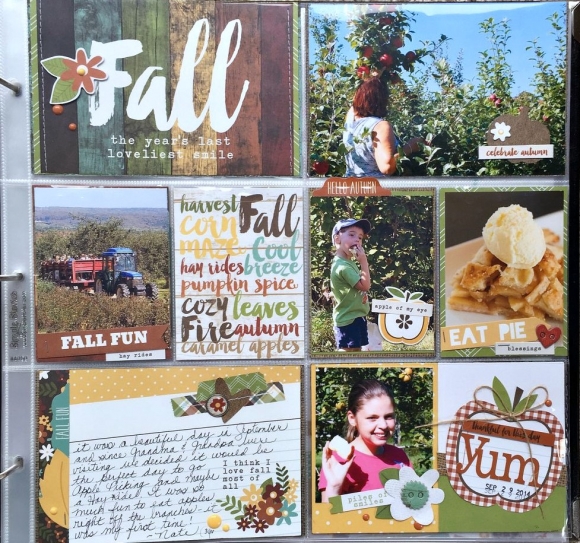
It's Kristine Davidson with you today and I am here to share a Life Documented spread featuring NEW Pumpkin Spice Collection! I had a few pictures from an Apple Picking adventure and this paper collection was perfect for it.  

I had quite a few photos from this adventure, but I didn’t want to add too many photos either. I decided to create a layout for the left side of my spread and then add a little pocket page scrapbooking on the right. A great way to create a double page spread perhaps? I am not very good at 2 pagers but this made it really easy.

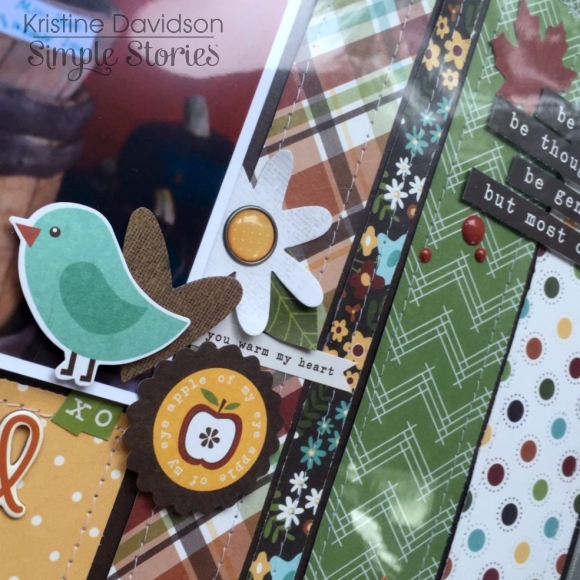
I added a photos of my nephew on this layout. Showcasing more of a thankful side with no journaling but adding strips of journaling from one of the 4x6 cards. I also wanted to add lots of paper to this page and doing several strips worked well. A great way to use up scraps or use tons of color that match perfectly together.

A simple pocket spread that add so many extras to an album. Adding lots of photos, extra journaling and even memorabilia. I added more photos on this page and a simple journal card talking about our day apple picking.

Here are a few extra pictures with details.

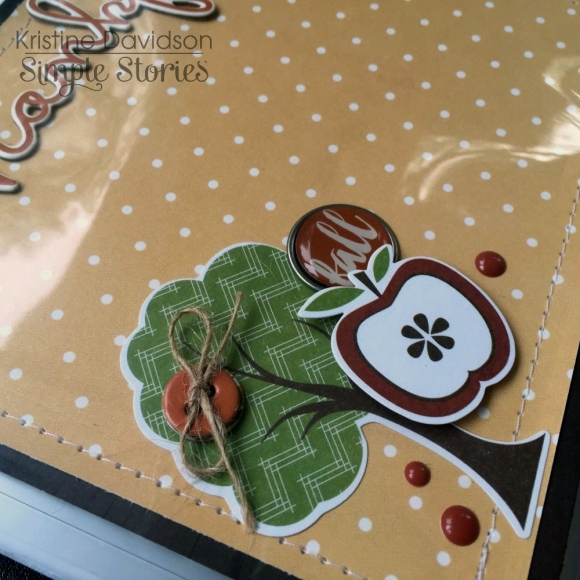
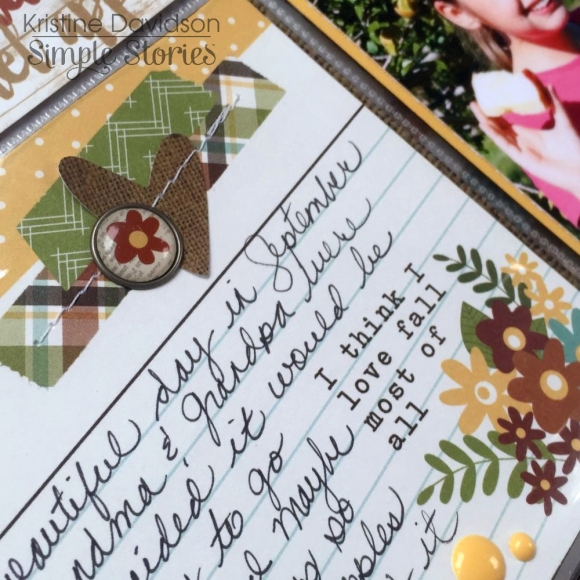
I love layers. On this corner I first did some sewing around the edge, added a diecut of the tree and then added an apple with 3D foam adhesive to create dimension. Adding extras such as chipboard buttons, bradz and enamel dots just finishes a corner of a page so nicely!

I find working with stickers and diecuts so much fun and easy to layer and create dimension with foam adhesive. I do this on most of my pages. To create more dimension and texture I add sewing and small enamel dots.

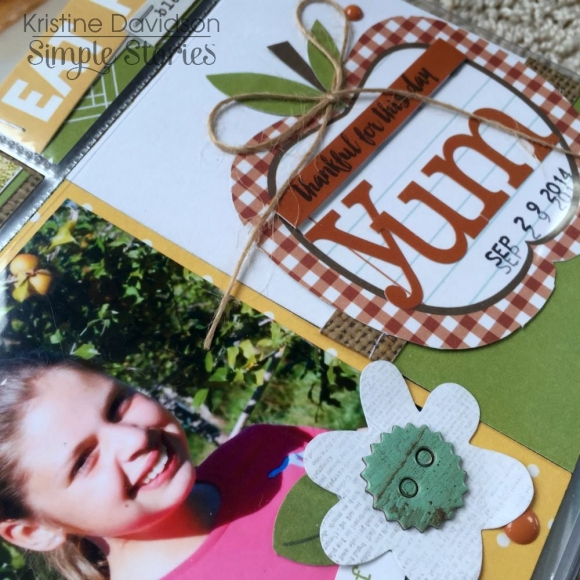
I loved this apple and decided to cut it from its original card. I added stickers from the expressions sticker sheet and some twine.

A journal card can be decorated even if it’s for adding details about your day. Add some washi paper tape, a brad or chipboard and your card is embellished.

I hope you enjoyed my post today and I hope you have a chance to create with Pumpkin Spice!

Supplies

Hi Simple fans, Audrey here! Today I have some fall card ideas to share with you, made with our adorable new autumn-inspired collection, Pumpkin Spice. AudreyPettit PumpkinSpice HelloFallCard I absolutely love the warm colors and prints in the Pumpkin Spice collection. For my first card, I pulled together an earthy palette of patterned papers for my jumping off point. The green and brown prints have a natural feel that work well all year round, but bringing in a touch of orange and russet definitely says fall is here. AudreyPettit PumpkinSpice HelloFallCard2 I always love working with the chipboard pieces on card designs, as they provide a great framework for my focal point. In this case, a cute fall garden scene made up of die cuts from the Bits & Pieces ephemera pack. I added a die cut cloud image above the frame to extend the view, and popped some of the images up with foam adhesive for a bit of extra dimension. AudreyPettit PumpkinSpice HelloFallCard3 The background is made up of a mixture of prints from the 12x12 Collection Kit and the Simple Basics Kit. I added machine stitching to help define the layers. And a scalloped cardstock sticker snipped into several sections adds a final little detail and pulls it all together. AudreyPettit PumpkinSpice FallCard My second card is a smaller 3.5" x 5" design, that also utilizes a fun Pumpkin Spice chipboard frame to ground my happy little fall scene. AudreyPettit PumpkinSpice FallCard2 Simple Stories offers so many awesome embellishment choices, that it really is easy to create adorable focal point scenes. This one is made up of more Bits & Pieces die cuts along with that cute chipboard pumpkin. The backing is one of the 3x4 journaling cards from the SN@P packs. Love the green slope. Makes an instant hilly background with literally no effort. AudreyPettit PumpkinSpice FallCard3 The card base was once again pieced from the 12x12 papers with a thin sliver of the Simple Basics prints. Simple and sweet! I hope you enjoy!

Supplies

Howdy friends!  Every so often we're happy to feature a company that purchases our products, makes some pretty cool kits with them and then offers them to consumers.  With that said, we're happy to introduce you to The Button Farm Club!  They've created an amazing mini book kit featuring our We Are...Family collection and have offered us a kit to give away to one of our random lucky readers!  

The Button Farm Club offers exciting paper crafting project kits exclusive to club members, featuring the hottest materials on the market.  You can expect the same high quality kits that you have enjoyed from The Button Farm in the past.  Each kit is thoughtfully planned, packed and delivered to your door monthly, complete with full color detailed instructions.  What makes The Button Farm Club different from other clubs?  Their Fabulous Designer!!  Angela Moen put in long creative hours designing your kits.  Each Kit comes with step-by-step Full Color Instructions. You can follow along or alter your kit to fit your needs.  One of the most unique and fun features of the Button Farm Club is the altered project included in each kit. From clipboards to mini albums,to tag books, there will always be something fun to create each and every month. These altered projects can be used as meaningful gifts or priceless family treasures.  Silver and Gold members will get a free bonus kit every six months!!  For membership information you may email Laura@buttonfarmclub.com or give them a call 918 207 9515.

Here are a few pictures of the completed mini book from their We Are...Family kit - 

If you'd like the chance to win one of these amazing kits from The Button Farm Club, enter via the Rafflecopter widget below by end of day Tuesday, September 22nd by midnight mountain time and we'll pick and announce the random lucky winner here on the blog on Wednesday.  Good luck!!

Visit The Button Farm Club on their website for more information about their kits!
a Rafflecopter giveaway

Happy Mid-Week...it's almost FriYAY!!! 
 
Candi here today to show you something a *little* different inside my Life Documented Planner!  This month there will be no month on two pages spread AND no weekly planner inserts...just several elements from the We Are...Family Collection Kit.  I had so much fun creating this for the month of October that I want the month to get here quickly!!!  It reminds me of when I make mini books...I like to use different size elements and bound them with a few loose leaf rings!  
 
For the opening of October I have a piece of Simply Us trimmed down to size on the left hand side.  On top of that I adhered an Interactive Element!  To secure the Interactive Element in place, I used an arrow paperclip.


On the right hand side I have my October Monthly Divider.  I covered up the top of the divider by trimming down the 12x12 So Very Loved and adhered that in place.   To finish off this page I added some Enamel Dots, a fewExpressions Cardstock Stickers and "happy" that came out of Bits & Pieces!


Flip over the October Monthly Divider and I covered that side up with Dreaming Big (yellow side).  On top of that I trimmed down a 6x12 Element that has a clipboard on it and I will be using that to jot down my notes for the month!  


Here is the beginning of my "Daily Planner Pages" for October.  I wanted to share each and every page with you, but we would be here all day :) I am just sharing about 8 shots of the different elements used throughout the month of October.  For my first page I trimmed out a 4x6 Vertical Journaling Card Element that has 1-5 on it.  I will obviously be using this for October 1st through the 5th.  I know there isn't a ton of room on this journaling card, but if I need more room I can always add another card!


October 6th and 7th = For some of the dates I did use a roller date stamp and others I used misc. number stickers.  Also keep in mind throughout this month I did take a Brown Color Box Cat's Eye Ink and rubbed it along all of the edges to give it a finished look.  For these two days I have plenty of room for my to-do's!  I could even add some journaling and even a small photo!


Here is another Interactive Element!!!  Remove the arrow paperclip and inside you will find October 8-10th!  
 
 
It is hard to write on dark paper unless you have an awesome white gel pen so I decided to add some extra decorating on the back side of October 11th!  Yep, I added another FUN Interactive Element...this one is like a matchbook!  There are about 4 tabs inside so I can jot down some memories and small photos...


October 14th and 15th...I stamped out the date on some Washi Paper Tape!


On the right hand side you will notice I tore some of the lined paper from this 6x8 Element so I could have a spot to write!


By the time I am finished with October, I am sure this will bulk up my planner a bit, but I don't mind at all!  The chunkier the better in my opinion :)  Also, keep in mind...you can use this same idea and take it outside of your planner and bind all of these fun elements with a few loose leaf binder rings to create a mini book!
 
If you are working with the We Are...Family Collection, make sure to check out the >free printables< for August, that match the Collection!!!  
 
So glad you stopped by!

Supplies

Hi Everyone ! It's Mindi here with you today. I am going to be sharing with you a few pocket pages using the Pumpkin Spice collection. With temperatures still reaching 100's here, fall seems really far away. It has made my days a little nicer working with some fall photos and stories from last year. 
 
 
Over the past year I have been working on filling in the holes in my 2014 album. I started this project out by printing some photos from my son's kindergarten field trip to the pumpkin patch. I didn't have too many and so I decided to add them into our regular week. 
 
 
I made a title card using the heart photo overlay underneath as a fun background. There was some white space on the left side of the card and so I decided to add another photo from the pumpkin patch. The fall script word was the perfect touch to finish off the title card. 
 
 
Whenever i start some new pages I go through my supplies and set aside some of my "favorite pieces". I just love that cute window and knew I had to use it. To dress it up a little bit by adding a few stickers and some enamel dots.  
 
 
The chipboard pieces are perfect for frames. It is one of my favorite things to use them for. Another fun thing I like to do is to add a little title to the journaling card as I did here. During the field trip we got lost in the corn maze. I believe that when you use a fun title it helps to aid the purpose of the photo so to speak. Adding a little title also helps me remember what the photo is all about. To spell out my title I used mismatched letters for a fun look. 
 
 
As I mentioned earlier that I added in the field trip to the rest of our week. I added in one regular photo to the left side of my spread. Stayed minimal on this one by adding some journaling and a sticker on the top. 
 
 
Lets move on to the right side. 
 
 
The Fall season always brings a few fun things, but for us it was cooler weather clothes shopping. The girls and I drove out to the outlets and did a little shopping. It was fun to spend some girl time together.  I added a photo of the girls having a snack and journaled on the other side of the 4x6 journaling card. 
 
 
I love to add little embellishments here and there as I'm sure you all do too. The filler card seemed to need something on the top so I added a strip of patterned paper. I also added one of the bits and pieces onto my apple crisp photo, it was perfect. 
 
 
Here is a close up of some photos and cards. 
 
 
I used another photo overlay over this photo of the fall leaf. Love those things. They are certainly an easy way to add something extra. 
 
 
I really have enjoyed working on some pages from last Fall and I hope you all have fun documenting your own fall memories. Fall is right around the corner!
 

Pages