December 2018 Blog Posts

I absolutely love the NEW Kissing Booth line!!! The colors and patterns are adorable!!!  Once your Christmas shopping is done relax and make some Valentines Cards!! 

It’s never to early to start thinking about loved ones.... 

I love this cute cupcake chipboard!!! 

These cards were made using the Kissing Booth Chipboard and the collection kit! 

Pick some up today and get started on some darling cards!!! We will be making all of these cards at our Scrapbook Retreat in Salt Lake City in January. Follow our Facebook page Mom and Me Scrapbooking for more information. 
 

Supplies

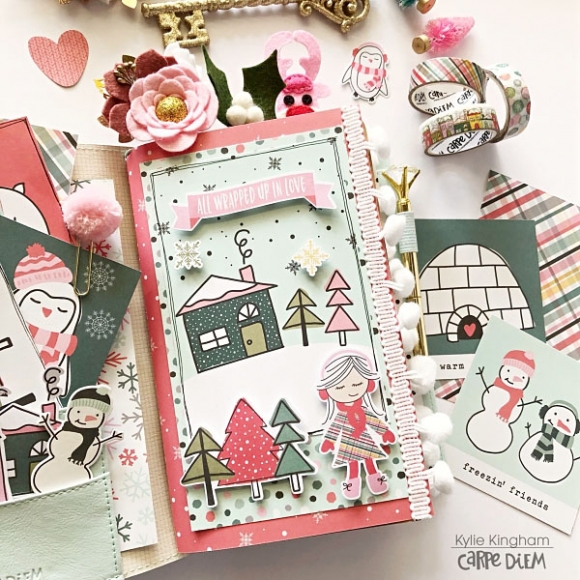
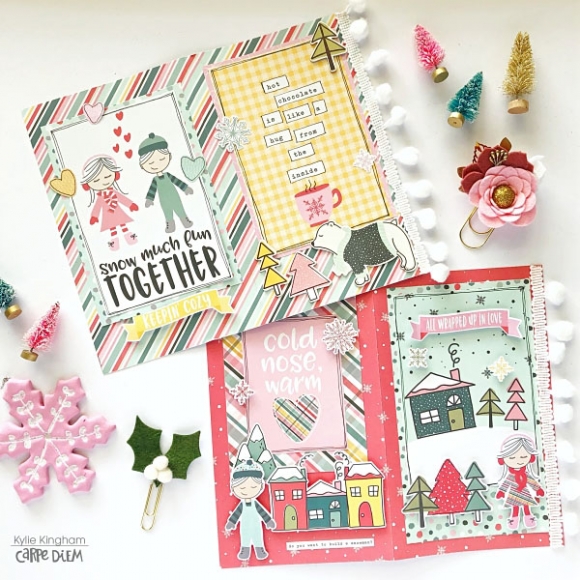
Hello creatives! Leah here with you on the blog today. I’ve started setting up my December TN using a blend of the Freezin’ Season and Merry & Bright collections. In my previous December Daily projects (learn more about this memory-keeping project started by Ali Edwards here), I have typically stuck to a more traditional Christmas color scheme. This year, I wanted to blend in some less conventional colors like those in the Freezin’ Season collection. This collection is designed to have more of a general winter theme, which fits the wintry season but doesn’t have as many holiday sentiments as the Merry & Bright collection, so I’ve decided to blend both collections for my December setup. Both collections have softer blues, greens, and reds which makes it easier to mix and match pieces from each.

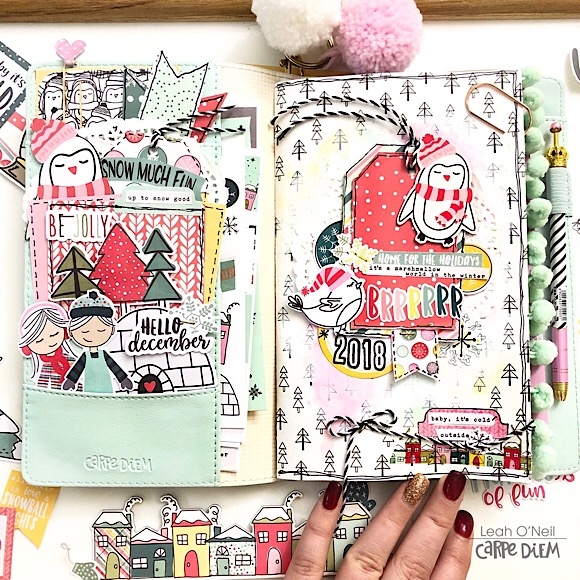
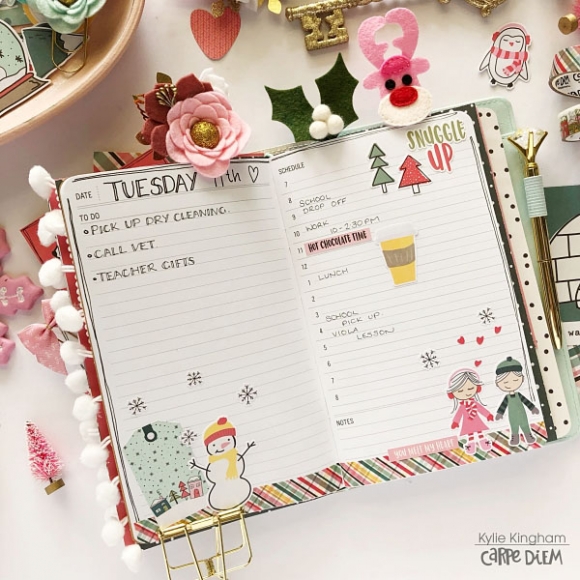
I’m using the Typewriter Circles Traveler’s Notebook to house a couple of inserts this year. One will function as my December Daily album and the other is where I’m keeping all my notes and plans throughout the holiday season. I like keeping these two notebooks in one place because I often find that the planning and lists I make during December can often be easily incorporated into the story I’m telling that day from a memory-keeping perspective in the December Daily.

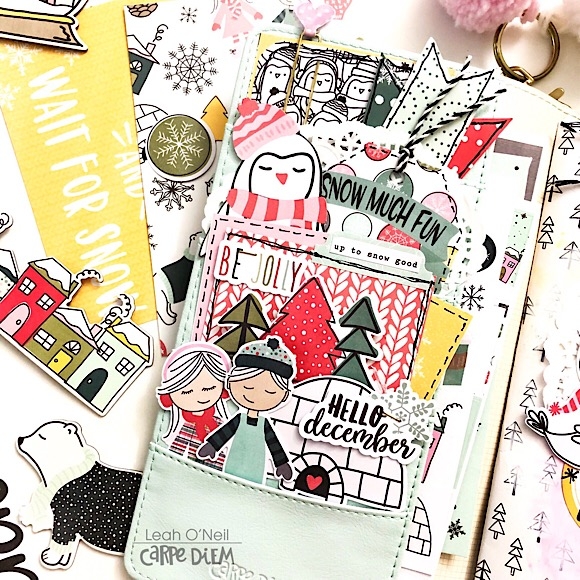
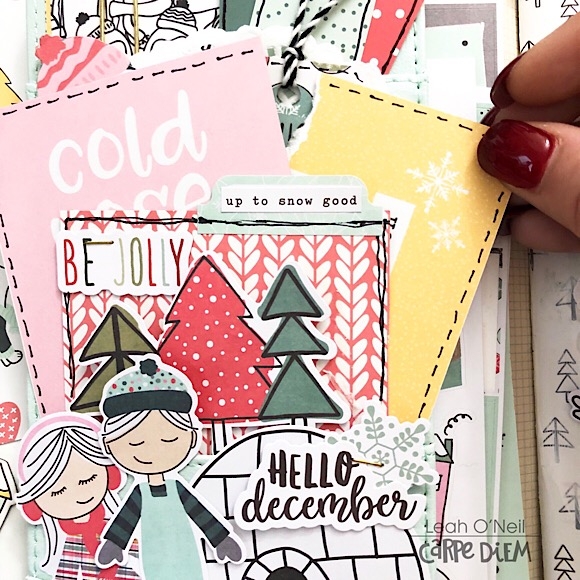
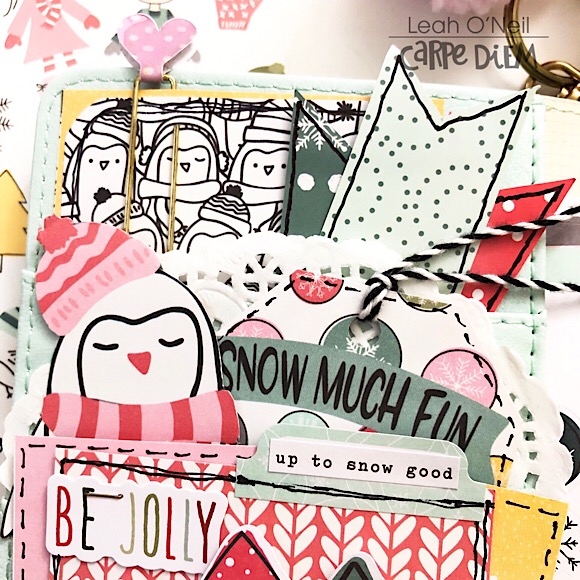
I’ve prettied up my TN pockets and December Daily cover using primarily the Freezin’ Season collection. I used some of the cards from the 3x4 Elements 12x12 paper, lots of die cuts from the Bits and Pieces pack, and a few chipboard stickers.

I learned last year that trying to do a December Daily album in a TN introduces a fun challenge in trying to be mindful not to add too much dimension. Otherwise it can get very difficult to close the notebook before the end of the month. One of the tricks I like to use when I want to add the illusion of dimension without adding extra bulk is adding hand drawn borders around some of the décor pieces. In particular, if you are layering a light colored element over another light colored element, you can establish some contrast by drawing a black border around the front piece. This gives an effect that the front piece is popping up away from the background slightly and therefore adding more dimension. I have also found that adding borders to loose or “floating” layers can really help anchor them and make the finished project feel more finished – but then again, that could just be part of my style and preference. I love the handmade look of doodled borders.
 

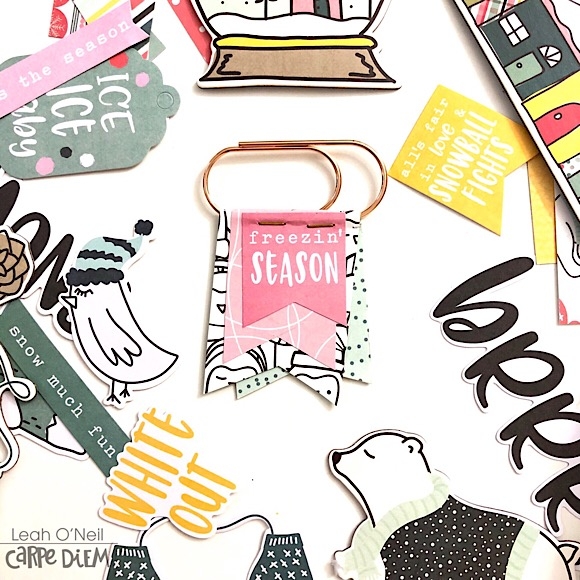
Bonus clip (literally)… I used a few scraps leftover from pocket pieces I had trimmed down to make this adorable clip!

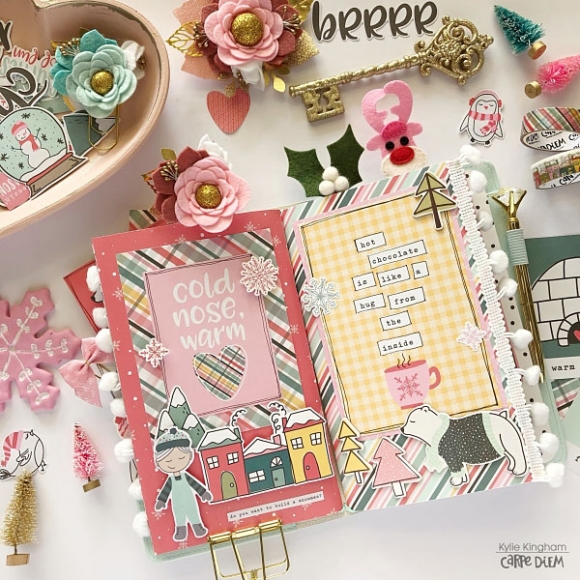
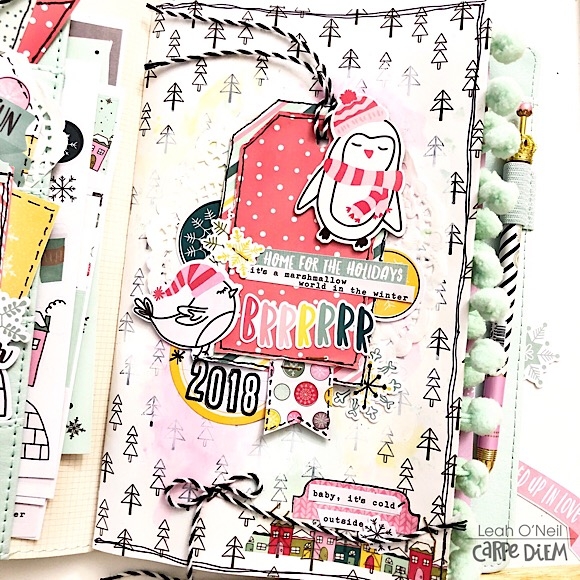
On the front cover of my December Daily insert, I had so much fun adding lots of layers and texture because the cover is one of the few pages of my December Daily where I don’t have to worry about the bulk preventing the album from closing. I used the black and white side of the “Snowed In” 12x12 Paper from the Freezin’ Season collection as my background. I added some watercolor paint to my background and then went over it with a layer of white gesso to soften the colors so they blended into the background more instead of competing with the décor I planned to add on top.

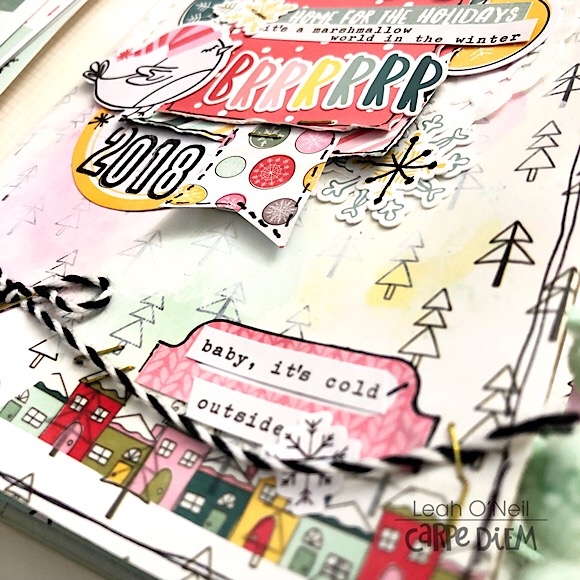
For the next few layers, I added a doily and a tag I made using some of the Freezin’ Season patterned papers. I then started layering in die cuts, chipboard stickers, and several stickers from the Freezin’ Season Combo Sticker Sheet. I made sure to tuck the smaller pieces over, under, and in between the doily and tag layers to give more texture and visual interest.

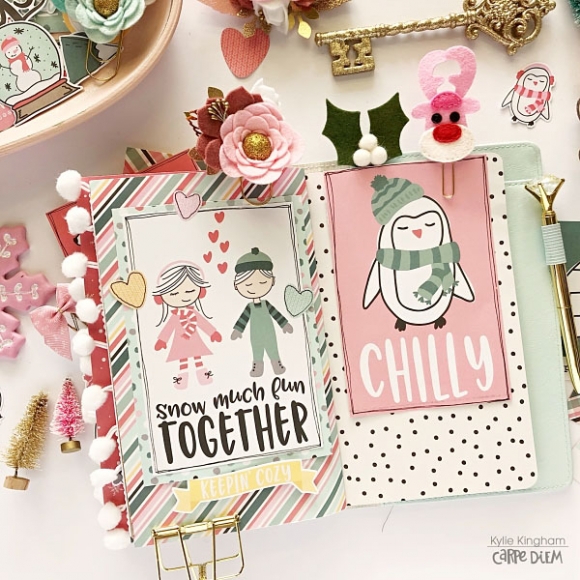
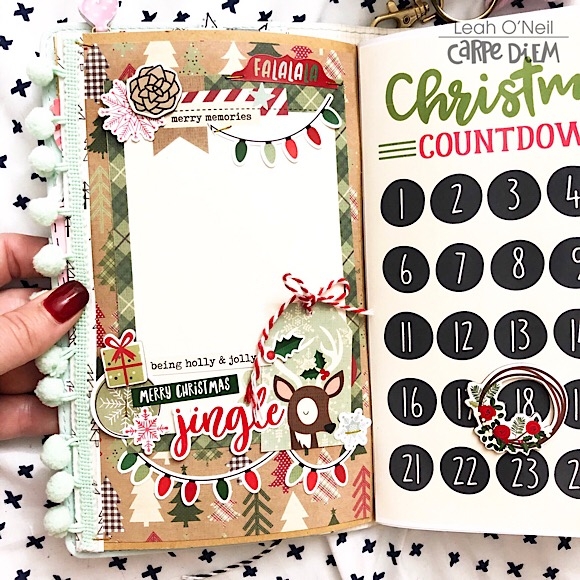
Inside my December Daily insert, I’ve used one of the free December printables available this month on the Simple Stories website. The countdown one is perfect to kick off my December Daily. The chipboard wreath I’m using to count down is a sticker but I left the sticker backing on it and then added repositionable double-sided tape so I can move it around. I’ve used items mostly from the Merry & Bright collection to decorate the inside cover of the insert. You can see how the Merry & Bright collection has a lot of those softer green and red hues that I also love in the Freezin’ Season collection. I am planning to type up my “Reason Why” and add it to this page.

What is your favorite seasonal collection from Simple Stories this year? Are you using it in your planner or to document memories, or both? Tag me on Instagram if you’re participating in December Daily this year. I truly love seeing how others plan and document the holiday season. Stay tuned on all the Simple Stories and Carpe Diem Planners social media channels for lots more creative inspiration to inspire your holiday season!

Hello everyone!!  Jackie G here today on the blog to share a couple fun, yet simple winter cards with you using the Freezin’ Season collection!!  Living in southern Arizona, we don’t get to see frost or snow (except for those “very” rare occasions) so this collection is lots of fun to work with.  I get to be festive without being cold!!

I decided to create a couple winter themed cards so I could use them for an occasion.  Whether they be for Christmas, to celebrate a birthday, a friendly hello or whatever I need.  Starting off with the first card I wanted to do something a little “off center” so chose to adhered my burlap background a little wonky.  Using lots of foam adhesive to pop up my sentiment and penguins, they made this little winter scene pop!!

It’s a chilly wonderland…can’t you feel it with this collection??  Again, using the chipboard stickers and bits and pieces to create this mountain scene for my little polar bear friend. 

Brrrr….my favorite out of the bunch, yet so simple!!  There is really nothing to this card except more chipboard stickers, bits and pieces and LOTS of dimension!!  The pink “Hello Winter” paper really makes this card so soft and elegant.

Last, but not least a fun little winter scene.  I used the long chipboard village piece to set the scene.  It wasn’t quite enough for me and I really wanted some added interest so I used an additional winter house to pop up in the front. 

I hope you have enjoyed these winter themed cards.  They are so incredibly easy…you can make them too!!!!

Supplies

Hey planner friends! It’s Rachel again and I am back on the blog to share a little “plan with me” using my favorite basic essentials on the Carpe Diem Planner website.

Ah…nothing more satisfying than a fresh new week! First up, I use the clear number stickers to add my dates in my weekly planner insert. If you are like me and are a planner opportunist (hee hee, planner peace?! Try all the planners for me, please!) then having undated pages is great because you can not only change up the type of inserts, but the size of inserts, too. With so many beautiful types and sizes of planners, it seems a shame to be tied to just one! I always have a set of clear number stickers stashed in the pockets of all my planners so I jump into that particular planner any time I want.

A quick tip: I use a pair of tweezers to help with the placement of these stickers.

Once the week is dated, it is time to add my plans! This is where the FUNtioncal planning comes in. I like to use a mix of icons, boxes and headers to add my plans and these three stamps set help me do that.

I’ve mentioned my love of stamping before (see this post!) and for this week, I loved getting to use a color palette that matches the fun decorative elements.

Some planner girls make awesome “before the pen” spreads, but I tend to write in my plans right away. If plans move or change, you can just cover it with washi or put a sticker over it!

After the plans are all laid out and penned it, I spend some time decorating! This part has no function, but certainly helps me scratch the creative itch with no pressure to make it “perfect”.

Since my Aztec Black and White traveler’s notebook is all decked out for Christmas,

I decided to use washi and stickers from the Merry and Bright Collection, along with few stickers from the awesome Planners Basics sticker tablet. If I could only have one sticker tablet, it would definitely be this one. All the different colors gives the option to decorate with so many different color palettes.

Once I’m done planning, it’s time put my insert back inside my decorated insert cover. I love making insert covers because it allows to switch up my setup without having to change my inserts.

Now, everything goes back in my travelers notebook. I can’t help but take a moment and admire all of the delicious, decorative goodies in my pockets and on my travelers notebook covers. This set-up is gives me all the heart eyes, and motivates me to open my planner and get things done!

Thanks for stopping by and I hope you enjoyed my walking through how I plan my week in my travelers notebook. Do you have a process for planning out your week? Leave a comment here on my instagram and tell me about it!

Supplies

Hello! Jana Eubank here. Traditions are an integral part of our Christmas celebrations each year and definitely deserve a spot in your family album. The Simple Vintage Christmas collection has that classic Christmas vibe that allows these memories to shine.

I love the images of Santa in this collection! Look how cute this die cut is ... he is definitely keeping an eye out to see who is being naughty or nice!

I also really love the greenery images from this collection ... especially the holly and berries. I made sure each embellishment cluster on this page had holly, tying them all together and adding a cohesive look to the design.

The chipboard Layered Frames for this collection are a must-have! The layered look will effortlessly make your main photo the star of the show!

Supplies

Hello friends, it’s Kylie here with you all today. Do you like making lists? Better yet do you like checking them off? I am a huge list maker and today I thought I would share with you how I have been making lists for December in my Typewriter Circles TN, as well as how I have set it up using the ‘Freezin Season’ collection by Simple Stories.

I have been using the ‘Daily’ Traveler’s Notebook Inserts as well as the ‘Lined’ Traveler’s Notebook inserts.The ‘Freezin Season’ collection is a cute Wintery themed range but for my TN, I love how I was able to use it for Christmas as well.

I love this open view on my desk.The colours are SO pretty and really ‘Pop’ against the soft aqua of my TN.

I love to cut apart the 4 x 4 and 3 x 4 element sheets to add into my pockets.These pockets are also great for storing stickers, washi card or anything else you need for planning on the go.

I also created some covers to wrap around my TN inserts. I added some cute die cuts and stickers with foam tape for extra dimension. The pom pom trim was in my ribbon stash and I thought it looked like little Snowballs!

Here is a closer look at the covers I made laying flat.

I love how they look inside my TN wrapped around the inserts.I’ve added some detailed outlining to my covers using a black felt tip pen. Its nice to add a border or to highlight a quote.

How cute are these 4 x 6 cut apart sheets??

Here is a look at one of my list pages in the ‘Lined’ TN insert.I have created it for keeping track of my Christmas cards. The washi tape I have added down the center is purely for adding colour.

Another page created for keeping track of Christmas gifts. I’ve cut apart the ‘Snowed In’ paper and added a small border to either side of my page.

I don’t know about you but I always forget what I am shopping for unless I write a list of everything I need. I’ve added a shopping list page as well, using my Letter Punch board to create my page titles.

And finally, I wanted to share my ‘Daily’ TN inserts. These are my go-to when life is so busy. It is set up one day on two pages with a timed column. I love to jot down everything for my day on these!

I hope you have enjoyed seeing my Traveler’s Notebook set up today!

Until next time,

Kylie.

Supplies

It doesn't stay cold in Georgia for very long, but given the weather here over the last few days,  it seems like we went from summer to winter and skipped fall all together!  So with chilly temperatures on my mind, I decided to create some pocket pages from recent years using Freezin Season.

I love the colors in this collection!!  That touch of pink with the aqua and teal work well with my photos even though those colors aren't in my pictures.
Since I have a lot of photos, I added a folded card (4"x8", scored at 4") and slipped it into one of the 4x4 plastic sleeves.  This gave me space for an extra photo and a fun 4x4 phrase card.
 
I used another folding card (6"x8", scored at 4") on the layout above. I adhered a 4x6 element card to the front, and a journaling card and photo inside.
 
Stickers from the 4x6 sticker pack were perfect for adding tabs, phrases, and snowflakes throughout the pages.
I also added in some journaling spots and cute die cuts from the Bits & Pieces package.
 
 
I hope I've inspired you to document your winter memories in a fun snap album.  I used the 6x8 Robin's Egg Stripe Designer binder since it coordinates beautifully with Freezin Season.  Have fun and stay warm!

Supplies

December is upon us and so also comes all the hustle and bustle of the holiday season! Hello friends, Linsey here today sharing my latest altered project using the super fun holiday collection by Simple Stories, Merry & Bright! I loved every minute of creating this project! I hope you'll grab a warm cuppa your favorite drink and come along with me as I share my festive holiday house!

This collection is brimming with delightful holiday sweetness and I wanted to capture it all! Each little "room" within my holiday house is decorated with elements from Merry & Bright, like the puffy stickers, chipboard, bits & pieces and more!

Creating a tiny scene for a few of the boxes was so enjoyable! I love the little presents tied with ribbons, the rustic floral arrangements and the charming sleigh, to name a few. Everything fits just right into each of the rooms and makes for the cutest Christmas house!

The Washi Tape was a perfect fit wrapped around the outside of the house. I love the how easy it is to add washi tape to my altered projects!

A Santa is standing in the main box as snowflakes and hearts silently fall, wishing a Merry Christmas to one and all! I adore his rosy cheeks and vintage-style attire. There's so much to love in this darling holiday collection and I do so love it all!

And that's my Merry & Bright Christmas House! Thank you so much for stopping by and allowing me to share a bit of holiday inspiration today! I hope you've enjoyed it and until next time, happy holiday crafting!

Supplies

Pages