December 2018 Blog Posts

Jomelle here today and I am sharing with you my Christmas Set Up in my A5 Planner. First, I needed to decide what planner to use to go with the Simple Vintage Christmas collection. I couldn't decide between the Clover or the Black Speckle. Which one would you pick?
I actually love showcasing this collection. I wanted to keep it just for display but I also couldn't wait to use this for my set up.
I decided to use the Clover A5 Planner. I think it goes so well with this collection and it brings out the red color but doesn't over power it too much. I wanted to do some layering to create my dashboard. It used different prints of the paper and I used some of my punches and dies to add finishing touch to my layering.
I found these wooden sleigh and reindeer from my stash and I thought it goes well with the vintage theme. As usual, I used my pockets for more decorative purpose than functional.
December "Before the Pen" I love how the 4x6 stickers came with numbers that you can use for dates. It comes in red and green color.

I'ts been a while since I showed my weekly layout in my A5 planner. When decoating this layout, I knew I wanted to use the square 25cents piece and since it's one of the bigger pieces,
I worked around it to finish the rest of the page.
Thank you for taking your time to view my blog. Have a Happy Holidays!

Supplies

Hello!  It's Jennifer here today to share a layout I created with the beautiful Merry and Bright collection!  I'm a big fan of the whimsical prints with the traditional red, green, and white Christmas colors! And I  love that there is a black and white buffalo plaid print!

  I scrapped a photo of our sweet pug, Max, from last Christmas.  We lost him this past fall so it goes to show that taking photos is so important! I  started with kraft cardstock followed by adhering a 11x11 inch piece of the B side of the 4x6 Horizontal Elements. I place strips of the beautiful plaid of Celebrate the Season as well as Holiday Memories across the bottom.  

I  affixed my photo to a white piece of cardstock fashioning it to look like a Polaroid frame.  For my title, I  used the cute "have yourself a merry little christmas" sentiment from the 6x12 Chipboard.  You can also spy some of the coordinating Washi Tape underneath that comes with the collection! 

Just under the corner of my photo, I  adhered one of the journaling spots from the Bits and Pieces pack.  I  then affixed this cute red truck chipboard circle. to accent. 

Across the middle of my layout, I  wanted to create a "clothesline" of sorts to tie in some of the die cut embellishments  as well as a couple of the Tags and Frames.  Using pop dots, I  affixed my embellishments to the page while running bakers twine along the tops. From my stash, I  added mini clothespins to give extra dimension. 

Here is one of the tags from the Tags and Frames pack along with a red flower I  attached to the top with my clothespin.  I  also layered the cute "peace love joy" tree which is also found in the Tags and Frames.  At the bottom of my Santa tag, you can also see some stamping with the Classic Christmas Roller Stamp!  

At the top of my page, I  utilized a cut file to create a border with different patterns (Snowflake Border #69597). Some of the pieces, I  layered two different papers, while others are a single pattern. I   affixed smaller die cuts from the Combo Sticker Sheet as well as  6x12 Chipboard. 

Thank you for reading the blog today! Visit the Products page to see this collection in its entirety as well as the rest of the awesome Simple Stories lines! Have a great day!  

Supplies

Hi everyone! It’s Tara from Secretbees Studio! Now that Thanksgiving is over the Christmas countdown has begun! For little children (and probably most adults) the season is full of magic and excitement and a Christmas Countdown Calendar is a fun and easy way to way to build suspense and anticipation until the big day!

The Simple Stories 'Merry & Bright' paper collection is full of bright traditional reds and greens along with the most adorably festive holiday icons and beautiful floral images! People young and old alike will love flipping the sections of this cheerful and jolly Christmas Countdown Calendar!

The idea for this countdown calendar was inspired by the 'Number Pocket Pieces' that are a part of this collection! They are in coordinating colors and designs and in varying sizes so they add a lot of interesting dimension to the pages! The other designs are the charming 3x4 and 4x6 journaling cards along with patterned papers cut to 1/4 inch larger. 

I wanted to really showcase all of the gorgeous papers, so I used two of each for the numbered pages and then one pattern for all of the journal cards. Decorating and embellishing was so easy with the huge selection of festive stickers and chipboard along with a few pearls, gems and glitter! Once I had all of my sections complete, I attached them to the base with metal rings 1/2 inch from the top so there would be plenty of room to flip.

This calendar was made with a base of chipboard that I cut to 11 3/4 inches by 7 inches. This left plenty of room for all of the journaling cards that I used as the pages of the calendar, plus it worked well with the 12x12 sheets of lovely patterned paper. I attached two triangular 'legs' to the back to hold it up and give it good stability. 

The first section has two journal card pages and then numbers from one to three. You could add more if you want to start your countdown super early! The second section also has two decorative journal card pages and numbers from zero to nine so there are tons of number combinations to be made! I included the decorative pages for when the days are in the single digits. My very talented daughter wrote 'days until' on a strip of the woodgrain paper that is part of the collection as well!

Pull out those beautiful Christmas paper collections and make a countdown calendar of your own! There is still plenty of time to get in on the holiday spirit! Wishing you and yours a very Merry Christmas! For a closer look at this wonderful calendar, be sure and check out my video on YouTube!

Supplies

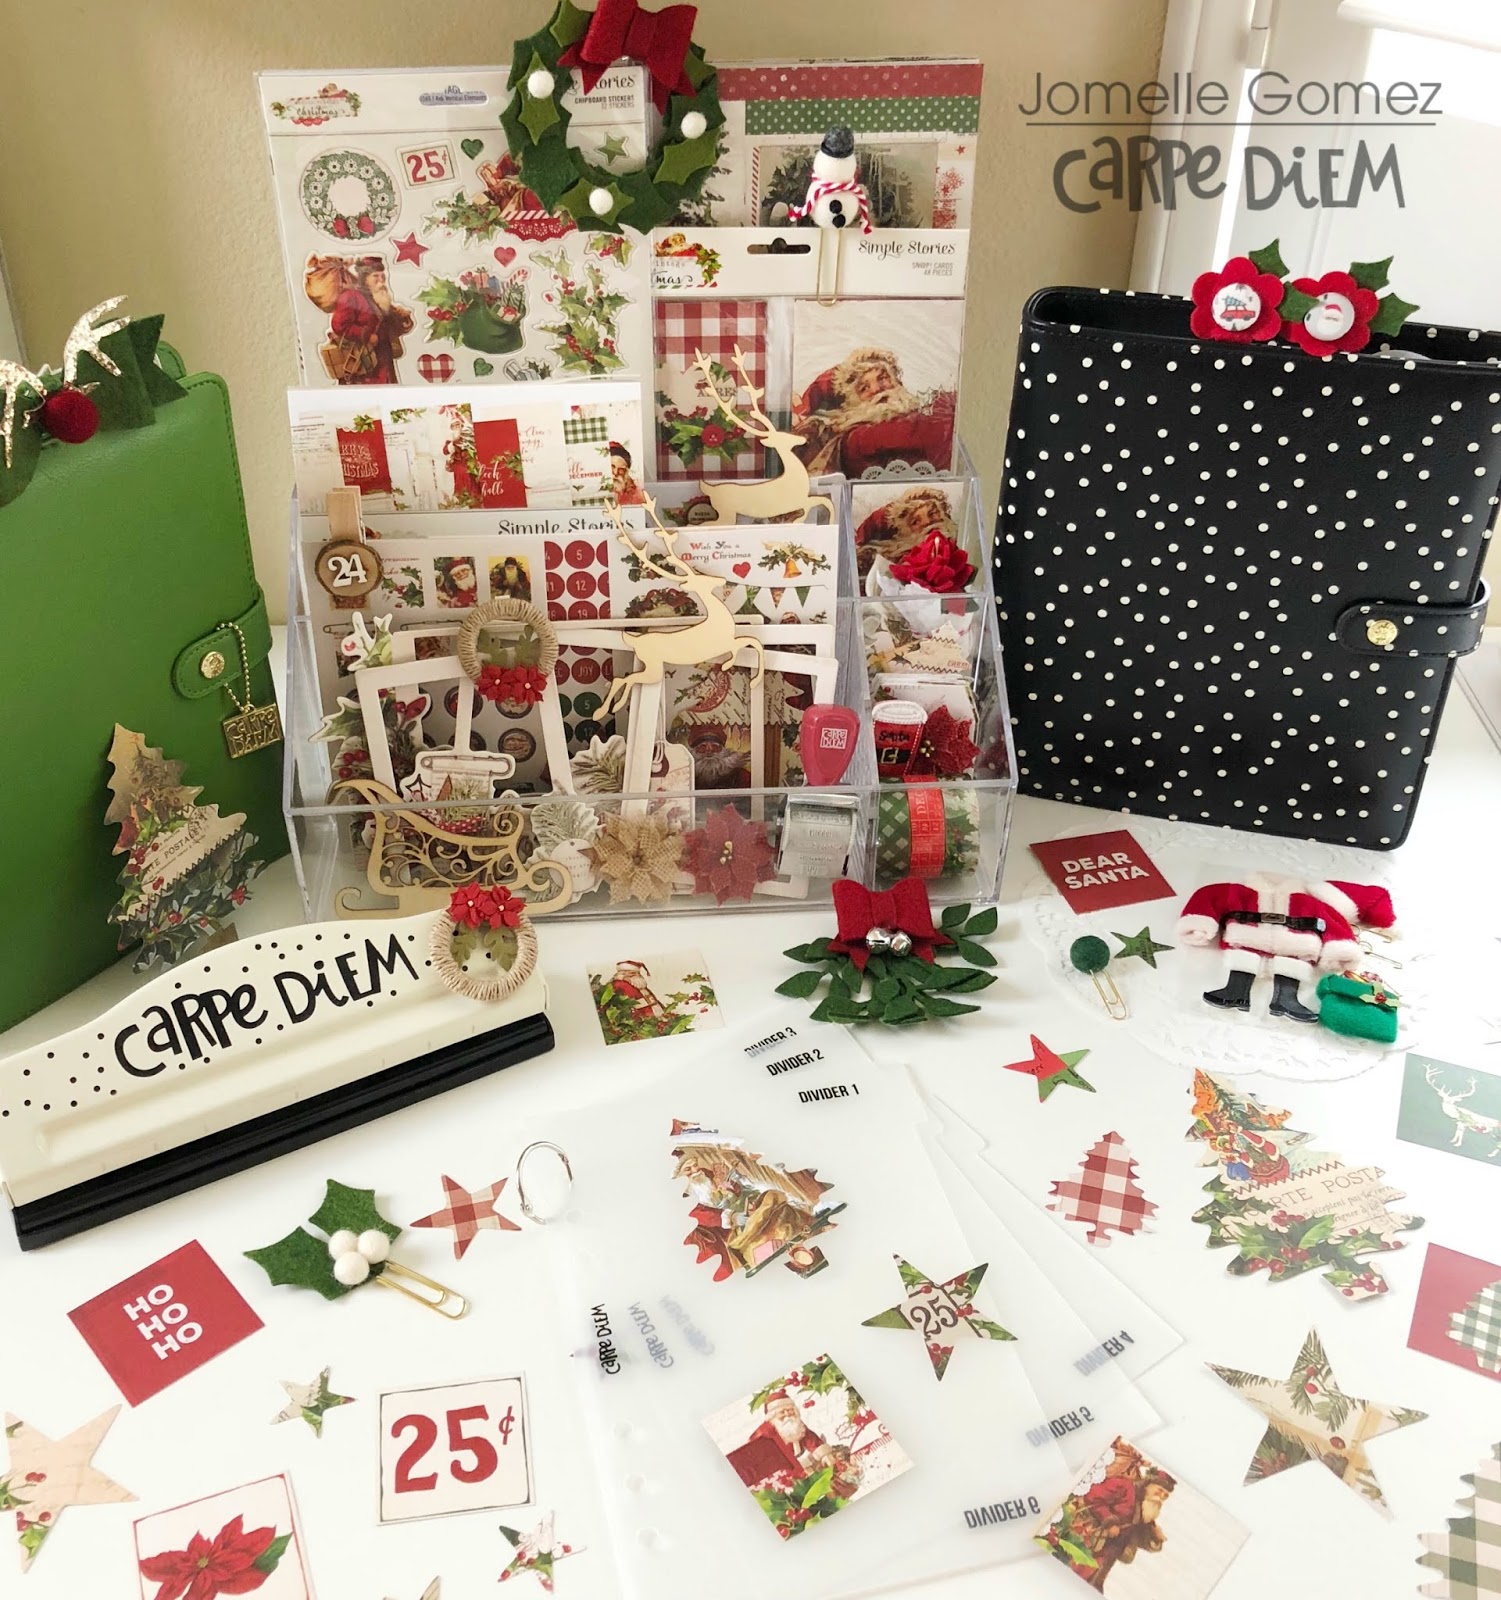
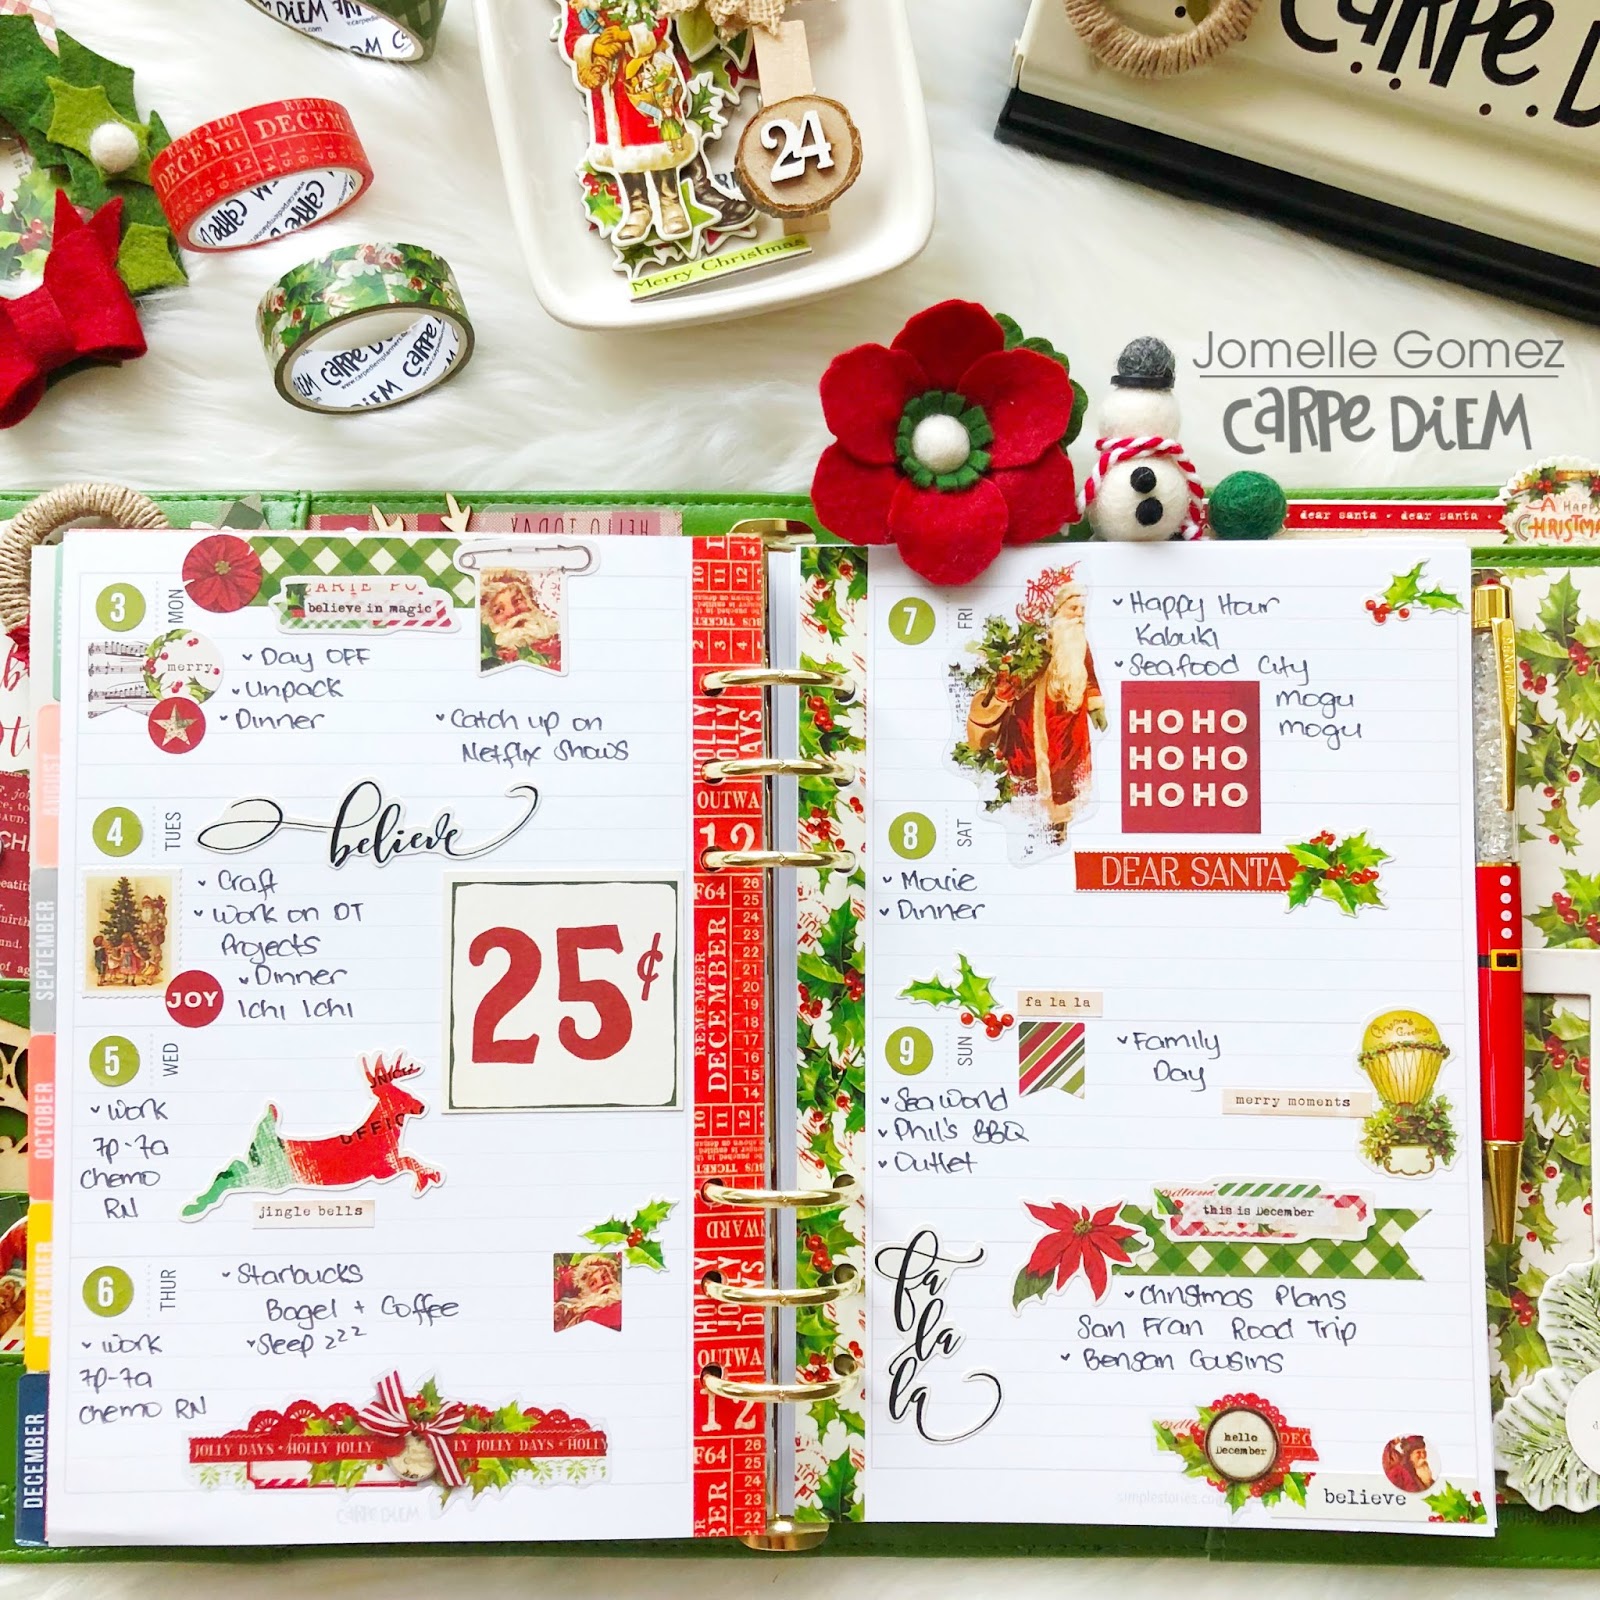
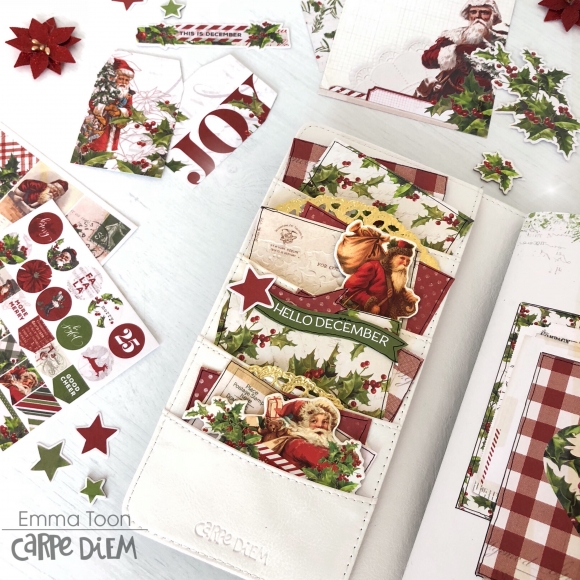
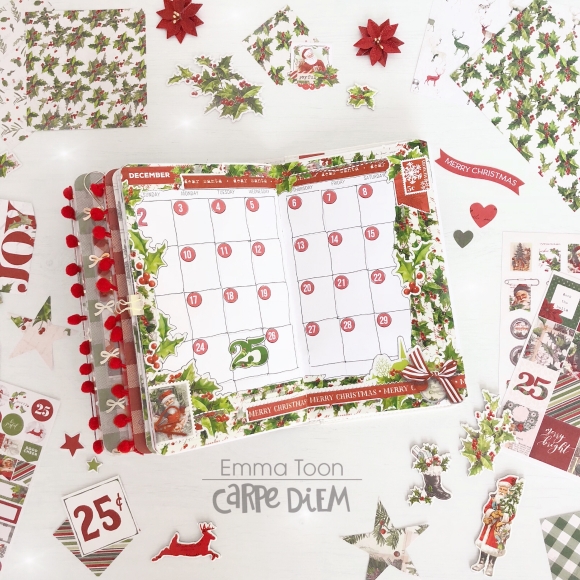
Hello again, as promised I’m back with a little look at my Christmas set up, all ready for December. If you remember last time I showed you how I’d made some pockets & insert covers using the Simple Vintage Christmas collection. Well I’ve now finished decorating and setting up my Aztec Black & White TN by Carpe Diem Planners.

So, shall we take a look? You know by now that I love to stuff my pockets nice and full, well, I’ve been quite restrained this time! I know! Not like me at all!!

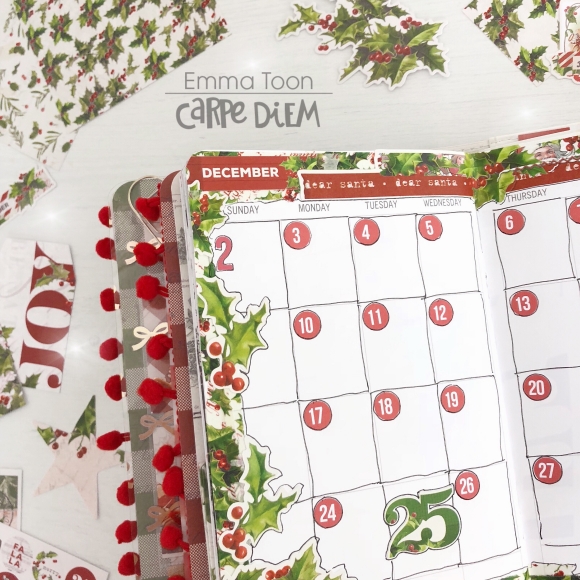
I haven’t held back on any of the other areas though, just look at those pom poms!! I’m often asked how I fix my pom pom trim to my insert covers, it’s dead easy, I just use double sided sticky tape and it works a treat!! I’ll let you into a secret, I used to add a little dollop of super glue to the ends to stop the edges fraying or lifting, but I don’t do that anymore since getting the trim stuck fast to my finger!!!

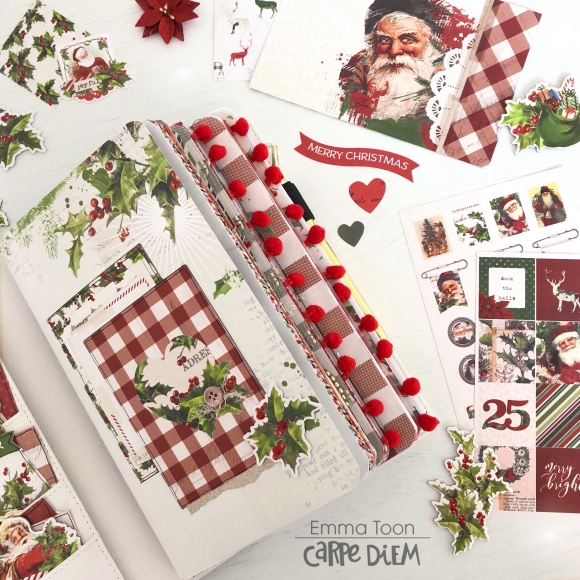
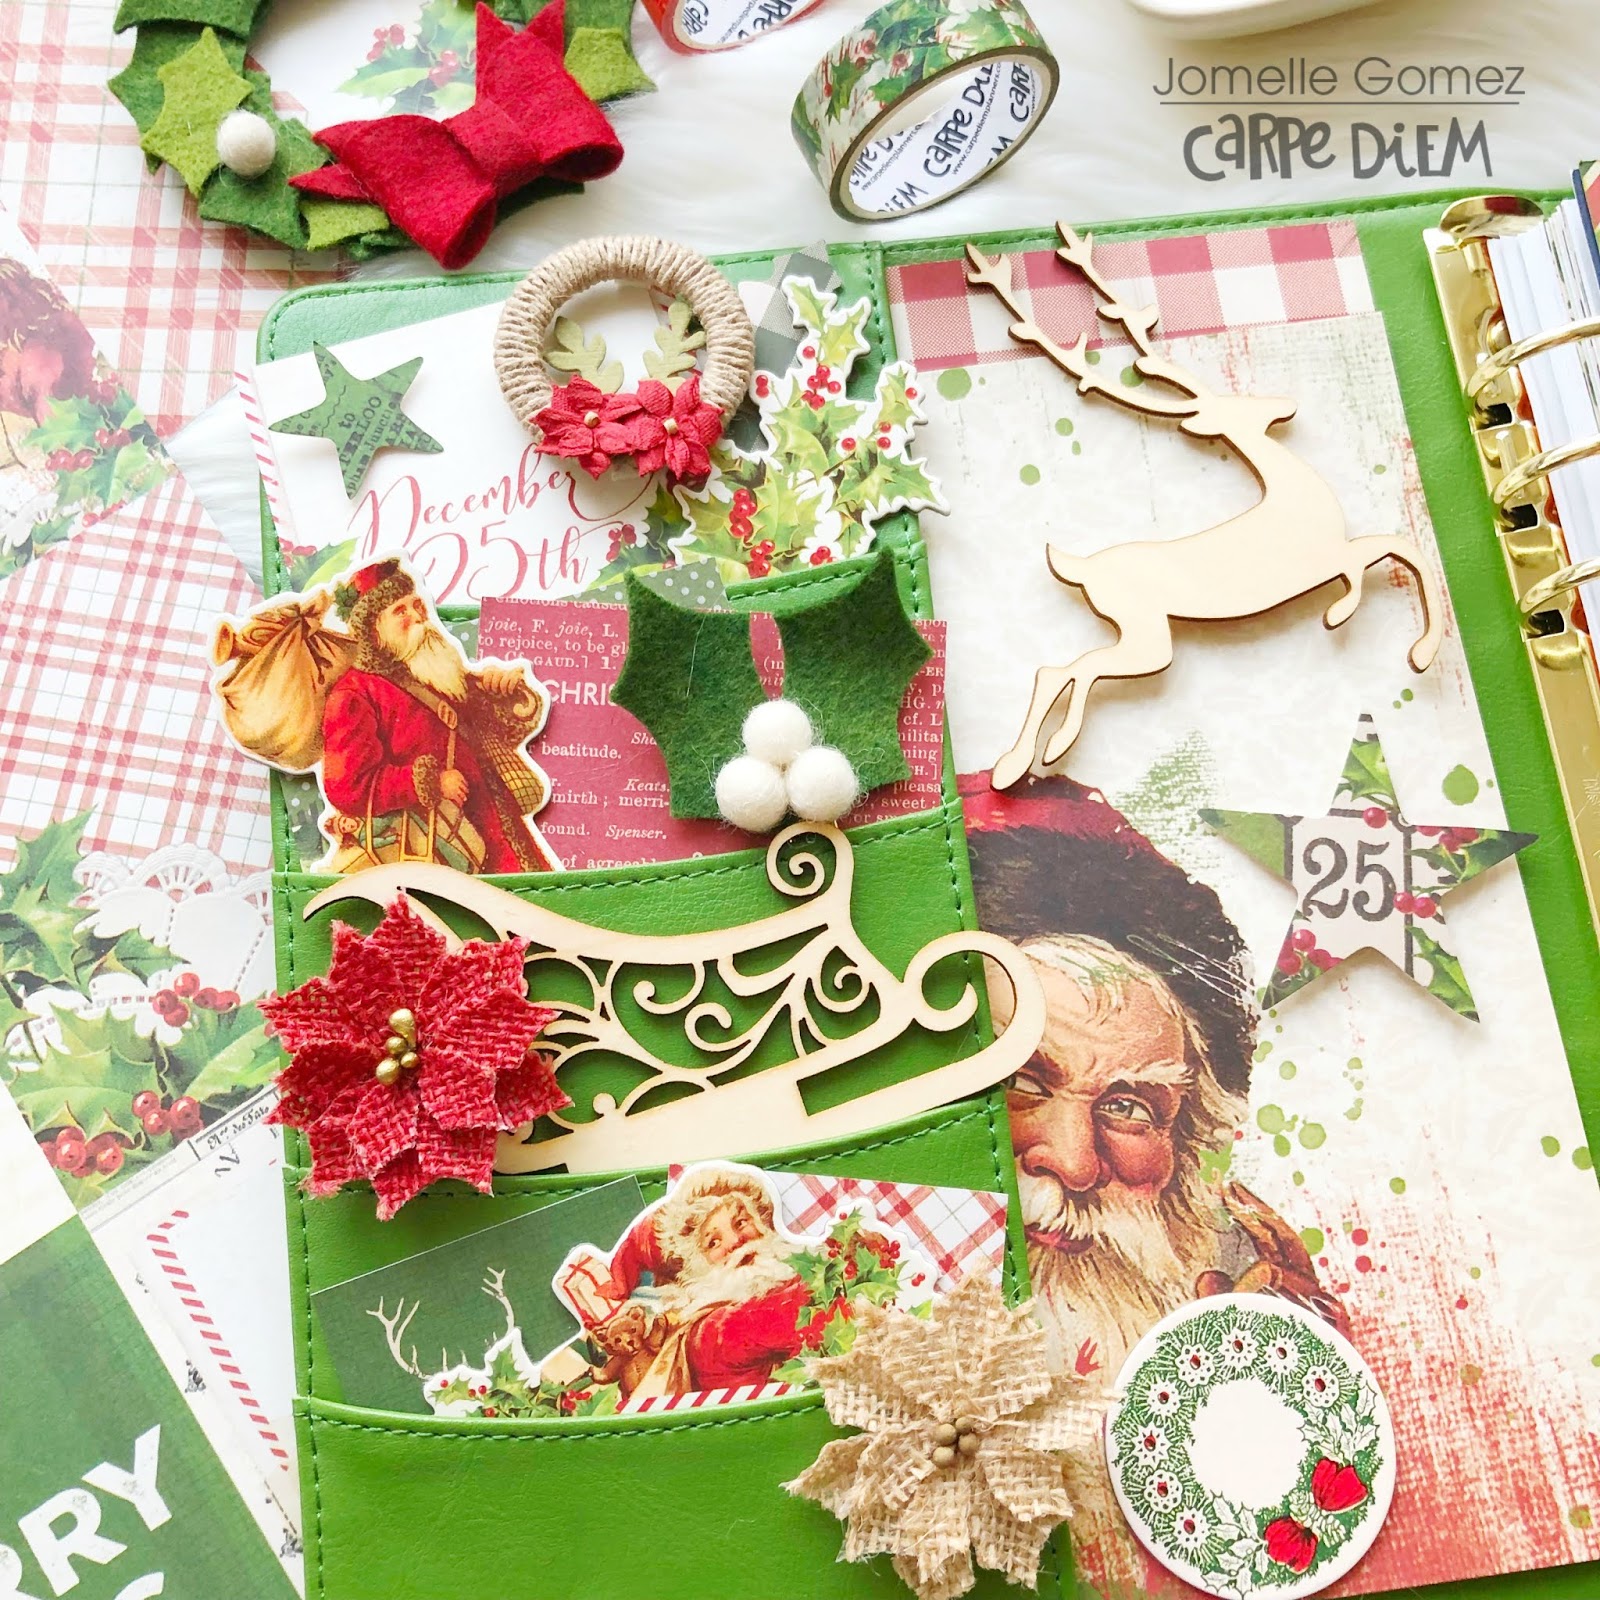
You’ve seen me use snap pockets on my inserts before, making them into shaker pockets, this time I’ve cut down some of the 4x4 pockets. I used some of the little cards out of the snap pack and a few cute snowflake sequins. You guessed it, I used double sided sticky tape to attach it to the back of my insert cover. I do love double sided sticky tape, it’s so useful! 

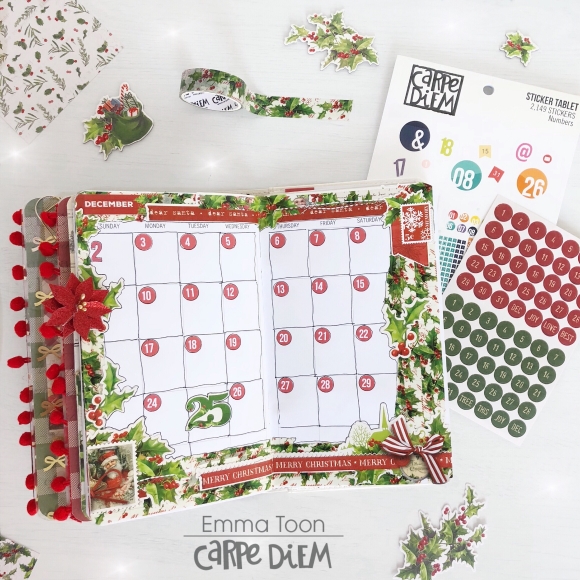
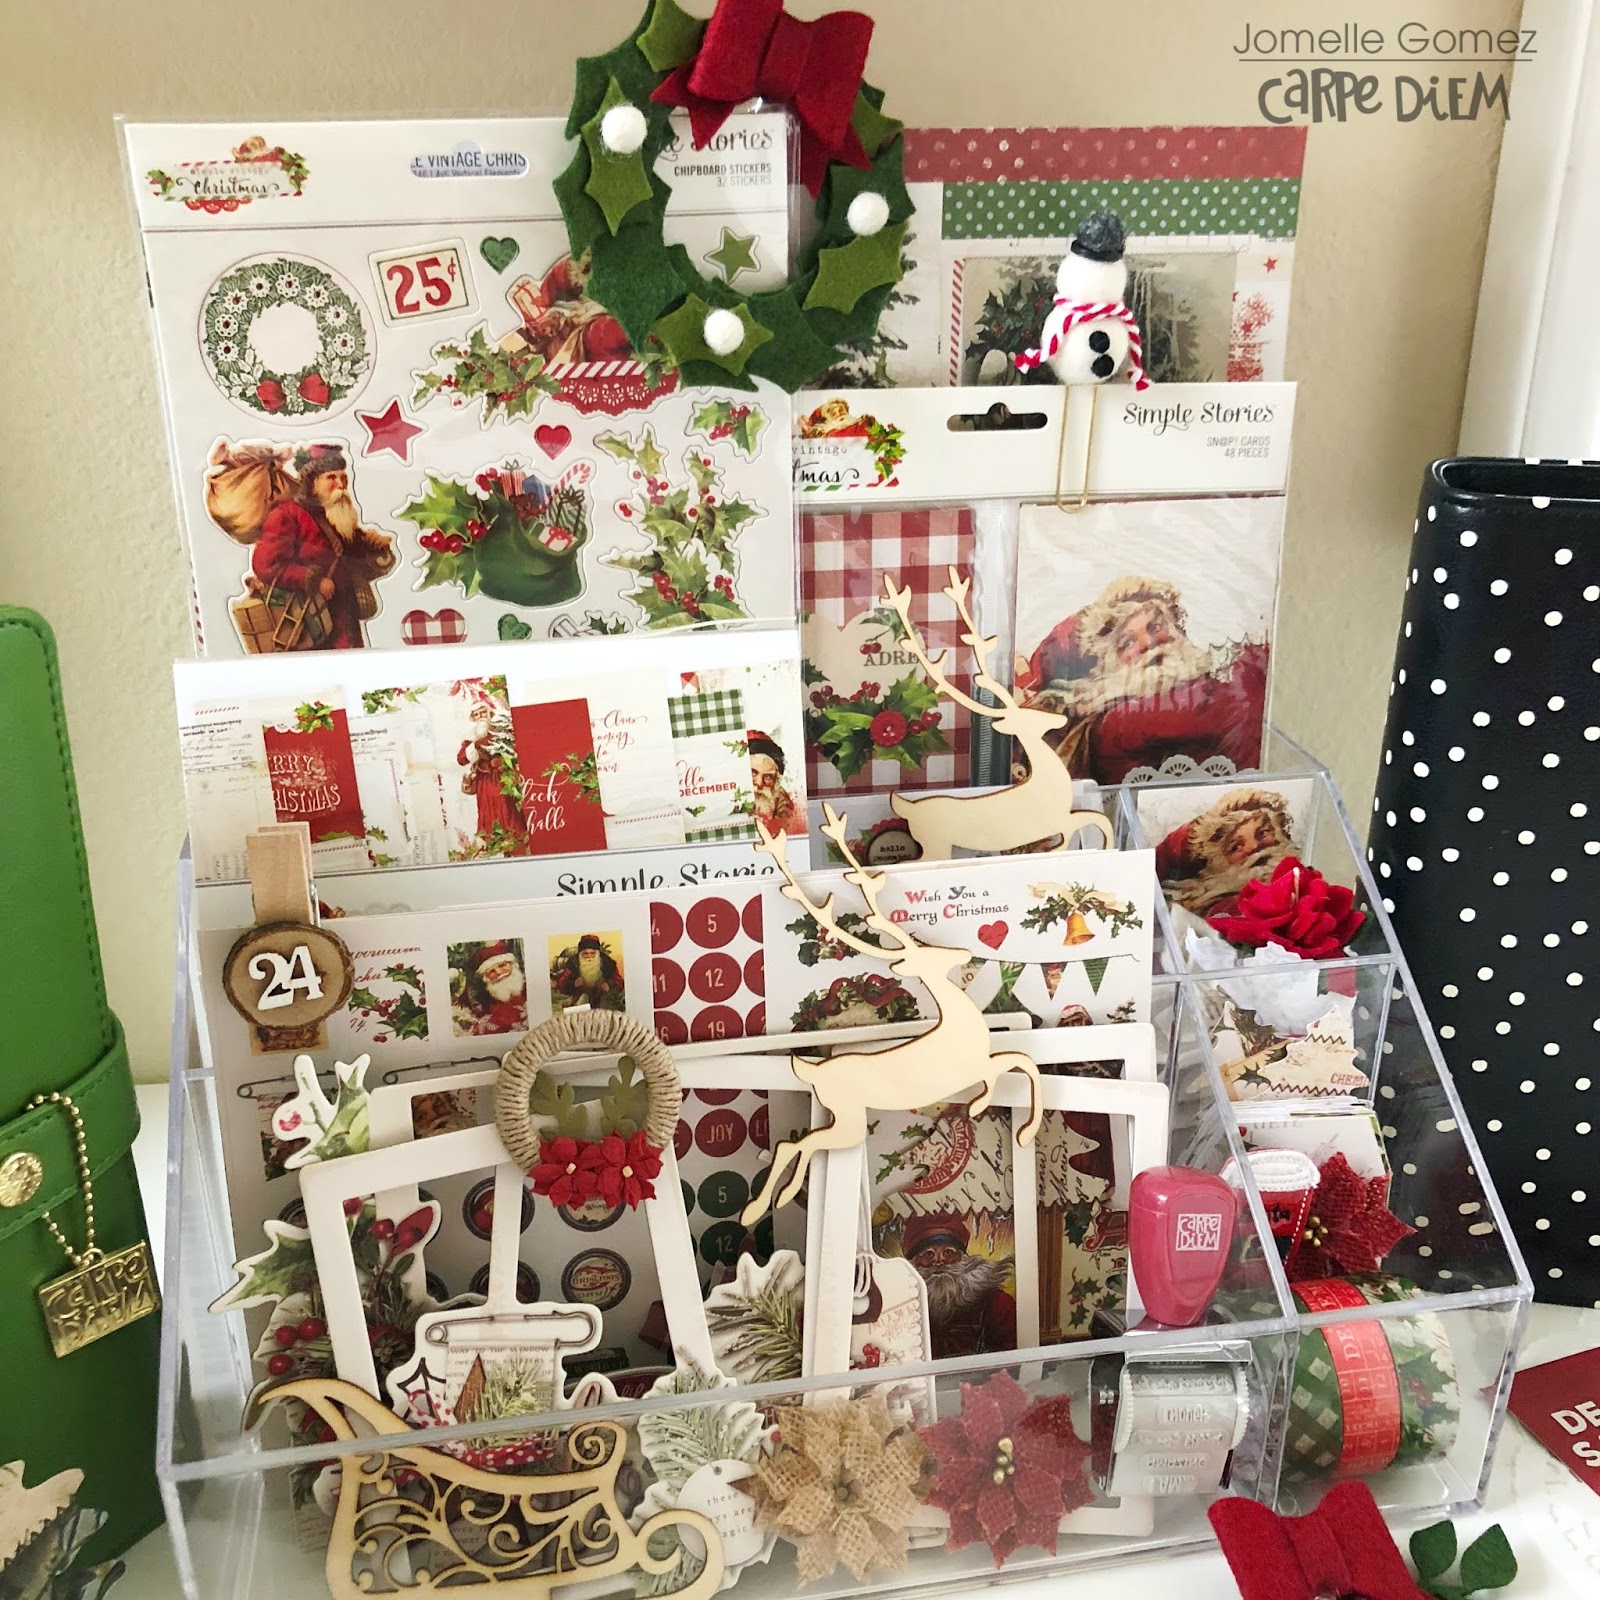
I think I’ve said this before, but since Carpe Diem planners brought out the monthly, daily, weekly inserts, it’s completely changed the way I use my TN’s!! I used to be an A5 girl all the way, but now, it’s all about my love for TN’s! I would say that an absolute must buy is the Numbers Sticker Tablet!! It’s bursting full of every size and colour numbers, there’s enough in there for a good year!! I choose to use the red circle numbers for December but there is also a sheet of number stickers that come in the sticker pack for this collection. 

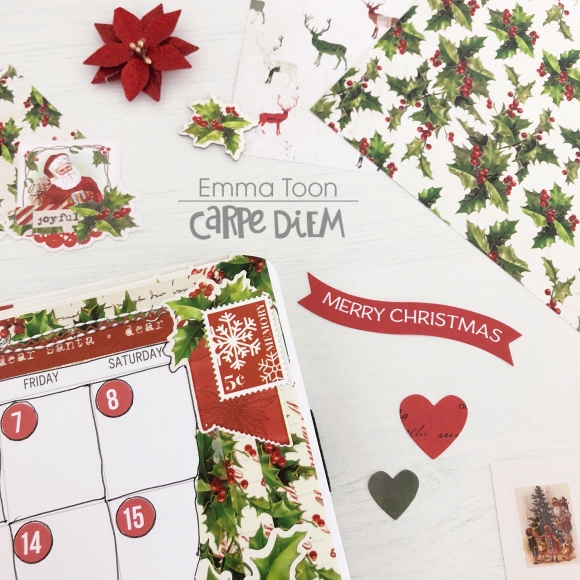
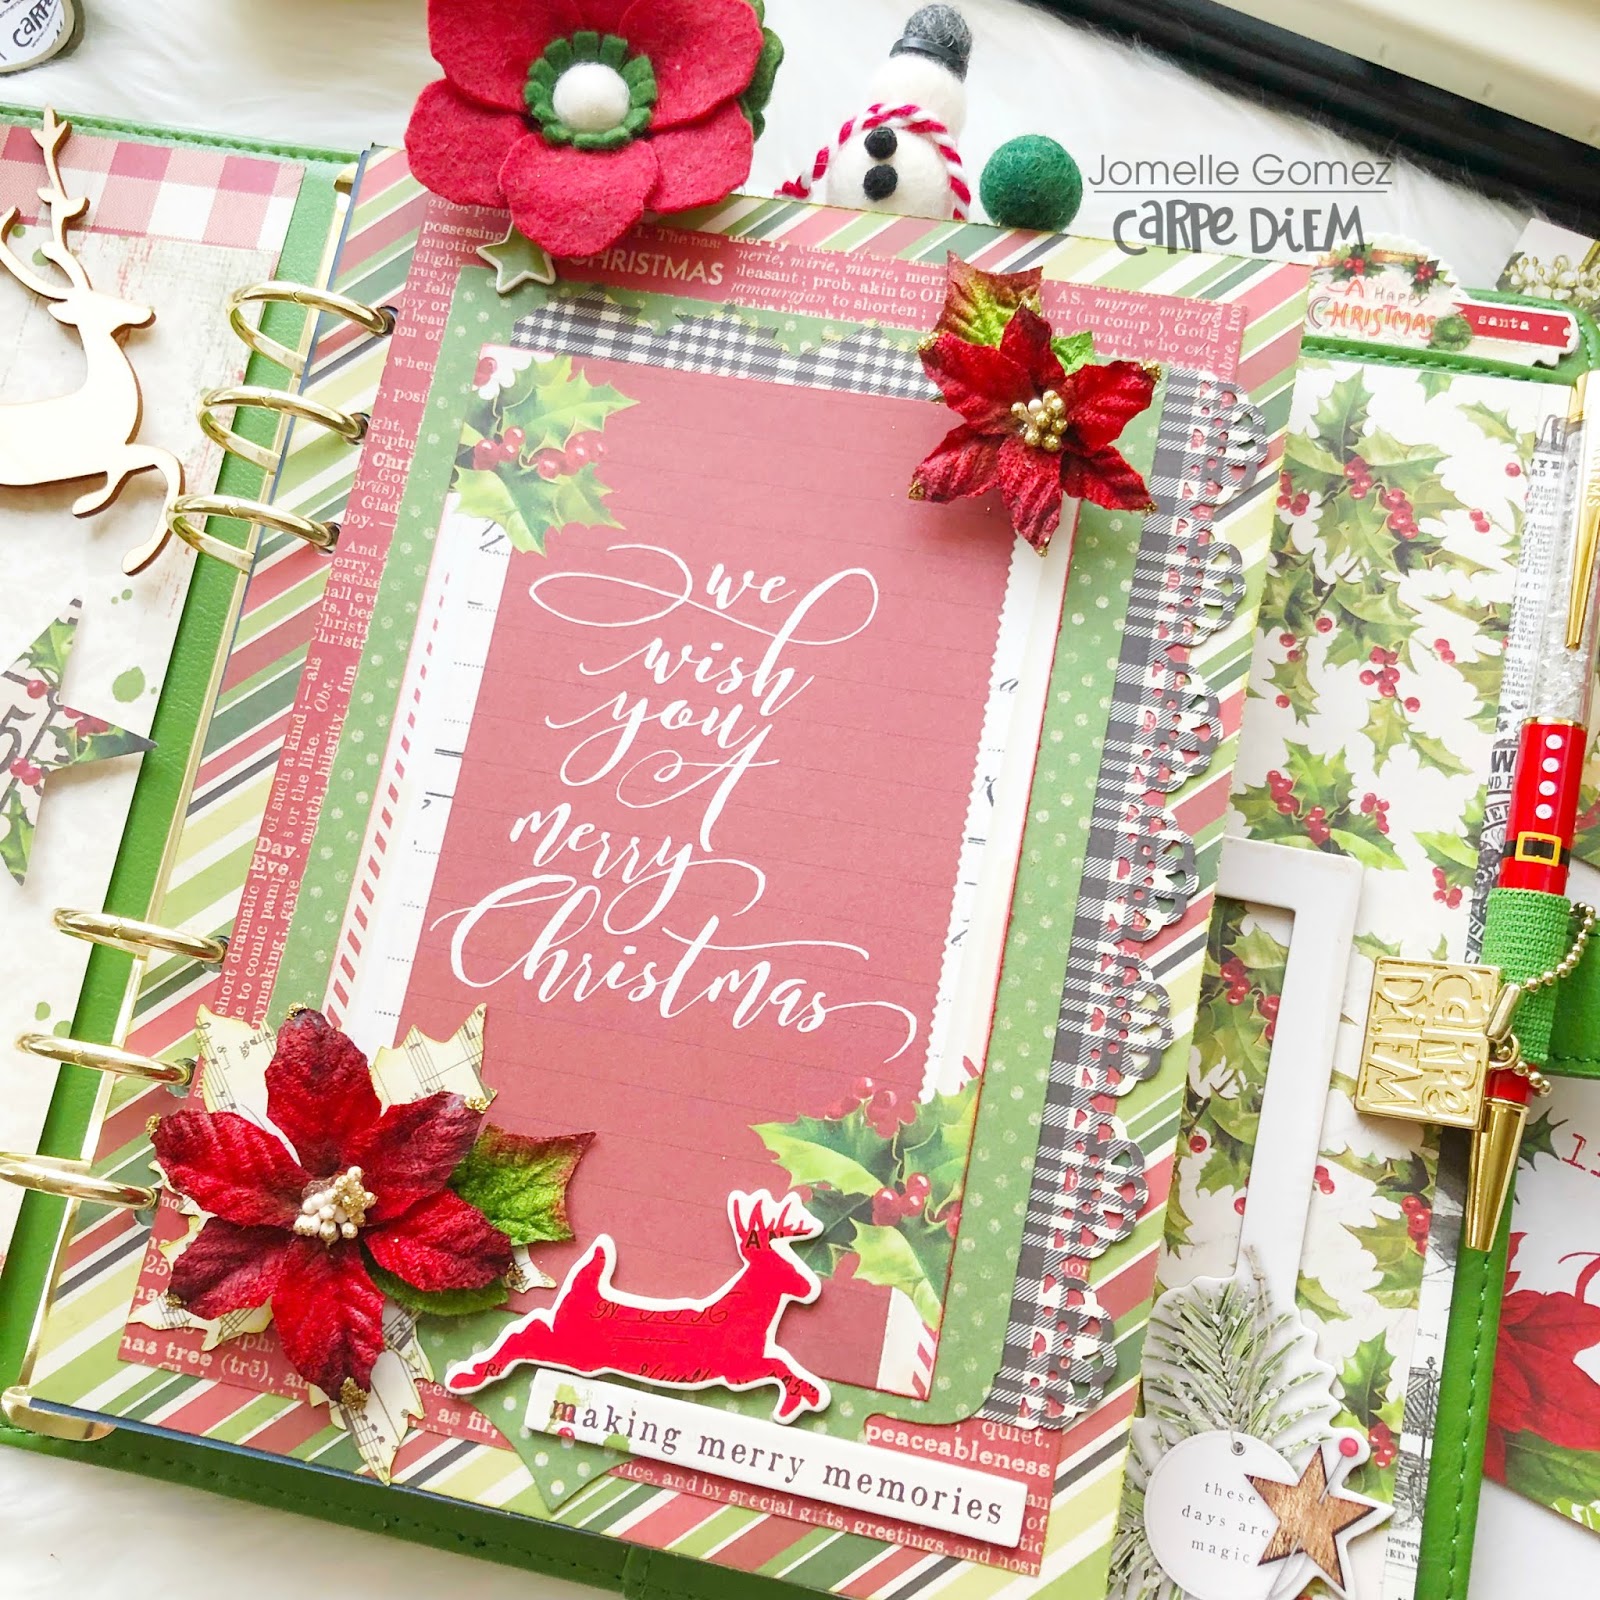
I’ve decorated my monthly spread in a very similar style to my October Halloween spread, lots of washi tape all around the edges and then some of the fabulous stickers that are on the 12x12 sheets! I’ve said this before, but I’ll say it again, don’t ever be afraid to cut your stickers to make them fit where you want! 

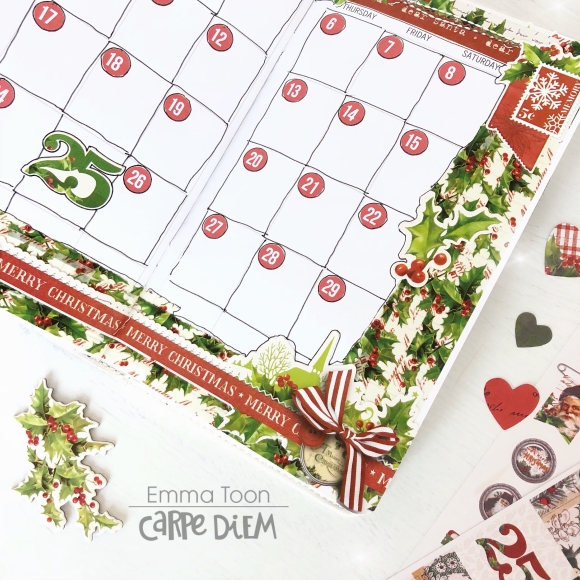
I like to draw around the edge of the stickers & washi, but also I draw around each box too!...don’t ask me why, I haven’t a clue what started me off doing it, but it’s  just something I do! 

So there we have it, my set up for December. 

I hope you’ve enjoyed a little peek inside my TN and possibly taken a few ideas, if nothing else, you’ve learned not to stick pom pom trim to your finger with super glue!! If you would like to see more pictures using Simple Stories products then checkout my IG account  Heartsbyemma (@heartsbyemma) • Instagram photos and videos

I've also included a little process video here as well

Supplies

Pages