September 2018 Blog Posts

Hi friends! Linsey here today sharing my latest altered project using the Dream Big collection! This magical collection is brimming with adorable images and sentiments that bring me back to childhood. I love the rainbows and fairies, the unicorns and roller skates--oh my! So much dreamy goodness! Come along and take a ride on my Dream Big Ferris Wheel! 

First, all pieces were painted white around the edges and then covered with patterned papers from the Dream Big Collection Kit. After adhering all papers down and allowing to dry, all edges were sanded gently. 

After putting together all pieces and building of the ferris wheel, it's now time to decorate the front! I love how the DREAM lettering from 6x12 Chipboard draws attention and makes one want to fly with fairies! A magical unicorn ticket-taker greets all guests and sprinkles a bit of fairy dust upon them before seating! 

The Dream Big ferris wheel brings together all kinds of friends! Mermaids, kitty's, fairies, cupcake sweeties and unicorn-ice cream cone wannabes alike! Everyone loves to ride on the Dream Big Ferris Wheel! Make a wish while riding and it might even come true!

Thanks so much for visiting today! I hope you enjoyed my project and hope you feel inspired to create something magical with the awesome Dream Big collection too! Until next time, happy crafting!

Supplies

Hello creatives! Leah here with you on the blog today playing dress up with my traveler's notebook to get her ready for spook-tober! I love this time of year and as much as I love my current setup, the Simple Vintage Halloween collection has inspired me to decorate my TN for the season. Switching out the traveler's notebook cover and redecorating the pockets are a couple of easy ways to change a planner's vibe, but another way I really love to change things up is by creating interchangeable covers for my notebook inserts. It's a super easy way to keep using the same inserts but give them a different and temporary look, very similar to changing out your planner dividers.

I've had several requests to film the process of creating a custom notebook insert cover and I'm happy to have finally done so.  Check out the video below to see how I made this Halloween-themed cover for my monthly notebook insert.

https://youtu.be/LNgsVKlcY60

Here are some photos of the finished project. The best part about making covers like this is how you can  switch them out and re-use them later. After Halloween, I can switch to another cover and keep this one around to use next October if I choose to. I keep all the covers I'm not using in a spare TN when I'm not using them.

To add to the Halloween vibes in the front of my TN, I tucked a bunch of die cuts into the pockets to match my new cover. Most are from the Simple Vintage Halloween collections, but a few of the florals are from the Forever Fall collection. A little double-sided repositionable tape helps all the little pieces stay in place.

I'm so excited to finish setting up my October monthly setup. This collection has me so inspired and it's my favorite time of the year which has me feeling extra creative. I've done a little pre-decorating for October's monthly spread.

I can't wait to see what other ways everyone will use this collection. Are you working on or planning any Halloween or Fall-themed creative projects? Let me know below or come say hello over on Youtube or Instagram. Head over to the Simple Stories and Carpe Diem Planner Instagram accounts for lots more seasonal inspiration!

Supplies

The orange glow from pumpkins on porches, stars twinkling in the night sky, and children exclaiming "Trick or Treat!" are just a few of my favorite things about Halloween! Hello, everyone! Jana Eubank here with a scrapbook page featuring the Happy Halloween collection.

I love when the 3x4 & 4x6 Elements papers include large words that I can cut out and use as titles on my scrapbook pages. This word adds so much fun color to the top of my layout!

I took the opportunity to decorate the using the 6x12 Sticker Sheet. For some added texture, I cut a long length of thin, white twine to use as a spiderweb trailing behind the spider sticker, wrapping it around several of the letters.

The banner sticker helps you to know that my girls are headed off to a party and it also anchors the witch sticker at the bottom of the main photo.

Finally, I added some sprinkles of white mist to mimic the look of a night sky.

How about you? Do you plan on attending a Halloween party this year?

Supplies

Halloween?  Already?  How is that possible!  But it will be here before we know it and I had lots of fun getting this fun Snap album ready for our not-so-spooky holiday.
I love the colors and patterns in the Simple Vintage collection.  Fun plaids, stripes, and polka dots paired with lots of cute chipboard pumpkins made this album come together very quickly.
I also love how the papers and element cards have a distressed, vintage feel!
How cute is my little granddaughter?!  These photos are from last year, and now I will just continue the album with photos for each year going forward. 

I also plan to make my album part of my Halloween decor, so that family and friends can flip through the cute pages each October.  I hope you love Simple Vintage Halloween as much as I do!

Supplies

Hey Sweet Creative Friends!

This year is just flying by and October is just around the corner. I printed the digital monthly freebie for the Travelers Notebooks. I’m going to glue this into my insert I’m using for October. I absolutely love Halloween and knew I wanted to use the Simple Vintage Halloween Kit for my Planning!

I also used some of our stamps, I am loving how perfect they are to complete a page. Some people say they aren’t stampers. Honestly neither was I. But I think once you find your groove and favorite products they’re so easy to use! 

I am also going to be doing October Daily. With this, everyday I do a challenge and document it. Whether it’s big or small and I just decorate it Halloween theme. It can be as simple as going to Starbucks to buy a Pumpkin Spice Latte, to taking my niece and nephew to the pumpkin patch. 

I have another blog post early October where I’ll be sharing you some of my inside pages as I will be documenting daily! Feel free to follow me on @livelifeandcreate to see my October Daily journal entries :) 

Winter, Spring, Summer, or Fall- which one is your favorite?! Hands down for me, FALL is my most favorite of all. I challenge you to dust off your paper crafting stash and lets use what we have to document October! 

Till next time!

Supplies

Hello friends! It's Jennifer on the blog today to share a layout I created using the gorgeous Forever Fall collection!  I   don't know about you but autumn is my favorite season! I  just love the colors of the leaves and cooler days!  Even better is creating scrapbook projects about fall!  Forever Fall is full of beautiful autumn hues and adorable embellishments and does not disappoint!

For my background, I  used a fun leaf cut file with the B side of Be Grateful which looks like blue denim! I then went back and inserted different patterns into the negative spaces.   Honestly, it was tough to pick which prints to use since  they are all so cute!

I  am a fan of layering my embellishments so I'm grateful Simple Stories always has many to choose from!  Here, I  used three die cuts from the Bits and Pieces pack followed by the "happy fall" circle from the 6x12 Chipboard.  I  wanted to add dimension to my title so the chipboard is "popped" up with pop dots. 

Showing more of the cute die cuts from the Bits and Pieces that I  layered next to my photo.  I  really love the newsprint leaves as they are a great contrast to the colorful prints!

I  also love to layer under my photos! Here, I  used the fun orange of the B side of Pumpkin Everything and the navy floral of Give Thanks! I also added a cute typed sentiment from the Bits and Pieces as well as a portion of the scallop border sticker from the Combo Sticker sheet! 

Thank you for stopping by the blog today! Check out Forever Fall in its entirety by visiting the Products page! Have a great day!

Supplies

Hi everyone! Tara with Secretbees Studio  Summer may be drawing to a close (say it isn't so!) but you can preserve all of those wonderful Summer memories in a fun and happy mini scrapbook that is jam-packed with pages, pockets and pull-outs!

For this adorable mini scrapbook, I used the Simple Stories 'Hello Summer' paper collection with it's amazing mix of sunny colors and bold, playful patterns. There are plenty of fruits, florals and flamingos for every page along with lots of charming summer-inspired sentiments! This collection is all about summer vibes and will document your summer story in the brightest way!

The front and back covers were cut from chipboard to 4.5" x 5.5" using a paper trimmer before being covered with the colorful patterned papers. I used an assortment of stickers, chipboard and bits & pieces layered with the cute word stickers to embellish the front and even added a few to the back cover for fun!

For the inside, I had a mixture of Simple Stories pocket pages that I cut to the desired size- some 3x4, some 4x4 and even one with four 2x2 squares! Some had patterned paper added to them along with delightful ephemera and some were just accented with a sticker or two! There are even a couple of interactive pull-out pages as well

Check out my video on youTube to get a great view of the entire mini scrapbook and don't forget to preserve those Summer memories!

Supplies

Hi there, it’s Emma back with you today. I’d like to show you in this months blog how you can decorate your monthly spread without having to spend a fortune on products! Can’t be done?...it sure can!! Take a look! 

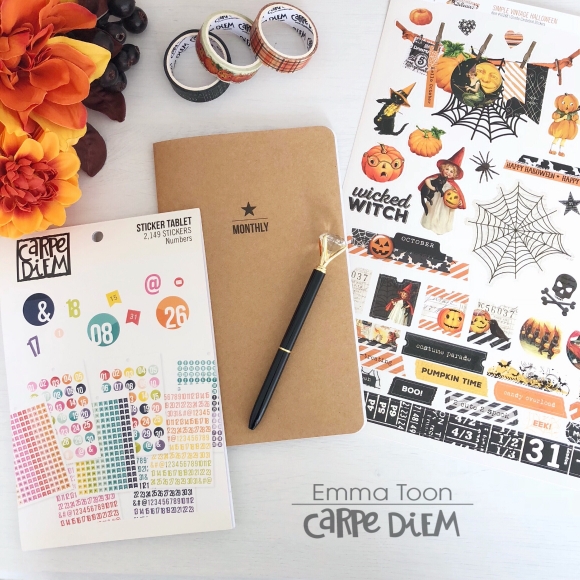
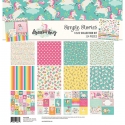
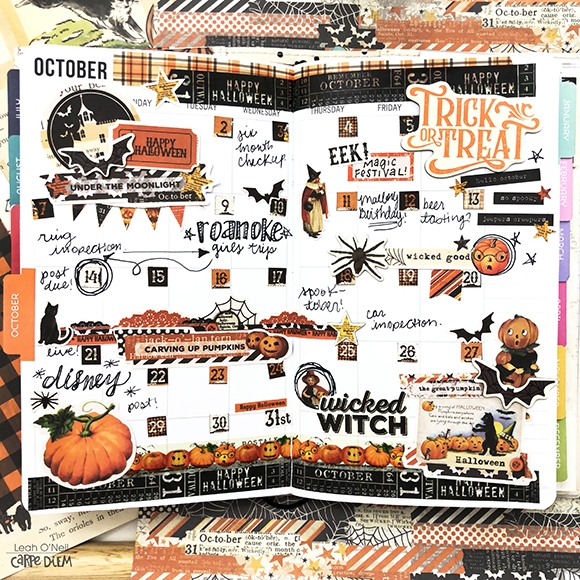
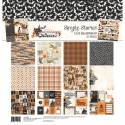
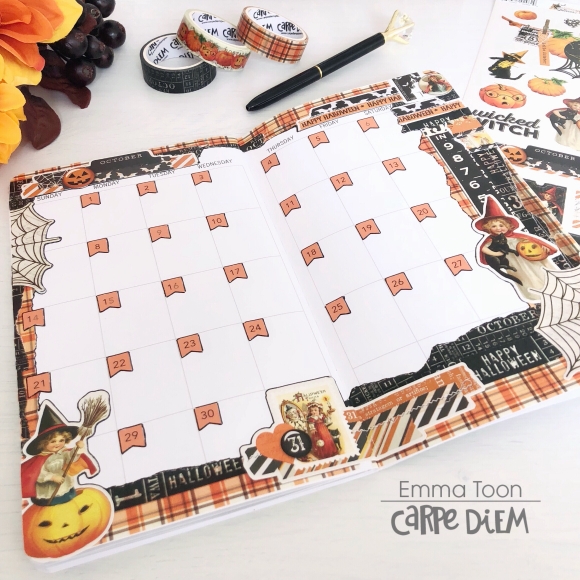
Here I’ve laid out the only products you’re going to need,and this can apply to any monthly spread, wether it be your A5, Personal size or TN insert pages, I’ve chosen to use my tn monthly insert by Carpediemplanner to show you. You’ll need a pen, washi tape, 12x12 combo sticker sheet and the Carpe Diem sticker tablet. The sticker tablet is optional, you can always write in your dates without it really affecting the look of this spread. 

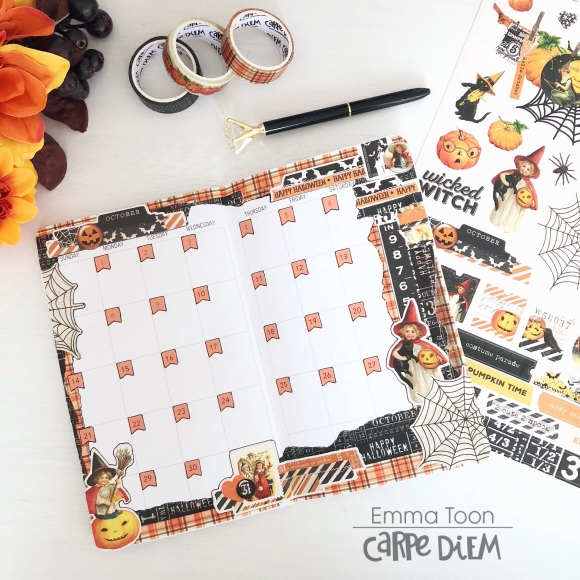
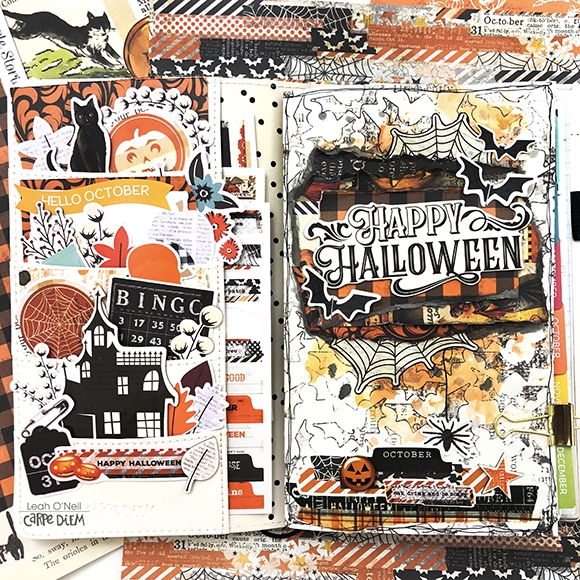
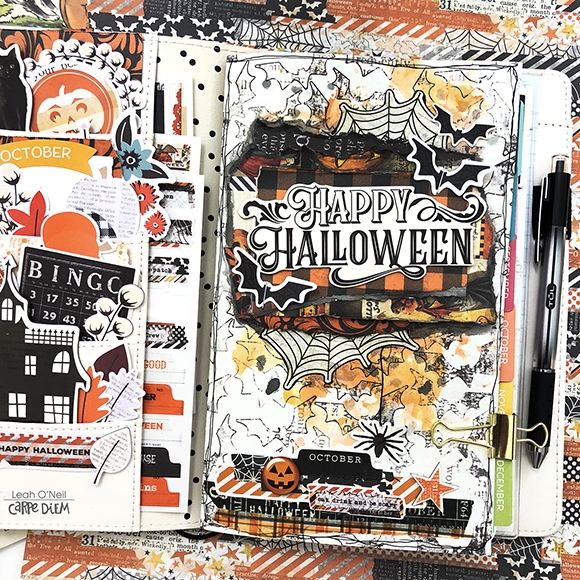
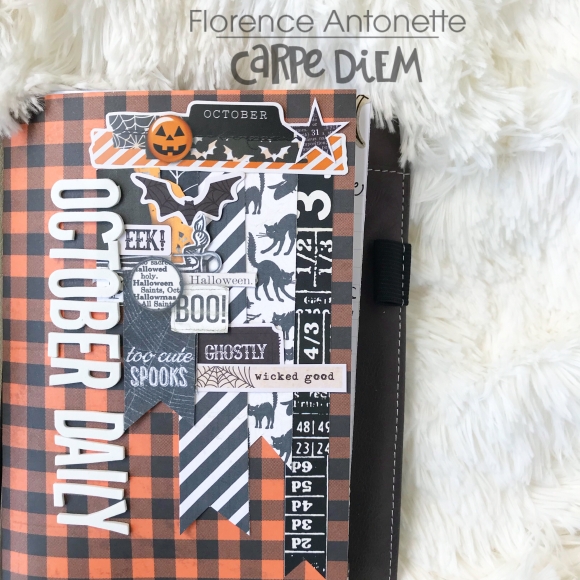
Ready?...ok, let’s start! I have used a selection of the Simple Vintage Halloween washi tape to go all around the edges of the pages, you really don’t have to be neat, I like to rip pieces along the sides to add different textures and avoid blunt edges, it softens the look. Layer your washi until you’ve covered all the blank white spaces. 

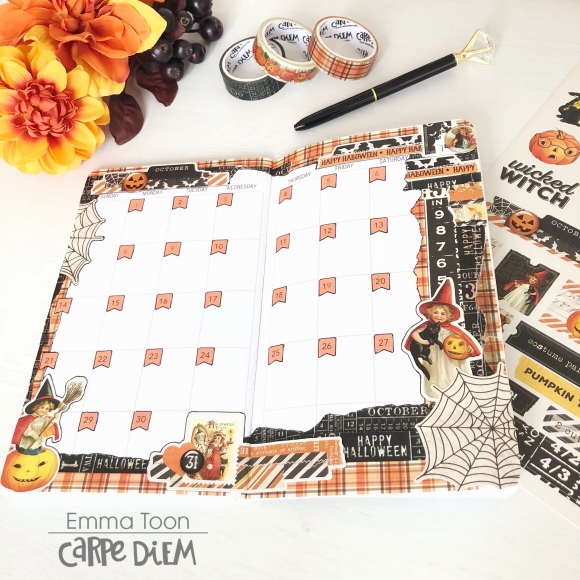
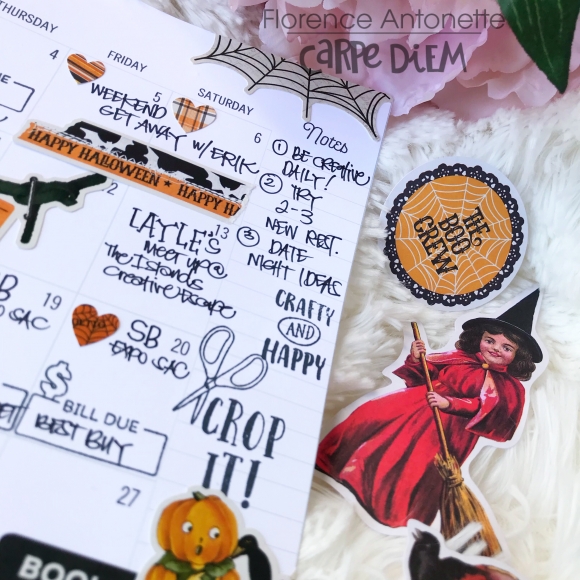
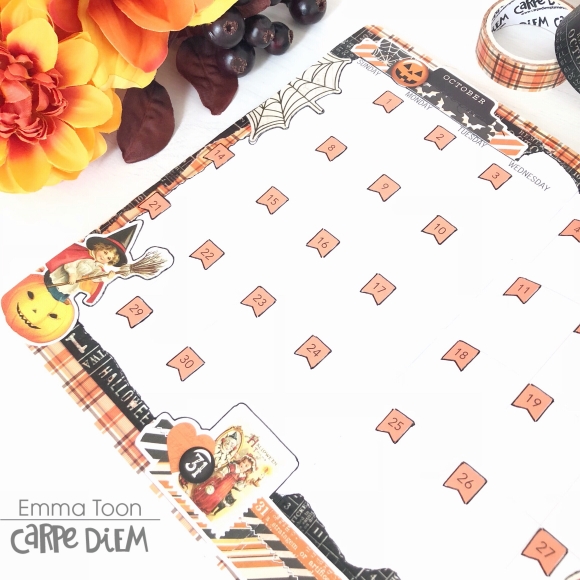
Now it’s time to start adding some stickers from the 12x12 sticker sheet. Don’t ever be afraid to cut your stickers to make them fit where you want. You can add them to corners and then trim any overhang. I’ve done this with the huge cobweb sticker, and then with the piece I cut off, used it on the other side of the page. 

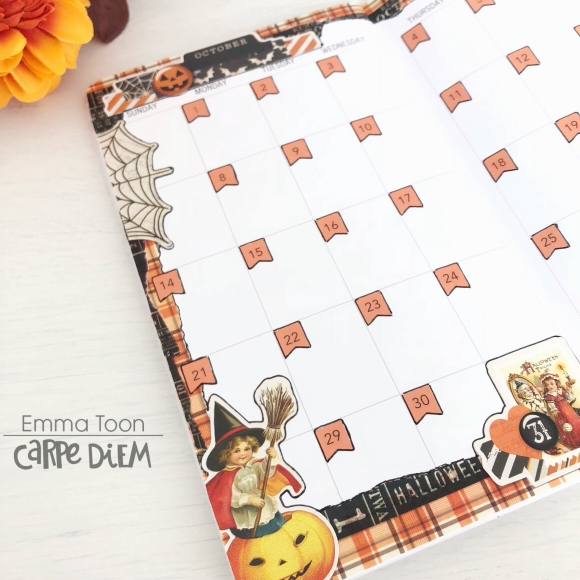
On the left hand bottom corner I’ve used the sticker of the little girl dressed as a witch and cut the overhang off, I like the finish that this technique gives.

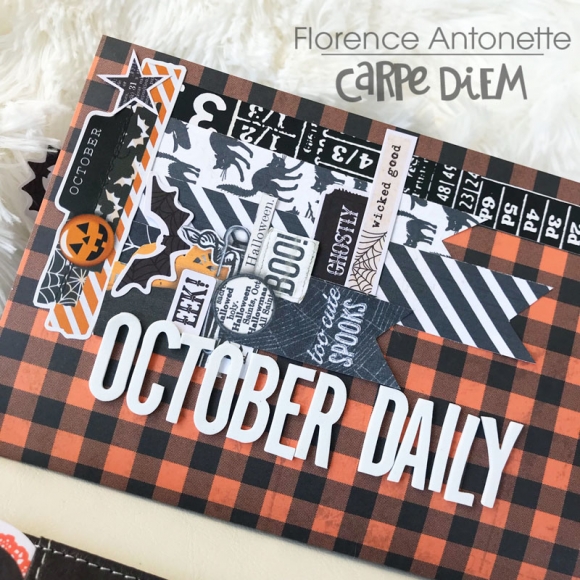
You can also see here in the top corner where I’ve covered over the ‘October’ on the original insert and used one of the stickers that has the word ‘october’ on it. The design of this sticker is where I got the idea for this spread, it’s made to look like lots of different layers, all stitched together. This is another sticker which I cut to make it fit!

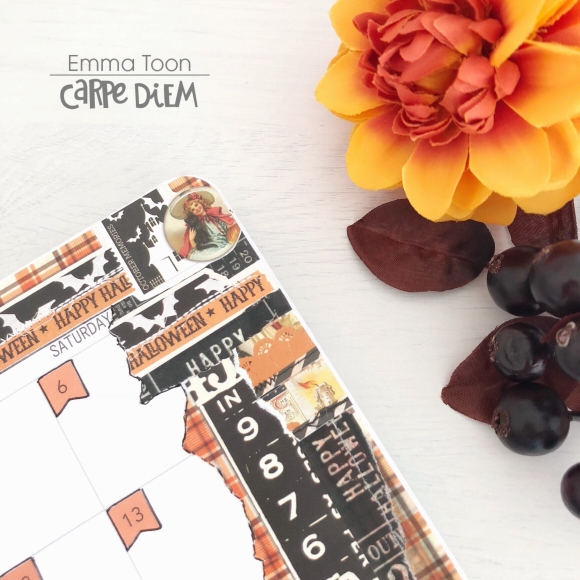
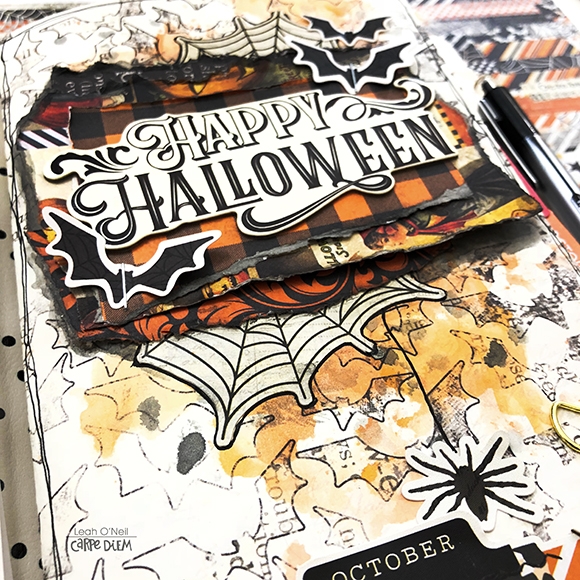
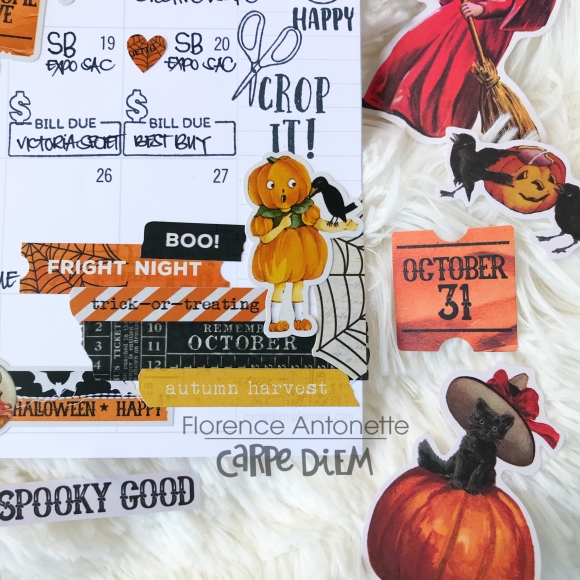
On the right side of the page I’ve almost mirrored what I did on the left, adding a witch sticker in the bottom corner, there’s the cobweb sticker that was cut and at the top a layered style sticker, which again, I cut to fit, and then the piece I cut off I used below it. 

I kept the centre of the spread really simple by literally just adding the number stickers, I used orange ones to tie in with the colour scheme and used my black ink pen to draw around each one, I also did this around the whole edge of the pages, it just makes the decoration ‘pop’! 

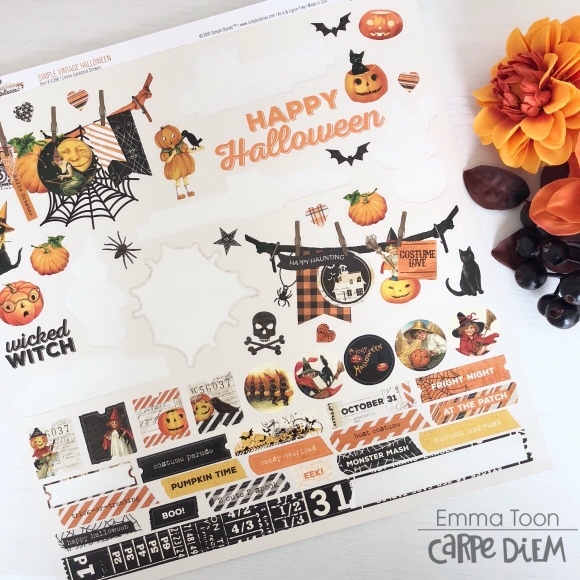
You can see on the used sticker sheet, just how a very small amount of stickers can go along way!! ...and don’t worry, the remaining stickers can then be used on your daily/weekly pages throughout the month! So, I don’t think that’s bad is it?!, a whole month of decorating your pages, only using one sticker sheet and some washi! 

The main thing to remember is, have fun! Enjoy decorating your pages, they are for you and nobody else, so as long as they make you smile, that’s all that matters!! As I’m always saying, there’s no right or wrong when it comes to planning...it’s what works for you! 

Thank you for joining me again this month, I do hope you’ve enjoyed looking at this spread and will join me again, next month. 

If you would like to see more pictures using Simple Stories products then checkout my IG account  Heartsbyemma (@heartsbyemma) • Instagram photos and videos

Supplies

Pages