October 2018 Blog Posts

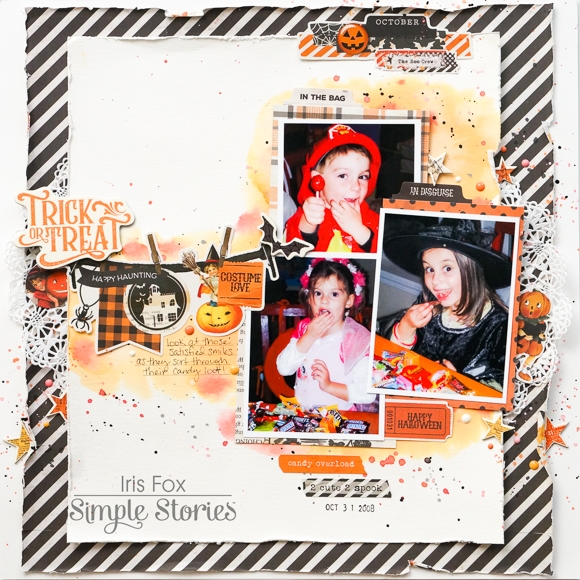
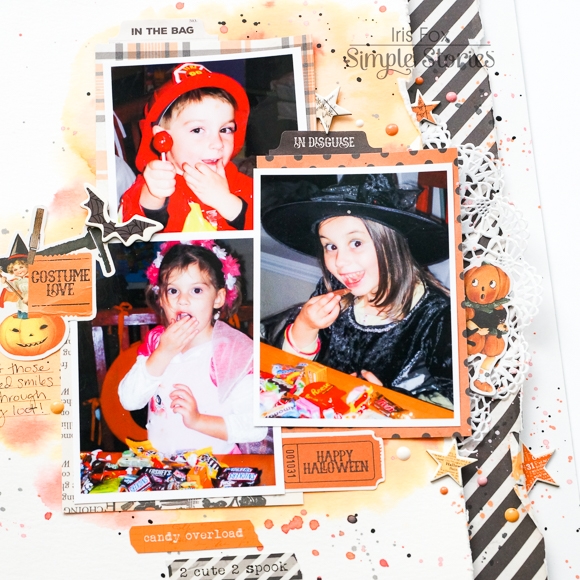
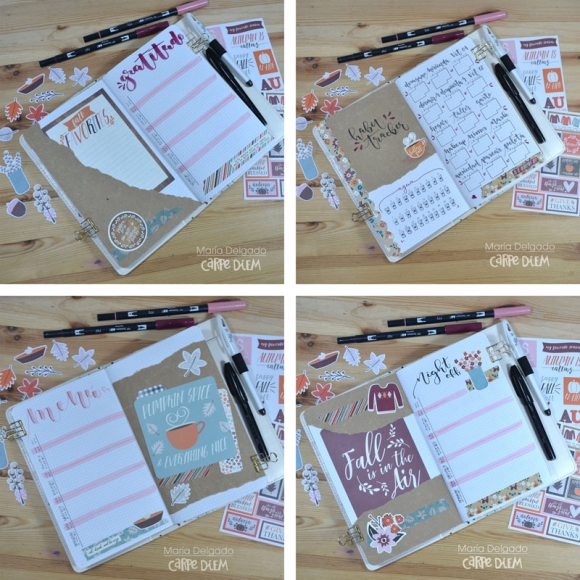
Hello everyone!  Nathalie with you today with a new layout that celebrates all those past Halloween memories.  My kids are now teenagers, which means they have stopped wearing customes, but i still have lots of pictures of all the Halloweens past, and the new SIMPLE VINTAGE HALLOWEEN was perfect to bring those memories to live.

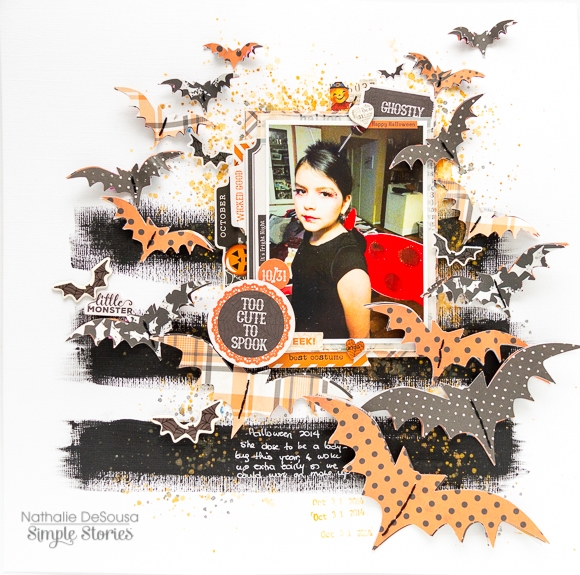
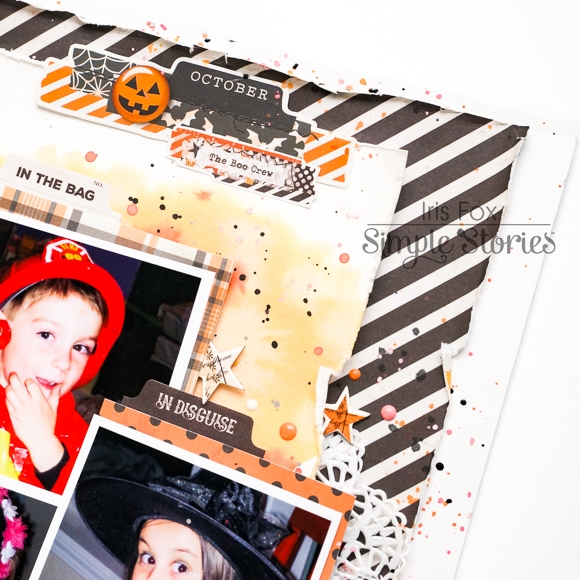
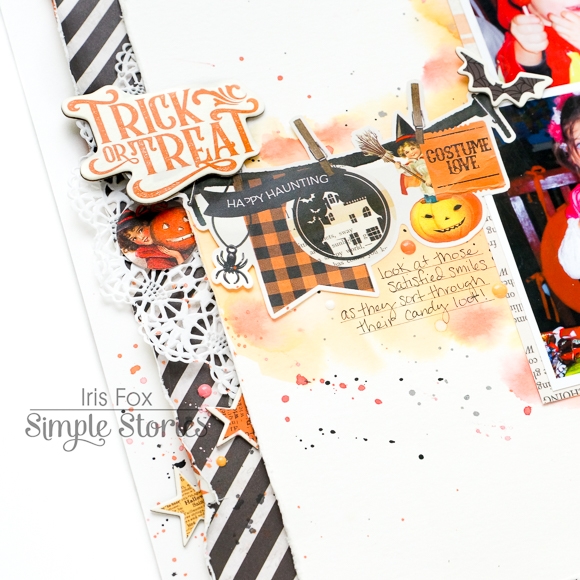
First i used a cut file from the Cut Shoppe to create all the bats from the Fright Night, Beware and 2x2 element papers.  While the papers were being cut, the background was being constructed with some black paint, orange and gold watercolor.

The bat cut outs were layered, then hand stitched to the page.   A bit of foam adhesive and strong glue was added to create the illusion of movement on the bats's wings.

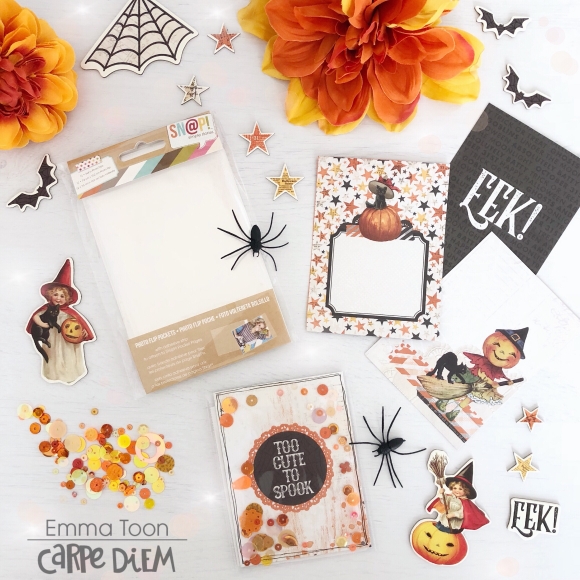
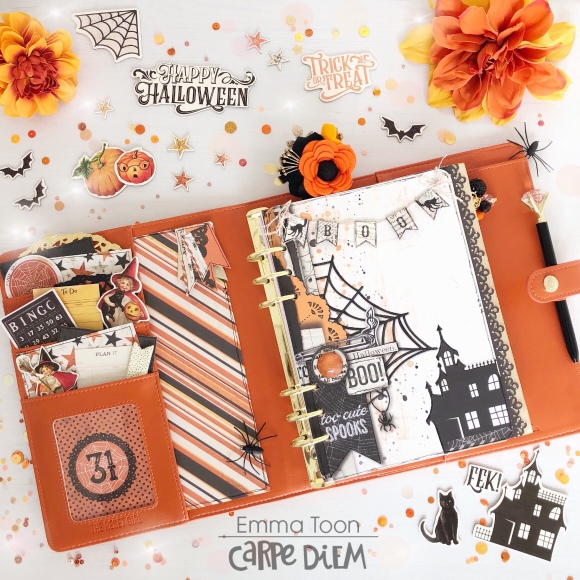
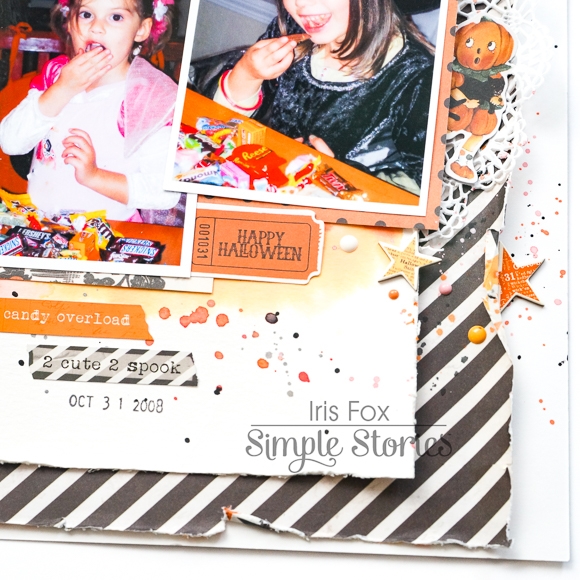
There are so many cute embellishments in the Simple Vintage Halloween collection, that it was so easy to use them to create layered clusters around the picture.

To create the title of this page, I simply used the bottom left corner of the picture to layer some embellishments in a cluster, and then added the die cut piece on top of it all to form my title.

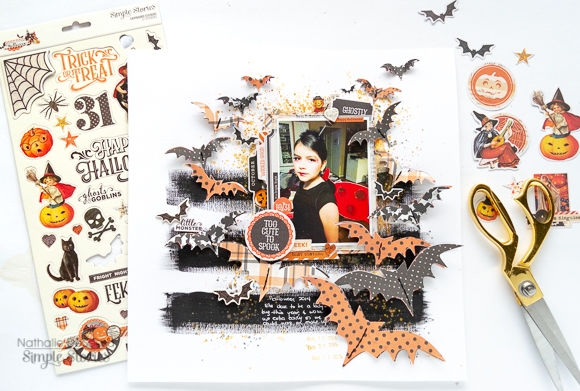
Love how this turned out!  The new SIMPLE VINTAGE HALLOWEEN from Simple Stories is the perfect collection to document your past and present Halloween memories.  You are going to love it!  Have a Great Halloween!!!

XO

Supplies

Hi, I’m back this month with the fabulous Halloween collection, Simple Vintage Halloween. I’m not normally one for decorating my planners for Halloween, but I loved this collection so much, that I went all out and decorated both my A5 Persimmon and my Cream Dot TN! 

Just take a look at all the gorgeous papers and embellishments that come with this collection! The first thing I did was cut out the 12x12 papers to make my insert covers for in my TN. 

I used the 12x12 paper with the 3x4 cut aparts for decorating my inserts and then used washi and ephemera to add some more detail.

I also love to make little shaker pockets to decorate my inserts, this is so easy! All you need is some of the Simple Stories Snap Photo Flip pockets, some of the cut aparts and some sequins! Slide your 3x4 card into the snap pocket, tip some sequins in and then use clear tape to seal the top. Add double sided sticky tape to the back and hey presto!!!...you’ve got a shaker pocket!!

Another fab use for the Snap Photo Flip pockets is to use them as card & sticker storage! I like to cut mine on a horizontal, just stick a line of washi horizontally across your snap pocket and cut, add double sided sticky tape to the back and stick on your insert...and as easy as that, you’ve got yourself more storage!

Here’s my A5 Persimmon all set up, Pockets are stuffed full and I’ve made a fun dashboard, which is so easy with the Carpediem A5 punch! I cut out the word BOO and made a little banner by adding them to some string and then stapling into place. 

My Cream Dot TN is decorated in a similar style, pockets full to bursting! I like my TNs to be nice and chunky, so I have four inserts, each with a decorated insert cover, and I also add a page marker with pockets and a washi card, I’ll have to show you on another blog how I make those!

So there we have it, the gorgeous Vintage Halloween set up in both my tn & A5. 

Thank you for joining me again this month, I do hope you’ve enjoyed looking at my Halloween set ups and will join me again, next month. 

If you would like to see more pictures using Simple Stories products then checkout my IG account 

Supplies

Jeanne here today and I’m sharing cards made with the Simple Stories Forever Fall Collection.  Fall is my favorite time of year and this beautiful fresh collection is a new favorite.  The colors are everything you’d expect for fall…warm colors like oranges, reds, and browns with a fun twist of navy and pink.

The background papers are florals, plaids, newsprint and dots that mix and match effortlessly.   I made all my cards with the 12” collection kit.  The first thing I do when I get the pack is to cut apart the journaling cards and then cut the 12” sheets into 6” squares.  This makes the papers more manageable for card making.  

This card features a 3x4” journaling card with a fun fall sentiment.   I embellished it with chipboard stickers and a sentiment and pink tab sticker from the combo pack.

The bits and pieces die cuts available in this collection are the icing on the cake.  You’ll find printed and die cut hearts, flowers, pumpkins, leaves, sentiments and so much more.   Because they’re ready to go they’re so easy to work with! 

I like to spread out the die cut images on my table (bits and pieces and chipboard) so I can get a good look at them all.  I arrange them on sheets of clear plastic the size of my card base so I can experiment with different layouts before I commit and adhere them in place. 

Arranging the elements on a clear sheet of plastic helps me decide on what background papers to use too.  I can pick up the plastic sheet and lay it over different pattern paper backgrounds and decide which one is most pleasing to my eyes

I had lots of fun making with this collection and I know you will too!

Supplies

This is halloween, this is halloween... Anyone else have that song stuck in their heads constantly in October? :D Hello lovelies, Iris here sharing a layout using the Simply Vintage Halloween collection.  I love all the traditional colors and especially the stripes and plaids in this collection. 

The photos I chose are of my two girls and our next door neighbor back from trick-or-treating when they were littles, sampling and sorting through their candy.  That's the best part of the night, amiright?!  Because my youngest was wearing a non-traditional color, I wanted to bring some of that into my layout.  So I started off with a sheet of watercolor paper, using Distress Oxide Inks (candied apple, spiced marmalade, worn lipstick, hickory smoke) to paint a background and add splatters.  Just a few sprinkles of the pink help that one photo blend in nicely.

Once dry, I cut the watercolor sheet down to 9"x10.5" rectangle to give it some interest and I backed it with the stripe side of the Trick or Treat paper, which has been cut to 11"x11". To brighten up the layout and concentrate the eye on the center of the page, I further backed the entire thing with white cardstock.  This gives me the opportunity to have ruffled layers but keep the layout looking fresh rather than busy.

I clustered my three photos, each matted in a different paper.  I'm a sucker for tabs and word strips, so I added those up and down the photos, and tucked in a ticket for good measure.

A banner from the sticker sheet - there are tons of great banners in this collection - connects the photos to the chipboard title.  I tucked two halves of a doily on either side of the top layer. I always think of doilies appropriate for vintage designs, yet they are trendy and modern too, so they can work with any look you're going for.  And they look like delicate spiderwebs.

A couple die-cuts peek out on the doilies, and tucked-under chipboard stars form a visual triangle. Because this layout is about the children enjoying their candy, I sprinkled some enamel dots (remember the candy dots from our childhoods?) within the star clusters. They are subtle but add interest. More Oxide sprinkles continue on the bottom cardstock layer to tie it all together.

Making this layout brought back so many Halloween memories that I'm excited to scrapbook.  What memories will you scrap with the Simple Vintage Halloween?

Supplies

Hi everyone, it is Kelly here today with a new blogpost. Today I will show you how I have setup my planner for fall and decorate a weekly and monthly spread. I used the pretty Forever Fall collection and my Blush A5 Carpe Diem planner.

For this setup I used lots of fussycut flowers from the ‘Be Grateful’ paper. I tucked these flowers in two of the four planner pockets and decorated the other two pockets with some papers and ephemera pieces.

I used my Silhouette machine to cut an ‘Autumn’ cutfile out of white cardstock. I backed the cutfile with 6 different papers from the collection. I layered the cutfile together with some flowers on my front dashboard. Love all the fall vibes this front dashboard gives me.

I mainly decorated my weekly spread with the three washitapes from the collection and stickers from the planner basics tablet. Little tip: when I plan my weekly spreads, I always leave some blank space in case I have some extra to do’s or new appointments.

For my monthly spread I used the lightpink flag number stickers from the numbers sticker tablet. These stickers match perfectly with the decorative elements from the Forever Fall collection.

I hope you have enjoyed reading this blog and next month I will be back with part two of my fall setup in my planner. Check out my instagram account createplannernl for more inspiration.

Supplies

Hello Simple Stories friends! 

Marcia here today with your Simple Stories inspiration. I couldn't resist using the Dream Big collection to document a special little ladies birthday. She reached double digits ... 10! Not too old though, Destinee is the perfect age for unicorns and fairies. I couldn't get a big unicorn with rainbow hair out of my mind when I saw this collection so I decided to do it big ... I love how he turned out!

I added sparkle to my unicorn with some holographic foil paper. I love the extra magical shimmer it added. The puffy stickers were perfect for adding some flowers near that magical horn.

I used more stickers and some bits and pieces die cuts to embellish my photo. Some machine stitching adds a little texture.

The Sparkle die cut makes for a fabulous title and the rainbow hair really sets the die cuts off.


Cupcake Unicorn Carousel

I wanted to make something extra special for this little ladies birthday so I created a cupcake carousel, complete with unicorn ponies.

Using the print and cut unicorns available in the Silhouette Store, I made some cupcake picks. The print and cut files are awesome as you can resize your unicorns to whatever size you need and make enough picks for all your cupcakes.

Would you like to see more?

Thanks so much for stopping by today. Be sure to check out the Dream Big collection for your fairy and unicorn lovers!

Supplies

Christmas in October?? Why not! When I got the Simple Stories Christmas collections I was so excited. I had only done a couple of pages of my 2017 December album so I decided to start fresh! I’m using a combination of Merry & Bright and Simple Vintage Christmas depending on the feel of the story I’m telling on my pages. They’re both so beautiful. Merry & Bright is perfect for more fun stories and Simple Vintage Christmas is perfect for telling stories about cherished family traditions.Today I’m sharing some pages I’ve done with Merry and Bright. I’m using the Merry & Bright album. It coordinates with the collection perfectly, has some fun add in pages and a wider spine to make room for all of the December goodness.

I decided to start with my cover page. I took one of the pages of 2x2 squares and filled them up with fun things. I used a combination of 2x2 SN@P! cards, chipboard stickers and bits and pieces, all from Merry & Bright. Simple and cute! 

This is my favourite part of my album so far. I had a black and white 8x12 photo of my boys that I took at the garden centre where we had gone to see Santa. I decided to turn it into a flip out page which was SO easy with the 6x8 paper pad. I cut the photo down the middle and then used washi tape on the back to attach them together. I then glued down some 6x8 papers over the backs of the photo which covered the washi tape. I cut a half inch off the end and hole punched the other side. Easy fold out photo!

I added a little tab from the Carpe Diem Planner Tabs sticker tablet (seriously, I use these SO much in my albums, I love tab stickers!) and some red reinforcements to balance the embellishments I added on the other side. It’s a great way to add one of my favourite landscape pictures without having to put it to a protector sideways.

Throughout my album I’m using some of the big numbers from the Merry & Bright collection. They’re in the same great colours as the rest of the collection and slide perfectly into 3x4 pockets. On this page I printed a photo on vellum to slide in behind the number. This page goes with the fold out photo from our trip to the garden centre to see Santa. The Hello Santa card is perfect. I also added some phrase stickers (the ones in the sticker set are so perfect!) and puffy stickers to accent my photos. I wanted to add a bit more journalling without losing the feel of this layout so I added in a photo flip!

I’ve been really into photo flips lately to add more journalling to my layouts. Under the wreath picture I wrote a bit about out trip to see Santa and another Santa journal card. Interactive elements are so much fun! 

I have a few full paged photos throughout the album. I printed them with the giant numbers in mind. The 7 fit perfectly on this page and I kept it simple with a cluster of stickers. My December albums can get so busy so it’s nice to have a few calmer spots.

One more spread from my album to share. These pages were about baking and doughnuts with lots of warm colours. I decided to keep the warm colours going and focus on reds. I added in some journal cards on the left side with various stickers, puffy stickers and bits and pieces. On the right is another large photo with a big number on it. Christmas Eve doughnuts!

Merry & Bright is just the right balance of whimsy and tradition that works so well with all of my photos, from Santa visits to baking and winter coffee shoe-fits. I really like the florals throughout. I can’t wait to see what other people do with it!

Supplies

Hello friends! María here with a new post to inspire you in your bullet journaling for the month of November. On this occasion I used the "Forever Fall" collection and some stamps.

I have decorated my notebook with the "Chipboard" and the "Bits & Pieces", I have created a list of favorites for autumn. I do not know about you but I'm looking forward to the cold.

For the interior I played with the cards and papers of the collection. I made a pocket to carry my stickers.

To decorate my sections I used kraft paper and "washi tape" I also used paper, cards and stickers from the Forever Fall collection. For my Habit Tracker I used the "Get It Done" stamps.

For my monthly I have decorated the same and I have also used the stampset "It's a Date" to stamp the days of the month.

You can see more photos and ideas in my instagram account.  

Supplies

Pages