October 2018 Blog Posts

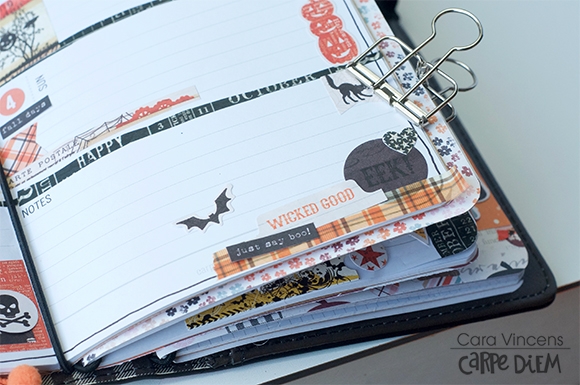
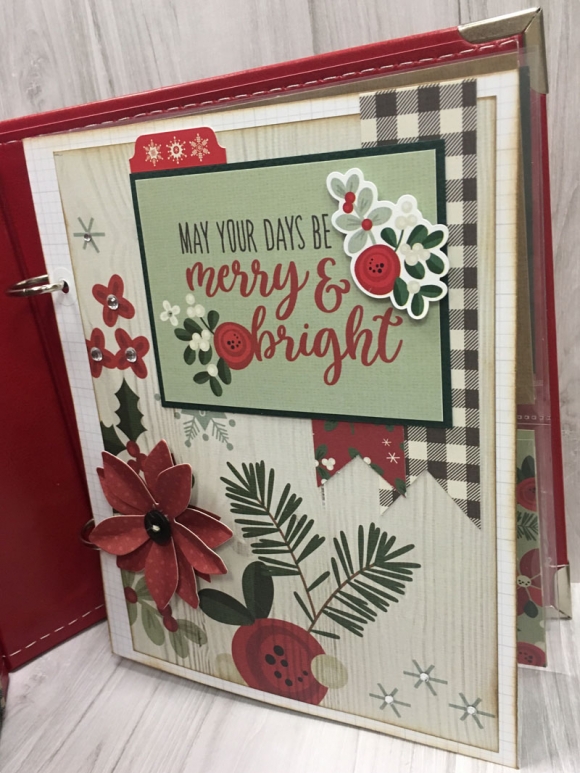
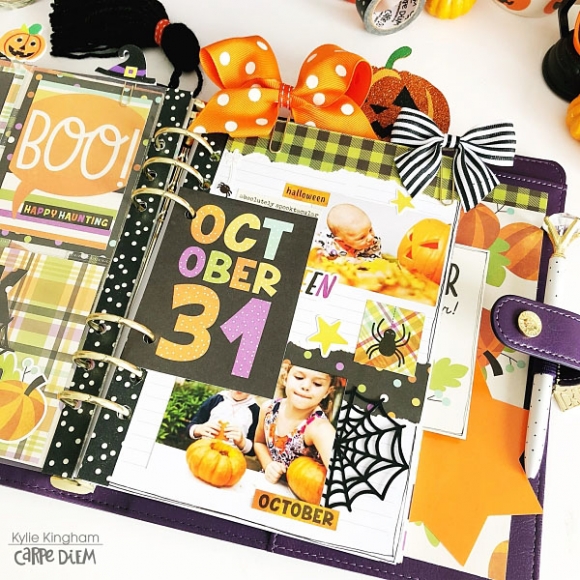
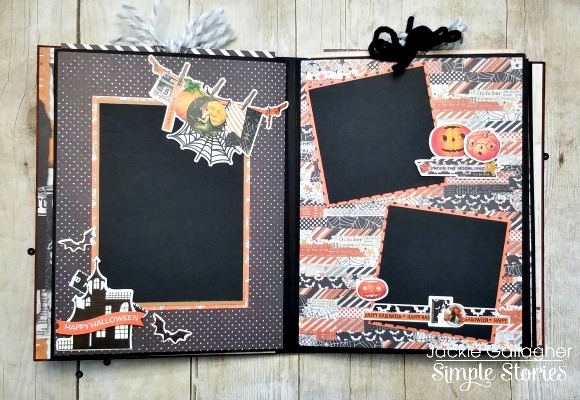
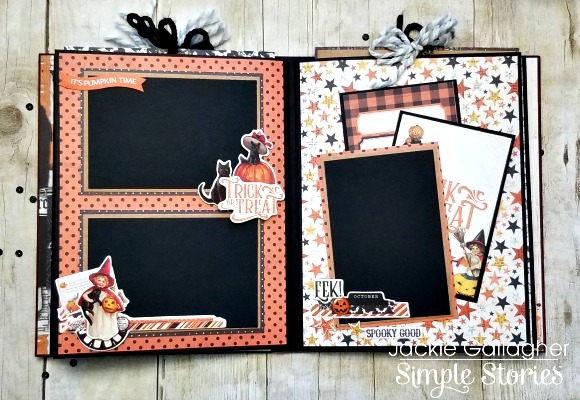
Hi everyone! Odessa here, bringing you some more December documenting inspiration! When I opened the Simple Vintage Christmas products I was all heart eyes. If you know me, you know I’m usually more into bold and modern styles, but Vintage Christmas is the right amount of vintage that makes it perfect for capturing memories and traditions. I’m mixing a few different Simple Stories collections in this SN@P! album of pictures from last December and I’m using Vintage Christmas for just that. The collection is PACKED with embellishments. I love the layered chipboard frames and date tags.

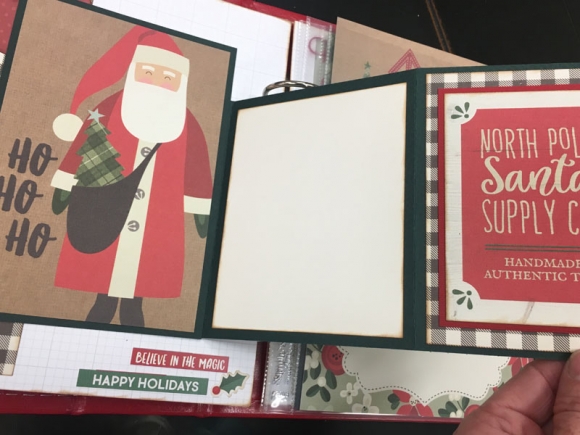
This spread has a couple of special things going on that went so well with Vintage Christmas. On the left, a story about making a stocking for our tiniest family member and the right a Christmas memory of mine. I added a few fun elements - I glued one of the chipboard layered frames right onto the outside of the page protector on the left page and used a photo flip on the right side to add some more journalling.

On the right side I thought that my 2 photos would look great in one of the Insta Pocket Pages. With all the cute 2x2 cards in the Vintage Christmas SN@P! pack it was easy to fill in the little squares on the page. I added some simple chipboard and stickers to make this page come together in a snap. 

Once I got working on this page I realized I wanted to add some more journalling. I liked how everything looked together and didn’t want to change to a different page protector to make room so I added a 3x4 photo flip for some hidden journalling. There were some tab stickers in the 4x6 sticker sheets that were great for hinting at the page’s secret. The number tag fit in one of the 2x2 pockets perfectly.

Under the Photo Flip I have some hidden journalling embellished with some stickers to finish off the page. The phrase stickers in the 4x6 sticker pack are SO good!

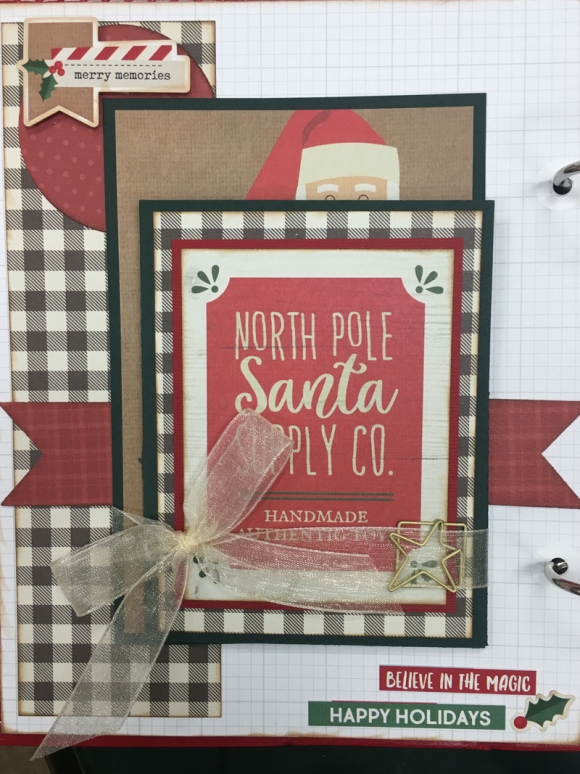
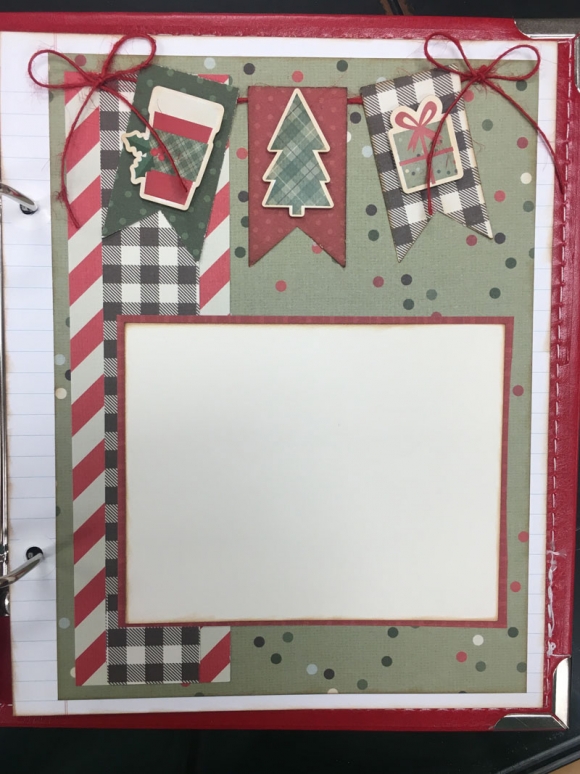
Here is another layout I did with the Simple Vintage Christmas line. This one is from St. Nicholas Day, a tradition I grew up with and continue with my kids today. Our biggest thing is getting our stockings ready and making Christmas Lists to go in them.  I used a variety of embellishments form Vintage Christmas - I love that chipboard Santa in the top left corner! He’s so traditional looking.

Here I used one of the number tags on a 4x6 journal card for a mix of journalling and embellishing. Throughout my album I add some faux ribbon to the date tags using some of the Vintage Christmas washi tape. I fold the washi in half, thread it through the top of the tag and trim them to the perfect length. It really finishes off the tags nicely while matching everything else so well. No need to search for the perfect ribbon!

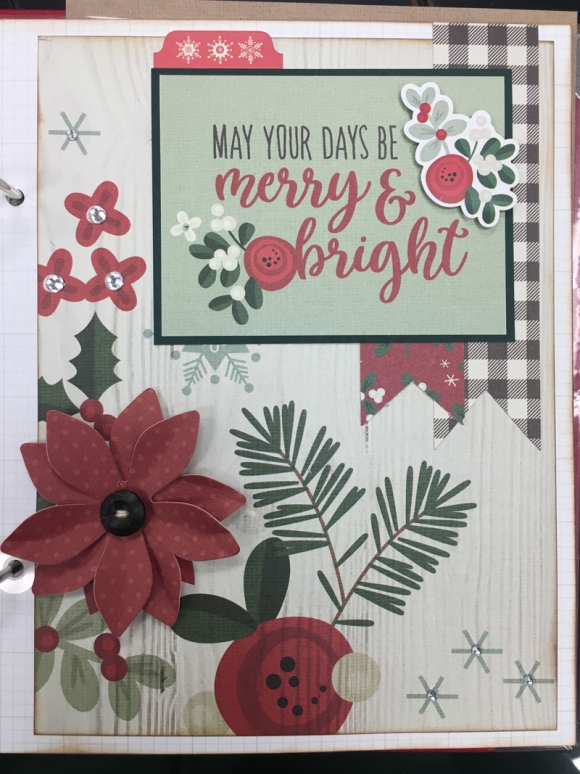
I wanted to add some more extra journalling on this layout so I brought out the photo flips again. I used some more of the tab stickers from the 4x6 sticker pack- it really adds a nice touch to the flip. 

Underneath is some journalling and a picture from Christmas List writing. I am just loving Photo Flips while working on my December album. I can fill a page full of pretty pictures and embellishments and have some sneaky journalling underneath. And more pictures. I hope you’ve enjoyed this peek into my album!

Supplies

Hello friends! Maria here with a different post, this time I will teach you my tricks to plan the organization of your home. Now more than ever I need a good organizational tool to get to everything, so for my home I use a planner different from my bullet journal, which is more personal and helps me with making sure everything is organized at home!

It is very important to organize the weekly menus and then go shopping, so we will buy only what is necessary. In addition I usually make two shopping lists one for food and another for household products.

I usually make several weekly menus that I alternate, saving time.

For cleaning I have a fixed template for the whole week, I am changing the secondary activities as needed. I usually use Sundays in the morning to plan everything.

Hello Friends!

It's Kristine with you today and I am sharing a layout using the Happy Halloween Collection. It is a Simple Set which means it contains 6 sheets of a paper and a 6x12 sticker sheet. These kits are perfect for layout classes and creating 2 page layouts as well!

I used this kit to create a page of my cousin's daughter dressed up for trick or treating a few years ago. I love the colors and patterns in this kit and they just work perfectly with my pic too! Halloween is such a fun time of year. I love scrapbooking fun faces and spooky places ;) 

With this layout I wanted a fun title but not black or simple. I really liked the 4x6 element card and wanted to use the word "Halloween"for my page title.

I did some fussy cutting and added dimensional adhesive to the back of the letters and created a fun title. These are easy to do and with a little patience you can create your own! We have several possibilities with this sheet of paper with title that could include October 31 / Trick or Trick / Boo / and more! Here are a few more pictures of my layout.

Hopefully you'll find some inspiration on my layout and create your own fun title using our element cards!

Come Find Simple Stories on social media @SimpleStories_ and myself @KristineDavidson
We have many amazing projects from our design team and friends!

Supplies

It’s Creepy Cara here today and I’ve got my Traveler’s Notebook all spooked out for Halloween! I decided to go all the way and add as many bats and spiders as would fit… there are soooo many fantastic Halloween products that I wanted to use as many as I could. 

I wanted this planner to be on the scary side, I’ve usually gone the cutesy route in the past, but now that my children are mostly older (and 5 of those are boys) it’s nasty, creepy crawlies, all the way. Bats and spiders are actually quite cool if you ask me! Stay tuned to the end though, because I couldn’t help it and did add some cuteness to my TN after all.

Starting with Halloween week I sectioned off the days with washi. 

I wanted thin strips of washi, so I decided to cut these strips from the black washi from the Halloween set, but the first strip ended up quite crooked. It was a happy accident, I liked how it looked so much that I purposely cut the other strips crooked too! I added a bit of the orange plaid to the 31st to help it stand out.

I found some orange numbers in the numbers tablet but left out the 31st, I wanted to add something different to make it stand out and I eventually decided on this black phrase sticker, layered on a pumpkin after trying many other sticker combinations.

Bats seemed to be my thing I turned to most and they are there as stickers, chipboard turned planner clips, and die cuts. Have I mentioned already that I really like bats? My 5 year old wants to be a bat for Halloween this year, and I think I’m more excited about it than he is. The trick with the bats is to make it look like they are flying on your page. Angling them each in a different direction and spacing them out really helps.

I added tons of layers so that I could get as many stickers on here as possible! I love layered clusters, maybe even more than I love bats ;)

On to my Halloween daily spread. Again with the bats flying around the page! 

I started with the black washi framing the spread on the edges of both pages and layering both edges with spooky stickers and quite by accident the ’31’ on the washi landed near the top of the left hand page. I highlighted it with stickers, including one that says ‘October’ (that I trimmed down) to make it into the date for the spread.

Ah the cute bit! Halloween truly is a child’s holiday, isn’t it? The Happy Halloween collection really is sweet so I made a little pocket folder with my favourite paper and stickers. 

It’s quite simple to make, I folded up the extra length of the paper to make it the right height and so that serves as the pocket. Then I trimmed it to the width. I’m a bit lazy so I used an insert as a guide and eyeballed it. I only stuck down the outer edges of the pockets, the elastic from my TN holds the pocket together in the middle.

If you'd like to follow along with my process, you can watch it here on my YouTube channel.

Happy Haunting!

Supplies

This darling Snap album was so fun to make using the new Simple Stories Merry and Bright Collection Kit

I love how fast and easy all these pages come together!!!! They’re so easy and so cute!!!! 

I love adding fun fold outs for more pictures. 

I used ribbon to tie the fold out closed. 

The stickers are so cute and look darling popped up. 

This was such a fun project to make and so easy!!!! All you need is the Merry and Bright Collection Kit and a Snap album!!!! 

Supplies

Hello lovely friends it’s Kylie with you again today. I have been setting up some more ‘Spooky’ goodness in my A5, Grape planner lately and having fun creating with the Happy Halloween Simple Set.

 If you saw my blog post earlier in the month you would have seen how I was using my Persimmon planner with the Vintage Halloween collection, for my everyday planning. Here is my blog post if you would like to see it again. Since I already had my day to day planning covered I decided to use my Grape planner as a flip “mood and inspiration” board, to house some memory keeping and ideas for planning a perfect Halloween.

The Happy Halloween collection is just so cute……..

The opening of my planner showcases a dashboard I created from the gorgeous printed papers, as well as some very full pockets of spooky cuteness. As always I loved the 3x4 & 4x6 elements sheet of paper for cutting apart the cute cards.

I added a couple of these element cards to my pockets, purely for cute factor!

I also used 3 x 4 element on my dashboard.The ‘Give me all the Candy’ was a definite favourite! For colour, I have also layered some contrasting papers in behind. The spider web was cut with a die from my stash which acted as a shadow behind my stickers.

The back of my dashboard was all about Pumpkins! More layering of papers and finished with another 3 x 4 element.

I added one of the 3 x 4 / 4 x 6 pocket pages to my planner. This was easy to do by covering the existing holes with washi tape and re-punching the holes to fit my planner with my Carpe Diem hole punch. The “Trick or Treat” phrase on the back, I cut with my Silhouette Cameo.It was a file I had found via the Silhouette store some time ago.

I printed some smaller sized photos to add to my pages for memory keeping, tying in lots of the fun stickers to frame them.With the beautiful papers I tore some strips to act as a border to the top of my page as well as through the centre, which gave a nice overall texture to my pages.

For my inspiration pages, again I printed my photos smaller to fit the page. I have created my own lettering by using some Alpha dies with the papers. As well as adding some of the 3 x 4 elements to my pages I have cut some of my favourites out and punched them so they fit onto my rings as a little tip in for my planner.By adding a free hand drawn border with a fine tip black pen helps them to stand out even more.

Along the punched side of my pages I have used some washi tape.Not only does this add colour to your pages but it serves a practical purpose by making the holes extra sturdy.

Here is another extra dashboard I created, including one of the 4 x 6 elements. Overall I love the fun vibe the Happy Halloween collection has given my planner.

Thanks for stopping by today! I hope you have some fun creating your own faBOOlous spread in your planner for Halloween.

Until next time,

Kylie

Supplies

Hello everyone!!  Jackie G on the blog today to share a BIG Halloween album with you all using the amazing Simple Vintage Halloween collection!!

I’m not joking…this album is BIG!!  Measuring in at 8.5”x11”!!  Halloween is my family’s favorite holiday, so I needed something massive to hold all our photos in!!  Do you celebrate Halloween??  What are your favorite traditions?  We love getting together with family, having a big cookout in the driveway to pass out candy…and of course taking the kids trick or treating!!

So because of the size of this album, I ended up using two collection kits.  I wanted my cover to resemble an old vintage book so I used plain chipboard distressed with some Tim Holtz vintage photo Distress Stain, making sure to really saturate the edges so they would puff up and curl a bit.  I also took some kraft cardstock and distressed that as well, including some splatters of black paint.  This was used for my actual spine.

Each of my pages are pocket pages with the top opening for a large photomat to store lots of pictures!!

I used regular flat stickers, chipboard stickers and the bits and pieces to decorate each of the pages!!

To give me lots of extra photo space I created a waterfall in the back cover!!  This is one of my favorites to put in a mini album because of how many photos you can fit into one.  Plus, you can customize it to whatever size you need. 

I hope you have enjoyed this BIG album and it has inspired you in some way!!  Thanks for stopping by!!!

Supplies

Hey Planner Friends! It’s Rachel again, and I’m here to share my Persimmon A5 Planner setup for the month of October using the Simple Vintage Halloween Collection. This collection has me feeling nostalgic with its vintage, storybook feel. I love all the illustrations, especially the cheeky pumpkin characters and mischievous little cats! The cats peaking out of pumpkins remind me of our own little rascal cat!

As always, let’s start with the pockets! I have a mix of the chipboard pieces and the bits and pieces from the collection tucked into my pockets. Those pieces on the outside of the pockets are adhered on with some removable roller adhesive. Because of the materials of the planners, I never have to worry about ruining them - sticky adhesive rubs right off (when you want it to!). I backed the large vertical pocket with some patterned paper from the collection and use this pocket to store the 4x6 collection stickers for easy access. How cute it the dressed-up girl peaking out of the pocket!

With such a cute washi set for this collection, I wanted to try and make a washi dashboard. I love how it turned out and it was super easy to make! I laid the washi down on a piece of white card stock, trimmed it out, and adhered the back of the card stock to a paper from the collection. This is a great project to get some extra mileage with your washi, and be able to display it in an eye catching way! I did add a few other washi’s from other collections, but you could easily make this dashboard with just the three in this collections.

Next up was the divider for October. I am a big fan of this plaid paper, and couldn’t wait to make a divider out of it. To measure out my divider, I traced around the A5 Divider template. I used a paper trimmer, but you could also use the template like the photo crops and cut right around the template! Once I had the divider trimmed, I used the planner punch to make the punch the holes.

I then pulled some stickers from the combo stickers sheet. This collection has stickers that come already layered into adorable clusters! If you are like me and are somewhat new to planner decorating, these clustered stickers and images are a life saver! See that sticker at the top? Yep, it came like that! All I had to do was peel it off the sheet and place in on the page! Same with the October tab! This is is great for people who love the look of layers, but maybe don’t have the time or experience to expertly craft an embellishment cluster.

I decided to put a little decoration on the page that appears before the monthly layout. I plan to document some great past costumes that my husband from years past. Spoiler alert - he is much more creative than I am when it comes to costumes!

Here is a look at the monthly spread. I started by dating the pages using the It’s a date stamp set. After the pages were dated, I filled in the major events using some icons from the Get It Done Stamp set and stickers from the 4x6 set.

I added a strip of washi to the top of the page and layered some more stickers on top. The little word strips are always so clever!

I love the monthly layout because I can plan around with the decoration, while still leaving room for the important details of the month.

It wouldn’t be a project from me with out a little planner hack! For the weekly pages, I wanted to create a little bookmark with pieces from the collection. I decided to trim down a 2x2 insta pocket page to add chip board stickers, paper from the collection using the 2x2 photo crop, and the bits and pieces. To the top, I added a monthly tab from the Tabs sticker tablet and a washi paper clip banner.

On to the weekly layout! Because Carpe Diem Inserts are undated, you can play around with all the different layouts! This month, I wanted to use the fitness layout. To make it work for me, I simply covered the far left column where each of the boxes are labeled and placed stickers along the bottom where the hydration tracker was. I dated the pages using the numbers A5 Sticker Tablet, a must for undated planner inserts! I even made a ho-hum task list playful by adding bats as bullet points!

Here is a look at the pocket page place marker in action. This is a great way to liven up a planner page, especially if you don’t have time to decorate the planner page itself.

For the second half of the week, I tried to keep some white space for those events and to do’s that come up as the week progresses.

I hope you enjoyed a look inside my October planner setup! Even if I don’t dress up for Halloween this year, at least my planner looks the part! Until next time, I hope you have a BOOtiful October and a Happy Halloween!

Supplies

Pages