November 2018 Blog Posts

Hi Simple Stories friends!

Nathalie with you today with a  festive page that is sure to bring the Christmas Cheer to your holiday season.  The new Simple Vintage Christmas collection from Simple Stories is a beautiful combination of vintage elegance with classical colors and layered details, and the perfect collection to create a sweet keepsake of last year's Christmas memories.

I started by creating the Holy frame using a cut file (Citrus Twist Kits) and backing it with papers from the 6x8 paper pad, having the same patterns as the papers but in a smaller scale makes it ideal to back the leaves of the frame.

The frame was then handstitched to the Be Merry paper - i added a few stamped images so that faint script of the paper shows through the background-, and then trimmed to size.  This was then glued to the Believe paper.

Once it was all set up, i used the layered frames to add my pictures to the bottom of the page ( i cut one of the double frames, so that they both can fit at the corner of the frame).

There are so many beautiful stickers, tags, and pieces of ephemera to chose from that it makes it so simple to add details in clusters around the layout

To finish this page, I followed the layered look of the collection design to create the title for this layout at the top left corner of the frame.  To finish a few drops of gold and white ink, lines of journal will be added to the back of the page later on.

The beautiful Simple Vintage Christmas from Simple Stories is not just gorgeous, but also versatile and packed with so many details you will fall in love with each piece.   Remember to check it all out! 

See you all soon!

XO

Supplies

Hello friends, Iris here.  It’s the most wonderful time of the year, the time to do some Christmas scrapping!  

I’m delving into documenting our tree picking traditions with the Merry & Bright collection. I wanted to play with the smaller scale patterns of the 6x8 paper pad and some of those cute frames from the Tags & Frames pack, so I made those the focus of my layout with a layered design.

I started by picking my photos and printing them at 2x3 inches and 2x2 inches to fit my two favorite frames from the pack.  To add a little bit of texture and whimsy, I added a border of tiny pompoms to the smaller frame.  

For my background I picked the green plaid side of the Joy & Happiness paper.  I cut the papers into 2x2 squares and overlapped them randomly along with the framed photos until I reached a point where they looked balanced.  The rectangular die-cut of the truck carrying a tree from the Bits & Pieces pack was a great addition to the layers.  I cut the scalloped buffalo plaid border sticker from the Combo Sticker sheet, tucking a bit under the truck and another bit above the right photo frame. These little bits echo the left frame, providing a visual triangle.  

I added chipboard, flat stickers, and puffy stickers along many of the seams of the layers, with an emphasis on the Christmas trees.

I typed my journaling on vellum because I didn’t want a bunch of white strips taking too much visual weight away from the layers. Before sticking the journaling on, I splattered white mist up and down in line with the larger photo.  Directly at the bottom of the column of splatters, I used one of the die-cuts as my title at the very edge of the page, cutting off the bottom.  The final touch was to stitch a double line of machine stitching along the entire edge of the page.

The Merry & Bright collection has the loveliest mix of traditional and modern.  I love all the plaid, the brush script, and the cute icons in this collection, and I know you will too.

Supplies

Are you starting to count the days until Christmas?  If you’re like me you still need to get lots done!  I like to make my own Christmas cards for family and friends.  They’re especially important if I’m giving a gift card to add a personal touch.

The Simple Stories Merry & Bright Collection features traditional red and green with a fun contemporary twist.    The papers include plaids, confetti dots, florals,  and woodgrain perfectly coordinated for mixing and matching. 

I love the hand drawn look of the florals and mixed font sentiments.

This collection includes everything you need to make loads of cards, tags and more including journaling cards, die cut bits and pieces, chipboard stickers, washi and more.  

All the embellishments make creating a snap.  This simple card was created with a 4x6 journaling card and some chipboard stickers.

Wishing your days be as Merry and Bright as this beautiful collection.

Happy Cyber Monday!  The last day of our Black Friday/Cyber Monday sale is today - your entire purchase from our digital store is 50% off!


WIth ALL of your favorite Simple Stories collections in digital format, you're sure to find just what you need for all of your digital crafting needs!  Visit our digital store here and enter code BFCM2018 during checkout!!  

Hi everyone, it is Kelly here today on the Carpe Diem blog. I get asked quite often how I set up a new planner and what basic supplies I use. In this blog I will show how I have setup my new planner for 2019.

Step 1: choose a planner and monthly insert set

I love to use the A5 planner size, because this gives me enough room to have functional and creative spreads. The planners come in different colors and floral prints and you just have to choose which one you like the most. Or like me, buy multiple planners and switch them often. Carpe Diem released three new beautiful monthly insert sets, but I decided to go for the floral ‘Hello’ set for my main 2019 planner setup.

Step 2: choose weekly pages

There are different kind of insert sets available; weekly, daily and hourly sets. I love to use the horizontal and vertical weekly pages, so every other month I switch them out.

Step 3: basic supplies

In my opinion, there are a few basic supplies that you need when you are setting up a new planner: the A5 planner punch, a bookmark notepad that you can out in the back pocket of your planner and sticker tablets. Of course, you need lots of stickers! I recommend to buy at least the ‘planner basics’ and ‘numbers’ tablet, because they are useful in every spread.

Step 4: personalize your planner

The fun part of setting up a new planner is that you can create your own dashboards and extra dividers. The A5 planner punch makes it really easy to punch and add your own dashboards in your planner.

I made a fun little washitape card with some samples of my favorite washitapes. I made the card by laminating a piece of acetate and punched three holes on the left side. You can also use a piece of paper instead of the acetate.

Step 5: make a future log

For this basic planner setup, I also made a future log. A future log is a place in my planner where I can write down future appointments and to-do’s. For the basis of this future log, I used the grid pages of the basic inserts pack and the mini monthly calendar stickers. I decorated the pages with some stamps, flowers and stickers.

I hope you enjoyed reading this blog, you can find more inspiration on my planner instagram. Have a nice day!

Supplies

Hello Simple Stories friends!

Marcia here today with a festive December layout I created with the Simple Stories Vintage Christmas collection. I wanted to use this collection, not for Christmas photos, but for one of my daughter's Senior photos. Being from Minnesota where we get lots of snow, it was fun to do a photo shoot of her with a toboggan and a winter hat and scarf. I wanted to show you that even though there are lots of adorable vintage Santas in this collection, it also works to document some everyday December moments. Here is my layout ...

Is there anyone besides me that is crushing on these plaid papers? That red buffalo plaid is the perfect background and really set off the chipboard frames which I adore! I chose two of the smaller single frames and printed my photo to fit inside one. In the other frame I used one of the 3x4 journaling cards. These frames are beautiful just the way they are or you can layer up other embellishments on top like I did. A woodgrain banner, stickers, washi tape, and snowflakes tucked underneath add even more layers.

To set off my title Snow Cute, I added a strip of the reindeer pattern paper across the bottom of the page. The die cut letters backed with the black buffalo plaid pattern paper really pop on the lighter background. I substituted a snowflake for the in the title and layered another reindeer over the top. He is so cute!

I know December is so hectic with Holiday gatherings but try to take a little time to slow down and capture the everyday winter activites too. Thanks so much for stopping by today! Have an awesome weekend.

Supplies

Odessa here with some more December Documenting inspiration! This time I am using Simple Stories Freezin’ Season to document some of the bold and cold stories in my album. If you missed my other posts I’m using Freezin’ Season, Vintage Christmas and Merry & Bright to document last Christmas with each collection being perfect for different stories in my album. This one is perfect for winter fun!

This page ended up being about coffee. I used some letter stickers along with some simple embellishment stickers from the collection on these pages to keep it simple but add some fun. I love the super cute toque and eyelashes card on the left side!

This page combines a regular 6x8 pocket page on the left with one of the 4x6 vertical pocket pages on the right. I love those smaller pocket pages to add in a focal square picture.

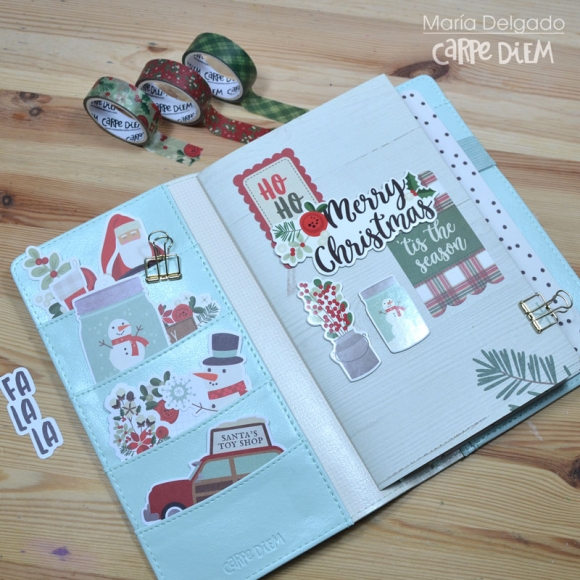
The playful palette and graphics in Freezin’ Season go great with bold titles. One of my favourite things is to use larger alpha stickers to make a bold title and then layer a small phrase sticker over it like I did here. I added in a chipboard tree sticker to fill in some negative space.

I used the vertical 4x6 pocket page to highlight a photo for that day in my album. Underneath the 4x4 pocket are two small 2x2 pockets. I filled them with some cut down paper from the collection with embellishments on top. I didn’t really have more story-wise to tell so I decided to make it cute! And that penguin really is the cutest. As with most of the tags in my album, I folded down some of the Freezin’ Season washi to thread through the hole in the tag to add a little more to it.

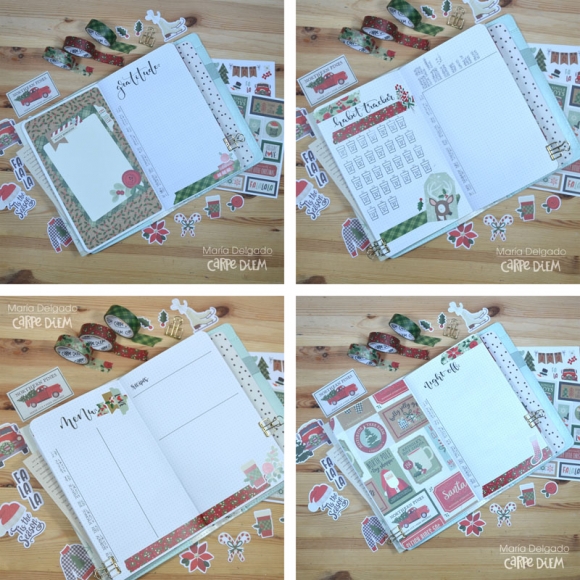
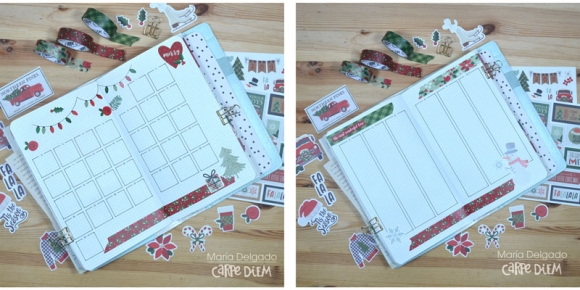
This page is all about bold colour! I love colour and the saturated fun colours Freezin Season make me so happy. On the left is a pocket page with some journal cards from the collection that go well together and with my photos on the page. My photos are pretty neutral so they’re balanced perfectly with the red and blue cards. On the left is a 6x8 layout with a bright photo on one of the quieter papers in the collection. It’s a great contrast to the pocket page.

I used some of the great stickers from the collection to fancy up  my pocket pages but overall kept it pretty simple to maintain contrast with the right side where I embellished quite a bit more. The phrase stickers in the 4x6 sticker pack are winter perfection!

On the right side I used a circular photo (which was easy to cut with the photo crop circles) on top of a cute tree print from the collection. I added a layer of vellum in the middle to make the photo pop a bit more. I added in a tab and some phrase stickers and some song lyrics that always get in my head when I am Christmas baking!

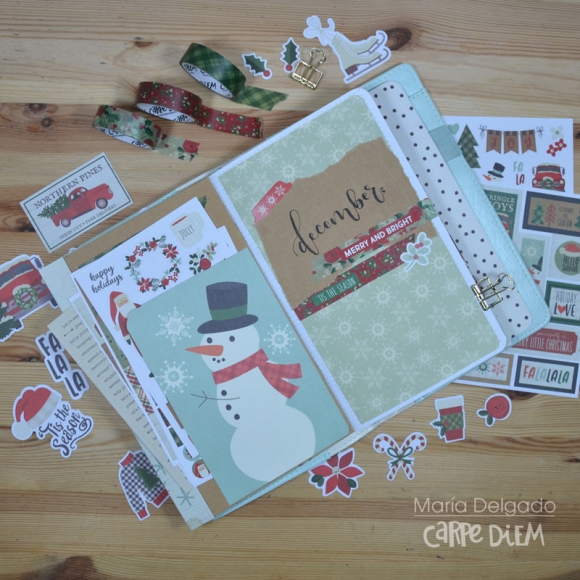
Here’s the last page I am sharing today. On the left instead of journal cards I cut down some papers from the collection and used them in a couple of different ways. I added a big chipboard snow globe (ADORABLE) to the paper with all of the snowy houses. I left the all over print paper plain because I really like how it looks cut down. I added some stickers to my photos to quickly finish off this page, I really like how quickly this page came together while still looking super fun. On the right I used some journal cards from the collection with a bunch of stickers. I even got some journalling in. I couldn’t resist another snow globe!

There are some really great stickers in the 4x6 sticker pack. I really like the one I used on this photo, it’s the perfect size! And I bet you’re humming jingle bells now!

The way the pocket with the paper full of houses with the chipboard snow globe on it might be my favourite in all of my pages using Freezin’ Season. I added a phrase sticker for a final touch.


The penguins in Freezin’ Season are the cutest ever and I need a million. Or at least one per page. Hope you enjoyed this peek into my December album!

Supplies

Hello! Maria here, to decorate a new month in my bullet journal, now it's December and Christmas is coming. I can not wait for it!

I fell in love with the "Merry & Bright" Collection the since I first saw it, I knew that I needed to use it to decorate my month of December. The "Bits & Pieces", "Chipboard" and "Puffy Stickers" are perfect for decorating the exterior cover.

The inside cover I have adorned with "washi tapes" and "Combo Sticker". I have made a pocket with a "4x6 Vertical Elements" card to store the "4x6 Stickers". Also I added lettering for the month.

Here are the collections I use every month, gratitude, habit tracker, menu (with a special page to write Christmas recipes) and night off to record series and movies.

I added a list of my favorite films to see at Christmas, so I did not miss seeing any of them.

Month view and week view to help me with the organization. I also want to use the rest of the notebook to make my Christmas diary, I think it can be very nice, you can see it on my instagram account.

Supplies

Pages