November 2018 Blog Posts

Hello Friends!

It's Kristine here today. I am sitting in my scrapbook room freezing! It's 18F with a winter storm warning for the east coast of Canada and I'm so not looking forward to winter. Wanna know what I like best about winter? Seeing someone playing in the snow!

This picture is of my cousin enjoying some time outside on a snow day! So much fun was had just jumping around, making snowmen, and throwing snow balls! I love watching kids enjoy the beauty of winter. I used the gorgeous winter collection called Freezin' Season. It is filled with beautiful colors such as blues and pinks that make white snow look so lovely!

I wanted to add some fun to my page so I used the chipboard with the Bits and Pieces diecuts. I rarely put pictures on my page sideways but I wanted to try something different. I added tons of layers with dimensional adhesive and lots of fun colors.

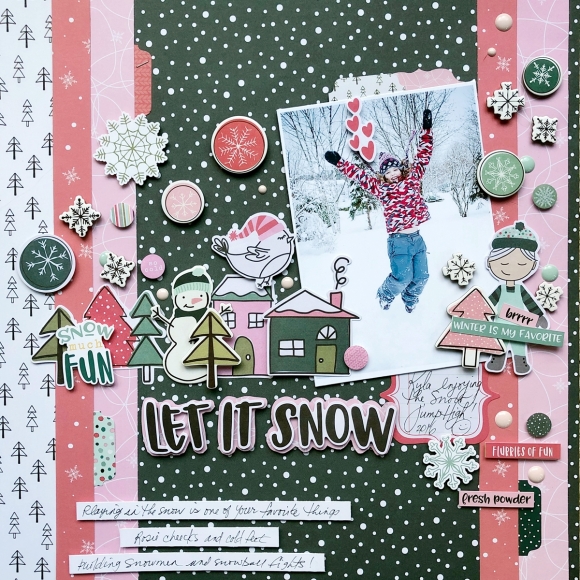
I did something different with my title on this page. I used the Let It Snow diecuts and placed them on a pink piece of paper. That gave my title some 3D effect. I really like  the look of it.

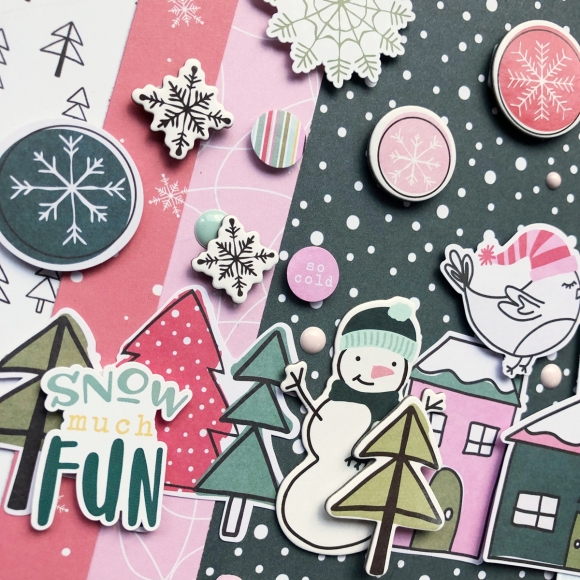
I placed some small stickers and enamel dots around my embellishments to add some " snowy " details.  Using the multi colors trees and houses on tis page really added some fun to a wintry page! Come Find Simple Stories on social media @SimpleStories_ and myself @KristineDavidson

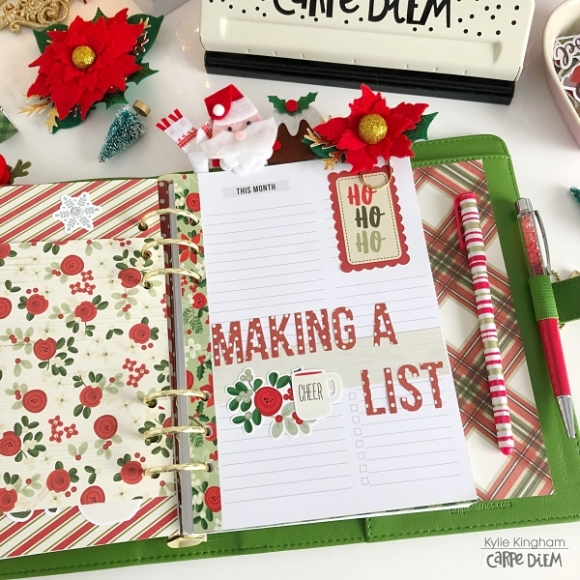
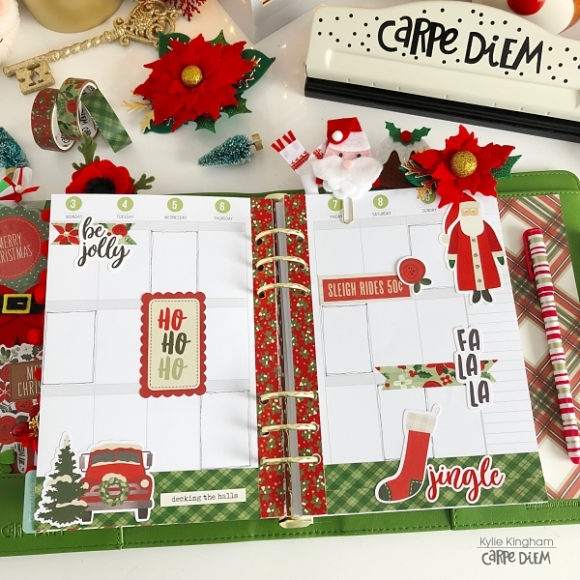
We have many amazing projects from our design team and friends!

Supplies

Hi, it’s Cara here today, for my very first post on the gorgeous new Carpe Diem website!

I’m completely addicted to setting myself goals and going after my dreams, so as we get closer to 2019, I’ve been thinking a lot about my year to come. I love setting myself goals and challenges for the year, to make it better than the year before. I wanted a place to keep track of all my dreams and ideas so then I could turn them into goals and projects. 

Traveller’s notebooks are so very versatile, they can be a lot more than just a planner, so I chose this gorgeous turquoise one to use for my dream and goals journal. I’m starting with just two inserts, but I can add many more as the year (years!) goes on and I can even remove the specific insert I’m using so that I can curl up in bed with a cup of tea and write, slipping it back in it’s elastics when I’m done.

What’s better than a pretty journal? A pretty, decorated, journal! I pulled out the Hello sticker tablet. This has to be my favourite collection with all those butterflies and flowers, all in my happy colours! It’s the perfect choice for my goal journal.

I divided the inserts up using tabs and covering them with the clear tabs. I’m expecting this book to get a lot of use. So it needs as much protection from getting dog-eared as possible. 

Each insert got a title page and each section did as well. I chose box stickers that reflected the theme of each section and decorated the pages using that one sticker as a starting point. 

Layering up smaller stickers and arranging things in clusters, along with good amounts of white space, allowed me to get a lot on a page without it looking cluttered or too busy. I’m hoping this will help my busy, cluttered brain sift through my ideas and dreams and get them down on paper in a way that will help them come true.

I loved lining up the flag stickers to add bunting across the tops of my pages.

I also created a section for books in the second insert, I used a 20 and a 19 from the Numbers sticker tablet to write 2019. 

I read a lot and I find that after finishing one on-fiction book, I race on to the next, not taking time to reflect or learn. I’m going to jot down ideas and lessons learned from non-fiction in one section of this insert.

I also LOVE a good story, so I plan to track the novels that I read in this insert as well.

You can follow along in my process video on my YouTube channel, and don’t forget that the new Carpe Diem shop has everything 20% off until the end of the month if you use the code CARA20 at the checkout. Grab yourself a nice pretty traveller's notebook and make your own Dreams and Goals journal.

I’m having so much fun with the Merry and Bright Line!!! This paper is darling for home decor!!! I covered the wood Car from Foundations Decor to make this adorable project!!! 

And you can’t have a car with out a Glamper..... because I’m crazy for trailers..... 

These papers are absolutely adorable and make into the cutest cards and tags!!! 

Using the papers and stickers from the collection kit I created many projects!!!! 

This paper makes it so cute and easy to make your own Christmas Tags!!! 

Pick up your Merry and Bright Collection Kit today and start creating your own projects!!!

Supplies

FEELING MERRY & BRIGHT.

Hello friends! It’s Kylie with you all today. I’m going to share how I have been setting up my planner for December. Yes I know it’s November but I’m totally going to be ready to enjoy the festive season. I can never get enough of Christmas and a Christmas theme for my planning too. I decided to use my Clover A5 planner because…’Hello festive green!’ It was a perfect companion for the new Merry & Bright collection. These colours together make me feel happy just looking at them!!

So by now you must of figured out I am by no means a minimalist. I like lots and lots of goodies tucked into every corner of my planner.

As my planner stays open on my desk each month, I love having that ‘visual’ of my month’s theme.A lot of the die cuts added into my pockets are purely there to sit decoratively. However, I do add items into my pockets that serve a practical purpose too.

This month I have added some cute shaker post cards.I thought these turned out so cute! I cut apart some of the 4 x 6 elements and slotted them into a 4 x 6 pocket page. Then I added some confetti from my stash and sealed each open side carefully with my heat seal tool. All that was left to do was cut them carefully apart.

I also added a washi tag to my pockets.This is great if you ever are planning on the go. It saves packing all of your washi tape rolls. I laminated a tag from the Tags & Frames packet and then carefully cut it into a bookmark shape.Then I added some of my washi tape! Easy Peasy!

Here is a little look at my opening divider. Using my A5 divider templates I was able to trace and cut out to size. I’ve layered lots of papers and added the cute Reindeer from the 3 x 4 elements. Couldn’t resist adding some adhesive gems to him!

I also made a countdown to Christmas card using some of the number stickers from the Numbers Sticker Tablet.

This month I was super excited to receive the new ‘Seasons” A5 monthly inserts. I dived right into them and added them in for my month. They already have a gorgeous print to them but I also added a few extra embellishments as well.

Here’s a little look at my monthly view before the pen-

I love being able to add some fav photos into my planning also. The 4 x 6 elements were perfect for adding a photo to and punching with my A5 hole punch so it fits perfectly into my planner rings.

Using some alpha dies I cut a title from one of the papers.It added a fun element to my task page for the month.

I’m using the vertical inserts for December. With the beautiful Merry & Bright washi tapes, I’ve added some borders to frame each page and add lots of colour.

I hope you have enjoyed seeing my planner set up today and it leaves you feeling inspired for the festive season!

Until next time,

Supplies

Happy fall, y’all Planner Babes! It’s Rachel, back on the on the blog to share my Cream Dot Traveler’s Notebook set up for November. With so many beautiful travelers notebooks, it was tough to choose which one to use. Spoiler alert: I’ll end up using two this month. The Cream Dot Notebook will be used this month as my catch all “get things done” planner and my Floral Typewriter Notebook will be used to for my journal and creative lists. I’ll be posting more about both on my instagram so make sure to check it out!

Fall is my hands down favorite season and this Forever Fall Collection does such a great job capturing the feel of this season. I used paper scraps from my notebook covers as a place to secure the pocket decorations. I like to choose my favorite chipboards pieces and die cuts to decorate my pockets, adhered to the paper with a little bit of removable adhesive.

For this setup I decided to use just three inserts for monthly (combined with a blank insert), weekly and daily plans. Making notebook covers for my inserts is so easy with the papers from the Forever Fall Collection.

I trim the height first, fold the paper around the insert, and measure the width with the insert closed.

To decorate the covers, I trimmed out the element card papers and add the combo stickers and a few bits and pieces.

To keep the bulk down, I removed several pages of a the weekly insert. I have been using this horizontal layout since September and I have a few weeks left of the insert now, but the rest of the pages are all regular lined pages. I decided to make a vertical layout for my weekly pages. With pencil, I measured out the vertical columns (roughly 1.5 in ) drew the vertical lines, stamps the days of the week, added clear date stickers and then stamped the month along the bottom. 

I decorated with washi, stickers from the 4x6 sticker pack and a few stamps.

I love the layered decoration on this page. Don’t be afraid to trim your stickers to make them work for you!

Here is one of my pages in the daily insert. Daily pages are a great place to “plan all the things”. I love these pages, because they have room for your schedule, your lists and even some memory keeping. And since the insert is undated, you can jump in and out of this insert as needed.

I can’t get enough of the adorable collection, so I decided to try out the digital version of this collection to make my own stickers and embellishments. Anyone can do this! I just downloaded the files, and re-shaped them in a Word document to the size and shape I wanted, printed the sheet on full sheet label paper, and fussy cut them out!

My favorite stickers I made with the printables were scaled down versions of the 4x6 and 3x4 element cards and functional boxes with a light shading in the middle. Check back on my instagram to see how I use them in my weekly spreads later this month!

I hope you enjoyed a look inside my fall setup in my Cream Dot Travelers Notebook. Be sure to check out the https://carpediemplanners.com to purchase this notebook, inserts and stamps and more!

Supplies

Hello everyone!!  Jackie G here on the blog today!!  I am super excited to share this vintage inspired mini album using the gorgeous “Simple Vintage Christmas” collection!! I absolutely LOVE this paper collection!!!  It reminds me of my Grandmother and all the Christmas fun when I was little.  So, let’s get started!!

This album is a simple pocket page constructed album consisting of only four pages and measuring at 6” by 7.75”.  With a 2.5” spine, each page has a half inch gusset to allow plenty of room for the layered chipboard frames.  These frames are simply gorgeous and made this album so easy to decorate.  You can find an easy step by step tutorial on how to construct this album over on My Sister’s Scrapper YouTube channel.

Like I said before, these layered frames are gorgeous, and I didn’t need to do much to decorate my album.  I did layer some stickers, bits and pieces, and some chipboard elements to each of them for some dimension.

For some added interest I did make one of my pages super big to allow my photo mat insert stick out quite a ways.

I hope you have enjoyed this mini album and are inspired to make a fun Christmas album for yourself!! 

Supplies

Hello, Simple Stories Fans! It's Jana Eubank back to share a scrapbook page using my favorite Forever Fall Collection

I love the name of this collection, because if there is one season I would want to last forever, it would definitely be Fall! I love everything about it, the rich colors, the coziness, everything! I wanted to embody that feeling on this next page about my daughter.

First of all, the Be Grateful paper with it's denim pattern ... SWOON! I could use this paper for every layout this season! I cut out the heart from the 4x4 Elements paper and paired it with the chipboard fox to use as a large accent next to my die cut title. 

Next, I wanted to do something special around this cute photo of my daughter. I used an electronic die cutting machine to cut out several large leaves and then backed them with the Gather Together, Changing Leaves, and Pumpkin Everything papers.

I then used my sewing machine to stitch around the outer edges and veins of the leaves, giving them lots of cozy texture!

Finally, I fussy-cut the large floral element from the 4x6 Horizontal Elements paper and gathered several other floral die cuts and stickers to tuck in among the leaves. The result is a fun way to show off a favorite photo!

Happy Fall!

Supplies

Hello there creatives! Leah here with you on the blog today. I often feel like I have a million tabs open in my head. The more stressed I get, the worse that seems to get. Then the more information that is flying around in my head, the more stressed I get. It’s a spiral. When I feel too overwhelmed, it can be paralyzing. I know there is so much to do but I can’t figure out where to start. When I get to this point of feeling stuck, I have a process that helps me get the information out of my head and onto paper, and then organized in a way that allows my brain to figure out a path forward. I wanted to share this process today in the hopes that maybe someone else out there will find it helpful.

Check out my process of planning through the overwhelm in the video here -

It starts with sticky notes, lots of sticky notes. I am using the adorable Bloom sticky notes here, but any sticky notes will do. I take some time to write down every task or goal in my head I can think of. It takes me a while because it’s been too long since I last did this and consequently, my brain seems to be more jumbled due to the overload of information. This is my version of a “brain dump.” Writing every random idea onto sticky notes gives me flexibility to move the thoughts around and organize them into some sort of structure that makes sense to me.

When I’ve finished writing everything down, I start looking for common themes so that I can start grouping the thoughts into smaller categories. Everyone’s “categories” will probably be a bit different, but most of my goals/ideas/to dos seemed to fall under seven topics for now - home, budget, general to do, creative, relationships, self care, and work. I used some alpha stickers from Simple Stories to label several sheets of grid paper from the A5 Basic Inserts pack, giving each category a separate page.


Now that the million tabs I had open in my head have been broken down into a few more manageable groups, I feel I am able to sit down and plan out my day with a clearer mind, and I can incorporate some of the goals and tasks that I’ve written down into my plans.

I love the daily TN inserts because they give me plenty of room to break my pages into compartments that correspond to the categories I’ve created.

I’m keeping the sticky notes in my A5 Mint Blossom planner so I can easily flip through the pages as I’m writing out my plans in my TN. I can move the sticky notes around anytime and get rid of or replace them as I start getting some of the tasks done.

You can see where I’m simply taking things I wrote on the sticky notes and transferring them to my daily layout, doing my best to make each idea into a reasonable action item. For example, I wrote “start yoga” on a sticky note, but on my actual planner layout, I wrote “pick a new yoga routine” for this day.

I hope this method of organizing lots of random thoughts into a few more manageable categories is an idea some of you may find useful if you have been feeling overwhelmed lately. If you have a technique that you use to help you work through overwhelm, please share in the comments here, or over on my Instagram or YouTube. What works for one may not work for all, so someone may really benefit from hearing your method. Thank you for joining me here on the blog today!

Until next time friends,

Pages