April 2019 Blog Posts

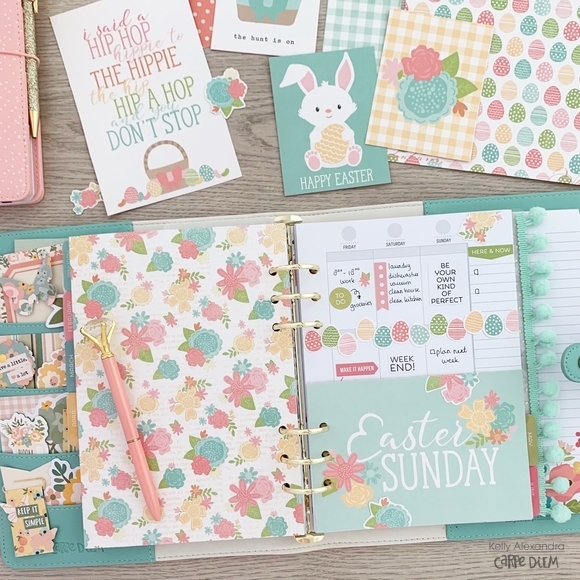
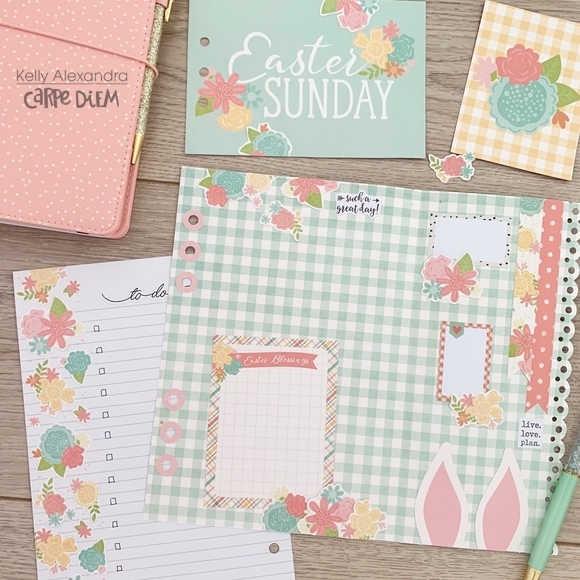
Hi there! Nathalie back with you today.  I am so blessed to continue working with Simple Stories for another term, i truly love their products and the people behind the scenes. As we start a new season, Spring -here in the Northern Hemisphere-, we are also getting ready to celebrate Easter, so i want to share with you a new project created with the new Bunnies and Baskets collection.

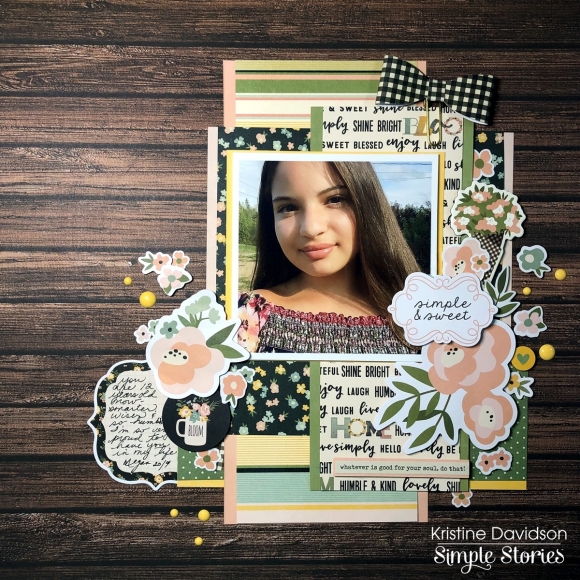
For this layout, i chose a cut file from Handipaper to be the centerpiece of the page, and cut it from white cardstock, backed it all with vellum.  To add color to the flowers, i used some Vicki Boutin Art Crayon and Stencil Brush to add color to the back of the vellum, then backed the entire cut file with the Black/Cream basics paper from the Spring Farmhouse collection.

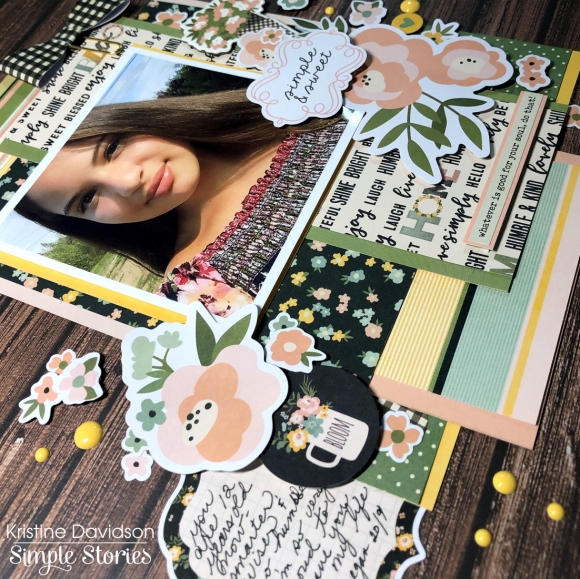
To build the layout, first, a piece of the White Dot/Chestnut Sn@p Basics paper was hand stitched to the b side of the Easter Blessings paper.  I set the bunny on the right corner of the paper, and layered a few Easter egg cut outs (also from Handipaper) along the bottom part of the layout.

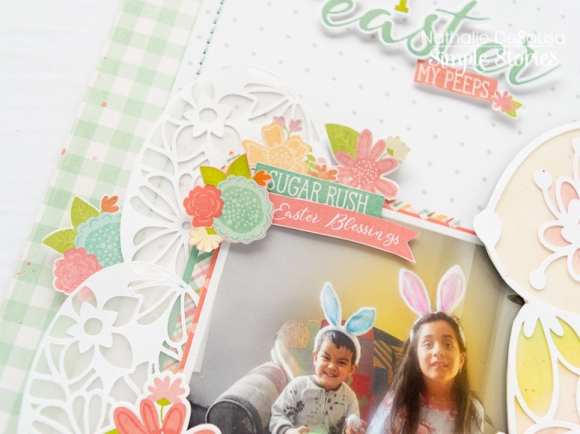
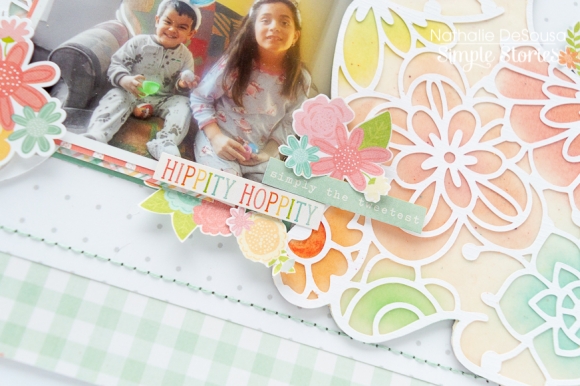
I used the other papers from the Bunnies and Baskets collection to create layers behind the picture of my little niece and nephew from a few Easters back, and  then tucked the picture to the left side of the  bunny.  I fussy cut a few florals from the the Easter Blessings paper and  used them to create clusters around the layout along with the stickers from the collection.

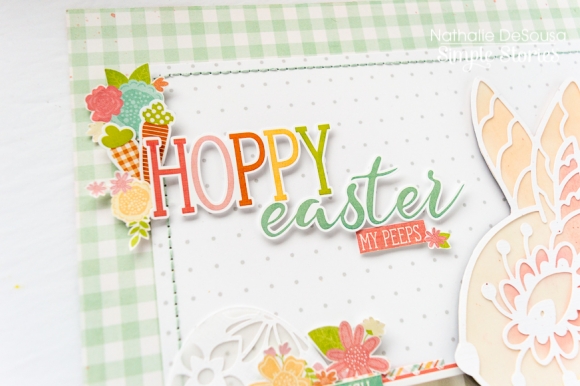
For the title of this page, i simply used the large word sticker from the collection, and propped it with some foam adhesive.  A small cluster of fussy cut florals and stickers complete this page.

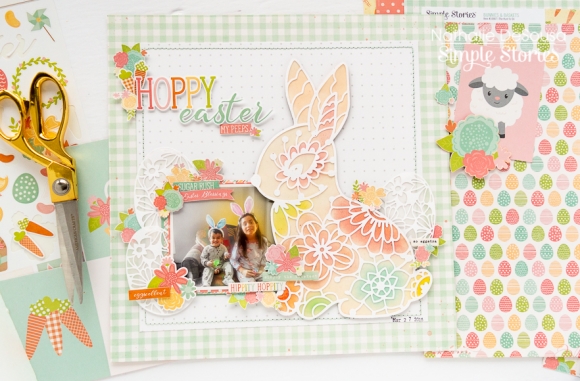
I really love how this turned out and how cute the picture of my littles looks nestled around lots of Easter icons.  The new Simple Stories' Bunnies and Baskets collection is sure to bring the special touch to your Easter memories. 

Til next time,

Supplies

There are several young gentlemen in my life who are graduating college soon.  I know they’ll be anxious to start their careers, but I hope they can and will take a break from all their studying for a little time to explore the world. It may not seem like it to them, but this is the best time in their life to travel.  Most of them are not committed to a partner, a career, or house payments yet so they are more free to travel before they settle into a routine.


I made some pocket cards with the Simple Stories Simple Vintage Traveler Collection to inspire them.  These cards are a little different because the cover half panel is actually a pocket perfect for stuffing with little treasures. 

I rounded the tops of the card bases with a ¼” corner rounder.  I adhered the shorter pattern paper panel on three sides (in a U shape) leaving the top of the panel open for gift cards, cash.. wouldn’t a plane ticket be amazing?


The collection has everything you need to embellish these pretty pockets.. chipboard, bits and pieces, stickers and washi too!

These pocket cards will delight all the travelers on your list and hopefully encourage a new generation of explorers.

Supplies

Hello, it is Kelly here today with a new blog. I am a bit ahead of time but I already created some fun happy Easter spreads in my planner with the new cute Easter Simple Set called ‘Bunnies and Baskets’.

Because I know I have much to do in the Easter weekend, I decided to create a decorated to-do page. I used a basic lined paper and fussycutted florals from the ‘Easter Blessings’ paper (#10686). I fussycutted a third of the paper and glued them on the side of the lined blank paper. I draw some check-off boxes and used a to-do sticker to finish the page.

I always spend Easter with my family and to create a spread in my planner to document this year’s Easter celebration I created a flip-out page. I used a border punch from my stash to create a fun border of the part of the page that flips. I decorated the page with florals, pieces of paper and a notecard. The page is now done, I only have to add some photo’s and journaling. Love the little bunny ears at the bottom right of the page.

One of the papers in the Simple set is filled with little Easter eggs in fun colors (paper ‘The hunt is on’, #10687). I fussycutted a few of them and glued them overlapping in a row on the middle of the vertical planner page. I added some functional stickers to finish the spread!

I hope you enjoyed reading this little Easter blog and you can find more planner inspiration on my instagram account.

Have a nice day!

Supplies

The Simple Vintage Traveler collection was just the inspiration to get some pictures of a family trip printed and in an album! As soon as I saw the colours I knew they’d go perfect with the majestic mountains and dreamy blue-green lakes we saw camping in Jasper National Park a bit over a year ago. I started with a Robins Egg Stripe Designer binder because it went with the collection so well and got to work adding in photos, paper and more.

This first spread have a couple of my favourite photos of our trip. I went with a large 6x8 photo on the left and a 4x6 and a journal card on the right. I really like the layered chipboard frames found in the Vintage Traveler collection. They don’t fit in the pockets because they’re more geared towards larger layouts but I found that attaching one to the outside of the page protector to be just what I needed to frame my photo. I kept the rest of the page simple with a cute journal card with a chipboard geotag.

Embellishment clusters make me happy and were just what my big 6x8 photo needed! I just started pulling stickers, chipboard pieces and die cut Bits & Pieces and stuck them down to give the story some words.

This spread has a combination of photos and journal cards in pockets as well as an accent pocket. I used a postcard style SN@P! card to add some journalling to my spread. The card is really cute and keeps the whole travel theme up great.  I added some faux tickets stickers and die cut pieces to give it a bit more dimension. Underneath is a photo of my husband and boys I just added some simple phrase stickers. The super cute vintage cluster style stickers in Vintage Traveler are a great layer under phrase stickers. On the right I have some smaller photos and cards. I collected a bunch of various bits and pieces throughout our trip like the soda label on this page. Along with the cute bingo-y card and (of course) a coffee shot I added in a bit of our between adventure life.

In one of the pockets I simply placed one of the large geotags from the Bits & Pieces. It gives the page a bit of a breather and adds in some fun layering between pages. I love the amount and variety of geotags in Vintage Traveler!

On the next page I documented life around the campsite in the evening on the left and a map to start off documenting the next days’ adventure. I used some simple stickers and die cuts with my photos on the left and a photo flip (seriously, one of my favourite Simple Stories things!) to add some journalling space. I left the back of the geotag from the other side plain because I liked the way it looked there. On the right I used one of the square pocketed page protectors that Simple Stories makes. I cut down a map to fit in the 2 larger 4x4 pockets and filled the smaller 2x2 pockets on the side with some of the 2x2 cards from the collection.

I love including maps in travel albums. I save pretty much every tiny piece of paper that I can so I have a few of them in my Alberta trip scrapbook. This map was perfect because we had spent the day following it and checking stuff out. I marked some of the main spots we stopped with chipboard geotags and then used some of the Simple Stories alphabet stickers to add a title. I embellished the title with some phrase stickers from the sticker pack and combo sticker sheet, added a cute car die cut from the Bits & Pieces and it was a done page.

Finally, I added some journalling and one more picture of the boys enjoying campsite fun in a Photo Flip on the other side. There are some really great journal cards in Simple Traveler that gave me space to get our story down in a way that looked like more travel ephemera. I had been putting off documenting this trip because it was hard finding a collection that did all the gorgeous landscape shots I took justice but I can’t wait to finish up my album with Vintage Traveler now.

Supplies

Hello Friends! it's Kristine Davidson here today and I'm so happy to be a designer for another year. It's a pleasure designing for Simple Stories and I'm glad I can share these beautiful products with you!

This layout is called Simple & Sweet using the Spring Farmhouse collection. As you know I don't fuss about my titles that much and this layout is no exception. I used a diecut from the Bits & Pieces and found one that would be perfect for my niece's attitude and simple pleasures. If you ever feel stuck with a title perhaps look thru those diecuts and pick one that you can relate with. You can always emphasize a title by adding dimensional adhesive or surrounding it with flowers or other embellishments.

I started my base with an Elmwood background from the SN@P! Basics Paper Pack. If you don't have this collection in your stash -- go buy one! It is a must have. I wanted this layout to have layers and have of those gorgeous 6x8 papers.  I love the smaller paper patterns because they allow me to use small photos and they don't overcrowd my page or photos. Does that make sense? I also wanted to mat some of those papers and I used the Simple Basics Kit that match the Simple Farmhouse collection beautifully.

The Simple Basics Kit includes solid colored cardstock papers that can be used for cards, base colors on a layout and so much more. I used these papers to mat my patterned papers. You can see on this picture that I have them matted in assorted colors. I love that little extra pop of color. Cute right?

Adding those solid colors behind my patterns added some extra color on my page and made them visually pleasing. Try something new today! Maybe you have left over cardstock or solid colored papers that you can use on your next layout. Give it a try! Visit Us on Instagram @SimpleStories_ and @KristineDavidson for more projects using Simple Stories.

Chow for Now!

Supplies

Hi, it’s Cara here today with a project that is very close to my heart. If you don’t already know, I have 6 children. And you know what that means… lots of children, LOTS of odd socks! I’ve really tried to control this problem but it’s just too big and I have too many mateless socks. It has simply got out of control! So what is a planner girl to do? Set up a new planner, of course!!

I feel like I am constantly in that scene of Monster’s Inc, where a monster comes out of a door with a sock stuck to his back and someone starts screaming '23-19! We have a 23-19!’ 

This orphaned sock thing is a huge problem in my house and I’m determined to make it top priority in my life. I am going to dedicate this entire planner to keeping track of all the single socks in my house. I wanted to make this planner really special, to really make it stand out amount the others in my planning system and that’s why I chose the Typewriter Floral Traveler's Notebook and my absolute favourite collection, Hello which matches perfectly with the Simple Stories I Am… collection. It was really surprising to me that there are no sock stickers in any of the the Carpe Diem sticker tablets. I can’t be the only one who wants to set up a sock planner, right? Luckily there are quite a few cute laundry basket ones.

I love to decorate the pockets of my TNs and this one was no exception, lots of butterflies and flowers and that oh-so-adorable sneaker!! Sneakers go on over socks so I thought it was completely fitting. I also added some washi wrapped around a card to have on hand while I plan for my odd socks.

I decorated the covers of the inserts (seen above) so that they inspire me in this big project that I’m undertaking. If I’m going to tackle these socks, I’ll need the motivation! I think the most important part of this planner is the odd sock tracker. I’m going to catalogue each of the odd socks as they come out of the dryer and when I see an odd sock around the house (under the couch, in the front closet, or in the bottom of a hockey bag) I’m going to track it using the fab little stickers from the Calendar sticker tablet. Aren’t those little laundry baskets darling?

This challenge is probably going to be a busy one (so many odd socks), so I've chosen to do daily spreads for this month. I’ve decorated this first spread with some gorgeous stickers from the Hello Sticker tablet and the 4x6 stickers from the I Am… collection. There’s lots of room for me to plan out my sock hunts and mateless sock tracking.

Since today is the first day of a new month, I think it’s the best day to start this ambitious project. Wish me luck!

To watch my process video for this planner setup, pop on over to my YouTube channel here: Cara’s YouTube channel

Supplies

Pages