Anya Lunchenko's Blog Posts

Hello friends and family! Don't you agree that those two words are so important in our life and for that reason need to be documented more often? How about a cute little mini book? Anya here today and I am happy to share my scrapbook obsession – a mini book!

To create this mini album I started with a house shape. I downloaded mine from the Silhouette store, but if you don't have a digital cutting machine you can print a shape, fussy cut it and use it as a template to cut all of your pages. Digital cutting machines are helpful, but it didn't stop me from making shaped mini books when I didn't have one.

I covered all of the pages with coordinating patterned papers and decorated some them with different elements, leaving some of the pages blank for the freedom of photo placement. As always, one of my favorite ways to add more photos to a mini book is to add a small “card”, which has a 3x4” element piece on the front panel and has spots for two photos when you open it.

My favorite elements to decorate the cover for a mini book are chipboard pieces! They withstand the wear and always look awesome, adding details and depth. I hope you'll find some time to make a similar mini book soon, but I must warn you: creating these may become addicting, just like it was for me! Thank you for visiting and we hope you will stop by again for more inspiration from the Simple Stories team!

Supplies

Hello everyone! Anya here today with another mini book inspiration. Patterned papers in the Winter Farmhouse collection so beautifully coordinate with each other that it makes the creating process very easy and enjoyable.

This book measures 5x7 and was made from scratch. I created the cover for the mini book using three pieces of heavy cardstock. Front and back pieces I covered with patterned paper and the binding piece I adhere to a piece of faux leather, to which I also adhered the other two parts of the cover and stitched them down with a sewing machine.

To create the inside of the album, first I cut all the pages, scored them and using a sewing machine again stitched them down to a piece of paper that was later added to the binding of the mini book. For a fun look I kept some of the pages shorter, others longer and some with a little flap that opens for more photos.

This mini album can fit up to forty five photos in different sizes. When I an ready to fill it with photos all I would have to do is to measure the spot, trim down a photo a bit smaller to leave a white border and adhere it.

I used a lot of stickers and bits and pieces to decorate all of the pages inside this mini book. The front of the album I decorated with a shaker window, filled it with snow-like sequins and added chipboard pieces on top. A few enamel dots and a piece of backers twine finished the design.

I hope you'll give a handmade mini book a try if you haven't made one yet.

Supplies

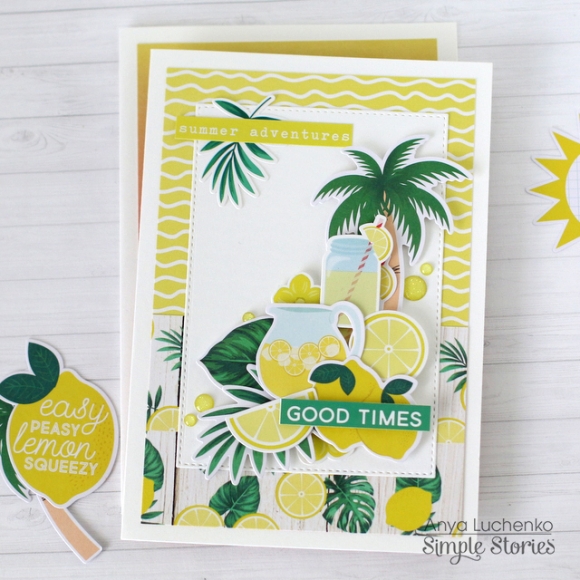
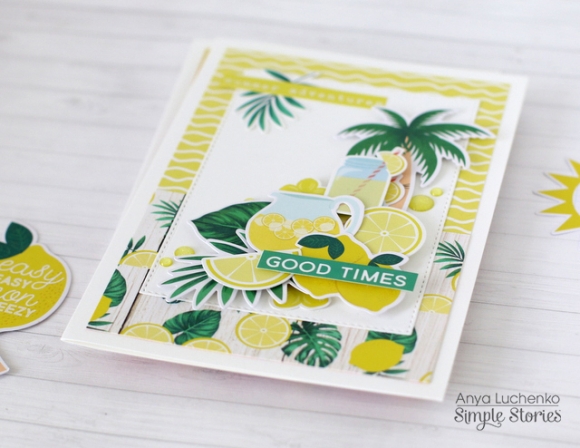
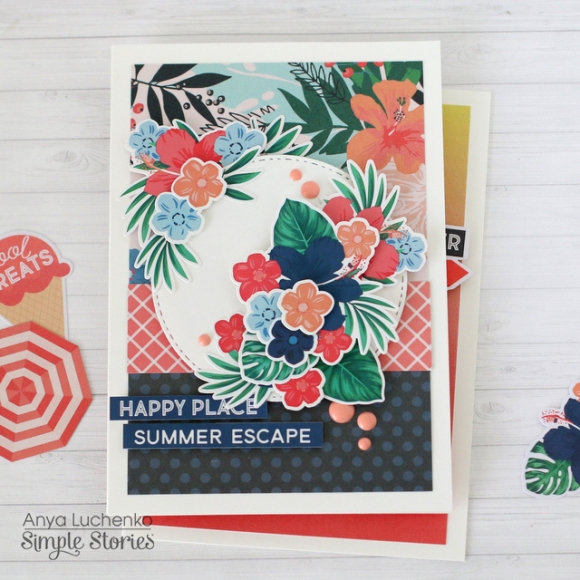
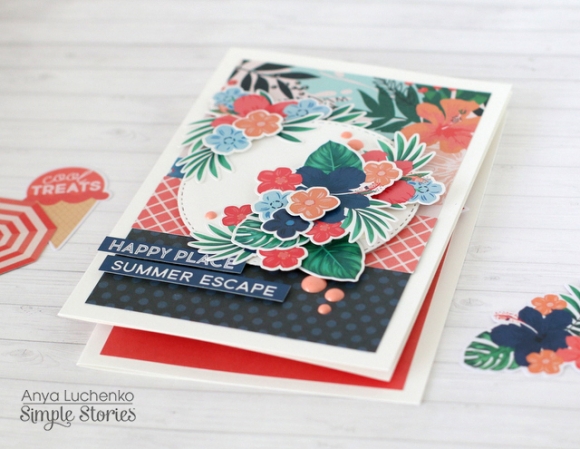
Hello everyone! Anya here today and I am happy to share some holiday shaker cards with you! Winter themed shaker cards are my favorite to make, because the filling in the shaker window reminds me of a snow. 

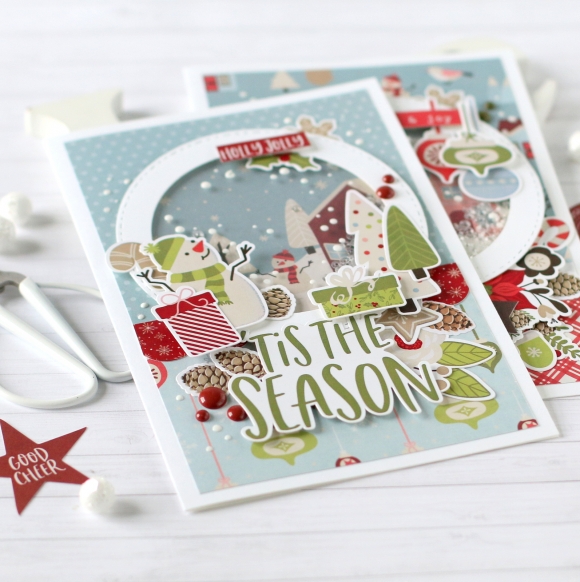
For the first card I used one of the 3x4 elements for a background inside the window and decorated the card with stickers adding them with pop dots to keep the decorative elements even with the shaker window. A few white dots made with Nuvo Drops always look great on acetate and also reminds me of snow floating in the air.

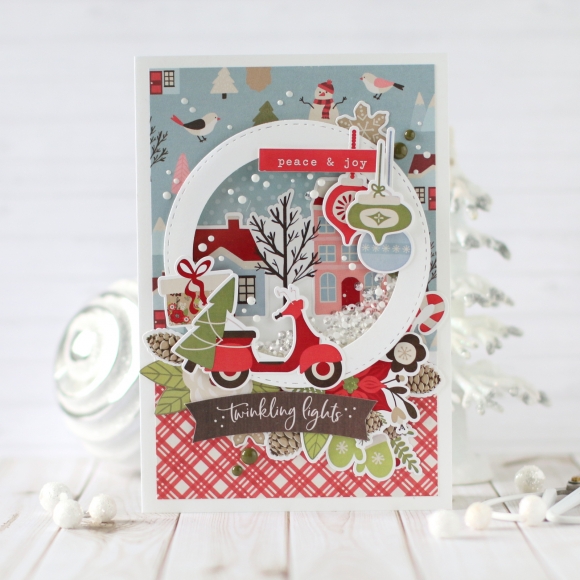
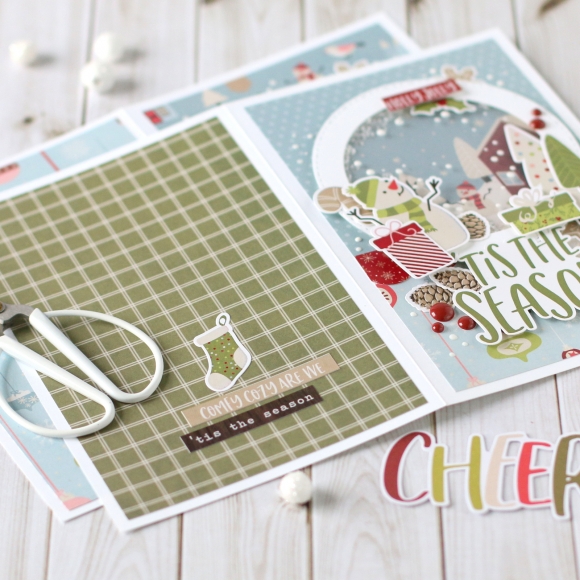
For the background picture inside the window of the second card, I created a scenery with stickers using adorable houses. I decorated the top of the shaker window with ornament stickers and added more stickers and some bits and pieces at the bottom, alternating height and colors. 

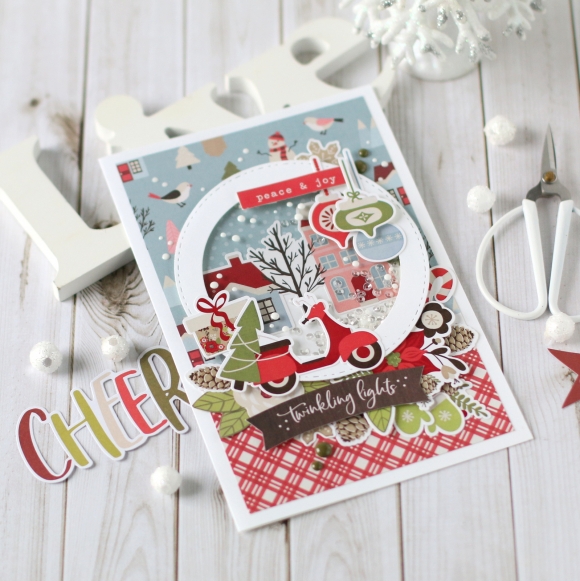
Always love to cover the back of the card with patterned paper. Adding a few little stickers to the background panel makes it even more fun and extra special. I really enjoyed creating these shaker cards and can't wait to make more!

Supplies

Pages