Iris Fox's Blog Posts

Hello friends, Iris here on the blog today.  Fall is our family's favorite season. We're eager for Fall as soon as school starts, but here in California, some years it comes a bit late.  So I was tickled when I saw The Cut Shoppe's Finally Fall cut file that includes the "Feeling Fallish" sentiment. It makes the perfect title for this story about my daughter playing in a pile of leaves in December.  Since she's wearing a non-fall colored shirt, the oranges and pinks of the Forever Fall line made it easy to scrap this photo.

My goal was to emphasize vertical movement. On my background I splattered pink, orange, and teal inks starting from the top and widening towards the bottom of the page so that they mimic how leaves fall and scatter downward.  I printed my photo tall and skinny (3" x 6") and matted it in the stripey Get Cozy paper.  Stripes are always so fun for photo mats and I love that this one includes all the colors. I anchored my photo with a bit of the diagonal striped washi.

To back my vertical title, I used some of the rectangular stickers from the 4x6 Stickers pack. I don't normally turn to those. They seem well suited for planners, but my planner doesn't have blocks of spaces.  So I was thrilled to finally use them! They fit perfectly in the narrow openings of this cut file and the tiny scale of the patterns means you can still see the designs.  I love hand stitching on my layouts but hadn't done much of it recently, so after I was sure of the title's placement, I used my hole piercer on the scripty word, snipped it off the top of the title, and hand stitched directly on the background in a dark orange thread that matches.

Raining down above my photo are a cascade of die-cut and sticker banners and leaves. I filled a couple of the blank banners with heart stickers and randomly machine stitched through some of them. 

I hand wrote my journaling to the right side of the photo to balance out the large title on the left. For a bit of texture on this side, I stapled a little strip of cording that I knotted. To continue the vertical design all the way to the bottom, my date is stamped on a die-cut in the space below the photo, finished off with a heart sticker.

Since my photo and the embellishments skew towards the right, I felt the left side needed something more. I added a thin strip of the stripey paper along the left edge of the layout, tucked a small word sticker under it, and as the final touch, stapled another piece of the cording above the words, to repeat how the cording is above my journaling.

I just can't get enough of the Forever Fall collection.  It's so versatile to capture all the Fall (and Fallish) memories, even when our kids aren't wearing the traditional seasonal colors!

Supplies

This is halloween, this is halloween... Anyone else have that song stuck in their heads constantly in October? :D Hello lovelies, Iris here sharing a layout using the Simply Vintage Halloween collection.  I love all the traditional colors and especially the stripes and plaids in this collection. 

The photos I chose are of my two girls and our next door neighbor back from trick-or-treating when they were littles, sampling and sorting through their candy.  That's the best part of the night, amiright?!  Because my youngest was wearing a non-traditional color, I wanted to bring some of that into my layout.  So I started off with a sheet of watercolor paper, using Distress Oxide Inks (candied apple, spiced marmalade, worn lipstick, hickory smoke) to paint a background and add splatters.  Just a few sprinkles of the pink help that one photo blend in nicely.

Once dry, I cut the watercolor sheet down to 9"x10.5" rectangle to give it some interest and I backed it with the stripe side of the Trick or Treat paper, which has been cut to 11"x11". To brighten up the layout and concentrate the eye on the center of the page, I further backed the entire thing with white cardstock.  This gives me the opportunity to have ruffled layers but keep the layout looking fresh rather than busy.

I clustered my three photos, each matted in a different paper.  I'm a sucker for tabs and word strips, so I added those up and down the photos, and tucked in a ticket for good measure.

A banner from the sticker sheet - there are tons of great banners in this collection - connects the photos to the chipboard title.  I tucked two halves of a doily on either side of the top layer. I always think of doilies appropriate for vintage designs, yet they are trendy and modern too, so they can work with any look you're going for.  And they look like delicate spiderwebs.

A couple die-cuts peek out on the doilies, and tucked-under chipboard stars form a visual triangle. Because this layout is about the children enjoying their candy, I sprinkled some enamel dots (remember the candy dots from our childhoods?) within the star clusters. They are subtle but add interest. More Oxide sprinkles continue on the bottom cardstock layer to tie it all together.

Making this layout brought back so many Halloween memories that I'm excited to scrapbook.  What memories will you scrap with the Simple Vintage Halloween?

Supplies

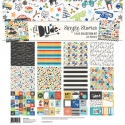
Hello friends, thanks for joining me for my first fall layout.  I noticed a paper folding trend a few months ago that I’ve been wanting to try involving a cascade of folded paper strips.  When thinking of autumn, my first thought is always of falling leaves, so I thought this would be a good technique to pair with a fall photo.  I pulled out my trimmer, score board, and the Forever Fall collection for this layout celebrating things I love about autumn.  Fall tends to come late in California, and at the first signs I can’t get into cozy sweaters and mittens fast enough.

The layouts I’d seen using these folded paper strips were pastel colors and I wanted to put my spin on it with darker colors.  I started off with the denim side of the Be Grateful paper as my background.  It already has stitching and splatter details, so I knew I could concentrate on all the goodies on top.

I cut strips from several of the papers in the collection in varying widths from one to two inches, then cut all of them into three inch lengths.  I scored them in the middle to have crisp folds, then ran the cut ends through my sewing machine to make them into little folded banners.  I placed my photo just off center because I knew I wanted a cascade of the papers coming down from the top in diagonal across the corners of the photo. This is a favorite design layout of mine.  I played with overlapping the folded banners upwards and downwards from the photo, then embellished them with chipboard, die-cuts, and square stickers from the 4x6 Stickers pack.

I clustered pairs of die-cut and chipboard leaves in three spots to reinforce the diagonal. You’ll note that the bottom pile of papers and embellishments doesn’t extend to the bottom diagonal.  I like a bit of asymmetry and often have one side closer to the corners and edges of my page than the other. The large “happy autumn” from the Combo Stickers were the perfect size to lay across the bottom edge of the photo.  They stand out from all the busy layers.  Since the folded papers have stitching that shows through in random areas, I added stitching to the title to tie it in.  Plus who doesn't like a stitched title? :)

For my journaling, I just used word strips. The sheet had all my favorite things and more!  I nestled them in the space under the title and finished off with a date label from the Bits & Pieces pack. 

There was a space to the left of the photo under the top cascade of papers that felt empty, so I filled it with the chipboard mason jar.  This also helps balance out the other end of the stitched title.  Most of the layout is made up of horizontal lines.  To break that up, I filled in spaces next to the leaf clusters with little round stickers.  For added interest,  I stapled a few elements with my tiny attacher.

I struggled a bit because I wanted to add all the cute fall stickers to this layout, but I pared it down since the folded papers provided quite a bit of visual weight.  That just means that I can go crazy with the embellishments in my next Forever Fall layout! :)

Supplies

Pages